Send personalized job application emails with Telegram, OpenAI, and Gmail
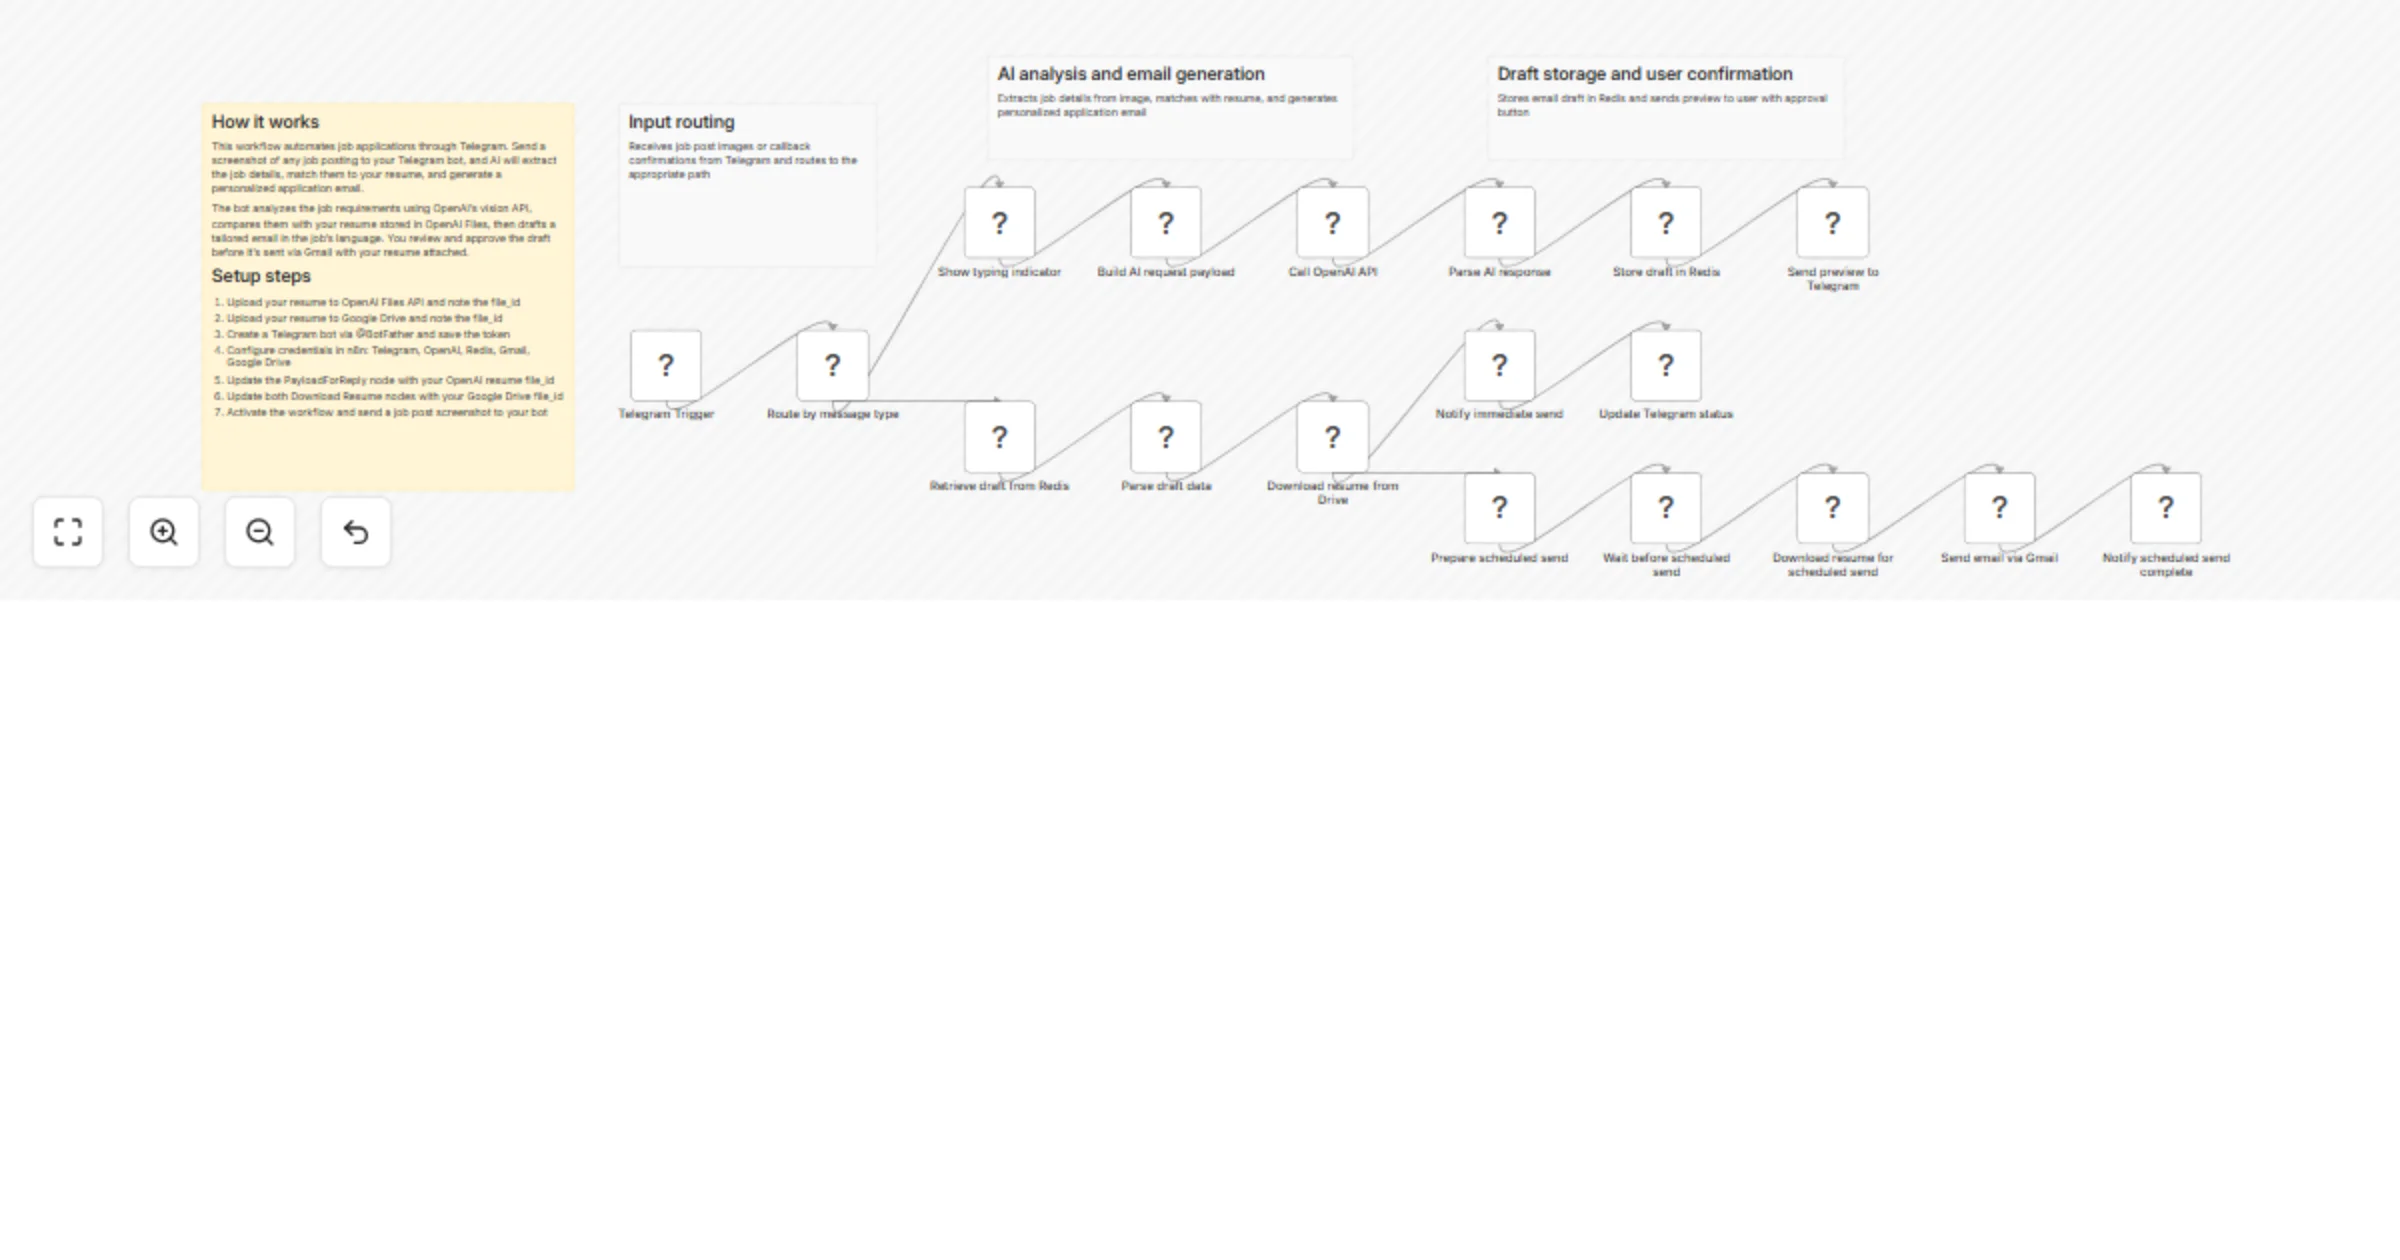
Workflow preview


 Early Deal
DISCOUNT 20%

Overview
🔧 Setup Guide - Hiring Bot Workflow


📋 Prerequisites
Before importing this workflow, make sure you have:
- ✅ n8n Instance (cloud or self-hosted)
- ✅ Telegram Bot Token (from @BotFather)
- ✅ OpenAI API Key (with GPT-4 Vision access)
- ✅ Gmail Account (with OAuth setup)
- ✅ Google Drive (to store your resume)
- ✅ Redis Instance (free tier available at Redis Cloud)
🚀 Step-by-Step Setup
1️⃣ Upload Your Resume to OpenAI
First, you need to upload your resume to OpenAI's Files API:
# Upload your resume to OpenAI
curl https://api.openai.com/v1/files \
 -H "Authorization: Bearer YOUR_OPENAI_API_KEY" \
 -F purpose="assistants" \
 -F file="@/path/to/your/resume.pdf"
Important: Save the file_id from the response (looks like file-xxxxxxxxxxxxx)
Alternative: Use OpenAI Playground or Python:
from openai import OpenAI
client = OpenAI(api_key="YOUR_API_KEY")

with open("resume.pdf", "rb") as file:
 response = client.files.create(file=file, purpose="assistants")
 print(f"File ID: {response.id}")
2️⃣ Upload Your Resume to Google Drive
- Go to Google Drive
- Upload your resume PDF
- Right-click → "Get link" → Copy the file ID from URL
- URL format:
https://drive.google.com/file/d/FILE_ID_HERE/view - Example ID:
1h79U8IFtI2dp_OBtnyhdGaarWpKb9qq9
3️⃣ Create a Telegram Bot
- Open Telegram and message @BotFather
- Send
/newbot - Choose a name and username
- Save the Bot Token (looks like
123456789:ABCdefGHIjklMNOpqrsTUVwxyz) - (Optional) Set bot commands:
/start - Start the bot
/help - Get help
4️⃣ Set Up Redis
Option A: Redis Cloud (Recommended - Free)
- Go to Redis Cloud
- Create a free account
- Create a database
- Note: Host, Port, Password
Option B: Local Redis
# Docker
docker run -d -p 6379:6379 redis:latest

# Or via package manager
sudo apt-get install redis-server
5️⃣ Import the Workflow to n8n
- Open n8n
- Click "+" → "Import from File"
- Select
Hiring_Bot_Anonymized.json - Workflow will import with placeholder values
6️⃣ Configure Credentials
A. Telegram Bot Credentials
- In n8n, go to Credentials → Create New
- Select "Telegram API"
- Enter your Bot Token from Step 3
- Test & Save
B. OpenAI API Credentials
- Go to Credentials → Create New
- Select "OpenAI API"
- Enter your OpenAI API Key
- Test & Save
C. Redis Credentials
- Go to Credentials → Create New
- Select "Redis"
- Enter:
- Host: Your Redis host
- Port:
6379(default) - Password: Your Redis password
- Test & Save
D. Gmail Credentials
- Go to Credentials → Create New
- Select "Gmail OAuth2 API"
- Follow OAuth setup flow
- Authorize n8n to access Gmail
- Test & Save
E. Google Drive Credentials
- Go to Credentials → Create New
- Select "Google Drive OAuth2 API"
- Follow OAuth setup flow
- Authorize n8n to access Drive
- Test & Save
7️⃣ Update Node Values
A. Update OpenAI File ID in "PayloadForReply" Node
- Double-click the "PayloadForReply" node
- Find this line in the code:
const resumeFileId = "YOUR_OPENAI_FILE_ID_HERE";
- Replace with your actual OpenAI file ID from Step 1:
const resumeFileId = "file-xxxxxxxxxxxxx";
- Save the node
B. Update Google Drive File ID (Both "Download Resume" Nodes)
There are TWO nodes that need updating:
Node 1: "Download Resume"
- Double-click the node
- In the "File ID" field, click "Expression"
- Replace
YOUR_GOOGLE_DRIVE_FILE_IDwith your actual ID - Update "Cached Result Name" to your resume filename
- Save
Node 2: "Download Resume1" (same process)
- Double-click the node
- Update File ID
- Update filename
- Save
8️⃣ Assign Credentials to Nodes
After importing, you need to assign your credentials to each node:
Nodes that need credentials:
| Node Name | Credential Type |
|---|---|
| Telegram Trigger | Telegram API |
| Generating Reply | OpenAI API |
| Store AI Reply | Redis |
| GetValues | Redis |
| Download Resume | Google Drive OAuth2 |
| Download Resume1 | Google Drive OAuth2 |
| Schedule Email | Gmail OAuth2 |
| SendConfirmation | Telegram API |
| Send a message | Telegram API |
| Edit a text message | Telegram API |
| Send a text message | Telegram API |
| Send a chat action | Telegram API |
How to assign:
- Click on each node
- In the "Credentials" section, select your saved credential
- Save the node
🧪 Testing the Workflow
1️⃣ Activate the Workflow
- Click the "Active" toggle in the top-right
- Workflow should now be listening for Telegram messages
2️⃣ Test with a Job Post
- Find a job post online (LinkedIn, Indeed, etc.)
- Take a screenshot
- Send it to your Telegram bot
- Bot should respond with:
- "Analyzing job post..." (typing indicator)
- Full email draft with confirmation button
3️⃣ Test Email Sending
- Click "Send The Email" button
- Check Gmail to verify email was sent
- Check if resume was attached
🐛 Troubleshooting
Issue: "No binary image found"
- Solution: Make sure you're sending an image file, not a document
Issue: "Invalid resume file_id"
- Solution:
- Check OpenAI file_id format (starts with
file-) - Verify file was uploaded successfully
- Make sure you updated the code in PayloadForReply node
Issue: "Failed to parse model JSON"
- Solution:
- Check OpenAI API quota/limits
- Verify model name is correct (
gpt-5.2) - Check if image is readable
Issue: Gmail not sending
- Solution:
- Re-authenticate Gmail OAuth
- Check Gmail permissions
- Verify "attachments" field is set to "Resume"
Issue: Redis connection failed
- Solution:
- Test Redis connection in credentials
- Check firewall rules
- Verify host/port/password
Issue: Telegram webhook not working
- Solution:
- Deactivate and reactivate workflow
- Check Telegram bot token is valid
- Make sure bot is not blocked
🔐 Security Best Practices
- Never share your credentials - Keep API keys private
- Use environment variables in n8n for sensitive data
- Set up Redis password - Don't use default settings
- Limit OAuth scopes - Only grant necessary permissions
- Rotate API keys regularly
- Monitor usage - Check for unexpected API calls
🎨 Customization Ideas
Change AI Model
In the PayloadForReply node, update:
const MODEL = "gpt-5.2"; // Change to gpt-4, claude-3-opus, etc.
Adjust Email Length
Modify the system prompt:
// From:
Email body: ~120–180 words unless INSIGHTS specify otherwise.

// To:
Email body: ~100–150 words for concise applications.
Add More Languages
Update language detection logic in the system prompt to support more languages.
Custom Job Filtering
Edit the system prompt to target specific roles:
// From:
Only pick ONE job offer to process — the one most clearly related to Data roles

// To:
Only pick ONE job offer to process — the one most clearly related to [YOUR FIELD]
Add Follow-up Reminders
Add a "Wait" node after email sends to schedule a reminder after 7 days.
📊 Workflow Structure
Telegram Input
 ↓
Switch (Route by type)
 ↓
├─ New Job Post
│ ↓
│ Send Chat Action (typing...)
│ ↓
│ PayloadForReply (Build AI request)
│ ↓
│ Generating Reply (Call OpenAI)
│ ↓
│ FormatAiReply (Parse JSON)
│ ↓
│ Store AI Reply (Redis cache)
│ ↓
│ SendConfirmation (Show preview)
│
└─ Callback (User clicked "Send")
 ↓
 GetValues (Fetch from Redis)
 ↓
 Format Response
 ↓
 Download Resume (from Drive)
 ↓
 ├─ Path A: Immediate Send
 │ ↓
 │ Send Confirmation Message
 │ ↓
 │ Edit Message (update status)
 │
 └─ Path B: Scheduled Send
 ↓
 Wait (10 seconds)
 ↓
 Download Resume Again
 ↓
 Schedule Email (Gmail)
 ↓
 Send Success Message
💡 Tips for Best Results
- High-Quality Resume: Upload a well-formatted PDF resume
- Clear Screenshots: Take clear, readable job post screenshots
- Use Captions: Add instructions via Telegram captions
- Example:
"make it more casual" - Example:
"send to [email protected]"
- Review Before Sending: Always read the draft before clicking send
- Update Resume Regularly: Keep your Google Drive resume current
- Test First: Try with a few test jobs before mass applying
🆘 Need Help?
- 📚 n8n Documentation
- 💬 n8n Community Forum
- 📺 n8n YouTube Channel
- 🤖 OpenAI Documentation
- 📱 Telegram Bot API Docs
📝 Checklist
Use this checklist to verify your setup:
- OpenAI resume file uploaded (got file_id)
- Google Drive resume uploaded (got file ID)
- Telegram bot created (got bot token)
- Redis instance created (got credentials)
- All n8n credentials created and tested
- PayloadForReply node updated with OpenAI file_id
- Both Download Resume nodes updated with Drive file_id
- All nodes have credentials assigned
- Workflow activated
- Test message sent successfully
- Test email received successfully
🎉 You're all set! Start applying to jobs in 10 seconds!
Made with ❤️ and n8n