Screen job applicants with Gemini AI: Jotform to Notion hiring pipeline
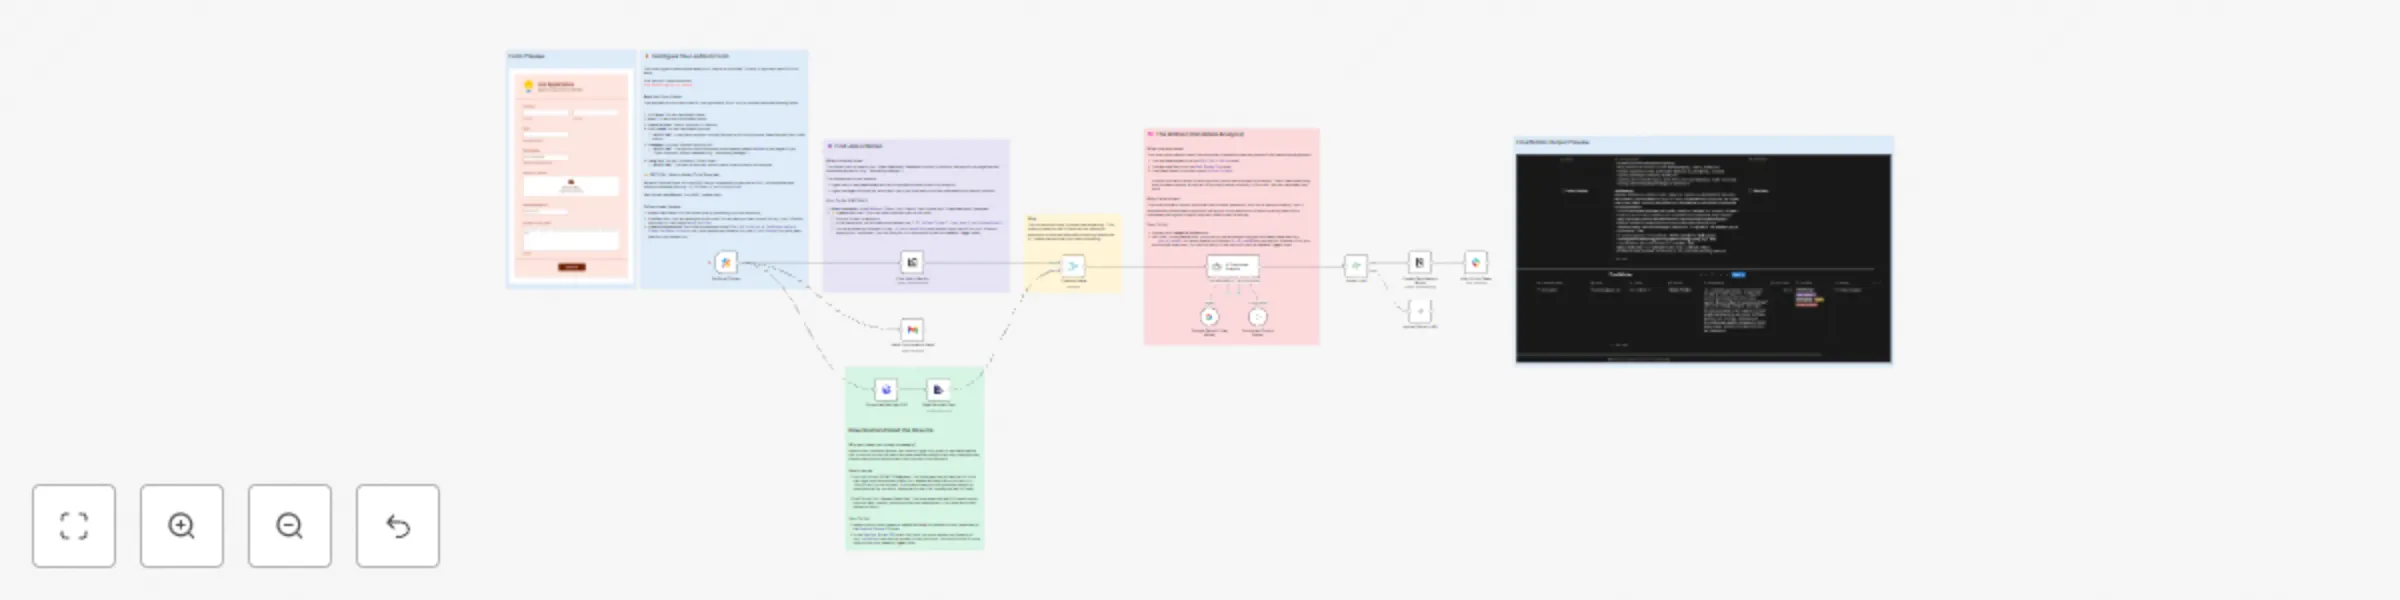
Workflow preview


 Early Deal
DISCOUNT 20%

Important notice
This workflow is provided as-is. Please review and test before using in production.
Overview
Stop drowning in job applications. This workflow transforms your hiring process from a manual, time-consuming data-entry task into an automated, intelligent screening system.
When a candidate applies via your Jotform, this workflow automatically:
- Downloads their PDF resume (even from private links).
- Extracts the text from the resume and reads their cover letter.
- Compares the application to the Notion job description using Gemini AI.
- Generates an "AI Fit Score" (0-100) and a concise summary.
- Filters out low-scoring applicants.
- Creates a new, fully detailed candidate page in your Notion database, linked to the correct job.
- Instantly alerts your hiring team on Slack with the candidate's score and summary.
- Sends an automated confirmation email to the candidate.
Features
- Triggers on New Jotform Submissions: Kicks off the moment a candidate clicks "Apply Now."
- Handles Private Files: Securely downloads private resume files from Jotform using your API key.
- PDF Text Extraction: Automatically reads the text from any uploaded PDF resume.
- Deep AI Analysis: Uses Gemini AI to compare the candidate's resume and cover letter against the specific job description from Notion.
- Relational Database Linking: Automatically links the new candidate to the correct "Open Position" page in Notion.
- Automated Quality Filtering: An IF node stops low-scoring candidates from cluttering your database.
- Multi-Channel Communication: Provides instant feedback to your team (Slack) and the candidate (Email).
Nodes Used
- 🟣 Jotform Trigger (
Jotform Trigger) - ✉️ Gmail (
Send Confirmation Email) - ⬇️ HTTP Request (
Download Resume PDF) - 📄 Extract From File (
Read Resume Text) - 🔍 Notion (
Find Job in Notion) - 🖇️ Merge (
Combine Data) - 🧠 AI Agent (
AI Candidate Analysis) - ❓ IF (
Score > 40?) - ➕ Notion (
Create Candidate in Notion) - 📣 Slack (
Alert Hiring Team) - 🚫 No Operation, do nothing (
Ignore (Score < 40))
How to use this template
This template requires manual setup due to Jotform's unique Question IDs (QIDs). Please follow these steps carefully.
⚠️ CRITICAL WARNING ON JOTFORM QIDs
To get the file URL, this template requires you to turn "Resolve Data" OFF in the Jotform Trigger. This means the workflow uses Question IDs (e.g., q7_positionApplying, q8_typeA8) instead of human-readable labels.
Your QIDs will be different from the ones in this template. You must run the trigger once, find your QIDs, and replace them in the downstream nodes.
1. Set up Jotform and Notion (See "More Information" section below)
- Before you start, create your Jotform form and your two Notion databases ("Open Positions" and "Candidates") as described at the end of this document.
2. Configure the Jotform Trigger Node
- Credentials: Connect your Jotform account.
- Form: Select your "Job Application" form.
- IMPORTANT: In the node Parameters, find the "Resolve Data" option and turn it OFF.
- Test: Run a test by submitting your form. Look at the output and write down your unique QIDs for each field (e.g.,
q3_fullName,q7_positionApplying,q8_typeA8,uploadYour).
3. Configure the Download Resume PDF (HTTP Request) Node
- Credentials: This node needs your Jotform API Key.
- Authentication:
Query Auth - Credential: Create new
Header Authcredentials.- Name:
Jotform API Key (Query) - Parameter Name:
apiKey - Parameter Value: [Paste your Jotform API Key here]
- Name:
- Authentication:
- URL: Replace
uploadYourin the expression{{ $('Jotform Trigger').item.json.uploadYour[0] }}with the QID for your file upload field.
4. Configure the Find Job in Notion Node
(See the "Required Notion Setup" section at the end of this document for detailed instructions on how to build this database)
- Credentials: Connect your Notion credentials.
- Database ID: Select your "Open Positions" database.
- Filter Value: Replace
q7_positionApplyingin the expression{{ $('Jotform Trigger').item.json.q7_positionApplying }}with the QID for your "Position" dropdown.
5. Configure the AI Candidate Analysis Node
- Credentials: Connect your Google AI (Gemini) credentials.
- Prompt: In the prompt, find the line for "Candidate's Cover Letter". Replace
q8_typeA8in the expression{{ $('Jotform Trigger').item.json.q8_typeA8 }}with the QID for your cover letter field.
6. Configure the IF (Score > 40?) Node
- No credentials needed. You can change the "Value 2" from
40to any score you want to use as your quality filter.
7. Configure the Create Candidate in Notion Node
(See the "Required Notion Setup" section at the end of this document for detailed instructions on how to build this database)
- This is the most important step. Connect your Notion credentials and select your "Candidates" database.
- You must go through every single property and replace my QIDs with your QIDs from the Jotform trigger.
- Candidate Name:
{{ $('Jotform Trigger').item.json.q3_fullName.first }} ...(Replaceq3_fullName) - Email:
{{ $('Jotform Trigger').item.json.q4_email }}(Replaceq4_email) - Phone:
{{ $('Jotform Trigger').item.json.q5_phoneNumber?.full ? ...(Replaceq5_phoneNumber) - Position (Relation): This expression,
{{ $('Find Job in Notion').item.json.id }}, is correct. - AI Summary, Score, Skills: These expressions are also correct.
- Resume (File): In the URL field, replace
uploadYourwith your file QID.
- Candidate Name:
8. Configure Communication Nodes
Send Confirmation Email(Gmail): Connect your email credentials and customize the email body.Alert Hiring Team(Slack): Connect your Slack credentials and select your desired channel (e.g.,#hiring).
9. Activate your Workflow!
- Once all steps are configured and QIDs are replaced, save and activate your workflow.
How to Adapt the Template
- Log Rejected Candidates: Connect the
false(No) output of theIF (Score > 40?)node to a Google Sheets node to keep a log of all candidates who didn't meet the score threshold. - Change the AI Prompt: Edit the prompt in the
AI Candidate Analysisnode to ask for different insights, such as "List 3 potential red flags" or "Estimate years of experience." - Use a Different AI: Replace the Google AI node with an OpenAI or Claude node.
- Change Notifications: Swap the Slack node for Discord, Microsoft Teams, or a simple email notification.
More Information
About Jotform
Jotform is a powerful and easy-to-use online form builder perfect for creating professional job application forms. Its flexibility with file uploads and webhooks makes it an ideal trigger for this n8n automation. If you don't have an account, you can get started using the link above.
Required Jotform Fields
Your Jotform must have these fields for the template to work:
- Full Name
- Phone Number (Can be optional)
- File Upload (Label:
Upload Your Resume)- Crucial: Set the file type option to
pdfonly.
- Crucial: Set the file type option to
- Dropdown (Label:
Position Applying For)- Crucial: The options (e.g., "Marketing Manager") must exactly match the page titles in your "Open Positions" Notion database.
- Long Text (Label:
Summary / Cover Letter)
Required Notion Setup
This workflow requires two separate databases in Notion that are linked together. Both databases must be shared with your n8n integration.
Database 1: "Open Positions" This database holds your job descriptions. The AI reads from this database to understand the job requirements.
- Create a new Table database in Notion named
Open Positions. - Create the following properties:
Name(Title): This is the job title. It must exactly match the options in your Jotform dropdown (e.g., "Marketing Manager").Job Description(Text): A text field where you will paste the full job description for the role.
Database 2: "Candidates" This database will store every new applicant and their AI-generated score.
- Create a new Table database in Notion named
Candidates. - Create the following properties to store the data:
Candidate Name(Title): This will be filled with the applicant's name from the form.Email(Email): Stores the candidate's email.Phone(Phone): Stores the candidate's phone number.Resume(File): Stores the link to the resume PDF.AI Summary(Text): Stores the 2-sentence summary from the AI.AI Fit Score(Number): Stores the 0-1S00 score from the AI.Key Skills(Multi-select): Stores the skills array generated by the AI.Position(Relation): This is the final, crucial property.- Type: Select
Relation. - Database: In the menu, search for and select your "Open Positions" database.
- IMPORTANT: A toggle labeled "Show on 'Open Positions'" will appear. You must turn this toggle ON. This creates a two-way relation, which is required for n8n to see and use this property.
- Type: Select