Network vulnerability scanner with NMAP and automated CVE reporting
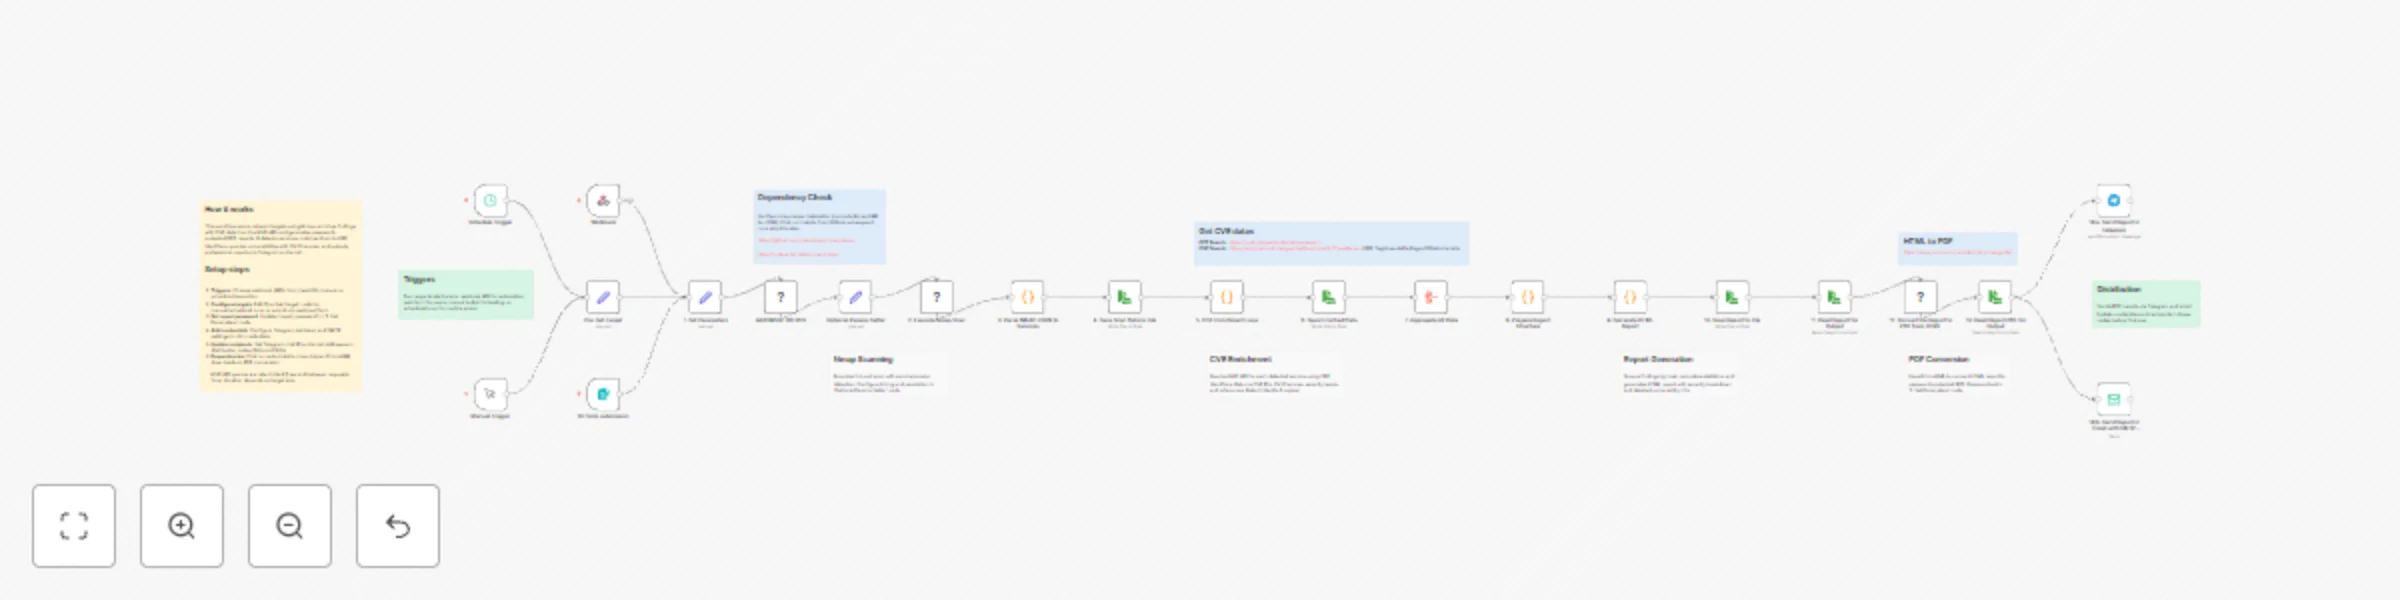
Workflow preview


 Early Deal
DISCOUNT 20%

Important notice
This workflow is provided as-is. Please review and test before using in production.
Overview
Network Vulnerability Scanner (used NMAP as engine) with Automated CVE Report
Workflow Overview
This n8n workflow provides comprehensive network vulnerability scanning with automated CVE enrichment and professional report generation. It performs Nmap scans, queries the National Vulnerability Database (NVD) for CVE information, generates detailed HTML/PDF reports, and distributes them via Telegram and email.
Key Features
- Automated Network Scanning: Full Nmap service and version detection scan
- CVE Enrichment: Automatic vulnerability lookup using NVD API
- CVSS Scoring: Vulnerability severity assessment with CVSS v3.1/v3.0 scores
- Professional Reporting: HTML reports with detailed findings and recommendations
- PDF Generation: Password-protected PDF reports using Prince XML
- Multi-Channel Distribution: Telegram and email delivery
- Multiple Triggers: Webhook API, web form, manual execution, scheduled scans
- Rate Limiting: Respects NVD API rate limits
- Comprehensive Data: Service detection, CPE matching, CVE details with references
Use Cases
- Regular security audits of network infrastructure
- Compliance scanning for vulnerability management
- Penetration testing reconnaissance phase
- Asset inventory with vulnerability context
- Continuous security monitoring
- Vulnerability assessment reporting for management
- DevSecOps integration for infrastructure testing
Setup Instructions
Prerequisites
Before setting up this workflow, ensure you have:
System Requirements
- n8n instance (self-hosted) with command execution capability
- Alpine Linux base image (or compatible Linux distribution)
- Minimum 2 GB RAM (4 GB recommended for large scans)
- 2 GB free disk space for dependencies
- Network access to scan targets
- Internet connectivity for NVD API
Required Knowledge
- Basic networking concepts (IP addresses, ports, protocols)
- Understanding of CVE/CVSS vulnerability scoring
- Nmap scanning basics
External Services
- Telegram Bot (optional, for Telegram notifications)
- Email server / SMTP credentials (optional, for email reports)
- NVD API access (public, no API key required but rate-limited)
Step 1: Understanding the Workflow Components
Core Dependencies
Nmap: Network scanner
- Purpose: Port scanning, service detection, version identification
- Usage: Performs TCP SYN scan with service/version detection
nmap-helper: JSON conversion tool
- Repository: https://github.com/net-shaper/nmap-helper
- Purpose: Converts Nmap XML output to JSON format
Prince XML: HTML to PDF converter
- Website: https://www.princexml.com
- Version: 16.1 (Alpine 3.20)
- Purpose: Generates professional PDF reports from HTML
- Features: Password protection, print-optimized formatting
NVD API: Vulnerability database
- Endpoint: https://services.nvd.nist.gov/rest/json/cves/2.0
- Purpose: CVE information, CVSS scores, vulnerability descriptions
- Rate Limit: Public API allows limited requests per minute
- Documentation: https://nvd.nist.gov/developers
Step 2: Telegram Bot Configuration (Optional)
If you want to receive reports via Telegram:
Create Telegram Bot
- Open Telegram and search for @BotFather
- Start a chat and send
/newbot - Follow prompts:
- Bot name: Network Scanner Bot (or your choice)
- Username: network_scanner_bot (must end with 'bot')
- BotFather will provide:
- Bot token:
123456789:ABCdefGHIjklMNOpqrsTUVwxyz(save this) - Bot URL:
https://t.me/your_bot_username
- Bot token:
Get Your Chat ID
- Start a chat with your new bot
- Send any message to the bot
- Visit:
https://api.telegram.org/bot<YOUR_BOT_TOKEN>/getUpdates - Find your chat ID in the response
- Save this chat ID (e.g.,
123456789)
Alternative: Group Chat ID
For sending to a group:
- Add bot to your group
- Send a message in the group
- Check getUpdates URL
- Group chat IDs are negative:
-1001234567890
Add Credentials to n8n
- Navigate to Credentials in n8n
- Click Add Credential
- Select Telegram API
- Fill in:
- Access Token: Your bot token from BotFather
- Click Save
- Test connection if available
Step 3: Email Configuration (Optional)
If you want to receive reports via email:
Add SMTP Credentials to n8n
- Navigate to Credentials in n8n
- Click Add Credential
- Select SMTP
- Fill in:
- Host: SMTP server address (e.g.,
smtp.gmail.com) - Port: SMTP port (587 for TLS, 465 for SSL, 25 for unencrypted)
- User: Your email username
- Password: Your email password or app password
- Secure: Enable for TLS/SSL
- Host: SMTP server address (e.g.,
- Click Save
Gmail Users:
- Enable 2-factor authentication
- Generate app-specific password: https://myaccount.google.com/apppasswords
- Use app password in n8n credential
Step 4: Import and Configure Workflow
Configure Basic Parameters
Locate "1. Set Parameters" Node:
- Click the node to open settings
- Default configuration:
network: Input from webhook/form/manual triggertimestamp: Auto-generated (format: yyyyMMdd_HHmmss)report_password:Almafa123456(change this!)
Change Report Password:
- Edit
report_passwordassignment - Set strong password: 12+ characters, mixed case, numbers, symbols
- This password will protect the PDF report
- Save changes
Step 5: Configure Notification Endpoints
Telegram Configuration
Locate "14/a. Send Report in Telegram" Node:
- Open node settings
- Update fields:
- Chat ID: Replace
-123456789012with your actual chat ID - Credentials: Select your Telegram credential
- Chat ID: Replace
- Save changes
Message customization:
- Current: Sends PDF as document attachment
- Automatic filename:
vulnerability_report_<timestamp>.pdf - No caption by default (add if needed)
Email Configuration
Locate "14/b. Send Report in Email with SMTP" Node:
- Open node settings
- Update fields:
- From Email:
[email protected]→ Your sender email - To Email:
[email protected]→ Your recipient email - Subject: Customize if needed (default includes network target)
- Text: Email body message
- Credentials: Select your SMTP credential
- From Email:
- Save changes
Multiple Recipients:
Change toEmail field to comma-separated list:
[email protected], [email protected], [email protected]
Add CC/BCC: In node options, add:
cc: Carbon copy recipientsbcc: Blind carbon copy recipients
Step 6: Configure Triggers
The workflow supports 4 trigger methods:
Trigger 1: Webhook API (Production)
Locate "Webhook" Node:
- Path:
/vuln-scan - Method: POST
- Response: Immediate acknowledgment "Process started!"
- Async: Scan runs in background
Trigger 2: Web Form (User-Friendly)
Locate "On form submission" Node:
- Path:
/webhook-test/form/target - Method: GET (form display), POST (form submit)
- Form Title: "Add scan parameters"
- Field:
network(required)
Form URL:
https://your-n8n-domain.com/webhook-test/form/target
Users can:
- Open form URL in browser
- Enter target network/IP
- Click submit
- Receive confirmation
Trigger 3: Manual Execution (Testing)
Locate "Manual Trigger" Node:
- Click to activate
- Opens workflow with "Pre-Set-Target" node
- Default target:
scanme.nmap.org(Nmap's official test server)
To change default target:
- Open "Pre-Set-Target" node
- Edit
networkvalue - Enter your test target
- Save changes
Trigger 4: Scheduled Scans (Automated)
Locate "Schedule Trigger" Node:
- Default: Daily at 1:00 AM
- Uses "Pre-Set-Target" for network
To change schedule:
- Open node settings
- Modify trigger time:
- Hour: 1 (1 AM)
- Minute: 0
- Day of week: All days (or select specific days)
- Save changes
Schedule Examples:
- Every day at 3 AM: Hour: 3, Minute: 0
- Weekly on Monday at 2 AM: Hour: 2, Day: Monday
- Twice daily (8 AM, 8 PM): Create two Schedule Trigger nodes
Step 7: Test the Workflow
Recommended Test Target
Use Nmap's official test server for initial testing:
- Target:
scanme.nmap.org - Purpose: Official Nmap testing server
- Safe: Designed for scanning practice
- Permissions: Public permission to scan
Important: Never scan targets without permission. Unauthorized scanning is illegal.
Manual Test Execution
- Open workflow in n8n editor
- Click Manual Trigger node to select it
- Click Execute Workflow button
- Workflow will start with
scanme.nmap.orgas target
Monitor Execution
Watch nodes turn green as they complete:
- Need to Add Helper?: Checks if nmap-helper installed
- Add NMAP-HELPER: Installs helper (if needed, ~2-3 minutes)
- Optional Params Setter: Sets scan parameters
- 2. Execute Nmap Scan: Runs scan (5-30 minutes depending on target)
- 3. Parse NMAP JSON to Services: Extracts services (~1 second)
- 5. CVE Enrichment Loop: Queries NVD API (1 second per service)
- 8-10. Report Generation: Creates HTML/PDF reports (~5-10 seconds)
- 12. Convert to PDF: Generates password-protected PDF (~10 seconds)
- 14a/14b. Distribution: Sends reports
Check Outputs
Click nodes to view outputs:
- 3. Parse NMAP JSON: View discovered services
- 5. CVE Enrichment: See vulnerabilities found
- 8. Prepare Report Structure: Check statistics
- 13. Read Report PDF: Download report to verify
Verify Distribution
Telegram:
- Open Telegram chat with your bot
- Check for PDF document
- Download and open with password
Email:
- Check inbox for report email
- Verify subject line includes target network
- Download PDF attachment
- Open with password
How to Use
Understanding the Scan Process
Initiating Scans
Method 1: Webhook API
Use curl or any HTTP client and add "network" parameter in a POST request.
Response:
Process started!
Scan runs asynchronously. You'll receive results via configured channels (Telegram/Email).
Method 2: Web Form
Open form URL in browser:
https://your-n8n.com/webhook-test/form/targetFill in form:
- network: Enter target (IP, range, domain)
Click Submit
Receive confirmation
Wait for report delivery
Advantages:
- No command line needed
- User-friendly interface
- Input validation
- Good for non-technical users
Method 3: Manual Execution
For testing or one-off scans:
- Open workflow in n8n
- Edit "Pre-Set-Target" node:
- Change
networkvalue to your target
- Change
- Click Manual Trigger node
- Click Execute Workflow
- Monitor progress in real-time
Advantages:
- See execution in real-time
- Debug issues immediately
- Test configuration changes
- View intermediate outputs
Method 4: Scheduled Scans
For regular, automated security audits:
- Configure "Schedule Trigger" node with desired time
- Configure "Pre-Set-Target" node with default target
- Activate workflow
- Scans run automatically on schedule
Advantages:
- Automated security monitoring
- Regular compliance scans
- No manual intervention needed
- Consistent scheduling
Scan Targets Explained
Supported Target Formats
Single IP Address:
192.168.1.100
10.0.0.50
CIDR Notation (Subnet):
192.168.1.0/24         # Scans 192.168.1.0-255 (254 hosts)
10.0.0.0/16            # Scans 10.0.0.0-255.255 (65534 hosts)
172.16.0.0/12          # Scans entire 172.16-31.x.x range
IP Range:
192.168.1.1-50         # Scans 192.168.1.1 to 192.168.1.50
10.0.0.1-10.0.0.100    # Scans across range
Multiple Targets:
192.168.1.1,192.168.1.2,192.168.1.3
Hostname/Domain:
scanme.nmap.org
example.com
server.local
Choosing Appropriate Targets
Development/Testing:
- Use
scanme.nmap.org(official test target) - Use your own isolated lab network
- Never scan public internet without permission
Internal Networks:
- Use CIDR notation for entire subnets
- Scan DMZ networks separately from internal
- Consider network segmentation in scan design
Understanding Report Contents
Report Structure
The generated report includes:
1. Executive Summary:
- Total hosts discovered
- Total services identified
- Total vulnerabilities found
- Severity breakdown (Critical, High, Medium, Low, Info)
- Scan date and time
- Target network
2. Overall Statistics:
- Visual dashboard with key metrics
- Severity distribution chart
- Quick risk assessment
3. Detailed Findings by Host: For each discovered host:
- IP address
- Hostname (if resolved)
- List of open ports and services
- Service details:
- Port number and protocol
- Service name (e.g., http, ssh, mysql)
- Product (e.g., Apache, OpenSSH, MySQL)
- Version (e.g., 2.4.41, 8.2p1, 5.7.33)
- CPE identifier
4. Vulnerability Details: For each vulnerable service:
- CVE ID: Unique vulnerability identifier (e.g., CVE-2021-44228)
- Severity: CRITICAL / HIGH / MEDIUM / LOW / INFO
- CVSS Score: Numerical score (0.0-10.0)
- Published Date: When vulnerability was disclosed
- Description: Detailed vulnerability explanation
- References: Links to advisories, patches, exploits
5. Recommendations:
- Immediate actions (patch critical/high severity)
- Long-term improvements (security processes)
- Best practices
Vulnerability Severity Levels
CRITICAL (CVSS 9.0-10.0):
- Color: Red
- Characteristics: Remote code execution, full system compromise
- Action: Immediate patching required
- Examples: Log4Shell, EternalBlue, Heartbleed
HIGH (CVSS 7.0-8.9):
- Color: Orange
- Characteristics: Significant security impact, data exposure
- Action: Patch within days
- Examples: SQL injection, privilege escalation, authentication bypass
MEDIUM (CVSS 4.0-6.9):
- Color: Yellow
- Characteristics: Moderate security impact
- Action: Patch within weeks
- Examples: Information disclosure, denial of service, XSS
LOW (CVSS 0.1-3.9):
- Color: Green
- Characteristics: Minor security impact
- Action: Patch during regular maintenance
- Examples: Path disclosure, weak ciphers, verbose error messages
INFO (CVSS 0.0):
- Color: Blue
- Characteristics: No vulnerability found or informational
- Action: No action required, awareness only
- Examples: Service version detected, no known CVEs
Understanding CPE
CPE (Common Platform Enumeration):
- Standard naming scheme for IT products
- Used for CVE lookup in NVD database
Workflow CPE Handling:
- Nmap detects service and version
- Nmap provides CPE (if in database)
- Workflow uses CPE to query NVD API
- NVD returns CVEs associated with that CPE
- Special case: nginx vendor fixed from
igor_sysoevtonginx
Working with Reports
Accessing HTML Report
Location:
/tmp/vulnerability_report_<timestamp>.html
Viewing:
- Open in web browser directly from n8n
- Click "11. Read Report for Output" node
- Download HTML file
- Open locally in any browser
Advantages:
- Interactive (clickable links)
- Searchable text
- Easy to edit/customize
- Smaller file size
Accessing PDF Report
Location:
/tmp/vulnerability_report_<timestamp>.pdf
Password:
- Default:
Almafa123456(configured in "1. Set Parameters") - Change in workflow before production use
- Required to open PDF
Opening PDF:
- Receive PDF via Telegram or Email
- Open with PDF reader (Adobe, Foxit, Browser)
- Enter password when prompted
- View, print, or share
Advantages:
- Professional appearance
- Print-optimized formatting
- Password protection
- Portable (works anywhere)
- Preserves formatting
Report Customization
Change Report Title:
- Open "8. Prepare Report Structure" node
- Find
metadataobject - Edit
titleandsubtitlefields
Customize Styling:
- Open "9. Generate HTML Report" node
- Modify CSS in
<style>section - Change colors, fonts, layout
Add Company Logo:
- Edit HTML generation code
- Add
<img>tag in header section - Include base64-encoded logo or URL
Modify Recommendations:
- Open "9. Generate HTML Report" node
- Find
<h2>Recommendations</h2>section - Edit recommendation text
Scanning Ethics and Legality
Authorization is Mandatory:
- Never scan networks without explicit written permission
- Unauthorized scanning is illegal in most jurisdictions
- Can result in criminal charges and civil liability
Scope Definition:
- Document approved scan scope
- Exclude out-of-scope systems
- Maintain scan authorization documents
Notification:
- Inform network administrators before scans
- Provide scan window and source IPs
- Have emergency contact procedures
Safe Targets for Testing:
scanme.nmap.org: Official Nmap test server- Your own isolated lab network
- Cloud instances you own
- Explicitly authorized environments
Compliance Considerations
PCI DSS:
- Quarterly internal vulnerability scans required
- Scan all system components
- Re-scan after significant changes
- Document scan results
HIPAA:
- Regular vulnerability assessments required
- Risk analysis and management
- Document remediation efforts
ISO 27001:
- Vulnerability management process
- Regular technical vulnerability scans
- Document procedures
NIST Cybersecurity Framework:
- Identify vulnerabilities (DE.CM-8)
- Maintain inventory
- Implement vulnerability management
License and Credits
Workflow:
- Created for n8n workflow automation
- Free for personal and commercial use
- Modify and distribute as needed
- No warranty provided
Dependencies:
- Nmap: GPL v2 - https://nmap.org
- nmap-helper: Open source - https://github.com/net-shaper/nmap-helper
- Prince XML: Commercial license required for production use - https://www.princexml.com
- NVD API: Public API by NIST - https://nvd.nist.gov
Third-Party Services:
- Telegram Bot API: https://core.telegram.org/bots/api
- SMTP: Standard email protocol
Support
For Nmap issues:
- Documentation: https://nmap.org/book/
- Community: https://seclists.org/nmap-dev/
For NVD API issues:
- Status page: https://nvd.nist.gov
- Contact: https://nvd.nist.gov/general/contact
For Prince XML issues:
- Documentation: https://www.princexml.com/doc/
- Support: https://www.princexml.com/doc/help/
Workflow Metadata
- External Dependencies: Nmap, nmap-helper, Prince XML, NVD API
- License: Open for modification and commercial use
Security Disclaimer
This workflow is provided for legitimate security testing and vulnerability assessment purposes only. Users are solely responsible for ensuring they have proper authorization before scanning any network or system. Unauthorized network scanning is illegal and unethical. The authors assume no liability for misuse of this workflow or any damages resulting from its use. Always obtain written permission before conducting security assessments.