SecOps Workflows
Orchestrate multi-agent compliance monitoring and audit logging with GPT-4o and Slack
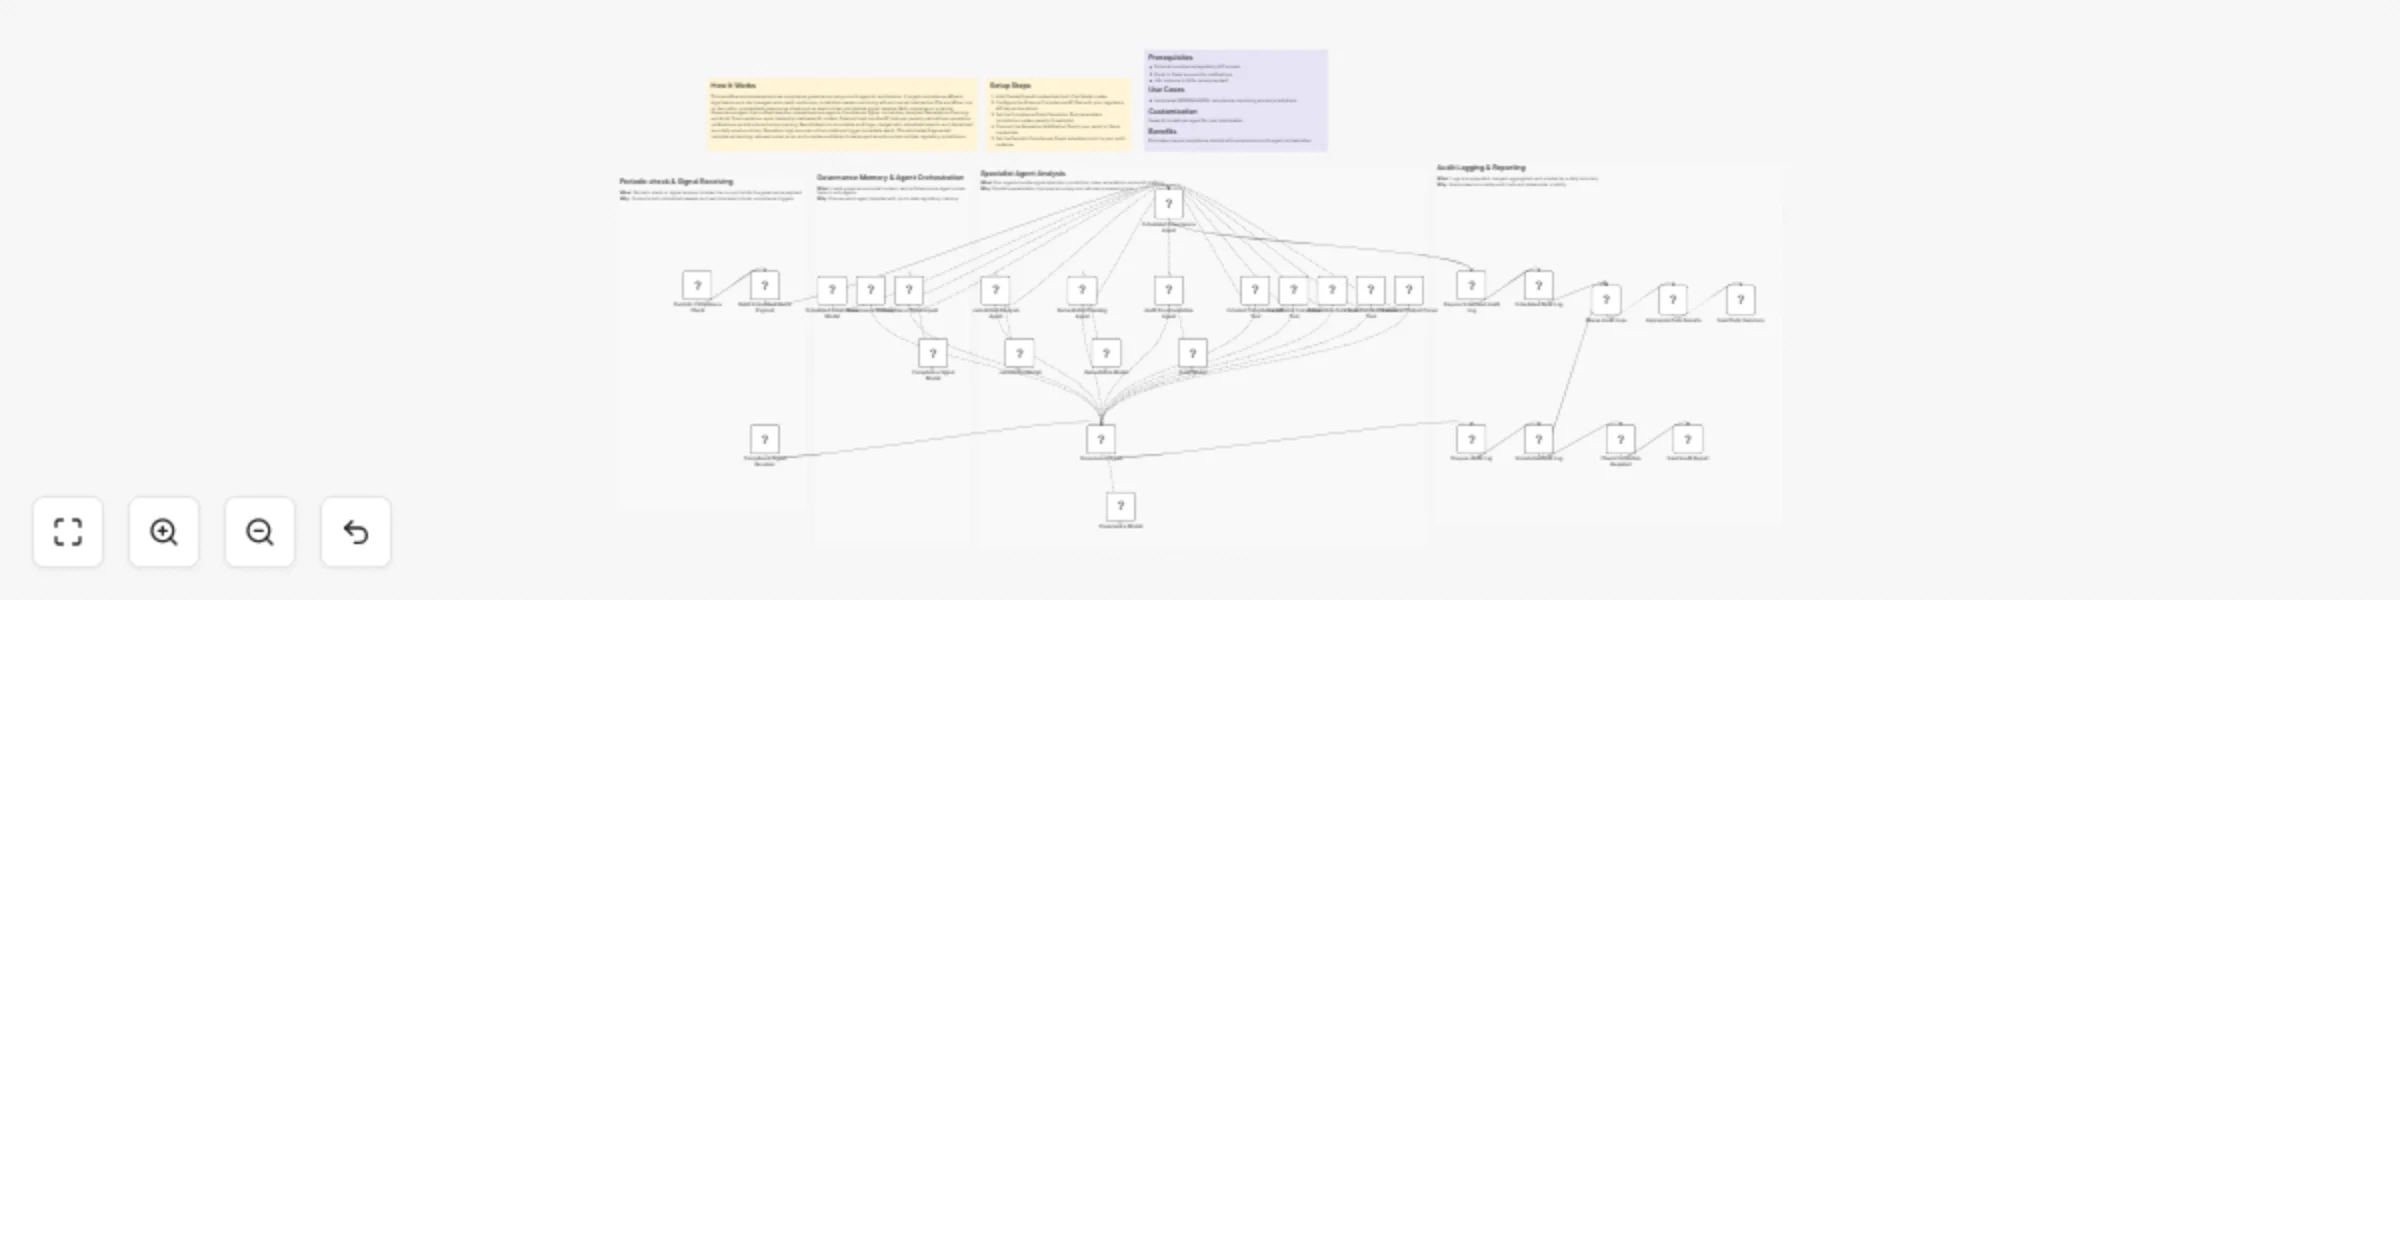
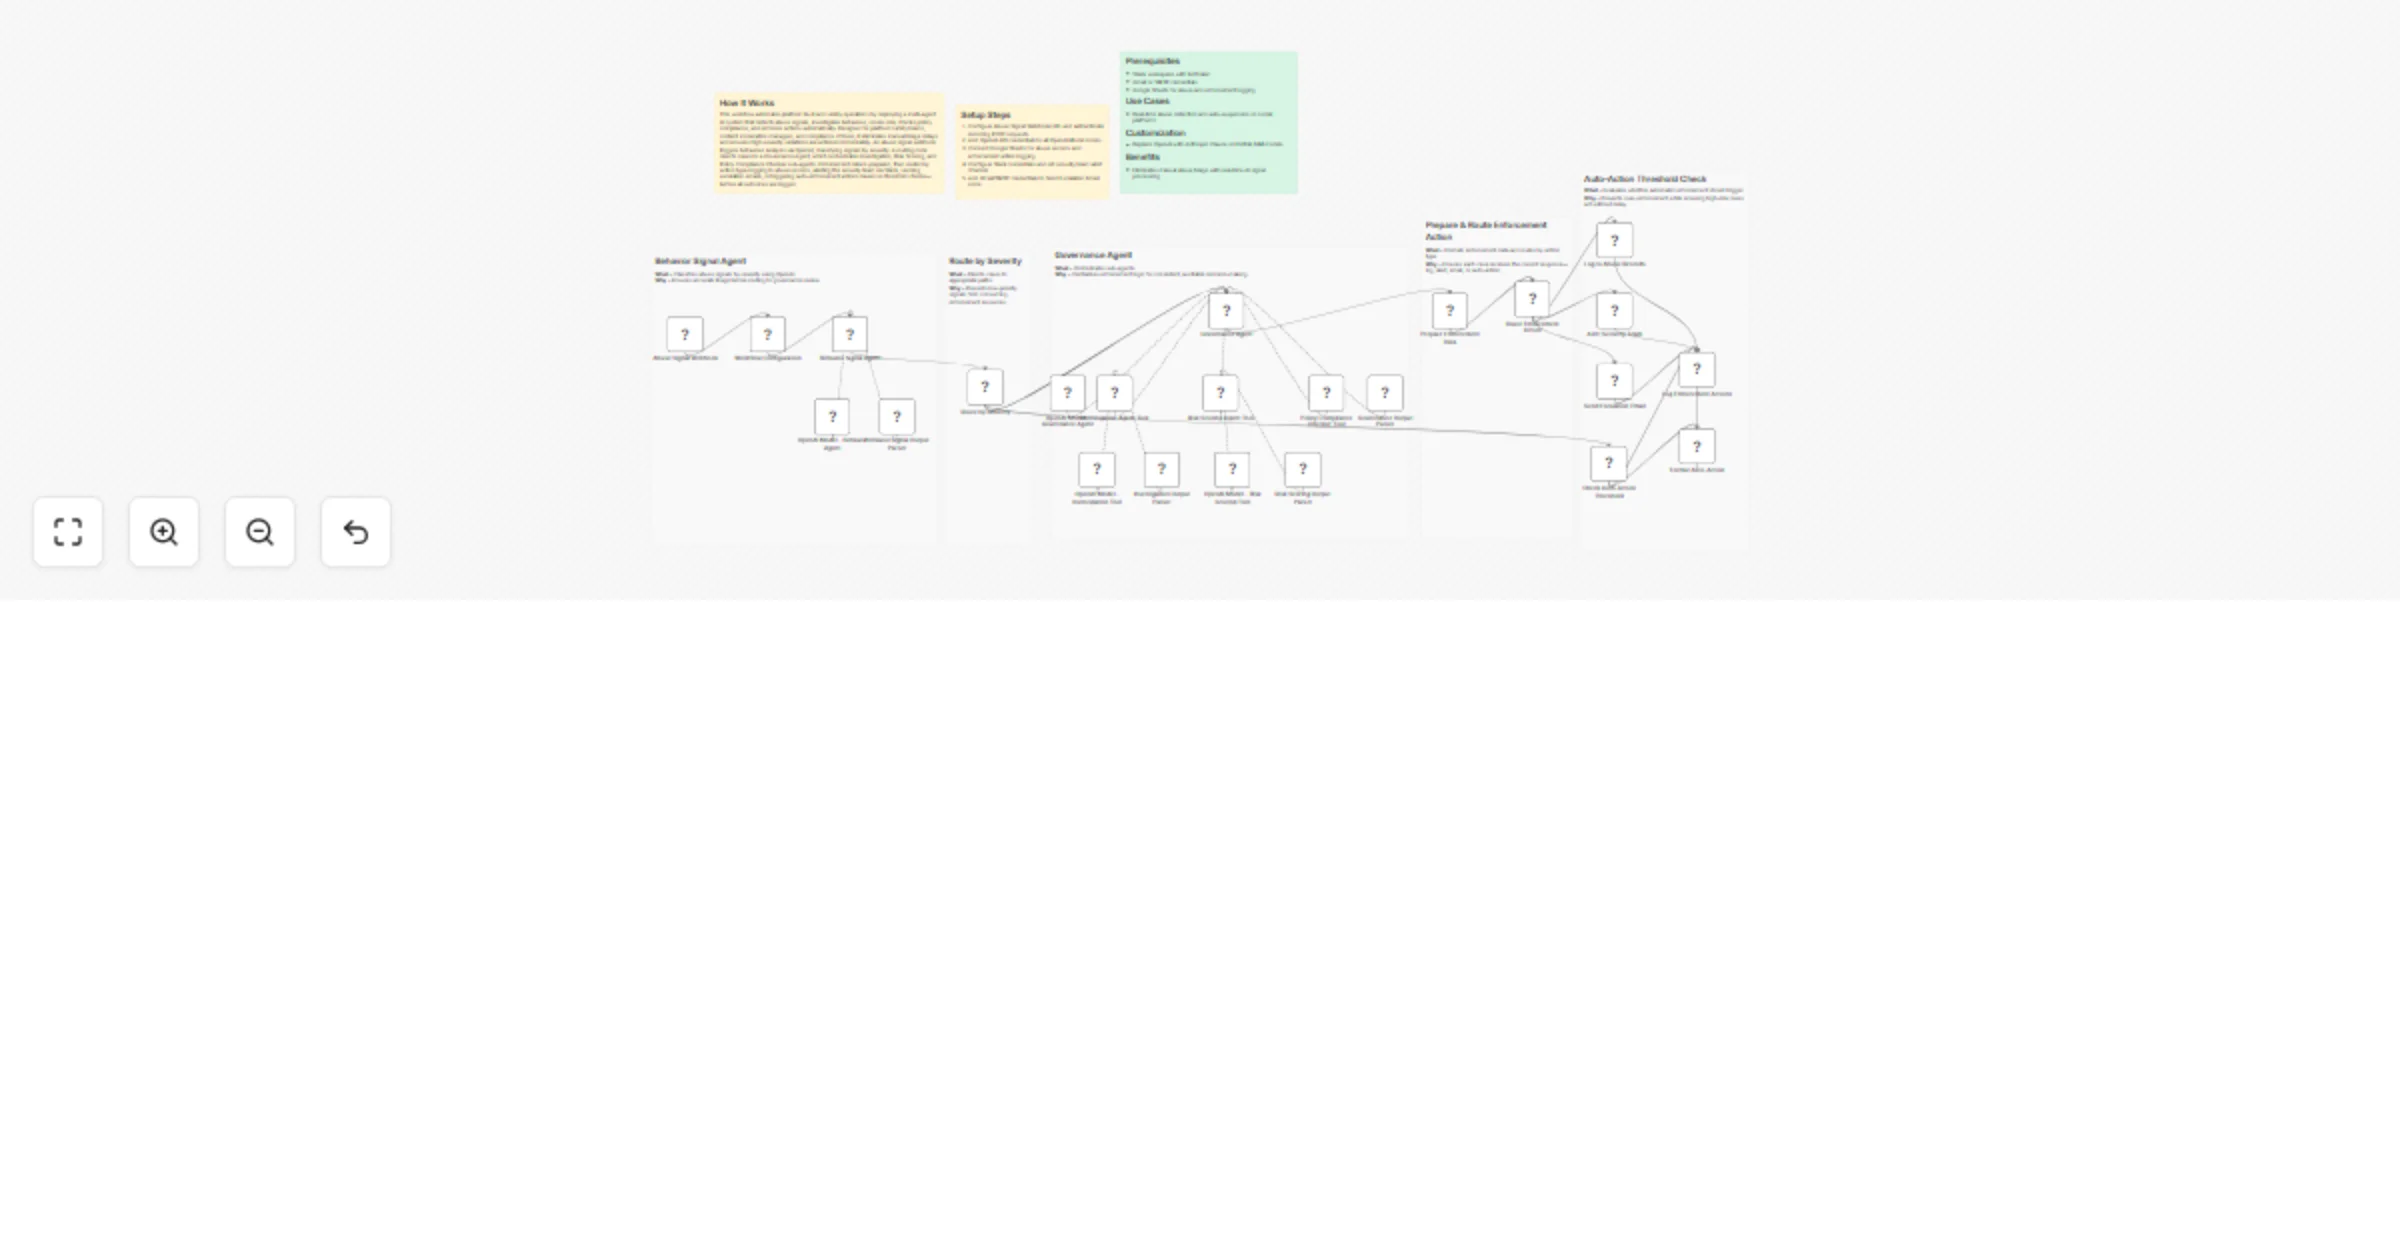
How It Works This workflow automates enterprise compliance governance using a multi agent AI architecture. It targets...
Detect WooCommerce order fraud and send alerts to Slack
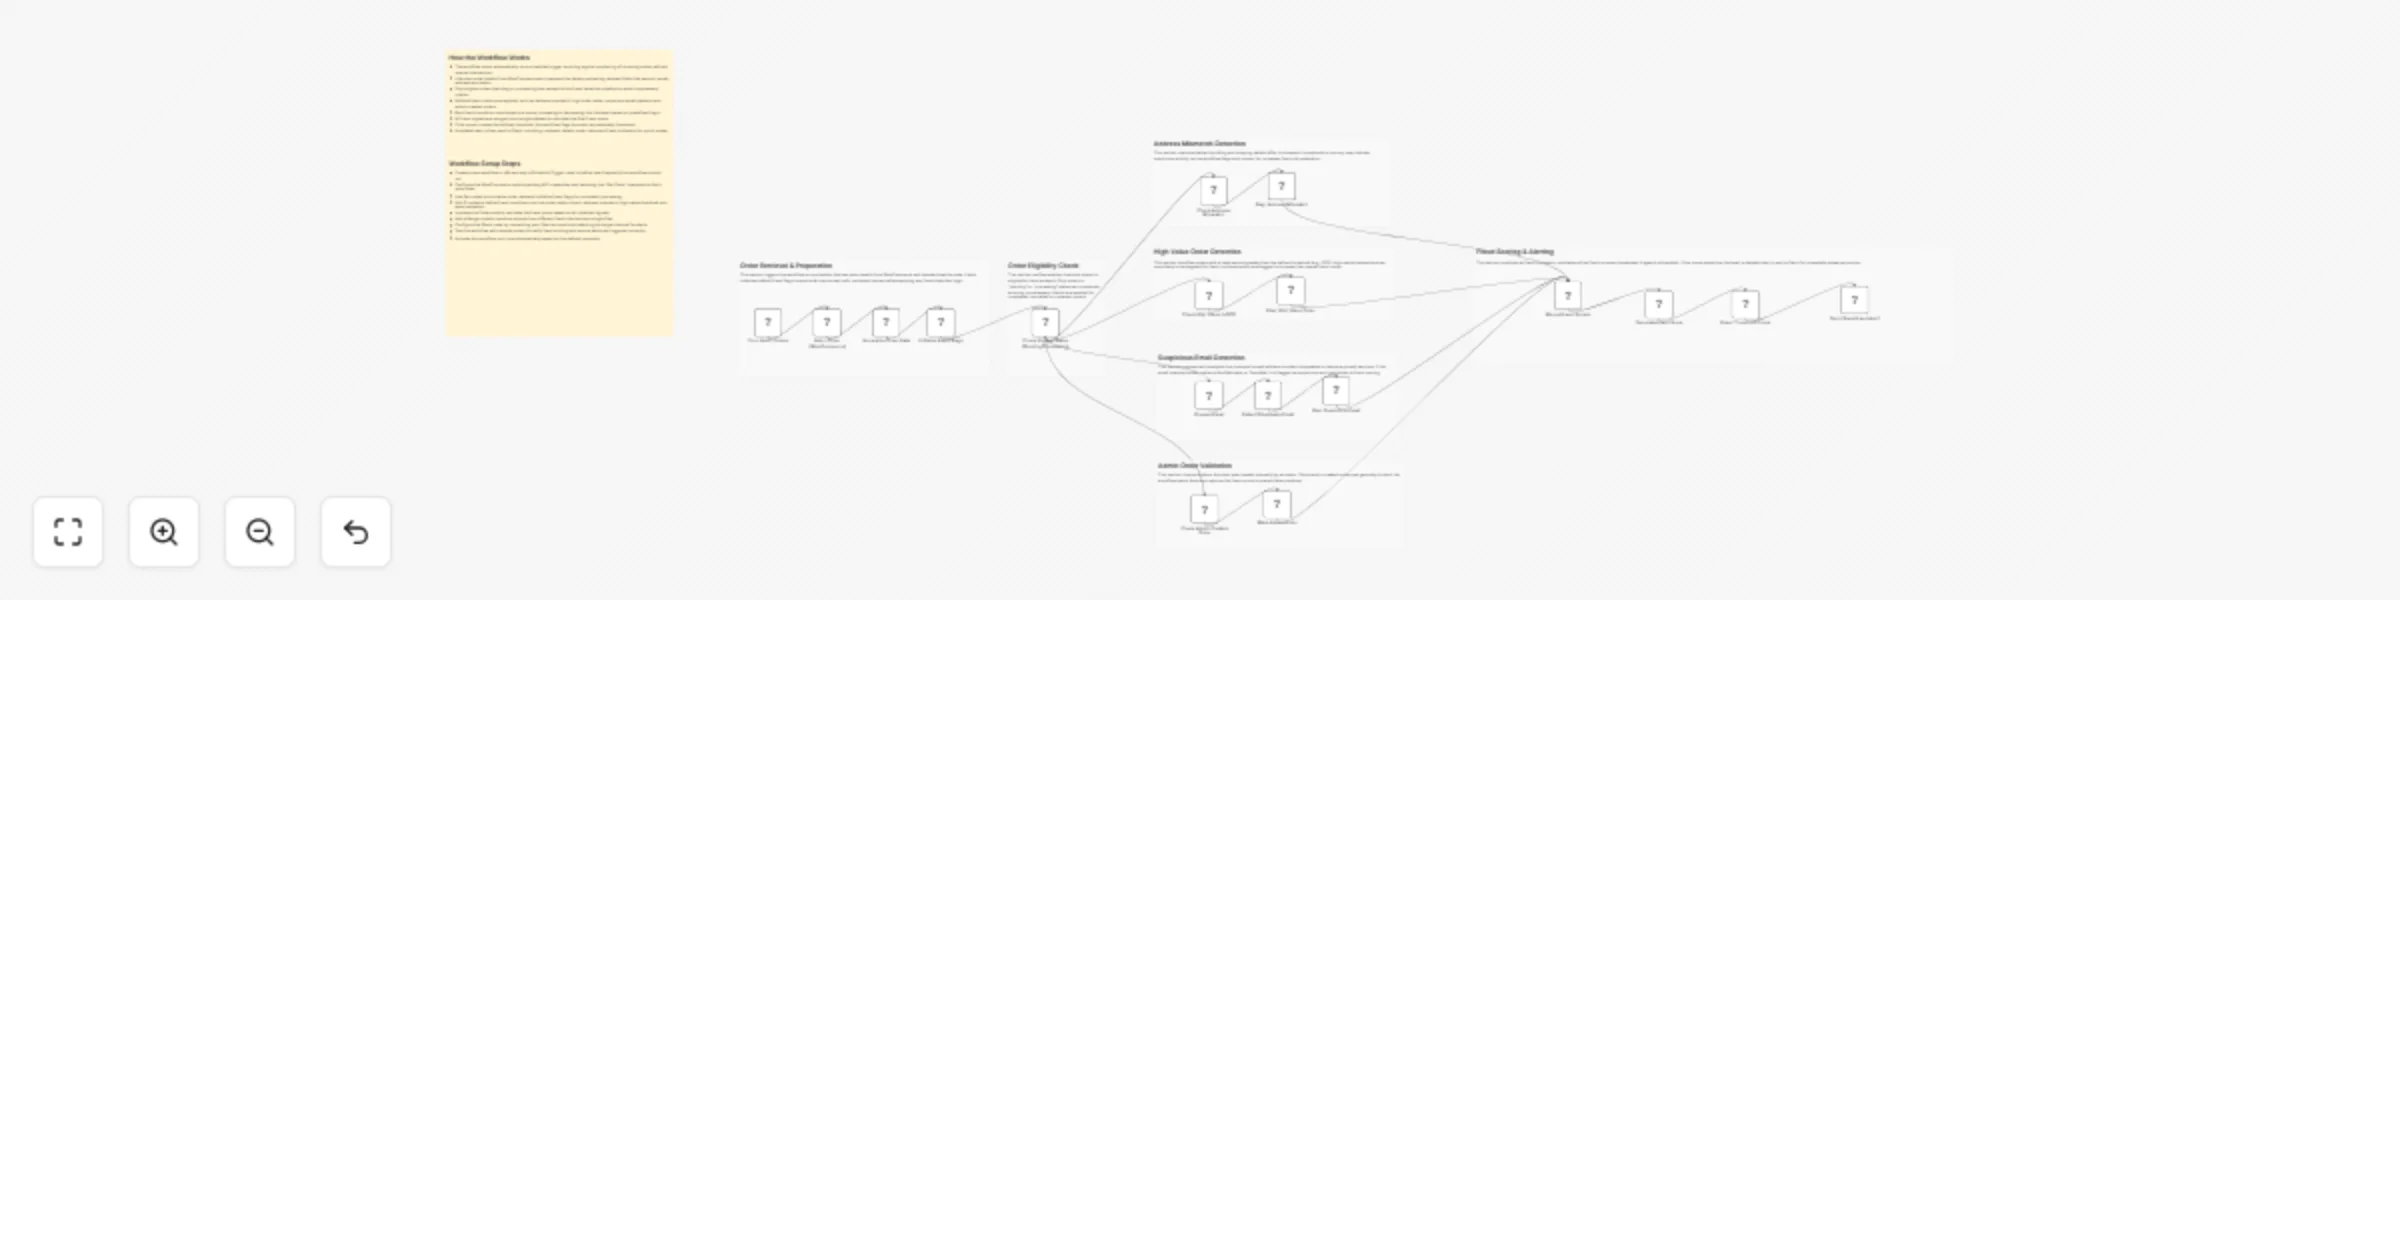
WooCommerce Fraud Detection & Slack Alert Workflow This workflow automatically monitors WooCommerce orders, evaluates...
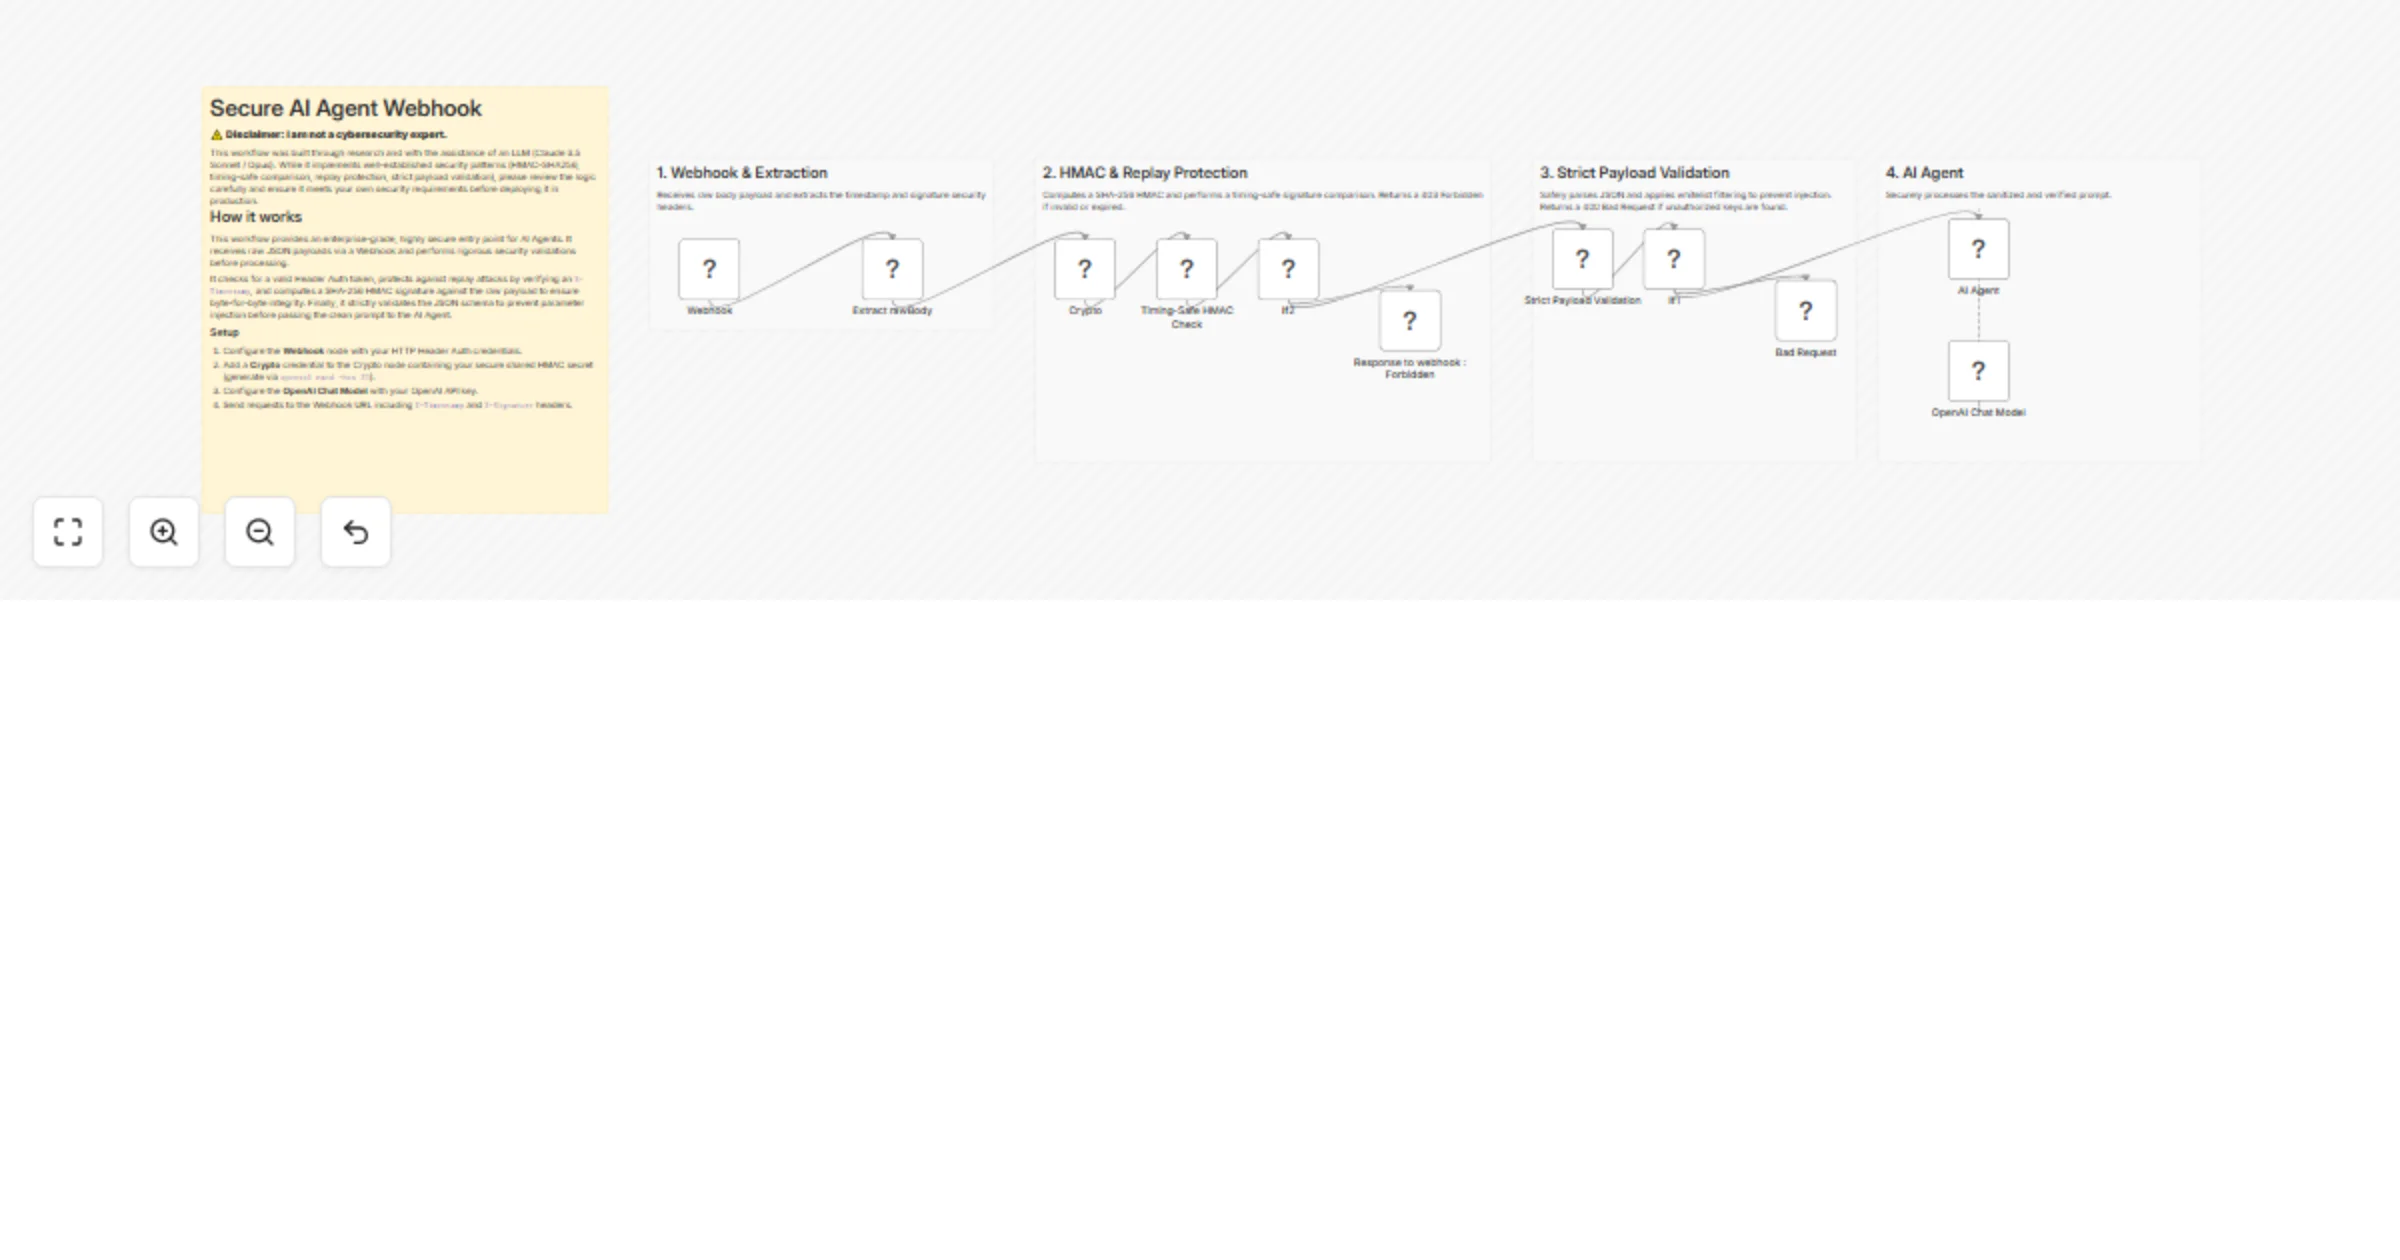
Secure AI agent webhook with HMAC, replay protection, and OpenAI GPT-5
⚠️ Disclaimer: > I am not a cybersecurity expert . This workflow was built through research and with the assistanc...
Assess blockchain smart contract and tokenomics risk with GPT-4o and Gmail
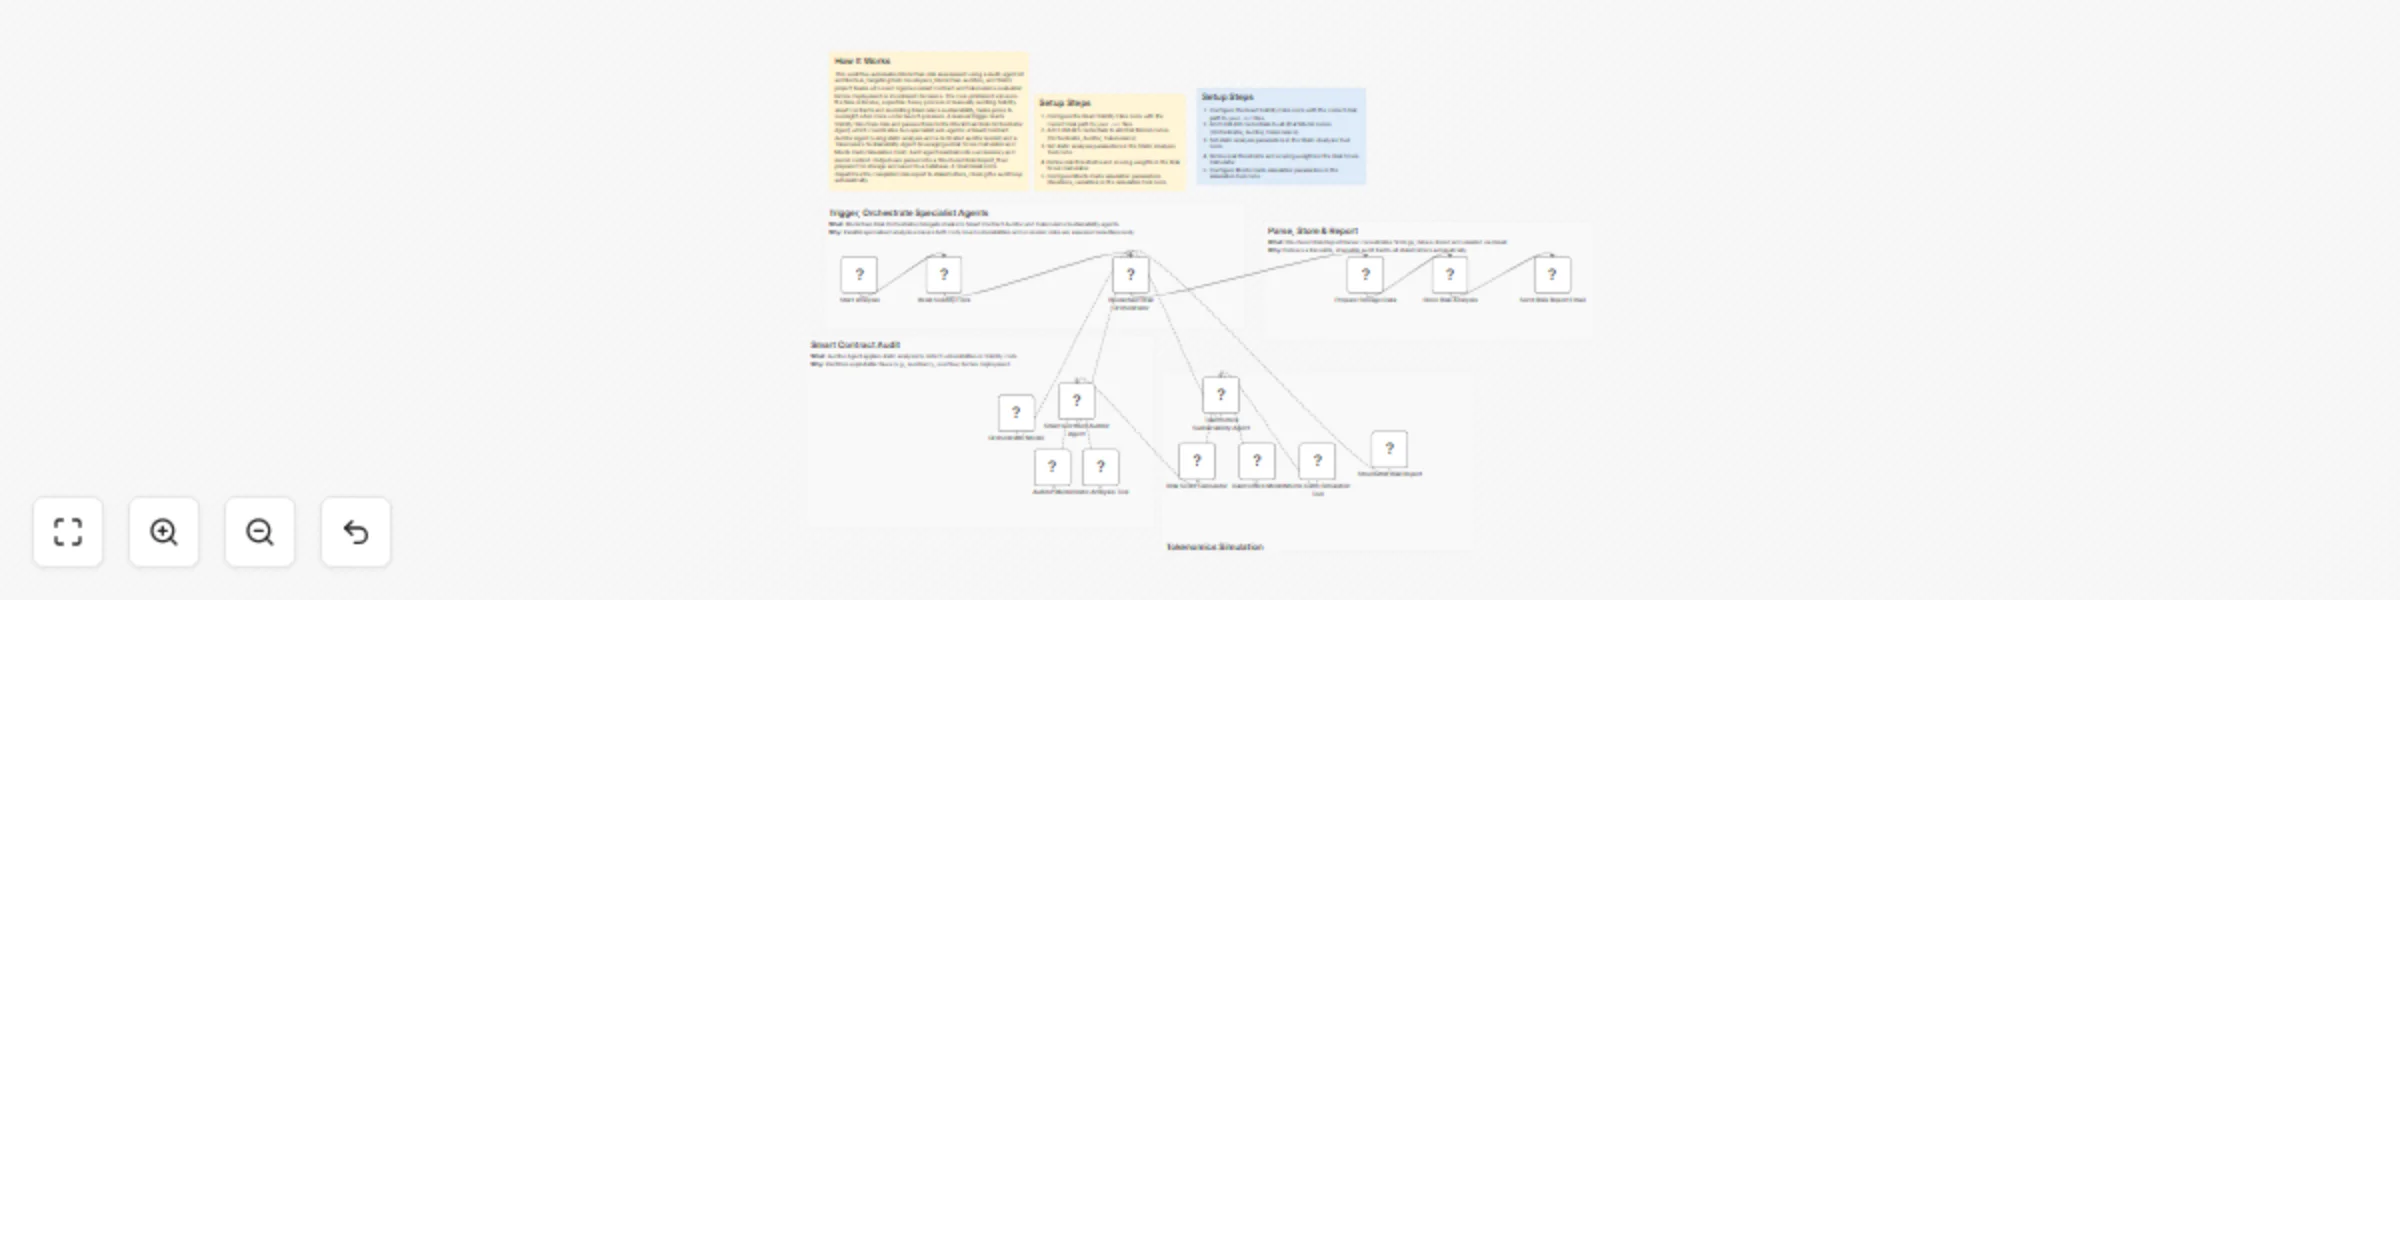
How It Works This workflow automates blockchain risk assessment using a multi agent AI architecture, targeting DeFi d...
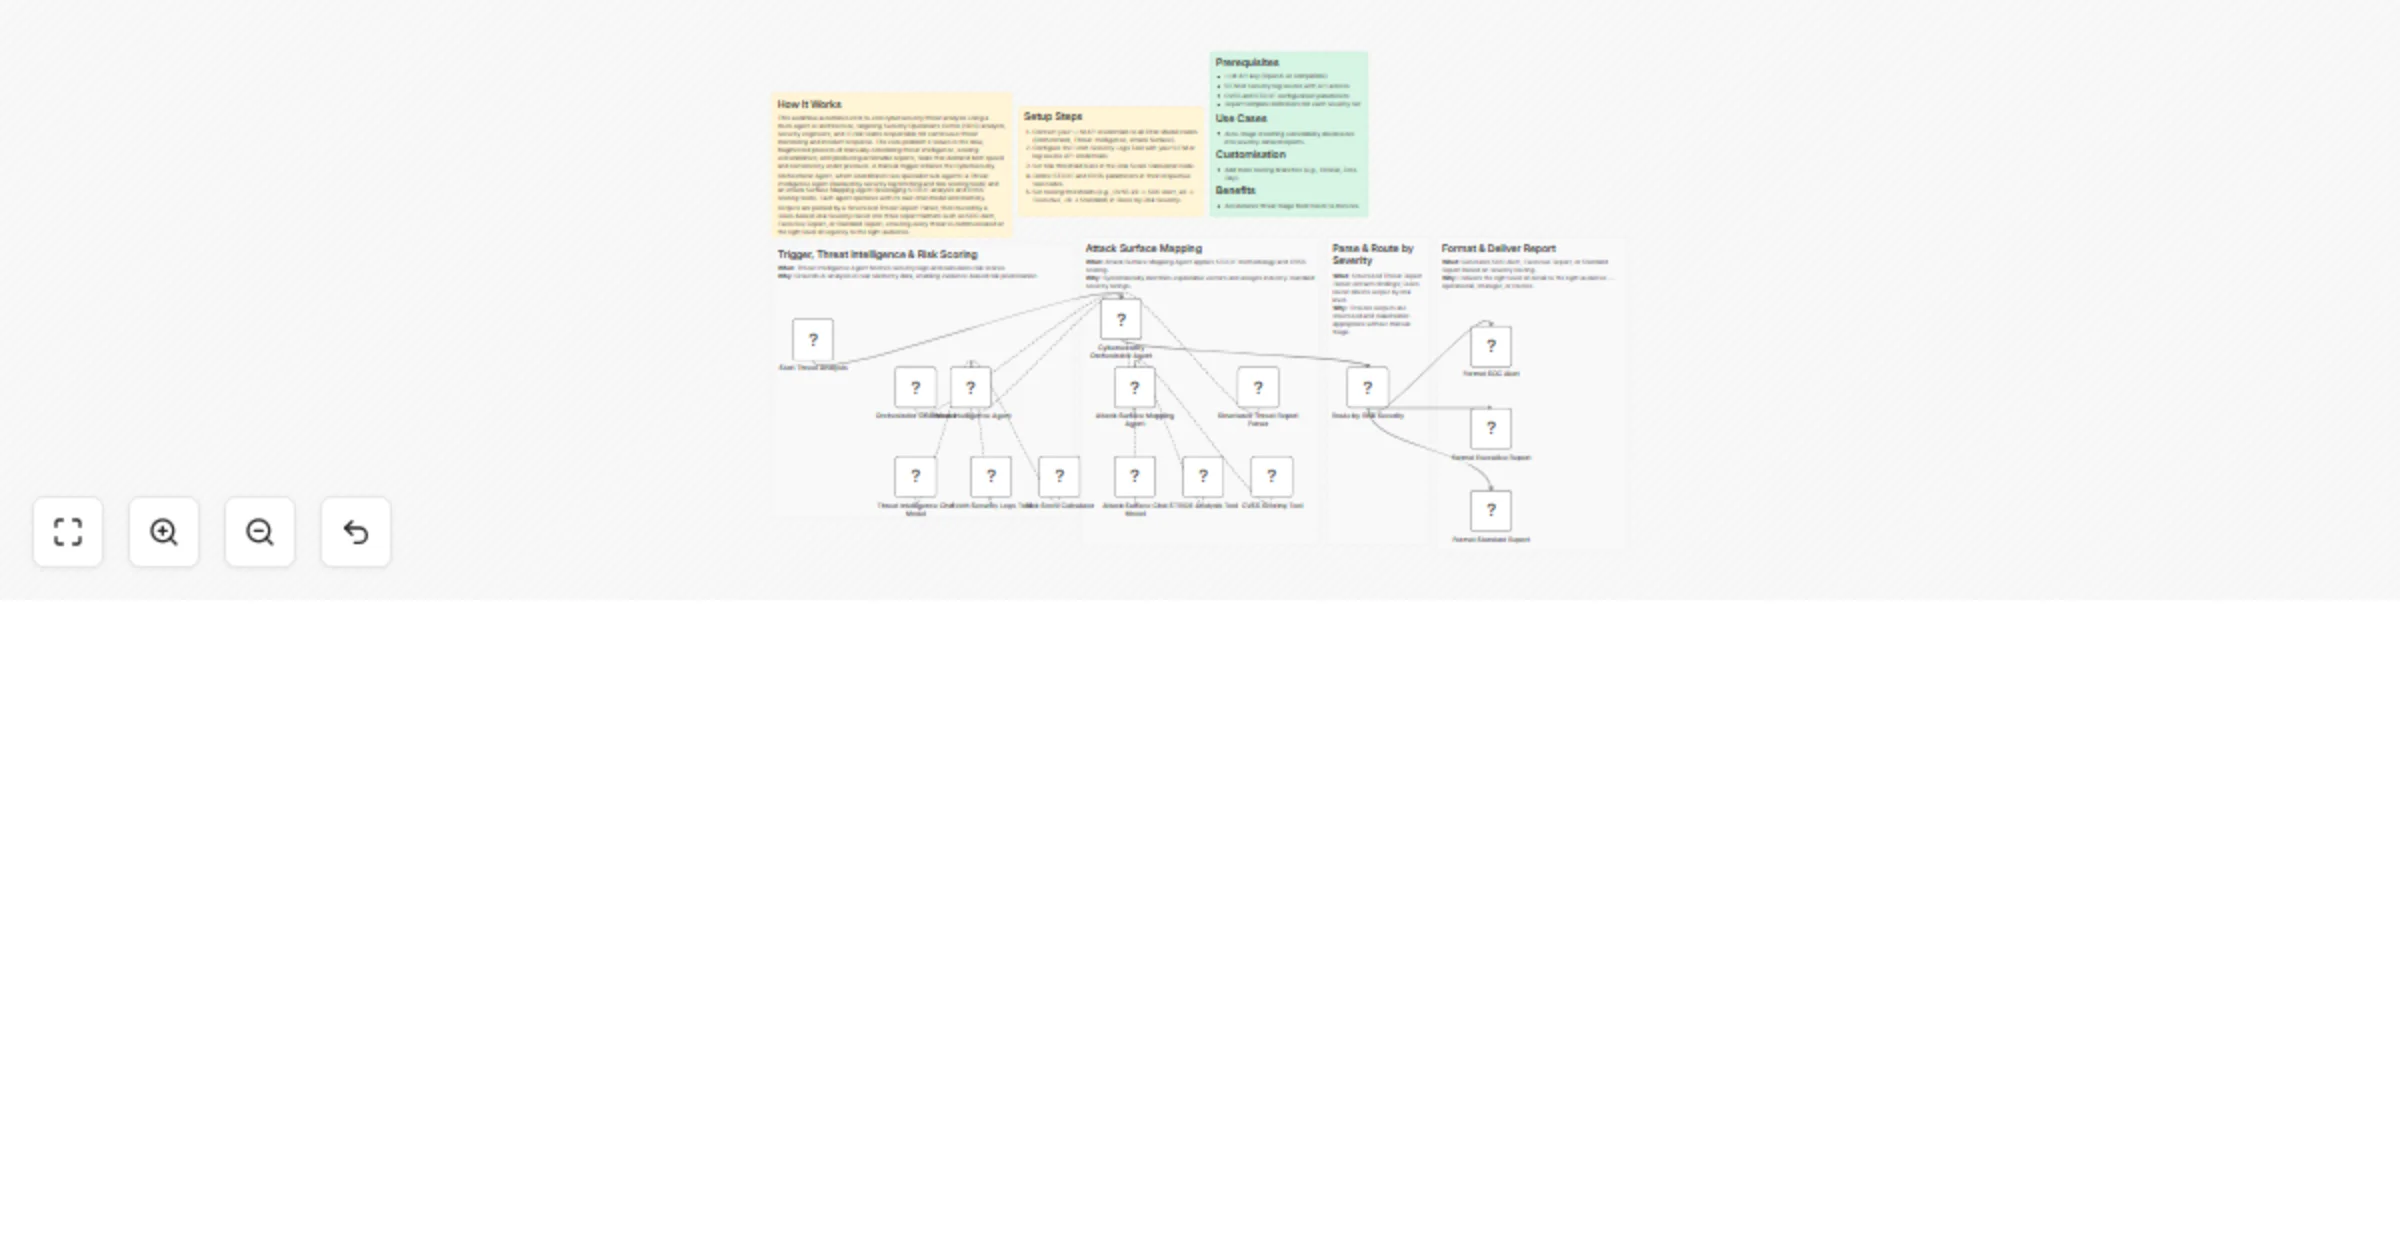
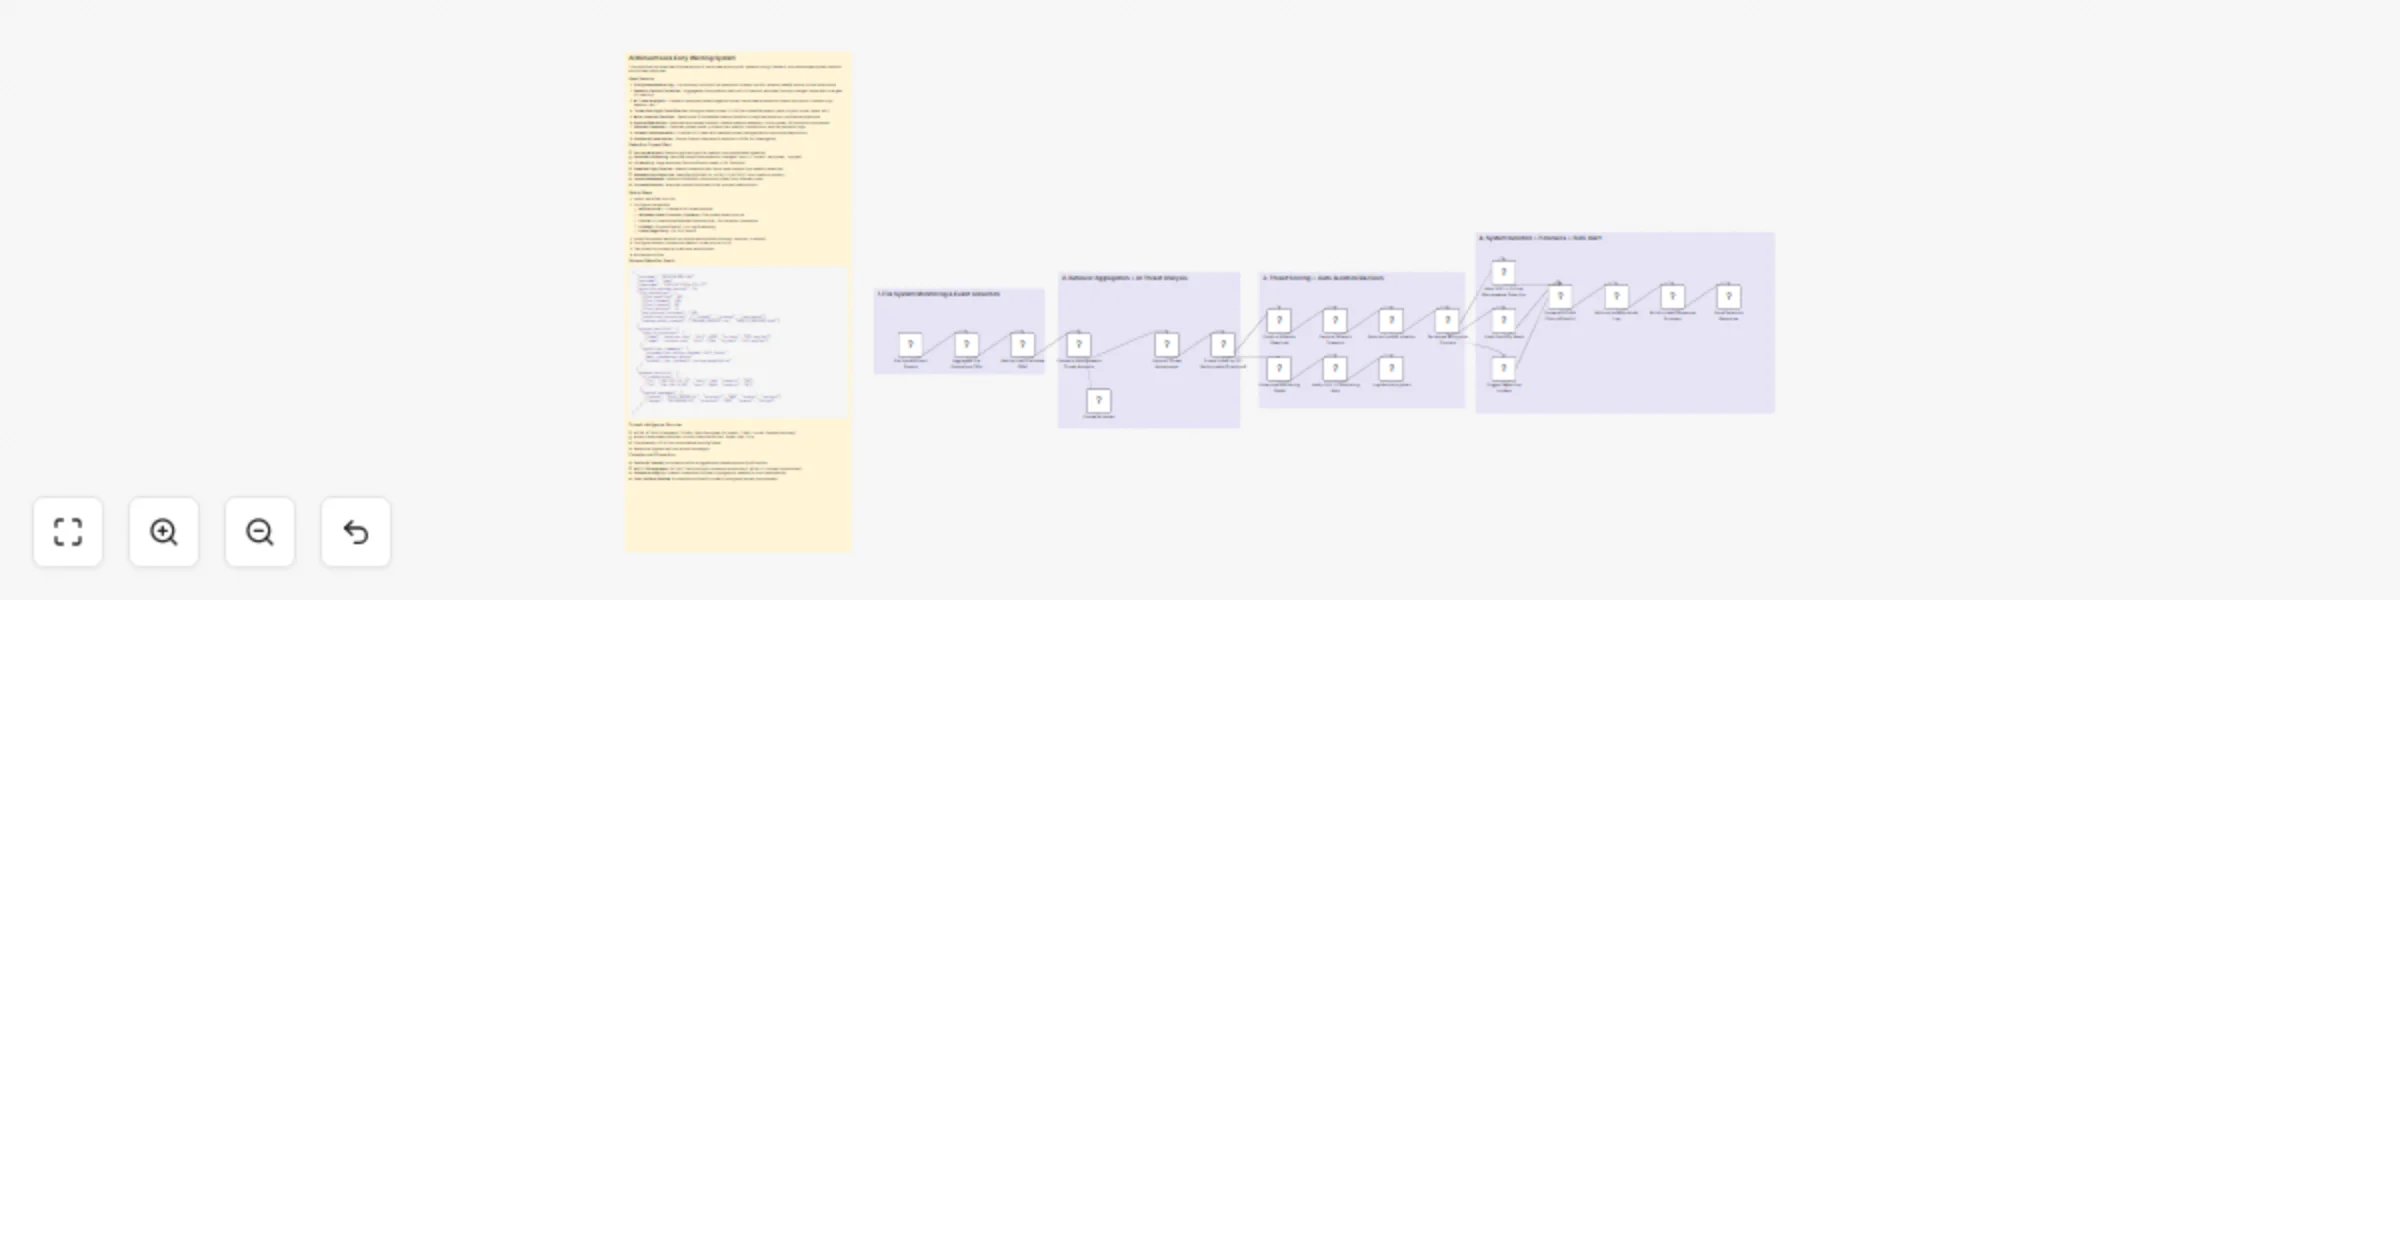
Automate cybersecurity threat analysis with GPT-4o, CVSS scoring and risk routing
How It Works This workflow automates end to end cybersecurity threat analysis using a multi agent AI architecture, ta...
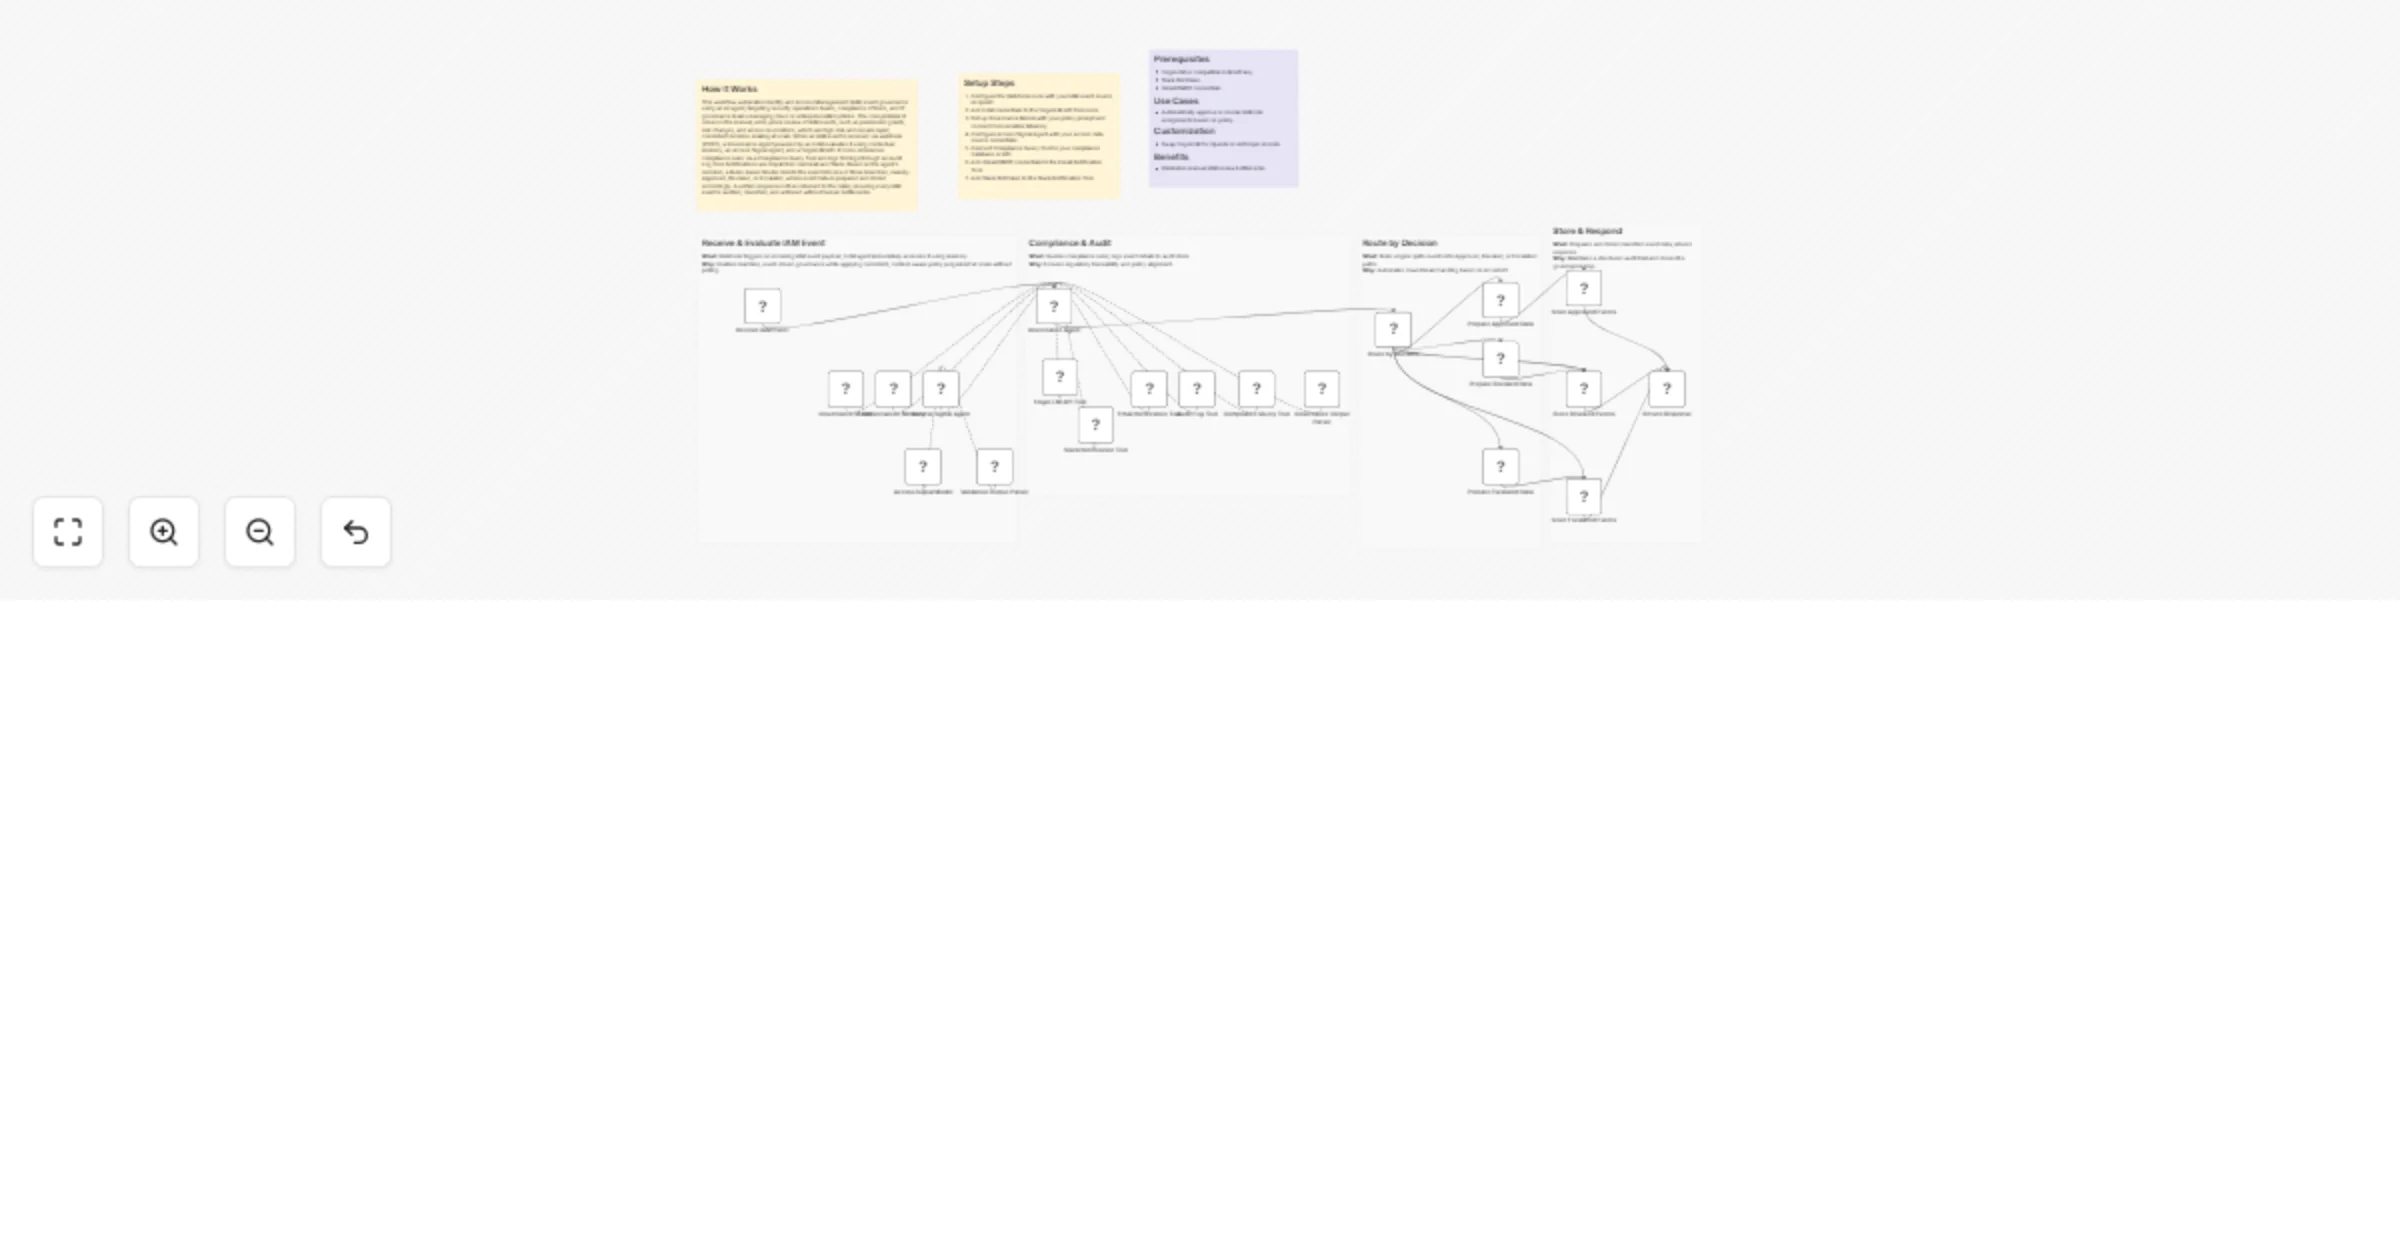
Route IAM events with GPT-4o-mini, forgeLLM, Slack, email, and audit logs
How It Works This workflow automates Identity and Access Management (IAM) event governance using an AI agent, targeti...
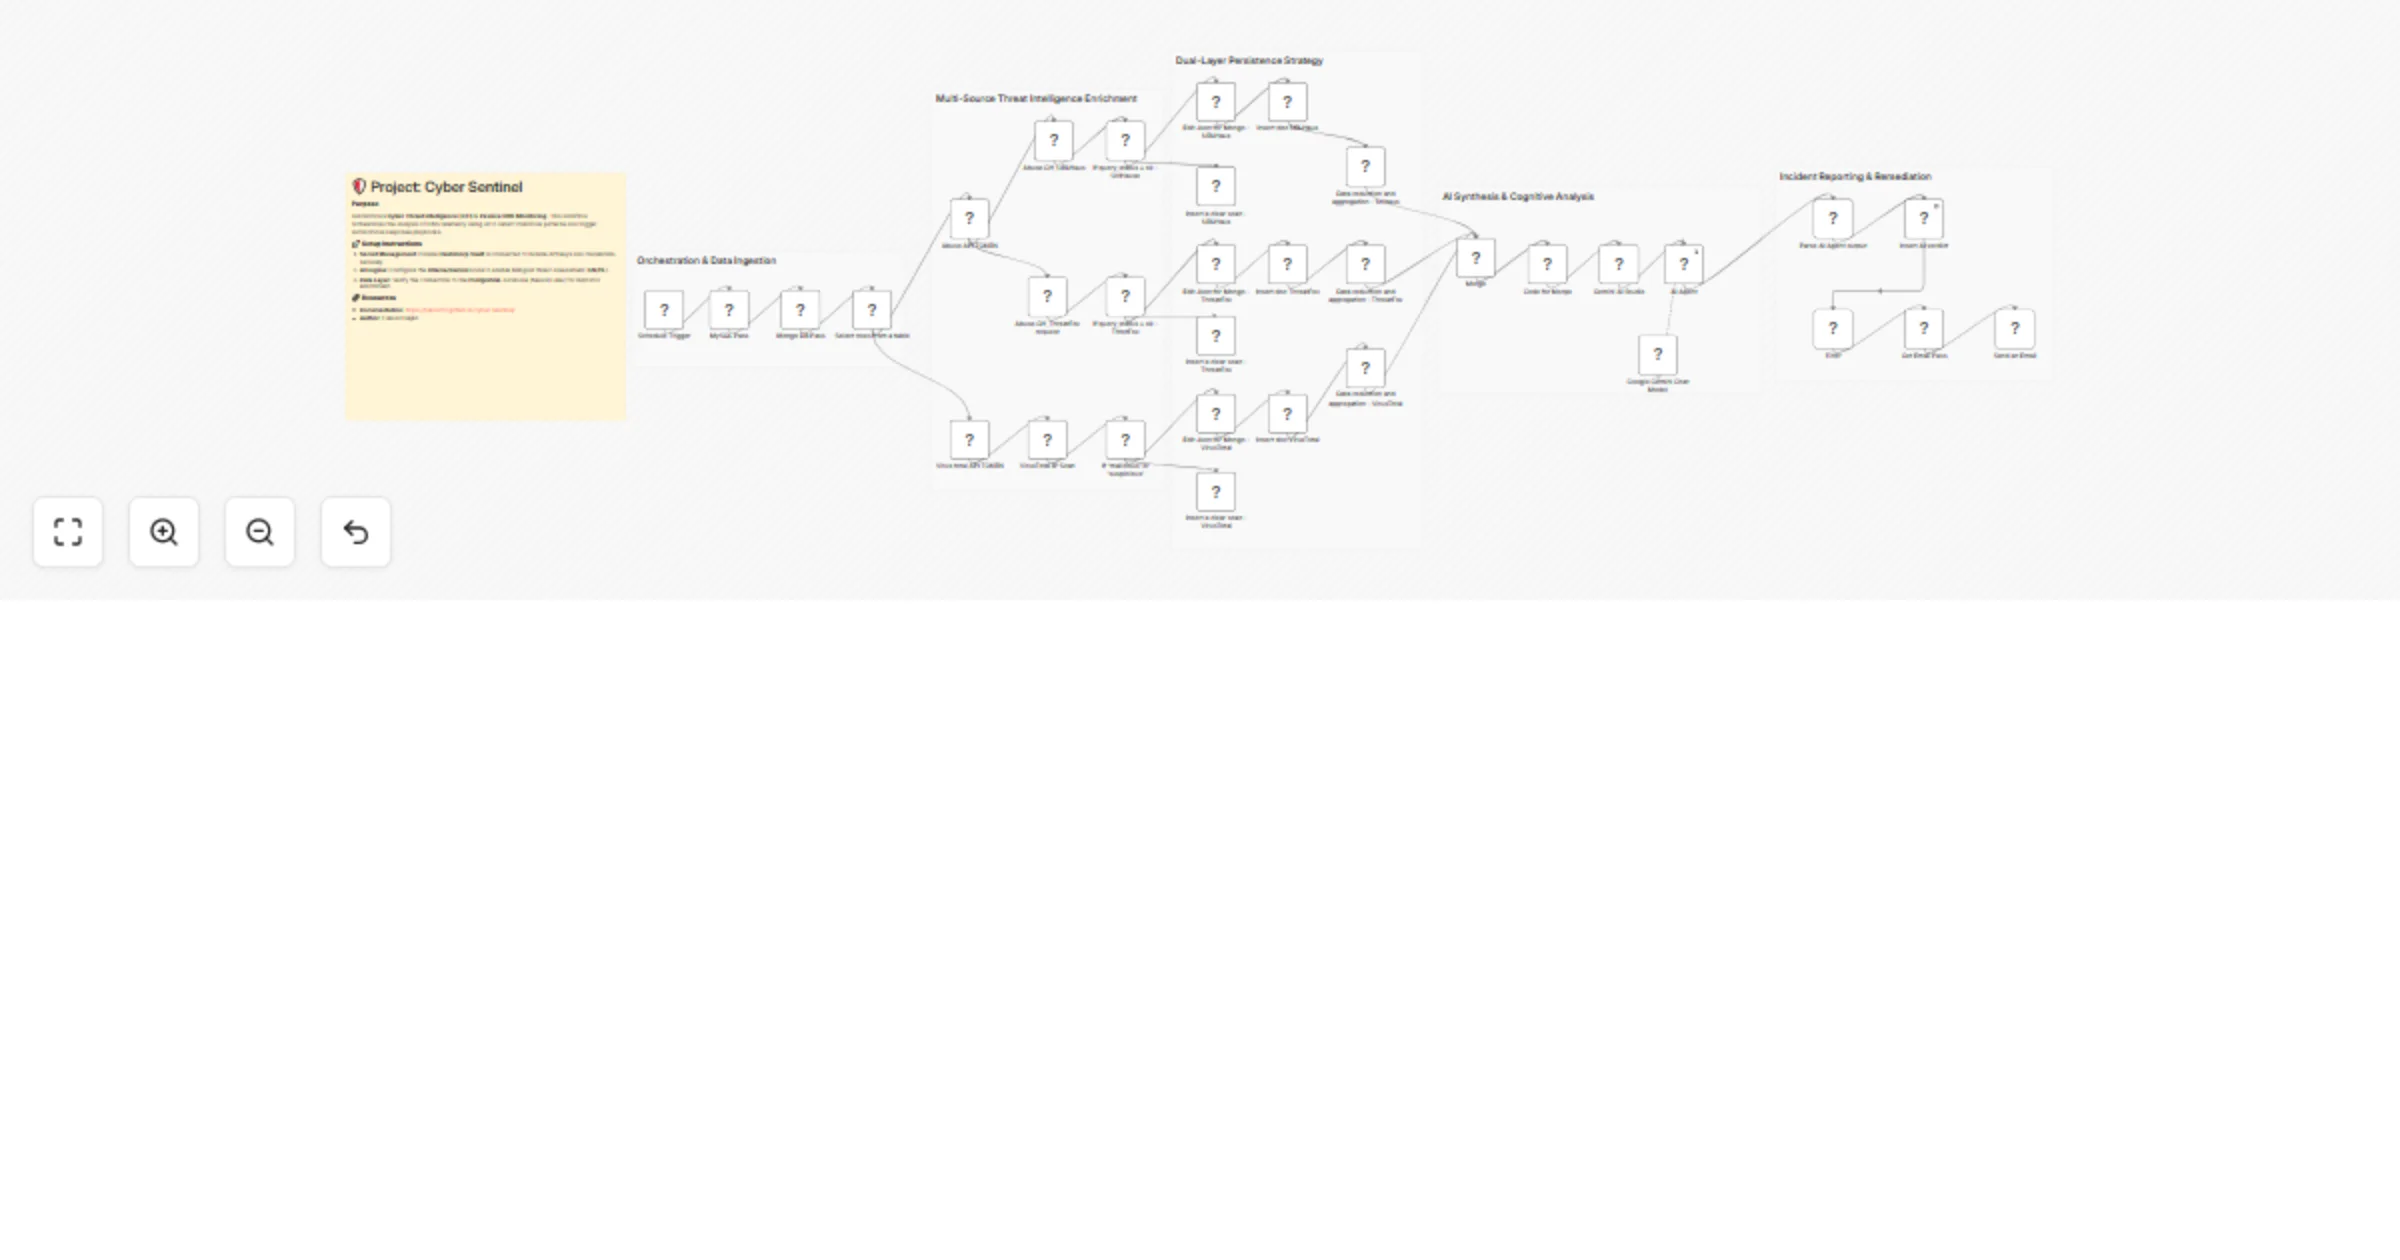
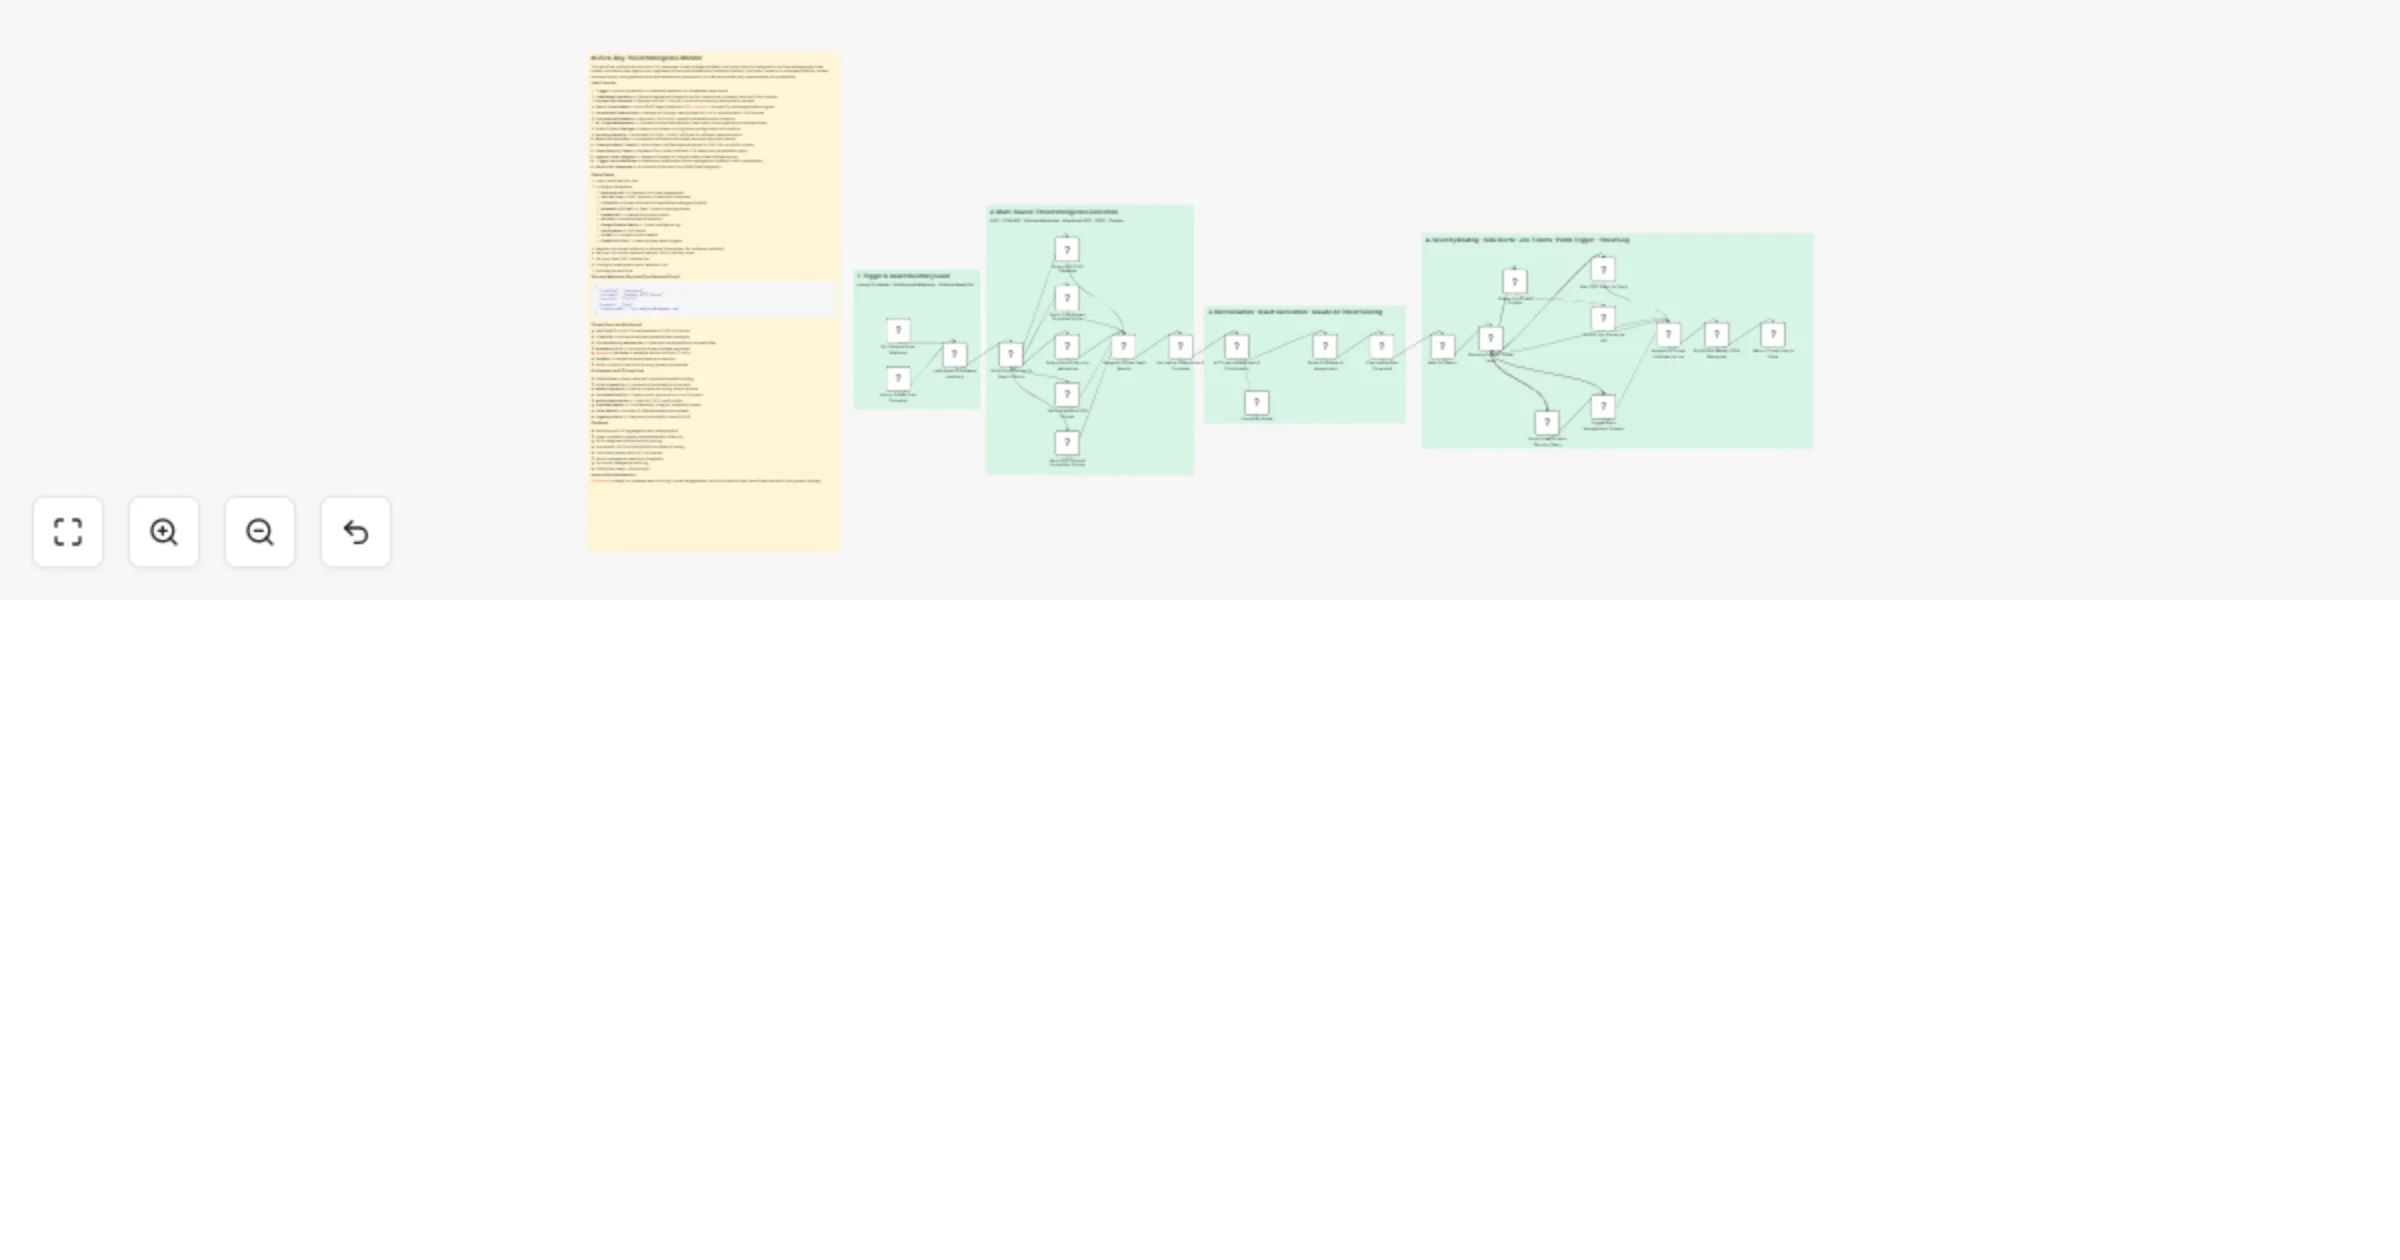
Score DNS threats with VirusTotal, Abuse.ch, HashiCorp Vault and Gemini
Stop fighting alerts and start orchestrating intelligence. This workflow is a complete ecosystem designed to combat n...
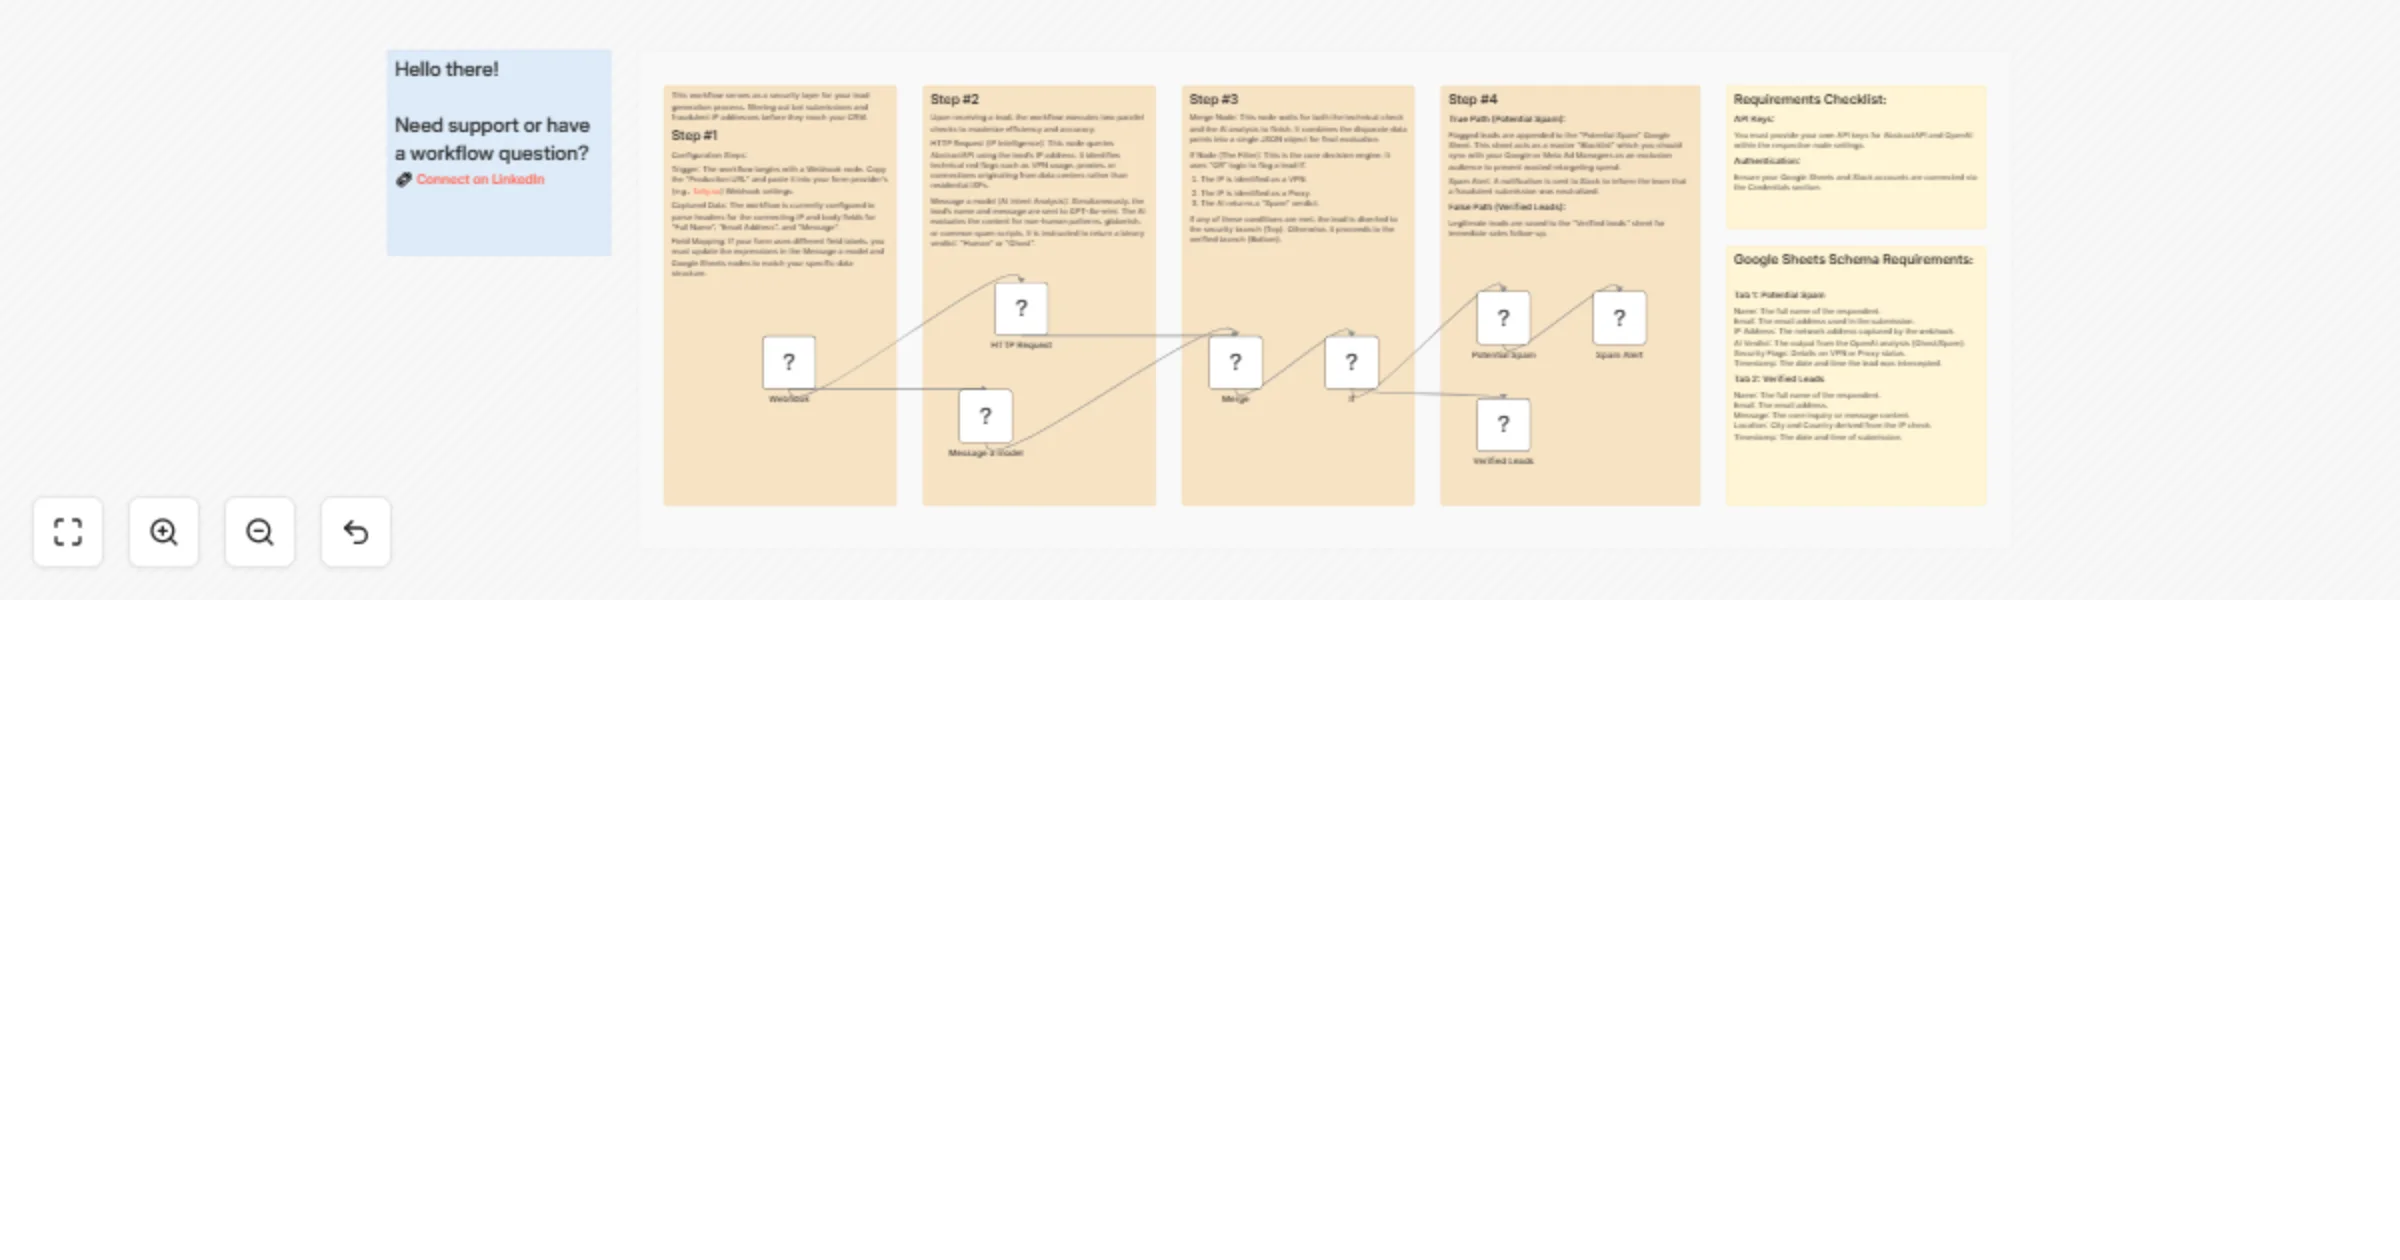
Filter fraudulent leads with GPT-4o-mini, AbstractAPI, Google Sheets and Slack
This n8n template serves as a security layer for your marketing efforts, ensuring that only high quality, human verif...
Detect and isolate ransomware with Claude (Anthropic), EDR, SIEM and Slack
This workflow provides real time detection of ransomware encryption patterns using Claude AI, with automated system i...
Detect and enforce abuse cases with OpenAI, Slack, Gmail and Sheets
How It Works This workflow automates platform trust and safety operations by deploying a multi agent AI system that d...
Monitor zero-day threats with Anthropic Claude, Airtable, Slack and Jira
This workflow continuously monitors CVE databases, threat intelligence feeds, and public security advisories to surfa...
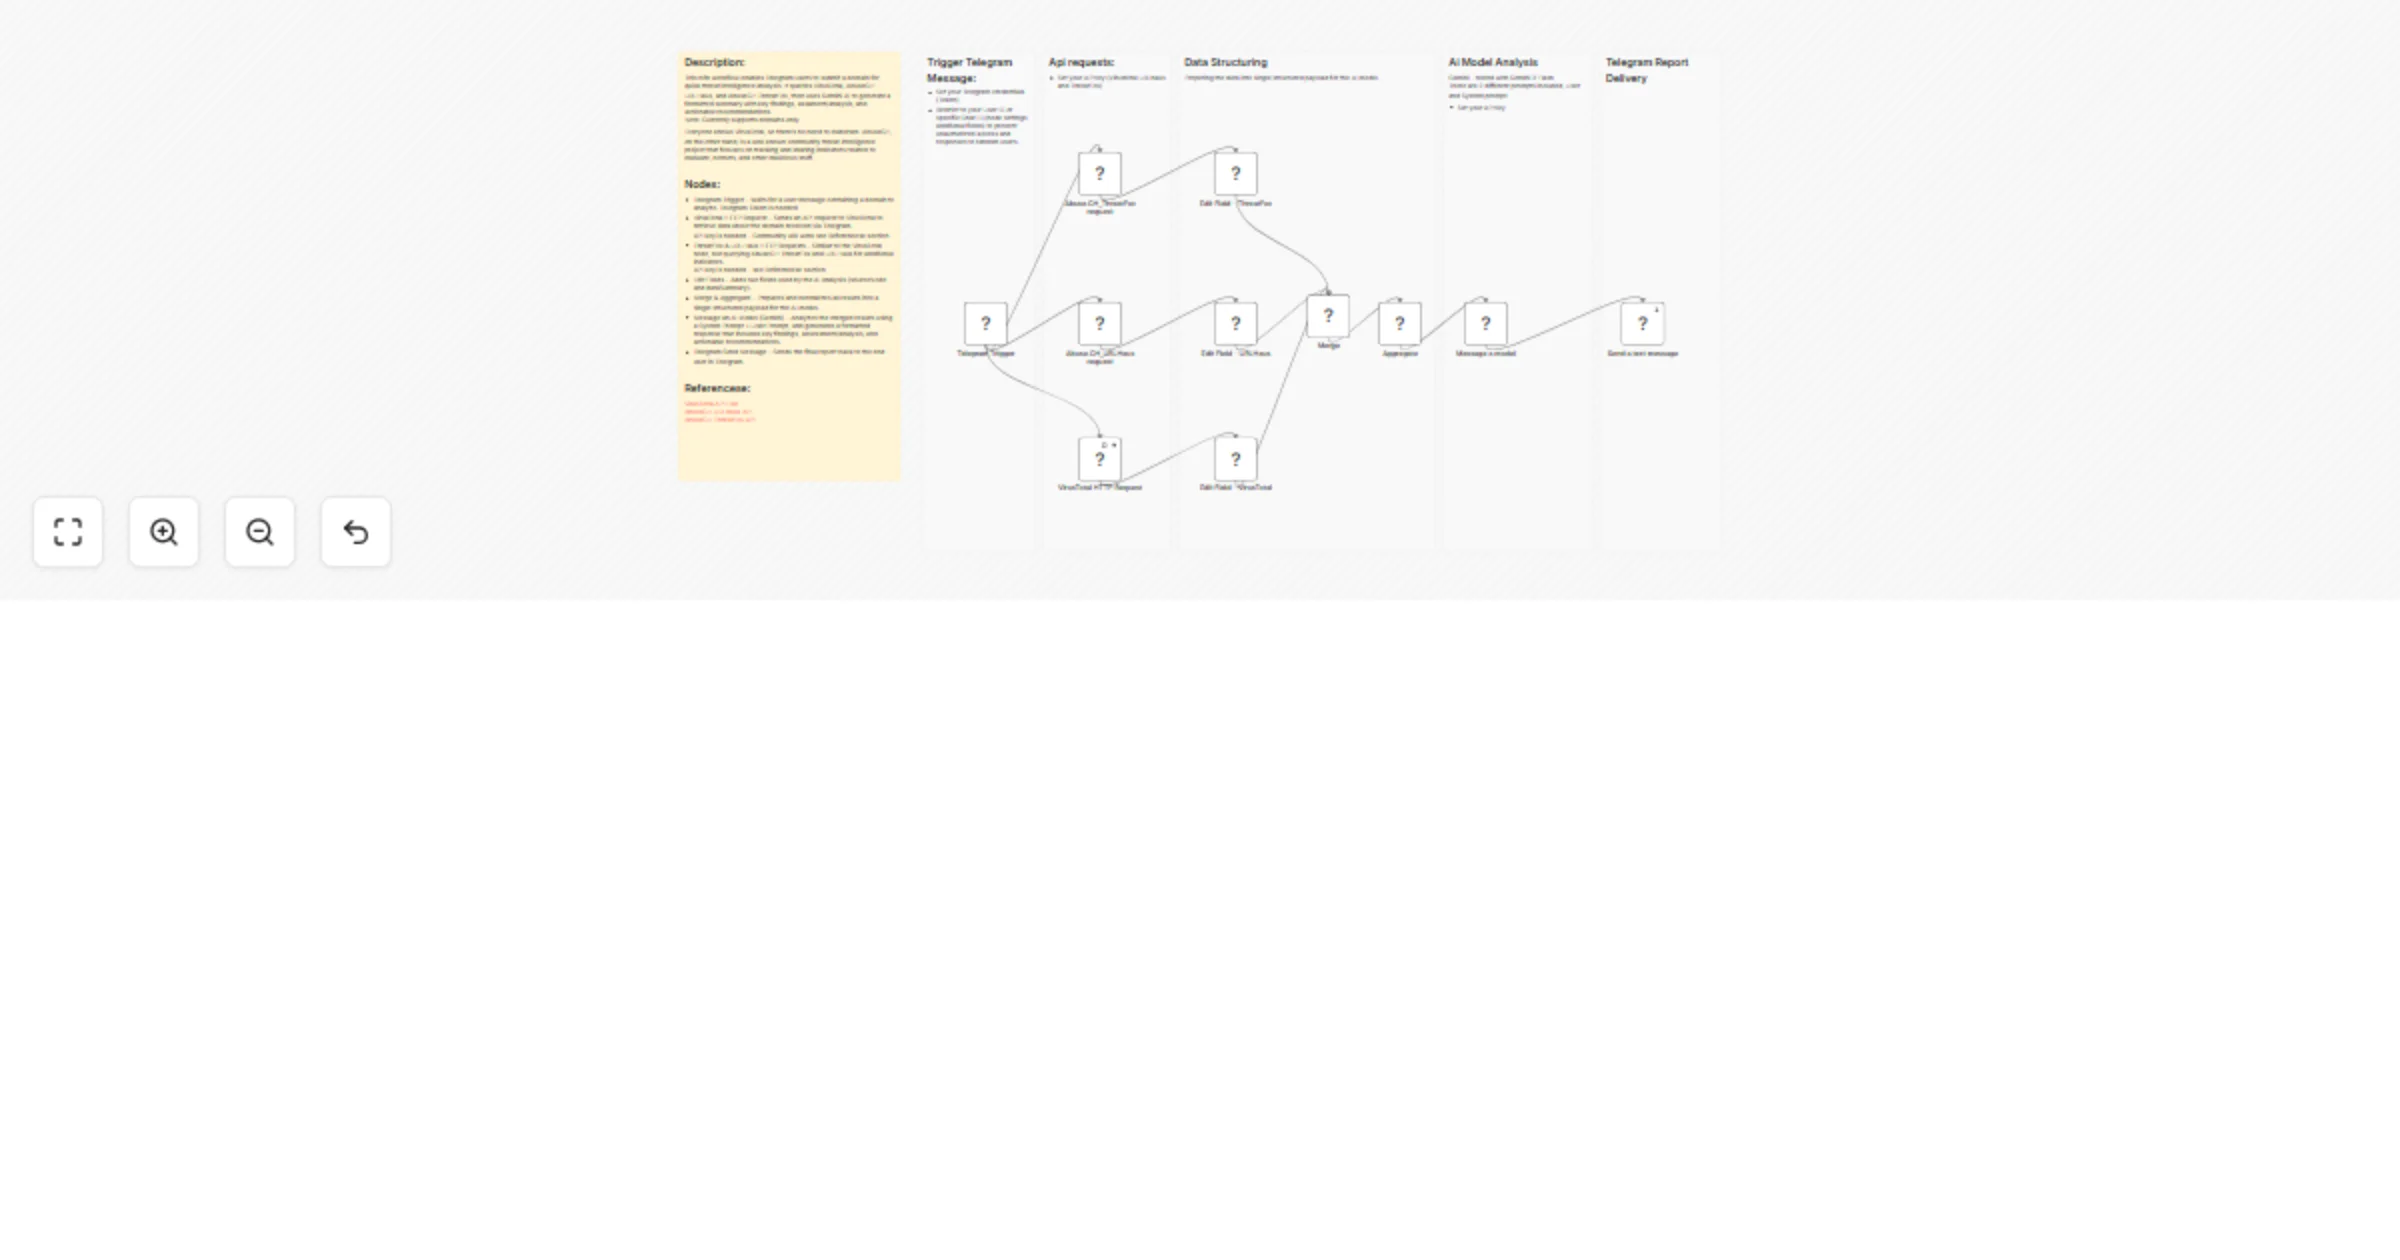
Analyze domain threats via Telegram with VirusTotal, AbuseCH, and Gemini AI
Domain AI Analysis via Telegram, AbuseCH and VirusTotal Workflow Description This workflow allows Telegram users to s...
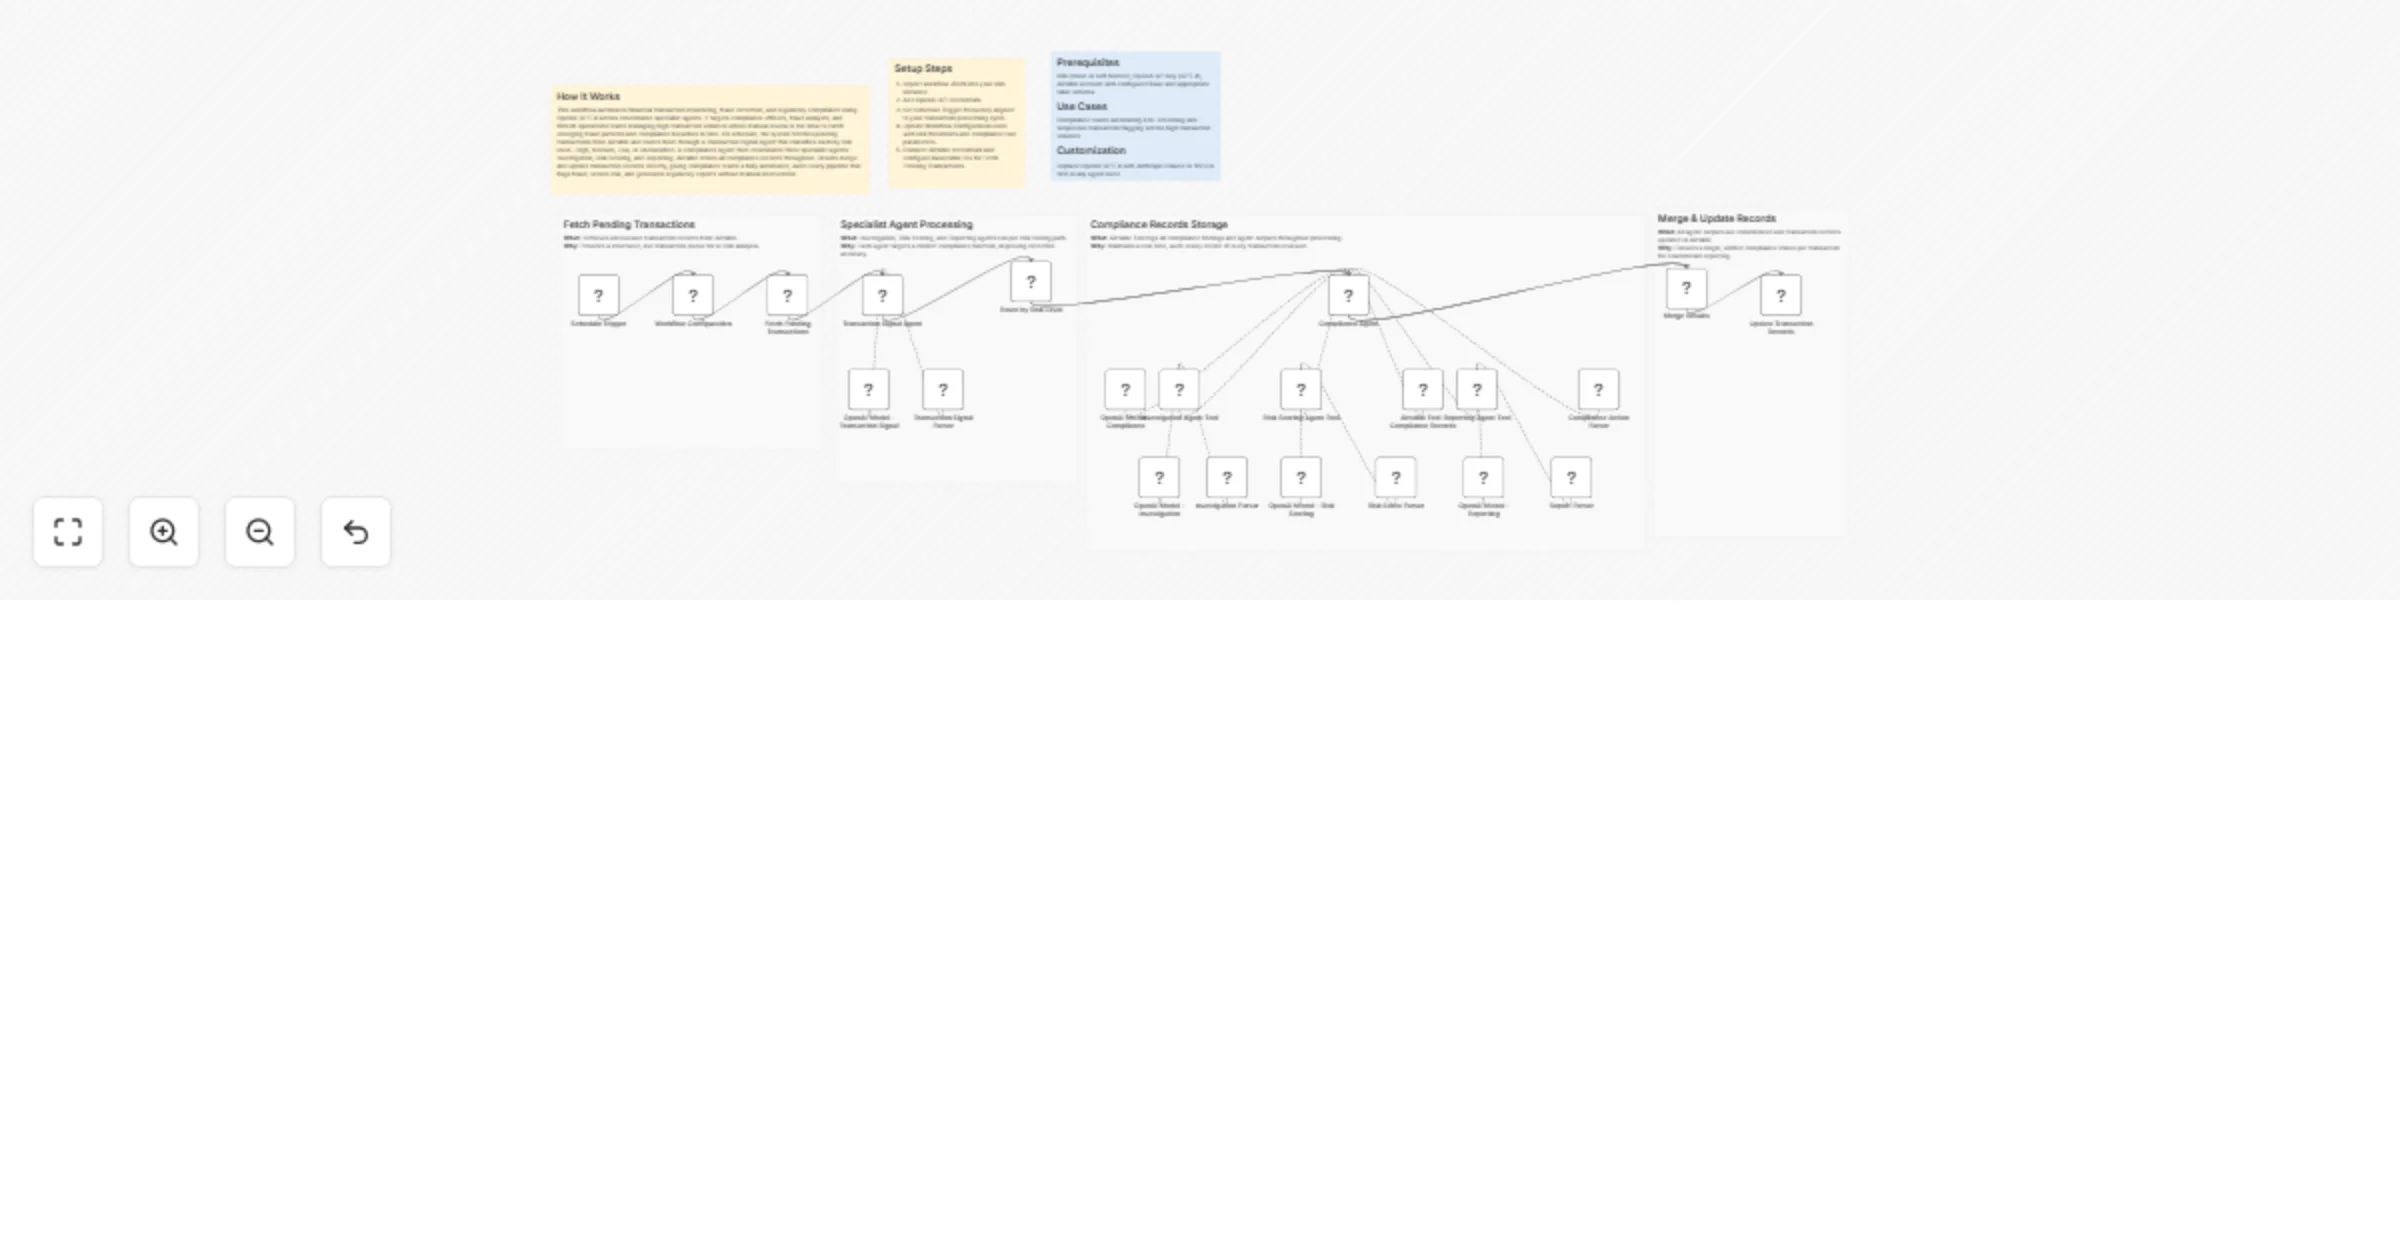
Detect transaction fraud and manage compliance with GPT-4 and Airtable
How It Works This workflow automates financial transaction monitoring, fraud detection, and regulatory compliance usi...
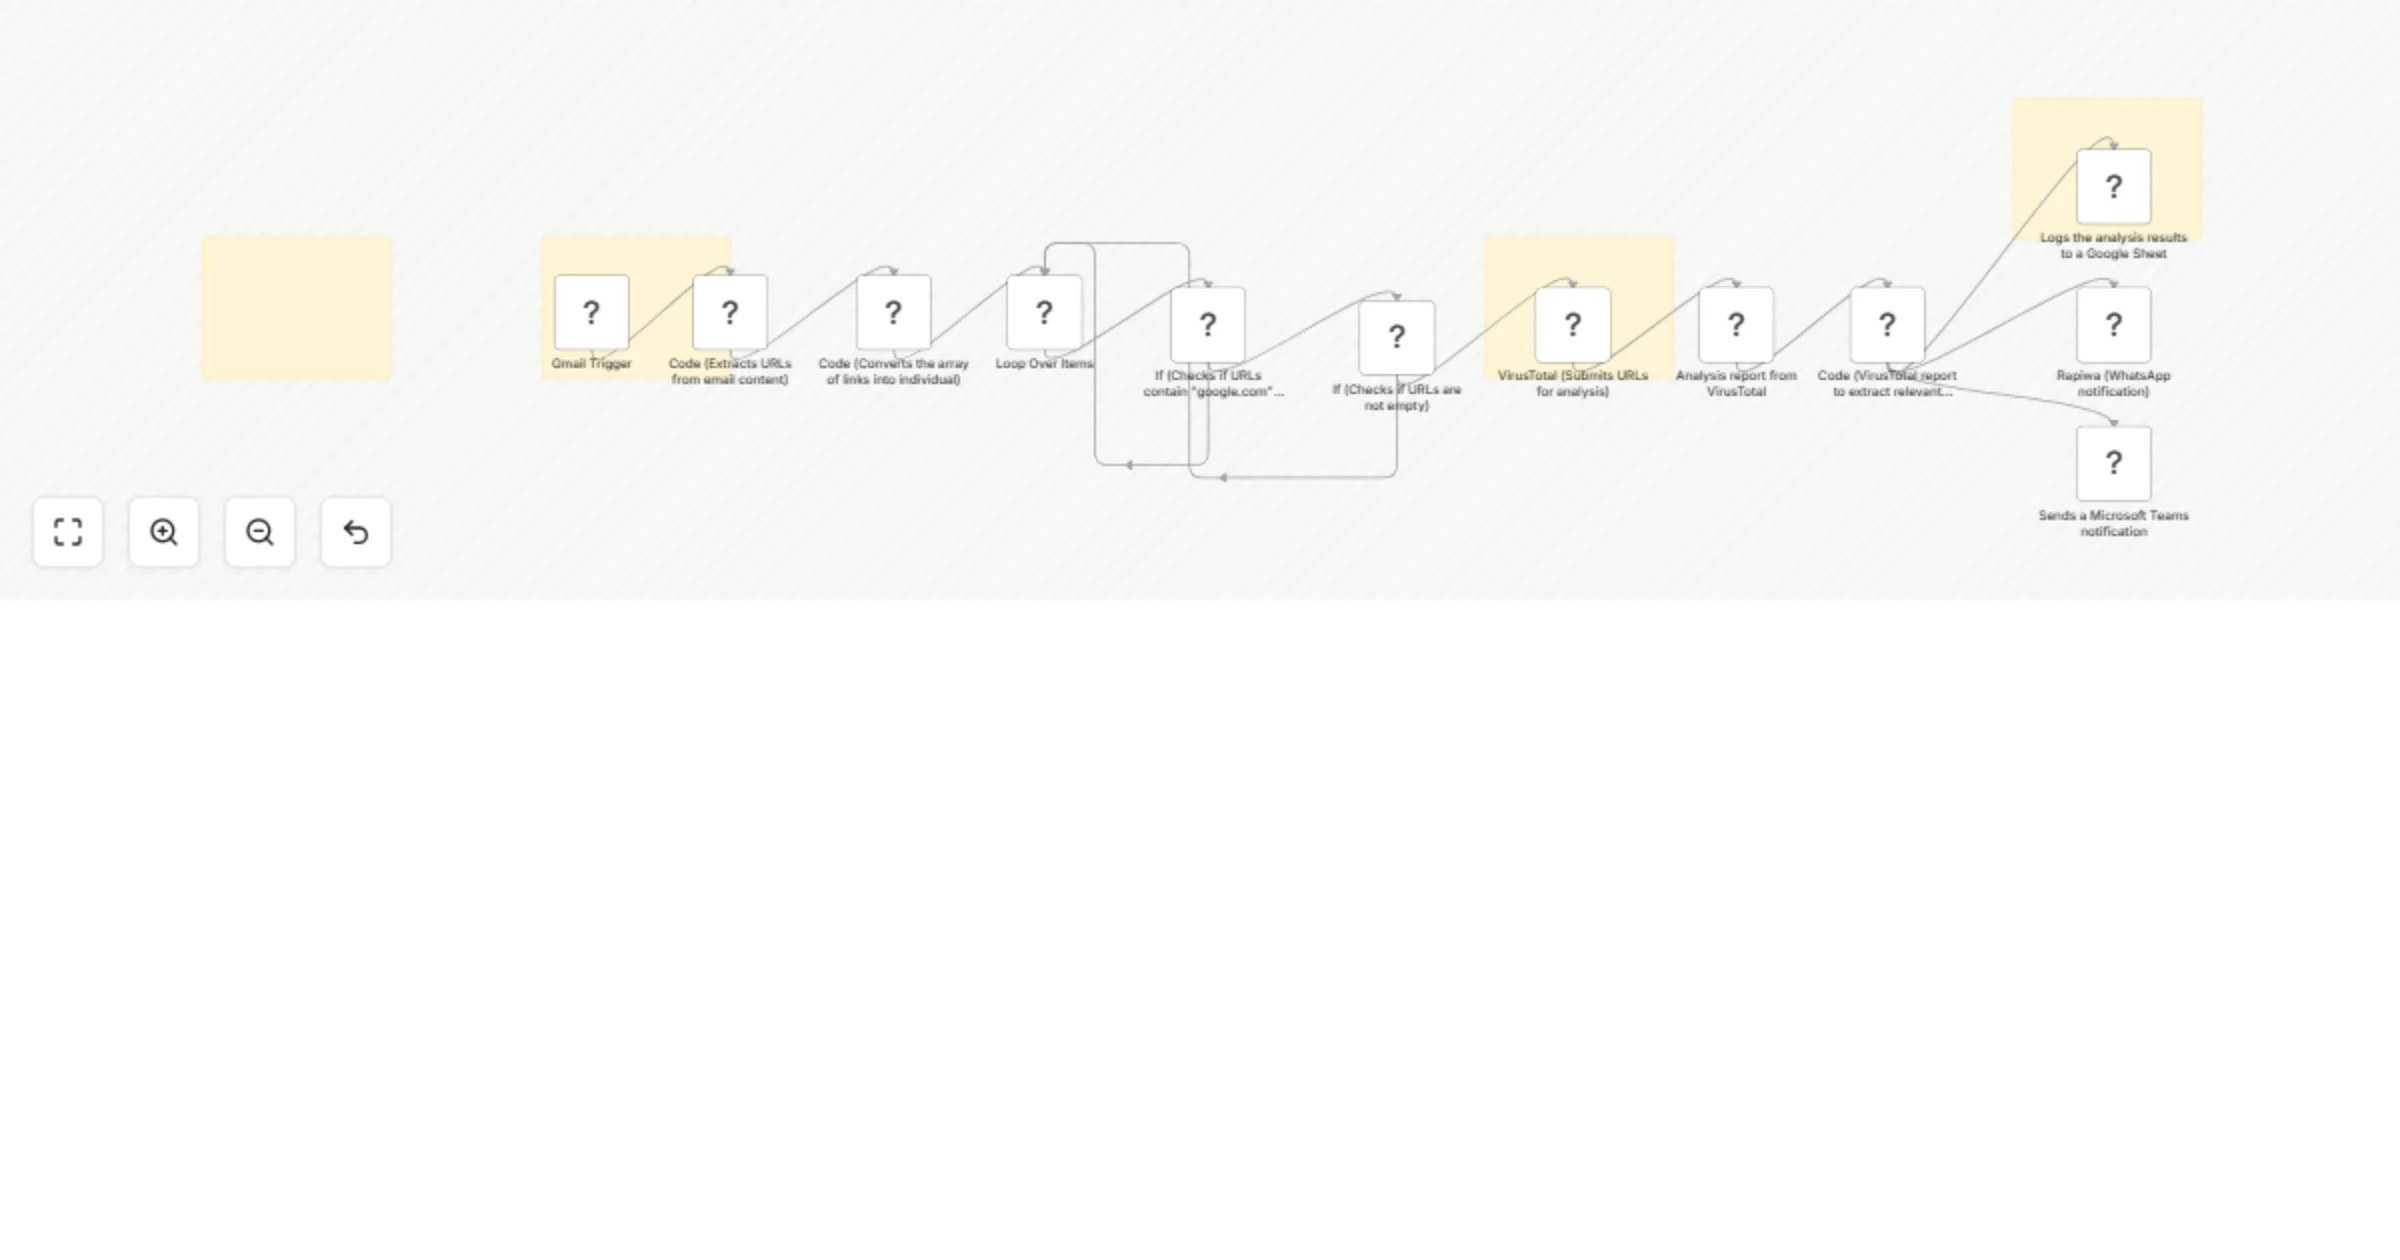
Scan Gmail links with VirusTotal and send alerts to WhatsApp, Teams, and Sheets
Who it's for This n8n workflow is designed for IT security professionals, email administrators, and organizations tha...

Protect public webhooks with Ainoflow Guard rate limiting
Webhook Rate Limiter (Ainoflow Guard) Stop webhook flooding before it starts. Add production grade rate limiting to a...
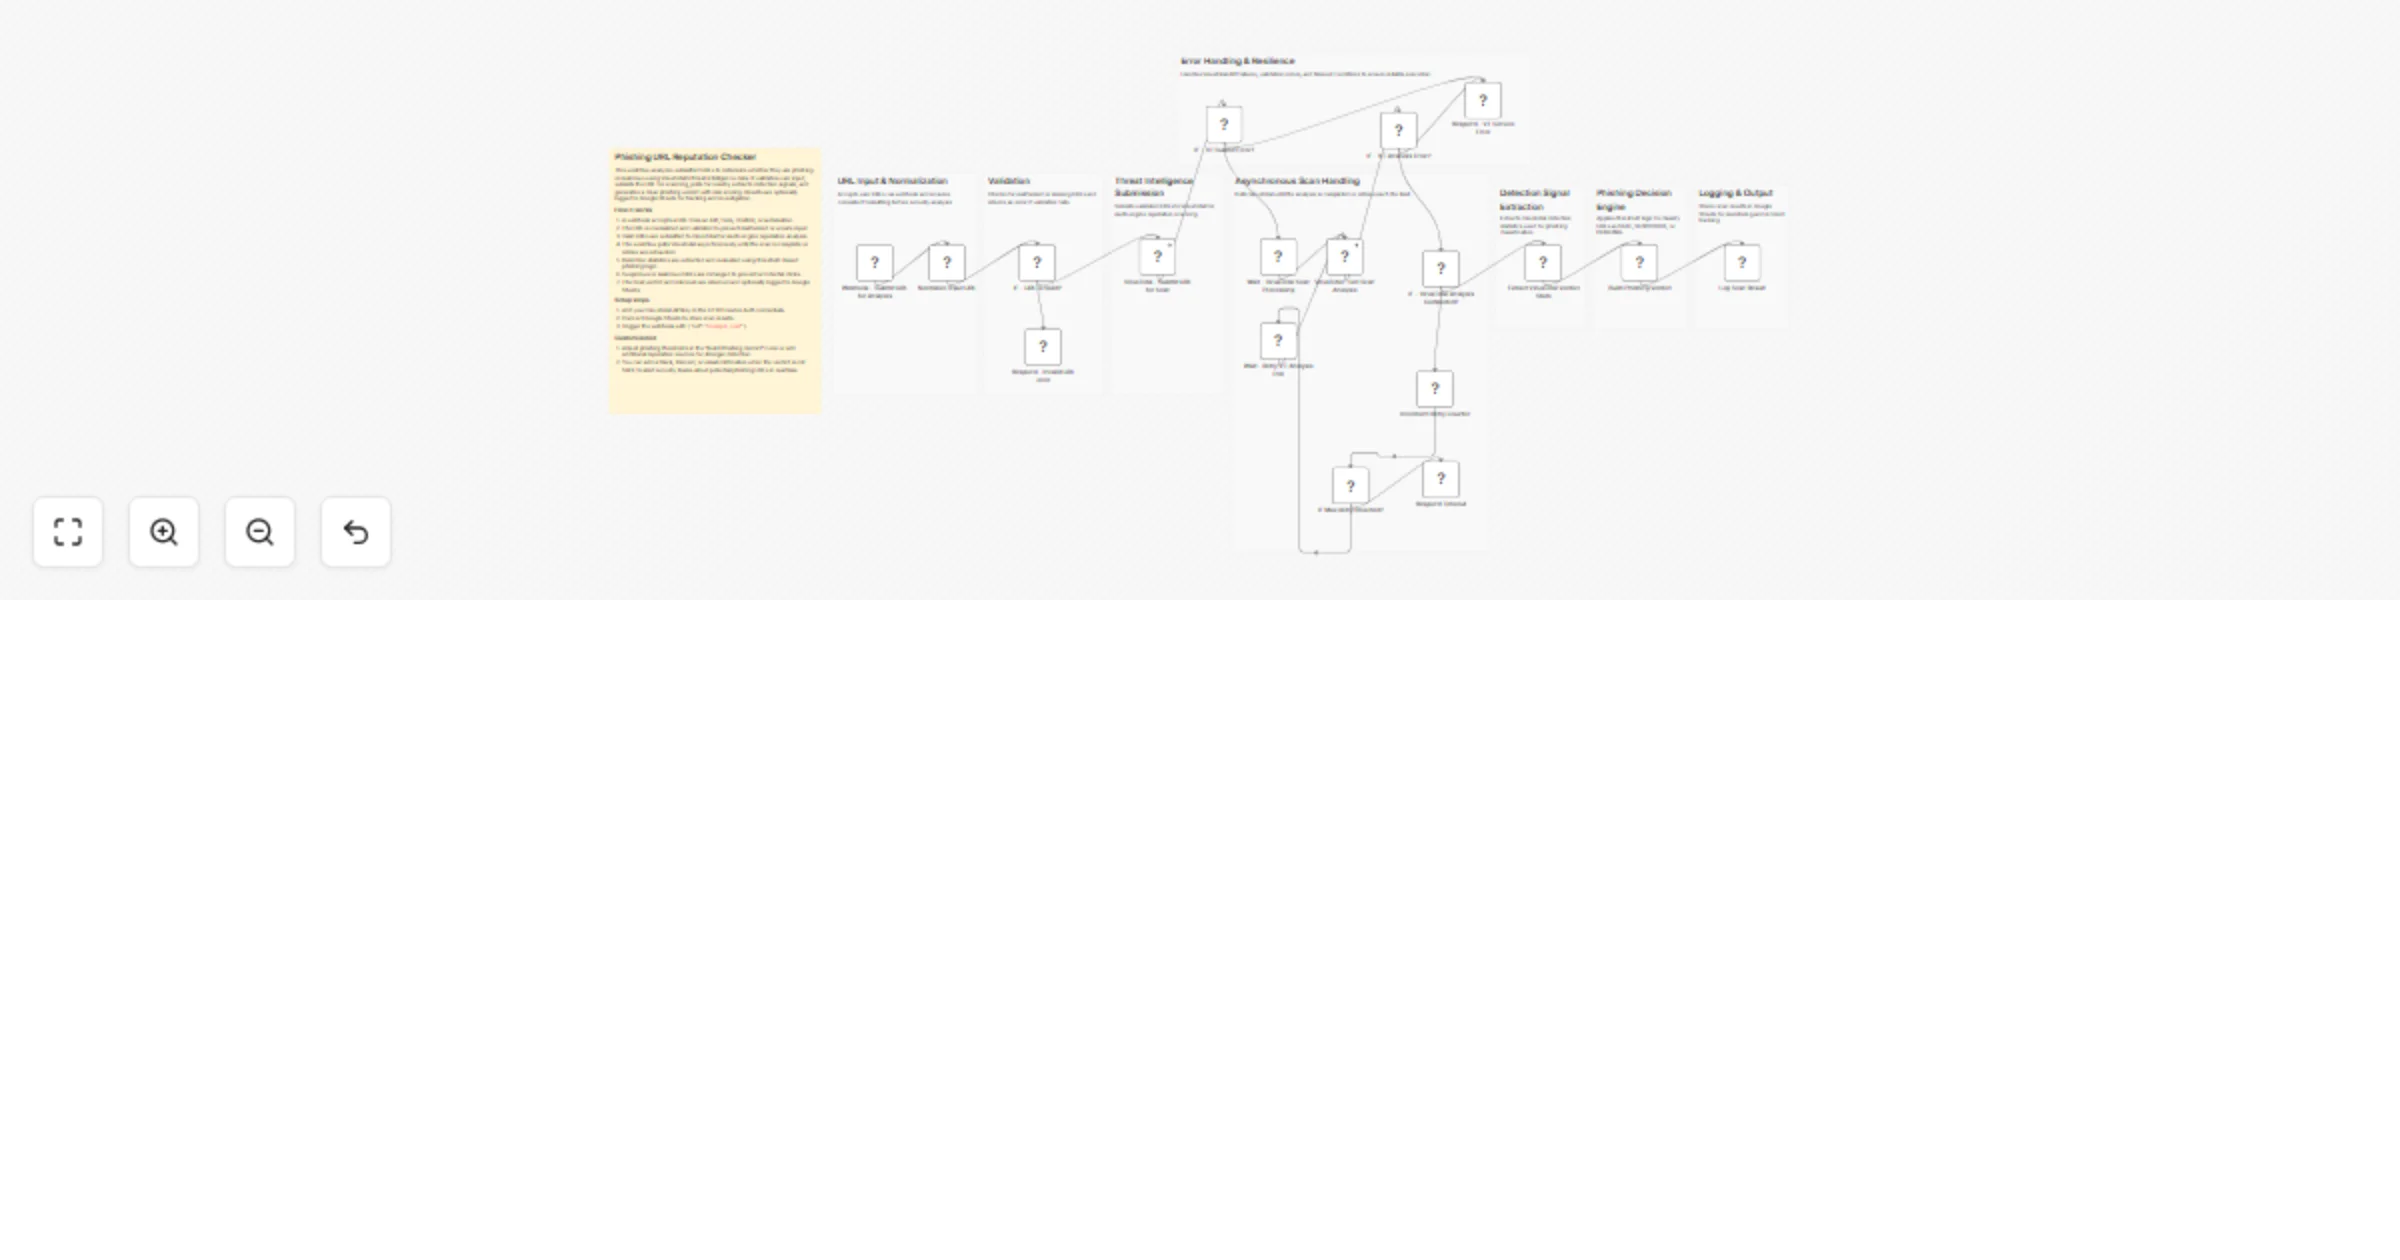
Check phishing URL reputation with VirusTotal and log to Google Sheets
🐟 Phishing URL Reputation Checker with VirusTotal This n8n template helps you automatically analyze URLs for phishin...
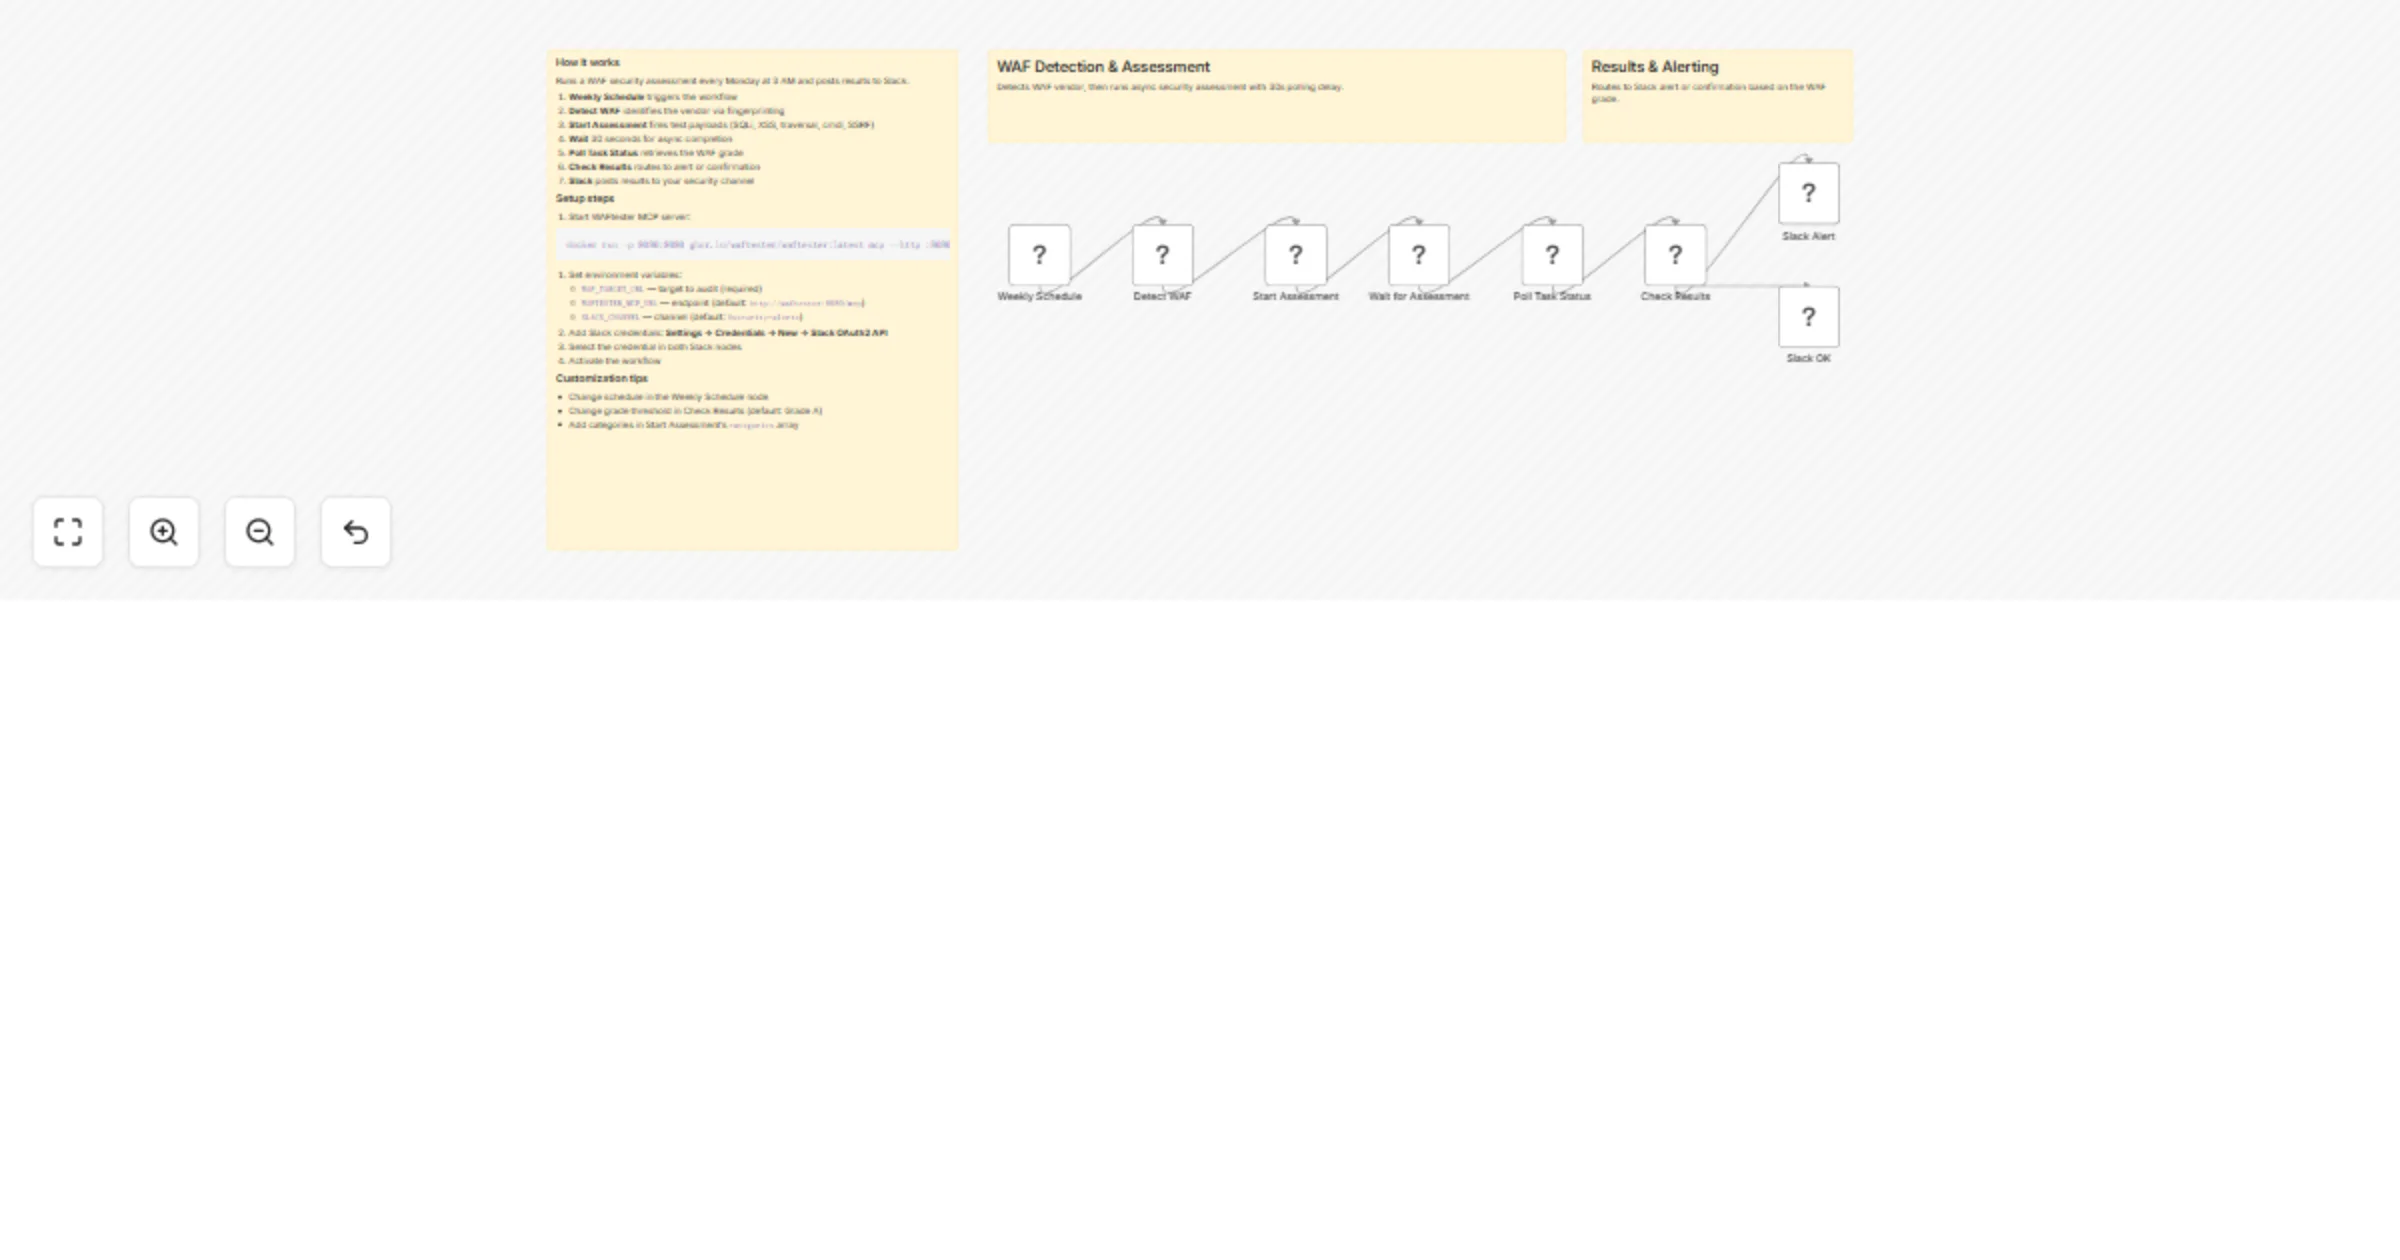
Run weekly WAF security audits with WAFtester and Slack alerts
What it does Automated weekly WAF security assessments with Slack reporting. Detects your WAF vendor, runs a security...
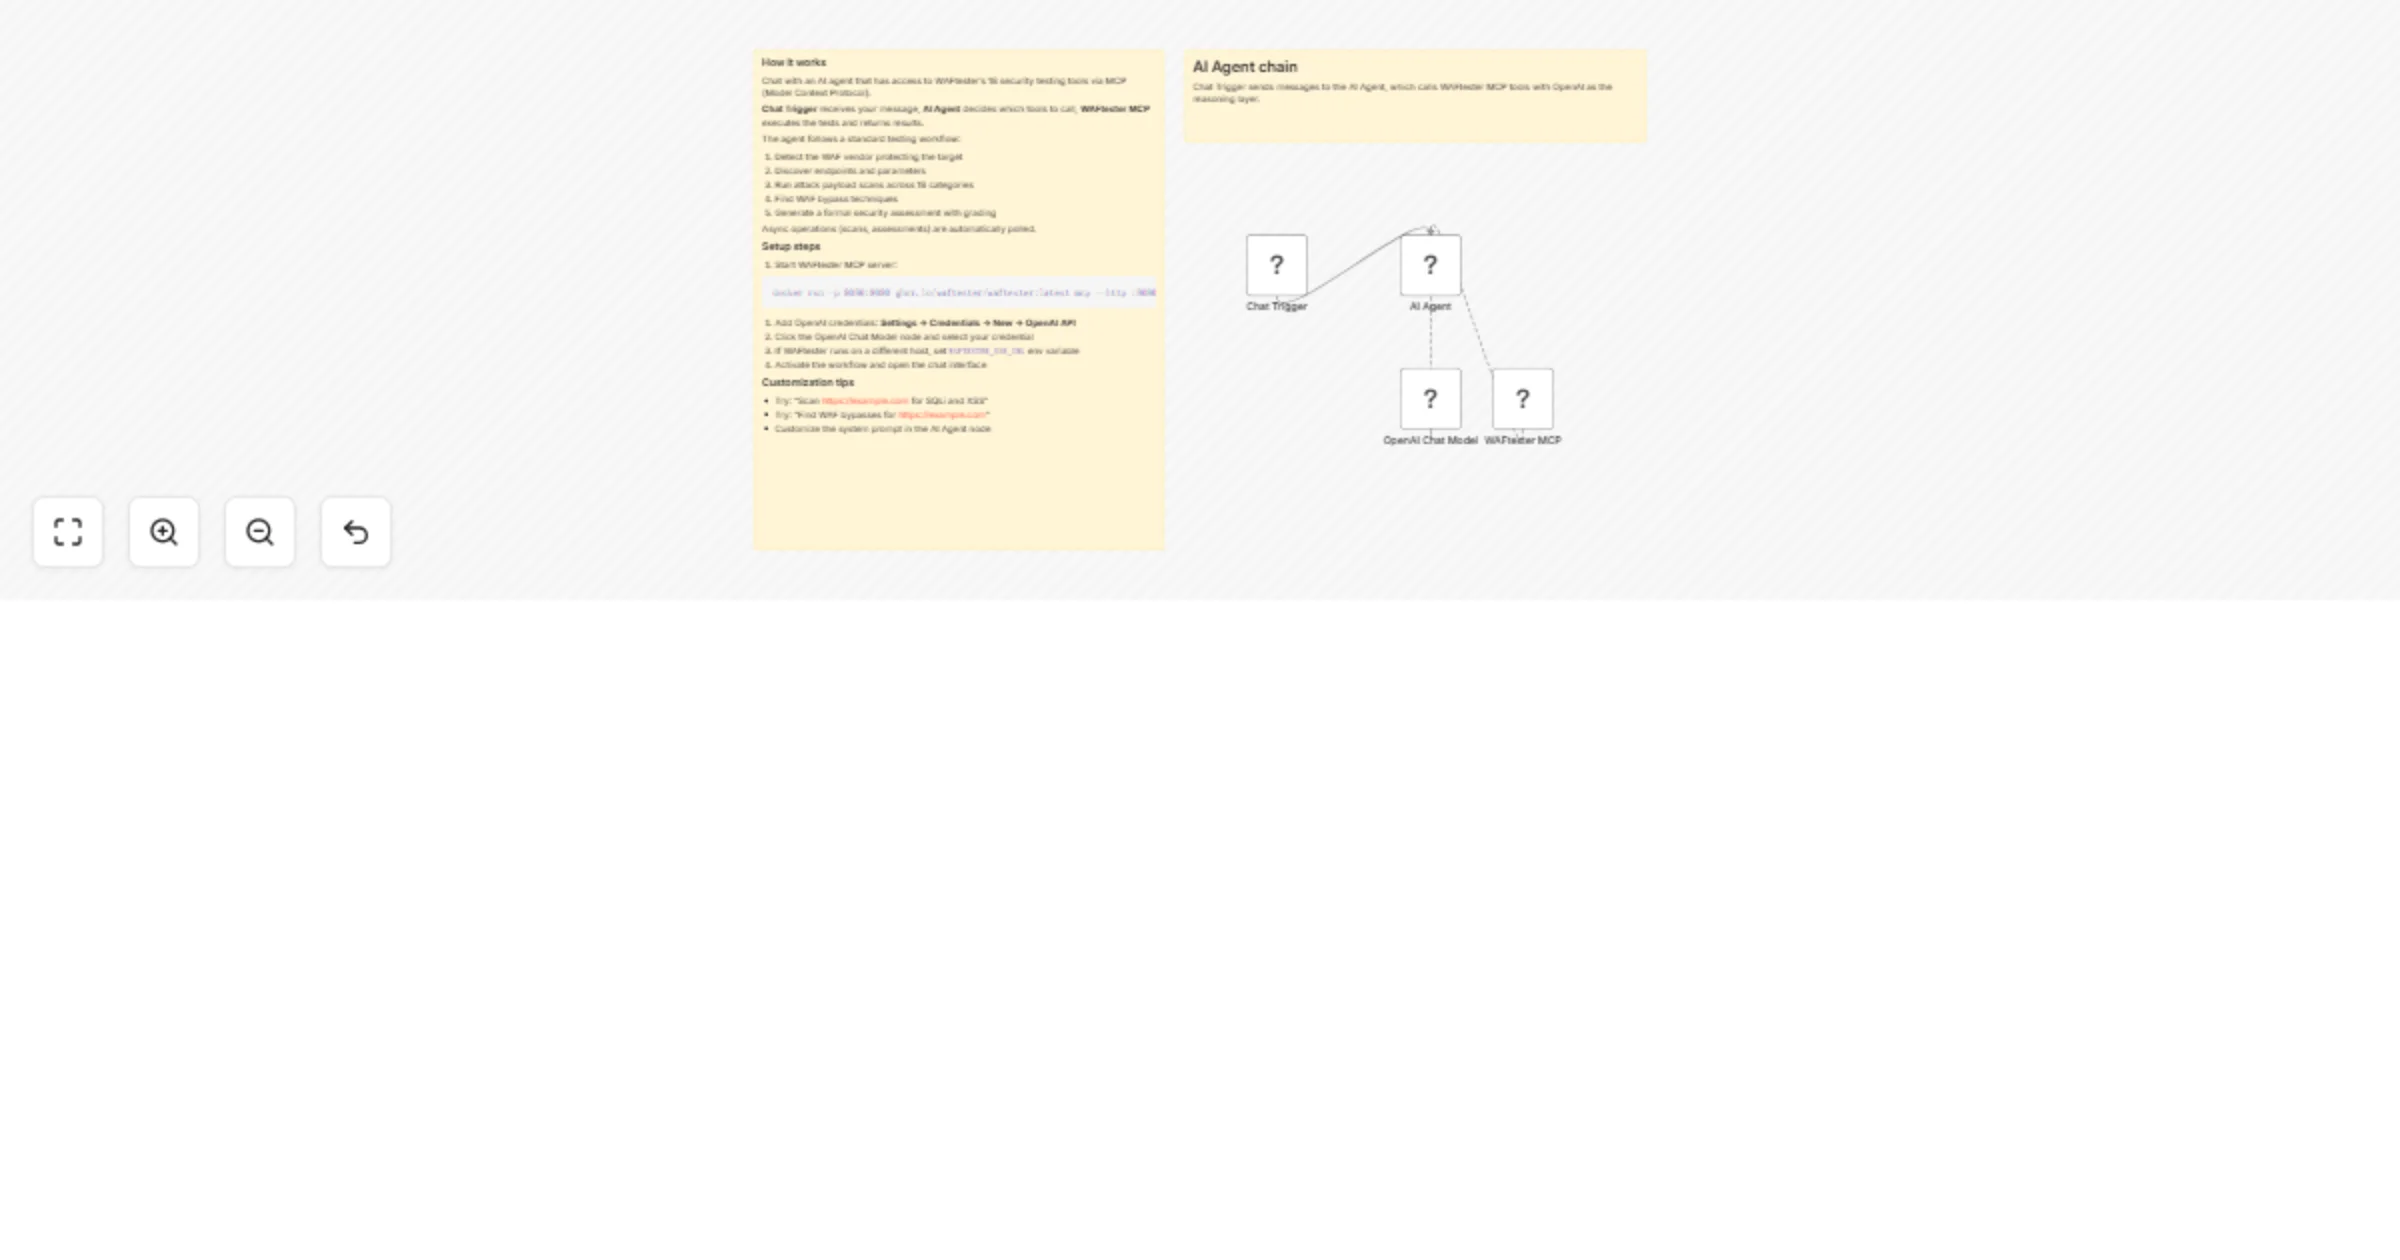
Test WAF security interactively with an AI agent and WAFtester MCP
What it does A conversational AI agent that connects to WAFtester via MCP (Model Context Protocol) for interactive We...
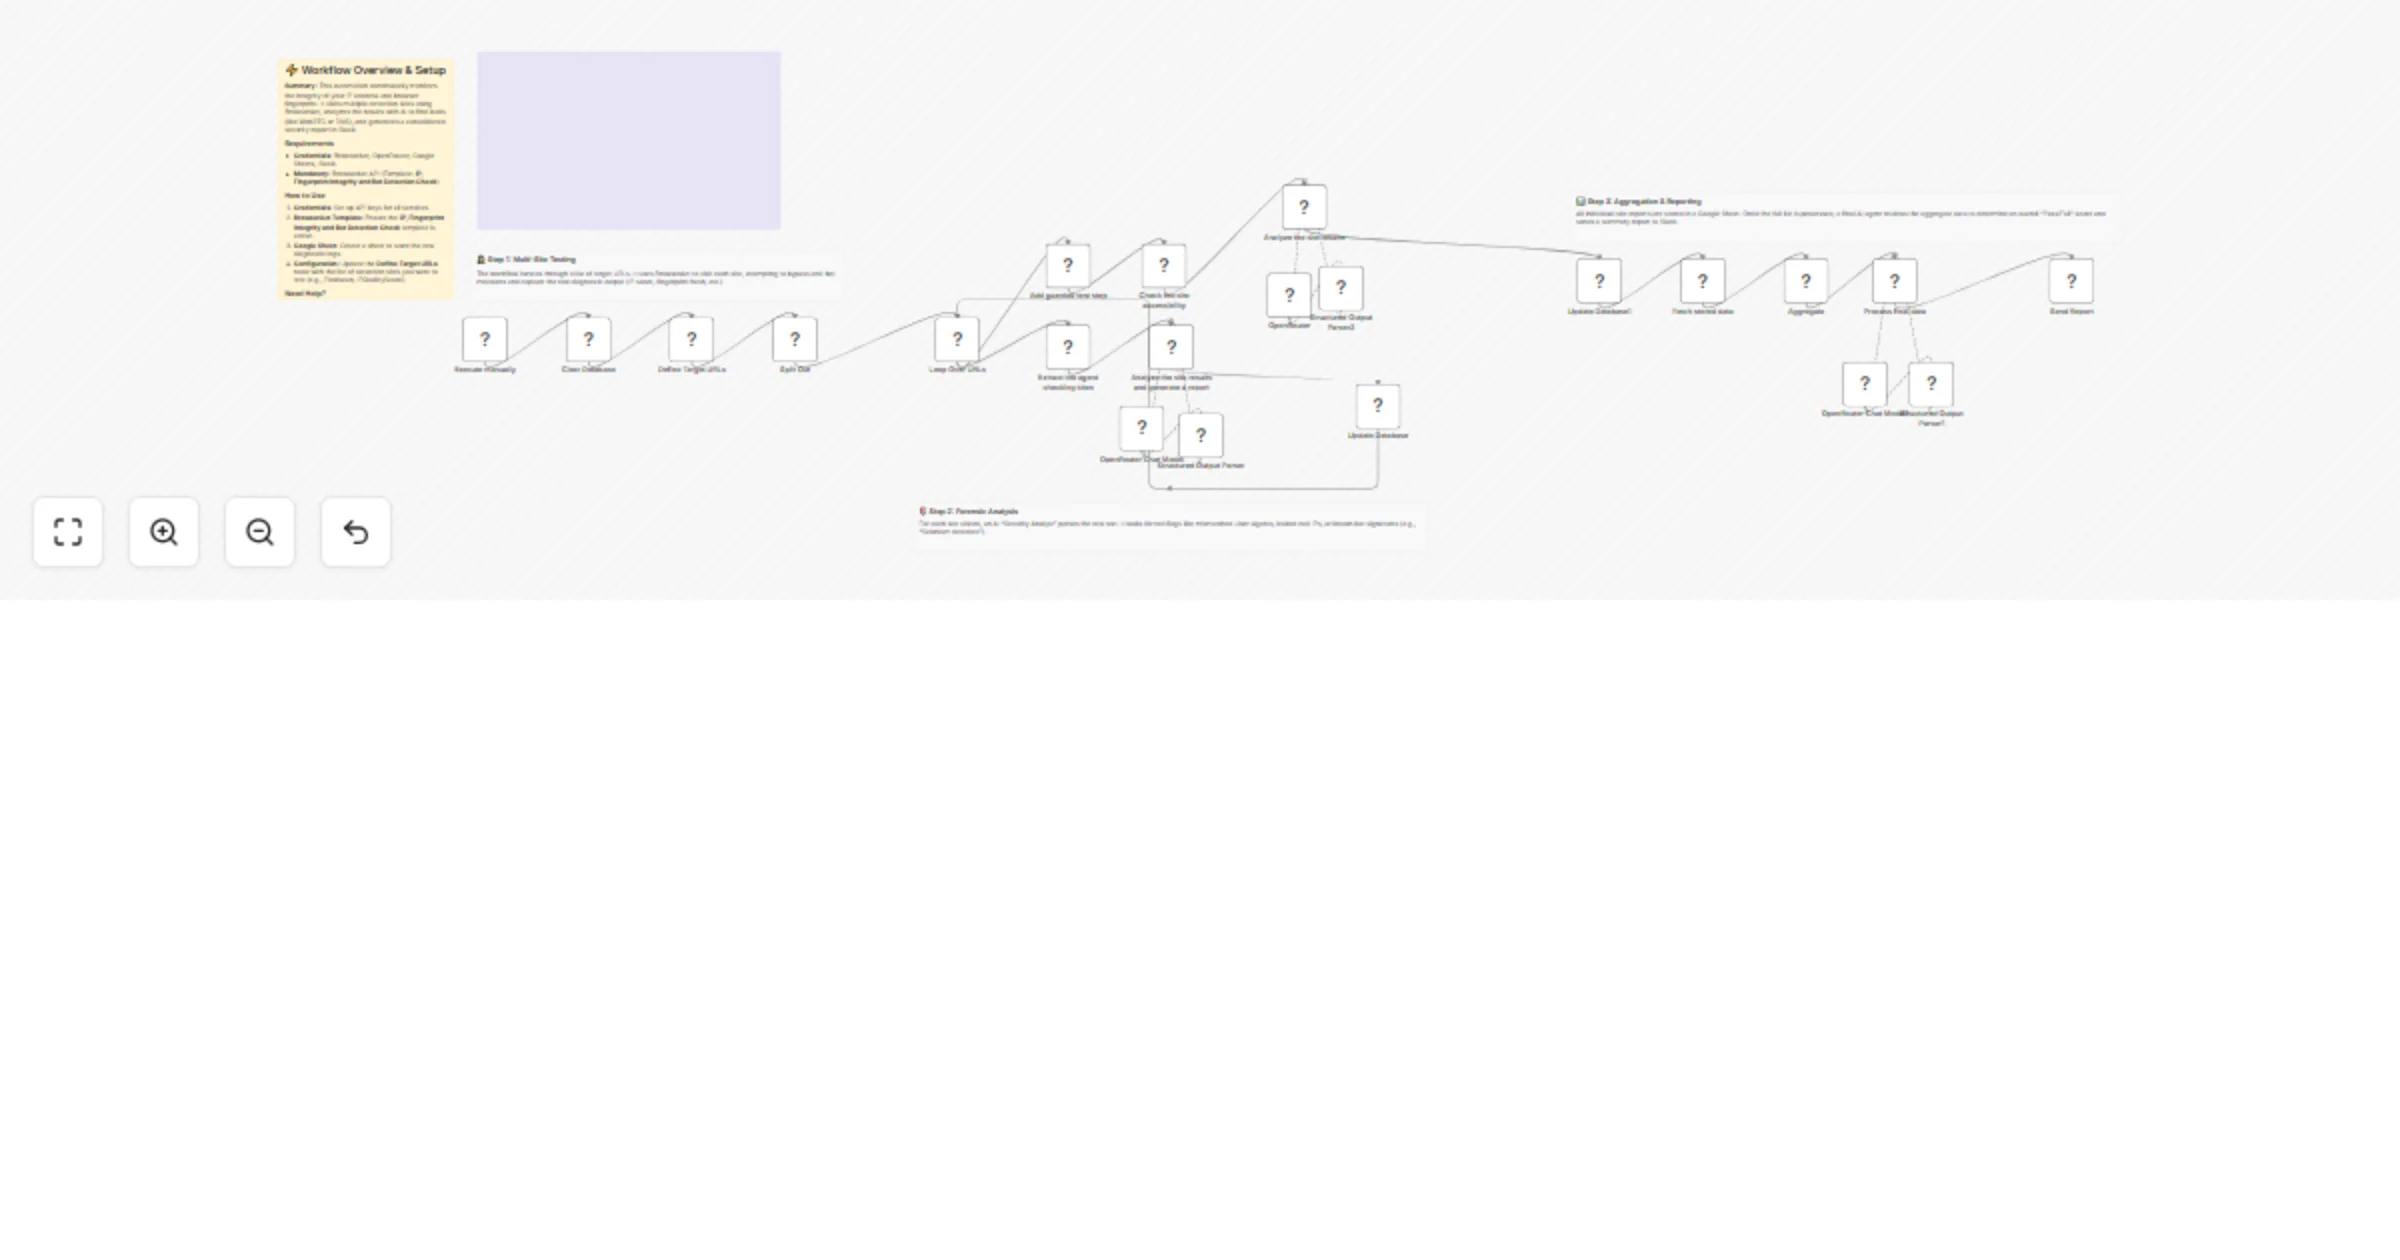
Audit browser and proxy fingerprint/IP integrity with GPT-4o, Sheets and Slack
Audit browser & Proxies fingerprint and IP integrity to Slack reports Introduction This workflow performs a comprehen...
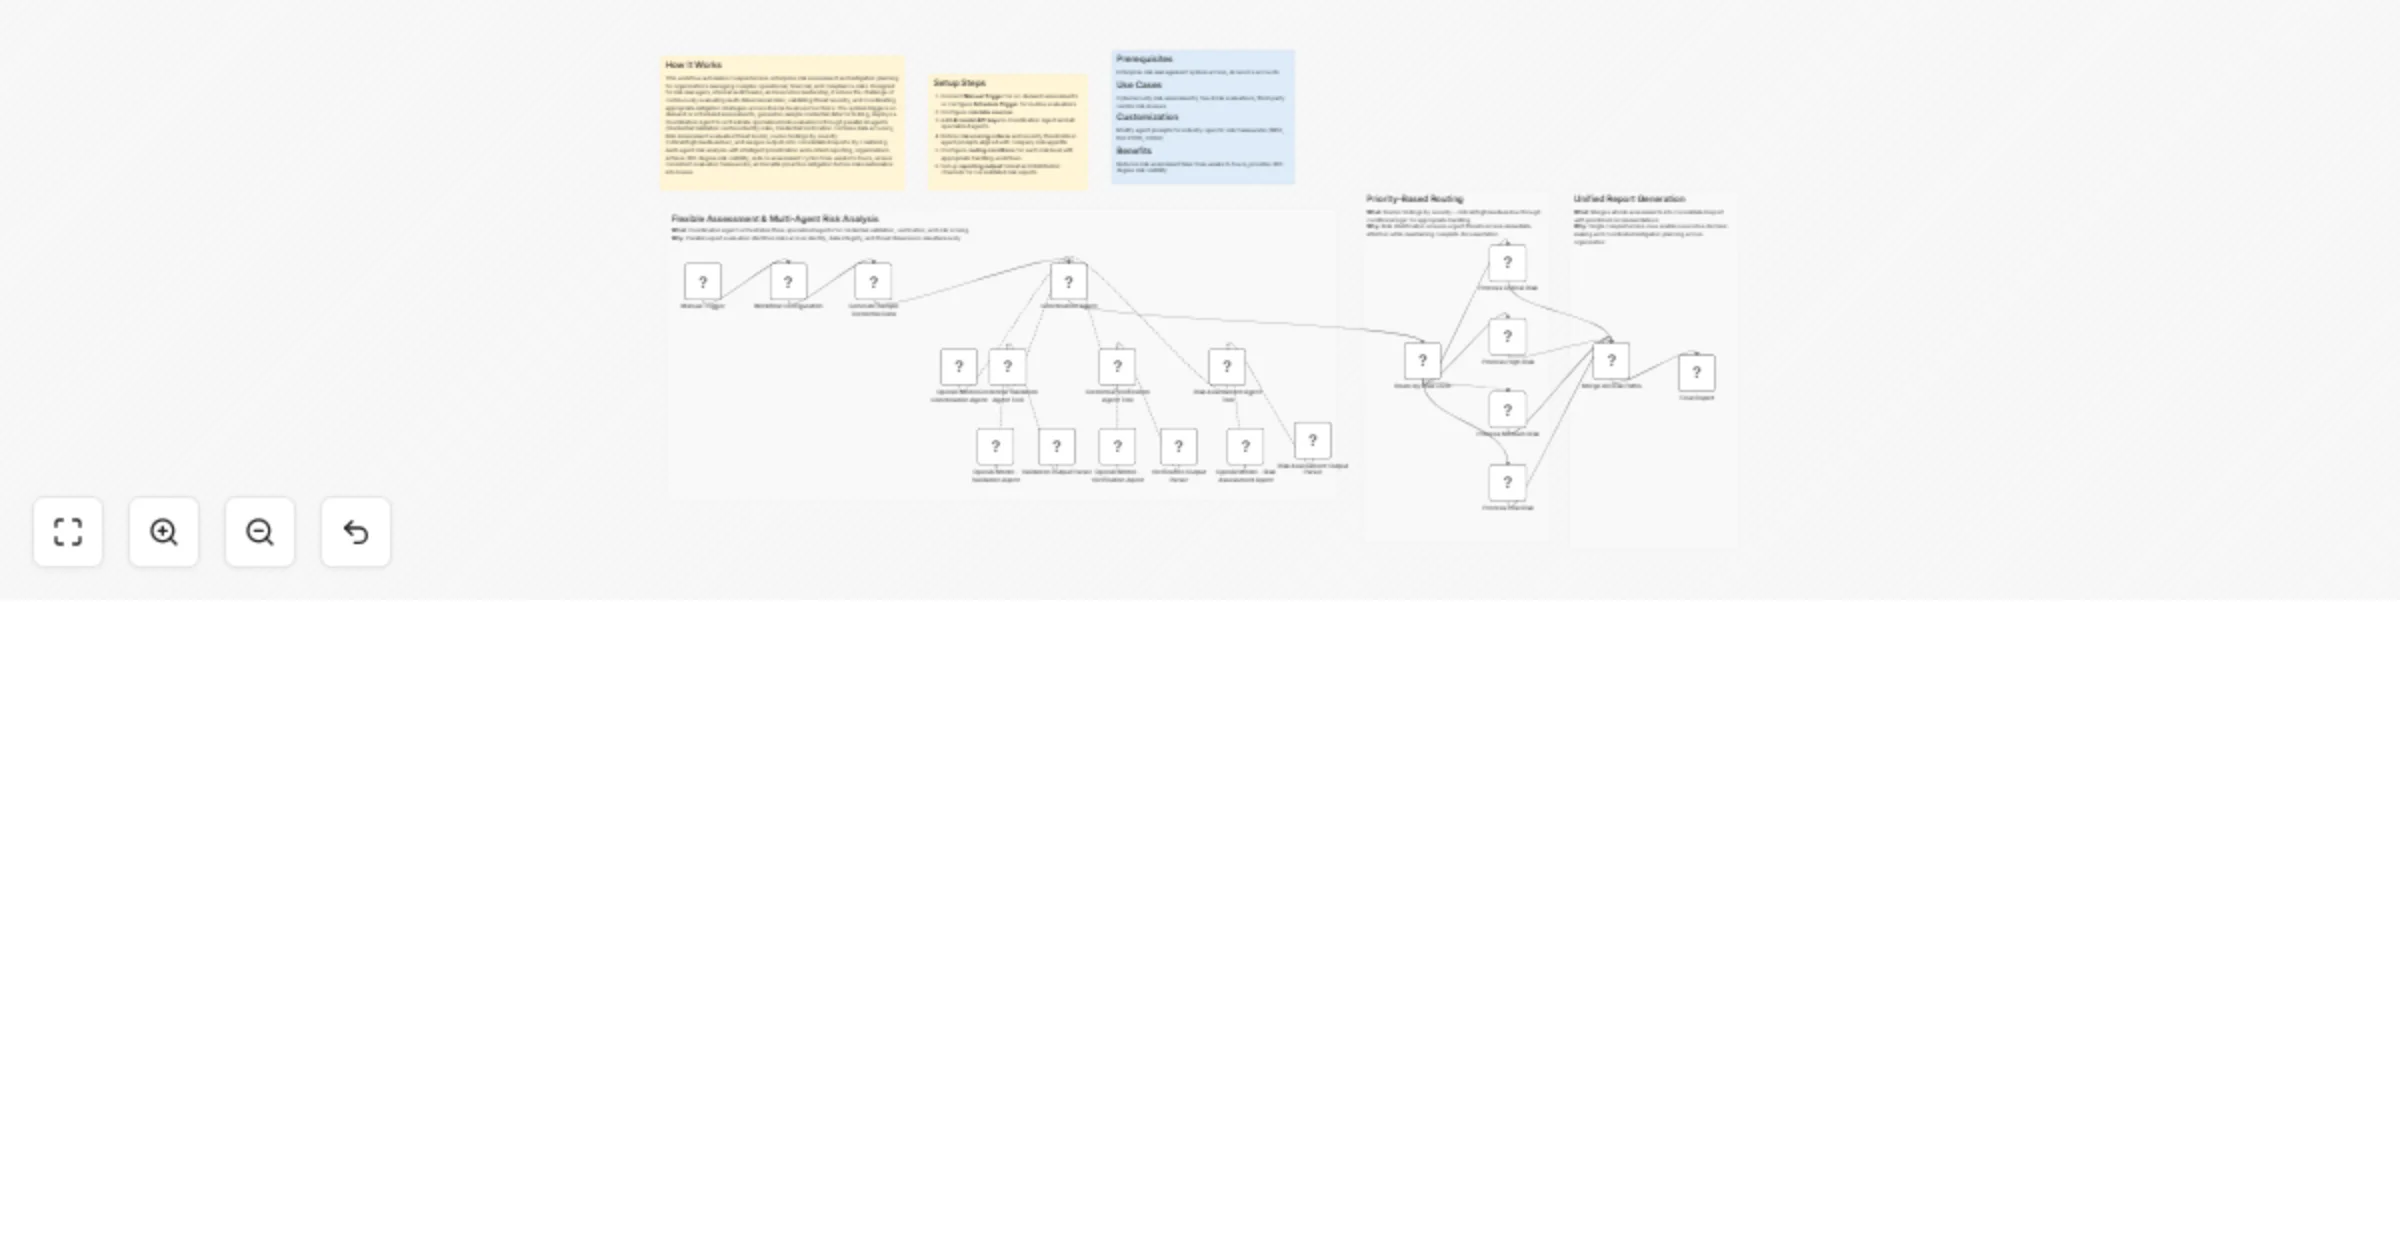
Assess credential risk and route mitigation actions with GPT-4o-mini
How It Works This workflow automates comprehensive enterprise risk assessment and mitigation planning for organizatio...
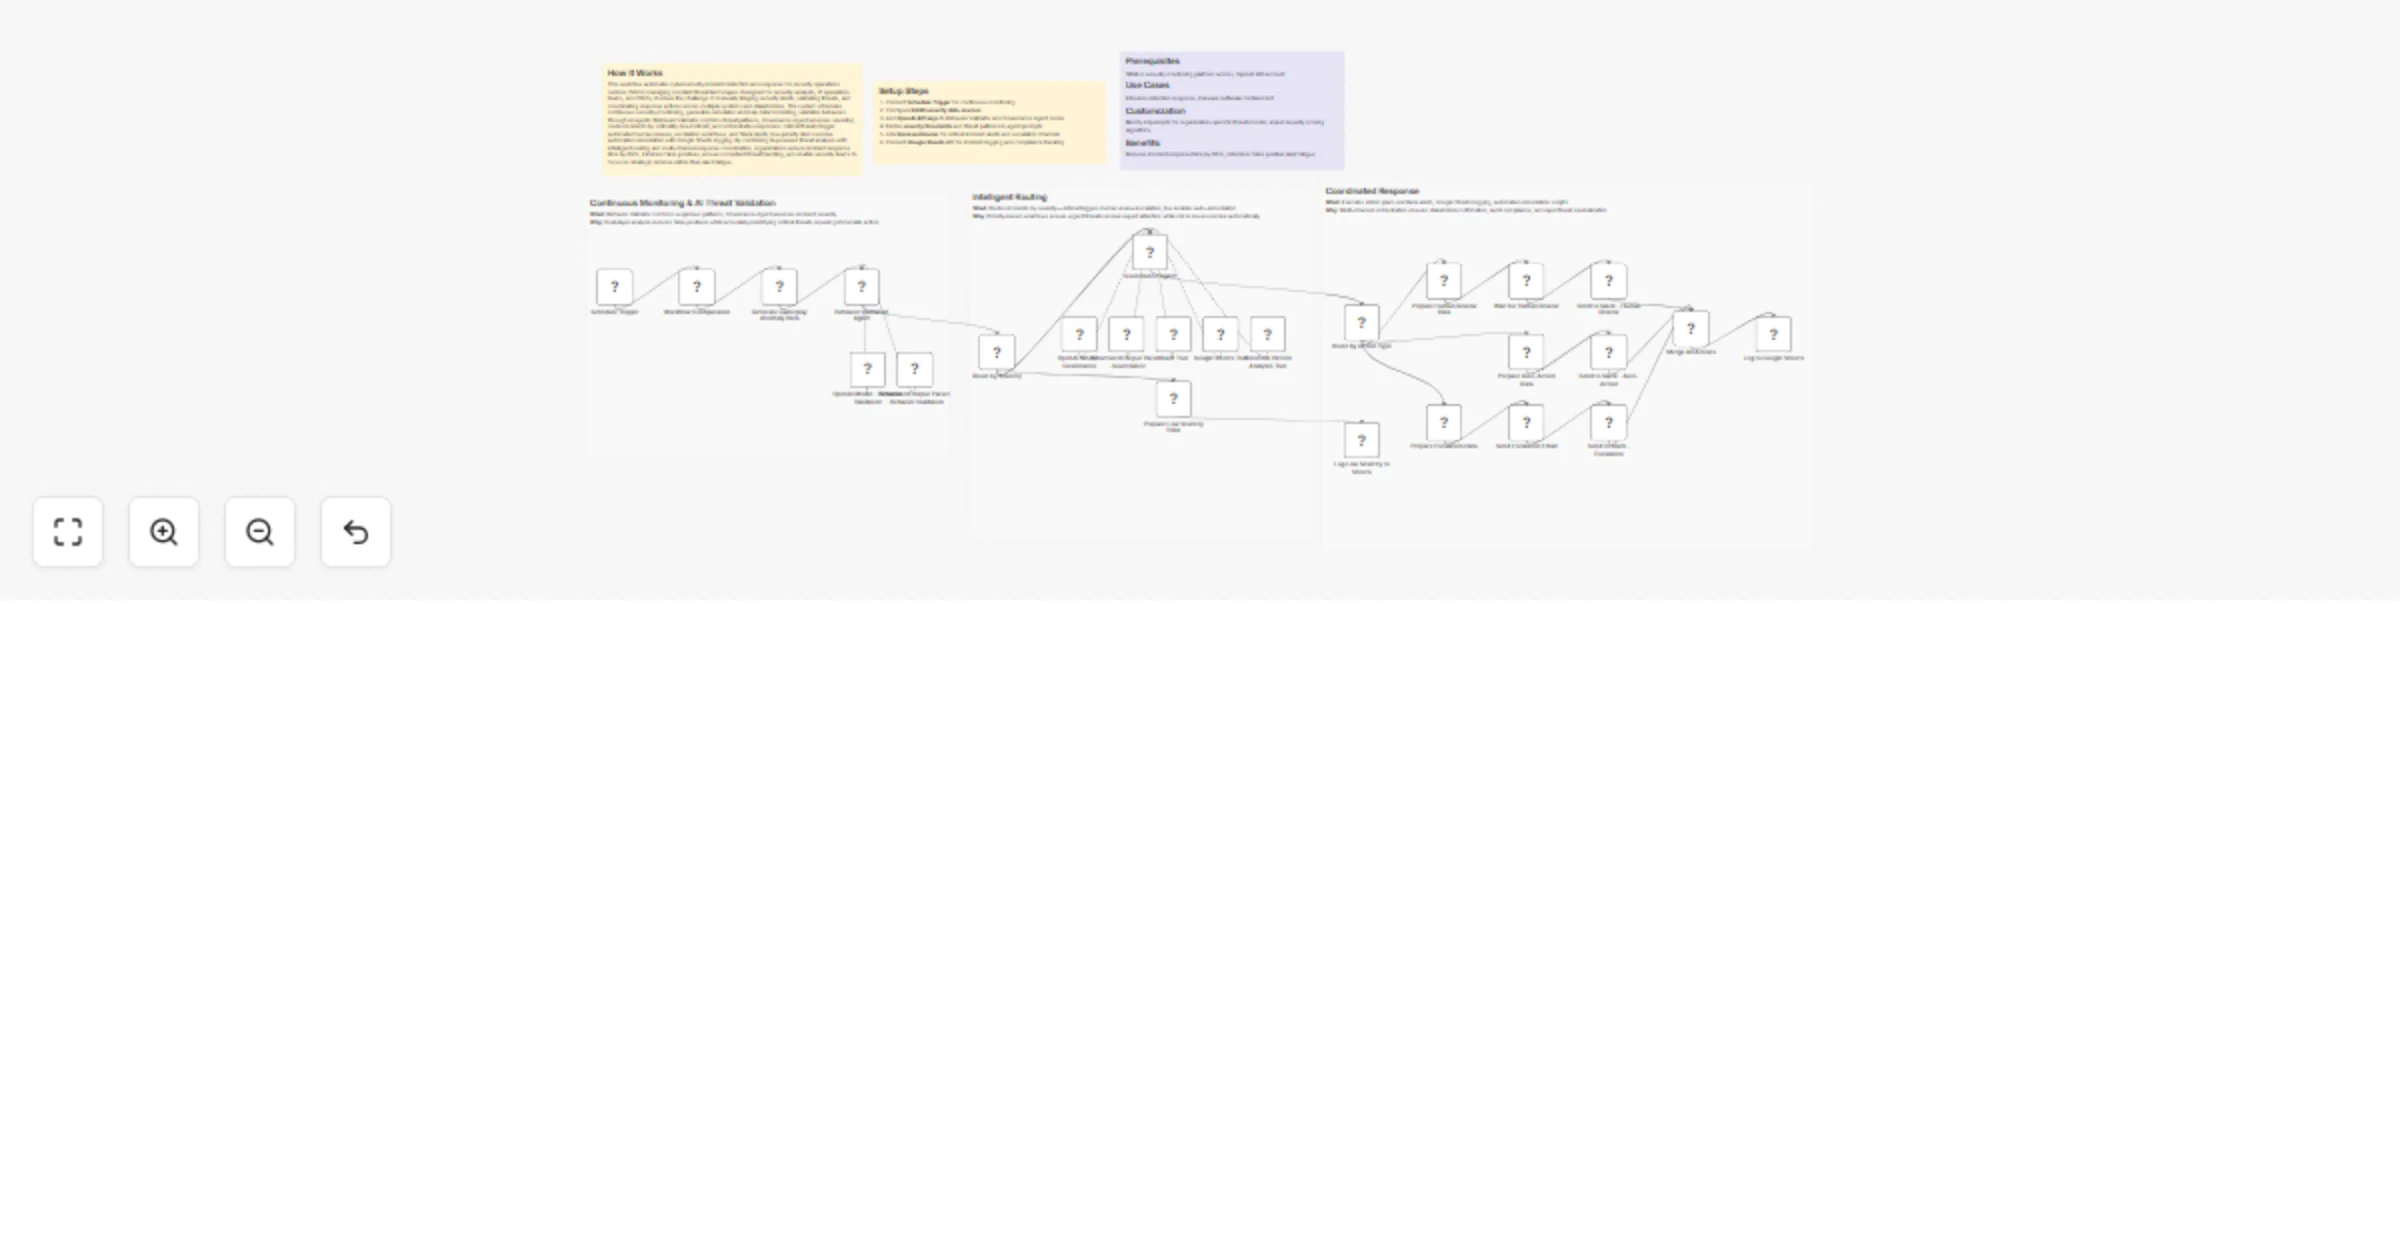
Detect and route gameplay security anomalies with GPT-4o, Slack and Sheets
How It Works This workflow automates cybersecurity incident detection and response for security operations centers (S...
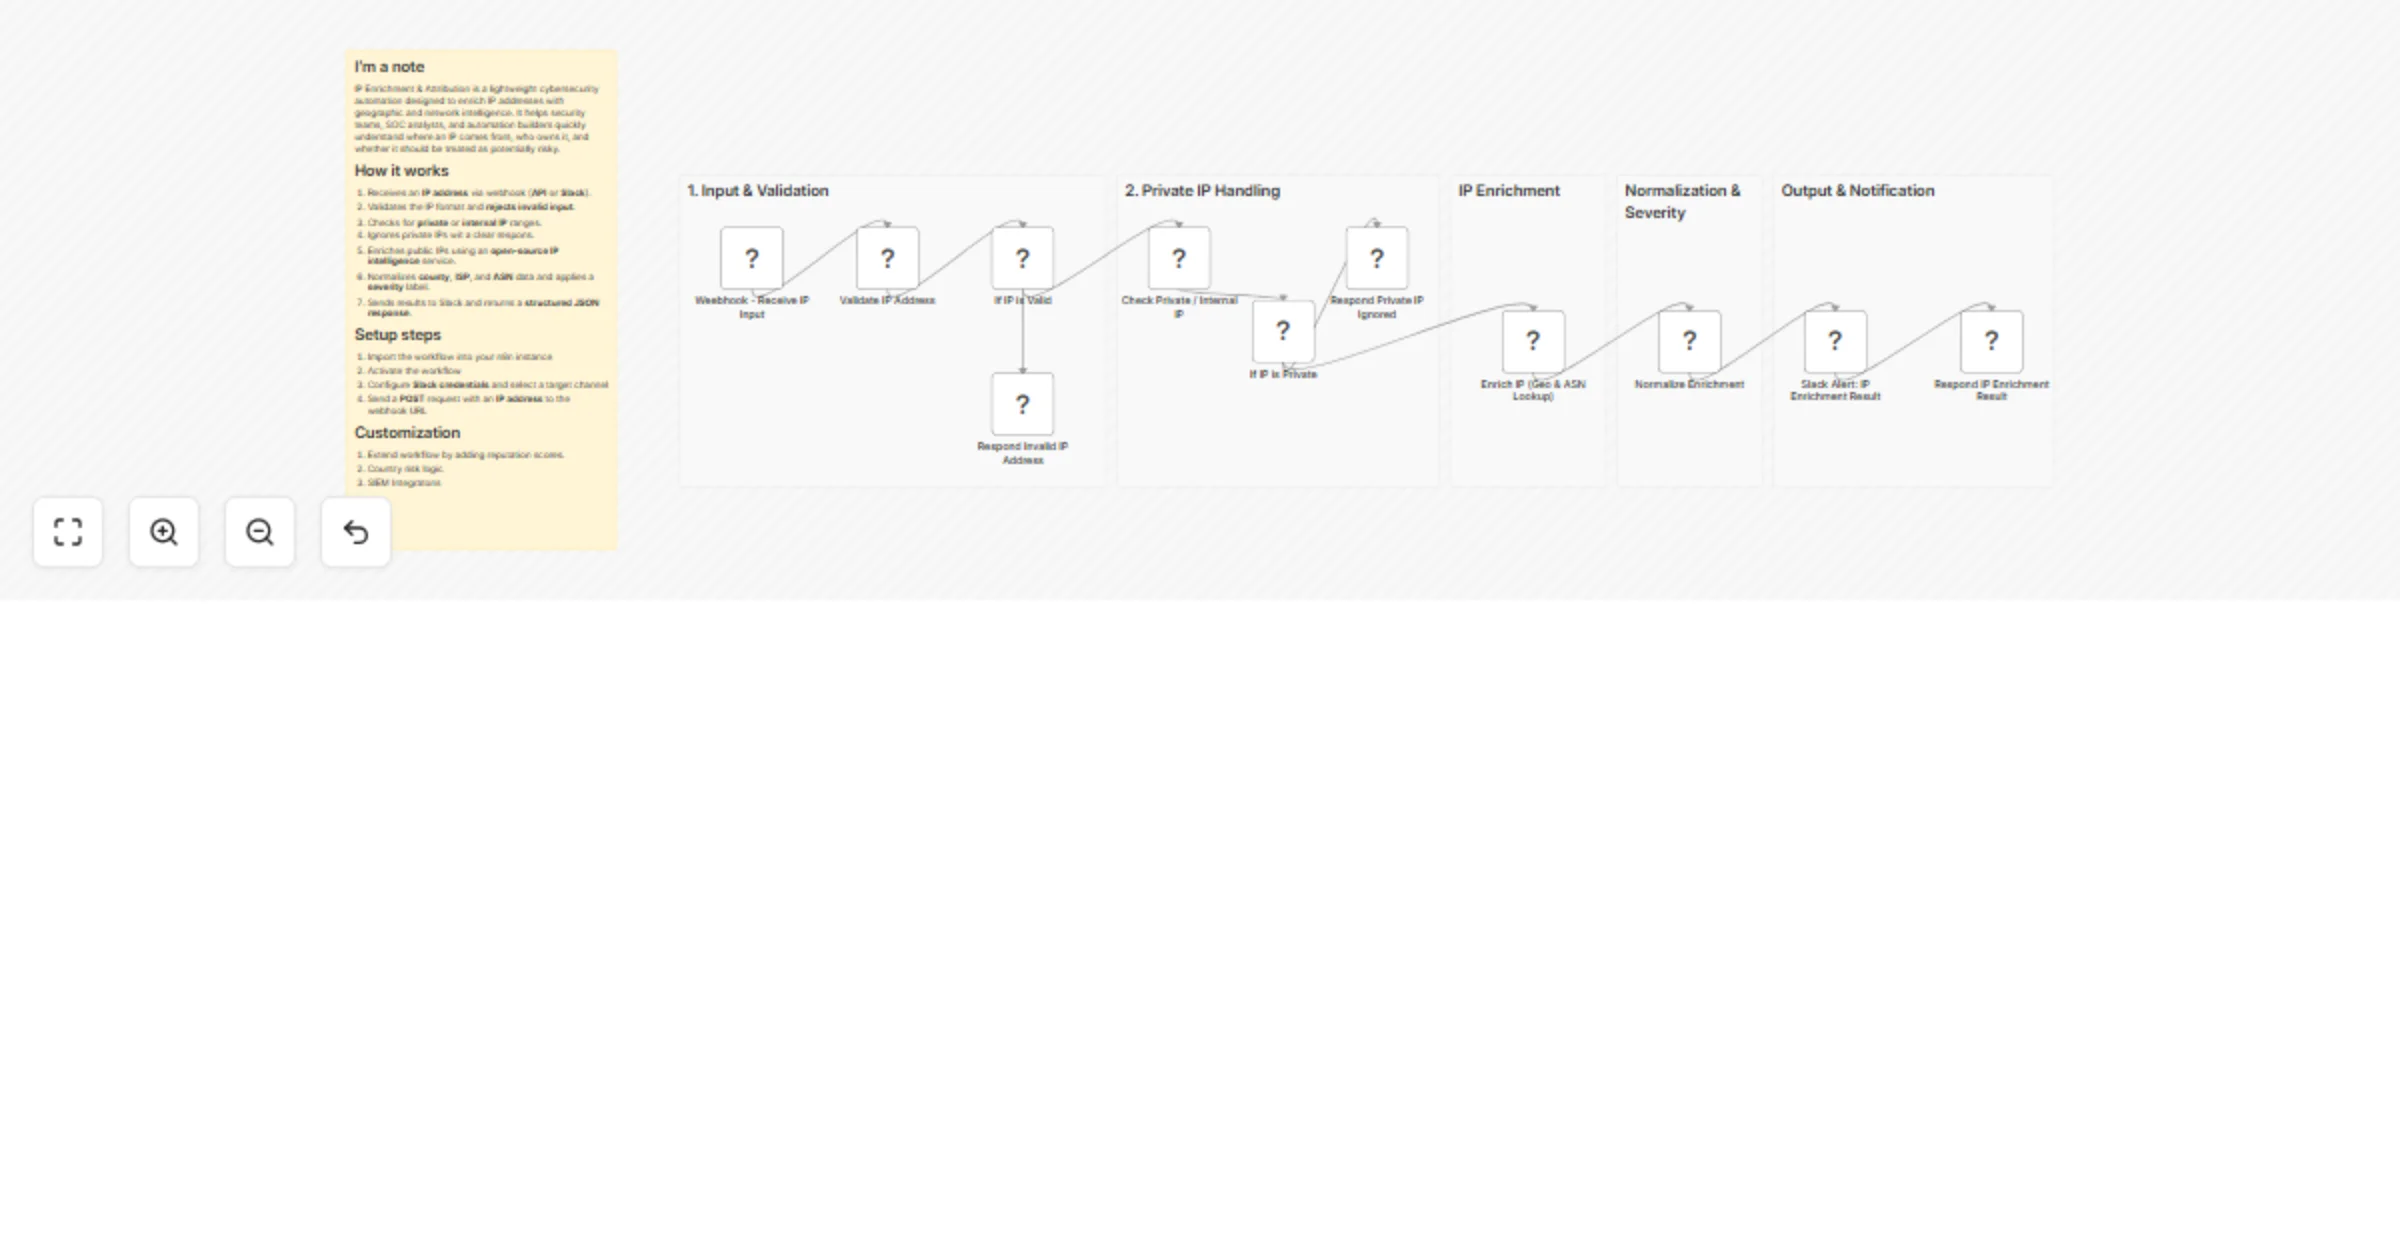
Enrich IP addresses with country attribution using IPinfo and Slack alerts
🧩 Template Description IP Enrichment & Country Attribution is a lightweight cybersecurity automation that enriches I...
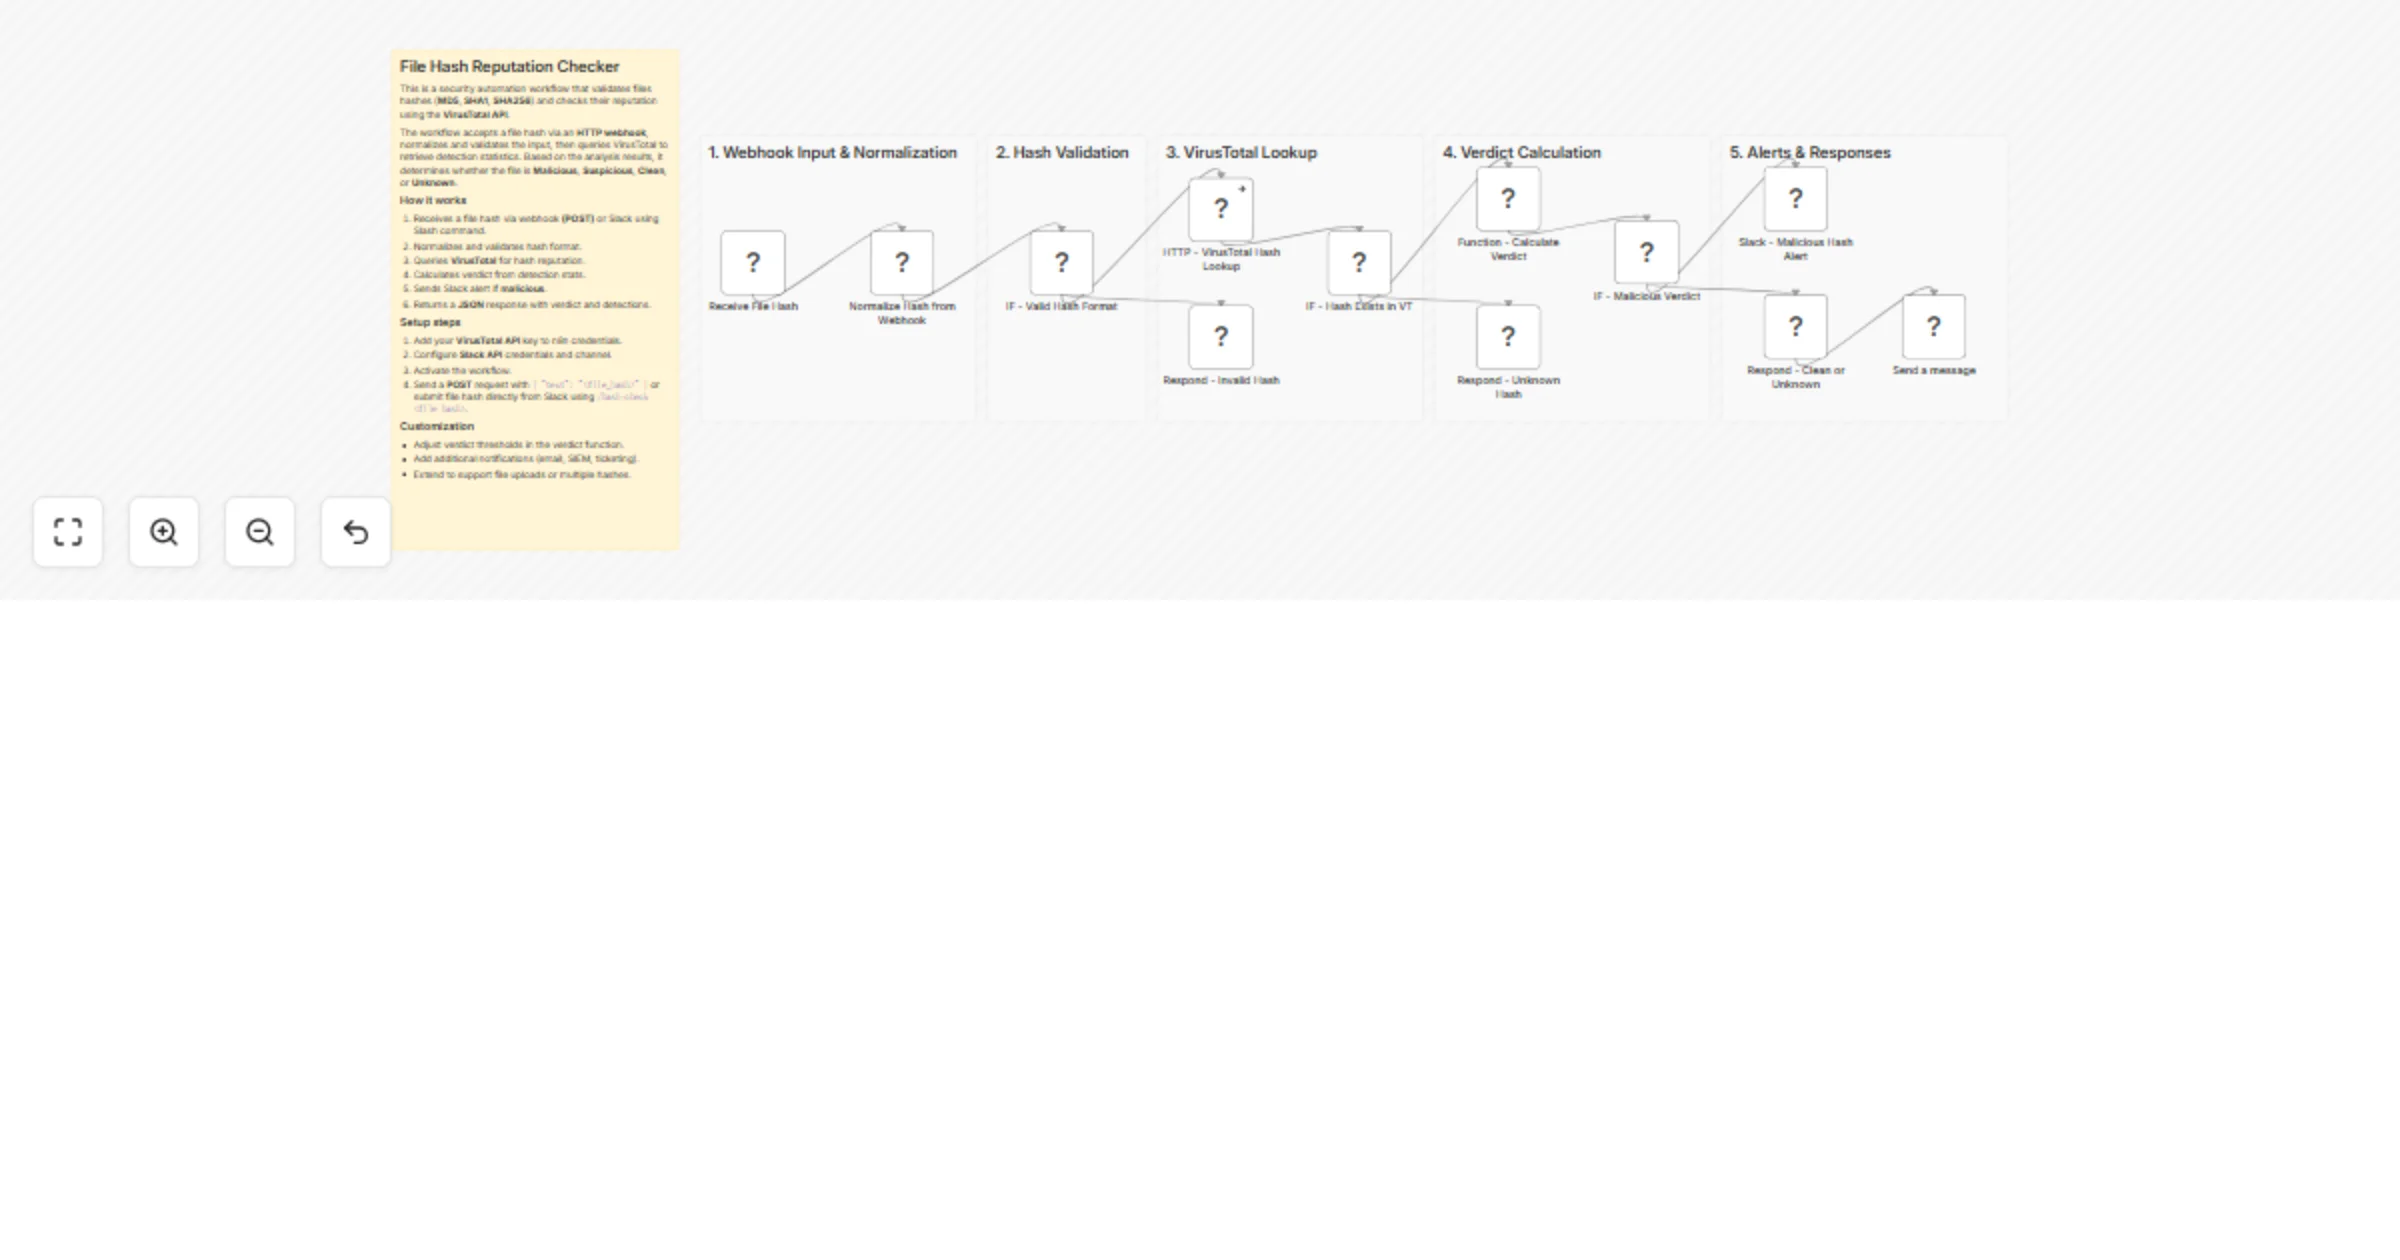
Check file hash reputation with VirusTotal and Slack alerts
🧩 Template Description File Hash Reputation Checker is a security automation workflow that validates file hashes ( M...

Report spam and phishing URLs from IMAP mailboxes to Spamhaus
This workflow automates URL reporting to Spamhaus based on incoming spam/phishing sample emails. It watches one or mo...