Vigh Sandor
Workflows by Vigh Sandor
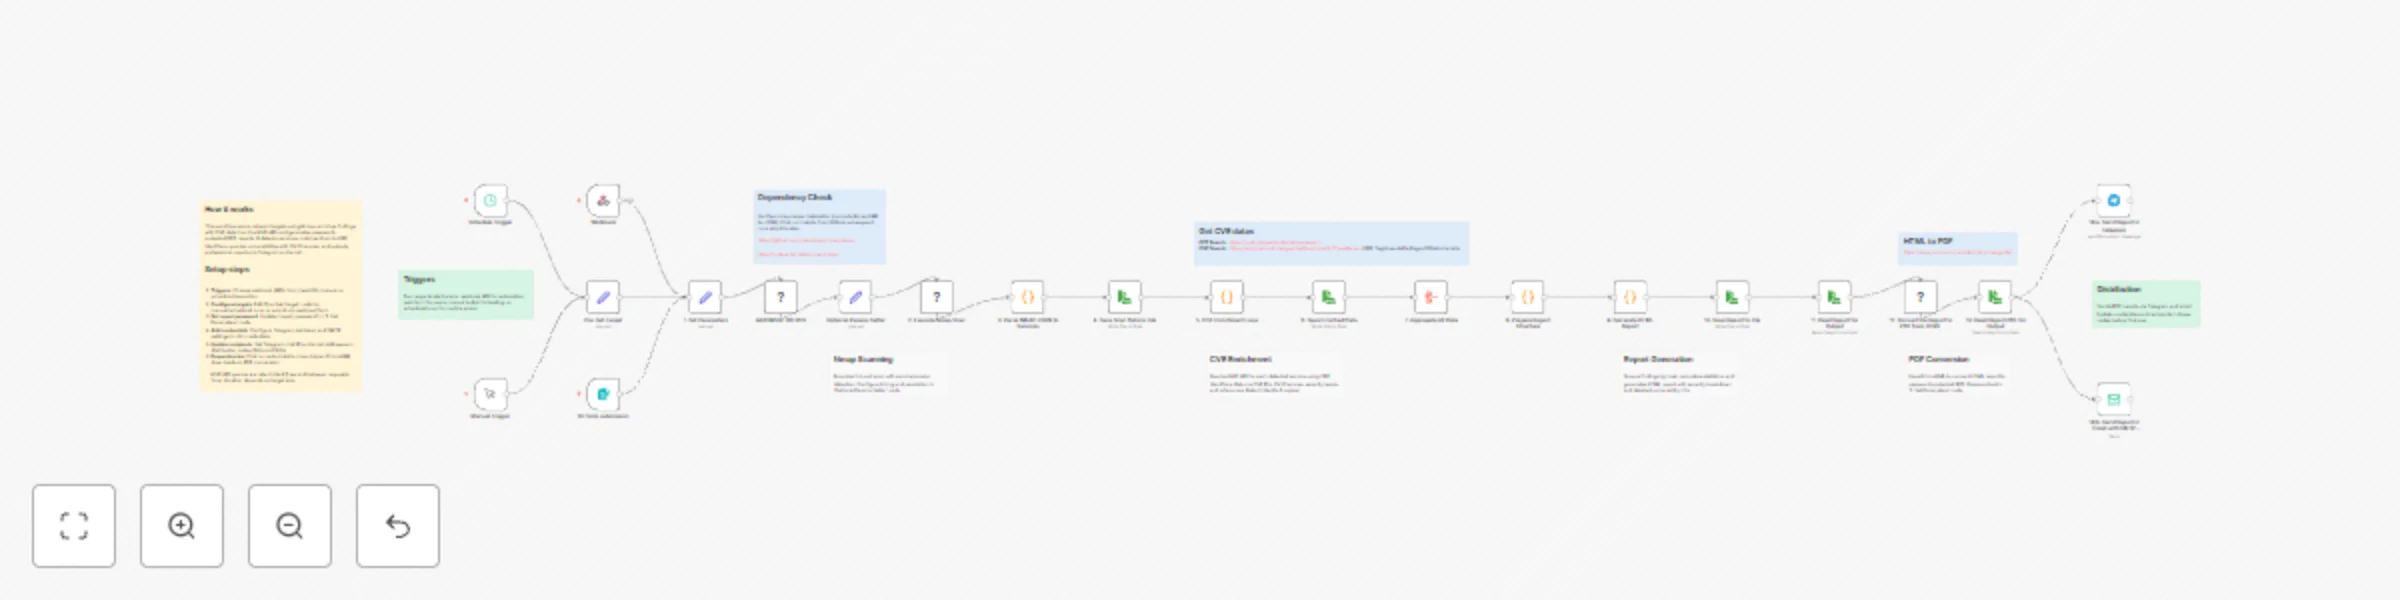
Network vulnerability scanner with NMAP and automated CVE reporting
Network Vulnerability Scanner (used NMAP as engine) with Automated CVE Report Workflow Overview This n8n workflow pro...
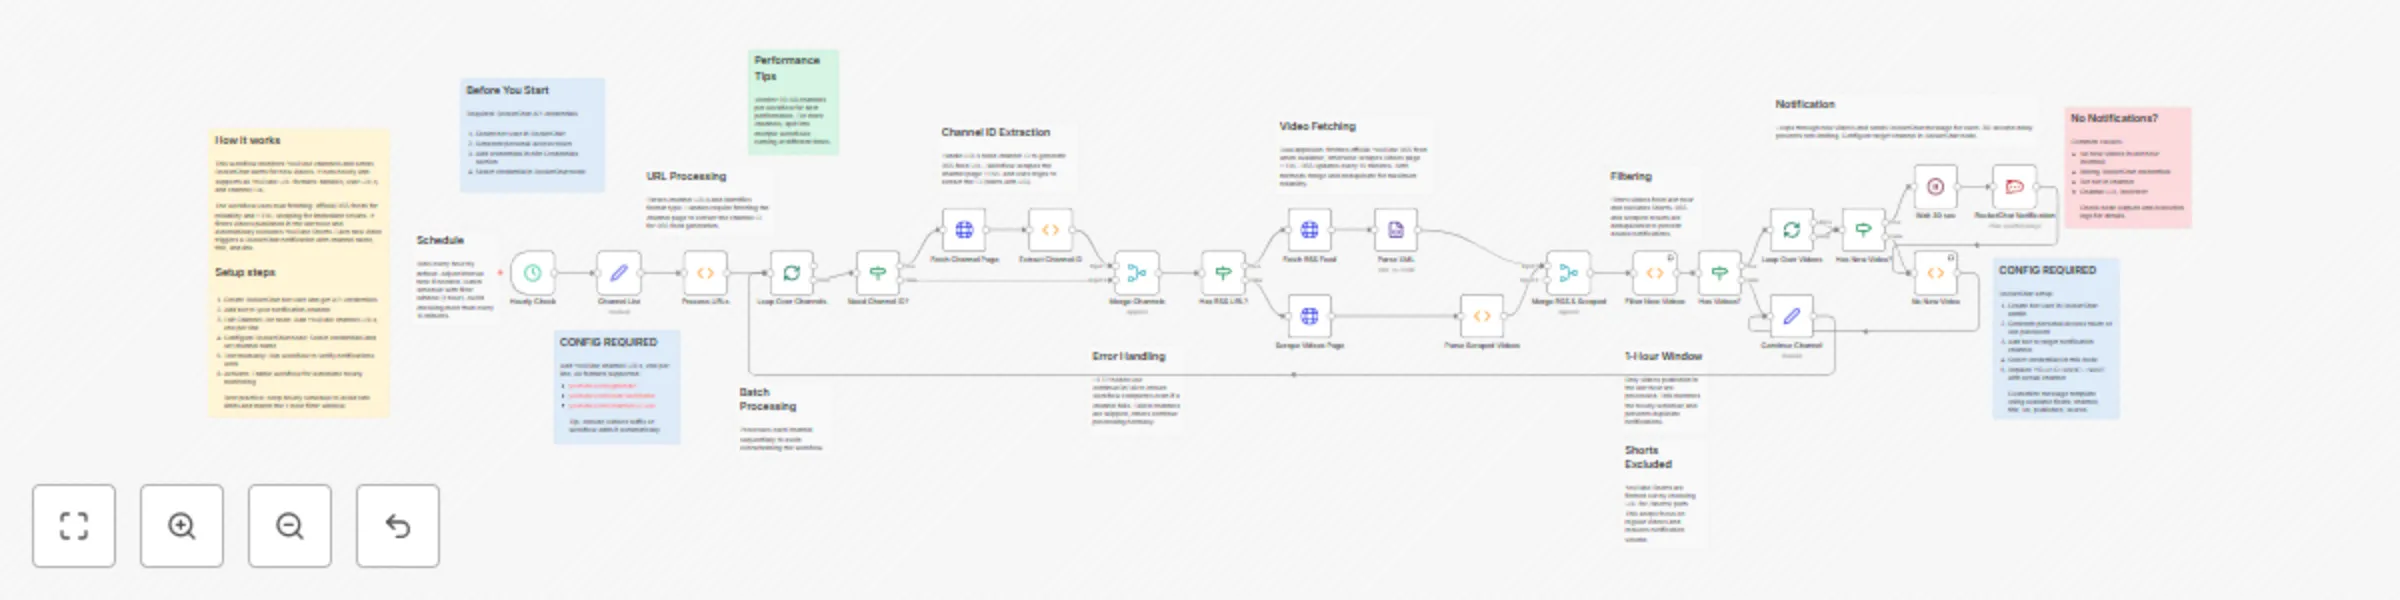
Monitor multiple YouTube channels with real-time RocketChat alerts
This n8n workflow provides automated monitoring of YouTube channels and sends real time notifications to RocketChat w...
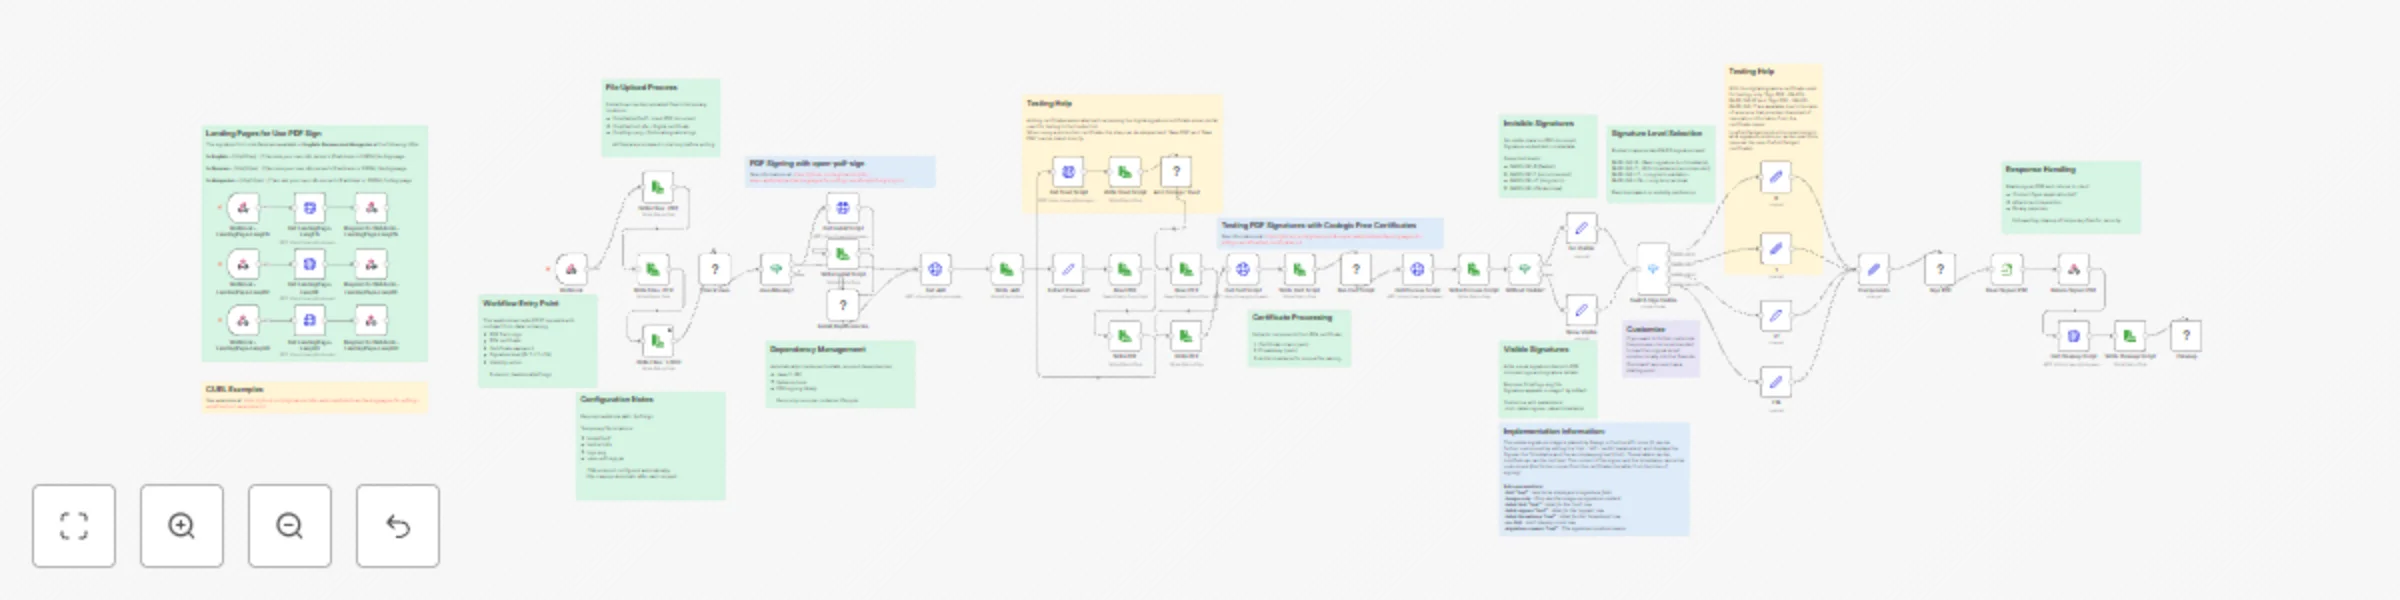
Sign PDF documents with X.509 certificates using PAdES standards
PDF Digital Signature API with PAdES Compliance Sign PDF documents with legally compliant digital signatures using X....

Automated Kubernetes testing with Robot Framework, ArgoCD & with KinD lifecycle
This n8n workflow provides automated CI/CD testing for Kubernetes applications using KinD (Kubernetes in Docker) . It...
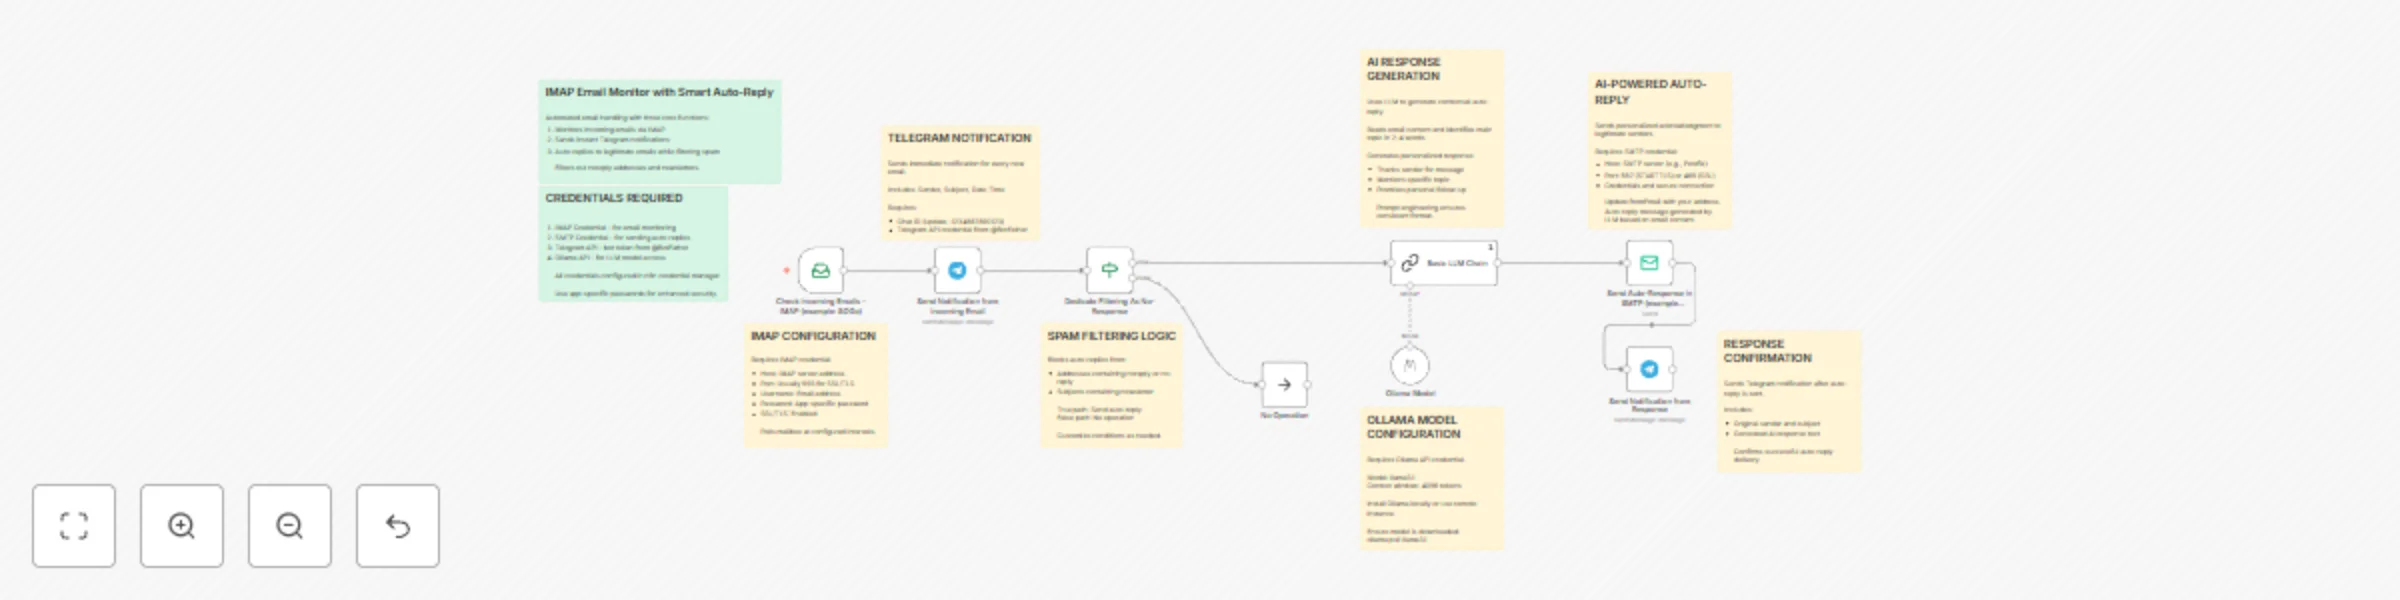
Monitor emails & send AI-generated auto-replies with Ollama & Telegram alerts
Workflow Overview This advanced n8n workflow provides intelligent email automation with AI generated responses. It co...
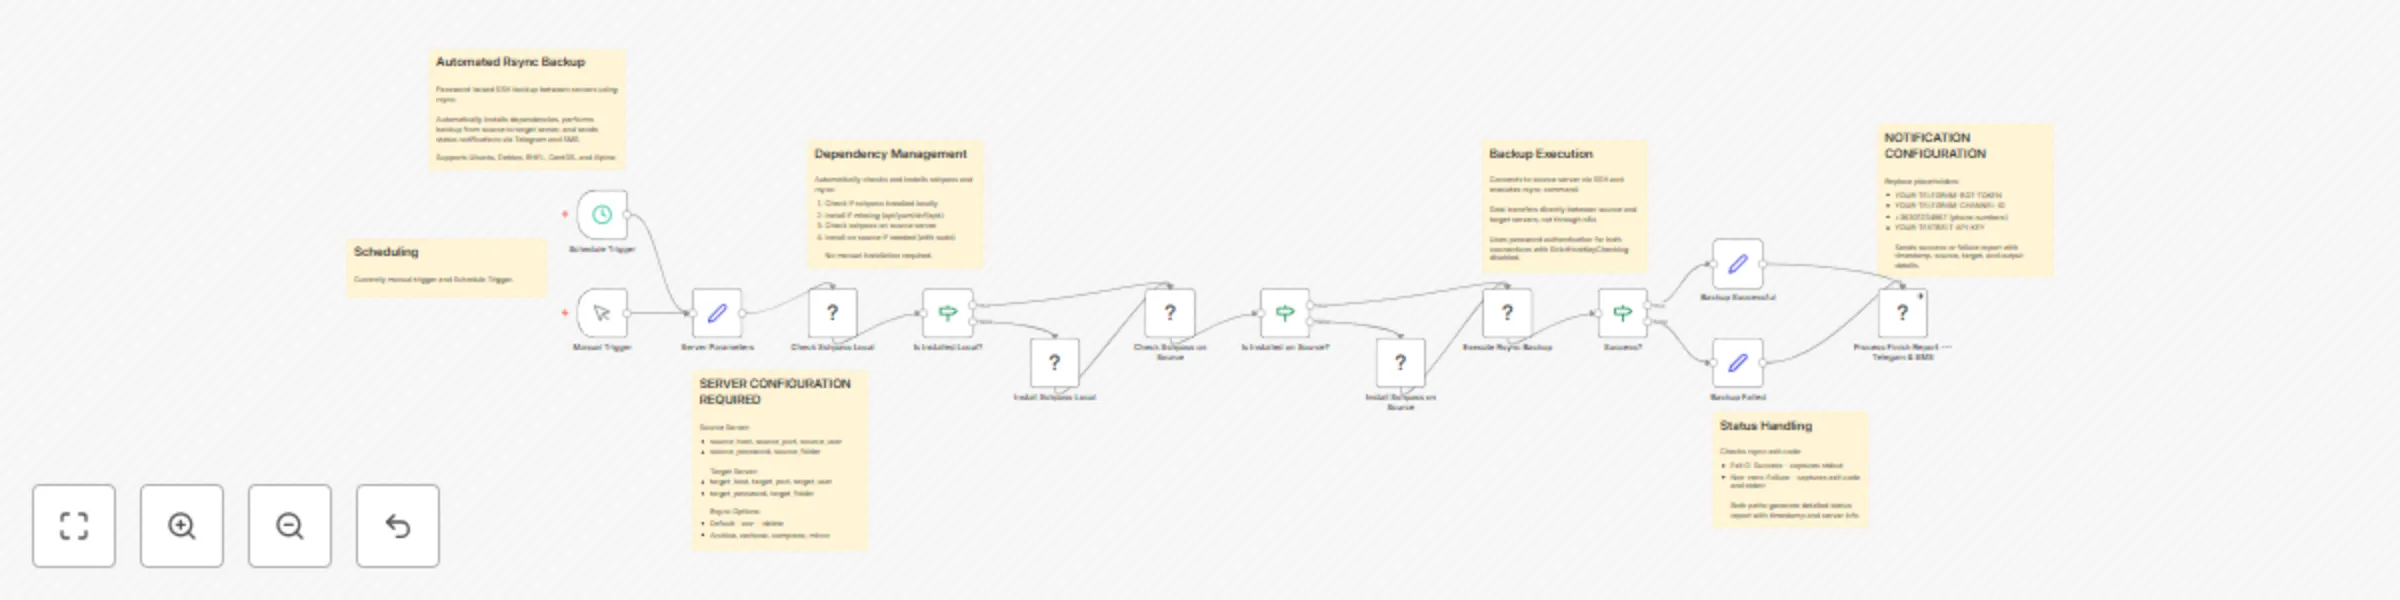
Automated rsync backup with password auth & alert system
Automated Rsync Backup with Password Auth & Alert System Overview This n8n workflow provides automated rsync backup c...

Monitor PKI certificates & CRLs for expiration with Telegram & SMS alerts
PKI Certificate & CRL Monitor Auto Expiration Alert System Overview This n8n workflow provides automated monitoring o...
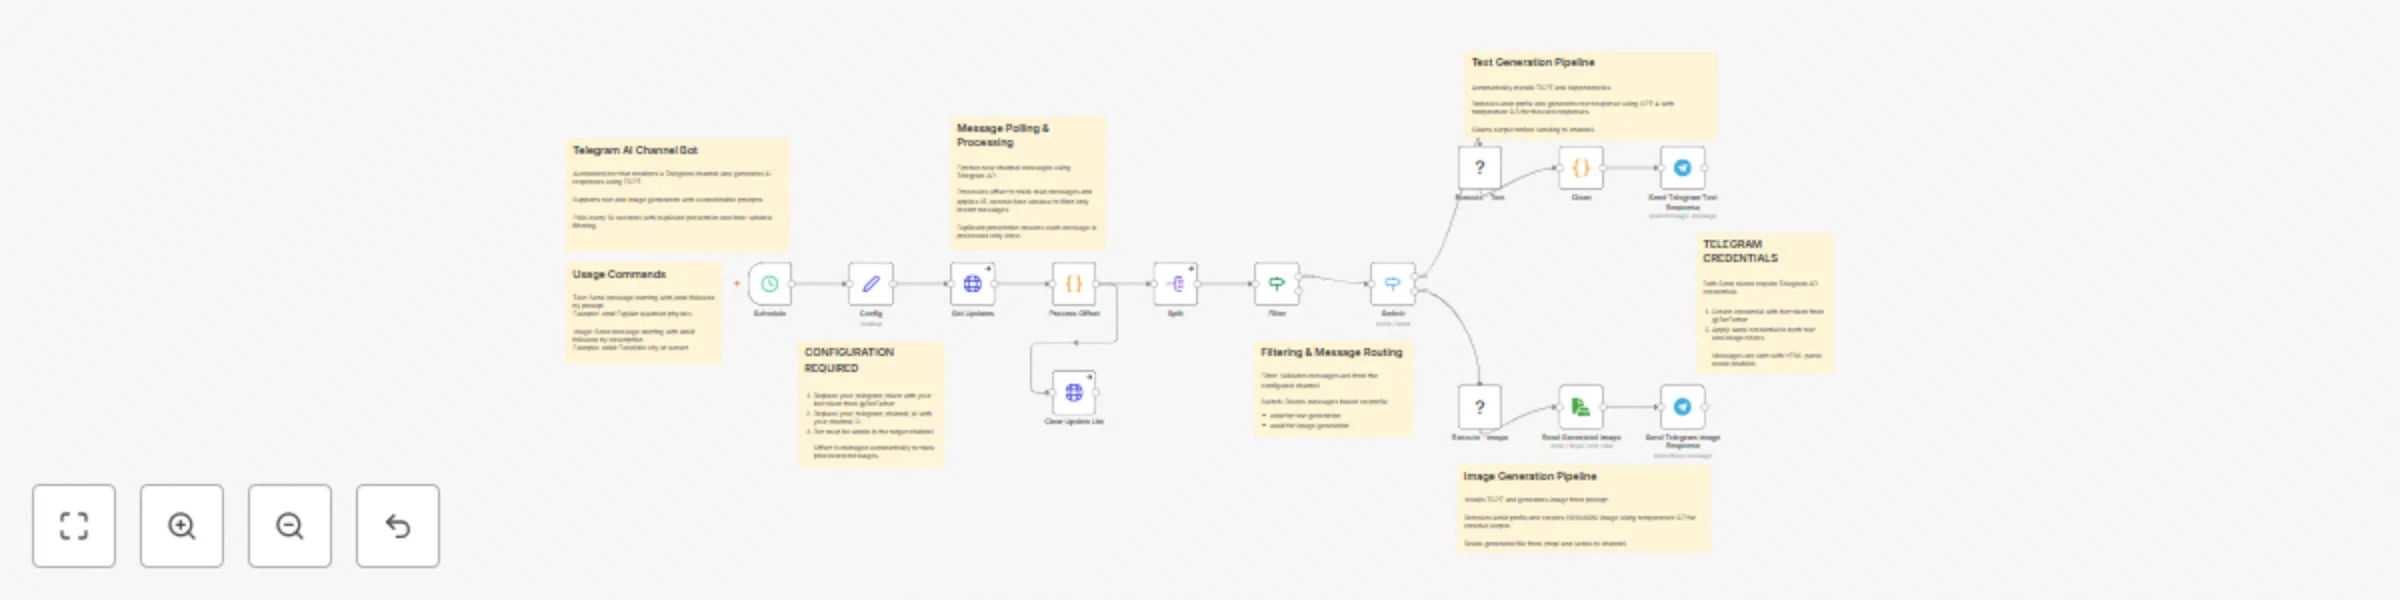
Generate text & image responses in Telegram channels with GPT-4 and TGPT
Telegram AI Channel Bot Text & Image Response Generator with TGPT Overview This n8n workflow creates an automated Tel...

Proxmox system monitor - VM status, host resources & temperature alerts via Telegram
Setup Instructions Overview This n8n workflow monitors your Proxmox VE server and sends automated reports to Telegram...

Kubernetes deployment & pod monitoring with Telegram alerts
SETUP INSTRUCTIONS 1. Configure Kubeconfig Open the "Kubeconfig Setup" node Paste your entire kubeconfig file content...