Monitor emails & send AI-generated auto-replies with Ollama & Telegram alerts
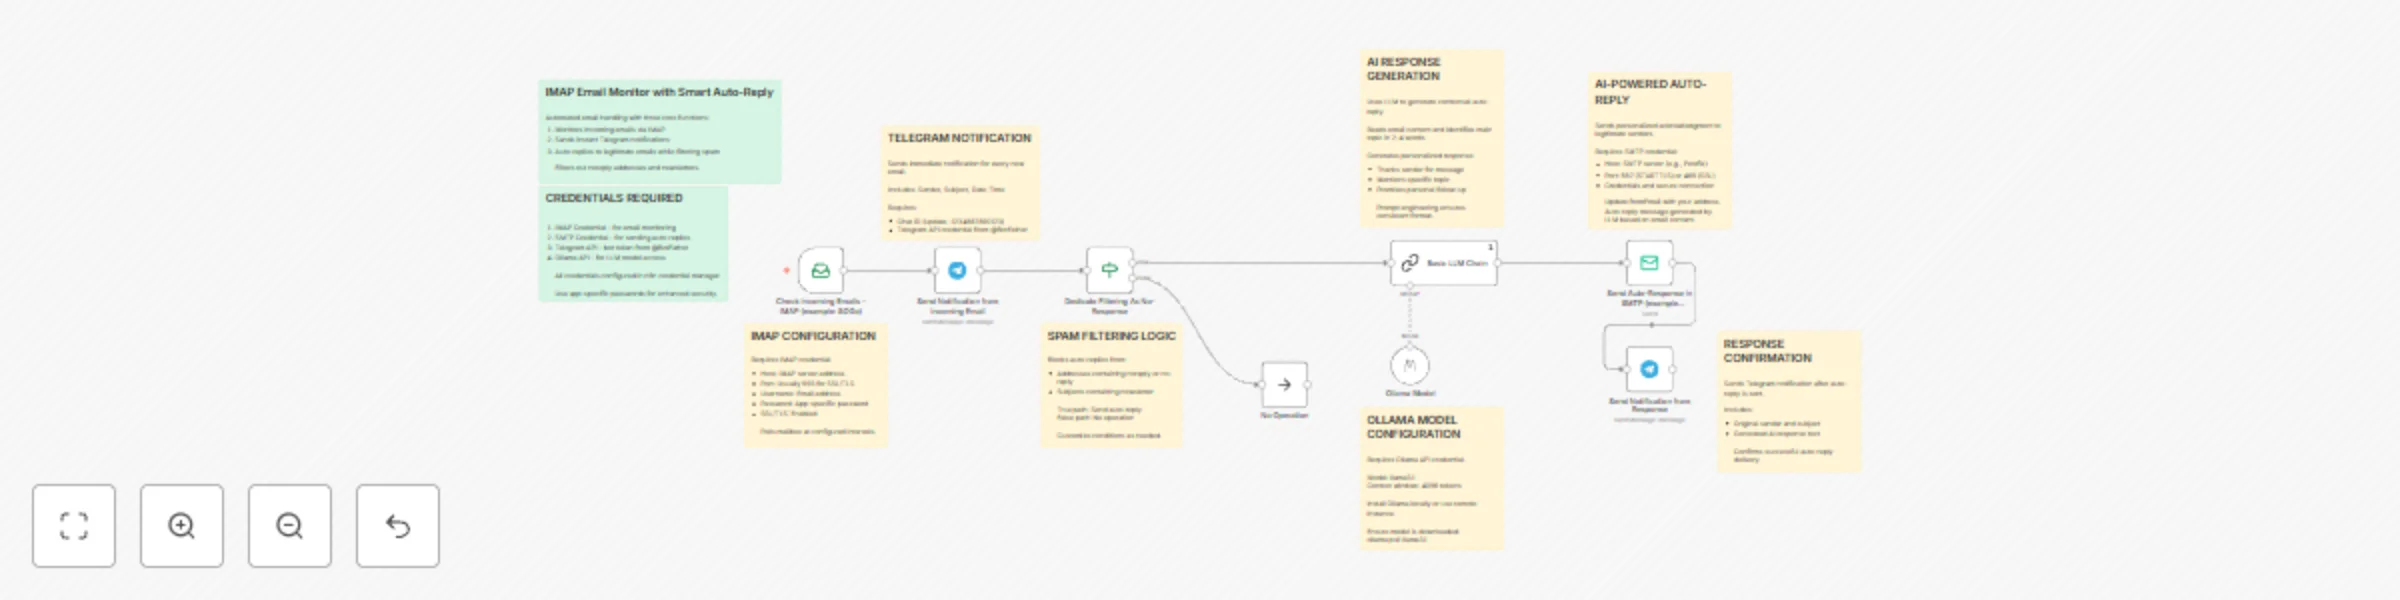
Workflow preview


 Early Deal
DISCOUNT 20%

Important notice
This workflow is provided as-is. Please review and test before using in production.
Overview
Workflow Overview
This advanced n8n workflow provides intelligent email automation with AI-generated responses. It combines four core functions:
- Monitors incoming emails via IMAP (e.g., SOGo)
- Sends instant Telegram notifications for all new emails
- Uses AI (Ollama LLM) to generate contextual, personalized auto-replies
- Sends confirmation notifications when auto-replies are sent
Unlike traditional auto-responders, this workflow analyzes email content and creates unique, relevant responses for each message.
Setup Instructions
Prerequisites
Before setting up this workflow, ensure you have:
- An n8n instance (self-hosted or cloud) with AI/LangChain nodes enabled
- IMAP email account credentials (e.g., SOGo, Gmail, Outlook)
- SMTP server access for sending emails
- Telegram Bot API credentials
- Telegram Chat ID where notifications will be sent
- Ollama installed locally or accessible via network (for AI model)
- The llama3.1 model downloaded in Ollama
Step 1: Install and Configure Ollama
Local Installation
Install Ollama on your system:
- Visit https://ollama.ai and download the installer for your OS
- Follow installation instructions for your platform
Download the llama3.1 model:
ollama pull llama3.1Verify the model is available:
ollama listStart Ollama service (if not already running):
ollama serveTest the model:
ollama run llama3.1 "Hello, world!"
Remote Ollama Instance
If using a remote Ollama server:
- Note the server URL (e.g., http://192.168.1.100:11434)
- Ensure network connectivity between n8n and Ollama server
- Verify firewall allows connections on port 11434
Step 2: Configure IMAP Credentials
- Navigate to n8n Credentials section
- Create a new IMAP credential with the following information:
- Host: Your IMAP server address
- Port: Usually 993 for SSL/TLS
- Username: Your email address
- Password: Your email password or app-specific password
- Enable SSL/TLS: Yes (recommended)
- Security: Use STARTTLS or SSL/TLS
Step 3: Configure SMTP Credentials
- Create a new SMTP credential in n8n
- Enter the following details:
- Host: Your SMTP server address (e.g., Postfix server)
- Port: Usually 587 (STARTTLS) or 465 (SSL)
- Username: Your email address
- Password: Your email password or app-specific password
- Secure connection: Enable based on your server configuration
- Allow unauthorized certificates: Enable if using self-signed certificates
Step 4: Configure Telegram Bot
Create a Telegram bot via BotFather:
- Open Telegram and search for @BotFather
- Send
/newbotcommand - Follow instructions to create your bot
- Save the API token provided by BotFather
Obtain your Chat ID:
- Method 1: Send a message to your bot, then visit:
https://api.telegram.org/bot<YOUR_BOT_TOKEN>/getUpdates - Method 2: Use a Telegram Chat ID bot like @userinfobot
- Method 3: For group chats, add the bot to the group and check the updates
- Note: Group chat IDs are negative numbers (e.g., -1234567890123)
- Method 1: Send a message to your bot, then visit:
Add Telegram API credential in n8n:
- Credential Type: Telegram API
- Access Token: Your bot token from BotFather
Step 5: Configure Ollama API Credential
- In n8n Credentials section, create a new Ollama API credential
- Configure based on your setup:
- For local Ollama: Base URL is usually
http://localhost:11434 - For remote Ollama: Enter the server URL (e.g.,
http://192.168.1.100:11434)
- For local Ollama: Base URL is usually
- Test the connection to ensure n8n can reach Ollama
Step 6: Import and Configure Workflow
- Import the workflow JSON into your n8n instance
- Update the following nodes with your specific information:
Check Incoming Emails Node
- Verify IMAP credentials are connected
- Configure polling interval (optional):
- Default behavior checks on workflow trigger schedule
- Can be set to check every N minutes
- Set mailbox folder if needed (default is INBOX)
Send Notification from Incoming Email Node
- Update
chatIdparameter with your Telegram Chat ID - Replace
-1234567890123with your actual chat ID - Customize notification message template if desired
- Current format includes: Sender, Subject, Date-Time
Dedicate Filtering As No-Response Node
- Review spam filter conditions:
- Blocks emails from addresses containing "noreply" or "no-reply"
- Blocks emails with "newsletter" in subject line (case-insensitive)
- Add additional filtering rules as needed:
- Block specific domains
- Filter by keywords
- Whitelist/blacklist specific senders
Ollama Model Node
- Verify Ollama API credential is connected
- Confirm model name:
llama3.1:bf230501(or adjust to your installed version) - Context window set to 4096 tokens (sufficient for most emails)
- Can be adjusted based on your needs and hardware capabilities
Basic LLM Chain Node
- Review the AI prompt engineering (pre-configured but customizable)
- Current prompt instructs the AI to:
- Read the email content
- Identify main topic in 2-4 words
- Generate a professional acknowledgment response
- Keep responses consistent and concise
- Modify prompt if you want different response styles
Send Auto-Response in SMTP Node
- Verify SMTP credentials are connected
- Check
fromEmailuses correct email address:- Currently set to
{{ $('Check Incoming Emails - IMAP (example: SOGo)').item.json.to }} - This automatically uses the recipient address (your mailbox)
- Currently set to
- Subject automatically includes "Re: " prefix with original subject
- Message text comes from AI-generated content
Send Notification from Response Node
- Update
chatIdparameter (same as first notification node) - This sends confirmation that auto-reply was sent
- Includes original email details and the AI-generated response text
Step 7: Test the Workflow
Perform initial configuration test:
- Test Ollama connectivity:
curl http://localhost:11434/api/tags - Verify all credentials are properly configured
- Check n8n has access to required network endpoints
- Test Ollama connectivity:
Execute a test run:
- Click "Execute Workflow" button in n8n
- Send a test email to your monitored inbox
- Use a clear subject and body for better AI response
Verify workflow execution:
- First Telegram notification received (incoming email alert)
- AI processes the email content
- Auto-reply is sent to the original sender
- Second Telegram notification received (confirmation with AI response)
- Check n8n execution log for any errors
Verify email delivery:
- Check if auto-reply arrived at sender's inbox
- Verify it's not marked as spam
- Review AI-generated content for appropriateness
Step 8: Fine-Tune AI Responses
Send various types of test emails:
- Different topics (inquiry, complaint, information request)
- Various email lengths (short, medium, long)
- Different languages if applicable
Review AI-generated responses:
- Check if topic identification is accurate
- Verify response appropriateness
- Ensure tone is professional
Adjust the prompt if needed:
- Modify topic word count (currently 2-4 words)
- Change response template
- Add language-specific instructions
- Include custom sign-offs or branding
Step 9: Activate the Workflow
Once testing is successful and AI responses are satisfactory:
- Toggle the workflow to "Active" state
- The workflow will now run automatically on the configured schedule
Monitor initial production runs:
- Review first few auto-replies carefully
- Check Telegram notifications for any issues
- Verify SMTP delivery rates
Set up monitoring:
- Enable n8n workflow error notifications
- Monitor Ollama resource usage
- Check email server logs periodically
How to Use
Normal Operation
Once activated, the workflow operates fully automatically:
Email Monitoring: The workflow continuously checks your IMAP inbox for new messages based on the configured polling interval or trigger schedule.
Immediate Incoming Notification: When a new email arrives, you receive an instant Telegram notification containing:
- Sender's email address
- Email subject line
- Date and time received
- Note indicating it's from IMAP mailbox
Intelligent Filtering: The workflow evaluates each email against spam filter criteria:
- Emails from "noreply" or "no-reply" addresses are filtered out
- Emails with "newsletter" in the subject line are filtered out
- Filtered emails receive notification but no auto-reply
- Legitimate emails proceed to AI response generation
AI Response Generation: For emails that pass the filter:
- The AI reads the full email content
- Analyzes the main topic or purpose
- Generates a personalized acknowledgment
- Creates a professional response that:
- Thanks the sender
- References the specific topic
- Promises a personal follow-up
- Maintains professional tone
Automatic Reply Delivery: The AI-generated response is sent via SMTP to the original sender with:
- Subject line: "Re: [Original Subject]"
- From address: Your monitored mailbox
- Body: AI-generated contextual message
Response Confirmation: After the auto-reply is sent, you receive a second Telegram notification showing:
- Original email details (sender, subject, date)
- The complete AI-generated response text
- Confirmation of successful delivery
Understanding AI Response Generation
The AI analyzes emails intelligently:
Example 1: Business Inquiry
Incoming Email: "I'm interested in your consulting services for our Q4 project..."
AI Topic Identification: "consulting services"
Generated Response: "Dear Correspondent! Thank you for your message regarding consulting services. I will respond with a personal message as soon as possible. Have a nice day!"
Example 2: Technical Support
Incoming Email: "We're experiencing issues with the API integration..."
AI Topic Identification: "API integration issues"
Generated Response: "Dear Correspondent! Thank you for your message regarding API integration issues. I will respond with a personal message as soon as possible. Have a nice day!"
Example 3: General Question
Incoming Email: "Could you provide more information about pricing?"
AI Topic Identification: "pricing information"
Generated Response: "Dear Correspondent! Thank you for your message regarding pricing information. I will respond with a personal message as soon as possible. Have a nice day!"
Customizing Filter Rules
To modify which emails receive AI-generated auto-replies:
- Open the "Dedicate Filtering As No-Response" node
- Modify existing conditions or add new ones:
Block specific domains:
{{ $json.from.value[0].address }}
Operation: does not contain
Value: @spam-domain.com
Whitelist VIP senders (only respond to specific people):
{{ $json.from.value[0].address }}
Operation: contains
Value: @important-client.com
Filter by subject keywords:
{{ $json.subject.toLowerCase() }}
Operation: does not contain
Value: unsubscribe
Combine multiple conditions:
- Use AND logic (all must be true) for stricter filtering
- Use OR logic (any can be true) for more permissive filtering
Customizing AI Prompt
To change how the AI generates responses:
- Open the "Basic LLM Chain" node
- Modify the prompt text in the "text" parameter
- Current structure:
- Context setting (read email, identify topic)
- Output format specification
- Rules for AI behavior
Example modifications:
Add company branding:
Return only this response, filling in the [TOPIC]:

Dear Correspondent!
Thank you for reaching out to [Your Company Name] regarding [TOPIC].
I will respond with a personal message as soon as possible.
Best regards,
[Your Name]
[Your Company Name]
Make it more casual:
Return only this response, filling in the [TOPIC]:

Hi there!
Thanks for your email about [TOPIC].
I'll get back to you personally soon.
Cheers!
Add urgency classification:
Read the email and classify urgency (Low/Medium/High).
Identify the main topic.

Return:

Dear Correspondent!
Thank you for your message regarding [TOPIC].
Priority: [URGENCY]
I will respond with a personal message as soon as possible.
Customizing Telegram Notifications
Incoming Email Notification:
- Open "Send Notification from Incoming Email" node
- Modify the "text" parameter
- Available variables:
{{ $json.from }}- Full sender info{{ $json.from.value[0].address }}- Sender email only{{ $json.from.value[0].name }}- Sender name (if available){{ $json.subject }}- Email subject{{ $json.date }}- Date received{{ $json.textPlain }}- Email body (use cautiously for privacy){{ $json.to }}- Recipient address
Response Confirmation Notification:
- Open "Send Notification from Response" node
- Modify to include additional information
- Reference AI response:
{{ $('Basic LLM Chain').item.json.text }}
Monitoring and Maintenance
Daily Monitoring
- Check Telegram Notifications: Review incoming email alerts and response confirmations
- Verify AI Quality: Spot-check AI-generated responses for appropriateness
- Email Delivery: Confirm auto-replies are being delivered (not caught in spam)
Weekly Maintenance
- Review Execution Logs: Check n8n execution history for errors or warnings
- Ollama Performance: Monitor resource usage (CPU, RAM, disk space)
- Filter Effectiveness: Assess if spam filters are working correctly
- Response Quality: Review multiple AI responses for consistency
Monthly Maintenance
- Update Ollama Model: Check for new llama3.1 versions or alternative models
- Prompt Optimization: Refine AI prompt based on response quality observations
- Credential Rotation: Update passwords and API tokens for security
- Backup Configuration: Export workflow and credentials (securely)
Advanced Usage
Multi-Language Support
If you receive emails in multiple languages:
- Modify the AI prompt to detect language:
Detect the email language.
Generate response in the SAME language as the email.

If English: [English template]
If Hungarian: [Hungarian template]
If German: [German template]
- Or use language-specific conditions in the filtering node
Priority-Based Responses
Generate different responses based on sender importance:
- Add an IF node after filtering to check sender domain
- Route VIP emails to a different LLM chain with priority messaging
- Standard emails use the normal AI chain
Response Logging
To maintain a record of all AI interactions:
- Add a database node (PostgreSQL, MySQL, etc.) after the auto-reply node
- Store: timestamp, sender, subject, AI response, delivery status
- Use for compliance, analytics, or training data
A/B Testing AI Prompts
Test different prompt variations:
- Create multiple LLM Chain nodes with different prompts
- Use a randomizer or round-robin approach
- Compare response quality and user feedback
- Optimize based on results
Troubleshooting
Notifications Not Received
Problem: Telegram notifications not appearing
Solutions:
- Verify Chat ID is correct (positive for personal chats, negative for groups)
- Check if bot has permissions to send messages
- Ensure bot wasn't blocked or removed from group
- Test Telegram API credential independently
- Review n8n execution logs for Telegram API errors
AI Responses Not Generated
Problem: Auto-replies sent but content is empty or error messages
Solutions:
- Check Ollama service is running:
ollama list - Verify llama3.1 model is downloaded:
ollama list - Test Ollama directly:
ollama run llama3.1 "Test message" - Review Ollama API credential URL in n8n
- Check network connectivity between n8n and Ollama
- Increase context window if emails are very long
- Monitor Ollama logs for errors
Poor Quality AI Responses
Problem: AI generates irrelevant or inappropriate responses
Solutions:
- Review and refine the prompt engineering
- Add more specific rules and constraints
- Provide examples in the prompt of good vs bad responses
- Adjust topic word count (increase from 2-4 to 3-6 words)
- Test with different Ollama models (e.g., llama3.1:70b for better quality)
- Ensure email content is being passed correctly to AI
Auto-Replies Not Sent
Problem: Workflow executes but emails not delivered
Solutions:
- Verify SMTP credentials and server connectivity
- Check fromEmail address is correct
- Review SMTP server logs for errors
- Test SMTP sending independently
- Ensure "Allow unauthorized certificates" is enabled if needed
- Check if emails are being filtered by spam filters
- Verify SPF/DKIM records for your domain
High Resource Usage
Problem: Ollama consuming excessive CPU/RAM
Solutions:
- Reduce context window size (from 4096 to 2048)
- Use a smaller model variant (llama3.1:8b instead of default)
- Limit concurrent workflow executions in n8n
- Add delay/throttling between email processing
- Consider using a remote Ollama instance with better hardware
- Monitor email volume and processing time
IMAP Connection Failures
Problem: Workflow can't connect to email server
Solutions:
- Verify IMAP credentials are correct
- Check if IMAP is enabled on email account
- Ensure SSL/TLS settings match server requirements
- For Gmail: enable "Less secure app access" or use App Passwords
- Check firewall allows outbound connections on IMAP port (993)
- Test IMAP connection using email client (Thunderbird, Outlook)
Workflow Not Triggering
Problem: Workflow doesn't execute automatically
Solutions:
- Verify workflow is in "Active" state
- Check trigger node configuration and schedule
- Review n8n system logs for scheduler issues
- Ensure n8n instance has sufficient resources
- Test manual execution to isolate trigger issues
- Check if n8n workflow execution queue is backed up
Workflow Architecture
Node Descriptions
Check Incoming Emails - IMAP: Polls email server at regular intervals to retrieve new messages from the configured mailbox.
Send Notification from Incoming Email: Immediately sends formatted notification to Telegram for every new email detected, regardless of spam status.
Dedicate Filtering As No-Response: Evaluates emails against spam filter criteria to determine if AI processing should occur.
No Operation: Placeholder node for filtered emails that should not receive an auto-reply (spam, newsletters, automated messages).
Ollama Model: Provides the AI language model (llama3.1) used for natural language processing and response generation.
Basic LLM Chain: Executes the AI prompt against the email content to generate contextual auto-reply text.
Send Auto-Response in SMTP: Sends the AI-generated acknowledgment email back to the original sender via SMTP server.
Send Notification from Response: Sends confirmation to Telegram showing the auto-reply was successfully sent, including the AI-generated content.
AI Processing Pipeline
- Email Content Extraction: Email body text is extracted from IMAP data
- Context Loading: Email content is passed to LLM with prompt instructions
- Topic Analysis: AI identifies main subject or purpose in 2-4 words
- Template Population: AI fills response template with identified topic
- Output Formatting: Response is formatted and cleaned for email delivery
- Quality Assurance: n8n validates response before sending