
Convert GIF to MP4 with FFmpegAPI

Workflow preview
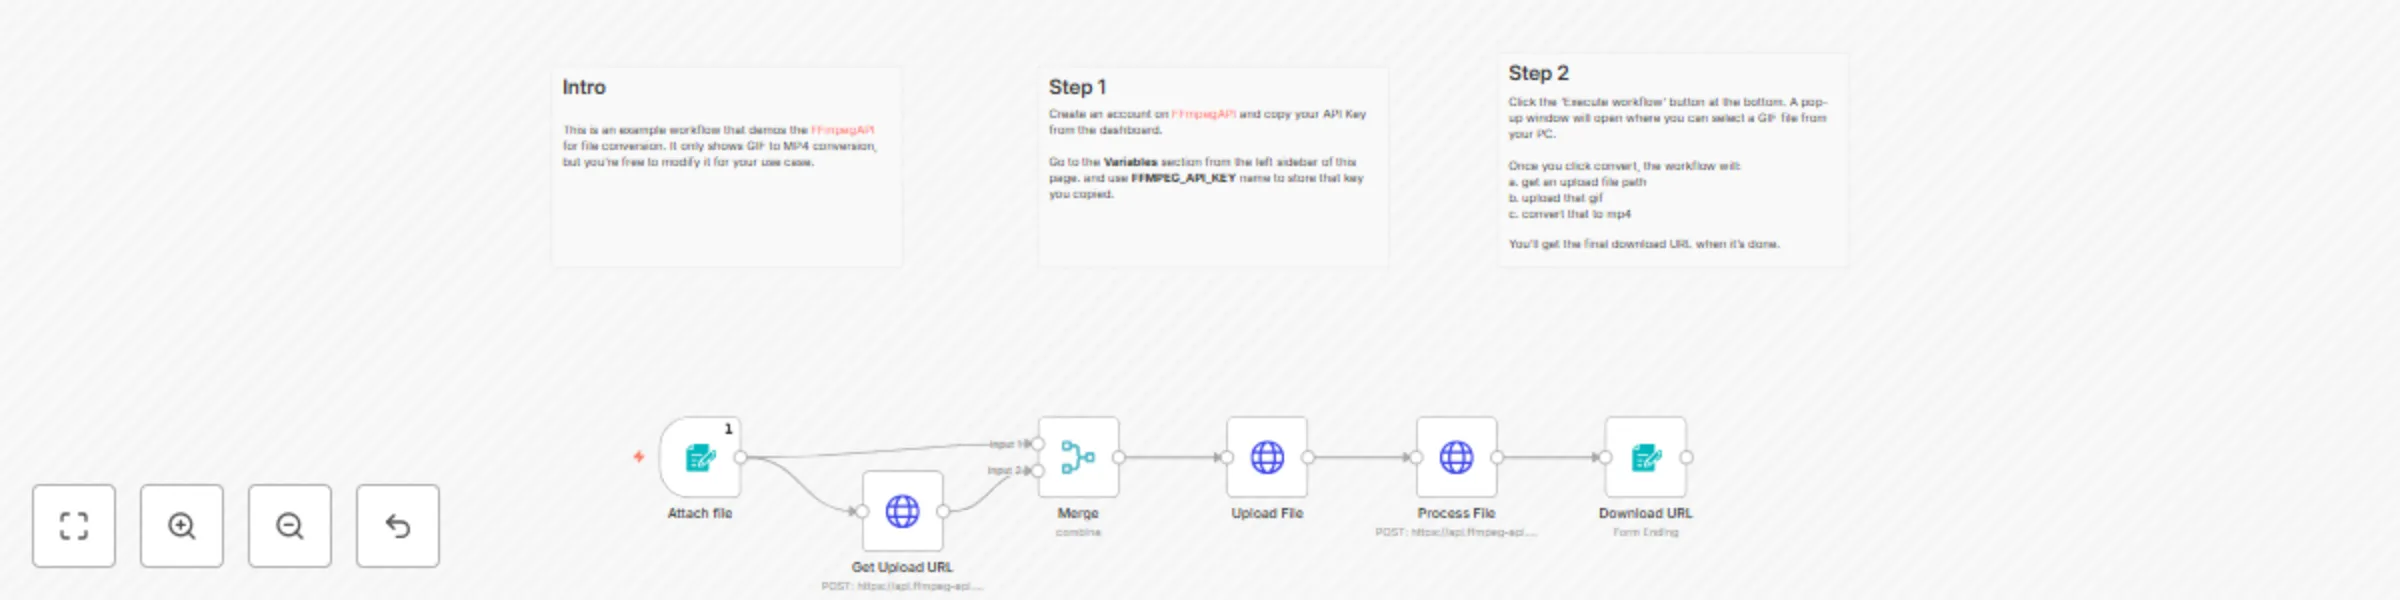
Workflow preview
100%
Convert GIF to MP4 with FFmpegAPI preview
Open on n8n.io

Important notice

This workflow is provided as-is. Please review and test before using in production.

1. Workflow Overview

FFmpeg is a powerful tool for media processing. While it can be used to perform virtually any kind of media processing (such as applying filters, cropping, or merging), this workflow only demonstra...

Best for

  • File Management automation workflows
  • intermediate n8n builders looking for reusable templates

Tools used

n8n-nodes-base.httprequest, n8n-nodes-base.merge, n8n-nodes-base.formtrigger, n8n-nodes-base.form, n8n-nodes-base.stickynote

Source and attribution

This workflow is cataloged by N8N Workflows and links back to its original n8n.io source page by Matt Delaney.

Original n8n.io source

1.1 Workflow description

Title
Convert GIF to MP4 with FFmpegAPI
Workflow name
Convert GIF to MP4 with FFmpegAPI

FFmpeg is a powerful tool for media processing. While it can be used to perform virtually any kind of media processing (such as applying filters, cropping, or merging), this workflow only demonstrates format conversion: GIF to MP4.

This workflow uses a REST API for FFmpeg. Be sure to follow the steps outlined in the notes to create a free account and get an API key.

How to use:

Execute the workflow to bring up the form. You can select the GIF that you want to convert. Once selected, click 'Convert'. You'll get the converted MP4 URL a few seconds later. Go ahead and download that.

How it works

Here is a high-level overview of how it works:

  1. Once you select a file and click 'Convert', we upload the file to n8n and get its name.
  2. The name is then used to create a file entry in FFmpegAPI and get an Upload URL and a file path.
  3. The upload URL is then used to upload the binary assets from step 1.
  4. Finally, the file path from step 2 is used to process the file and convert it into an MP4.
  5. The download URL is returned at the last step so you can download the final file.

Requirements

  • A free API key from FFmpegAPI

Customization

  • You can change the first node (Attach file) to accept multiple or different file formats. Currently, it's only restricted to .gif files.
  • The Process file node can also be changed to perform any other operation on the file. Consult the FFmpegAPI docs for more information.

1.2 Logical Blocks

This catalog entry is organized from the workflow JSON. The node-level section below shows the executable blocks available for review before importing the template.

2. Block-by-Block Analysis

Block 1 - Get Upload URL

Type / Role
n8n-nodes-base.httpRequest - httpRequest
Config choices
Version 4.2

Block 2 - Upload File

Type / Role
n8n-nodes-base.httpRequest - httpRequest
Config choices
Version 4.2

Block 3 - Merge

Type / Role
n8n-nodes-base.merge - merge
Config choices
Version 3.2

Block 4 - Process File

Type / Role
n8n-nodes-base.httpRequest - httpRequest
Config choices
Version 4.2

Block 5 - Attach file

Type / Role
n8n-nodes-base.formTrigger - formTrigger
Config choices
Version 2.3

Block 6 - Download URL

Type / Role
n8n-nodes-base.form - form
Config choices
Version 2.3

Block 7 - Sticky Note

Type / Role
n8n-nodes-base.stickyNote - stickyNote
Config choices
Version 1

Block 8 - Sticky Note1

Type / Role
n8n-nodes-base.stickyNote - stickyNote
Config choices
Version 1

Block 9 - Sticky Note2

Type / Role
n8n-nodes-base.stickyNote - stickyNote
Config choices
Version 1

3. Summary Table

Workflow Convert GIF to MP4 with FFmpegAPI
Complexity intermediate
Nodes 9
Categories File Management
Author Matt Delaney
Published 06 Sept 2025

4. Reproducing the Workflow from Scratch

  1. 1. Download the workflow JSON

    Use the JSON export at /data/workflows/8321/8321.json as the source template for this automation.

  2. 2. Import the template into n8n

    Open n8n, import the downloaded JSON, and review each node before activating the workflow.

  3. 3. Configure credentials and variables

    Replace placeholder credentials, API keys, webhook URLs, account IDs, and environment-specific values with your own settings.

  4. 4. Test with sample data

    Run the workflow manually or in a staging workspace, inspect node output, and confirm downstream systems receive the expected data.

  5. 5. Activate and monitor

    Enable the workflow only after testing, then monitor executions, errors, and rate limits during the first production runs.

5. General Notes & Resources

Review imported nodes carefully before activation. This catalog entry is intended to help you inspect the workflow structure, understand required services, and find related templates faster.

Node names, credentials, schedules, webhook paths, and external service limits may need adjustment for your workspace.

Frequently asked questions

What does Convert GIF to MP4 with FFmpegAPI do?

FFmpeg is a powerful tool for media processing. While it can be used to perform virtually any kind of media processing (such as applying filters, cropping, or merging), this workflow only demonstra...

What do I need before importing this workflow?

Review the workflow JSON, configure any required credentials in n8n, and test the automation in a safe workspace before using it in production.

Can I customize this workflow?

Yes. Use the block-by-block analysis and the downloadable JSON to inspect each node, then adjust credentials, prompts, schedules, filters, or destinations for your File Management use case.



