
Proxmox AI agent with n8n and generative AI integration

Workflow preview
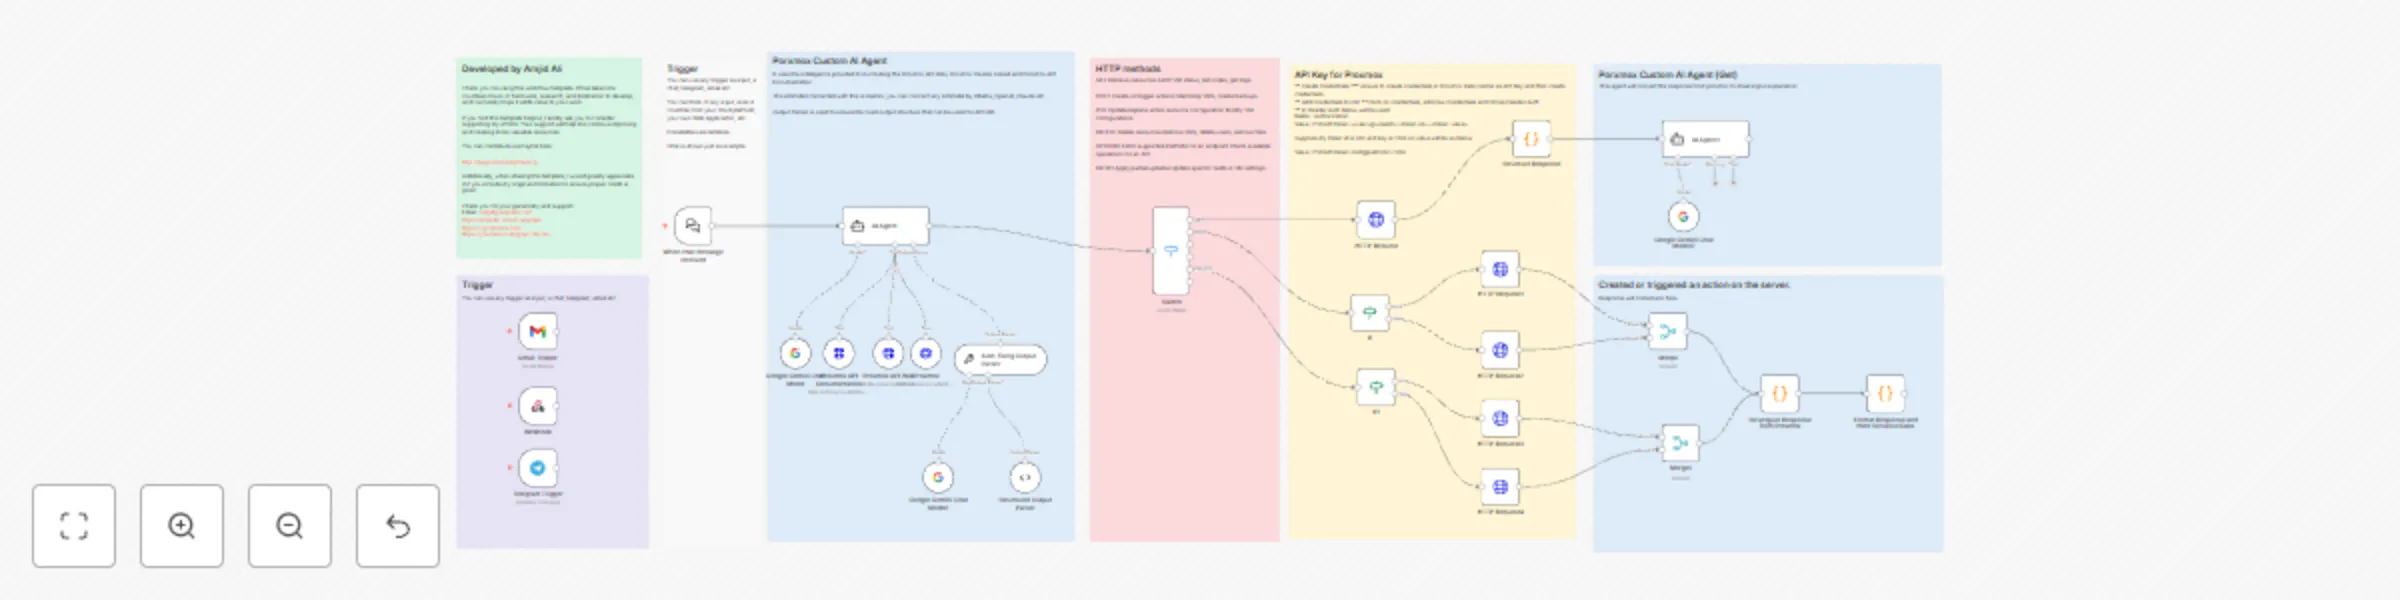
Workflow preview
100%
Proxmox AI agent with n8n and generative AI integration preview
Open on n8n.io

Important notice

This workflow is provided as-is. Please review and test before using in production.

1. Workflow Overview

Proxmox AI Agent with n8n and Generative AI Integration This template automates IT operations on a Proxmox Virtual Environment (VE) using an AI powered conversational agent built with n8n . By inte...

Best for

  • DevOps automation workflows
  • AI Chatbot automation workflows
  • advanced n8n builders looking for reusable templates

Tools used

n8n-nodes-base.httprequest, @n8n/n8n-nodes-langchain.toolhttprequest, @n8n/n8n-nodes-langchain.outputparserautofixing, @n8n/n8n-nodes-langchain.lmchatgooglegemini, @n8n/n8n-nodes-langchain.outputparserstructured, n8n-nodes-base.stickynote, @n8n/n8n-nodes-langchain.chattrigger, n8n-nodes-base.telegramtrigger

Source and attribution

This workflow is cataloged by N8N Workflows and links back to its original n8n.io source page by Amjid Ali.

Original n8n.io source

1.1 Workflow description

Title
Proxmox AI agent with n8n and generative AI integration
Workflow name
Proxmox AI agent with n8n and generative AI integration

Proxmox AI Agent with n8n and Generative AI Integration

This template automates IT operations on a Proxmox Virtual Environment (VE) using an AI-powered conversational agent built with n8n. By integrating Proxmox APIs and generative AI models (e.g., Google Gemini), the workflow converts natural language commands into API calls, enabling seamless management of your Proxmox nodes, VMs, and clusters. Buy My Book:
Mastering n8n on Amazon

Full Courses & Tutorials:
http://lms.syncbricks.com

Watch Video on Youtube

How It Works

  1. Trigger Mechanism

    • The workflow can be triggered through multiple channels like chat (Telegram, email, or n8n's built-in chat).
    • Interact with the AI agent conversationally.
  2. AI-Powered Parsing

    • A connected AI model (Google Gemini or other compatible models like OpenAI or Claude) processes your natural language input to determine the required Proxmox API operation.
  3. API Call Generation

    • The AI parses the input and generates structured JSON output, which includes:
      • response_type: The HTTP method (GET, POST, PUT, DELETE).
      • url: The Proxmox API endpoint to execute.
      • details: Any required payload parameters for the API call.
  4. Proxmox API Execution

    • The structured output is used to make HTTP requests to the Proxmox VE API. The workflow supports various operations, such as:
      • Retrieving cluster or node information.
      • Creating, deleting, starting, or stopping VMs.
      • Migrating VMs between nodes.
      • Updating or resizing VM configurations.
  5. Response Formatting

    • The workflow formats API responses into a user-friendly summary. For example:
      • Success messages for operations (e.g., "VM started successfully").
      • Error messages with missing parameter details.
  6. Extensibility

    • You can enhance the workflow by connecting additional triggers, external services, or AI models. It supports:
      • Telegram/Slack integration for real-time notifications.
      • Backup and restore workflows.
      • Cloud monitoring extensions.

Key Features

  • Multi-Channel Input: Use chat, email, or custom triggers to communicate with the AI agent.
  • Low-Code Automation: Easily customize the workflow to suit your Proxmox environment.
  • Generative AI Integration: Supports advanced AI models for precise command interpretation.
  • Proxmox API Compatibility: Fully adheres to Proxmox API specifications for secure and reliable operations.
  • Error Handling: Detects and informs you of missing or invalid parameters in your requests.

Example Use Cases

  1. Create a Virtual Machine

    • Input: "Create a VM with 4 cores, 8GB RAM, and 50GB disk on psb1."
    • Action: Sends a POST request to Proxmox to create the VM with specified configurations.
  2. Start a VM

    • Input: "Start VM 105 on node psb2."
    • Action: Executes a POST request to start the specified VM.
  3. Retrieve Node Details

    • Input: "Show the memory usage of psb3."
    • Action: Sends a GET request and returns the node's resource utilization.
  4. Migrate a VM

    • Input: "Migrate VM 202 from psb1 to psb3."
    • Action: Executes a POST request to move the VM with optional online migration.

Pre-Requisites

  1. Proxmox API Configuration

    • Enable the Proxmox API and generate API keys in the Proxmox Data Center.
    • Use the Authorization header with the format:
      PVEAPIToken=<user>@<realm>!<token-id>=<token-value>
  2. n8n Setup

    • Add Proxmox API credentials in n8n using Header Auth.
    • Connect a generative AI model (e.g., Google Gemini) via the relevant credential type.
  3. Access the Workflow

    • Import this template into your n8n instance.
    • Replace placeholder credentials with your Proxmox and AI service details.

Additional Notes

  • This template is designed for Proxmox 7.x and above.
  • For advanced features like backup, VM snapshots, and detailed node monitoring, you can extend this workflow.
  • Always test with a non-production Proxmox environment before deploying in live systems.

Start with n8n

Learn n8n with Amjid

Get n8n Book

What is Proxmox

1.2 Logical Blocks

This catalog entry is organized from the workflow JSON. The node-level section below shows the executable blocks available for review before importing the template.

2. Block-by-Block Analysis

Block 1 - HTTP Request1

Type / Role
n8n-nodes-base.httpRequest - httpRequest
Config choices
Version 4.2

Block 2 - Proxmox API Documentation

Type / Role
@n8n/n8n-nodes-langchain.toolHttpRequest - toolHttpRequest
Config choices
Version 1.1

Block 3 - Auto-fixing Output Parser

Type / Role
@n8n/n8n-nodes-langchain.outputParserAutofixing - outputParserAutofixing
Config choices
Version 1

Block 4 - Google Gemini Chat Model1

Type / Role
@n8n/n8n-nodes-langchain.lmChatGoogleGemini - lmChatGoogleGemini
Config choices
Version 1

Block 5 - Structured Output Parser

Type / Role
@n8n/n8n-nodes-langchain.outputParserStructured - outputParserStructured
Config choices
Version 1.2

Block 6 - Proxmox

Type / Role
@n8n/n8n-nodes-langchain.toolHttpRequest - toolHttpRequest
Config choices
Version 1.1

Block 7 - HTTP Request

Type / Role
n8n-nodes-base.httpRequest - httpRequest
Config choices
Version 4.2

Block 8 - Sticky Note

Type / Role
n8n-nodes-base.stickyNote - stickyNote
Config choices
Version 1

Block 9 - Sticky Note1

Type / Role
n8n-nodes-base.stickyNote - stickyNote
Config choices
Version 1

Block 10 - Google Gemini Chat Model2

Type / Role
@n8n/n8n-nodes-langchain.lmChatGoogleGemini - lmChatGoogleGemini
Config choices
Version 1

Block 11 - Sticky Note2

Type / Role
n8n-nodes-base.stickyNote - stickyNote
Config choices
Version 1

Block 12 - When chat message received

Type / Role
@n8n/n8n-nodes-langchain.chatTrigger - chatTrigger
Config choices
Version 1.1

Block 13 - Telegram Trigger

Type / Role
n8n-nodes-base.telegramTrigger - telegramTrigger
Config choices
Version 1.1

Block 14 - Gmail Trigger

Type / Role
n8n-nodes-base.gmailTrigger - gmailTrigger
Config choices
Version 1.2

Block 15 - Webhook

Type / Role
n8n-nodes-base.webhook - webhook
Config choices
Version 2

Block 16 - Sticky Note3

Type / Role
n8n-nodes-base.stickyNote - stickyNote
Config choices
Version 1

Block 17 - Proxmox API Wiki

Type / Role
@n8n/n8n-nodes-langchain.toolHttpRequest - toolHttpRequest
Config choices
Version 1.1

Block 18 - Structure Response

Type / Role
n8n-nodes-base.code - code
Config choices
Version 2

Block 19 - Sticky Note4

Type / Role
n8n-nodes-base.stickyNote - stickyNote
Config choices
Version 1

Block 20 - Sticky Note5

Type / Role
n8n-nodes-base.stickyNote - stickyNote
Config choices
Version 1

Block 21 - Structgure Response from Proxmox

Type / Role
n8n-nodes-base.code - code
Config choices
Version 2

Block 22 - Format Response and Hide Sensitive Data

Type / Role
n8n-nodes-base.code - code
Config choices
Version 2

Block 23 - If

Type / Role
n8n-nodes-base.if - if
Config choices
Version 2.2

Block 24 - HTTP Request2

Type / Role
n8n-nodes-base.httpRequest - httpRequest
Config choices
Version 4.2

Showing the first 24 of 35 workflow blocks. Download the JSON for the full node graph.

3. Summary Table

Workflow Proxmox AI agent with n8n and generative AI integration
Complexity advanced
Nodes 35
Categories DevOps, AI Chatbot
Author Amjid Ali
Published 18 Jan 2025

4. Reproducing the Workflow from Scratch

  1. 1. Download the workflow JSON

    Use the JSON export at /data/workflows/2749/2749.json as the source template for this automation.

  2. 2. Import the template into n8n

    Open n8n, import the downloaded JSON, and review each node before activating the workflow.

  3. 3. Configure credentials and variables

    Replace placeholder credentials, API keys, webhook URLs, account IDs, and environment-specific values with your own settings.

  4. 4. Test with sample data

    Run the workflow manually or in a staging workspace, inspect node output, and confirm downstream systems receive the expected data.

  5. 5. Activate and monitor

    Enable the workflow only after testing, then monitor executions, errors, and rate limits during the first production runs.

5. General Notes & Resources

Review imported nodes carefully before activation. This catalog entry is intended to help you inspect the workflow structure, understand required services, and find related templates faster.

Node names, credentials, schedules, webhook paths, and external service limits may need adjustment for your workspace.

Frequently asked questions

What does Proxmox AI agent with n8n and generative AI integration do?

Proxmox AI Agent with n8n and Generative AI Integration This template automates IT operations on a Proxmox Virtual Environment (VE) using an AI powered conversational agent built with n8n . By inte...

What do I need before importing this workflow?

Review the workflow JSON, configure any required credentials in n8n, and test the automation in a safe workspace before using it in production.

Can I customize this workflow?

Yes. Use the block-by-block analysis and the downloadable JSON to inspect each node, then adjust credentials, prompts, schedules, filters, or destinations for your DevOps, AI Chatbot use case.



