
πŸŽ“ Learn Workflow Logic with Merge, IF & Switch Operations

Workflow preview
Workflow preview
100%
πŸŽ“ Learn Workflow Logic with Merge, IF & Switch Operations preview
Open on n8n.io

Important notice

This workflow is provided as-is. Please review and test before using in production.

1. Workflow Overview

How it works Ever wonder how to make your workflows smarter? How to handle different types of data in different ways? This template is a hands on tutorial that teaches you the three most fundamenta...

Best for

  • Engineering automation workflows
  • advanced n8n builders looking for reusable templates

Tools used

n8n-nodes-base.manualtrigger, n8n-nodes-base.stickynote, n8n-nodes-base.set, n8n-nodes-base.noop, n8n-nodes-base.switch, n8n-nodes-base.merge, n8n-nodes-base.if

Source and attribution

This workflow is cataloged by N8N Workflows and links back to its original n8n.io source page by Lucas Peyrin.

Original n8n.io source

1.1 Workflow description

Title
πŸŽ“ Learn Workflow Logic with Merge, IF & Switch Operations
Workflow name
πŸŽ“ Learn Workflow Logic with Merge, IF & Switch Operations

How it works

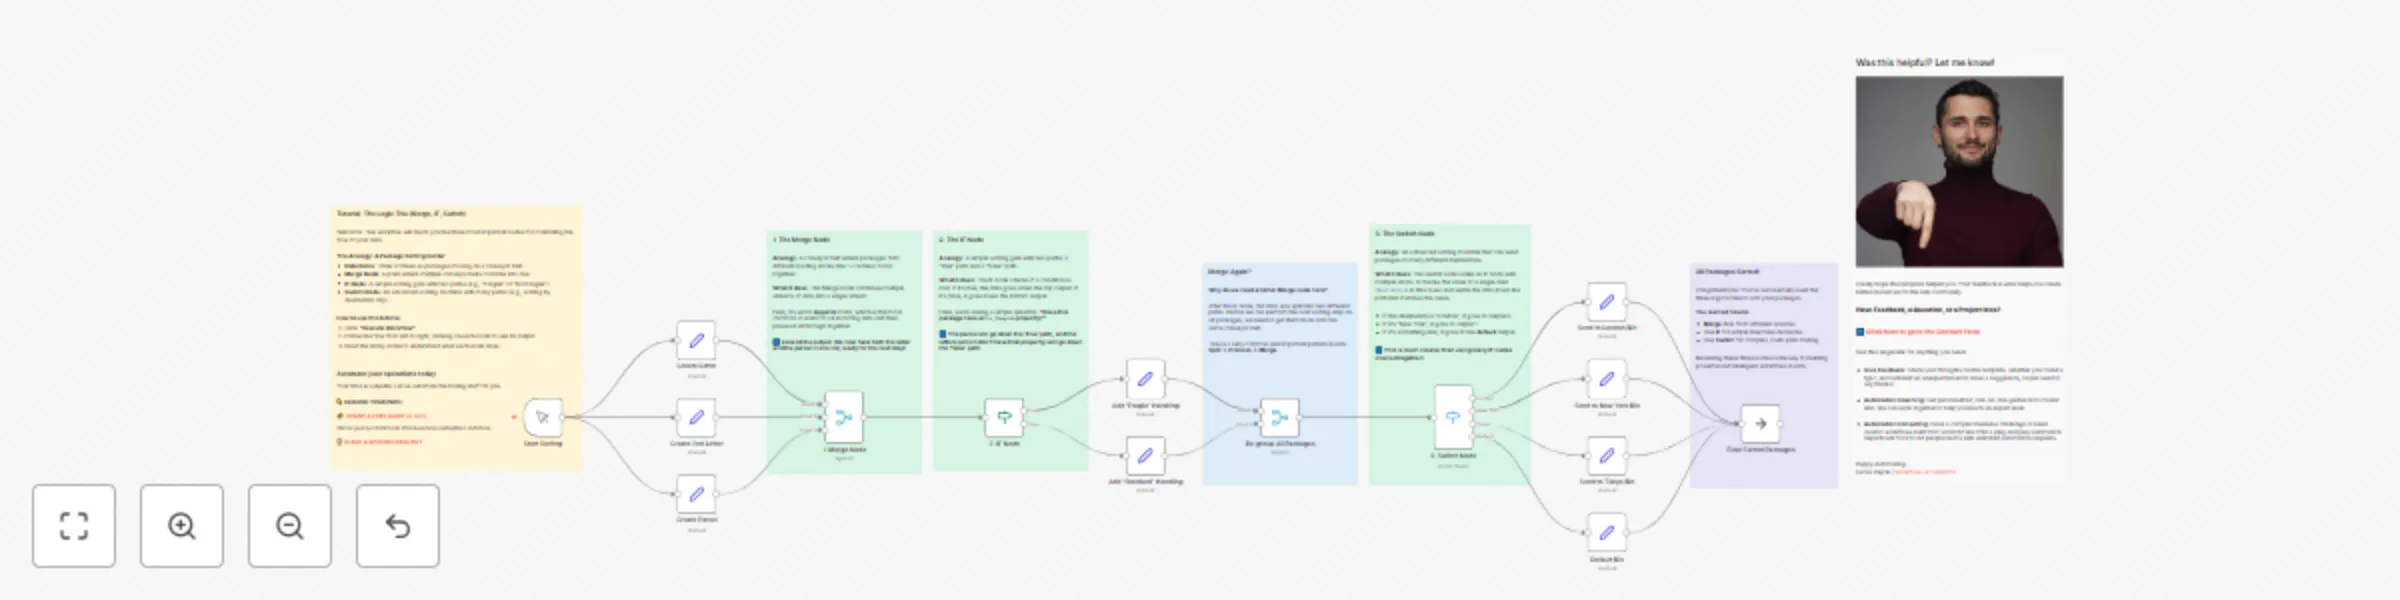
Ever wonder how to make your workflows smarter? How to handle different types of data in different ways? This template is a hands-on tutorial that teaches you the three most fundamental nodes for controlling the flow of your automations: Merge, IF, and Switch.

To make it easy to understand, we use a simple package sorting center analogy:

  • Data Items are packages on a conveyor belt.
  • The Merge Node is where multiple conveyor belts combine into one.
  • The IF Node is a simple sorting gate with two paths (e.g., "Fragile" or "Not Fragile").
  • The Switch Node is an advanced sorting machine that routes packages to many different destinations.

This workflow takes you on a step-by-step journey through the sorting center:

  1. Creating Packages: Three different "packages" (two letters and one parcel) are created using Set nodes.
  2. Merging: The first Merge node combines all three packages onto a single conveyor belt so they can be processed together.
  3. Simple Sorting: An IF node checks if a package is fragile. If true, it's sent down one path; if false, it's sent down another.
  4. Re-Grouping: After being processed separately, another Merge node brings the packages back together. This "Split > Process > Merge" pattern is a critical concept in n8n!
  5. Advanced Sorting: A Switch node inspects each package's destination and routes it to the correct output (London, New York, Tokyo, or a Default bin).

By the end, you'll see how all packages have been correctly sorted, and you'll have a solid understanding of how to build intelligent, branching logic in your own workflows.

Set up steps

Setup time: 0 minutes!

This template is a self-contained tutorial and requires zero setup.

  1. There are no credentials or external services to configure.
  2. Simply click the "Execute Workflow" button.
  3. Follow the flow from left to right, clicking on each node to see its output and reading the detailed sticky notes to understand what's happening at each stage.

1.2 Logical Blocks

This catalog entry is organized from the workflow JSON. The node-level section below shows the executable blocks available for review before importing the template.

2. Block-by-Block Analysis

Block 1 - Start Sorting

Type / Role
n8n-nodes-base.manualTrigger - manualTrigger
Config choices
Version 1

Block 2 - Sticky Note

Type / Role
n8n-nodes-base.stickyNote - stickyNote
Config choices
Version 1

Block 3 - Sticky Note1

Type / Role
n8n-nodes-base.stickyNote - stickyNote
Config choices
Version 1

Block 4 - Sticky Note2

Type / Role
n8n-nodes-base.stickyNote - stickyNote
Config choices
Version 1

Block 5 - Add 'Fragile' Handling

Type / Role
n8n-nodes-base.set - set
Config choices
Version 3.4

Block 6 - Add 'Standard' Handling

Type / Role
n8n-nodes-base.set - set
Config choices
Version 3.4

Block 7 - Sticky Note3

Type / Role
n8n-nodes-base.stickyNote - stickyNote
Config choices
Version 1

Block 8 - Sticky Note4

Type / Role
n8n-nodes-base.stickyNote - stickyNote
Config choices
Version 1

Block 9 - Send to London Bin

Type / Role
n8n-nodes-base.set - set
Config choices
Version 3.4

Block 10 - Send to New York Bin

Type / Role
n8n-nodes-base.set - set
Config choices
Version 3.4

Block 11 - Send to Tokyo Bin

Type / Role
n8n-nodes-base.set - set
Config choices
Version 3.4

Block 12 - Default Bin

Type / Role
n8n-nodes-base.set - set
Config choices
Version 3.4

Block 13 - Final Sorted Packages

Type / Role
n8n-nodes-base.noOp - noOp
Config choices
Version 1

Block 14 - Sticky Note5

Type / Role
n8n-nodes-base.stickyNote - stickyNote
Config choices
Version 1

Block 15 - 3. Switch Node

Type / Role
n8n-nodes-base.switch - switch
Config choices
Version 3.2

Block 16 - Create Letter

Type / Role
n8n-nodes-base.set - set
Config choices
Version 3.4

Block 17 - 1. Merge Node

Type / Role
n8n-nodes-base.merge - merge
Config choices
Version 3.2

Block 18 - 2. IF Node

Type / Role
n8n-nodes-base.if - if
Config choices
Version 2.2

Block 19 - Re-group All Packages

Type / Role
n8n-nodes-base.merge - merge
Config choices
Version 3.2

Block 20 - Create 2nd Letter

Type / Role
n8n-nodes-base.set - set
Config choices
Version 3.4

Block 21 - Create Parcel

Type / Role
n8n-nodes-base.set - set
Config choices
Version 3.4

Block 22 - Sticky Note6

Type / Role
n8n-nodes-base.stickyNote - stickyNote
Config choices
Version 1

3. Summary Table

Workflow πŸŽ“ Learn Workflow Logic with Merge, IF & Switch Operations
Complexity advanced
Nodes 22
Categories Engineering
Author Lucas Peyrin
Published 14 Jul 2025

4. Reproducing the Workflow from Scratch

  1. 1. Download the workflow JSON

    Use the JSON export at /data/workflows/5996/5996.json as the source template for this automation.

  2. 2. Import the template into n8n

    Open n8n, import the downloaded JSON, and review each node before activating the workflow.

  3. 3. Configure credentials and variables

    Replace placeholder credentials, API keys, webhook URLs, account IDs, and environment-specific values with your own settings.

  4. 4. Test with sample data

    Run the workflow manually or in a staging workspace, inspect node output, and confirm downstream systems receive the expected data.

  5. 5. Activate and monitor

    Enable the workflow only after testing, then monitor executions, errors, and rate limits during the first production runs.

5. General Notes & Resources

Review imported nodes carefully before activation. This catalog entry is intended to help you inspect the workflow structure, understand required services, and find related templates faster.

Node names, credentials, schedules, webhook paths, and external service limits may need adjustment for your workspace.

Frequently asked questions

What does πŸŽ“ Learn Workflow Logic with Merge, IF & Switch Operations do?

How it works Ever wonder how to make your workflows smarter? How to handle different types of data in different ways? This template is a hands on tutorial that teaches you the three most fundamenta...

What do I need before importing this workflow?

Review the workflow JSON, configure any required credentials in n8n, and test the automation in a safe workspace before using it in production.

Can I customize this workflow?

Yes. Use the block-by-block analysis and the downloadable JSON to inspect each node, then adjust credentials, prompts, schedules, filters, or destinations for your Engineering use case.



