
Automate LINE & Google account linking with OAuth2 authentication

Workflow preview
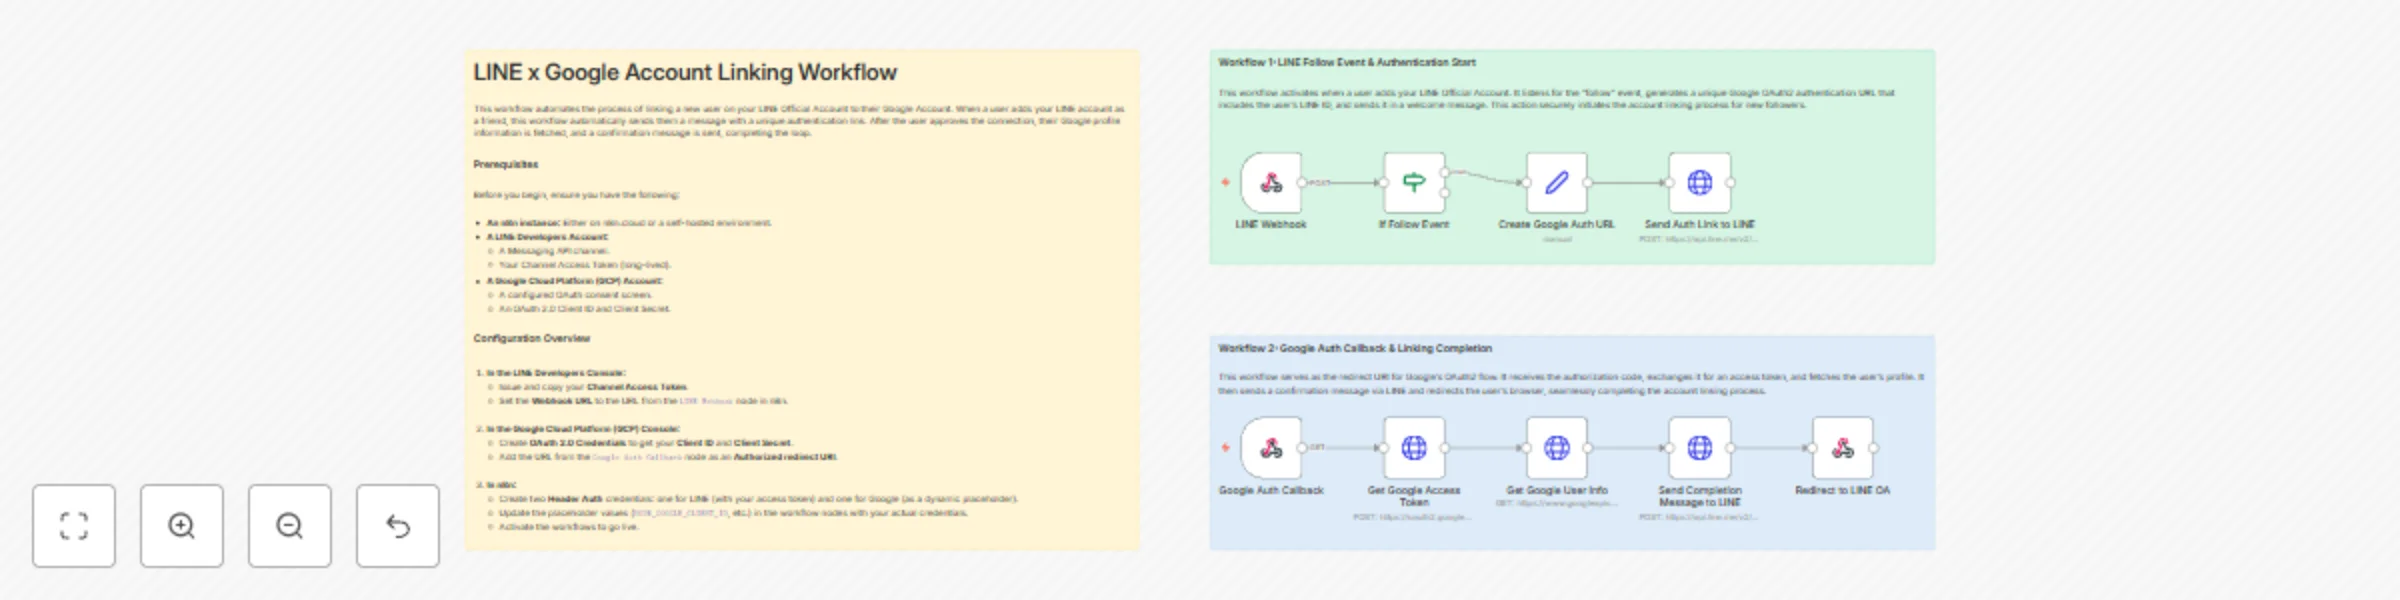
Workflow preview
100%
Automate LINE & Google account linking with OAuth2 authentication preview
Open on n8n.io

Important notice

This workflow is provided as-is. Please review and test before using in production.

1. Workflow Overview

LINE x Google Account Linking Workflow This workflow automates the process of linking a new user on your LINE Official Account to their Google Account. When a user adds your LINE account as a frien...

Best for

  • Miscellaneous automation workflows
  • intermediate n8n builders looking for reusable templates

Tools used

n8n-nodes-base.respondtowebhook, n8n-nodes-base.httprequest, n8n-nodes-base.if, n8n-nodes-base.set, n8n-nodes-base.webhook, n8n-nodes-base.stickynote

Source and attribution

This workflow is cataloged by N8N Workflows and links back to its original n8n.io source page by s3110.

Original n8n.io source

1.1 Workflow description

Title
Automate LINE & Google account linking with OAuth2 authentication
Workflow name
Automate LINE & Google account linking with OAuth2 authentication

LINE x Google Account Linking Workflow

This workflow automates the process of linking a new user on your LINE Official Account to their Google Account. When a user adds your LINE account as a friend, this workflow automatically sends them a message with a unique authentication link. After the user approves the connection, their Google profile information is fetched, and a confirmation message is sent, completing the loop.

Prerequisites

Before you begin, ensure you have the following:

  • An n8n instance: Either on n8n.cloud or a self-hosted environment.
  • A LINE Developers Account:
    • A Messaging API channel.
    • Your Channel Access Token (long-lived).
  • A Google Cloud Platform (GCP) Account:
    • A configured OAuth consent screen.
    • An OAuth 2.0 Client ID and Client Secret.

Setup Instructions

Follow these steps to configure the workflow.

Step 1: Configure LINE Developers Console

  1. Log in to the LINE Developers Console.
  2. Navigate to your provider and select your Messaging API channel.
  3. Go to the Messaging API tab.
  4. Issue a Channel access token (long-lived) and copy the value.
  5. In the Webhook URL field, paste the Test URL from the LINE Webhook node in your n8n workflow.
  6. Enable Use webhook.

Step 2: Configure Google Cloud Platform (GCP)

  1. Log in to the Google Cloud Console and select your project.
  2. Navigate to APIs & Services > OAuth consent screen. Configure it if you haven't already, ensuring you add your own Google account as a test user.
  3. Go to APIs & Services > Credentials.
  4. Click + CREATE CREDENTIALS and select OAuth 2.0 Client ID.
  5. For Application type, choose Web application.
  6. Under Authorized redirect URIs, click + ADD URI and paste the Test URL from the Google Auth Callback node in your n8n workflow.
  7. Click Create. Copy your Client ID and Client Secret.

Step 3: Configure the n8n Workflow

Import the workflow JSON into your n8n canvas and follow these steps to set it up.

1. Configure n8n Credentials

First, set up the credentials that the HTTP Request nodes will use.

  • For the LINE Messaging API:

    1. In n8n, go to Credentials > Add credential.
    2. Search for and select Header Auth.
    3. Set Name to Authorization.
    4. Set Value to Bearer YOUR_LINE_CHANNEL_ACCESS_TOKEN (replace with the token from Step 1).
    5. Save the credential with a memorable name like "LINE Messaging API Auth".
  • For the Google API (Dynamic Token):

    1. Create another Header Auth credential.
    2. Set Name to Authorization.
    3. For Value, enter a placeholder like Bearer dummy_token. This will be replaced dynamically by the workflow.
    4. Save the credential with a name like "Google API Dynamic Token".
2. Update Node Parameters

Now, update the parameters in the following nodes:

  • Create Google Auth URL node:

    • In the value field, replace YOUR_N8N_WEBHOOK_URL_FOR_GOOGLE with the webhook URL of the Google Auth Callback node.
    • Replace YOUR_GOOGLE_CLIENT_ID with the Client ID from GCP (Step 2).
  • Get Google Access Token node:

    • In the jsonBody field, replace YOUR_GOOGLE_CLIENT_ID, YOUR_GOOGLE_CLIENT_SECRET, and YOUR_N8N_WEBHOOK_URL_FOR_GOOGLE with your actual GCP credentials and callback URL.
  • Get Google User Info node:

    • For Authentication, select Header Auth.
    • For Credential for Header Auth, choose the "Google API Dynamic Token" credential you created.
    • Important: Click Add Option > Header To Append. Set the Name to Authorization and the Value to the following expression to use the token from the previous step: Bearer {{ $node["Get Google Access Token"].json["access_token"] }}.
  • Send Auth Link to LINE & Send Completion Message to LINE nodes:

    • For Credential for Header Auth, choose the "LINE Messaging API Auth" credential.
  • Redirect to LINE OA node:

    • In the redirectURL parameter, replace YOUR_LINE_OFFICIAL_ACCOUNT_ID with your LINE OA's ID (e.g., @123abcde).

Step 4: Activate and Test

  1. Save the workflow by clicking the Save button.
  2. Activate the workflow using the toggle in the top-right corner.
  3. On your phone, add your LINE Official Account as a friend. You should receive a message with a link.
  4. Follow the link to authorize with your Google account. After successful authorization, you should receive a completion message in LINE and be redirected.

> Note: When you are ready for production, remember to replace the "Test" webhook URLs in the LINE and GCP consoles with the "Production" URLs from the n8n webhook nodes.

1.2 Logical Blocks

This catalog entry is organized from the workflow JSON. The node-level section below shows the executable blocks available for review before importing the template.

2. Block-by-Block Analysis

Block 1 - Redirect to LINE OA

Type / Role
n8n-nodes-base.respondToWebhook - respondToWebhook
Config choices
Version 1.4

Block 2 - Get Google Access Token

Type / Role
n8n-nodes-base.httpRequest - httpRequest
Config choices
Version 4.3

Block 3 - Get Google User Info

Type / Role
n8n-nodes-base.httpRequest - httpRequest
Config choices
Version 4.3

Block 4 - Send Completion Message to LINE

Type / Role
n8n-nodes-base.httpRequest - httpRequest
Config choices
Version 4.3

Block 5 - If Follow Event

Type / Role
n8n-nodes-base.if - if
Config choices
Version 2.2

Block 6 - Create Google Auth URL

Type / Role
n8n-nodes-base.set - set
Config choices
Version 3.4

Block 7 - Send Auth Link to LINE

Type / Role
n8n-nodes-base.httpRequest - httpRequest
Config choices
Version 4.3

Block 8 - LINE Webhook

Type / Role
n8n-nodes-base.webhook - webhook
Config choices
Version 2.1

Block 9 - Google Auth Callback

Type / Role
n8n-nodes-base.webhook - webhook
Config choices
Version 2.1

Block 10 - Sticky Note

Type / Role
n8n-nodes-base.stickyNote - stickyNote
Config choices
Version 1

Block 11 - Sticky Note1

Type / Role
n8n-nodes-base.stickyNote - stickyNote
Config choices
Version 1

Block 12 - Sticky Note2

Type / Role
n8n-nodes-base.stickyNote - stickyNote
Config choices
Version 1

3. Summary Table

Workflow Automate LINE & Google account linking with OAuth2 authentication
Complexity intermediate
Nodes 12
Categories Miscellaneous
Author s3110
Published 18 Nov 2025

4. Reproducing the Workflow from Scratch

  1. 1. Download the workflow JSON

    Use the JSON export at /data/workflows/10950/10950.json as the source template for this automation.

  2. 2. Import the template into n8n

    Open n8n, import the downloaded JSON, and review each node before activating the workflow.

  3. 3. Configure credentials and variables

    Replace placeholder credentials, API keys, webhook URLs, account IDs, and environment-specific values with your own settings.

  4. 4. Test with sample data

    Run the workflow manually or in a staging workspace, inspect node output, and confirm downstream systems receive the expected data.

  5. 5. Activate and monitor

    Enable the workflow only after testing, then monitor executions, errors, and rate limits during the first production runs.

5. General Notes & Resources

Review imported nodes carefully before activation. This catalog entry is intended to help you inspect the workflow structure, understand required services, and find related templates faster.

Node names, credentials, schedules, webhook paths, and external service limits may need adjustment for your workspace.

Frequently asked questions

What does Automate LINE & Google account linking with OAuth2 authentication do?

LINE x Google Account Linking Workflow This workflow automates the process of linking a new user on your LINE Official Account to their Google Account. When a user adds your LINE account as a frien...

What do I need before importing this workflow?

Review the workflow JSON, configure any required credentials in n8n, and test the automation in a safe workspace before using it in production.

Can I customize this workflow?

Yes. Use the block-by-block analysis and the downloadable JSON to inspect each node, then adjust credentials, prompts, schedules, filters, or destinations for your Miscellaneous use case.



