File Management Workflows
Organize and back up n8n workflows to Google Drive as consolidated JSON
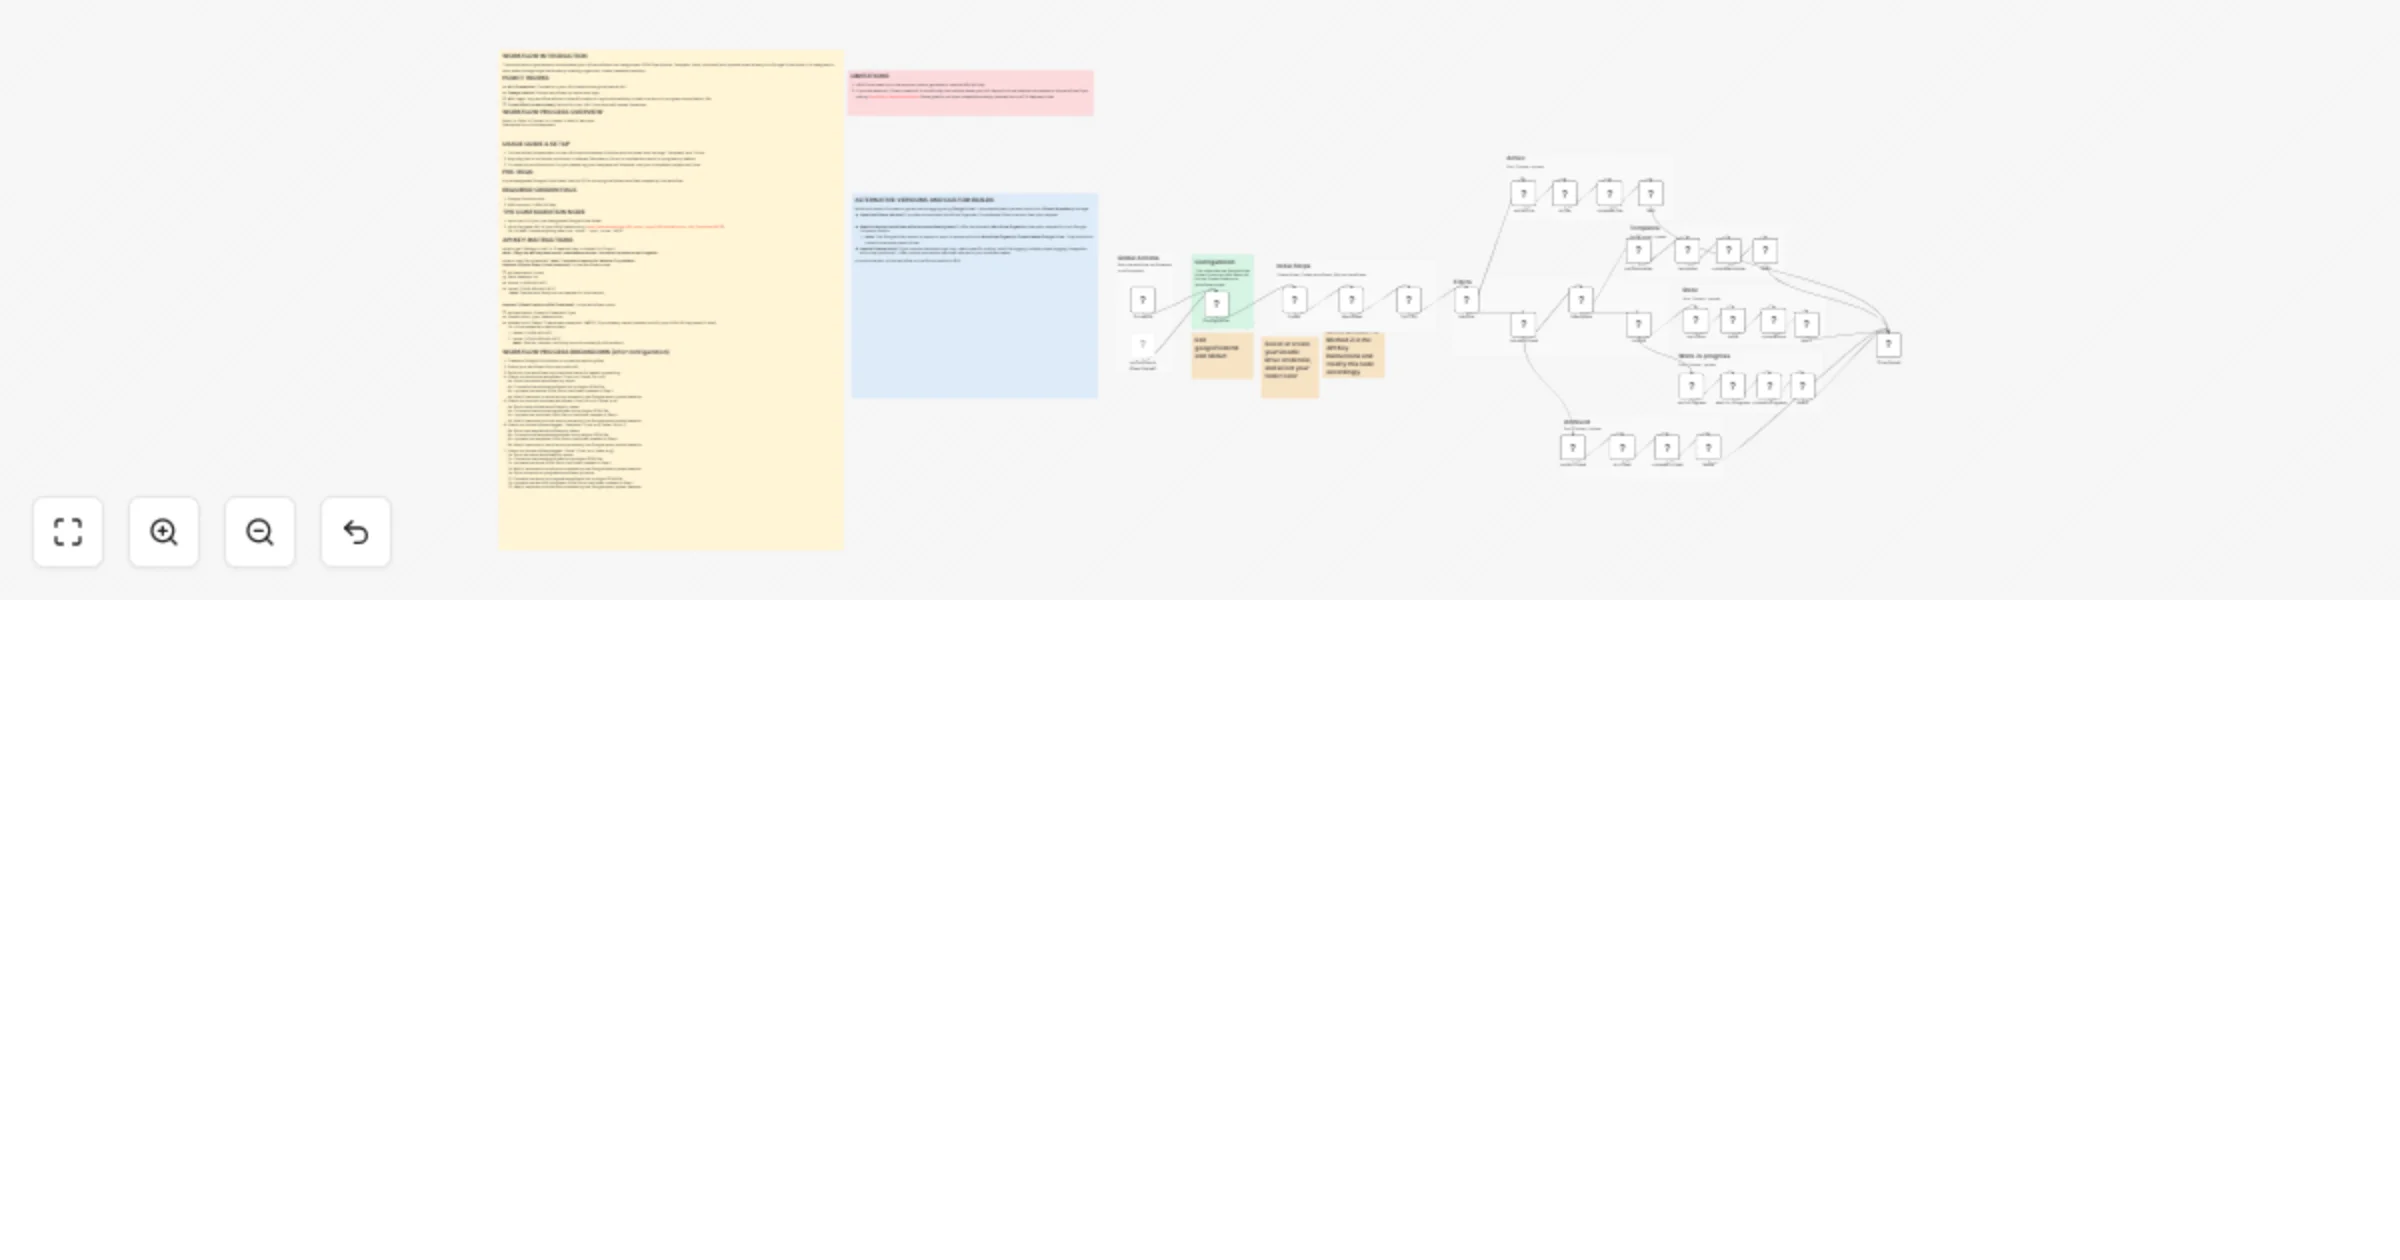
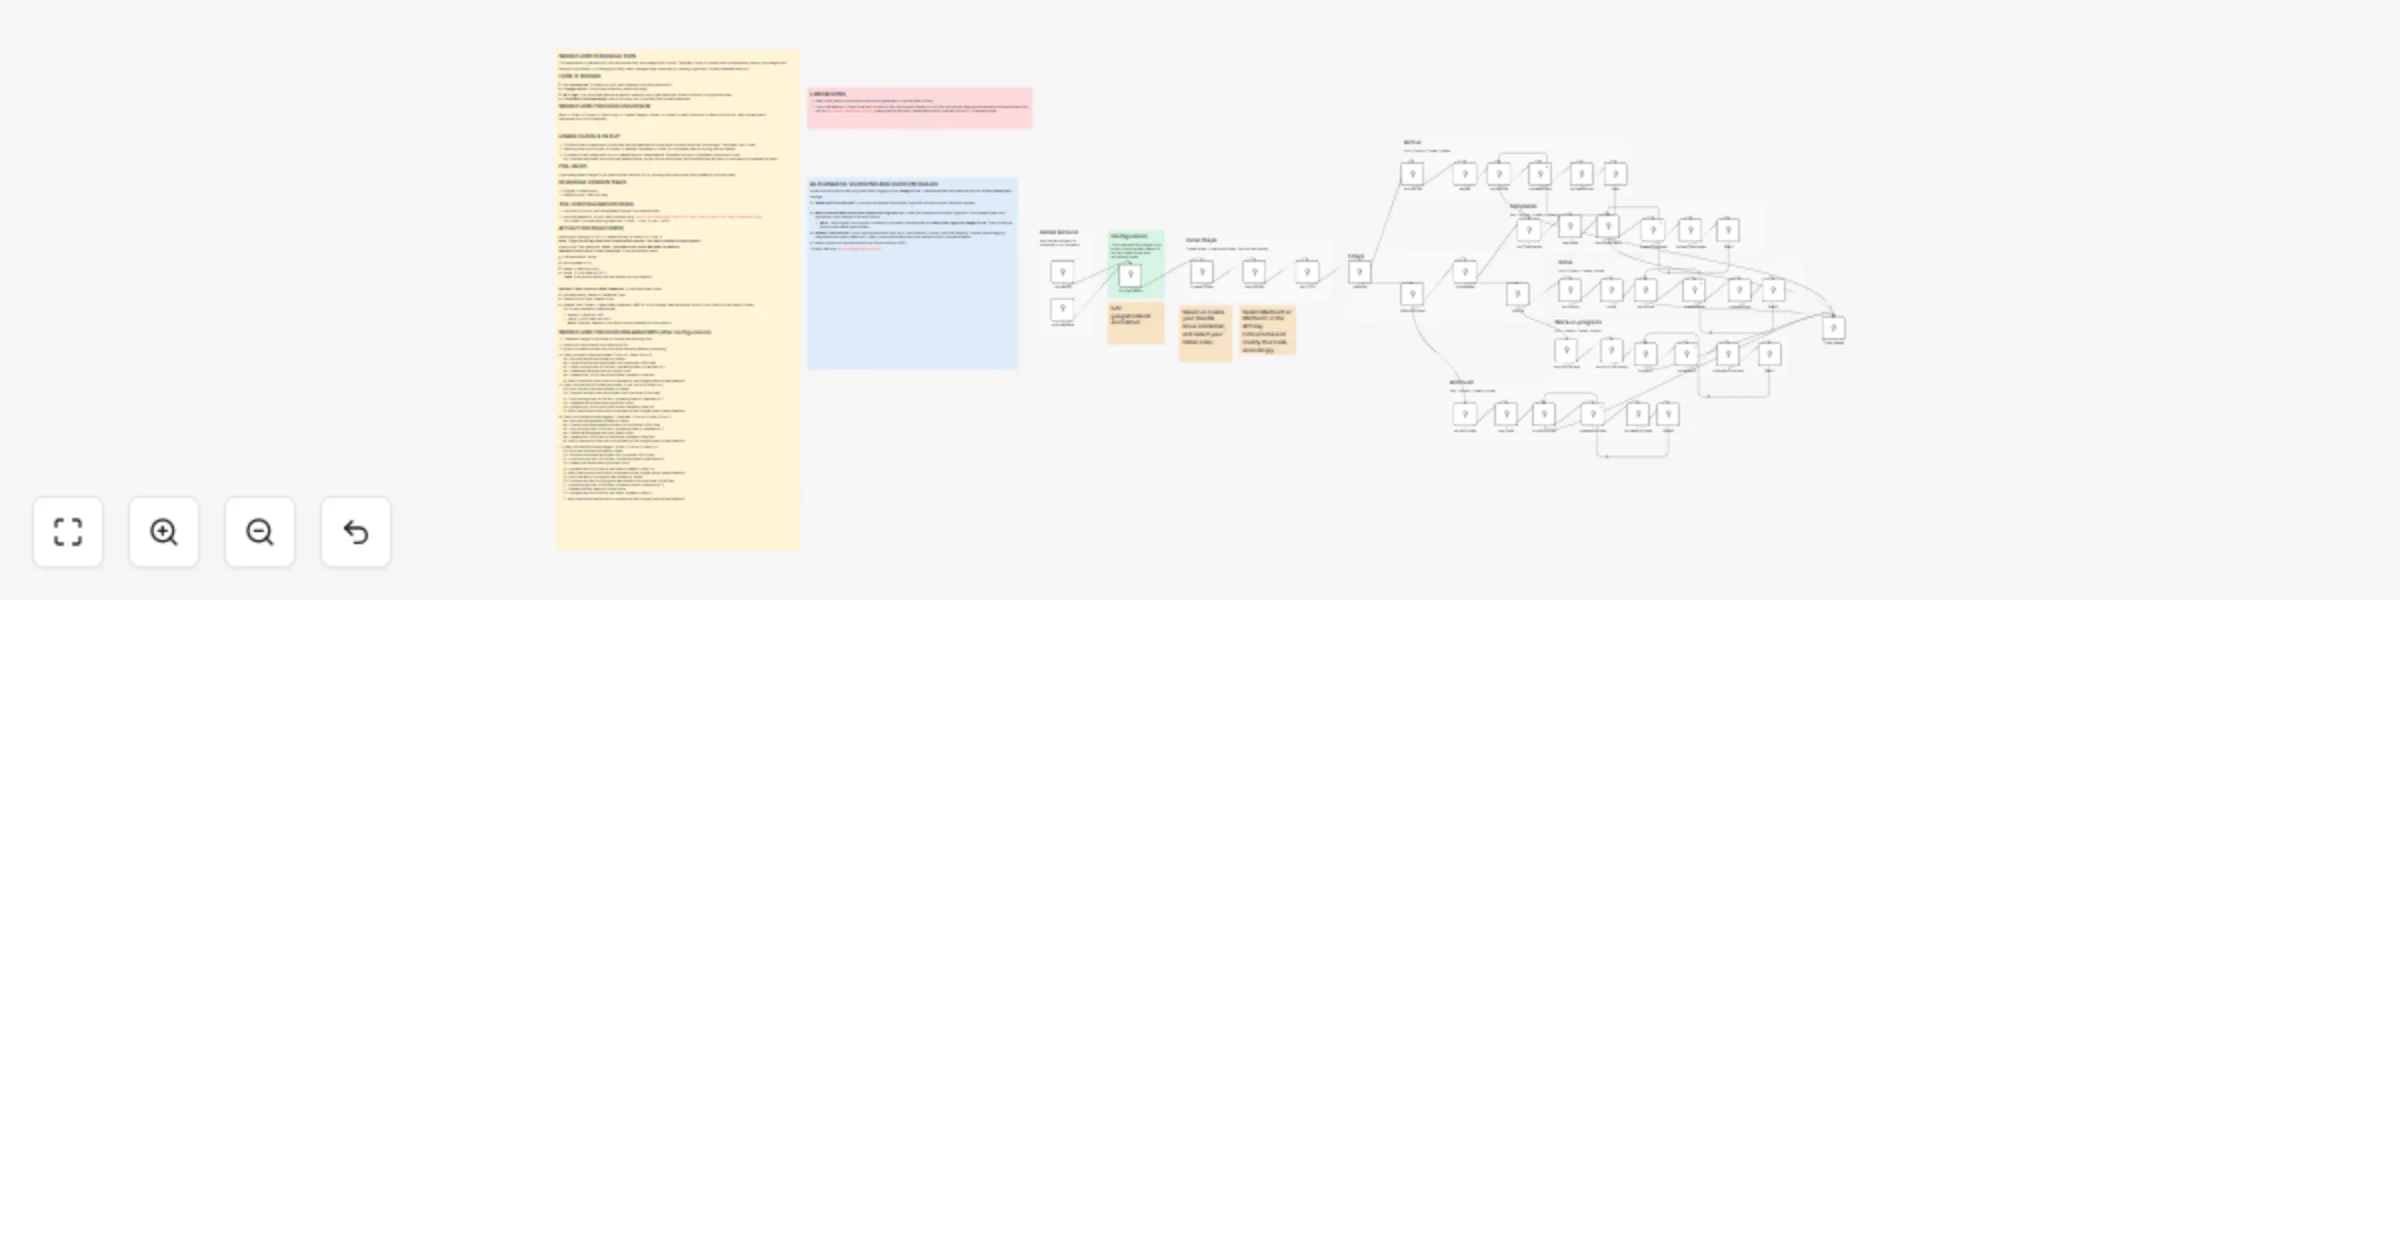
WORKFLOW INTRODUCTION This automation organizes and consolidates your n8n workflows into categorized JSON files (Acti...
Organize and back up n8n workflows to Google Drive folders
WORKFLOW INTRODUCTION This automation organizes your n8n workflows files into categorizes (Active, Template, Done, Ar...
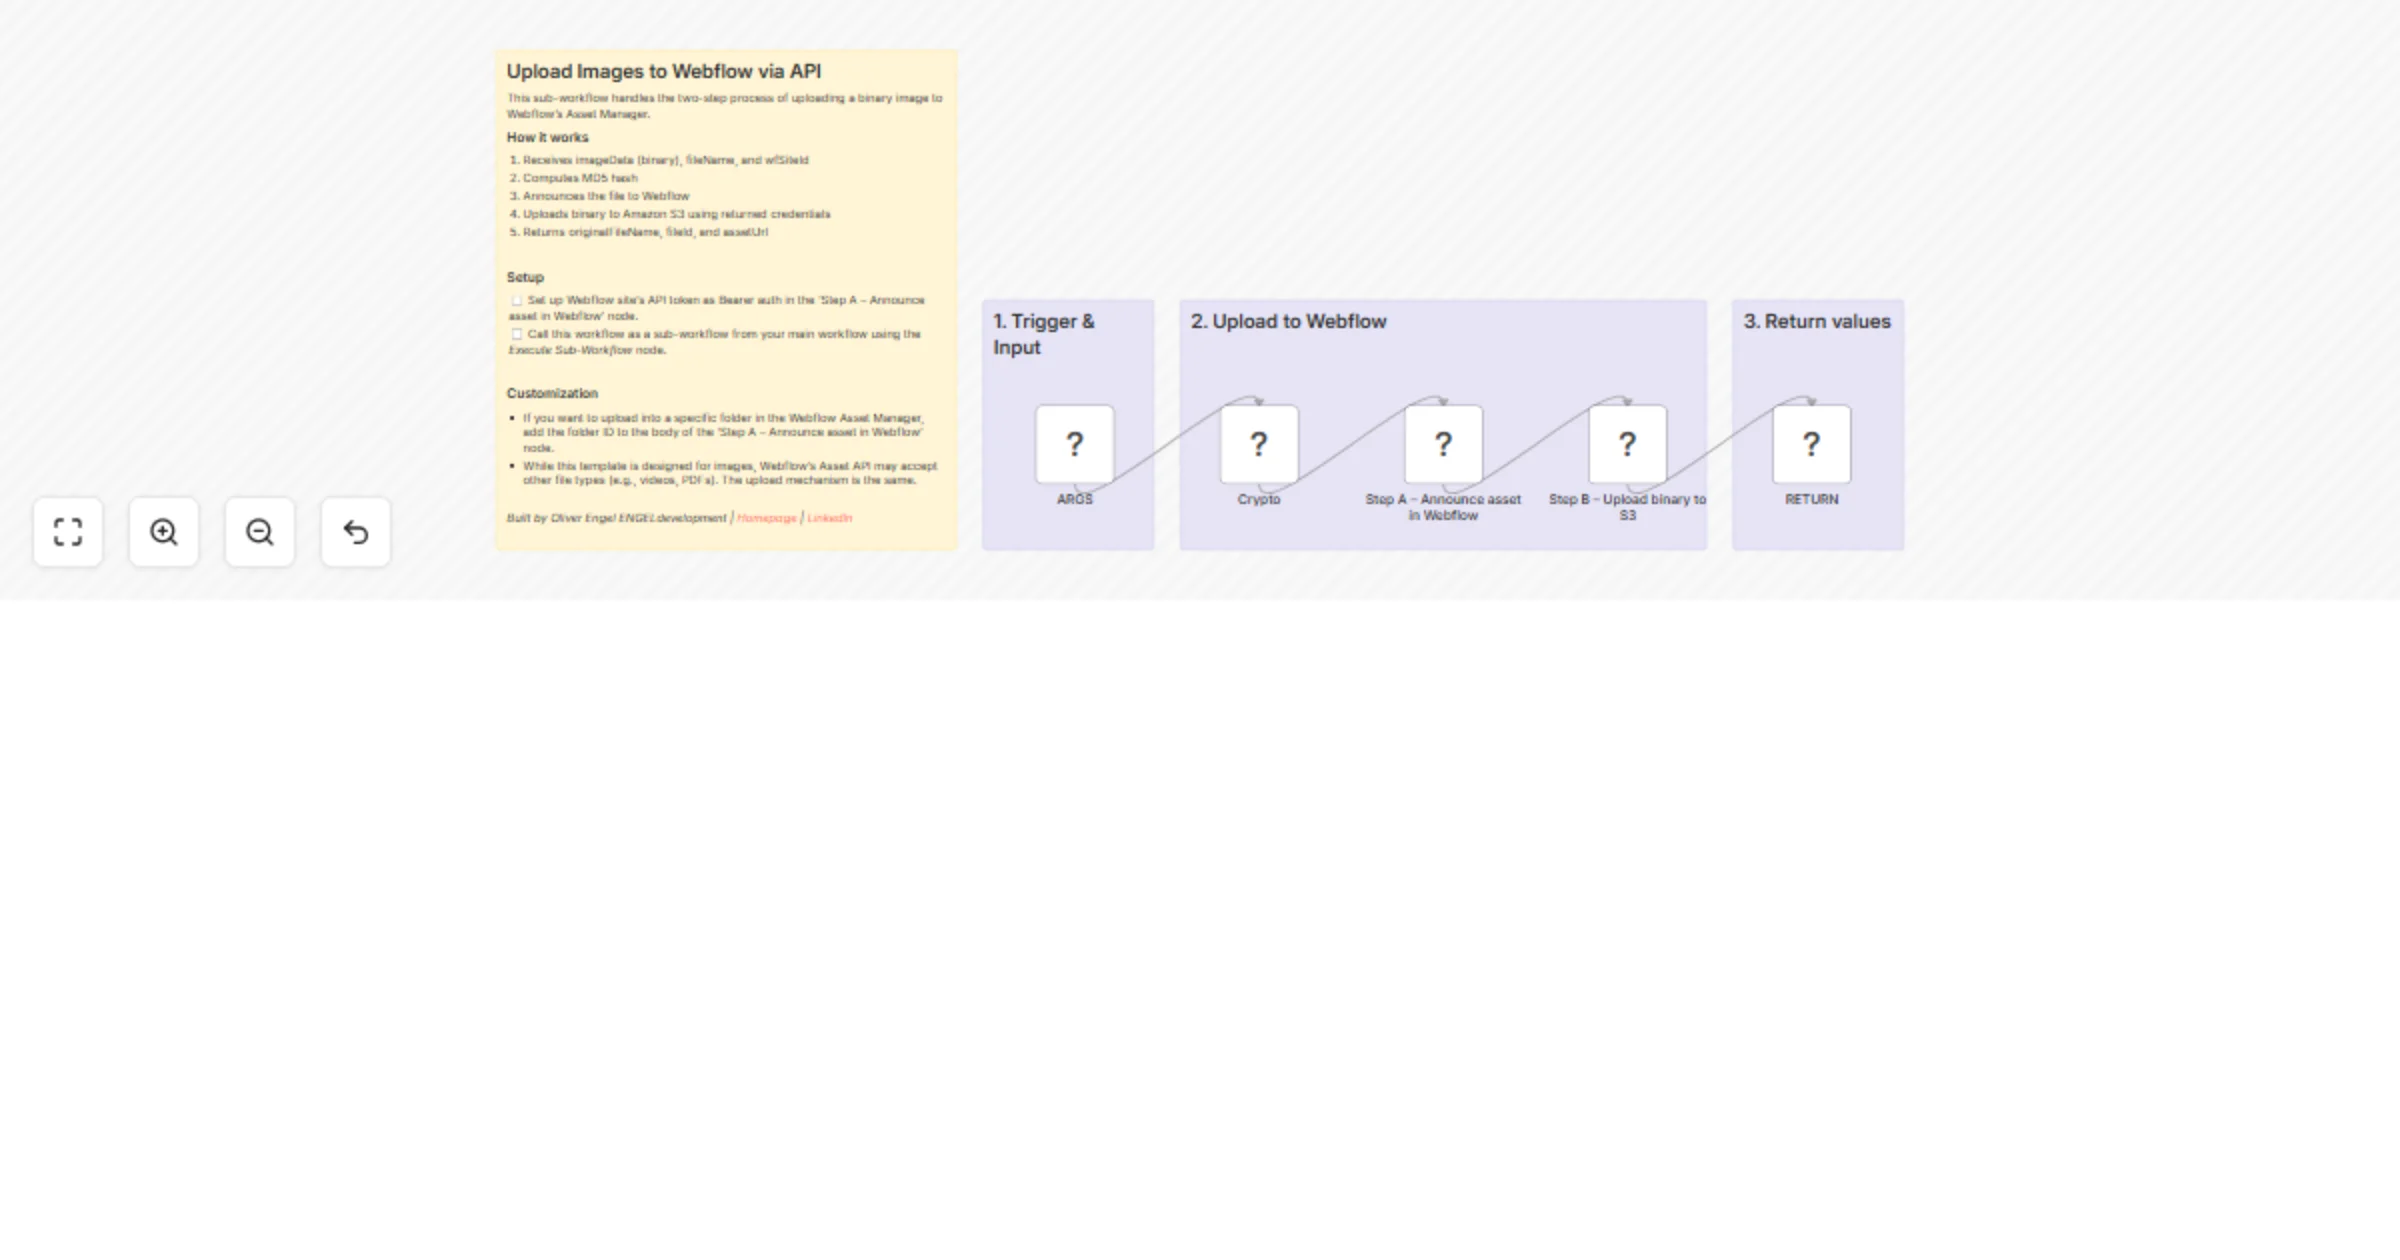
Upload images to Webflow via API as a reusable sub-workflow
Uploading an image to Webflow's Asset Manager through the API is surprisingly complex. It requires computing an MD5 h...
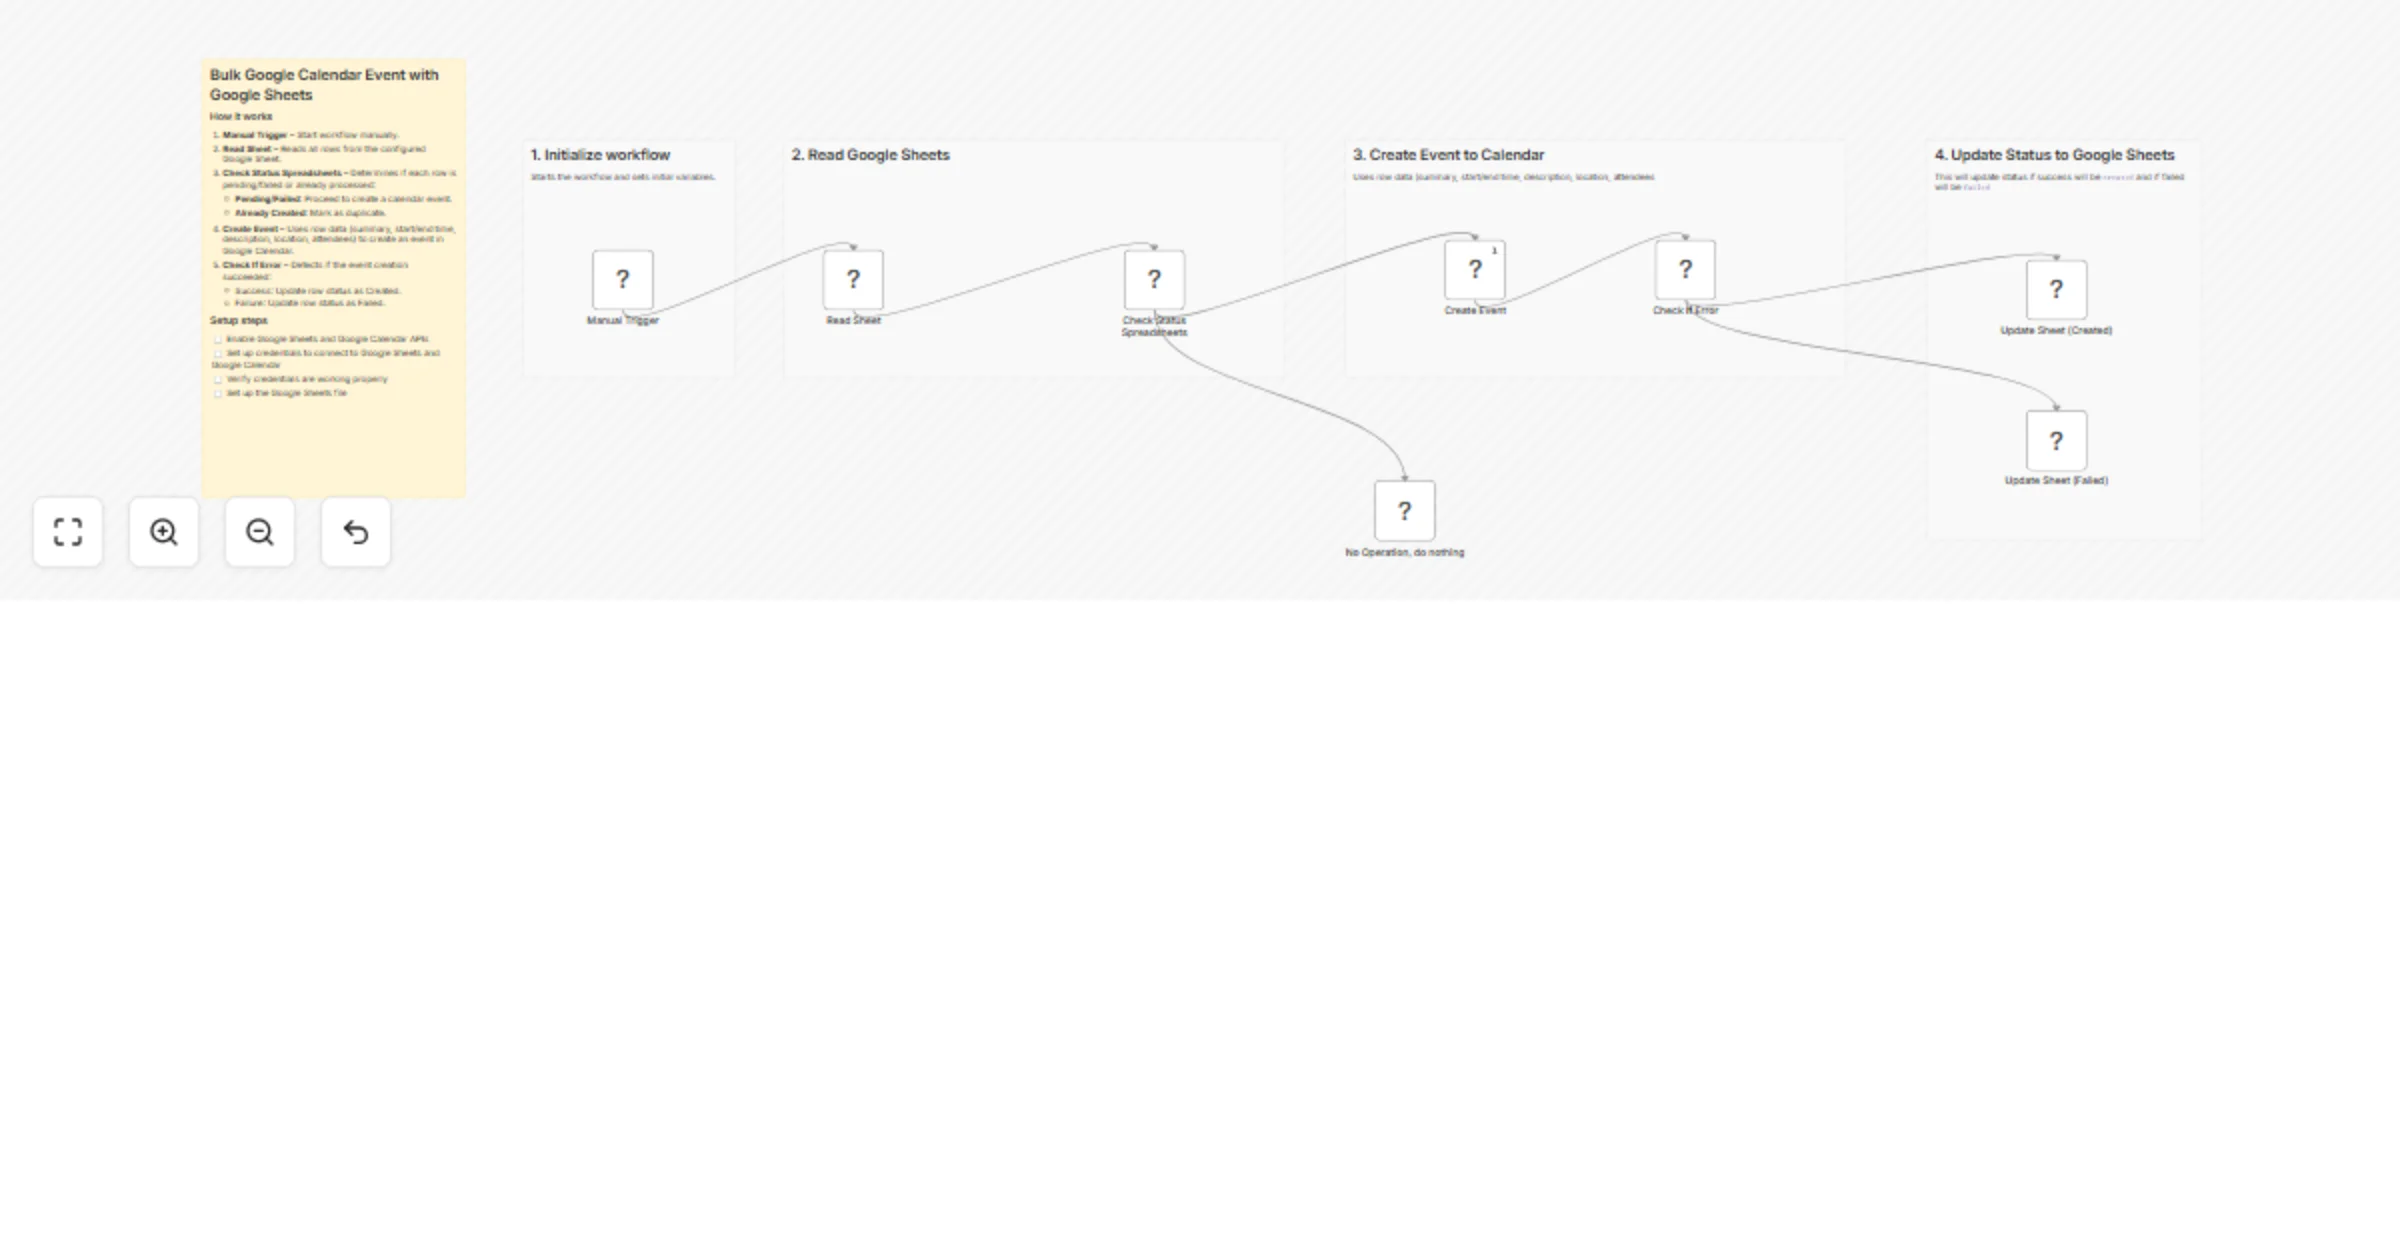
Bulk create Google Calendar events from Google Sheets
✅ What This Workflow Does This workflow automates the process of creating Google Calendar events from a Google Sheet....
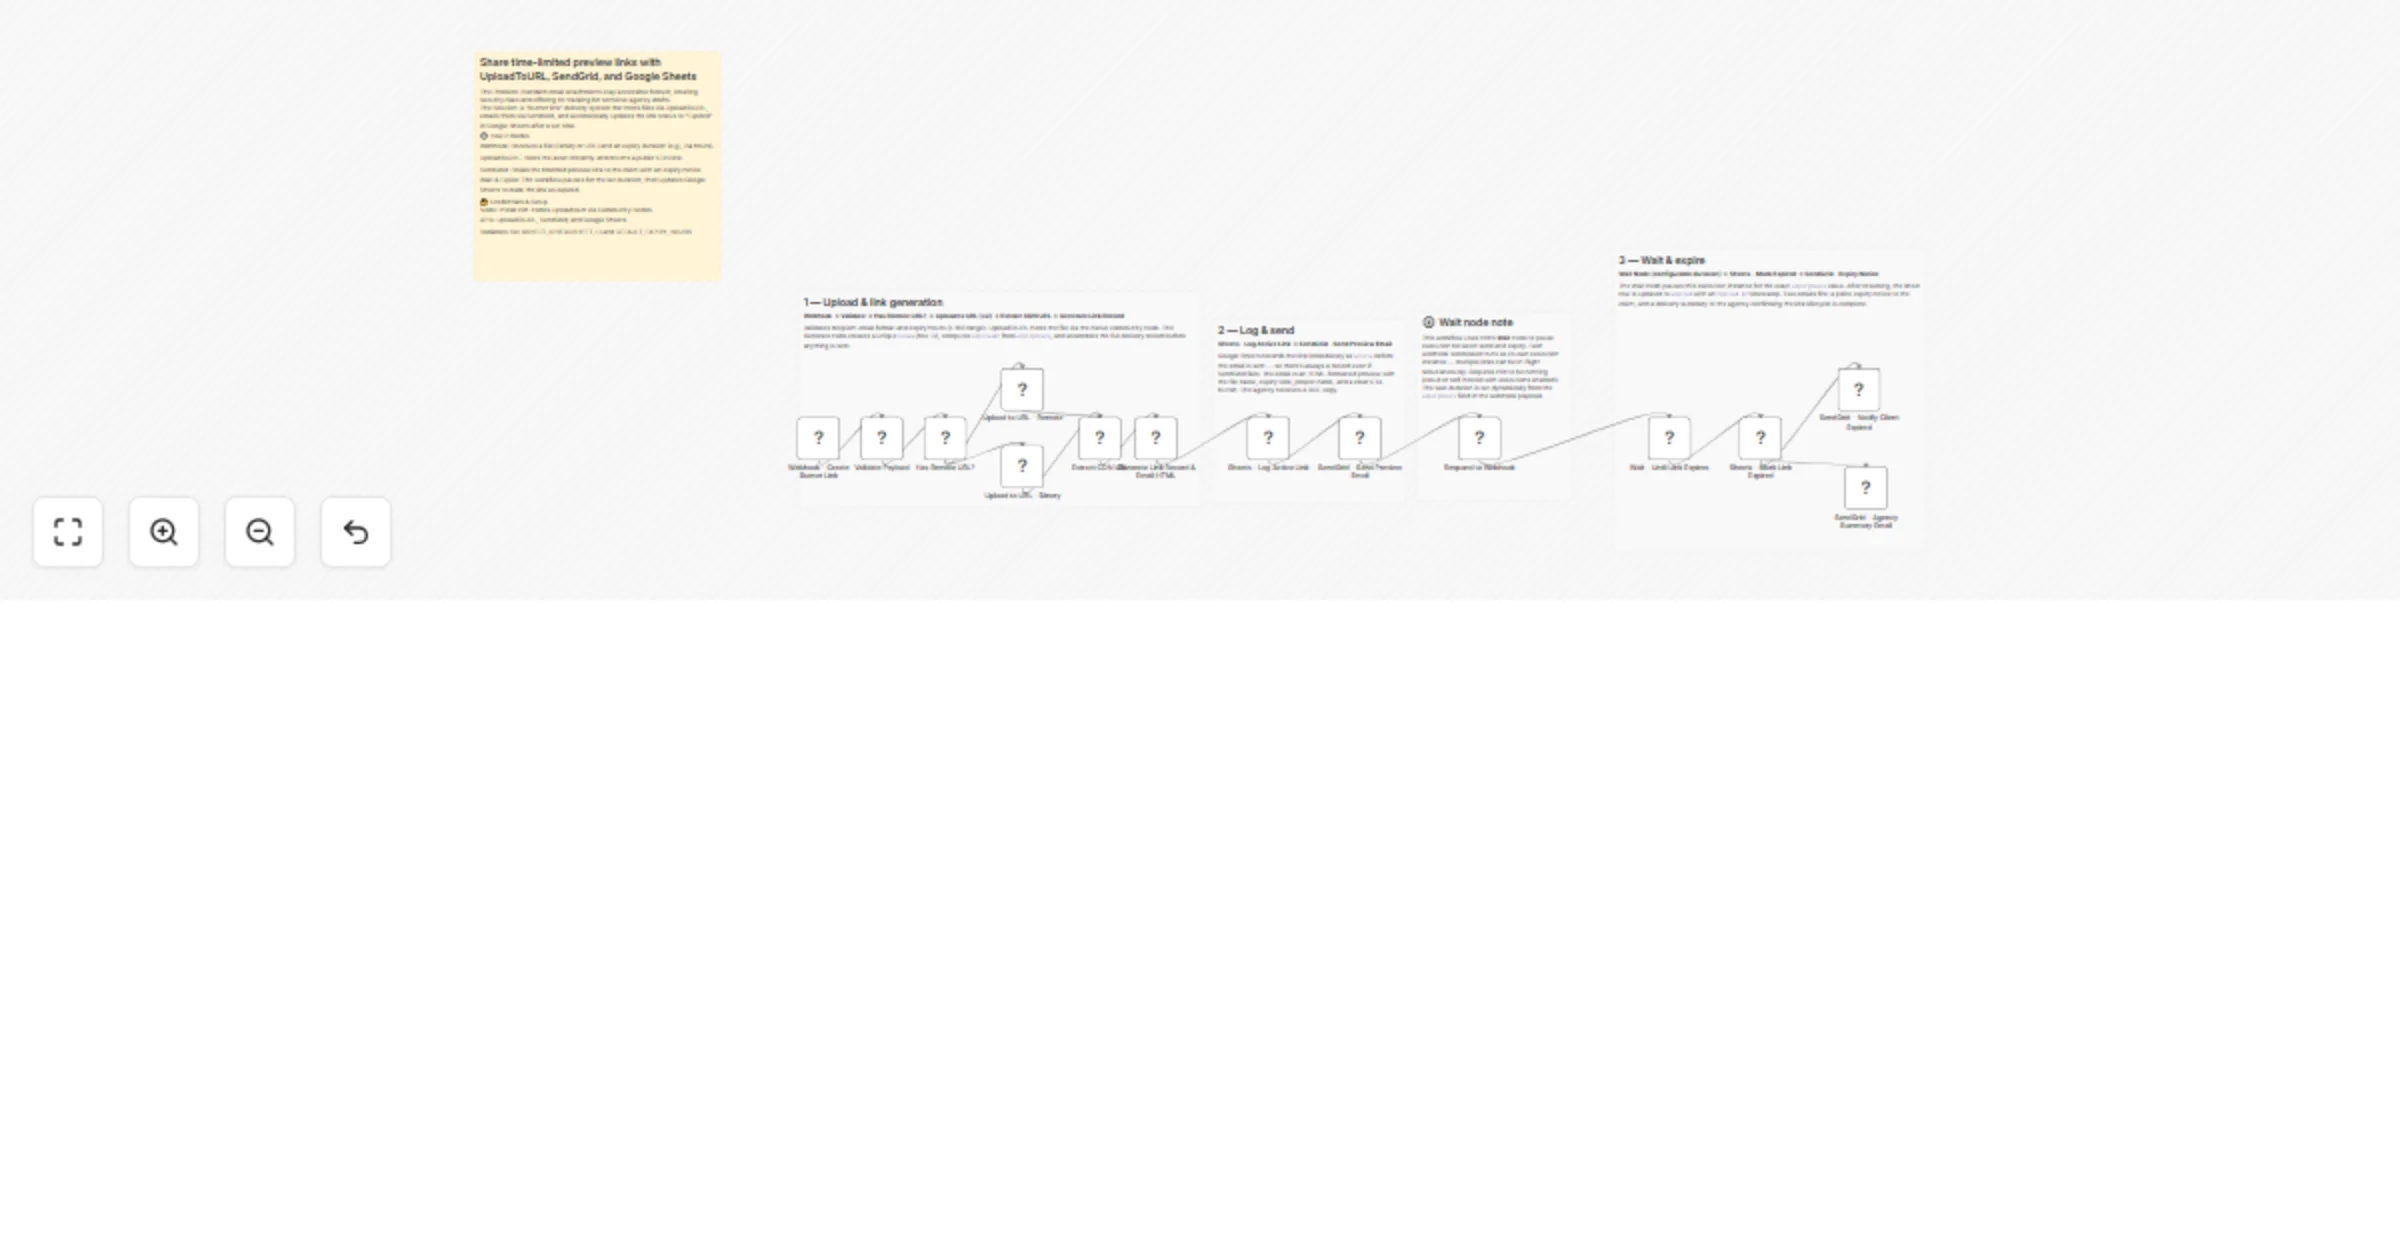
Share time-limited preview links with UploadToURL, SendGrid, and Google Sheets
Stop sending sensitive agency drafts as permanent email attachments. This workflow creates a "self destructing" deliv...
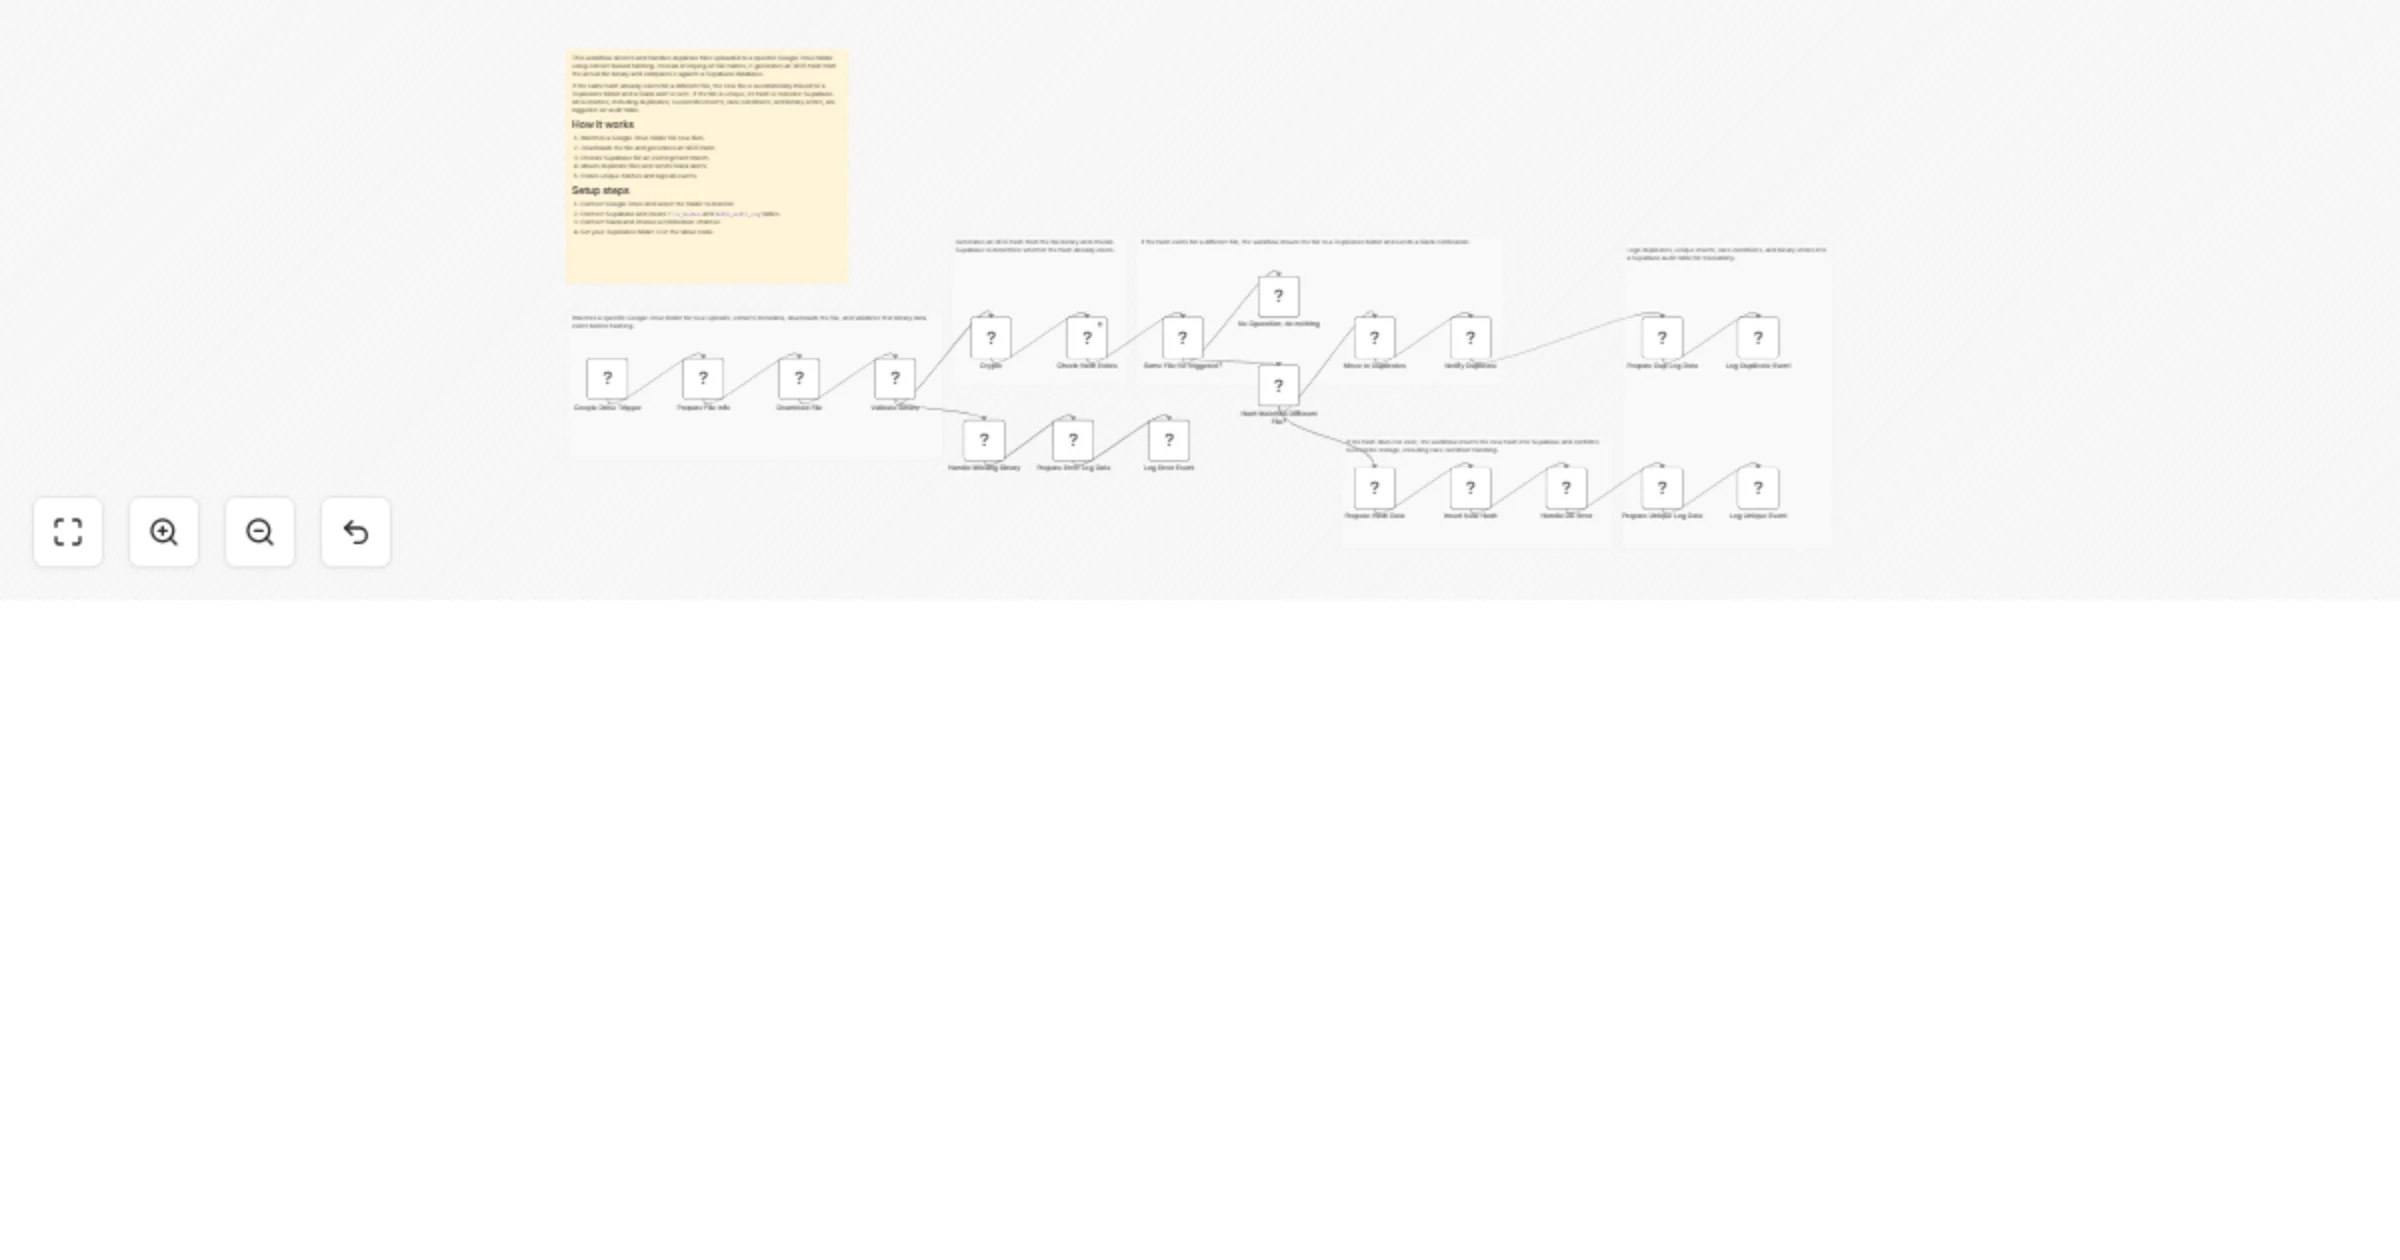
Detect and move duplicate Google Drive files with Supabase and Slack
This workflow automatically detects duplicate files uploaded to a specific Google Drive folder by generating an MD5 h...
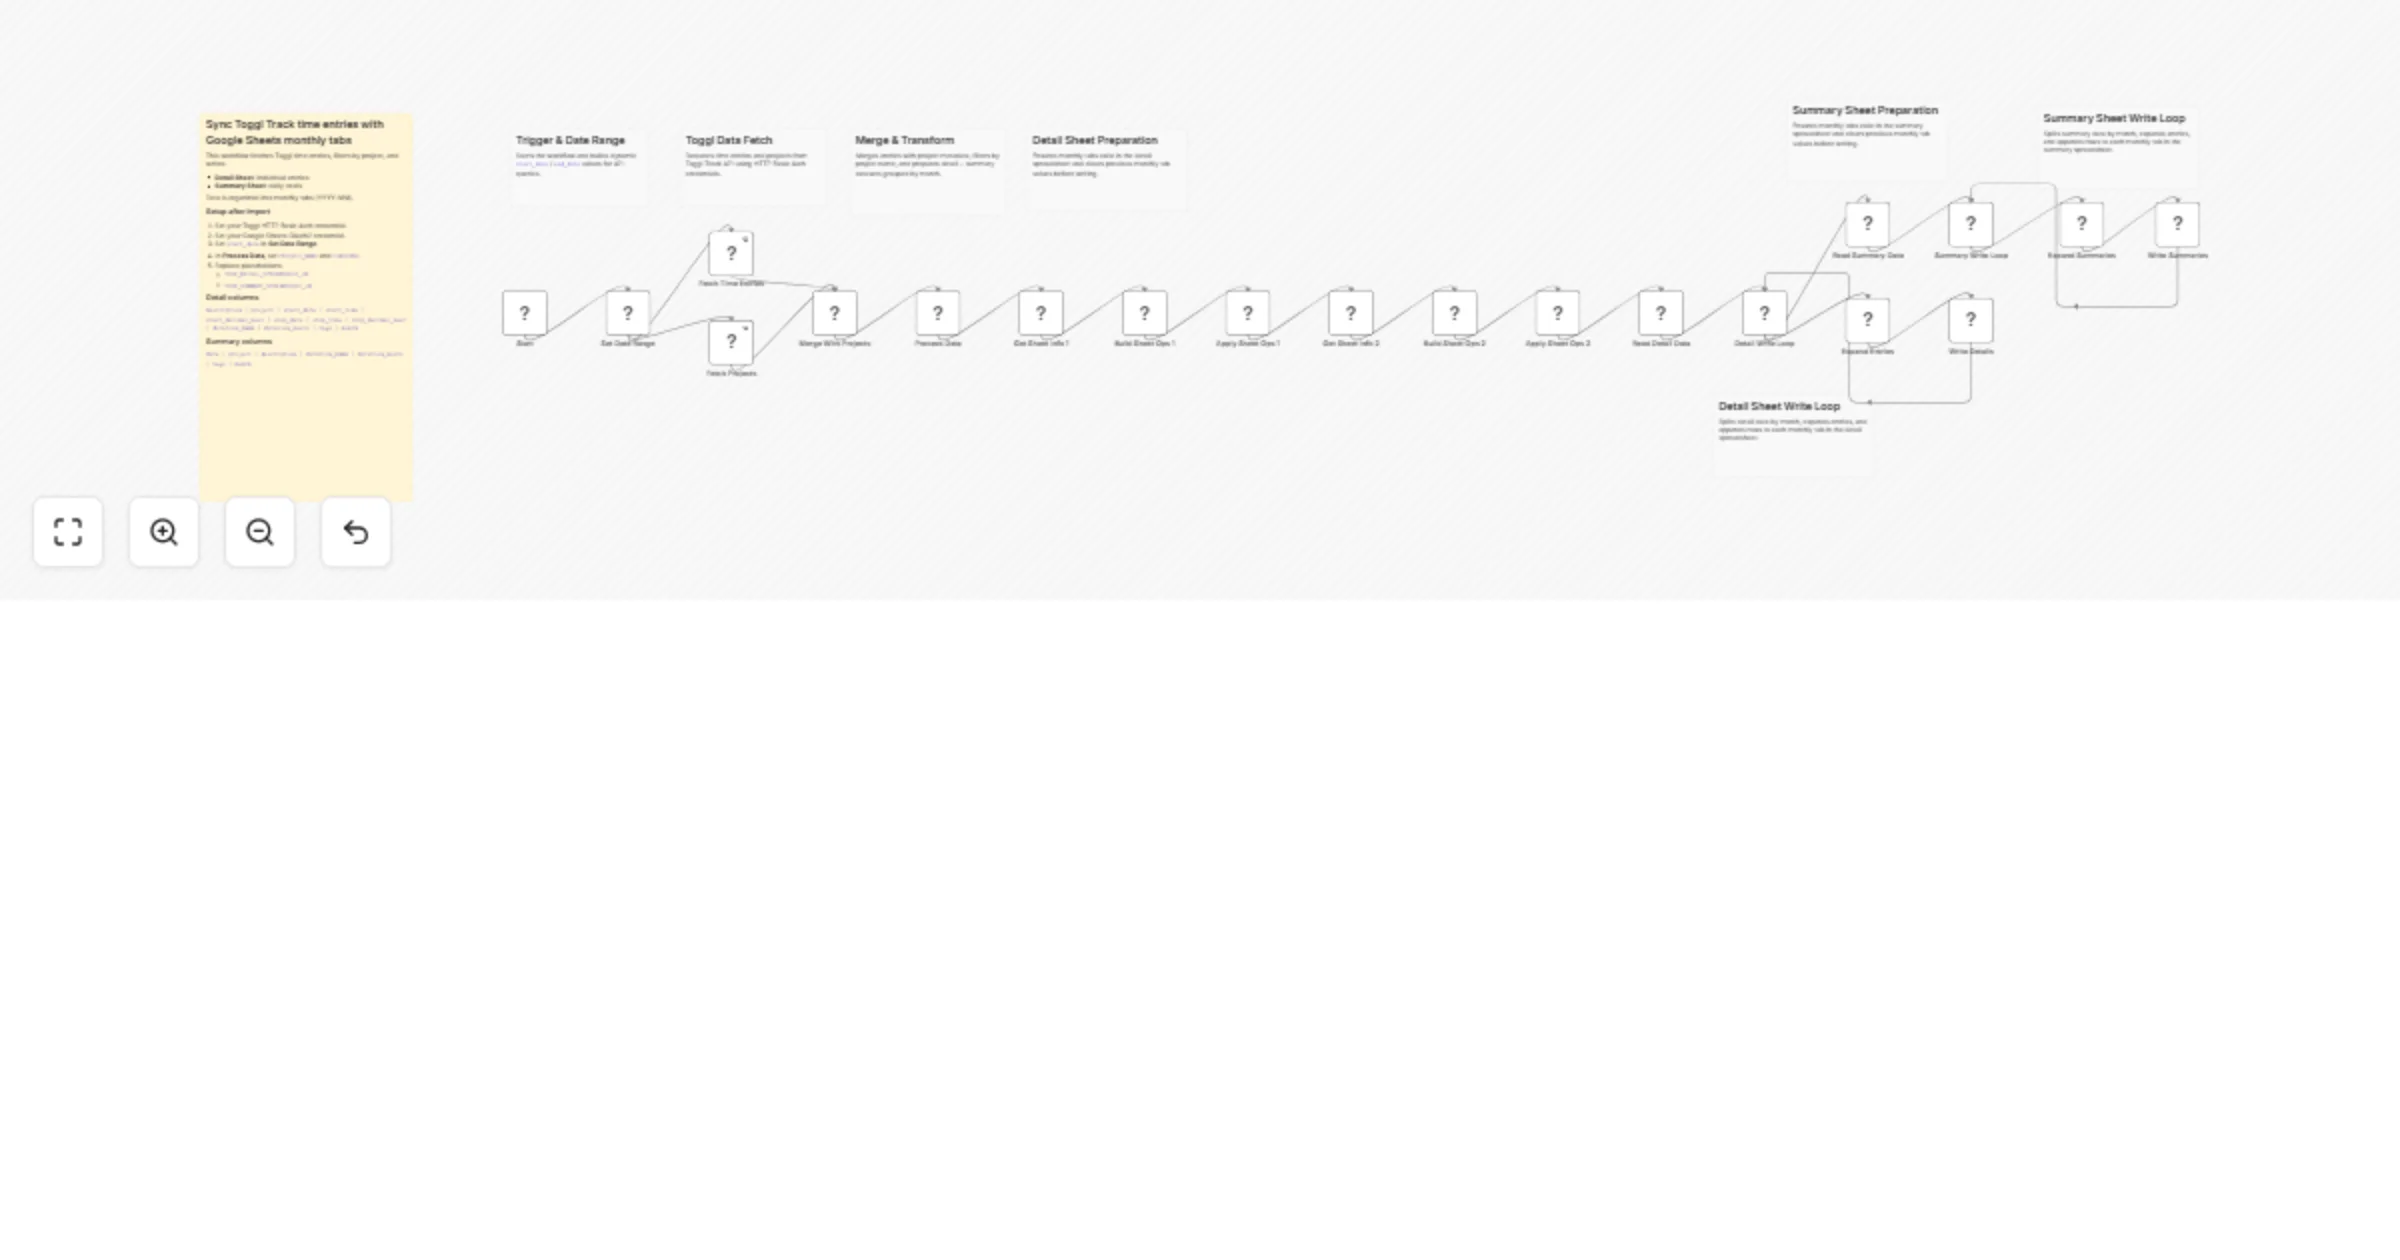
Sync Toggl Track time entries with Google Sheets detail and summary tabs
How it works This workflow syncs Toggl Track time entries to Google Sheets and creates monthly tabs automatically. It...
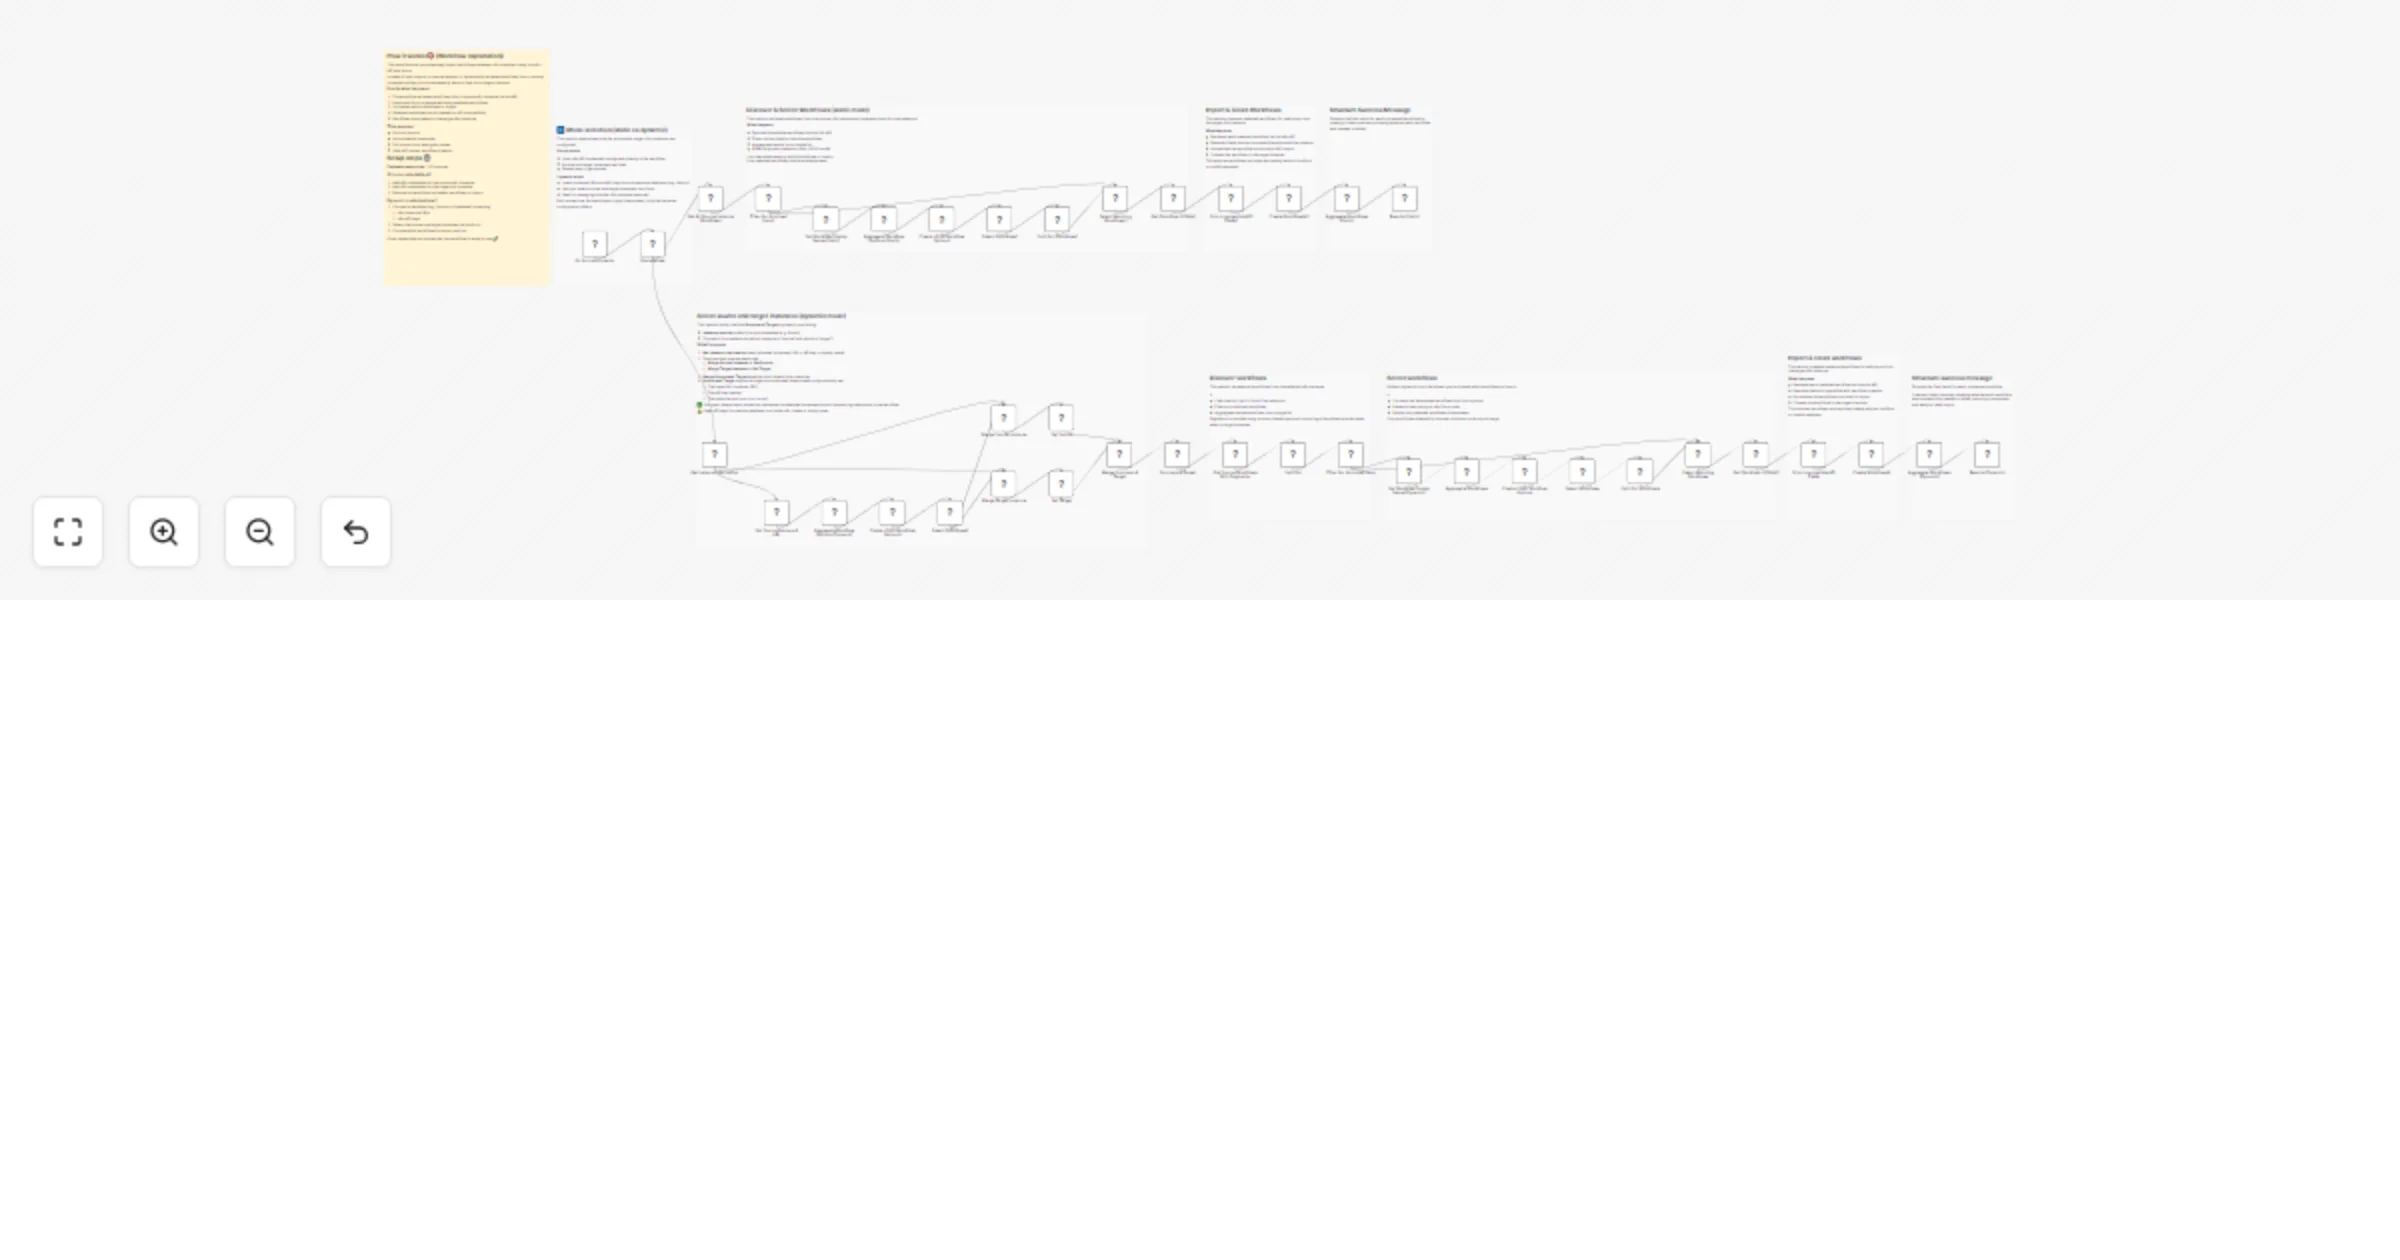
Selectively import workflows between instances using the n8n API and forms
How it works Retrieves workflows directly from an n8n instance using the n8n API Dynamically generates a form to sele...
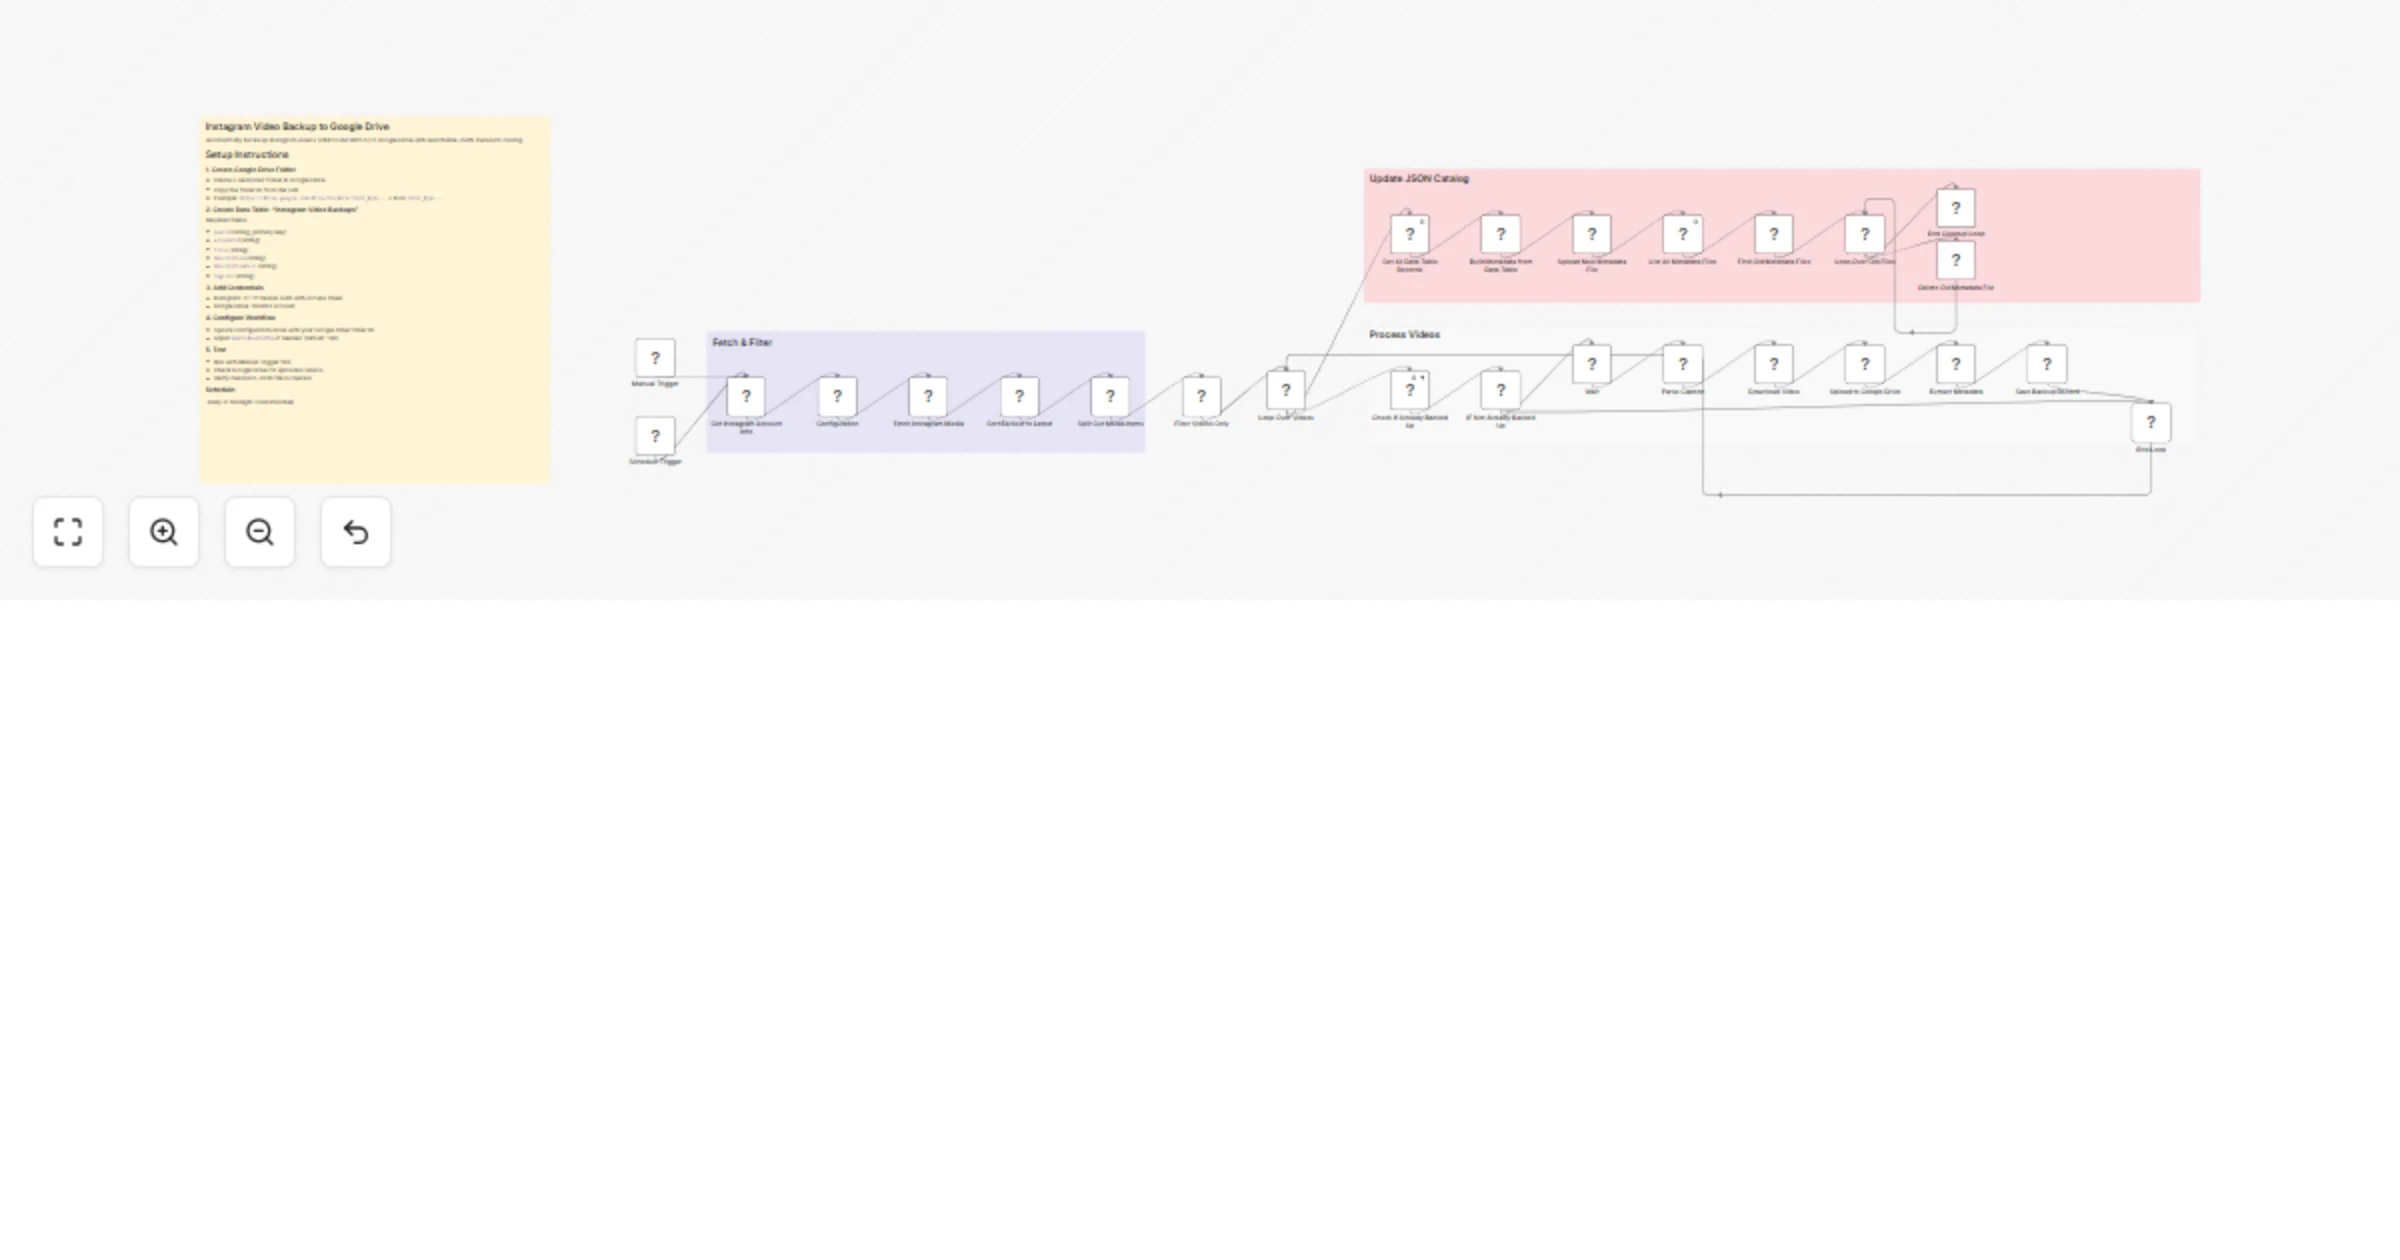
Back up Instagram videos to Google Drive with JSON metadata catalog
Instagram Video Backup to Google Drive Automatically backup all your Instagram videos to Google Drive with a searchab...
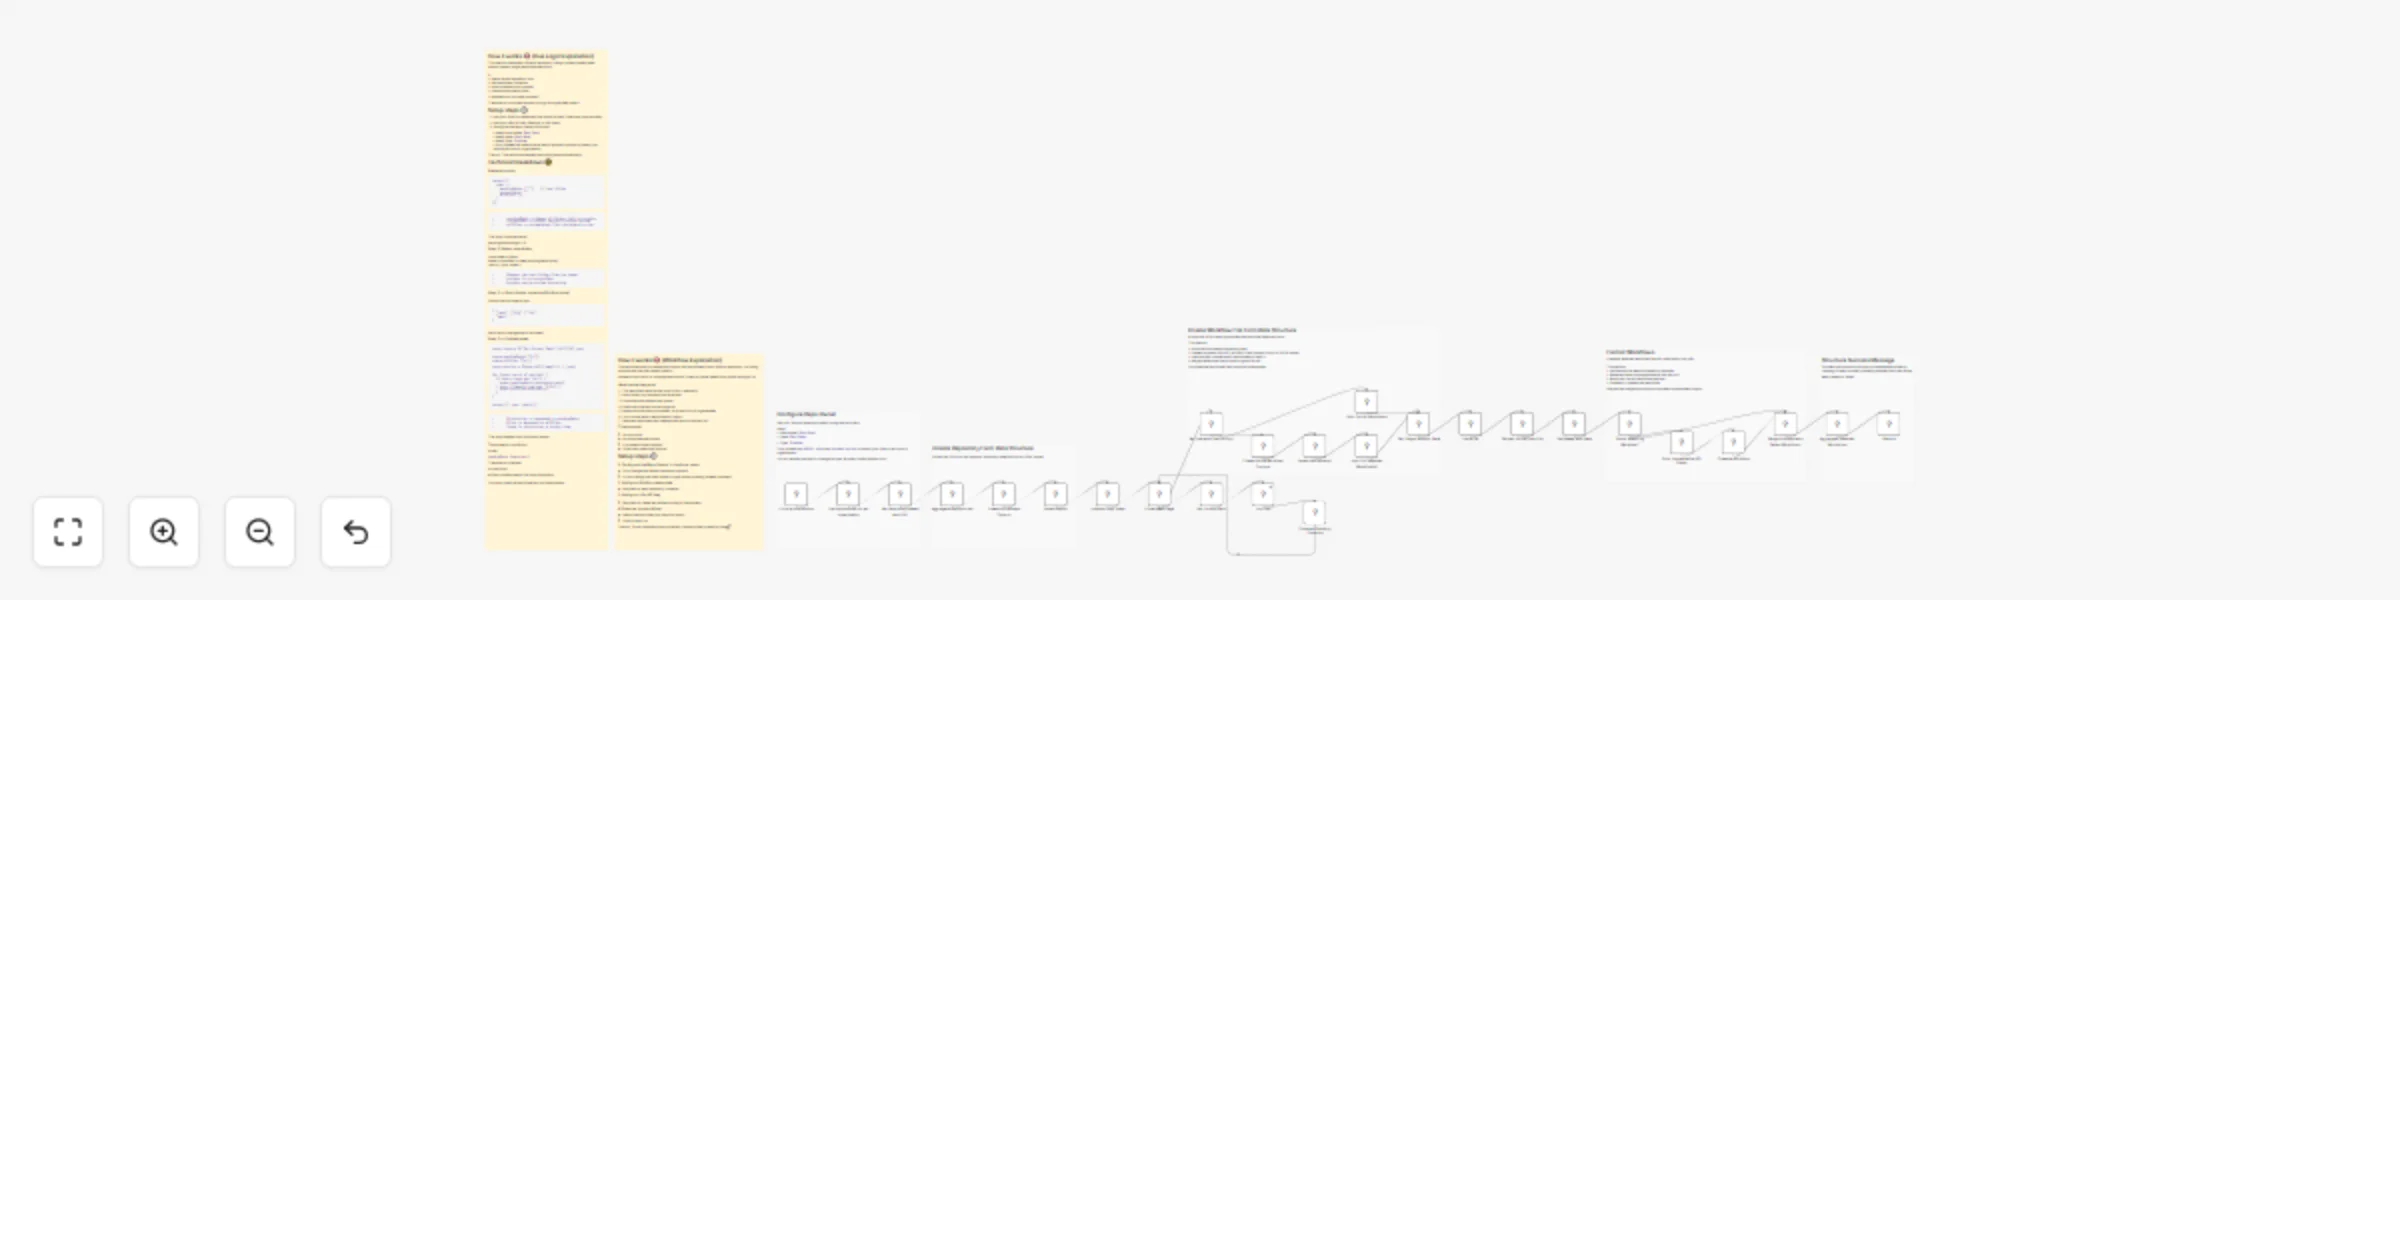
Selectively import workflows from GitHub, including nested folders
This template lets you selectively import n8n workflows from a GitHub repository, even when your repository uses deep...
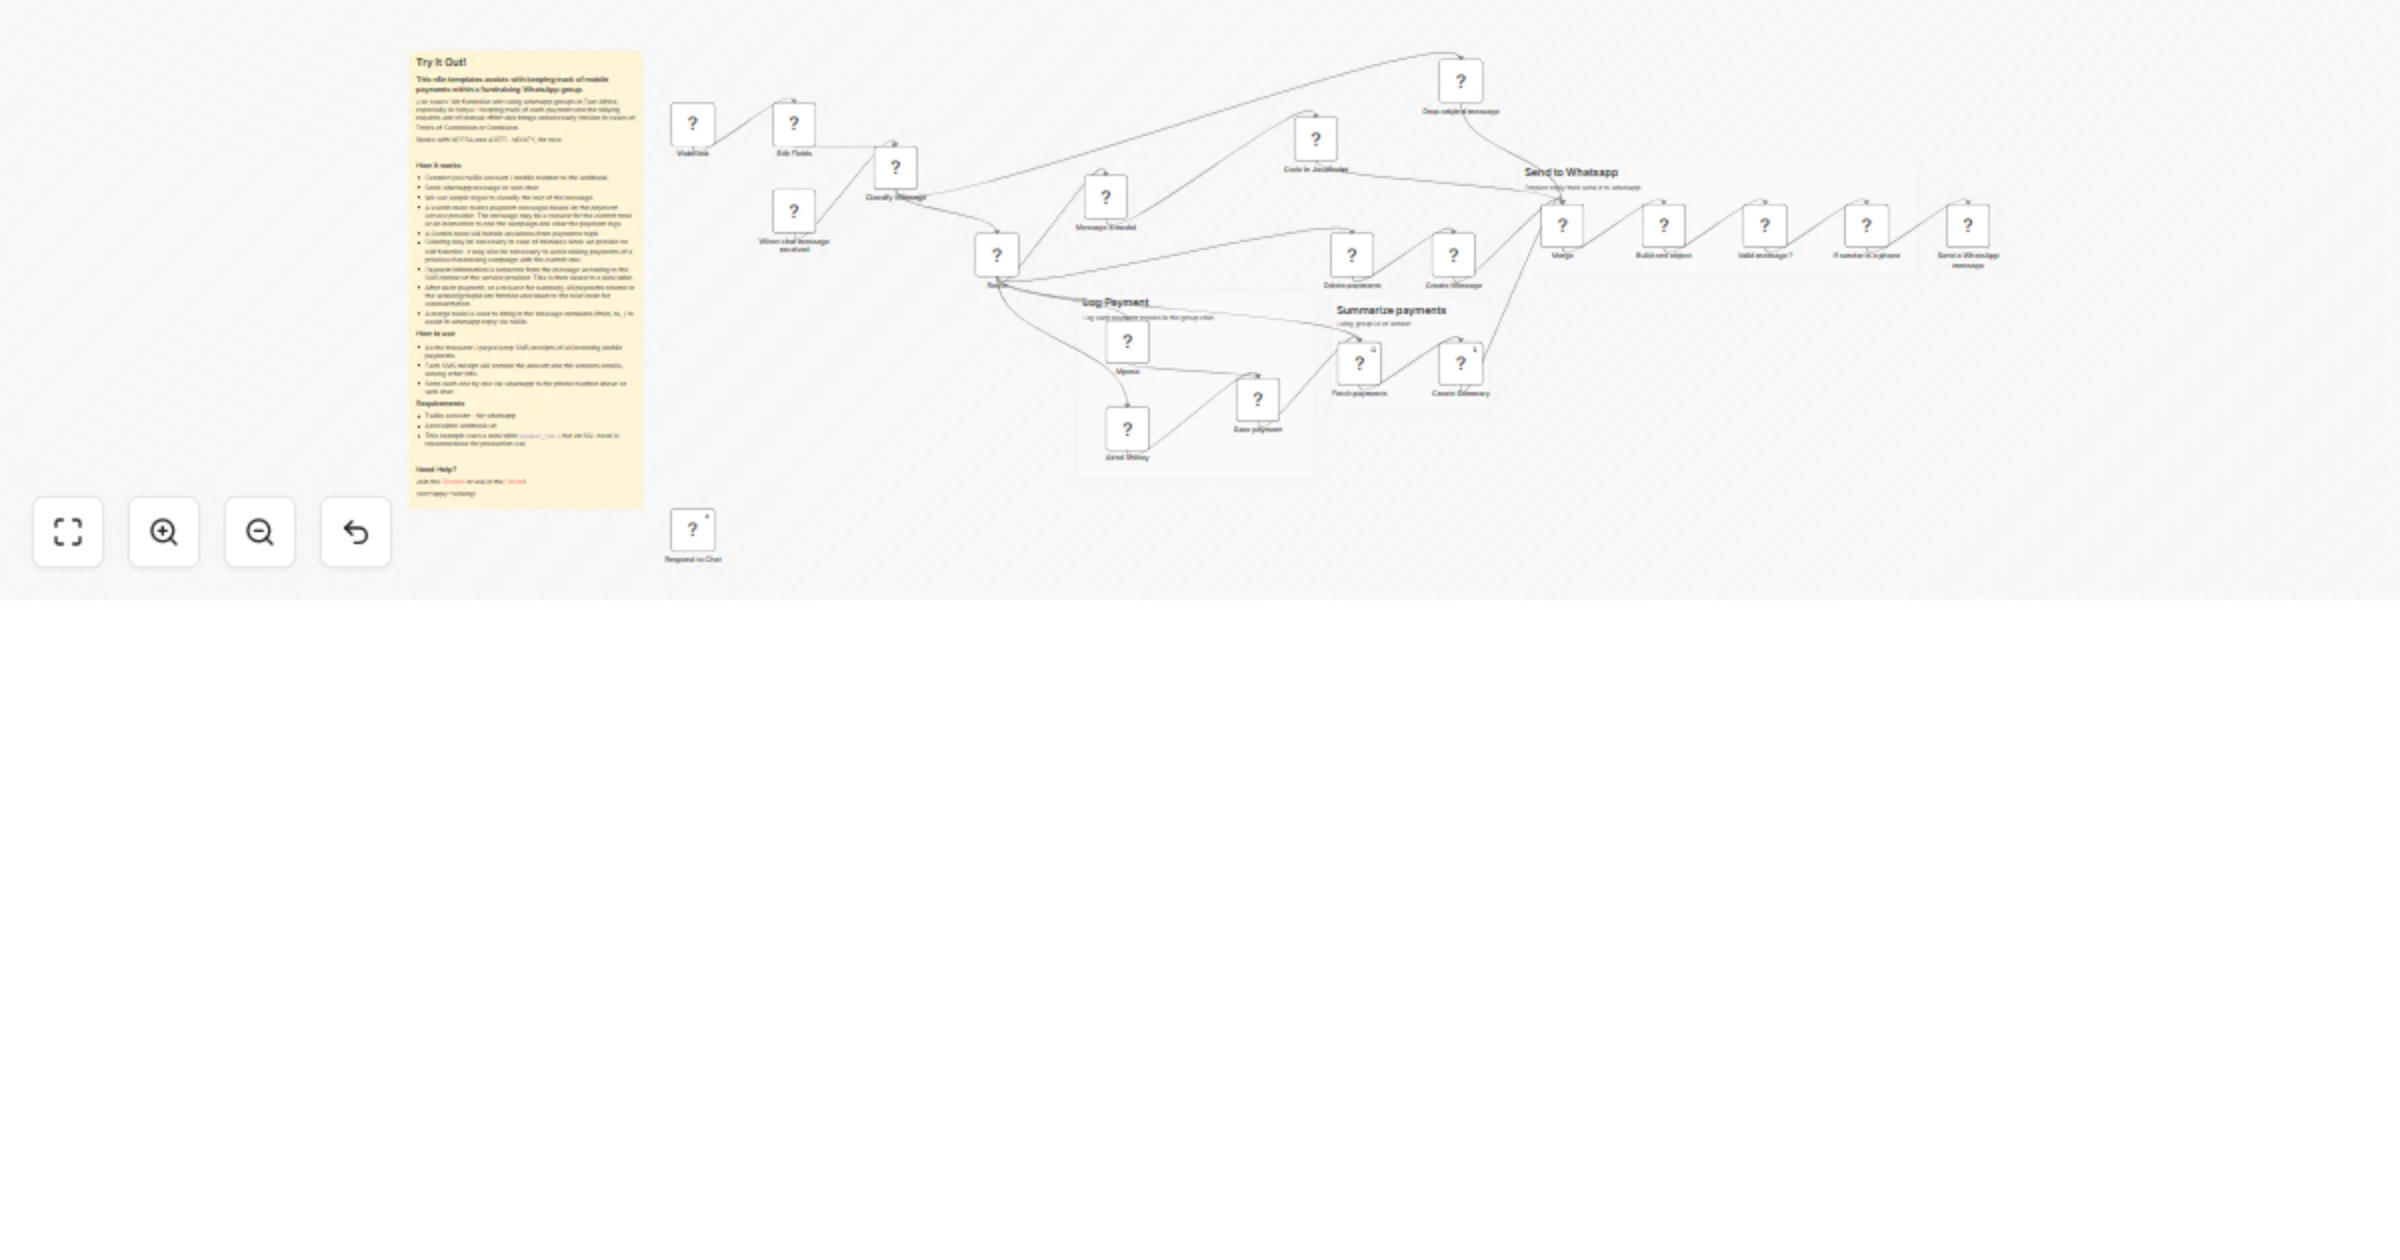
Track MPESA and Airtel mobile payments in a fundraising WhatsApp group
Try It Out! This n8n templates assists with keeping track of mobile payments within a fundraising WhatsApp group. Use...
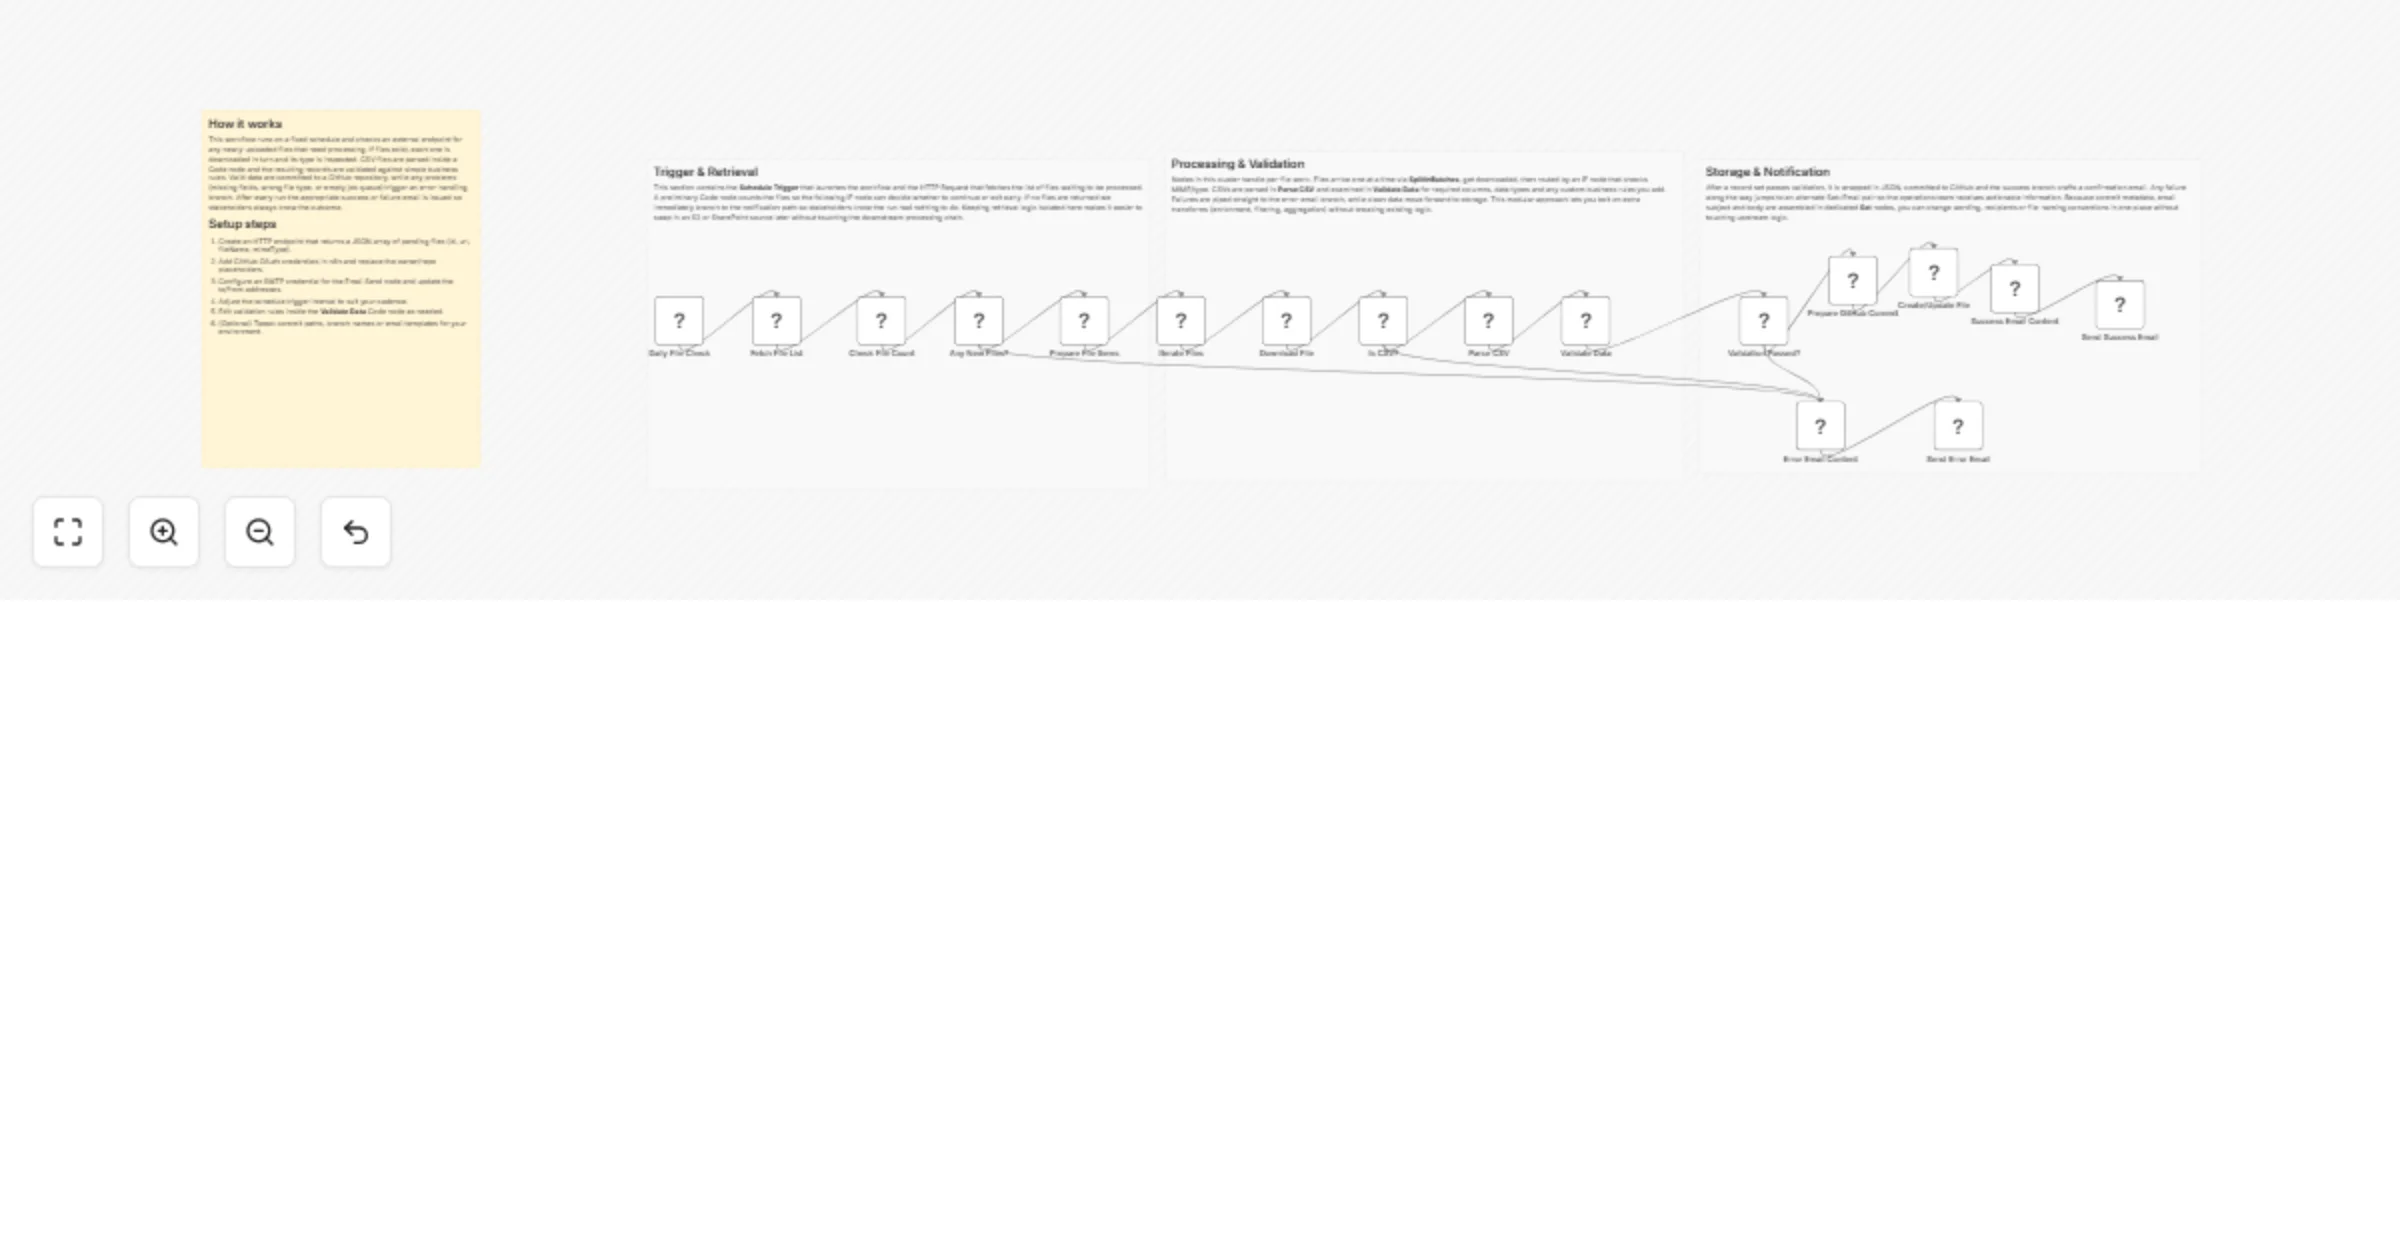
Process incoming files and notify via email with GitHub storage
File Processing Pipeline with Email and GitHub This workflow automatically ingests newly uploaded files, validates an...
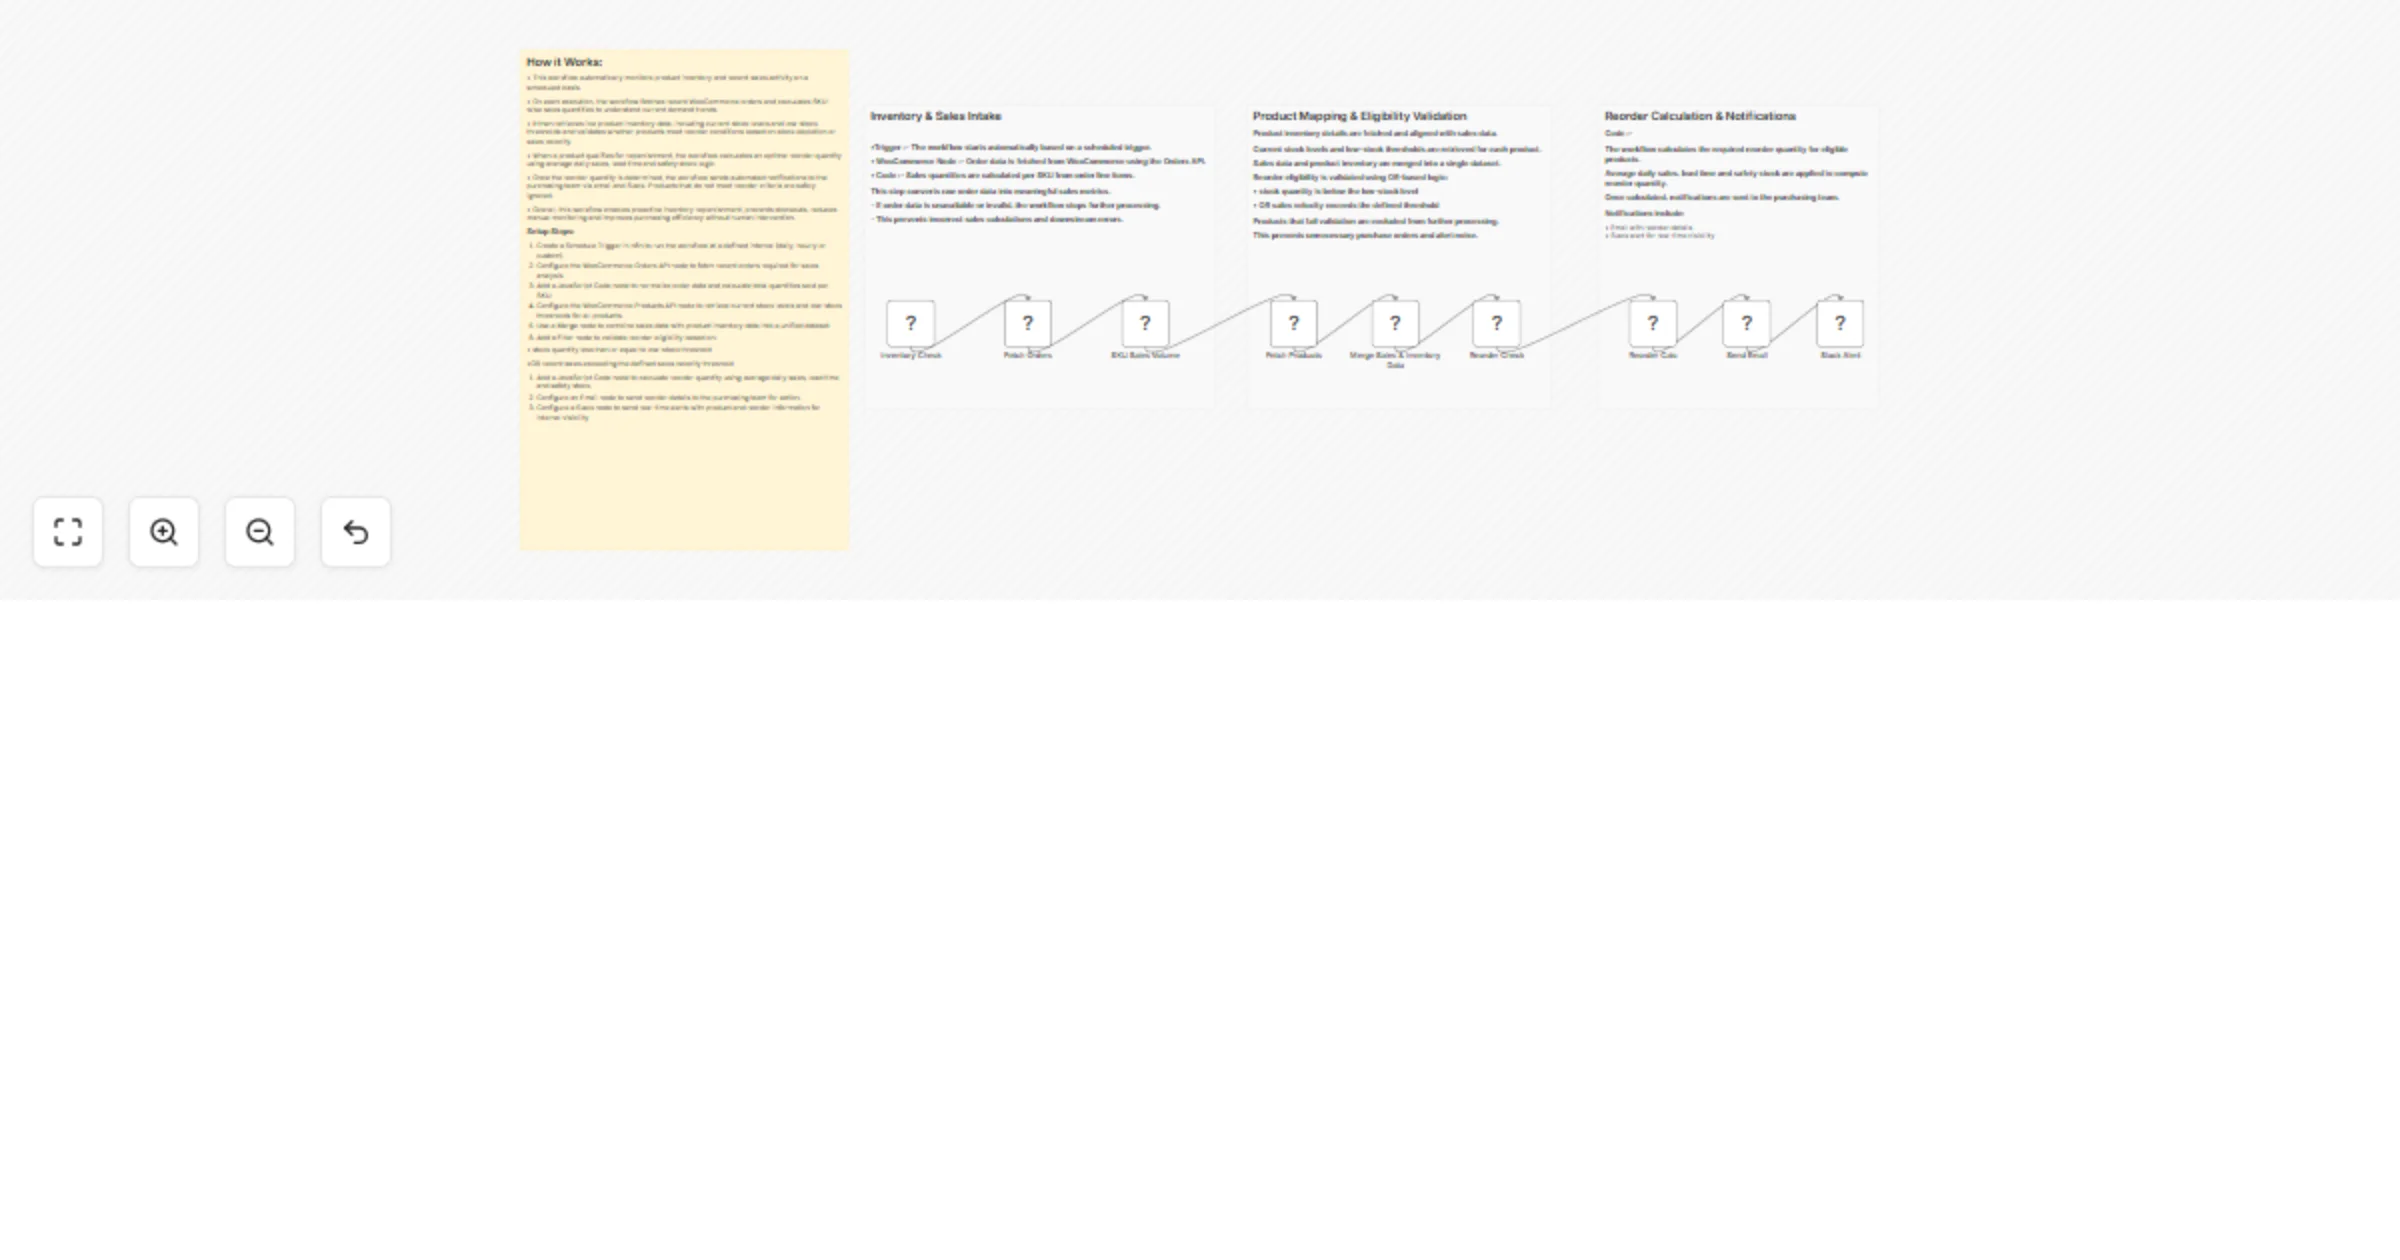
Track WooCommerce inventory and send reorder alerts via Gmail and Slack
WooCommerce Inventory Reorder Automation with n8n, Gmail & Slack Alerts Automatically track product sales and invento...

Sync inventory updates between systems via webhook and Google Sheets logging
(Retail Automation) Transfer Inventory Updates Across Systems This workflow automatically synchronizes inventory quan...
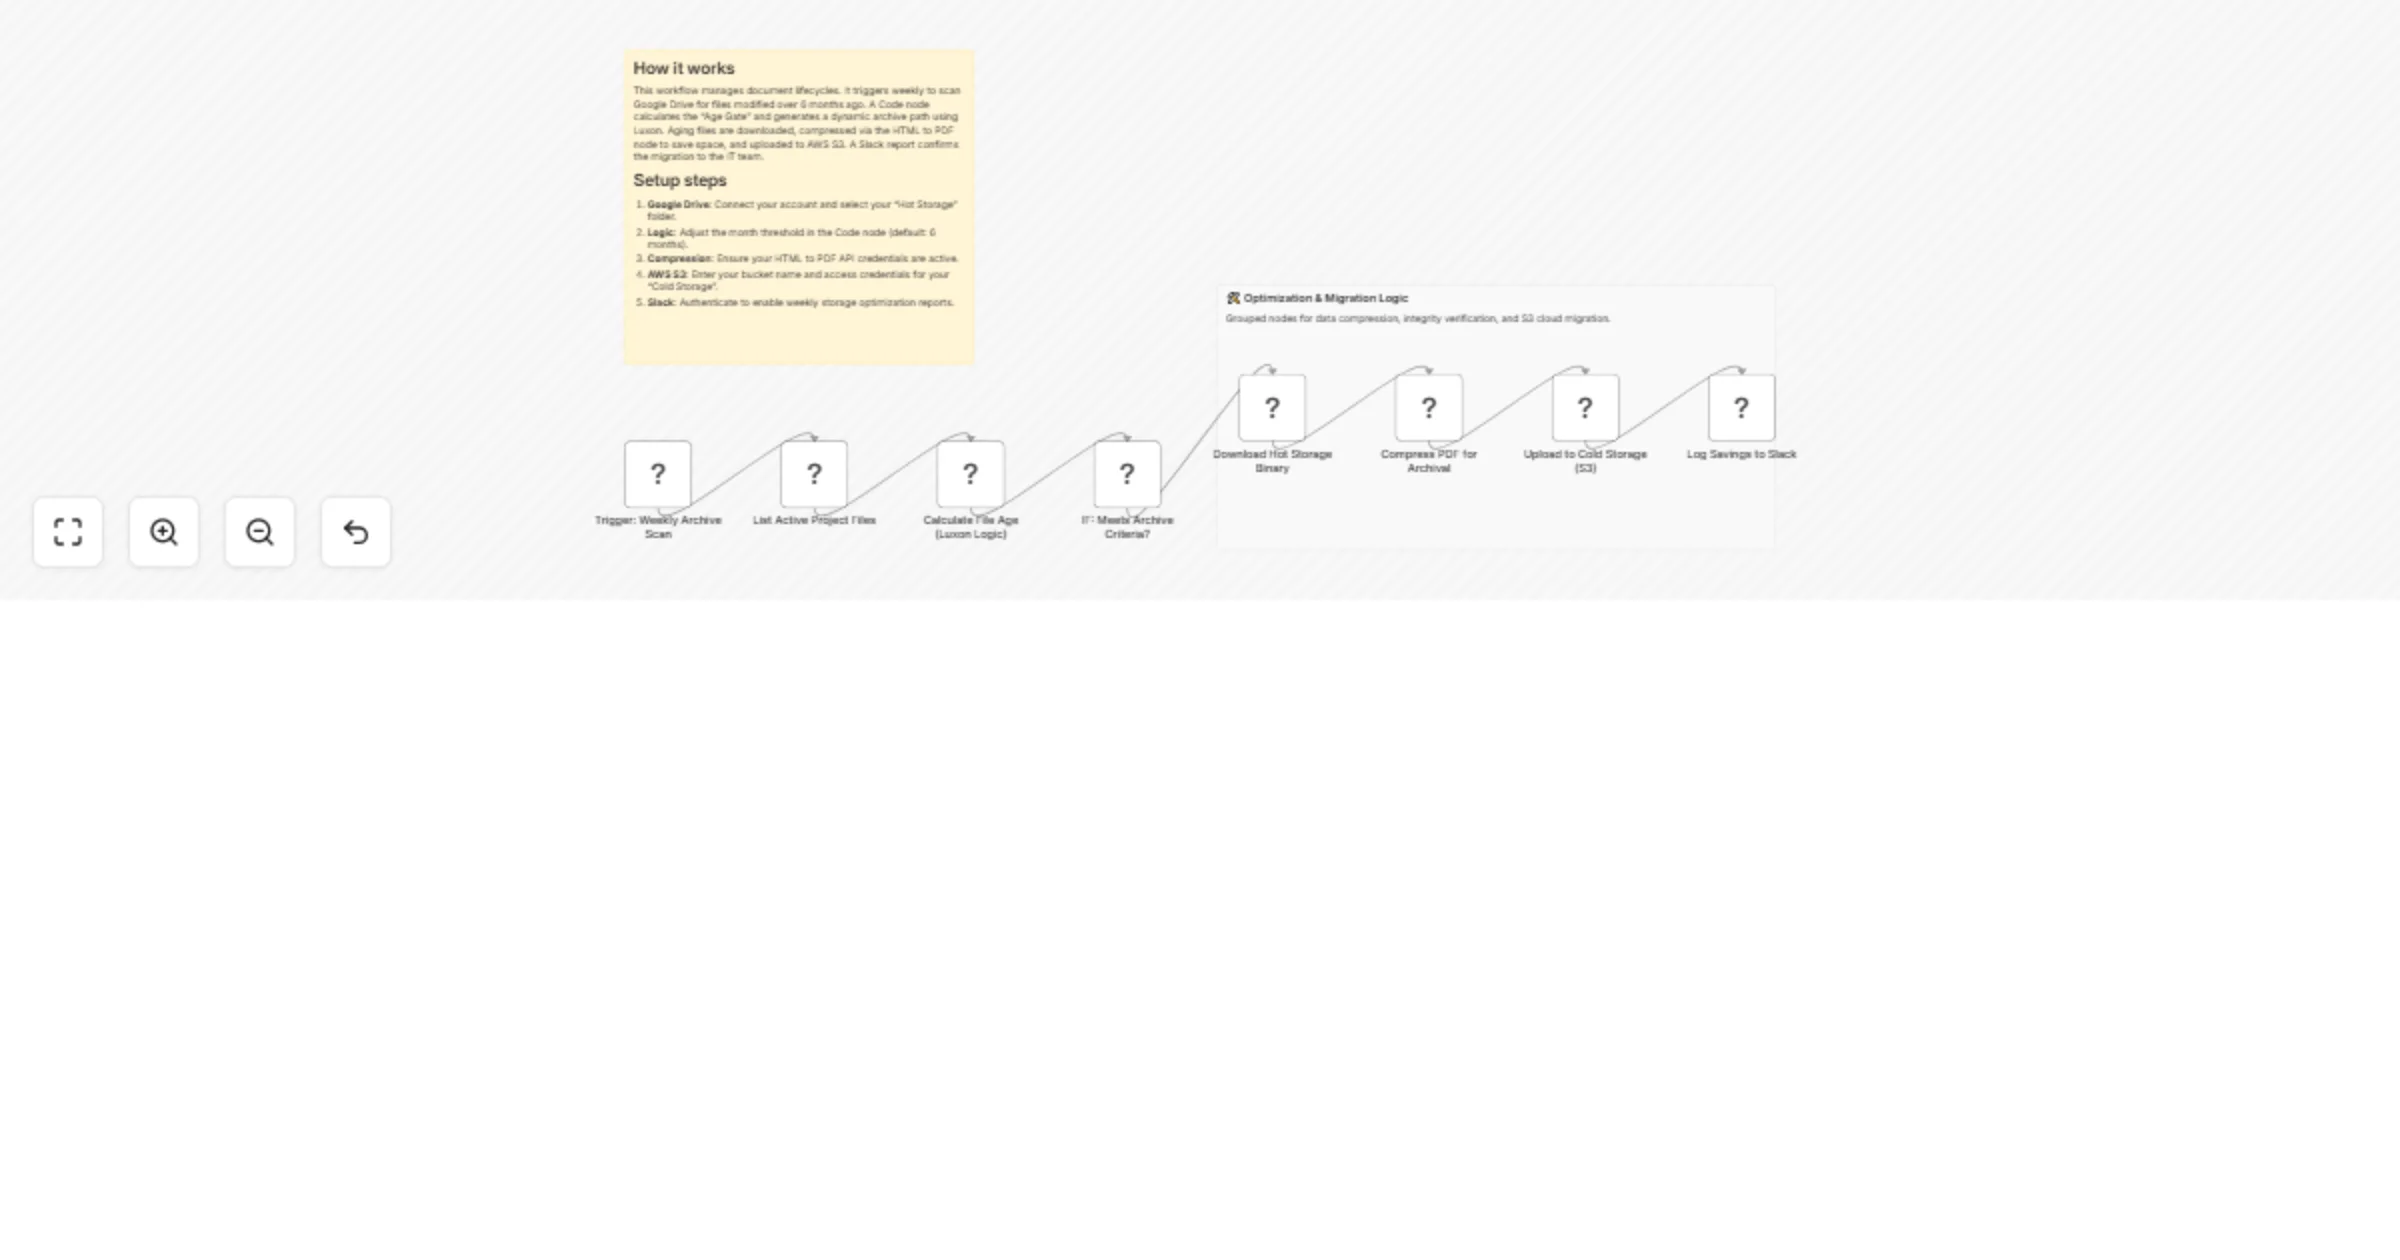
Compress and archive old Google Drive PDFs to AWS S3 cold storage with Slack reports
Consolidate and compress project archives for cost optimized cloud storage 🎯 Description Optimize your cloud storage...

Publish Zoom class recordings to Google Classroom automatically
About This flow is ideal for online schools that use Zoom to teach classes and Google Classroom for storing materials...
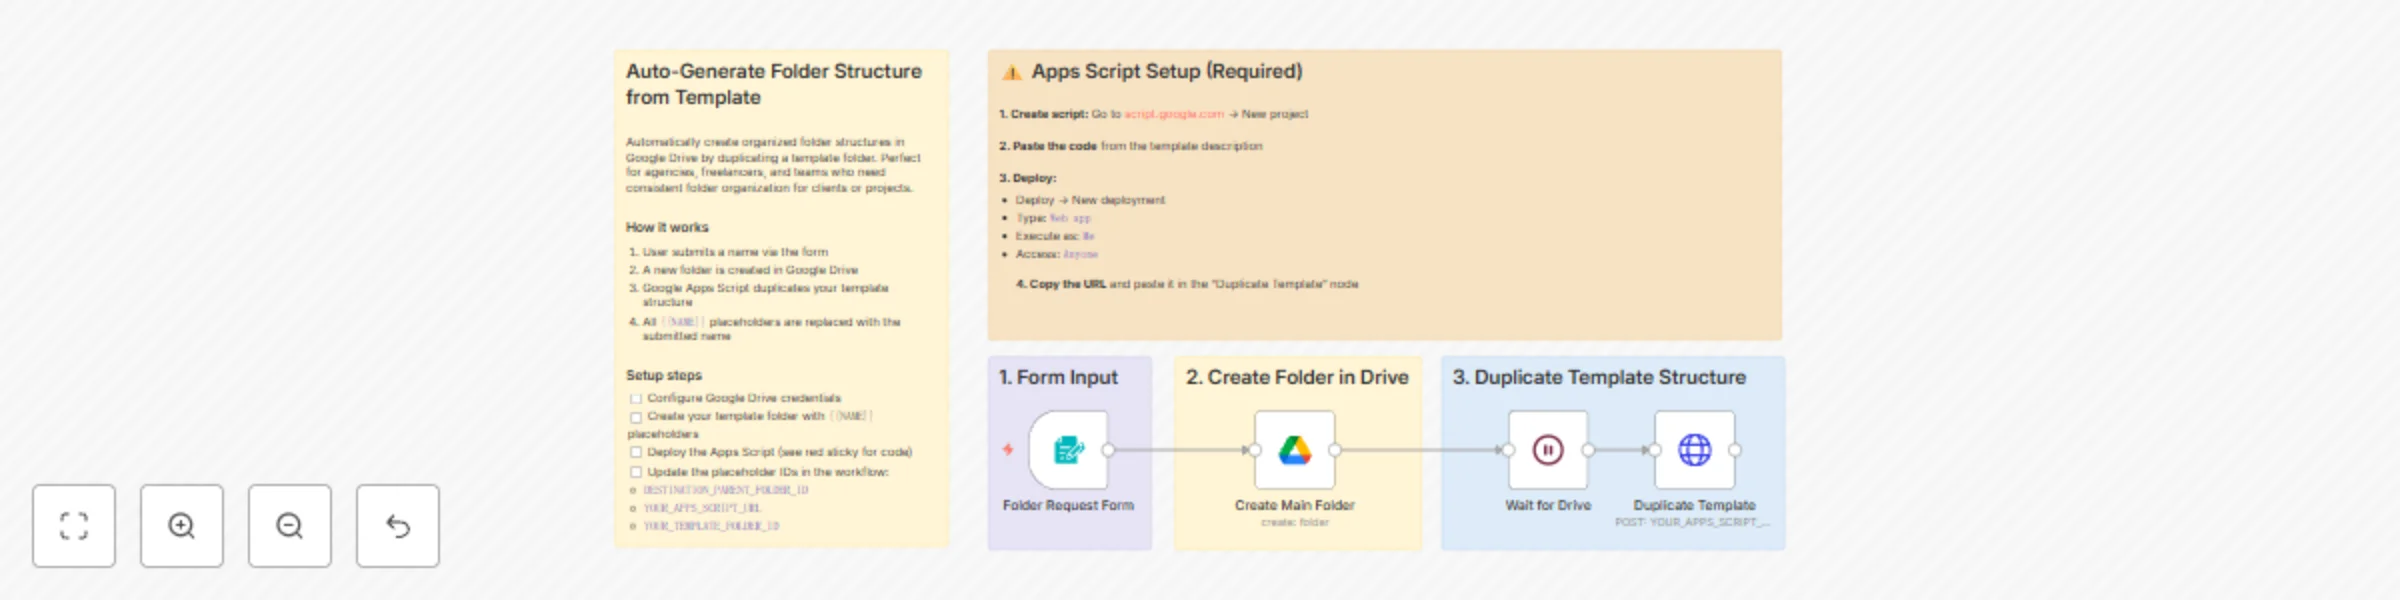
Template-based Google Drive folder generation with Forms and Apps Script
Stop manually creating folder structures for every new client or project. This workflow provides a simple form where...

Learn how to use binary data in n8n (video included)
This template and YouTube video goes over 8 different examples of how we can utilize Binary data within n8n. We start...
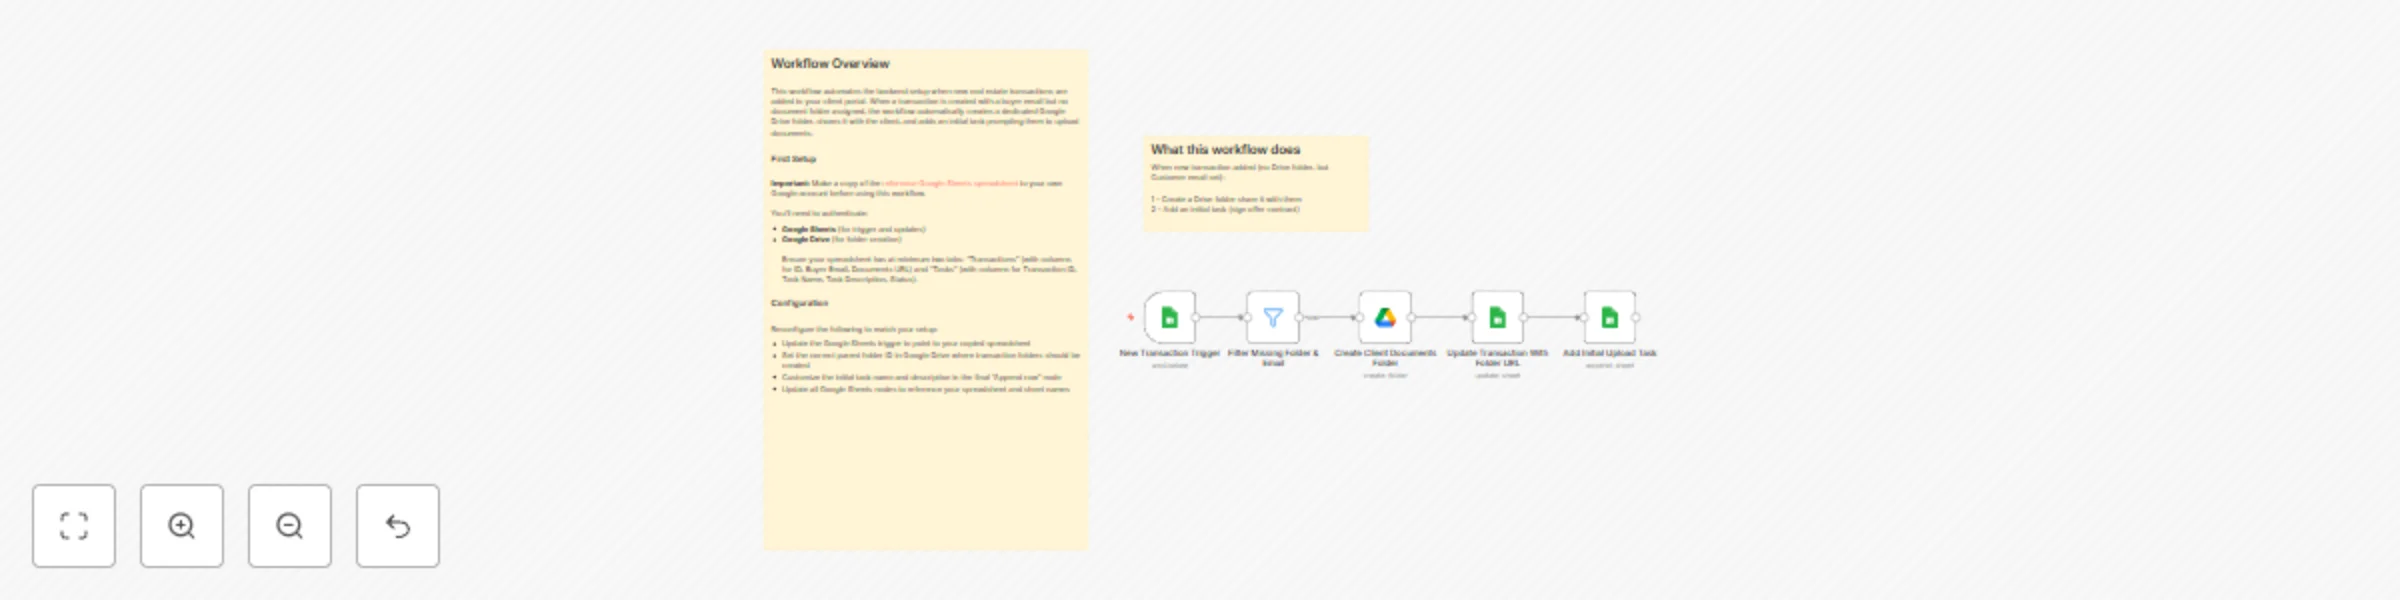
Automate real estate client folder creation with Google Sheets and Drive
What this workflow does This workflow automates backend setup tasks for real estate client portals. When a new proper...
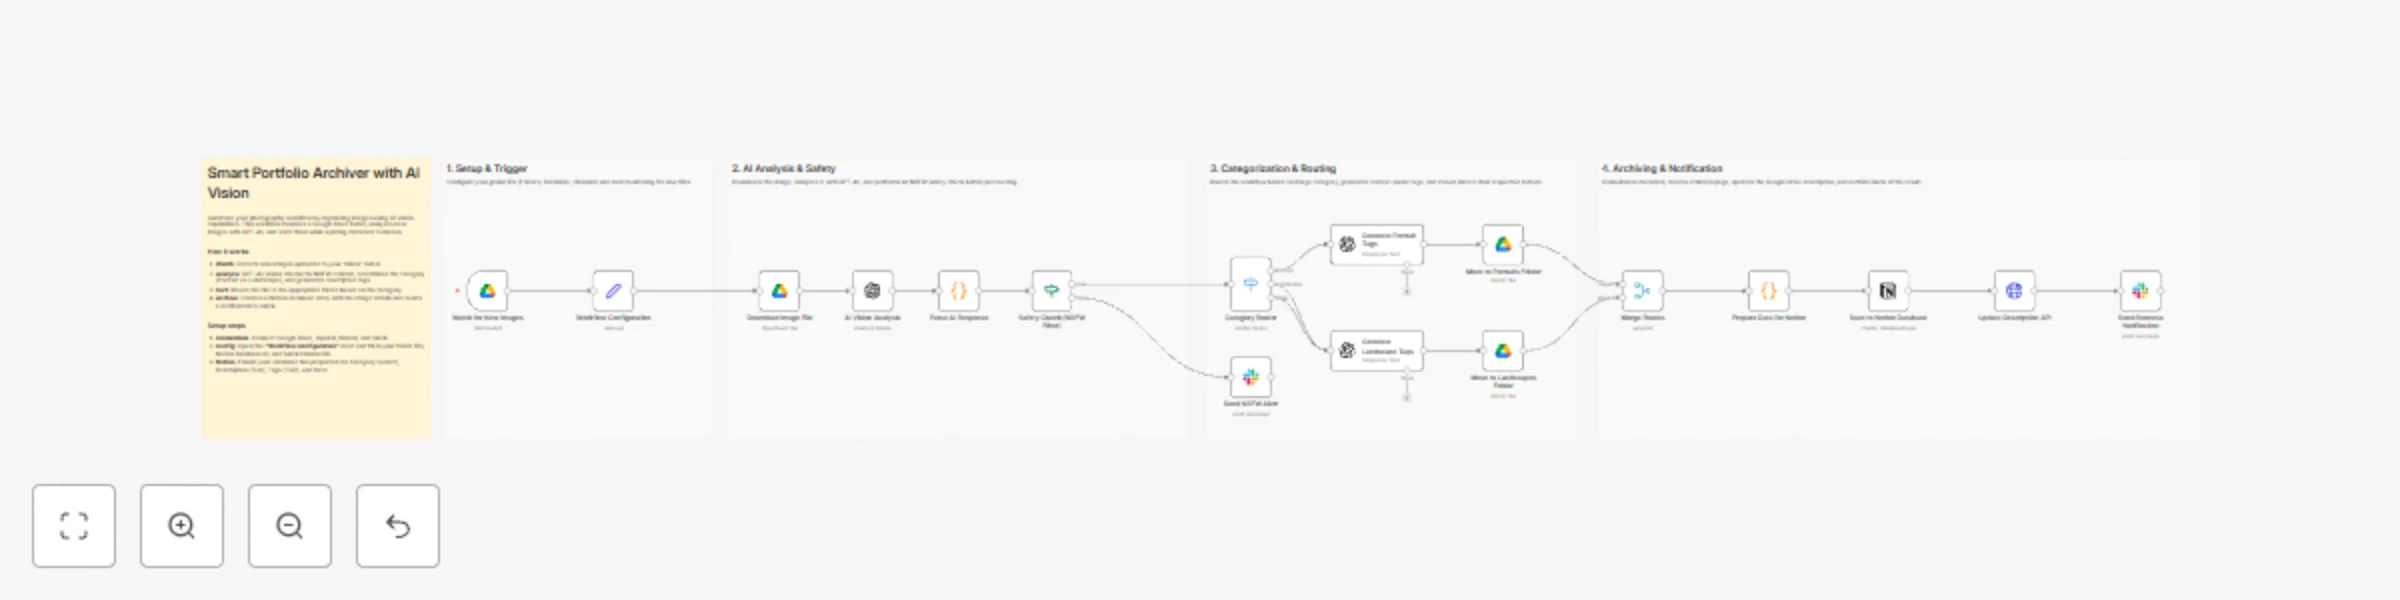
Automate image portfolio organization with GPT-4o Vision, Google Drive and Notion
This template is ideal for photographers, graphic designers, and creative professionals who manage large volumes of v...

🗜️ Automate image compression in Google Drive with Tinify API and email reports
Tags: Image Compression, Tinify API, TinyPNG, SEO Optimisation, E commerce, Marketing Context Hi! I’m Samir Saci, Sup...

Automatic PDF compression with iLovePDF for Google Drive files
Watch Google Drive folder and use iLovePDF Compress Tool to save it in another Google Drive folder This n8n template...
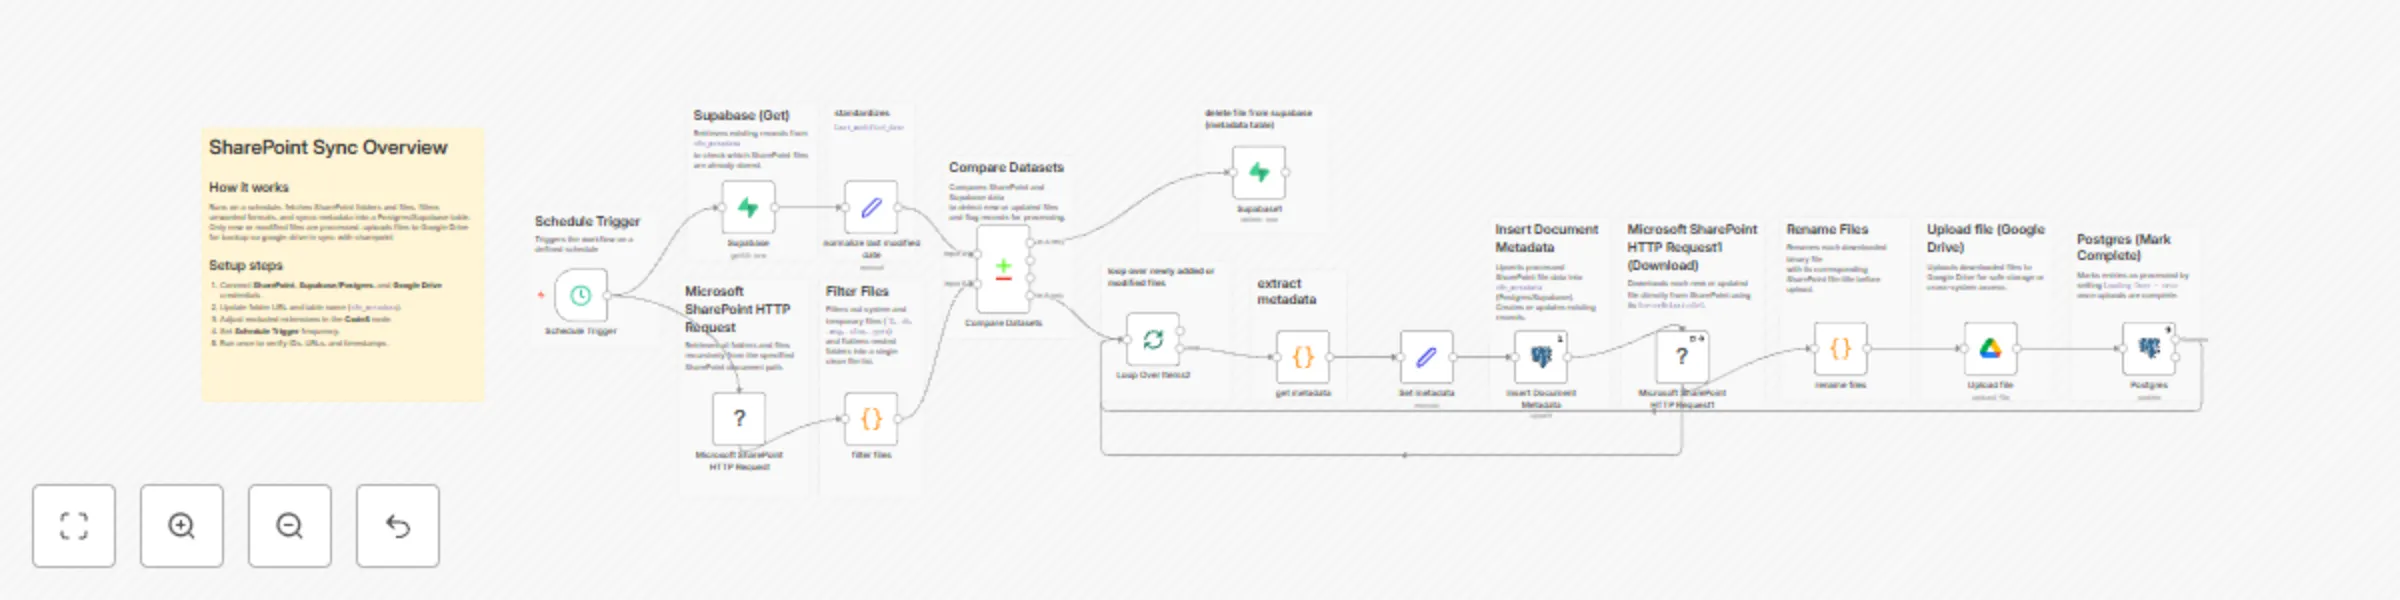
Automated document sync between SharePoint and Google Drive with Supabase
SharePoint → Supabase → Google Drive Sync Workflow Overview This workflow is a multi system document synchronization...

Telegram to Google Drive: auto upload & track videos with Gemini AI assistant
🚀 Overview This workflow automates video uploads from Telegram directly to Google Drive, complete with smart file re...