Create a self-contained CRUD app with Redis storage and HTML frontend

Workflow preview

Workflow preview
100%
Create a self-contained CRUD app with Redis storage and HTML frontend preview
Open on n8n.io

Important notice

This workflow is provided as-is. Please review and test before using in production.

1. Workflow Overview

Build a Redis Powered CRUD App with HTML Frontend ![App Screenshot](https:/...

Best for

  • Engineering automation workflows
  • advanced n8n builders looking for reusable templates

Tools used

n8n-nodes-base.webhook, n8n-nodes-base.redis, n8n-nodes-base.splitinbatches, n8n-nodes-base.stickynote, n8n-nodes-base.set, n8n-nodes-base.code, n8n-nodes-base.respondtowebhook

Source and attribution

This workflow is cataloged by N8N Workflows and links back to its original n8n.io source page by Ficky.

Original n8n.io source

1.1 Workflow description

Title
Create a self-contained CRUD app with Redis storage and HTML frontend
Workflow name
Create a self-contained CRUD app with Redis storage and HTML frontend

Build a Redis-Powered CRUD App with HTML Frontend

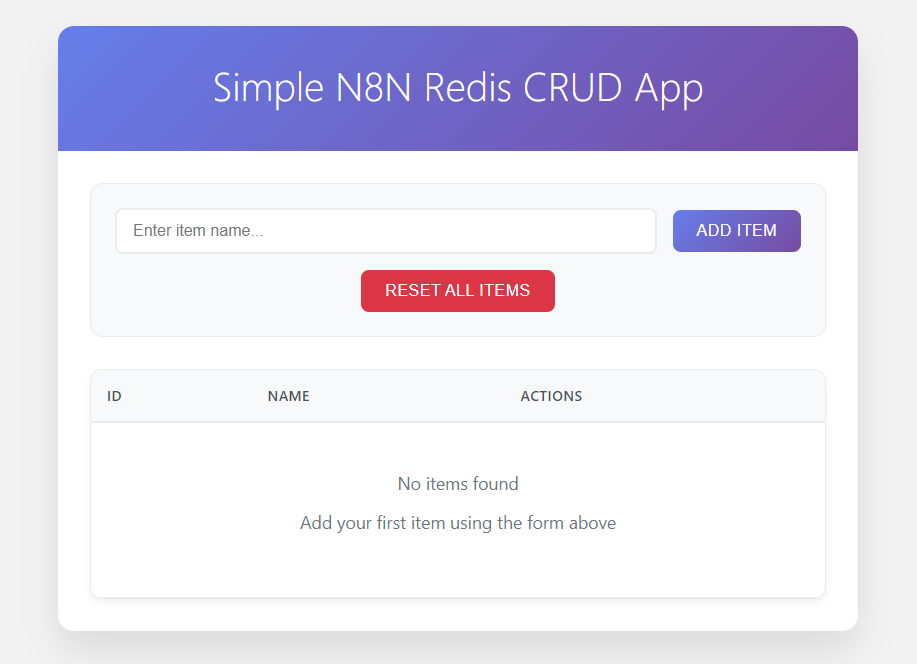
This workflow demonstrates how to use n8n to build a complete, self-contained CRUD (Create, Read, Update, Delete) application without relying on any external server or hosting. It not only acts as the backend, handling all CRUD operations through Webhook endpoints, but also serves a fully functional HTML Single Page Application (SPA) directly via a webhook response.

Redis is used as a lightweight data store, providing fast and simple key-value storage with auto-incremented IDs. Because both the frontend (HTML app) and backend (API endpoints) are managed entirely within a single n8n workflow, you can quickly prototype or deploy small tools without additional infrastructure.

This approach is ideal for:

  • Rapidly creating no-code or low-code applications
  • Running fully browser-based tools served directly from n8n
  • Teaching or demonstrating n8n + Redis integration in a single workflow

Features

  • Add new item with auto-incremented ID
  • Edit existing item
  • Delete specific item
  • Reset all data (clear storage and reset autoincrement id)
  • Single HTML frontend for demonstration (no framework required)

Setup Instructions

1. Prerequisites

Before importing and running the workflow, make sure you have:

  • A running n8n instance (self-hosted or cloud)
  • A running Redis server (local or remote)

2. API Path Setup

For the REST API, use a consistent path. For example, if you choose items as the path:

  • 2a. Get All Items

    • Method: GET
    • Endpoint: items
  • 2b. Add Item

    • Method: POST
    • Endpoint: items
  • 2c. Edit Item

    • Method: PUT
    • Endpoint: items
  • 2d. Delete Item

    • Method: DELETE
    • Endpoint: items
  • 2e. Reset Items

    • Method: POST
    • Endpoint: items-reset

3. Configure the API URL

Set the API URL in the SET API URL node. Use your n8n webhook URL, for example:
https://yourn8n.com/webhook/items

4. Run the HTML App

Once everything is set:

  1. Open the webhook URL for the HTML app in a browser.
  2. The CRUD interface will load and connect to the API endpoints automatically.
  3. You can now add, edit, delete, or reset items directly from the web interface.

Workflows

1. Render the HTML CRUD App

This webhook serves a self-contained HTML Single Page Application (SPA) for basic CRUD operations. The HTML content is returned directly in the webhook response.

This setup is ideal for lightweight, browser-based tools without external hosting.

How to Use

  • Open the webhook URL in a browser
  • The CRUD interface will load and connect to the data source via API calls
  • Before using, make sure to edit the api_url in the SET API URL node to match your webhook endpoint

2a. REST API: Get All Items

This webhook handles retrieving all saved items from Redis. Each item is returned with its corresponding ID and associated data (e.g., name). This endpoint is used by the HTML CRUD App to display the full list of items.

  • Method: GET
  • Function: Fetches all items stored in Redis and returns them as a JSON array

2b. REST API: Add Item

This webhook handles the Add Item functionality. This endpoint is typically called by the HTML CRUD App when adding a new item.

  • Method: POST
  • Request Body: { "name": "item name" }
  • Function: Generates an auto-incremented ID using Redis and saves the data under that ID

2c. REST API: Edit Item

This webhook handles updating an existing item in Redis.

  • Method: PUT
  • Request Body: { "id": 1, "name": "Updated Item Name" }
  • Function: Finds the item by the given id and updates its data in Redis

2d. REST API: Delete Item

This webhook handles deleting a specific item from Redis.

  • Method: DELETE
  • Request Body: { "id": 1 }
  • Function: Removes the item with the given id from Redis

2e. REST API: Reset Items

This webhook handles resetting all data in the application.

  • Method: POST
  • Function:
    • Deletes all stored items from Redis
    • Resets the auto-increment ID by deleting the data in Redis

1.2 Logical Blocks

This catalog entry is organized from the workflow JSON. The node-level section below shows the executable blocks available for review before importing the template.

2. Block-by-Block Analysis

Block 1 - Hook: Get Items

Type / Role
n8n-nodes-base.webhook - webhook
Config choices
Version 2

Block 2 - Hook: Add Item

Type / Role
n8n-nodes-base.webhook - webhook
Config choices
Version 2

Block 3 - Add Item

Type / Role
n8n-nodes-base.redis - redis
Config choices
Version 1

Block 4 - GetID

Type / Role
n8n-nodes-base.redis - redis
Config choices
Version 1

Block 5 - Hook: Edit Item

Type / Role
n8n-nodes-base.webhook - webhook
Config choices
Version 2

Block 6 - Hook: Delete Item

Type / Role
n8n-nodes-base.webhook - webhook
Config choices
Version 2

Block 7 - Delete Item by Id

Type / Role
n8n-nodes-base.redis - redis
Config choices
Version 1

Block 8 - Hook: Reset

Type / Role
n8n-nodes-base.webhook - webhook
Config choices
Version 2

Block 9 - Loop Over Items

Type / Role
n8n-nodes-base.splitInBatches - splitInBatches
Config choices
Version 3

Block 10 - Sticky Note

Type / Role
n8n-nodes-base.stickyNote - stickyNote
Config choices
Version 1

Block 11 - Sticky Note1

Type / Role
n8n-nodes-base.stickyNote - stickyNote
Config choices
Version 1

Block 12 - Sticky Note2

Type / Role
n8n-nodes-base.stickyNote - stickyNote
Config choices
Version 1

Block 13 - Sticky Note3

Type / Role
n8n-nodes-base.stickyNote - stickyNote
Config choices
Version 1

Block 14 - Sticky Note4

Type / Role
n8n-nodes-base.stickyNote - stickyNote
Config choices
Version 1

Block 15 - Sticky Note5

Type / Role
n8n-nodes-base.stickyNote - stickyNote
Config choices
Version 1

Block 16 - Sticky Note6

Type / Role
n8n-nodes-base.stickyNote - stickyNote
Config choices
Version 1

Block 17 - SET API URL

Type / Role
n8n-nodes-base.set - set
Config choices
Version 3.4

Block 18 - Format as JSON

Type / Role
n8n-nodes-base.code - code
Config choices
Version 2

Block 19 - Get All Items

Type / Role
n8n-nodes-base.redis - redis
Config choices
Version 1

Block 20 - Format the Items

Type / Role
n8n-nodes-base.code - code
Config choices
Version 2

Block 21 - Update the item

Type / Role
n8n-nodes-base.redis - redis
Config choices
Version 1

Block 22 - Get All Item Keys

Type / Role
n8n-nodes-base.redis - redis
Config choices
Version 1

Block 23 - Delete an Item

Type / Role
n8n-nodes-base.redis - redis
Config choices
Version 1

Block 24 - Reset Autoincrement ID

Type / Role
n8n-nodes-base.redis - redis
Config choices
Version 1

Showing the first 24 of 27 workflow blocks. Download the JSON for the full node graph.

3. Summary Table

Workflow Create a self-contained CRUD app with Redis storage and HTML frontend
Complexity advanced
Nodes 27
Categories Engineering
Author Ficky
Published 06 Jul 2025

4. Reproducing the Workflow from Scratch

  1. 1. Download the workflow JSON

    Use the JSON export at /data/workflows/5708/5708.json as the source template for this automation.

  2. 2. Import the template into n8n

    Open n8n, import the downloaded JSON, and review each node before activating the workflow.

  3. 3. Configure credentials and variables

    Replace placeholder credentials, API keys, webhook URLs, account IDs, and environment-specific values with your own settings.

  4. 4. Test with sample data

    Run the workflow manually or in a staging workspace, inspect node output, and confirm downstream systems receive the expected data.

  5. 5. Activate and monitor

    Enable the workflow only after testing, then monitor executions, errors, and rate limits during the first production runs.

5. General Notes & Resources

Review imported nodes carefully before activation. This catalog entry is intended to help you inspect the workflow structure, understand required services, and find related templates faster.

Node names, credentials, schedules, webhook paths, and external service limits may need adjustment for your workspace.

Frequently asked questions

What does Create a self-contained CRUD app with Redis storage and HTML frontend do?

Build a Redis Powered CRUD App with HTML Frontend ![App Screenshot](https:/...

What do I need before importing this workflow?

Review the workflow JSON, configure any required credentials in n8n, and test the automation in a safe workspace before using it in production.

Can I customize this workflow?

Yes. Use the block-by-block analysis and the downloadable JSON to inspect each node, then adjust credentials, prompts, schedules, filters, or destinations for your Engineering use case.