
Create a secure personal AI assistant with OpenAI and Signal Messenger

Workflow preview
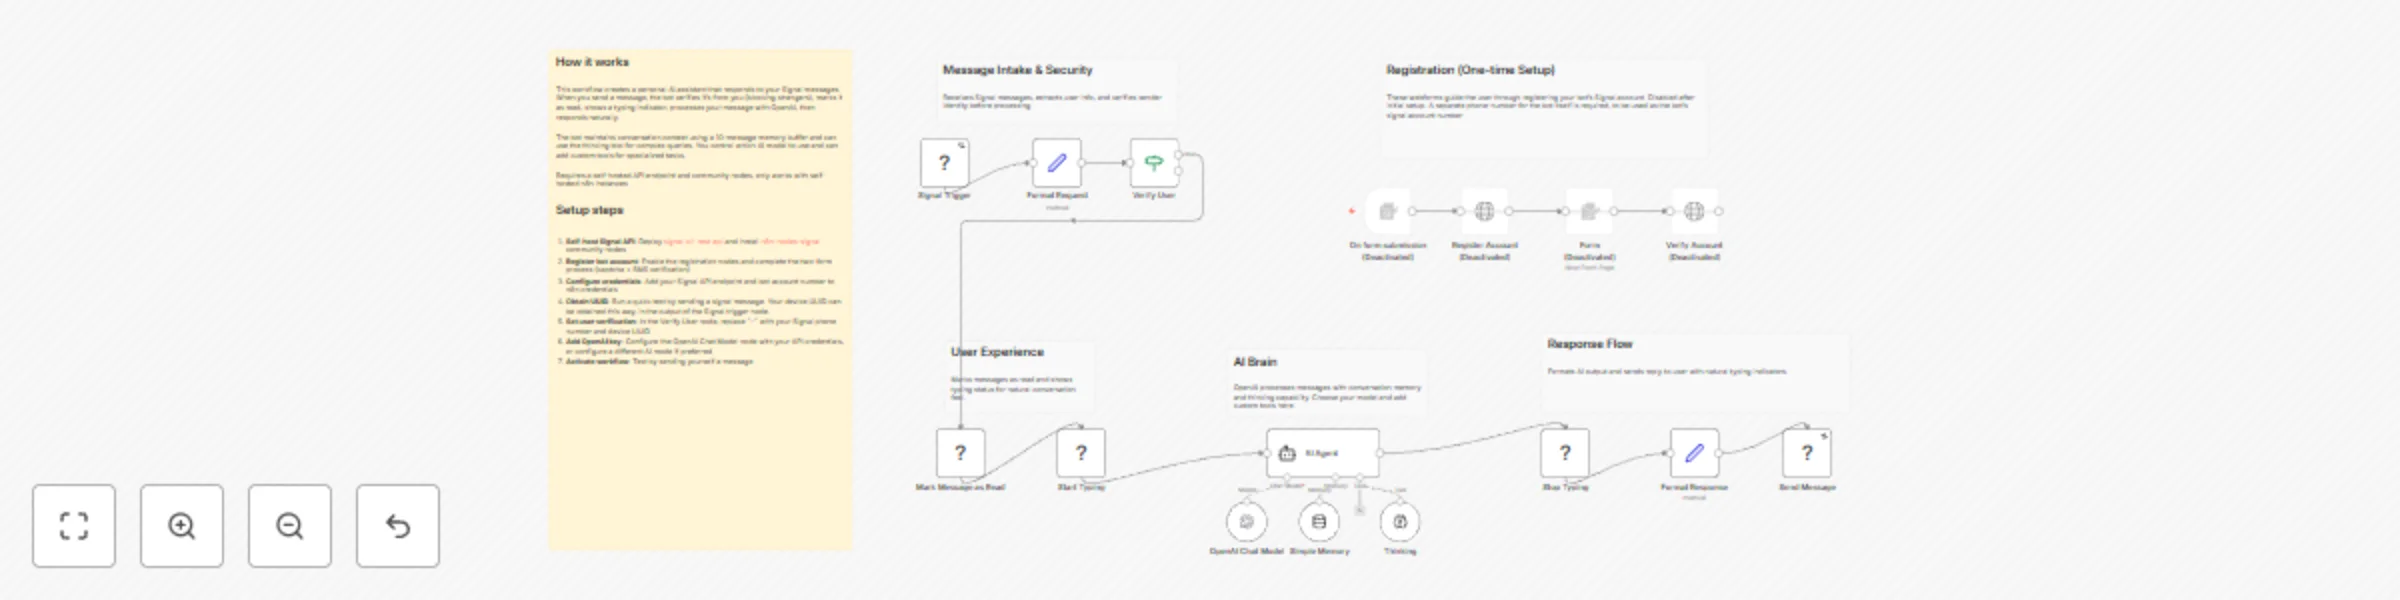
Workflow preview
100%
Create a secure personal AI assistant with OpenAI and Signal Messenger preview
Open on n8n.io

Important notice

This workflow is provided as-is. Please review and test before using in production.

1. Workflow Overview

Overview This workflow streamlines the process of setting up a chat bot using the Signal Messager API. What this is for Chat bot applications have become very popular on W...

Best for

  • Personal Productivity automation workflows
  • AI Chatbot automation workflows
  • advanced n8n builders looking for reusable templates

Tools used

@n8n/n8n-nodes-langchain.agent, @n8n/n8n-nodes-langchain.lmchatopenai, n8n-nodes-base.set, n8n-nodes-base.if, n8n-nodes-signal-cli-rest-api.signal, n8n-nodes-signal-cli-rest-api.signaltrigger, @n8n/n8n-nodes-langchain.toolthink, @n8n/n8n-nodes-langchain.memorybufferwindow

Source and attribution

This workflow is cataloged by N8N Workflows and links back to its original n8n.io source page by Chris Pryce.

Original n8n.io source

1.1 Workflow description

Title
Create a secure personal AI assistant with OpenAI and Signal Messenger
Workflow name
Create a secure personal AI assistant with OpenAI and Signal Messenger

Overview

This workflow streamlines the process of setting up a chat-bot using the Signal Messager API.

What this is for

Chat-bot applications have become very popular on Whatsapp and Telegram. However, security conscious people may be hesitant to connect their AI agents to these applications. Compared to Whatsapp and Telegram, the Signal messaging app is more secure and end-to-end encrypted by default. In part because of this, it is more difficult to create a chat-bot application in this app. However, this is still possible to do if you host your own Signal API endpoint.

This workflow requires the installation of a community-node package. Some additional setup for the locally hosted Signal API endpoint is also necessary. As such, it will only work with self-hosted instances of n8n.

You may use any AI model you wish for this chat-bot, and connect different tools and APIs depending on your use-case.

How to setup

Step 1: Setup Rest API

Before implementing this workflow, you must setup a local Signal Client Rest API.

version: "3"
services:
  signal-cli-rest-api:
    image: bbernhard/signal-cli-rest-api:latest
    environment:
      - MODE=normal #supported modes: json-rpc, native, normal
      #- AUTO_RECEIVE_SCHEDULE=0 22 * * * #enable this parameter on demand (see description below)
    ports:
      - "8080:8080" #map docker port 8080 to host port 8080.
    volumes:
      - "./signal-cli-config:/home/.local/share/signal-cli" #map "signal-cli-config" folder on host system into docker container. the folder contains the password and cryptographic keys when a new number is registered
  • After starting the docker-container, you will be able to interact with a local Signal client over a Rest API at http://localhost:8080 (by default, this setting can be modified in the docker-compose file).

Step 2: Install Node Package

  • Navigate to ++your-n8n-server-address/settings/community-nodes++, click the 'Install' button, and paste in the communiy-node package name '++n8n-nodes-signal-cli-rest-api++' to install this community node.

Step 3: Register and Verify Account

  • The last step requires a phone-number. You may use your own phone-number, a pre-paid sim card, or (if you are a US resident), a free Google Voice digital phone-number.

  • An n8n web-form has been created in this workflow to make headless setup easier. In the Form nodes, replace the URL with the address of your local Signal Rest API endpoint.

  • Open the webform and enter the phone number you are using to register your bot's Signal account

  • Signal needs to verify you are human before registering an account. Visit this page to complete the captcha challenge. The right-click the 'Open Signal' button and copy the link address. Paste this into the second form field and hit 'Submit'.

  • At this point you should receive a verification token as an SMS message to the phone-number you are using. Copy this and paste it into the second web-form.
  • Your bot's signal account should be setup now. To use this account in n8n, add the Rest-API address and account-number (phone-number) as a new n8n credential.

Step 4: Optional

  • For extra security it is recommended to restrict communication with this chat-bot. In the 'If' workflow node, enter your own signal account phone-number.
  • You may also provide a UUID. This is an identifier number unique to your mobile device. You can find this by sending a test message to your bot's signal account and copying it from the workflow execution data.

1.2 Logical Blocks

This catalog entry is organized from the workflow JSON. The node-level section below shows the executable blocks available for review before importing the template.

2. Block-by-Block Analysis

Block 1 - AI Agent

Type / Role
@n8n/n8n-nodes-langchain.agent - agent
Config choices
Version 2.2

Block 2 - OpenAI Chat Model

Type / Role
@n8n/n8n-nodes-langchain.lmChatOpenAi - lmChatOpenAi
Config choices
Version 1.2

Block 3 - Format Response

Type / Role
n8n-nodes-base.set - set
Config choices
Version 3.4

Block 4 - Format Request

Type / Role
n8n-nodes-base.set - set
Config choices
Version 3.4

Block 5 - Verify User

Type / Role
n8n-nodes-base.if - if
Config choices
Version 2.2

Block 6 - Stop Typing

Type / Role
n8n-nodes-signal-cli-rest-api.signal - signal
Config choices
Version 1

Block 7 - Signal Trigger

Type / Role
n8n-nodes-signal-cli-rest-api.signalTrigger - signalTrigger
Config choices
Version 1

Block 8 - Mark Message as Read

Type / Role
n8n-nodes-signal-cli-rest-api.signal - signal
Config choices
Version 1

Block 9 - Send Message

Type / Role
n8n-nodes-signal-cli-rest-api.signal - signal
Config choices
Version 1

Block 10 - Start Typing

Type / Role
n8n-nodes-signal-cli-rest-api.signal - signal
Config choices
Version 1

Block 11 - Thinking

Type / Role
@n8n/n8n-nodes-langchain.toolThink - toolThink
Config choices
Version 1.1

Block 12 - Simple Memory

Type / Role
@n8n/n8n-nodes-langchain.memoryBufferWindow - memoryBufferWindow
Config choices
Version 1.3

Block 13 - On form submission

Type / Role
n8n-nodes-base.formTrigger - formTrigger
Config choices
Version 2.3

Block 14 - Form

Type / Role
n8n-nodes-base.form - form
Config choices
Version 2.3

Block 15 - Verify Account

Type / Role
n8n-nodes-base.httpRequest - httpRequest
Config choices
Version 4.2

Block 16 - Register Account

Type / Role
n8n-nodes-base.httpRequest - httpRequest
Config choices
Version 4.2

Block 17 - Overview

Type / Role
n8n-nodes-base.stickyNote - stickyNote
Config choices
Version 1

Block 18 - Registration Section

Type / Role
n8n-nodes-base.stickyNote - stickyNote
Config choices
Version 1

Block 19 - Message Intake

Type / Role
n8n-nodes-base.stickyNote - stickyNote
Config choices
Version 1

Block 20 - AI Processing

Type / Role
n8n-nodes-base.stickyNote - stickyNote
Config choices
Version 1

Block 21 - Response Handling

Type / Role
n8n-nodes-base.stickyNote - stickyNote
Config choices
Version 1

Block 22 - UX Enhancements

Type / Role
n8n-nodes-base.stickyNote - stickyNote
Config choices
Version 1

3. Summary Table

Workflow Create a secure personal AI assistant with OpenAI and Signal Messenger
Complexity advanced
Nodes 22
Categories Personal Productivity, AI Chatbot
Author Chris Pryce
Published 09 Nov 2025

4. Reproducing the Workflow from Scratch

  1. 1. Download the workflow JSON

    Use the JSON export at /data/workflows/10661/10661.json as the source template for this automation.

  2. 2. Import the template into n8n

    Open n8n, import the downloaded JSON, and review each node before activating the workflow.

  3. 3. Configure credentials and variables

    Replace placeholder credentials, API keys, webhook URLs, account IDs, and environment-specific values with your own settings.

  4. 4. Test with sample data

    Run the workflow manually or in a staging workspace, inspect node output, and confirm downstream systems receive the expected data.

  5. 5. Activate and monitor

    Enable the workflow only after testing, then monitor executions, errors, and rate limits during the first production runs.

5. General Notes & Resources

Review imported nodes carefully before activation. This catalog entry is intended to help you inspect the workflow structure, understand required services, and find related templates faster.

Node names, credentials, schedules, webhook paths, and external service limits may need adjustment for your workspace.

Frequently asked questions

What does Create a secure personal AI assistant with OpenAI and Signal Messenger do?

Overview This workflow streamlines the process of setting up a chat bot using the Signal Messager API. What this is for Chat bot applications have become very popular on W...

What do I need before importing this workflow?

Review the workflow JSON, configure any required credentials in n8n, and test the automation in a safe workspace before using it in production.

Can I customize this workflow?

Yes. Use the block-by-block analysis and the downloadable JSON to inspect each node, then adjust credentials, prompts, schedules, filters, or destinations for your Personal Productivity, AI Chatbot use case.



