Intermediate Workflows
For users with some n8n experience. Workflows with moderate complexity and multiple integrations.
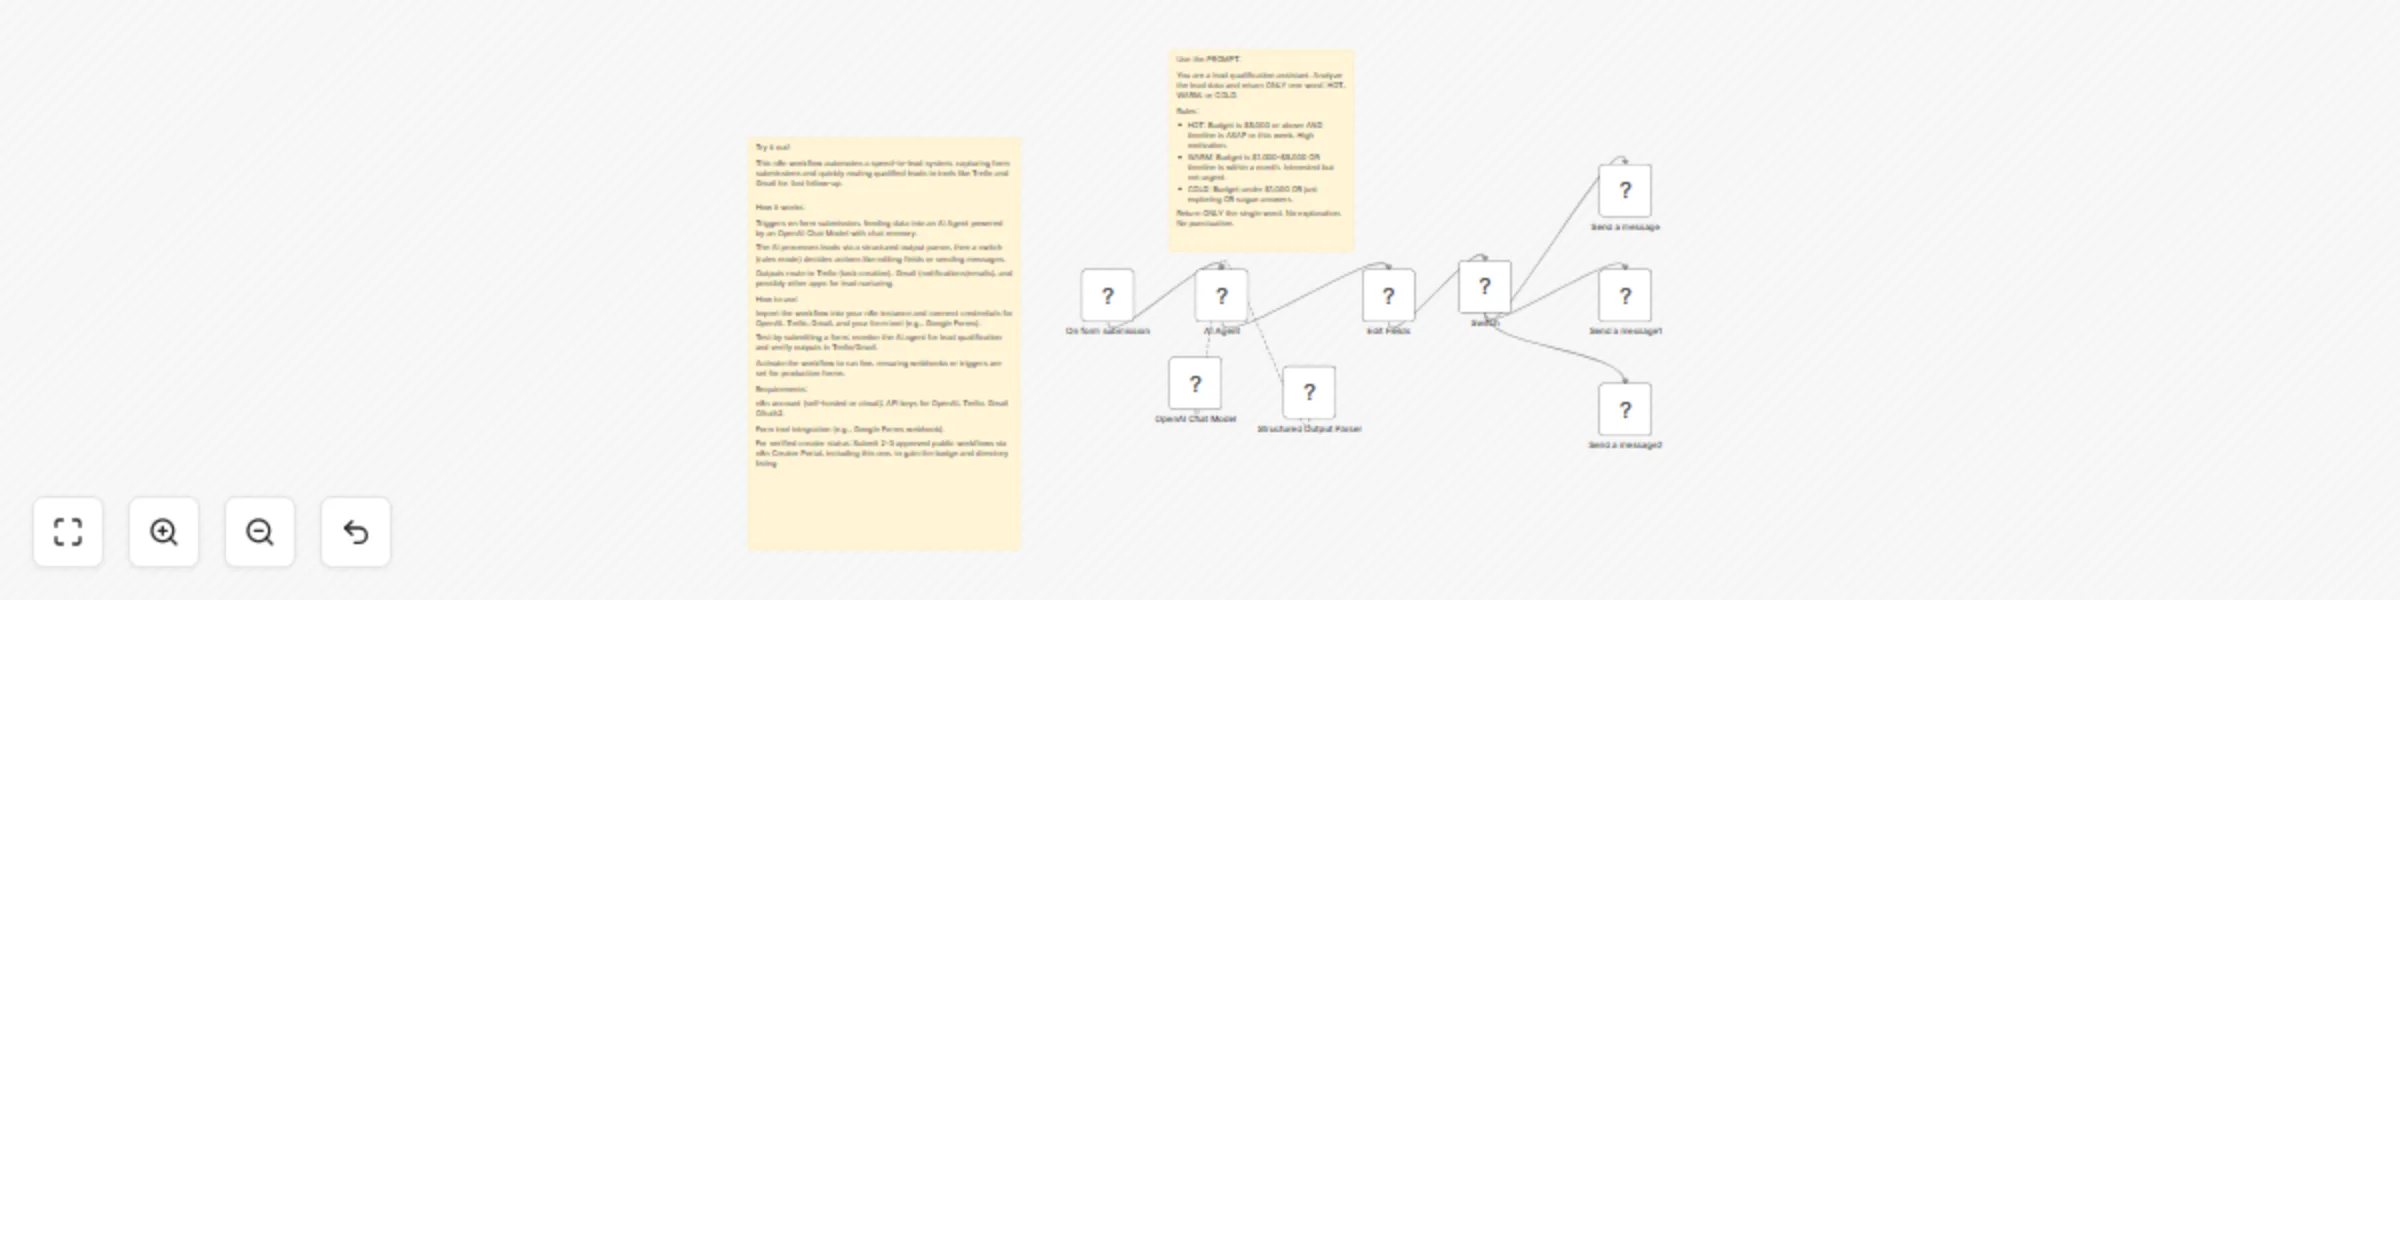
Qualify and route inbound leads with OpenAI, Trello, Slack and Gmail
Description This n8n workflow automates a speed to lead system, capturing form submissions and quickly routing qualif...
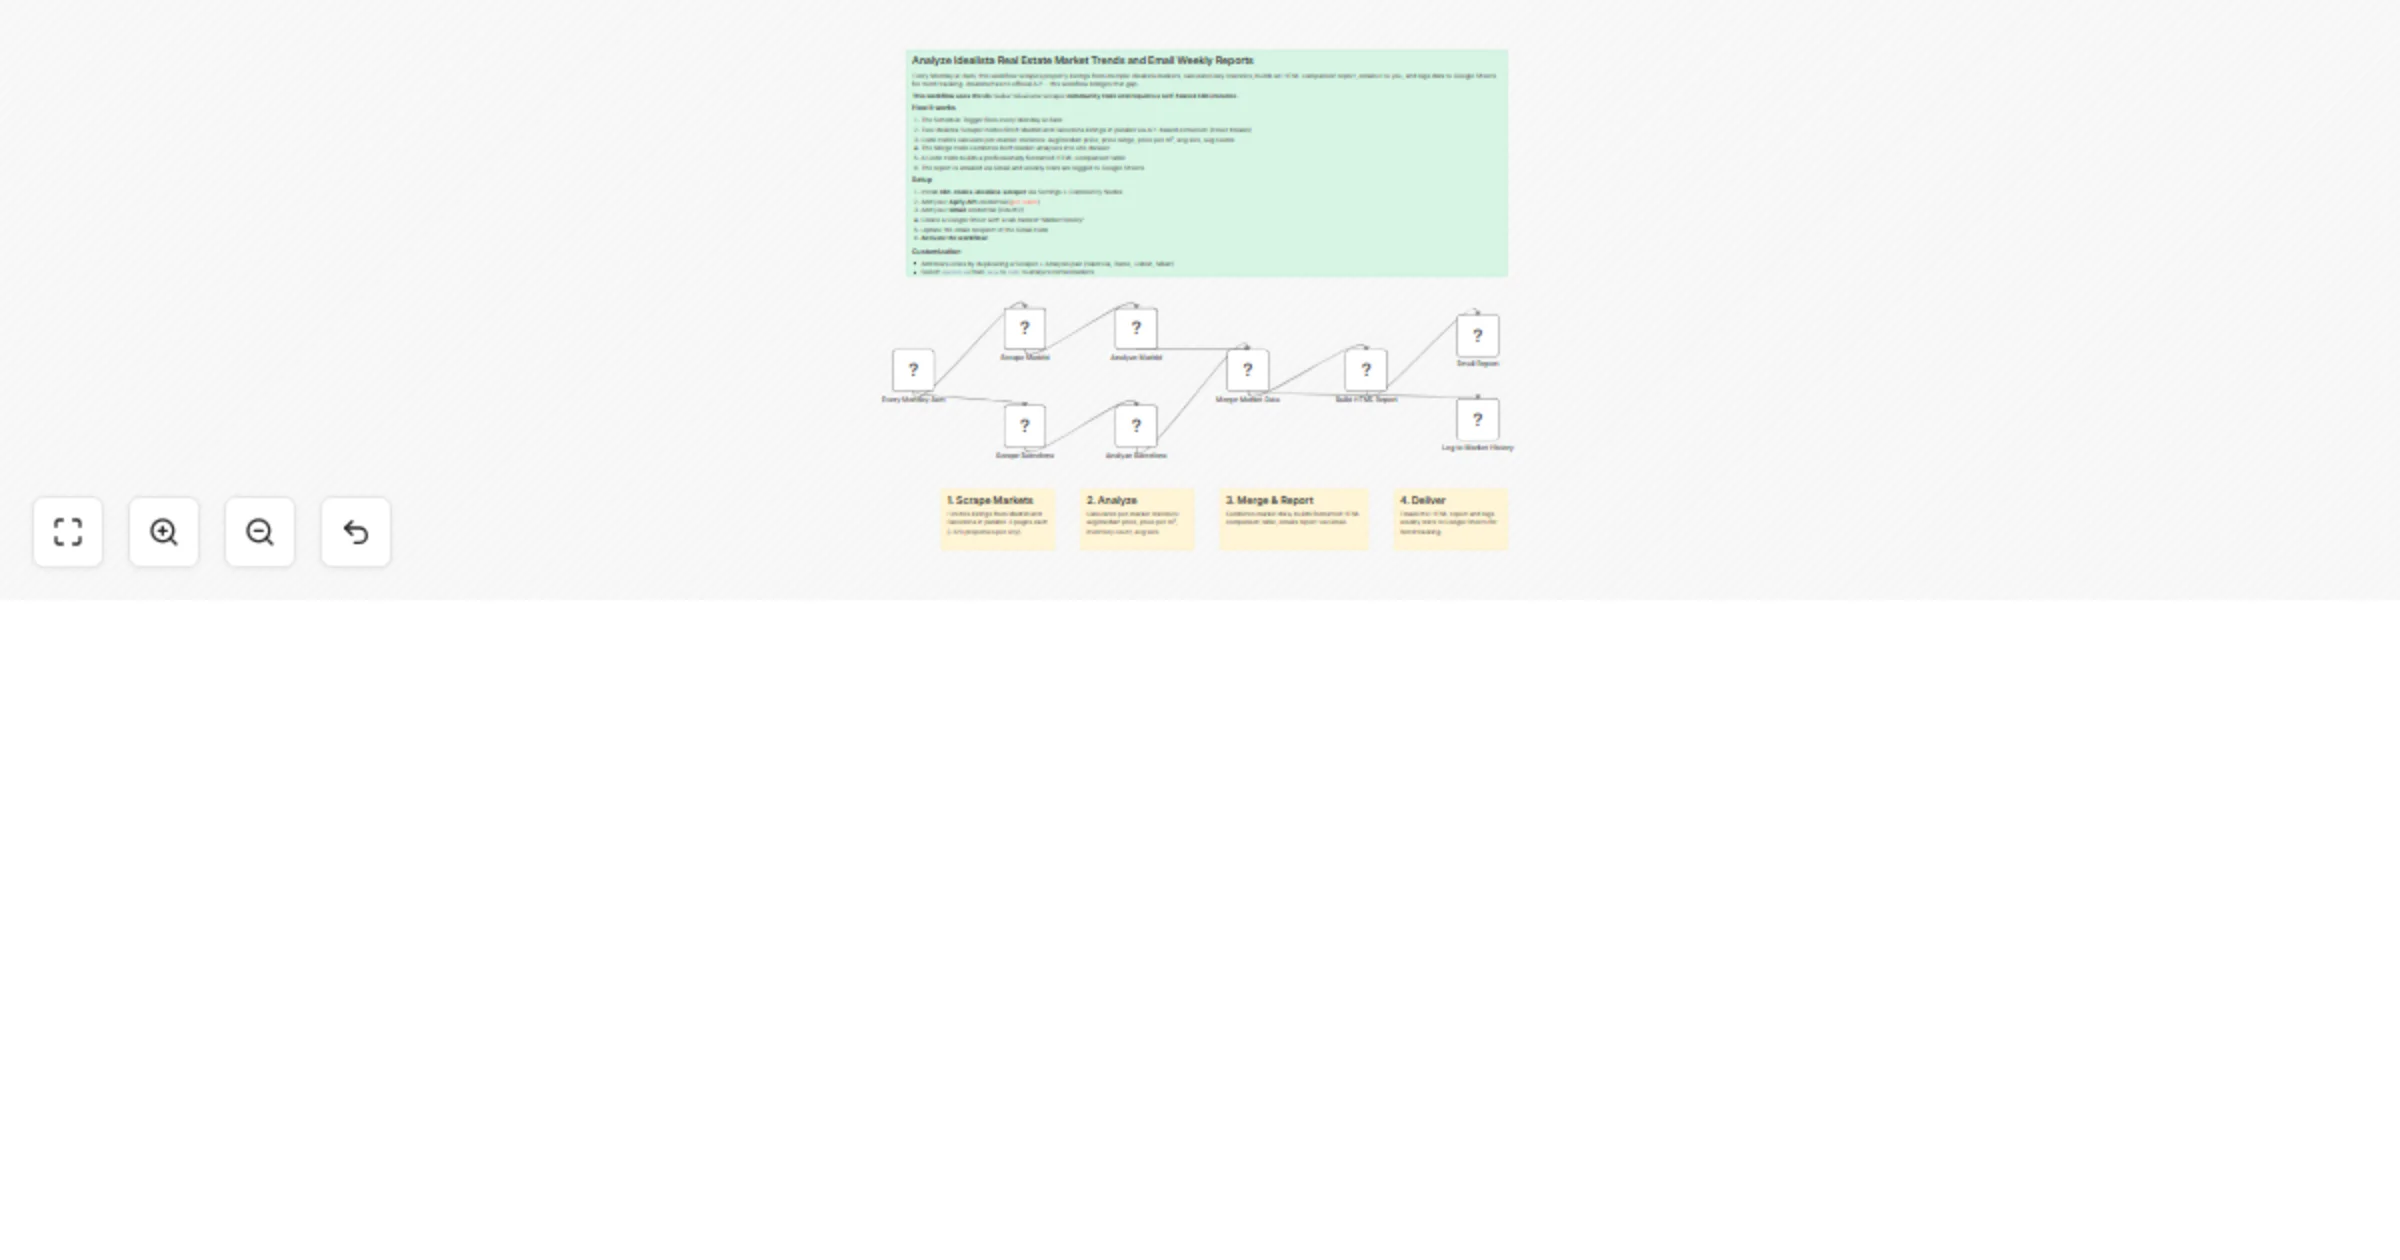
Track Idealista market stats weekly and email Google Sheets reports with Idealista Scraper
Who is this for Real estate investors comparing markets across cities, agencies generating market reports for clients...
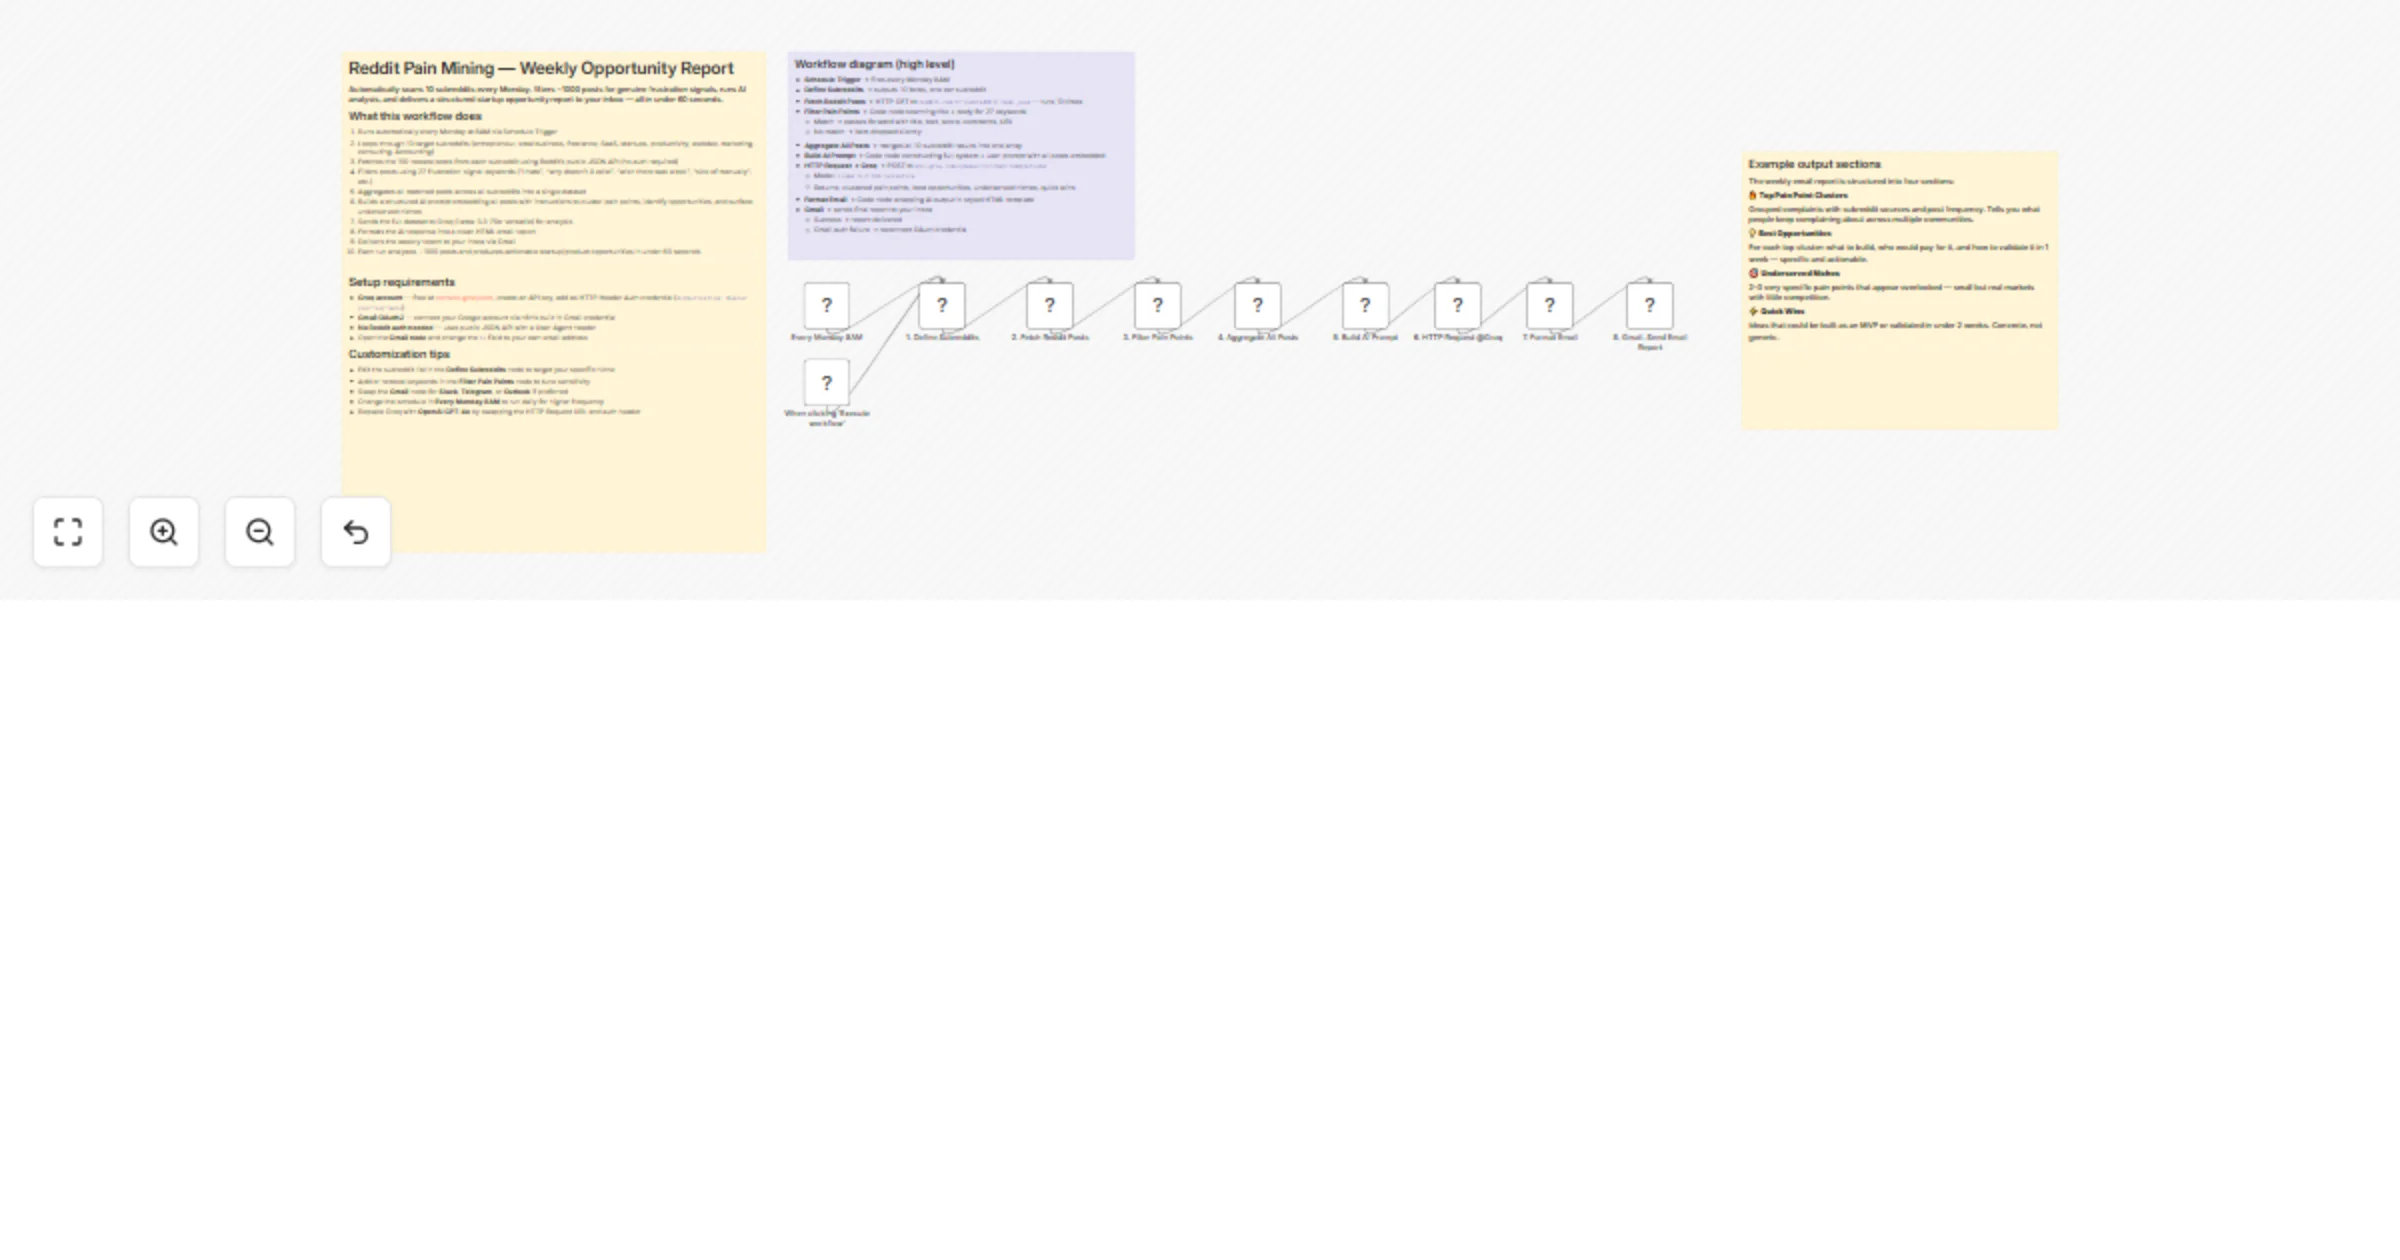
Generate weekly Reddit startup opportunity reports with Groq AI
This n8n template automatically scans 10 subreddits every Monday, filters 1000 posts for genuine frustration signals,...

Aggregate multi-source job boards to Supabase and Google Sheets
Stop manually checking dozens of career pages. This workflow runs every morning, hits the public APIs of 8+ ATS platf...
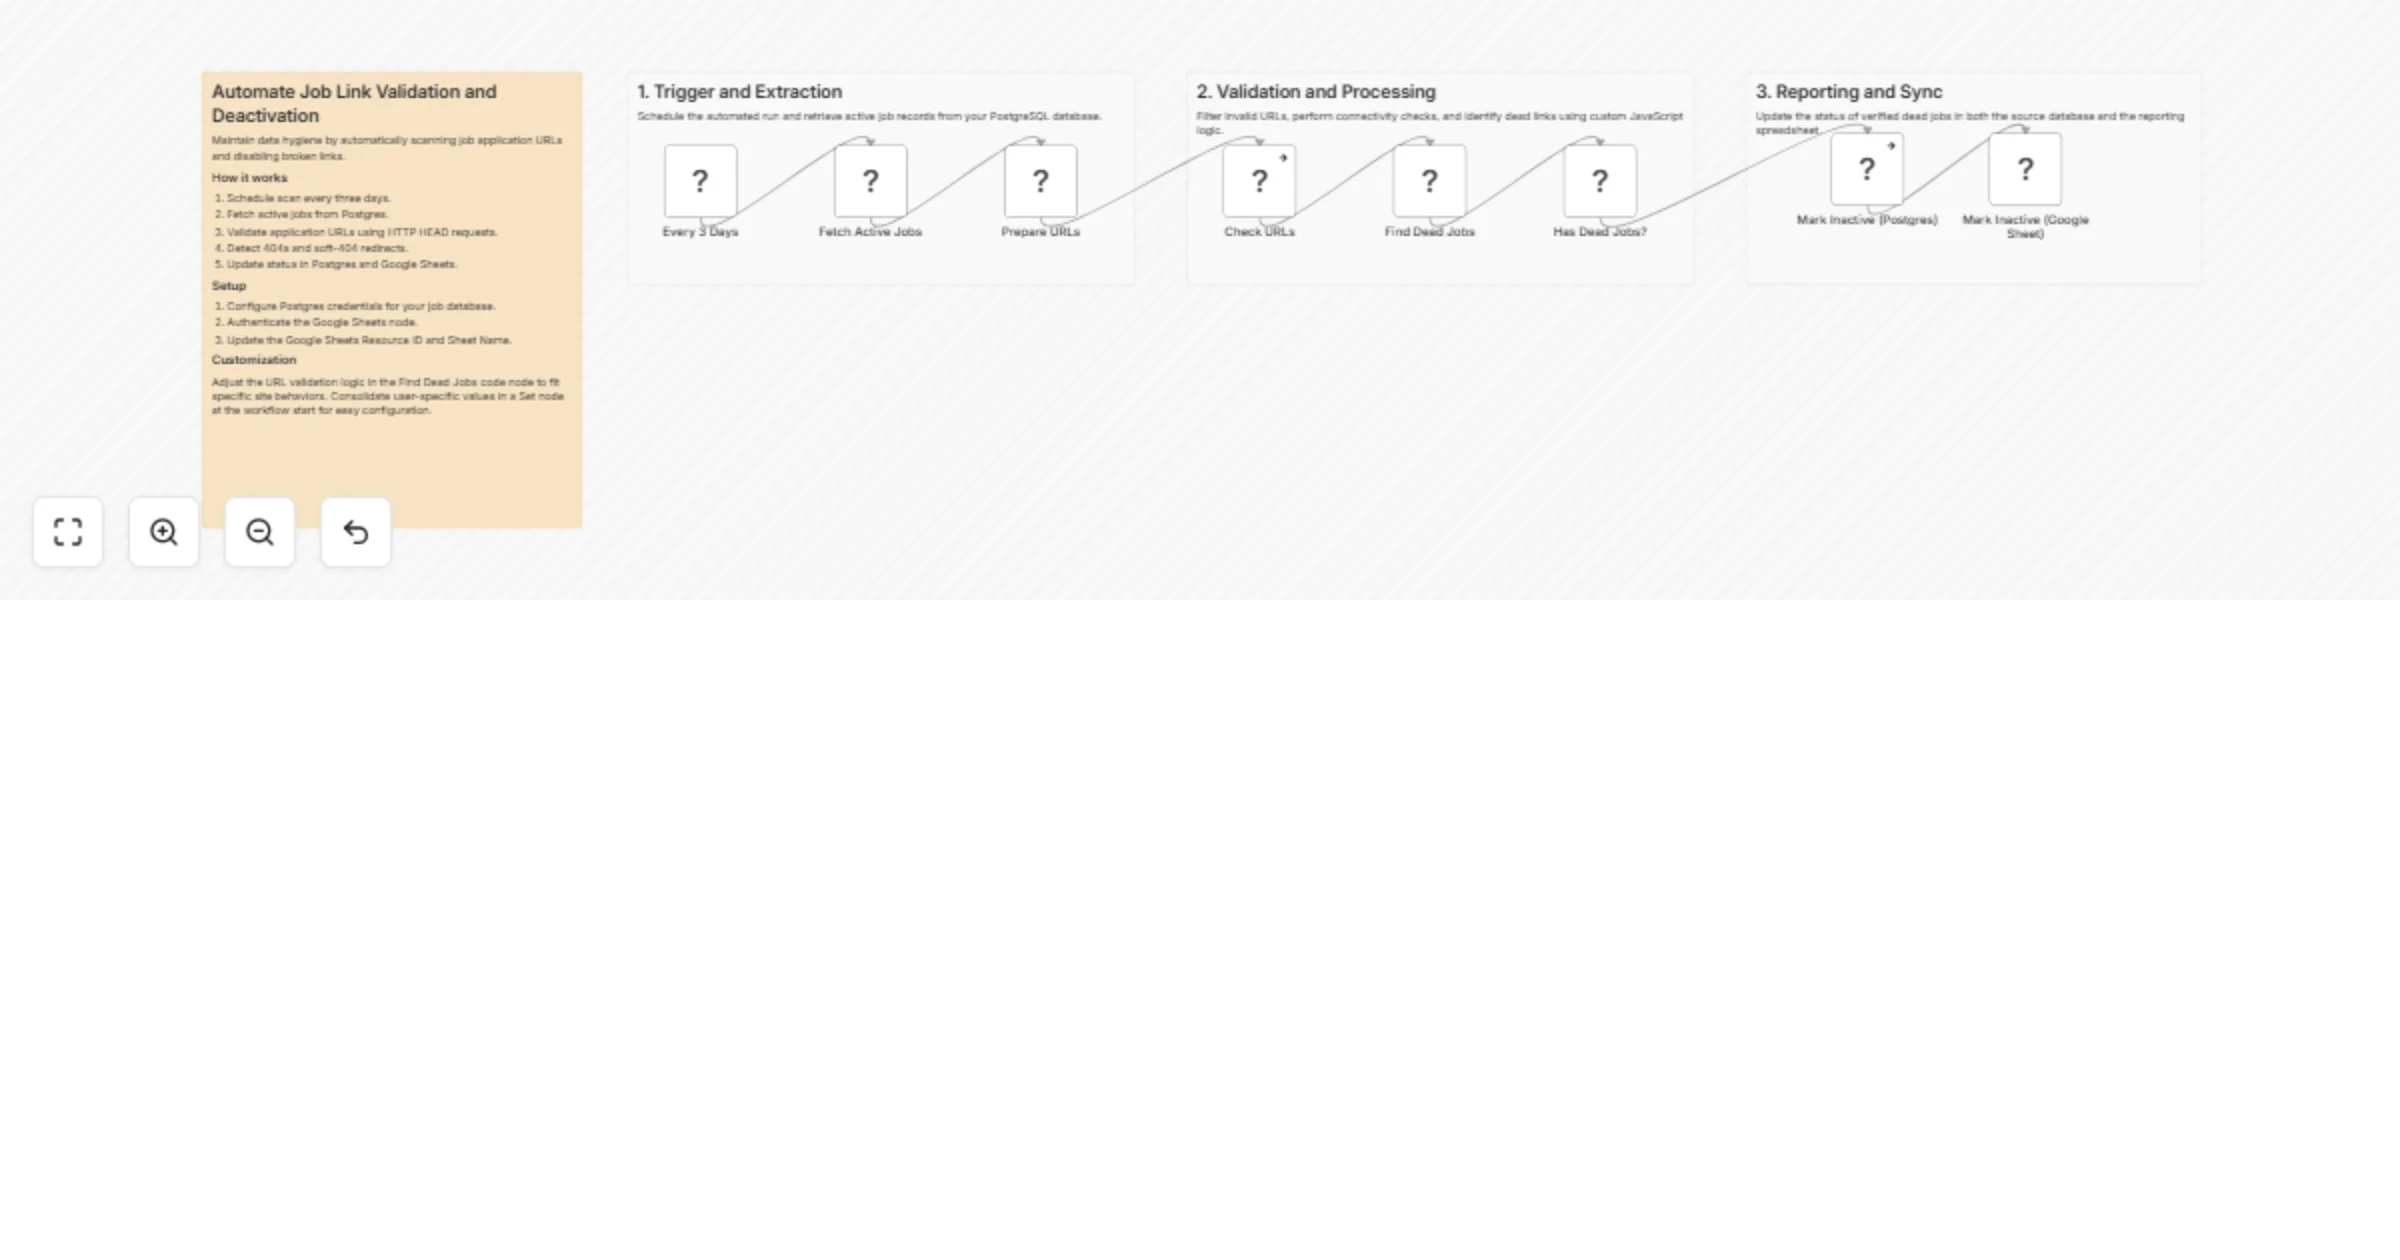
Check and deactivate broken job apply URLs with Postgres and Google Sheets
Keep your job listings database clean without manual checks. Every three days, this workflow fetches all active jobs...

Filter sitemap URLs and inspect indexing status with Google Search Console
This workflow provides a data driven approach to SEO by automating the indexing process. Instead of bulk submitting e...
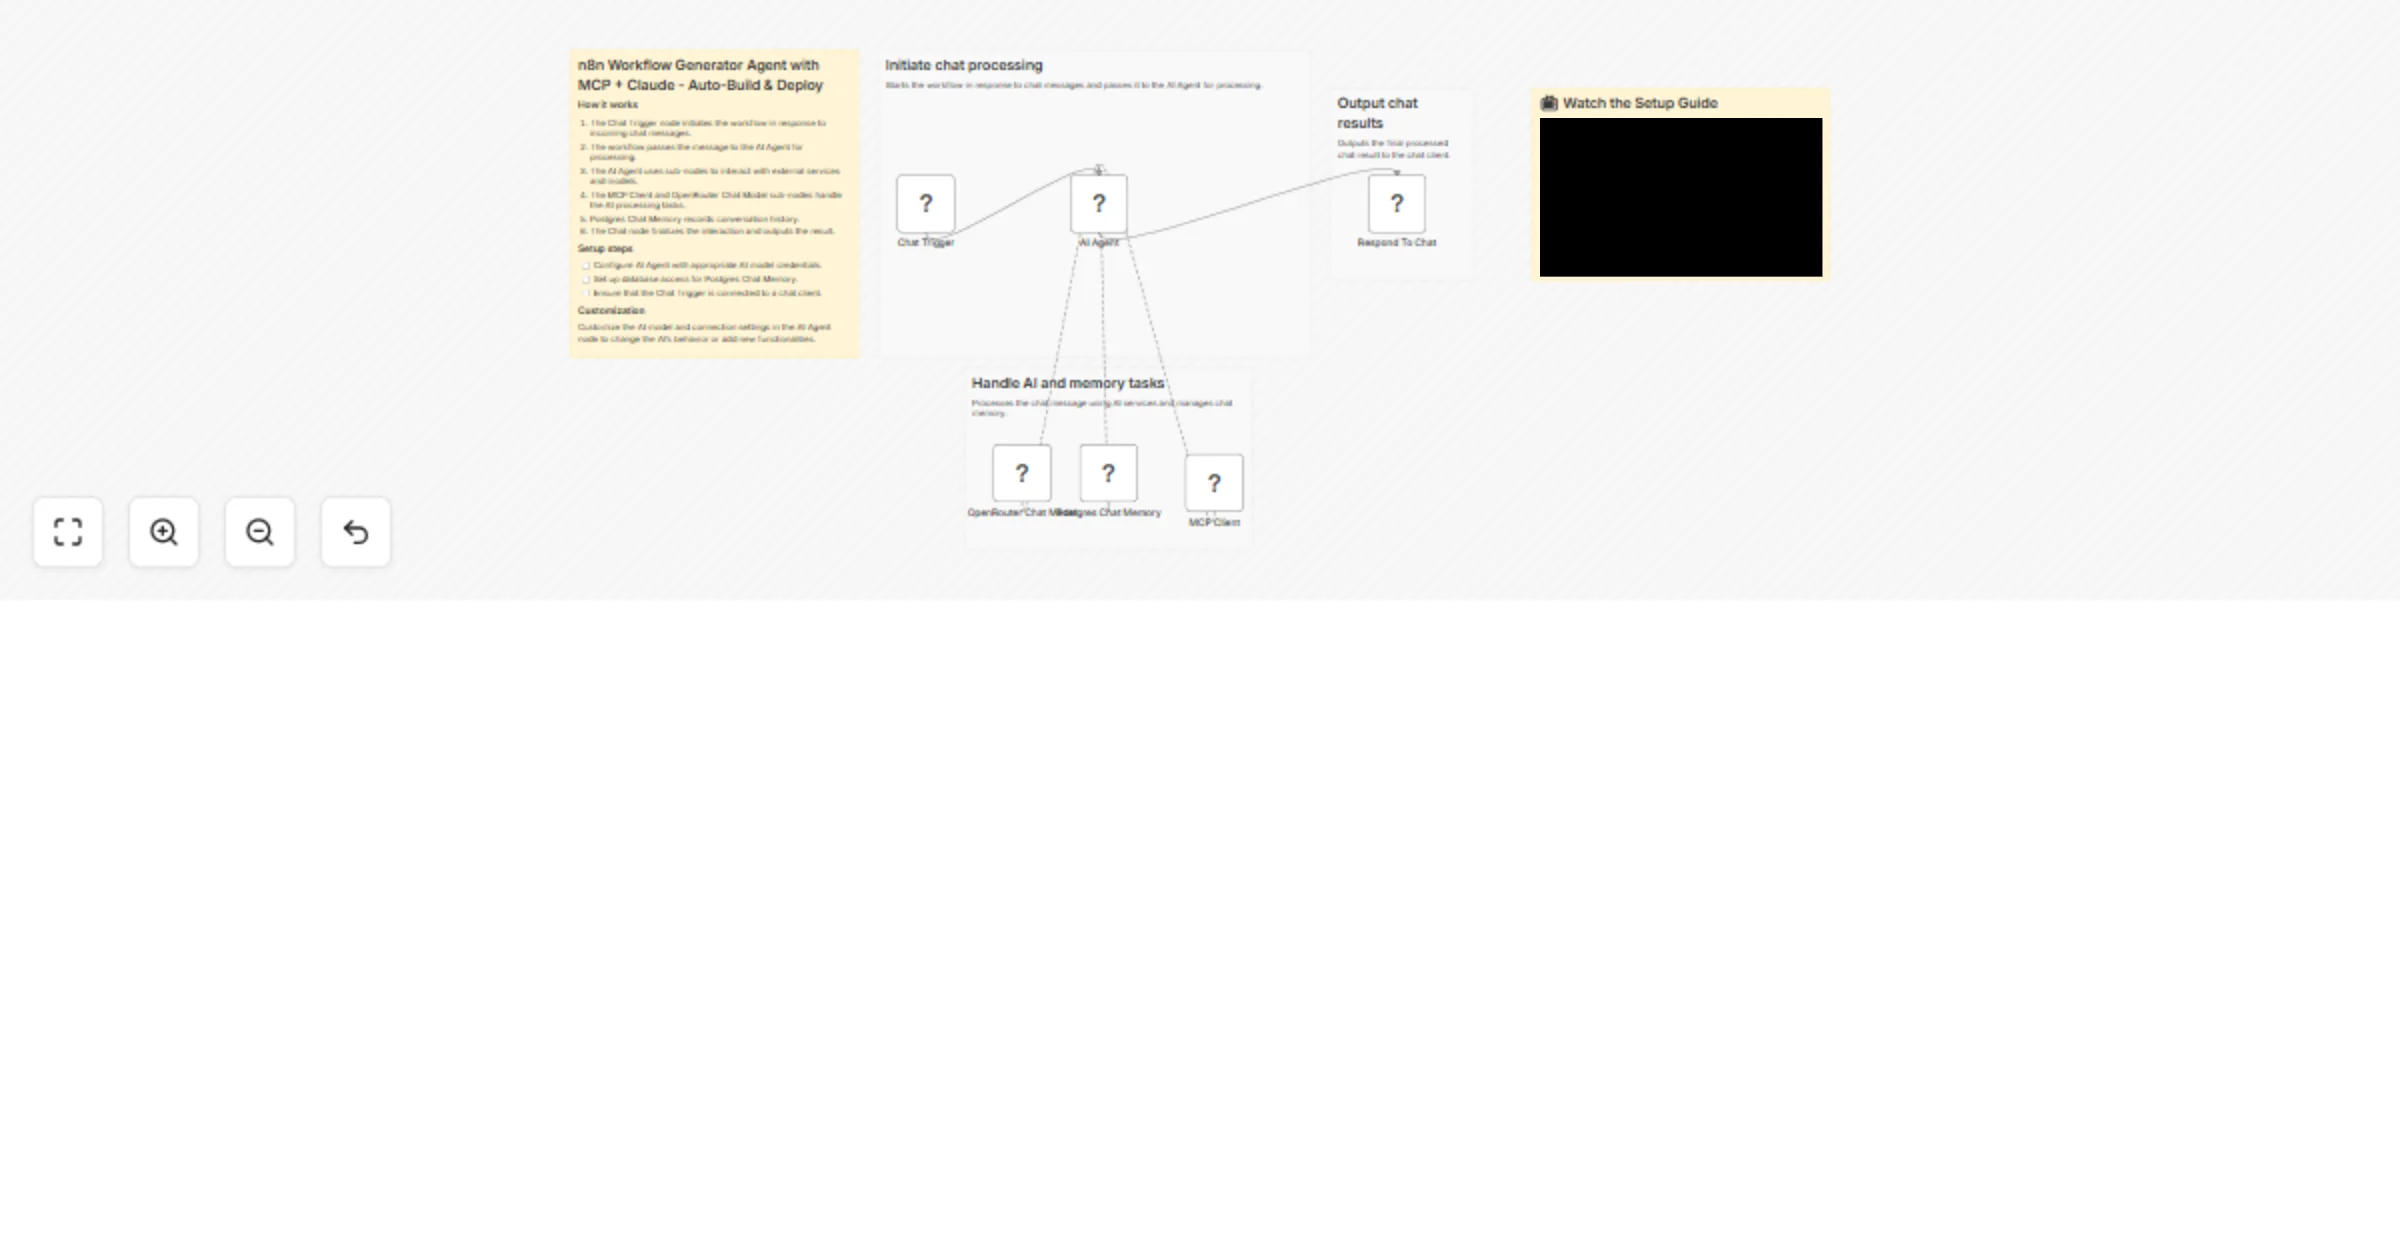
Generate n8n workflows from chat using MCP tools, Claude and Postgres
Describe any automation in plain English. This AI agent builds, validates, and deploys a working n8n workflow into yo...
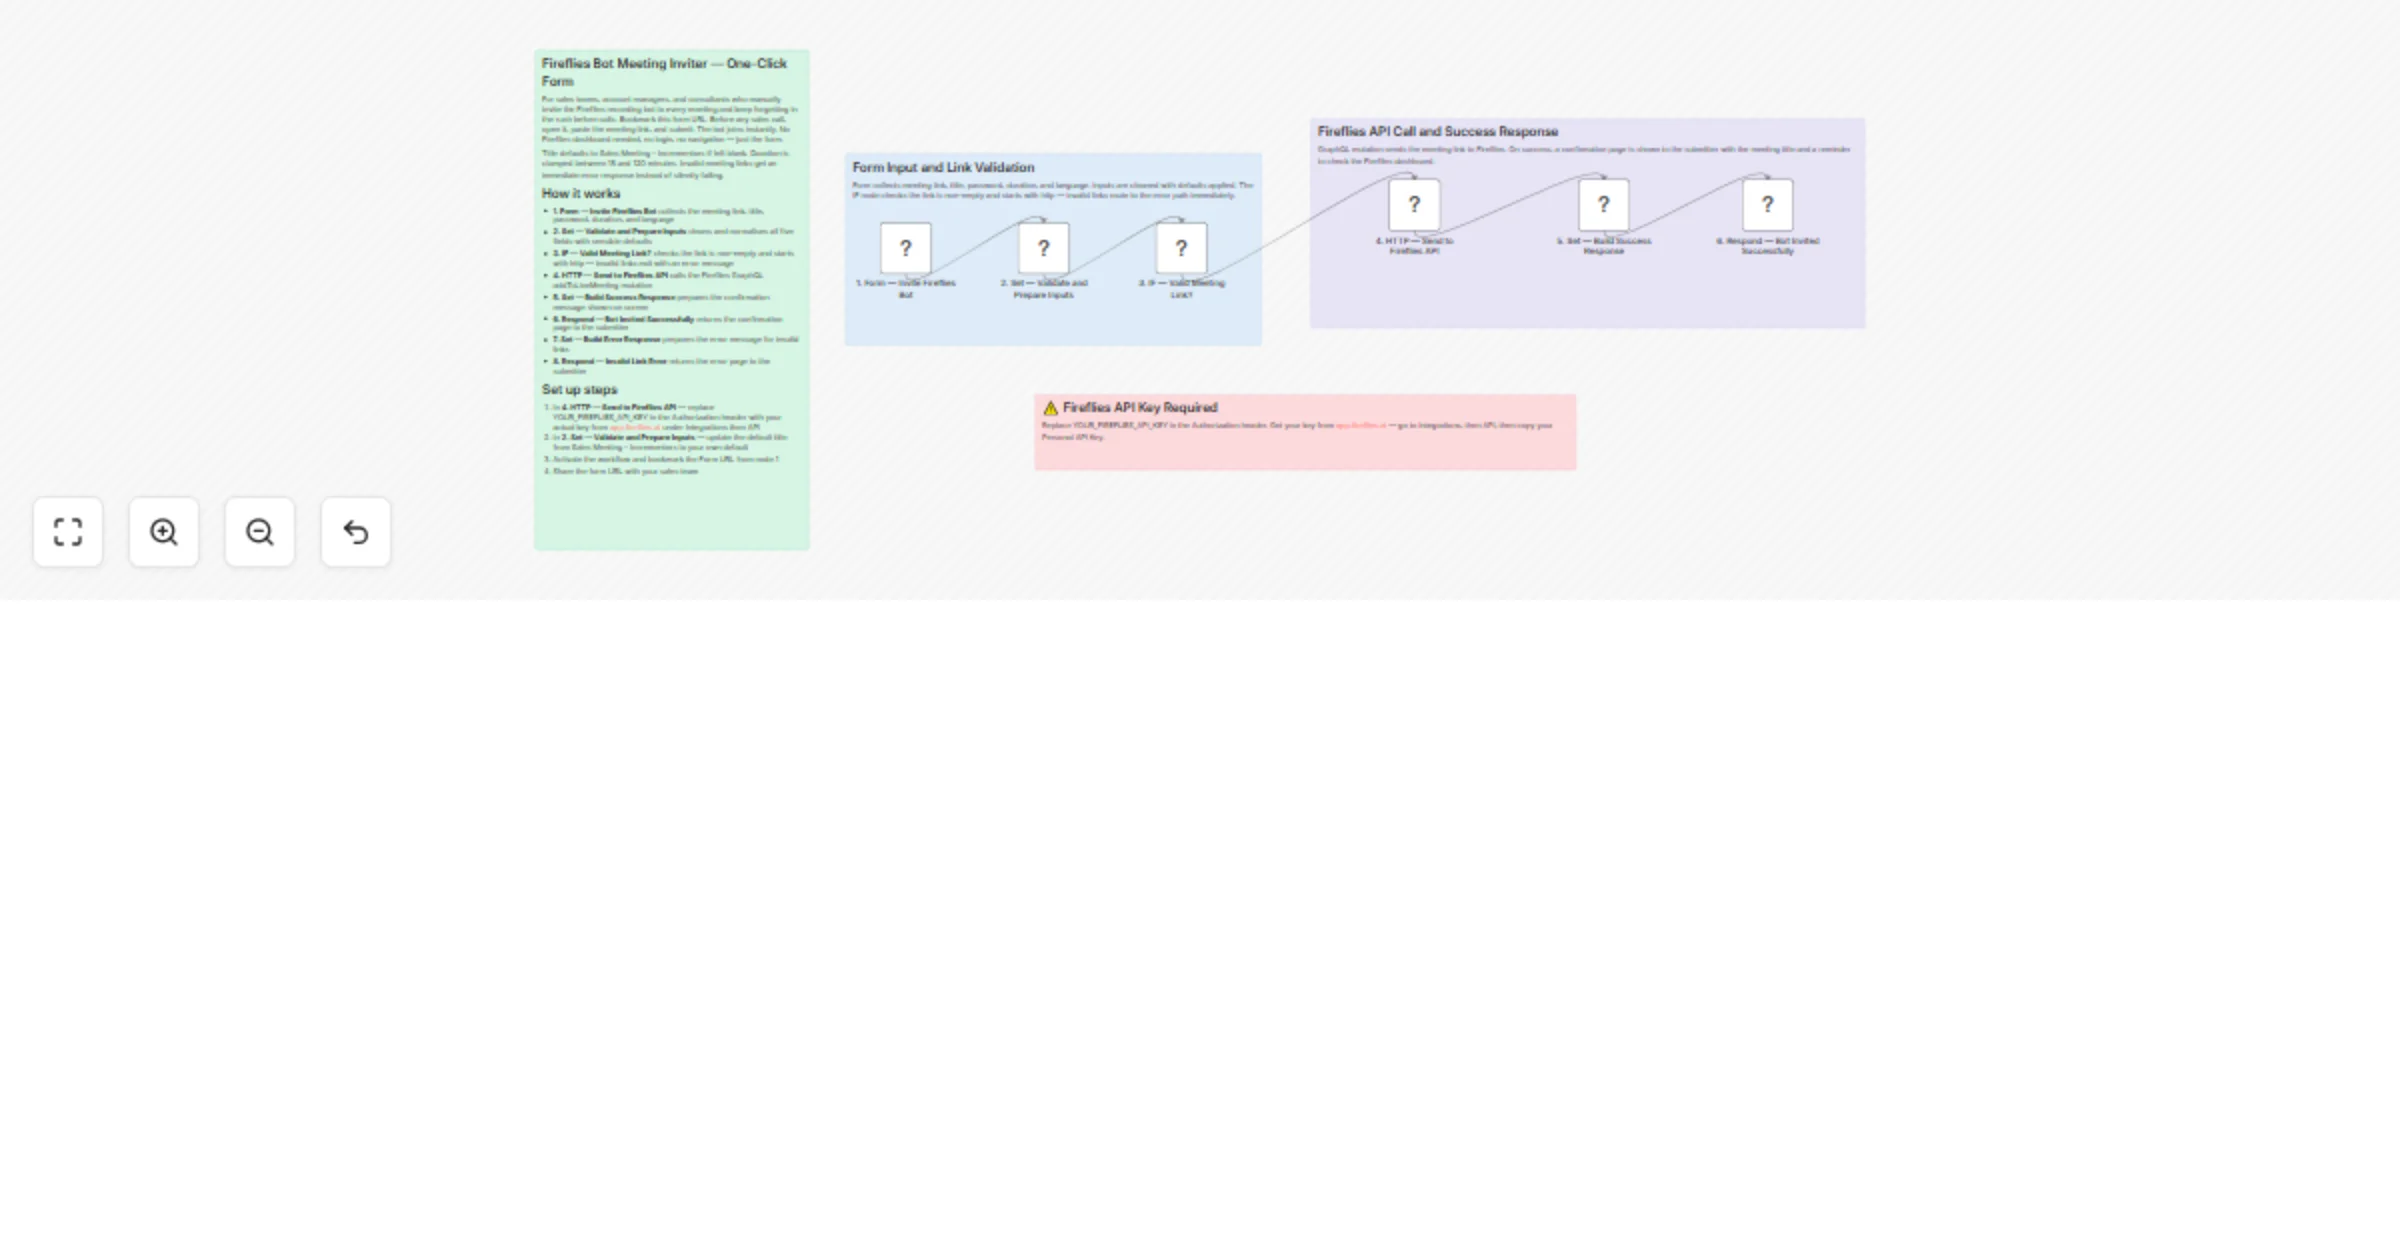
Invite the Fireflies recording bot to meetings from a one-click form
Description Paste your meeting link into a simple form and submit. The workflow instantly sends your Fireflies record...
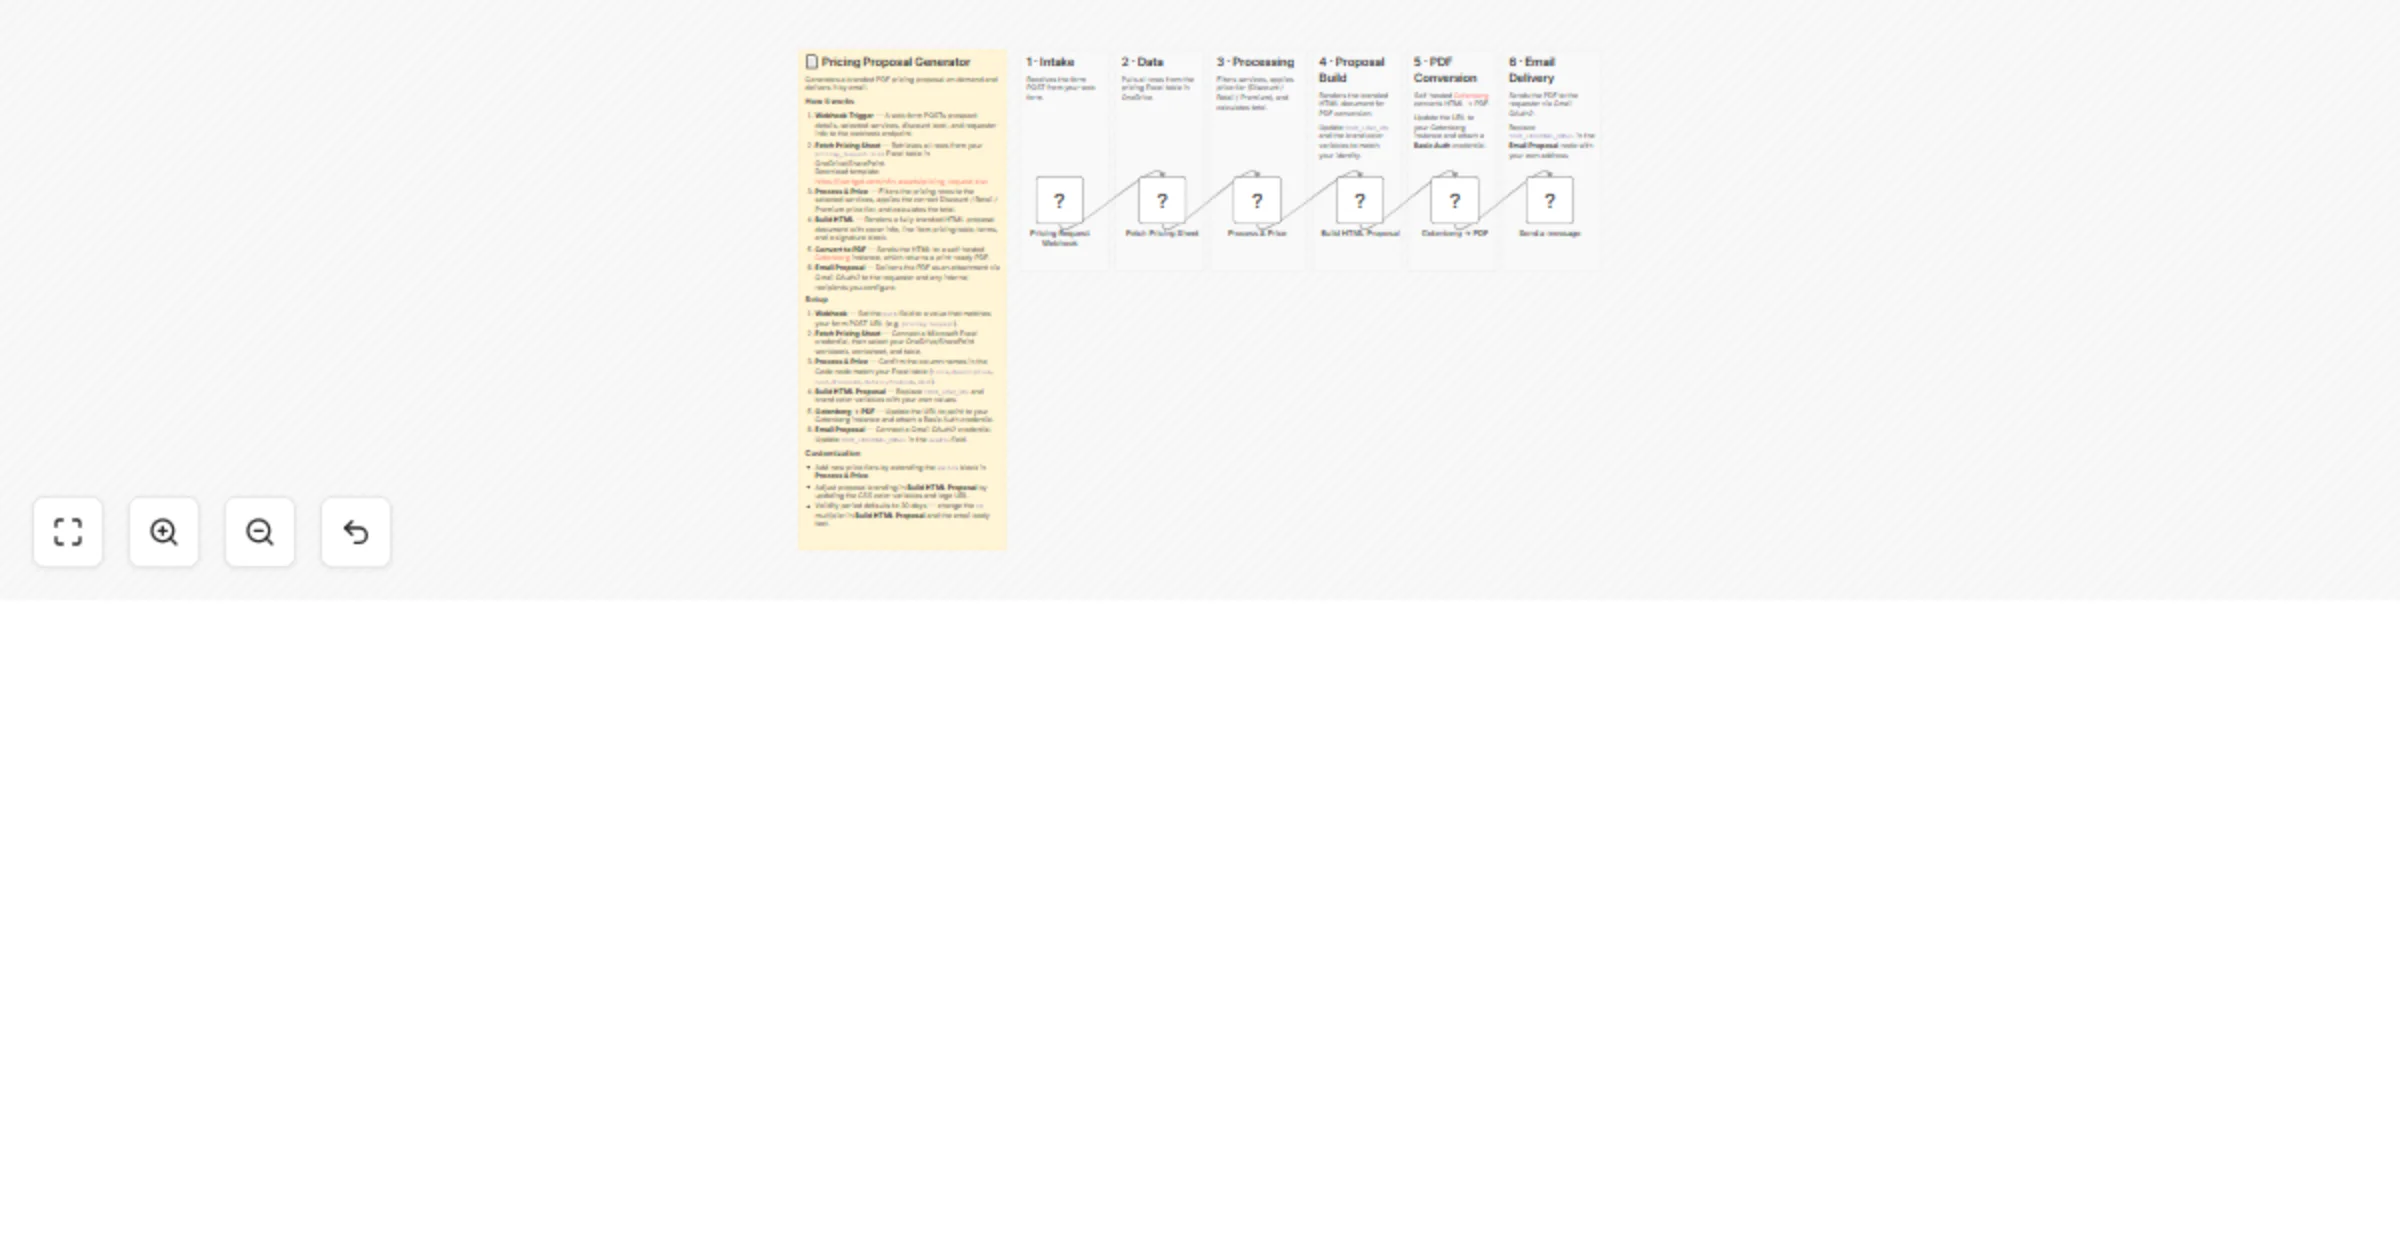
Generate PDF pricing proposals from Excel with Gotenberg and Outlook
How it works 1. Webhook Trigger — A web form POSTs prospect details, selected services, discount level, and requestor...
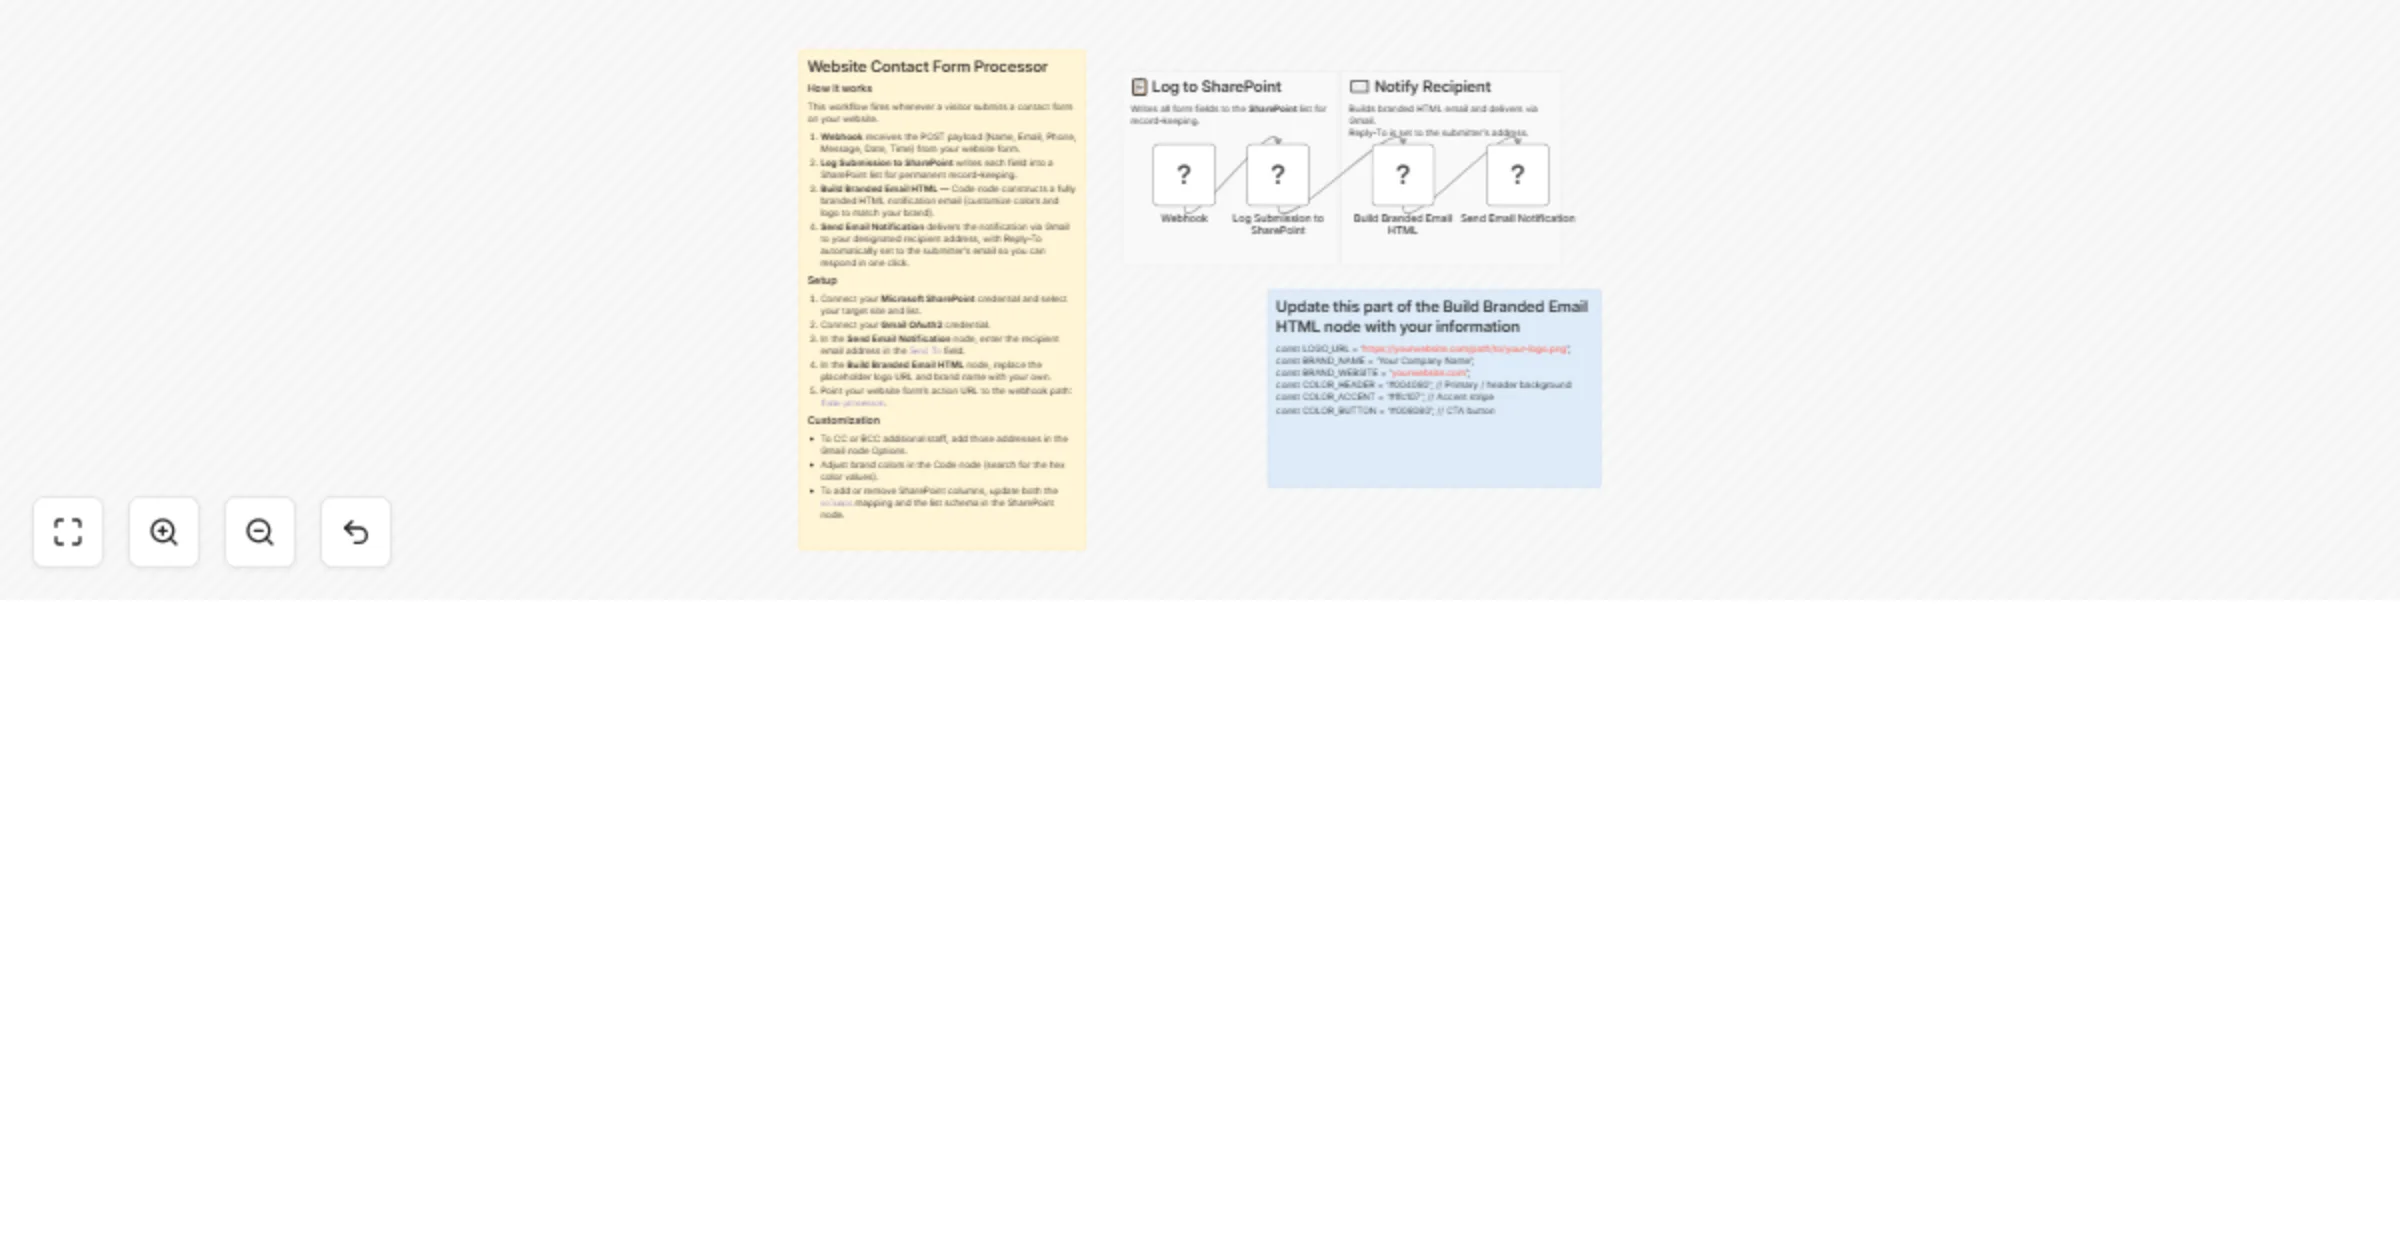
Process website contact form submissions with SharePoint and Gmail
How it works This workflow fires whenever a visitor submits a contact form on your website. 1. Webhook receives the P...

Triage customer support emails and draft Gmail replies with IONOS AI Model Hub
AI Customer Support Triage — Auto Draft Replies with IONOS AI Model Hub This n8n template shows you how to automate c...
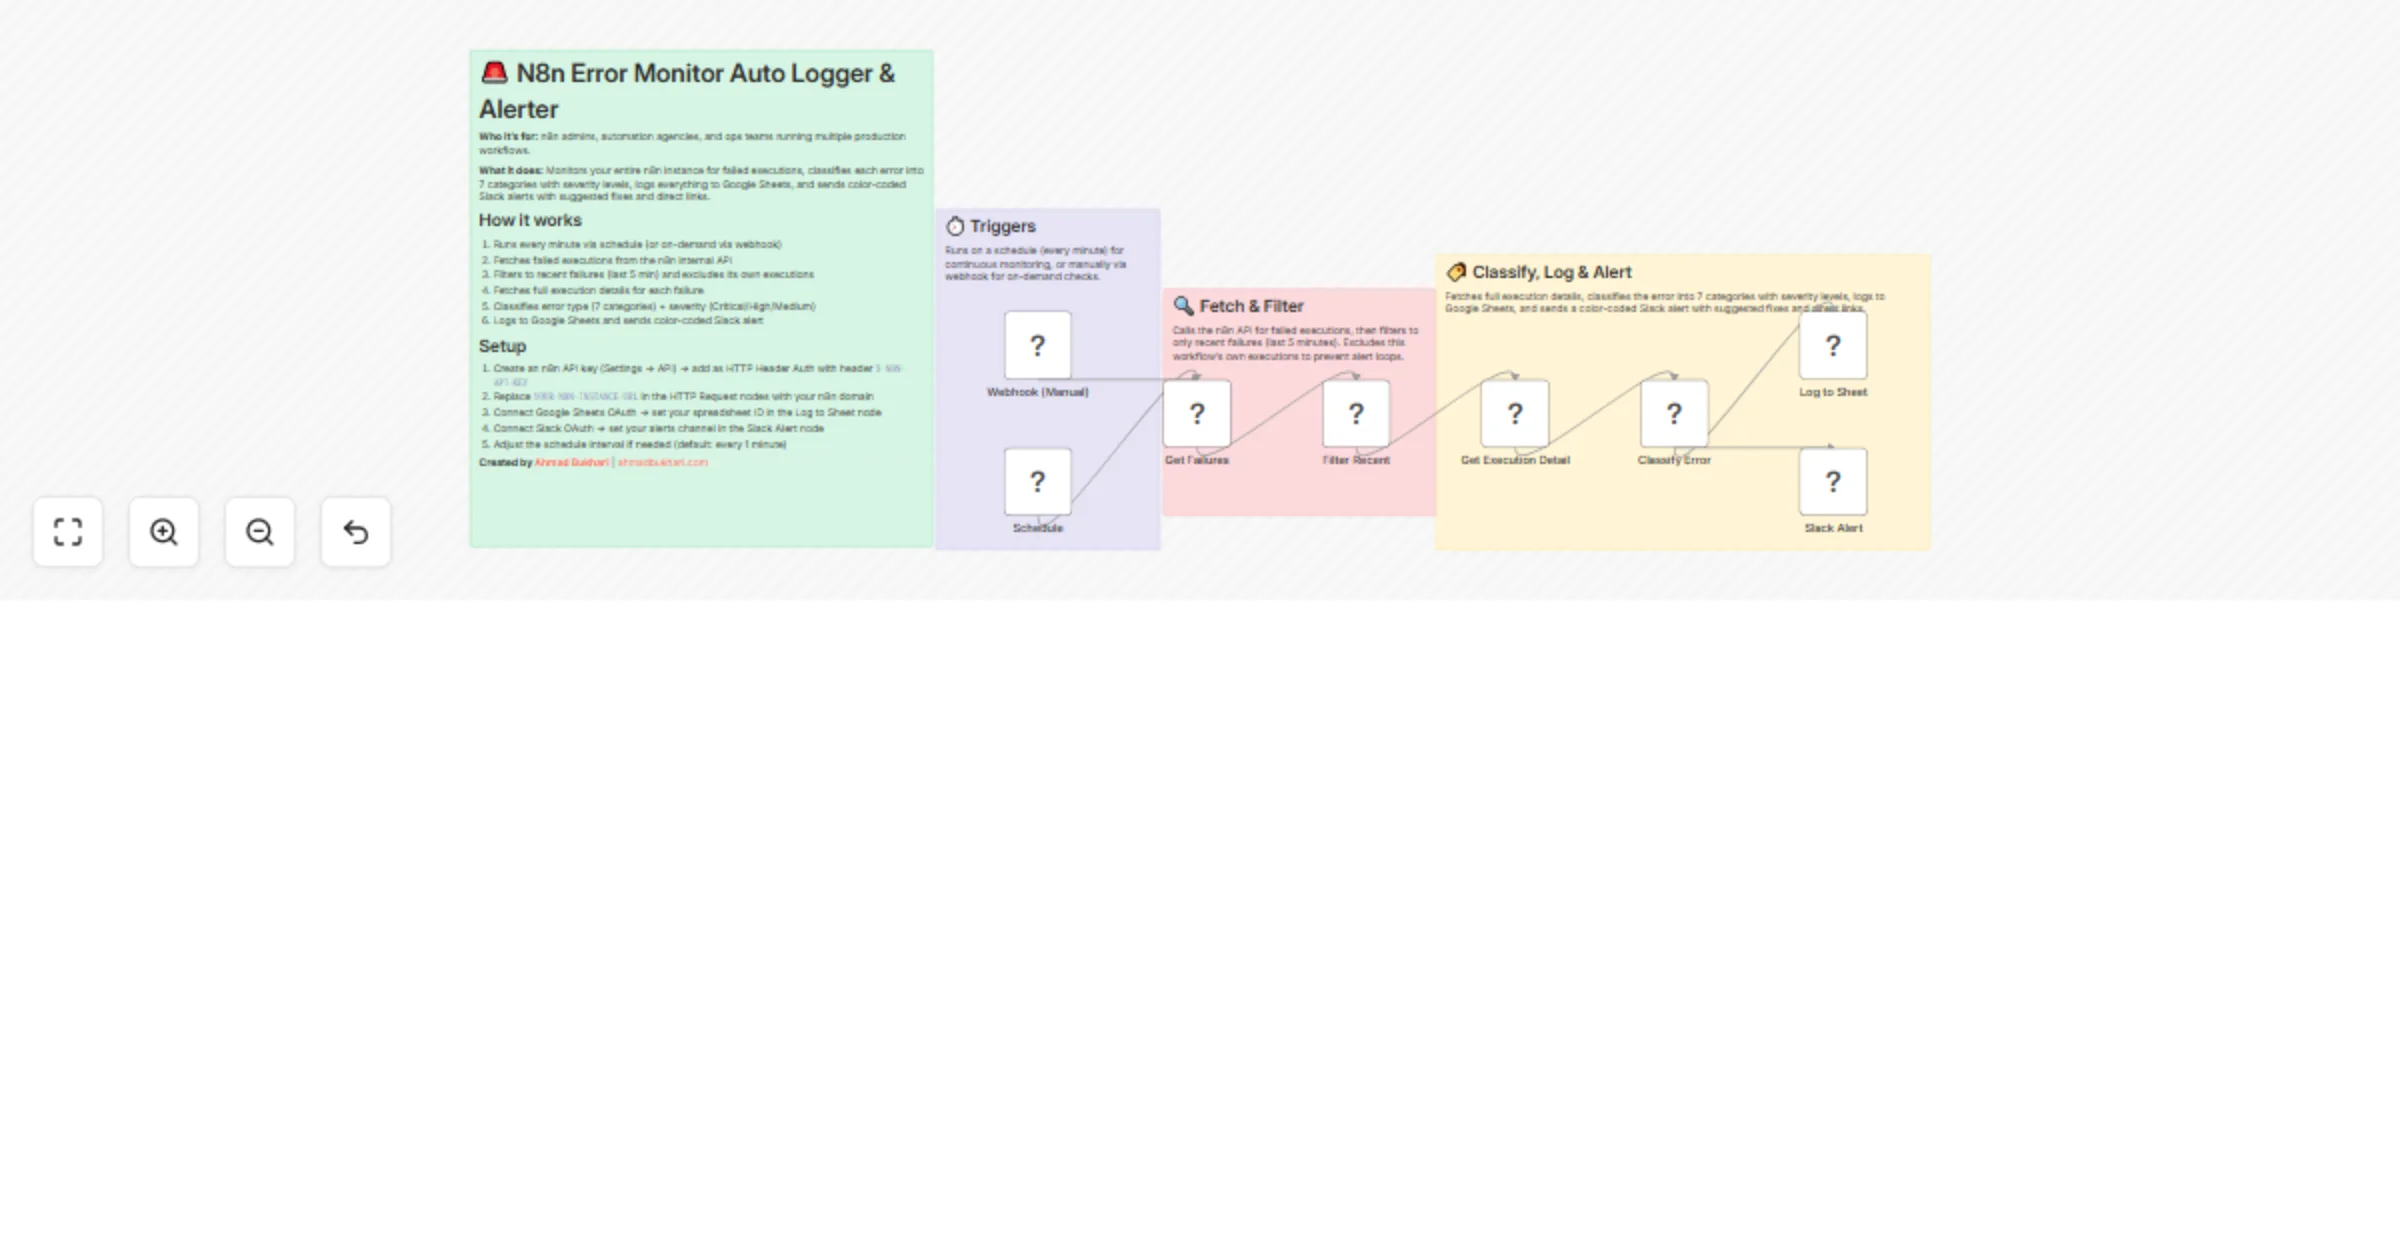
Monitor workflow errors with n8n API, log to Google Sheets, and alert via Slack
Who is this for? This workflow is built for n8n admins , automation agencies , solopreneurs , and ops teams running m...
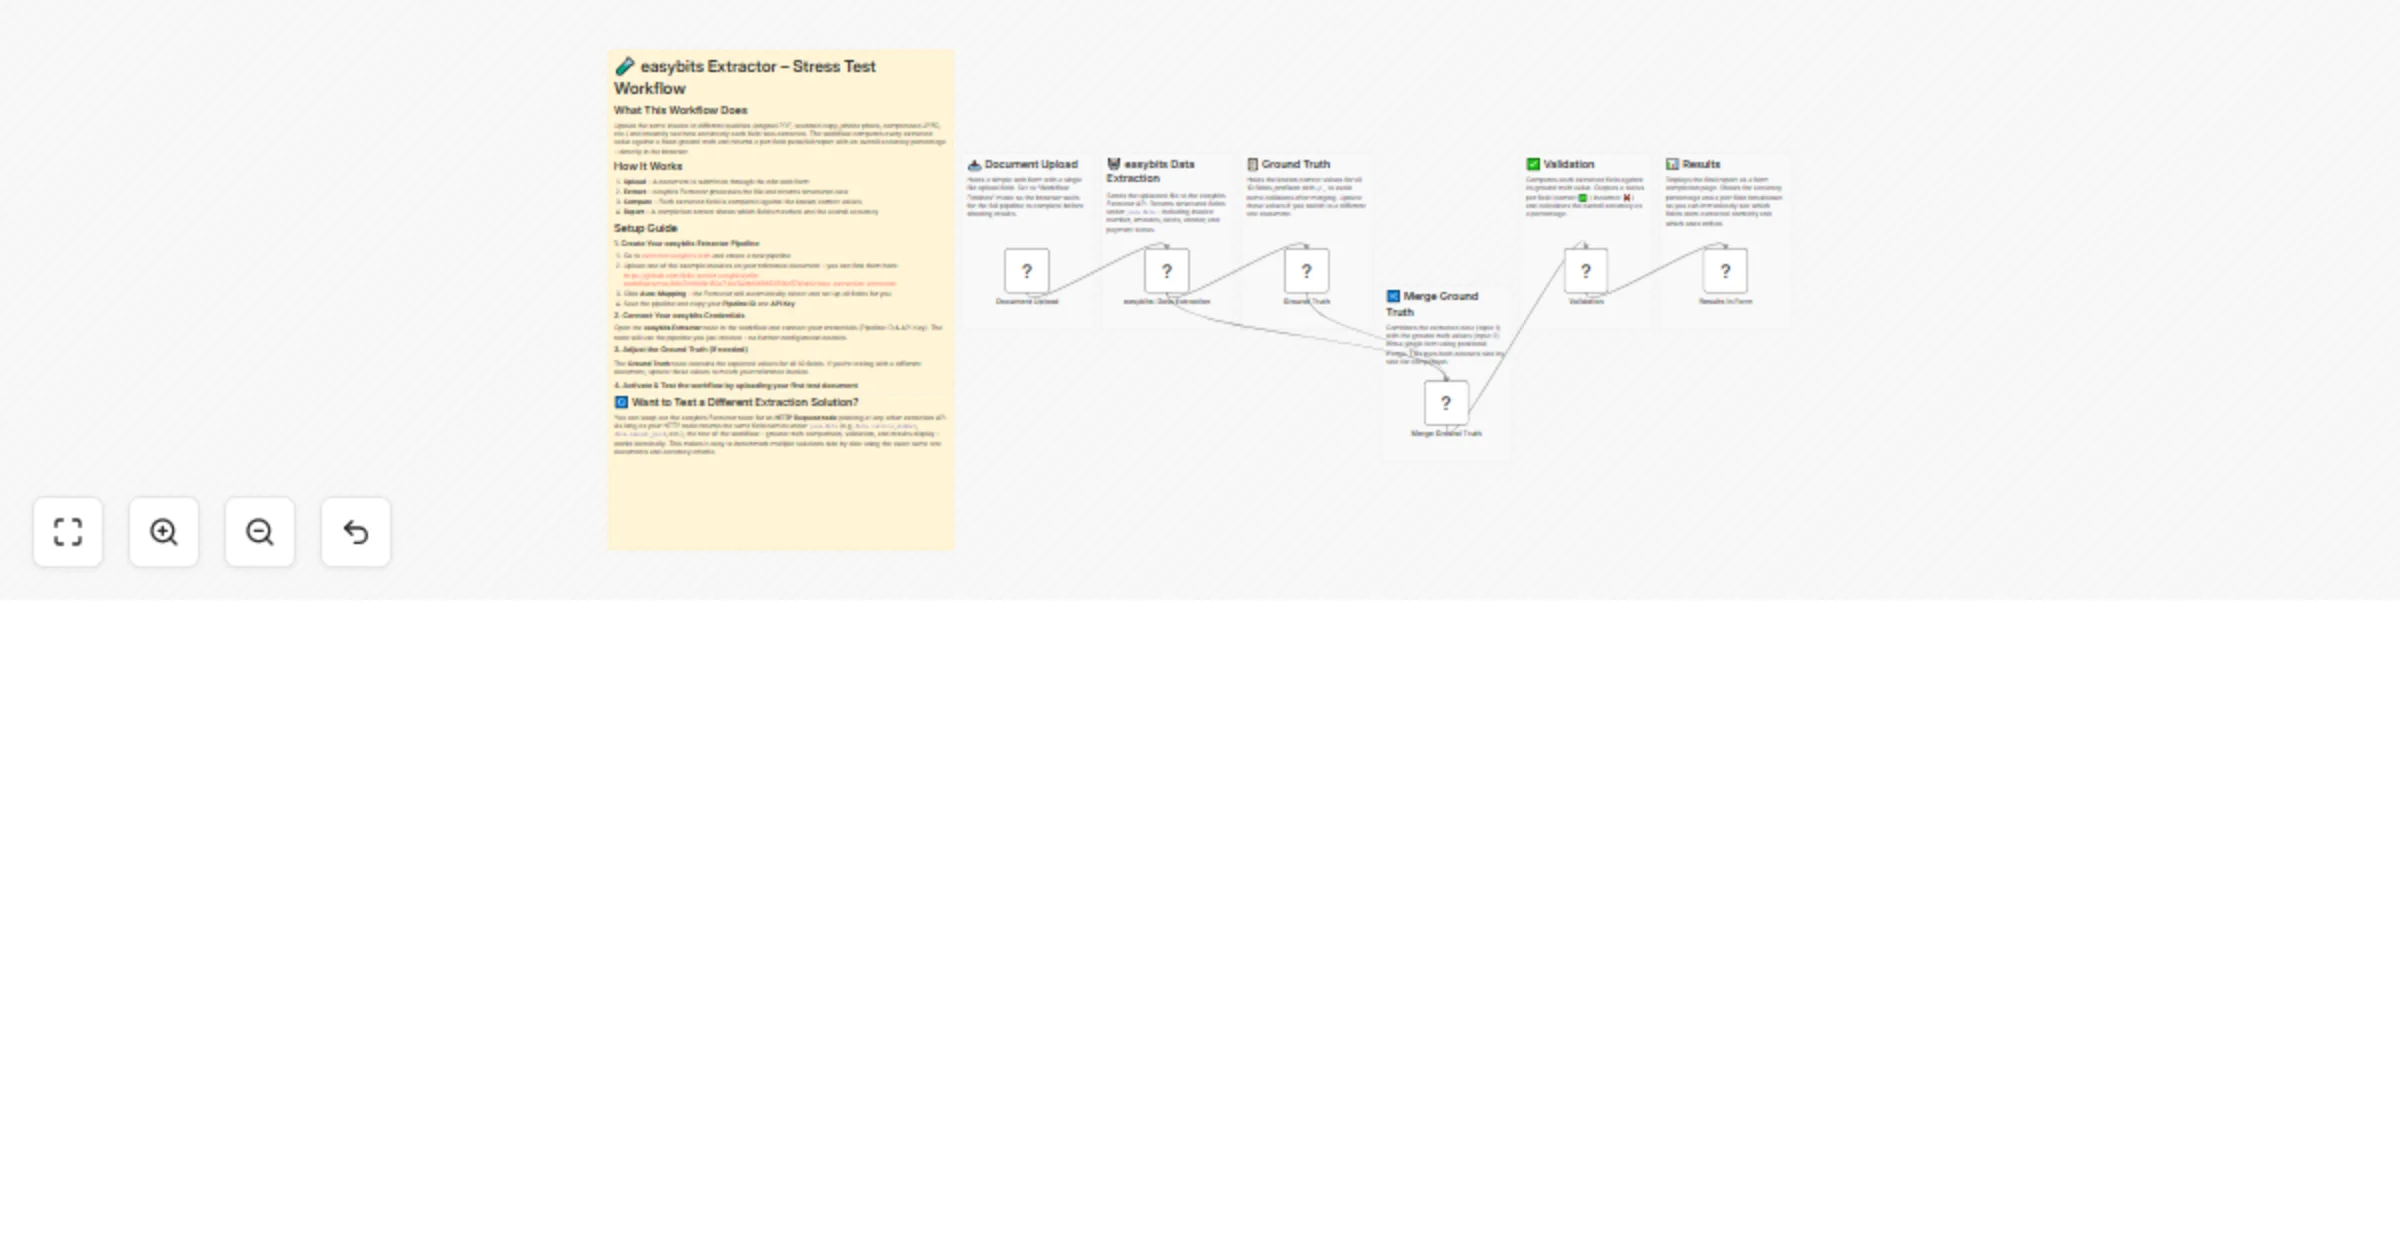
Benchmark invoice data extraction accuracy with easybits
What This Workflow Does Upload the same invoice in different qualities (original PDF, scanned copy, phone photo, comp...
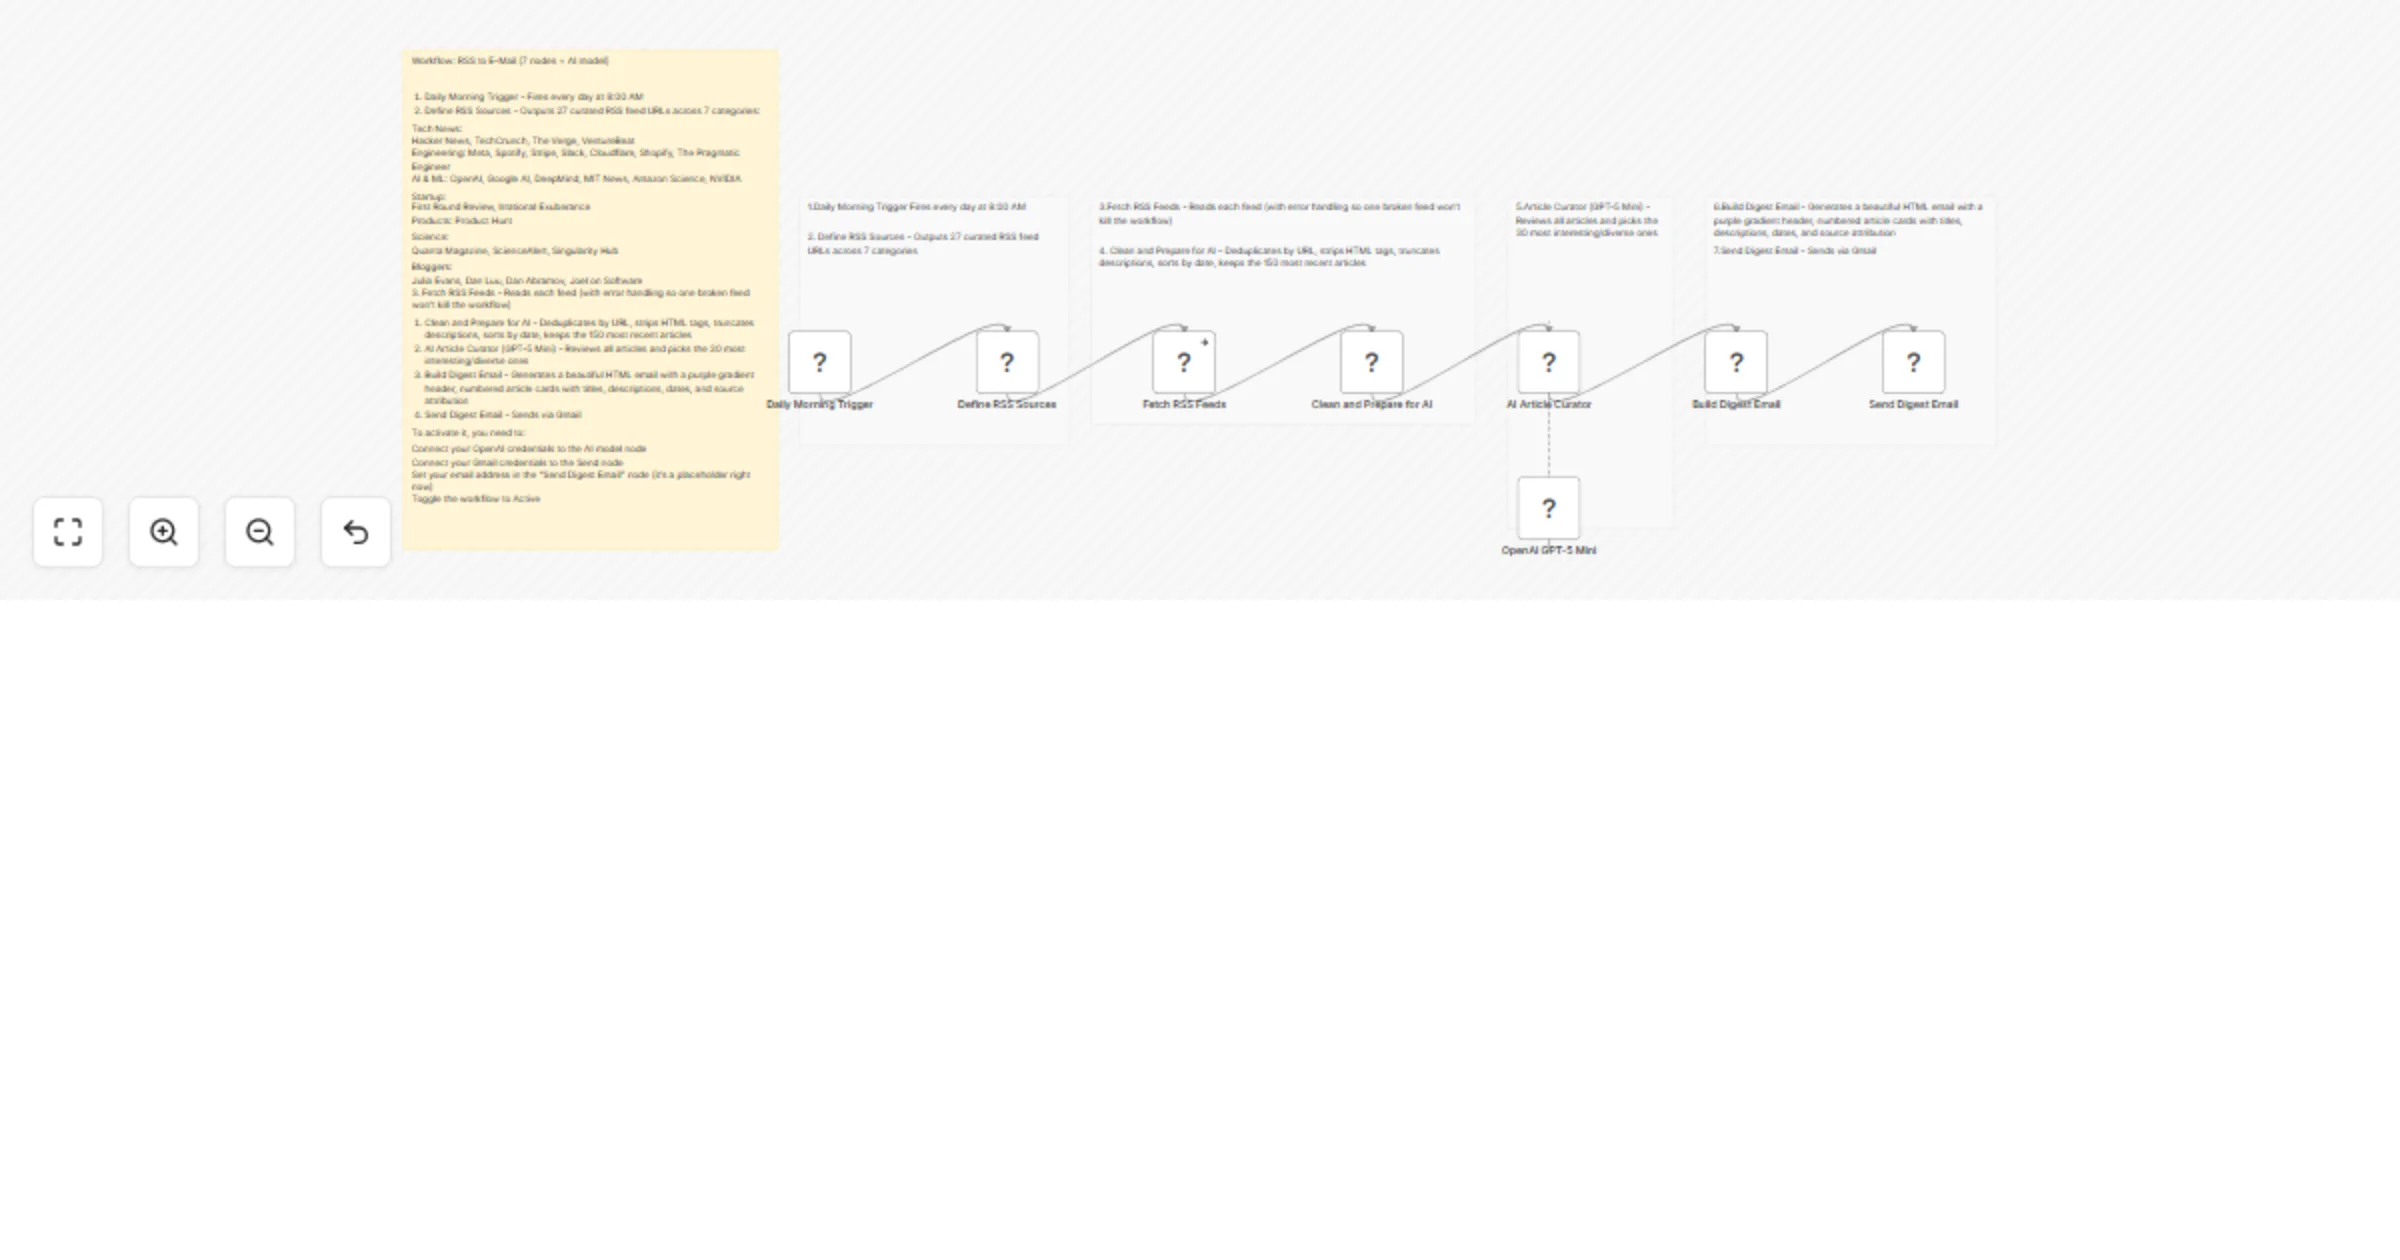
Send a curated tech RSS digest to Gmail with OpenAI GPT-5 Mini
Workflow: RSS to E Mail 7 Nodes + AI Model ⚙️ Pipeline Steps 1. Daily Morning Trigger Fires every day at 8:00 AM. 2....
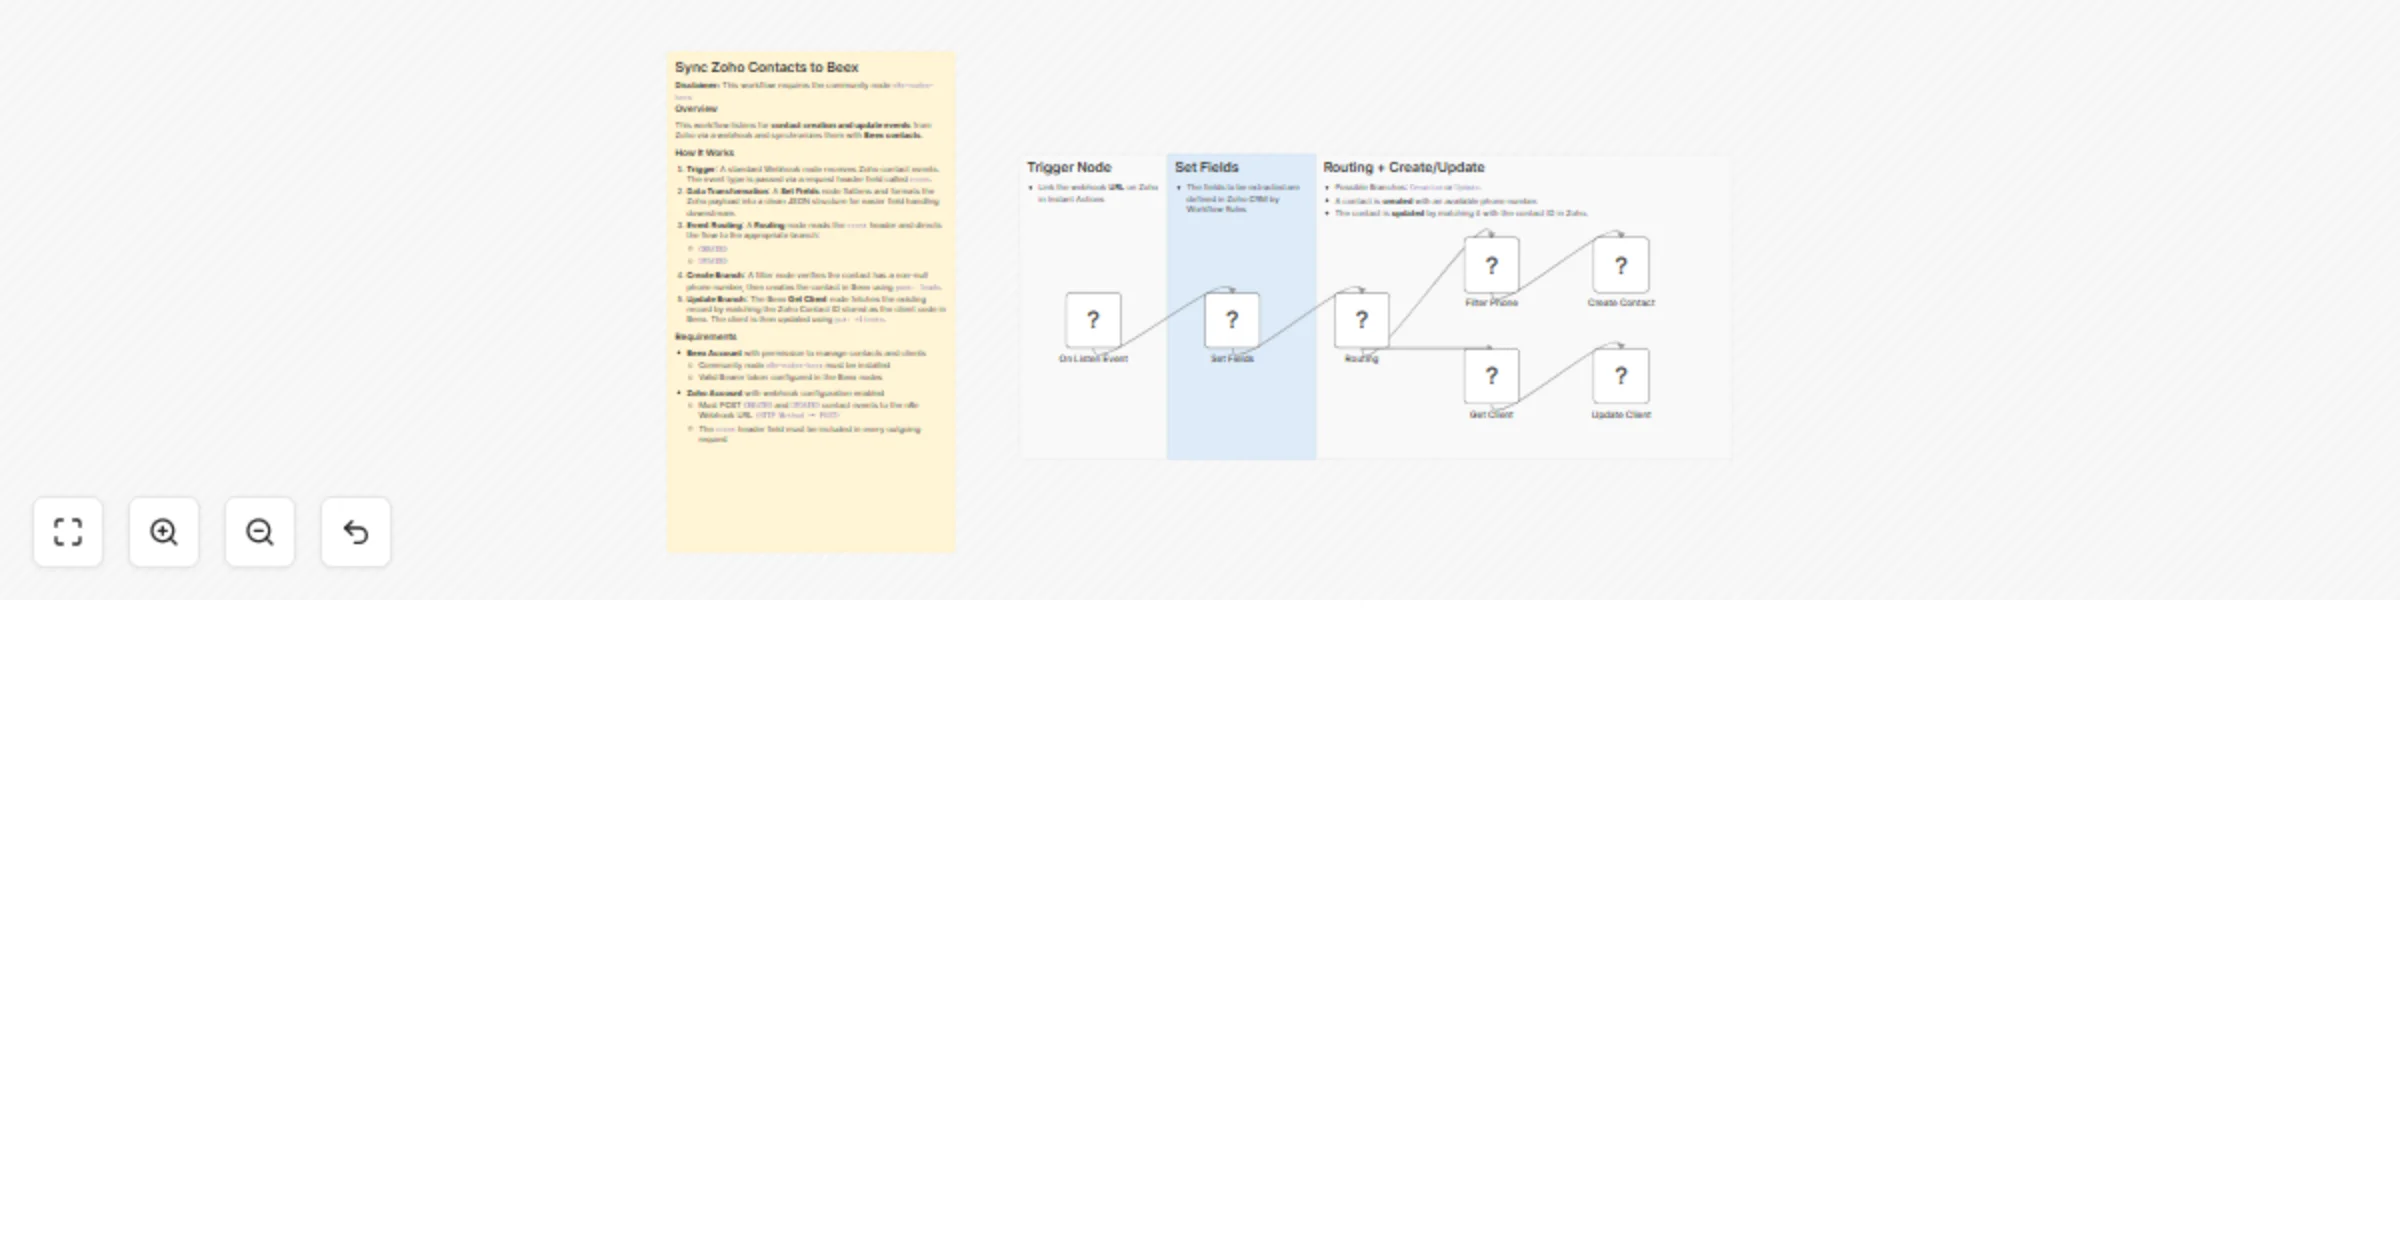
Sync Zoho CRM contacts with Beex Contact Center in real time
Summary Automatically syncs your Zoho contacts with Beex Contact Center by handling creation and update events in rea...
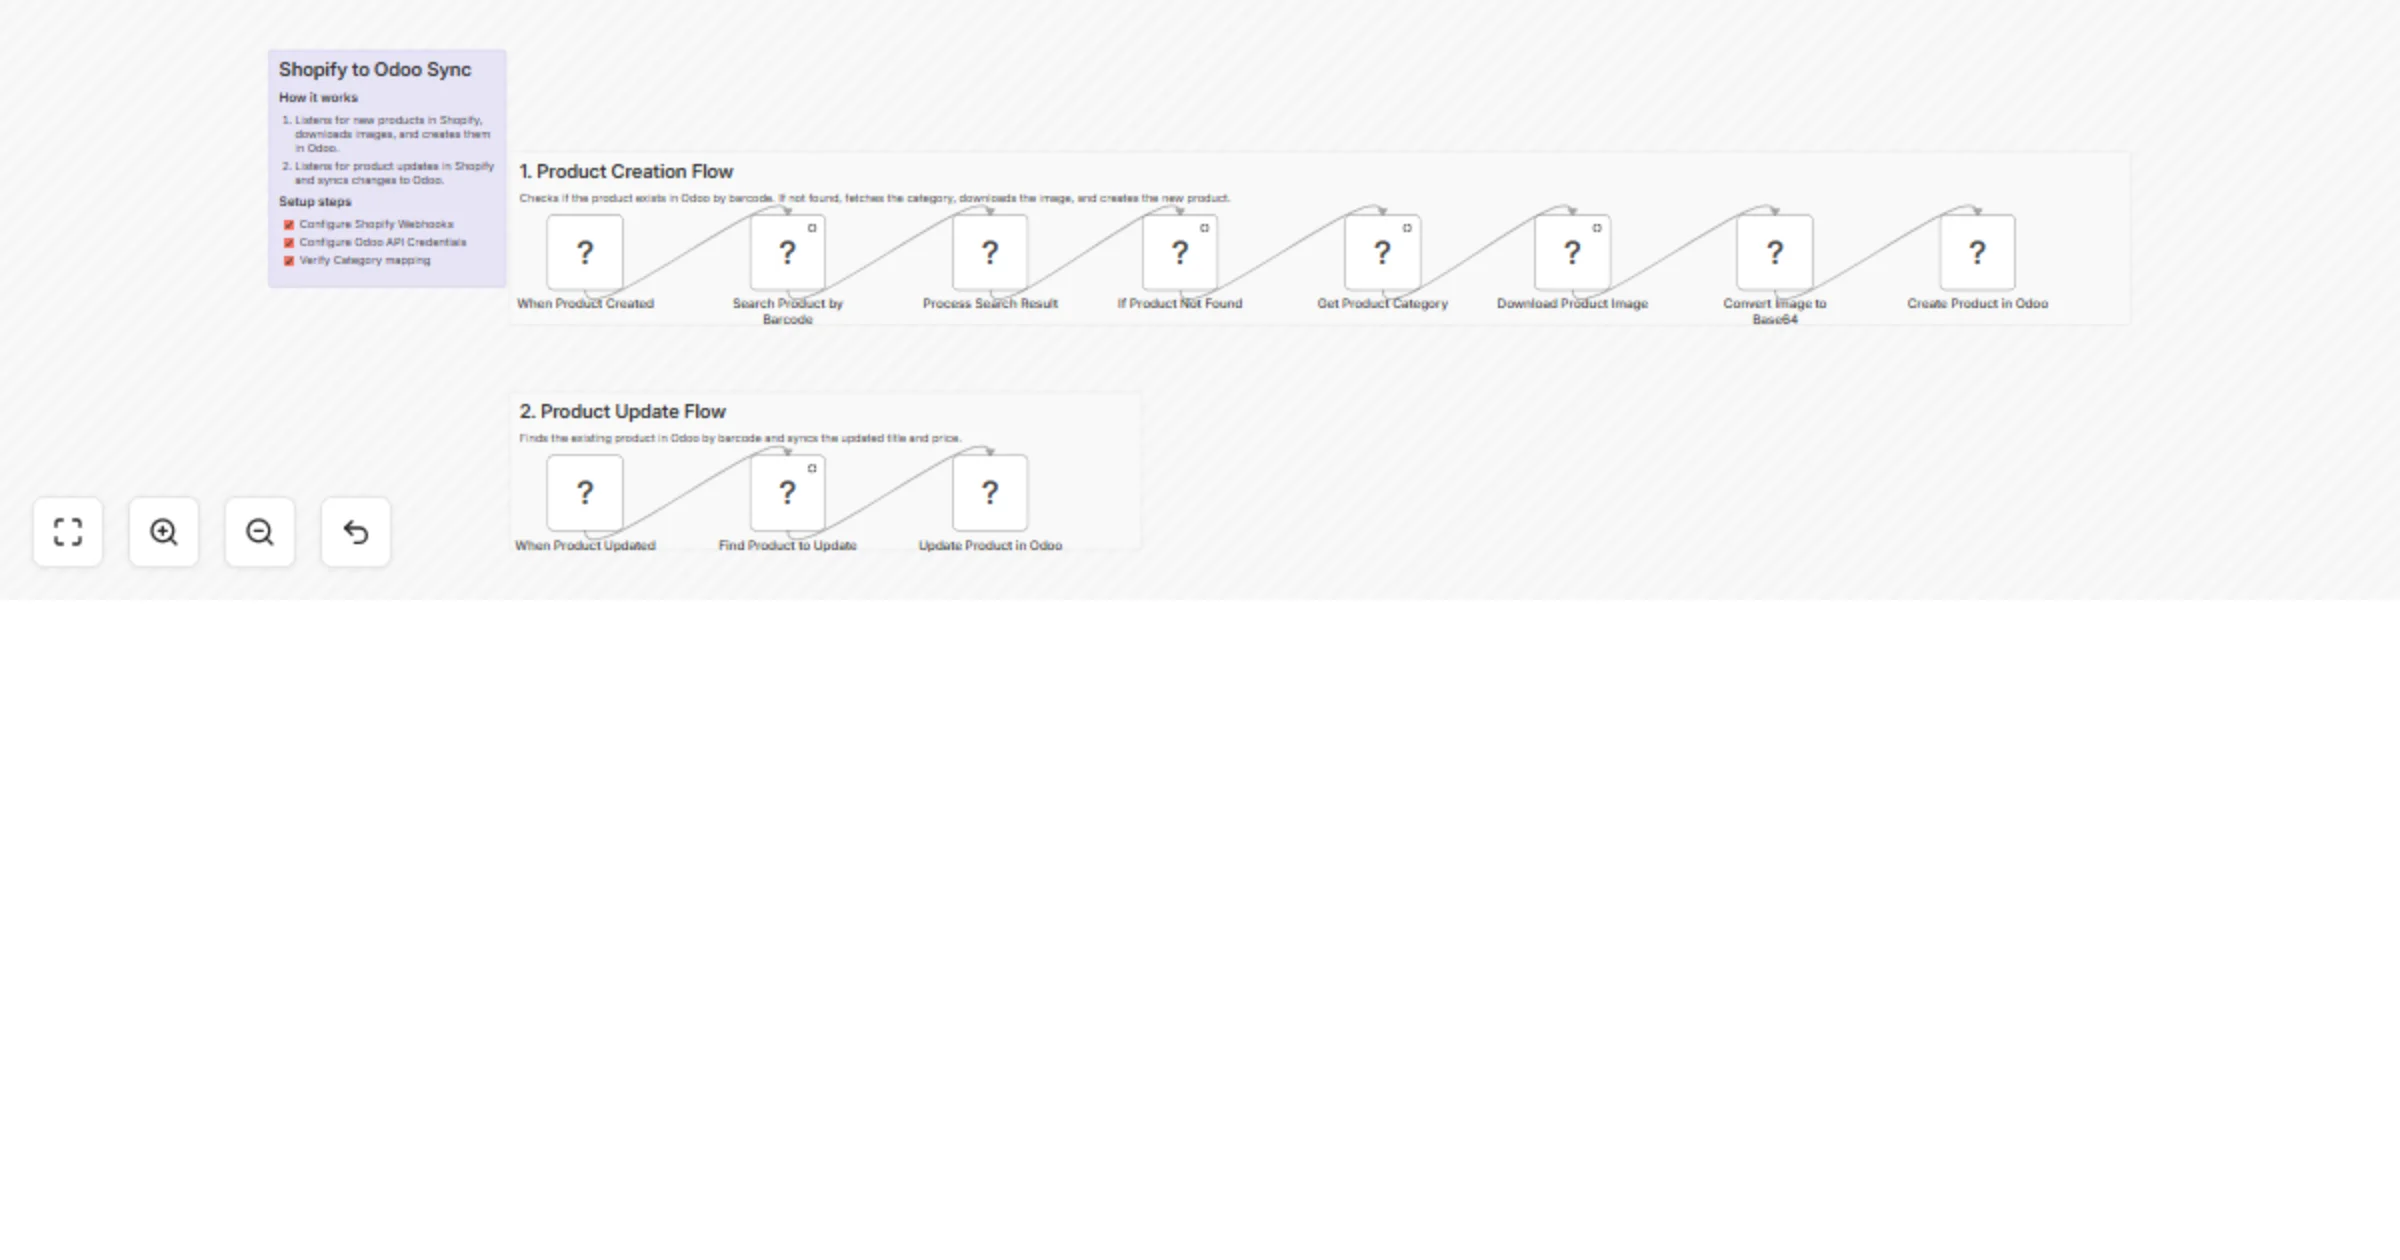
Sync Shopify products to Odoo in real time for create and update events
What Problem Does It Solve? Keeping product data consistent between Shopify and Odoo is a major operational challenge...
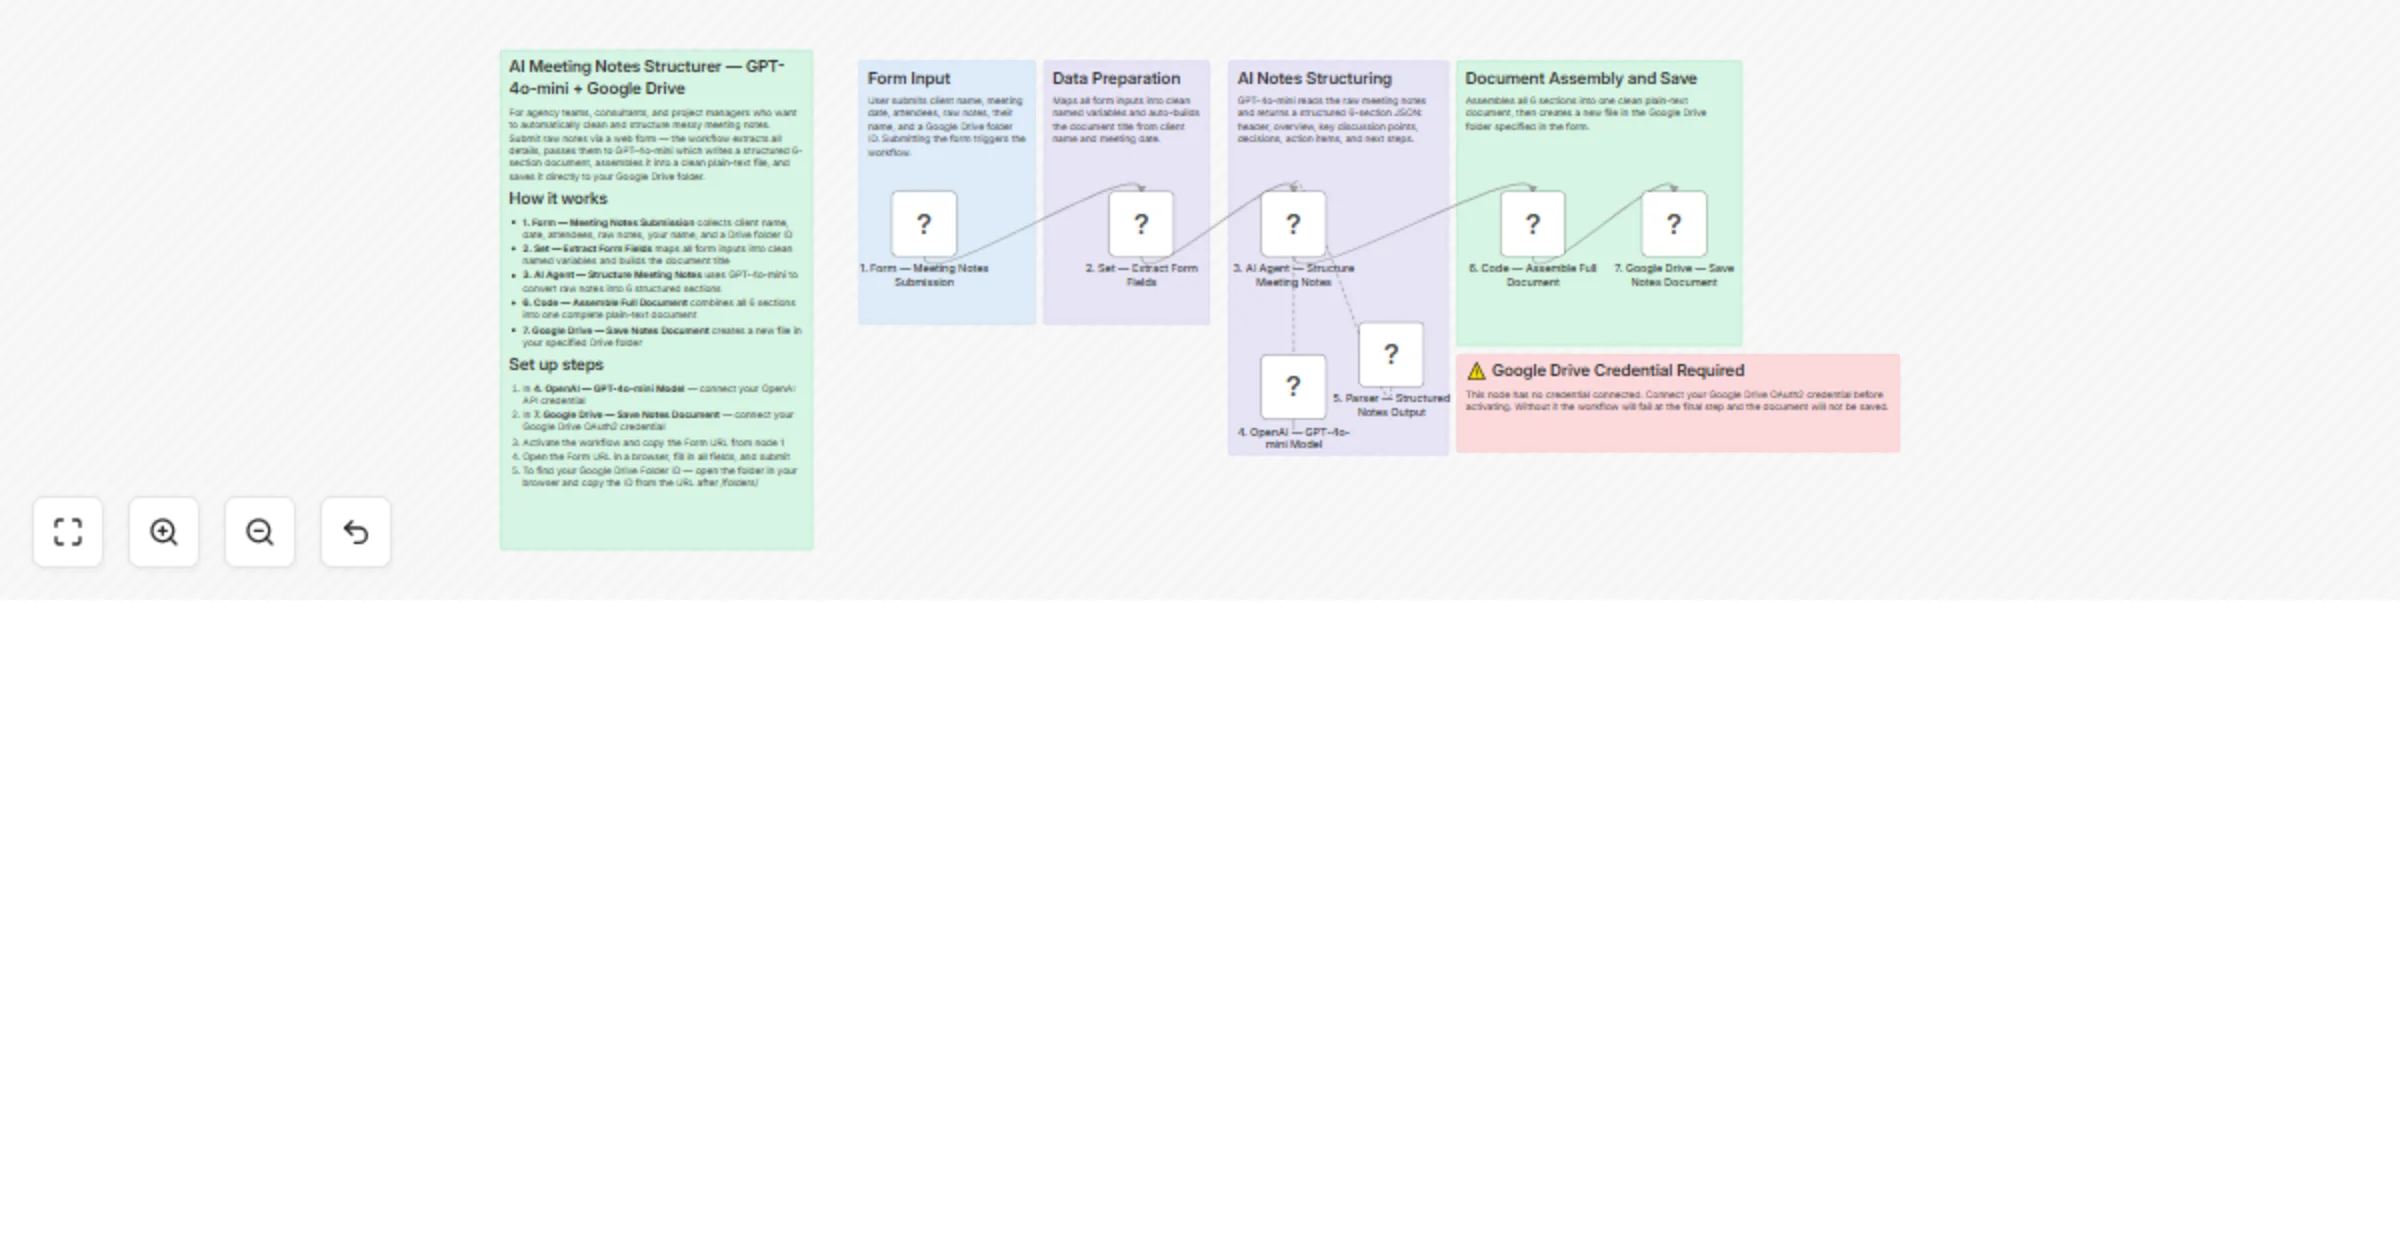
Structure AI meeting notes with GPT-4o-mini and save to Google Drive
Paste your raw meeting notes into a simple web form and submit. The workflow sends your notes to GPT 4o mini, which c...
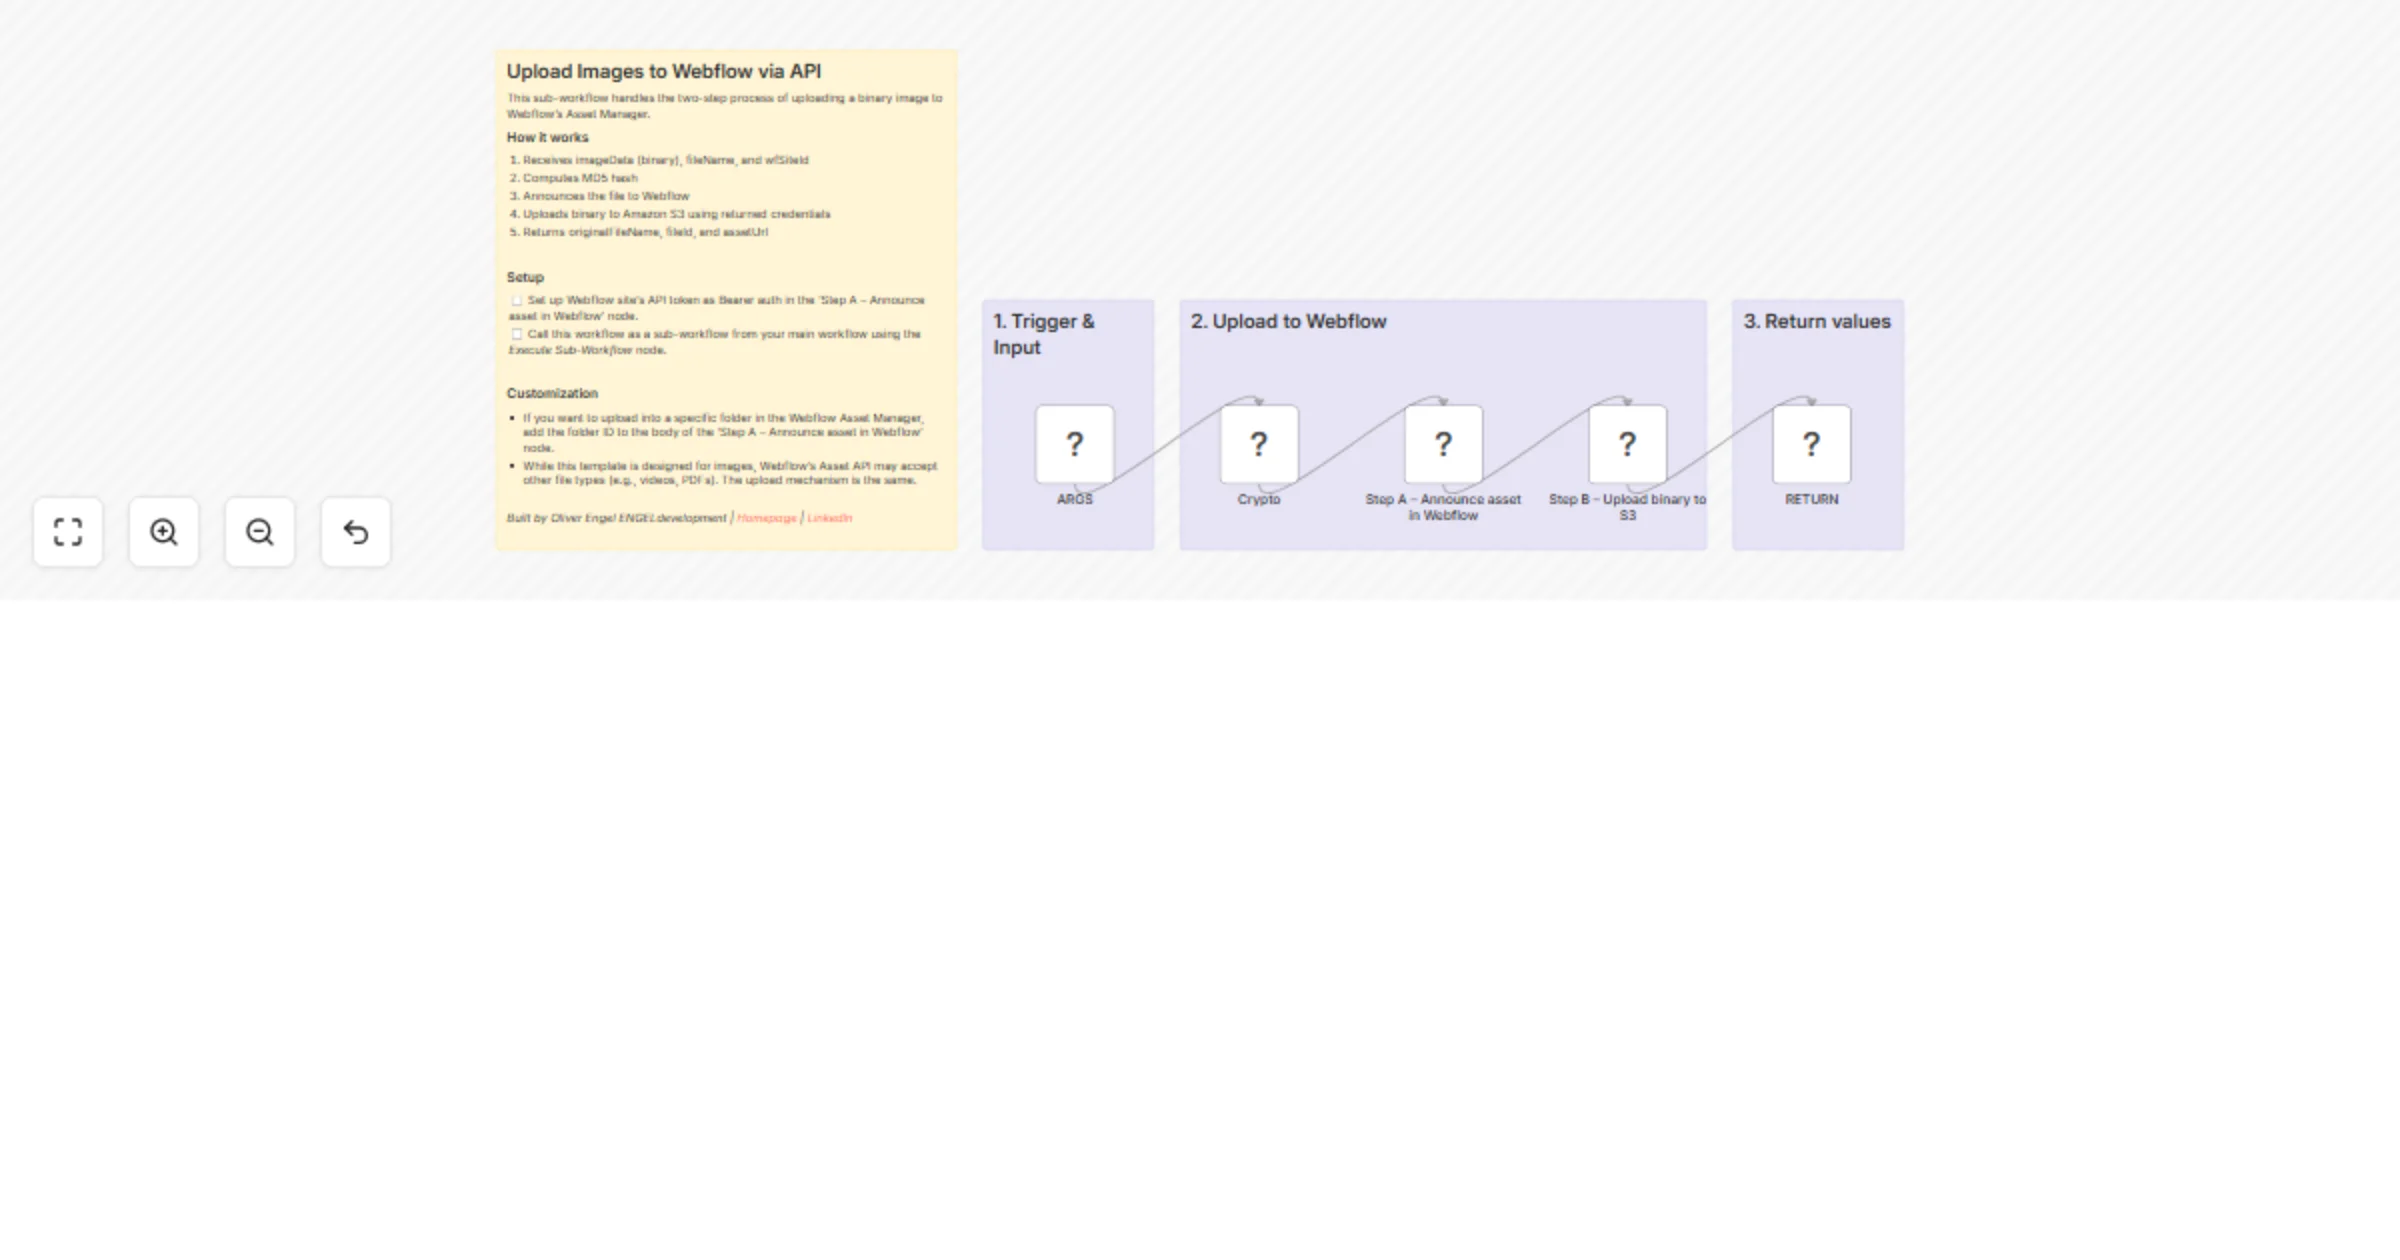
Upload images to Webflow via API as a reusable sub-workflow
Uploading an image to Webflow's Asset Manager through the API is surprisingly complex. It requires computing an MD5 h...
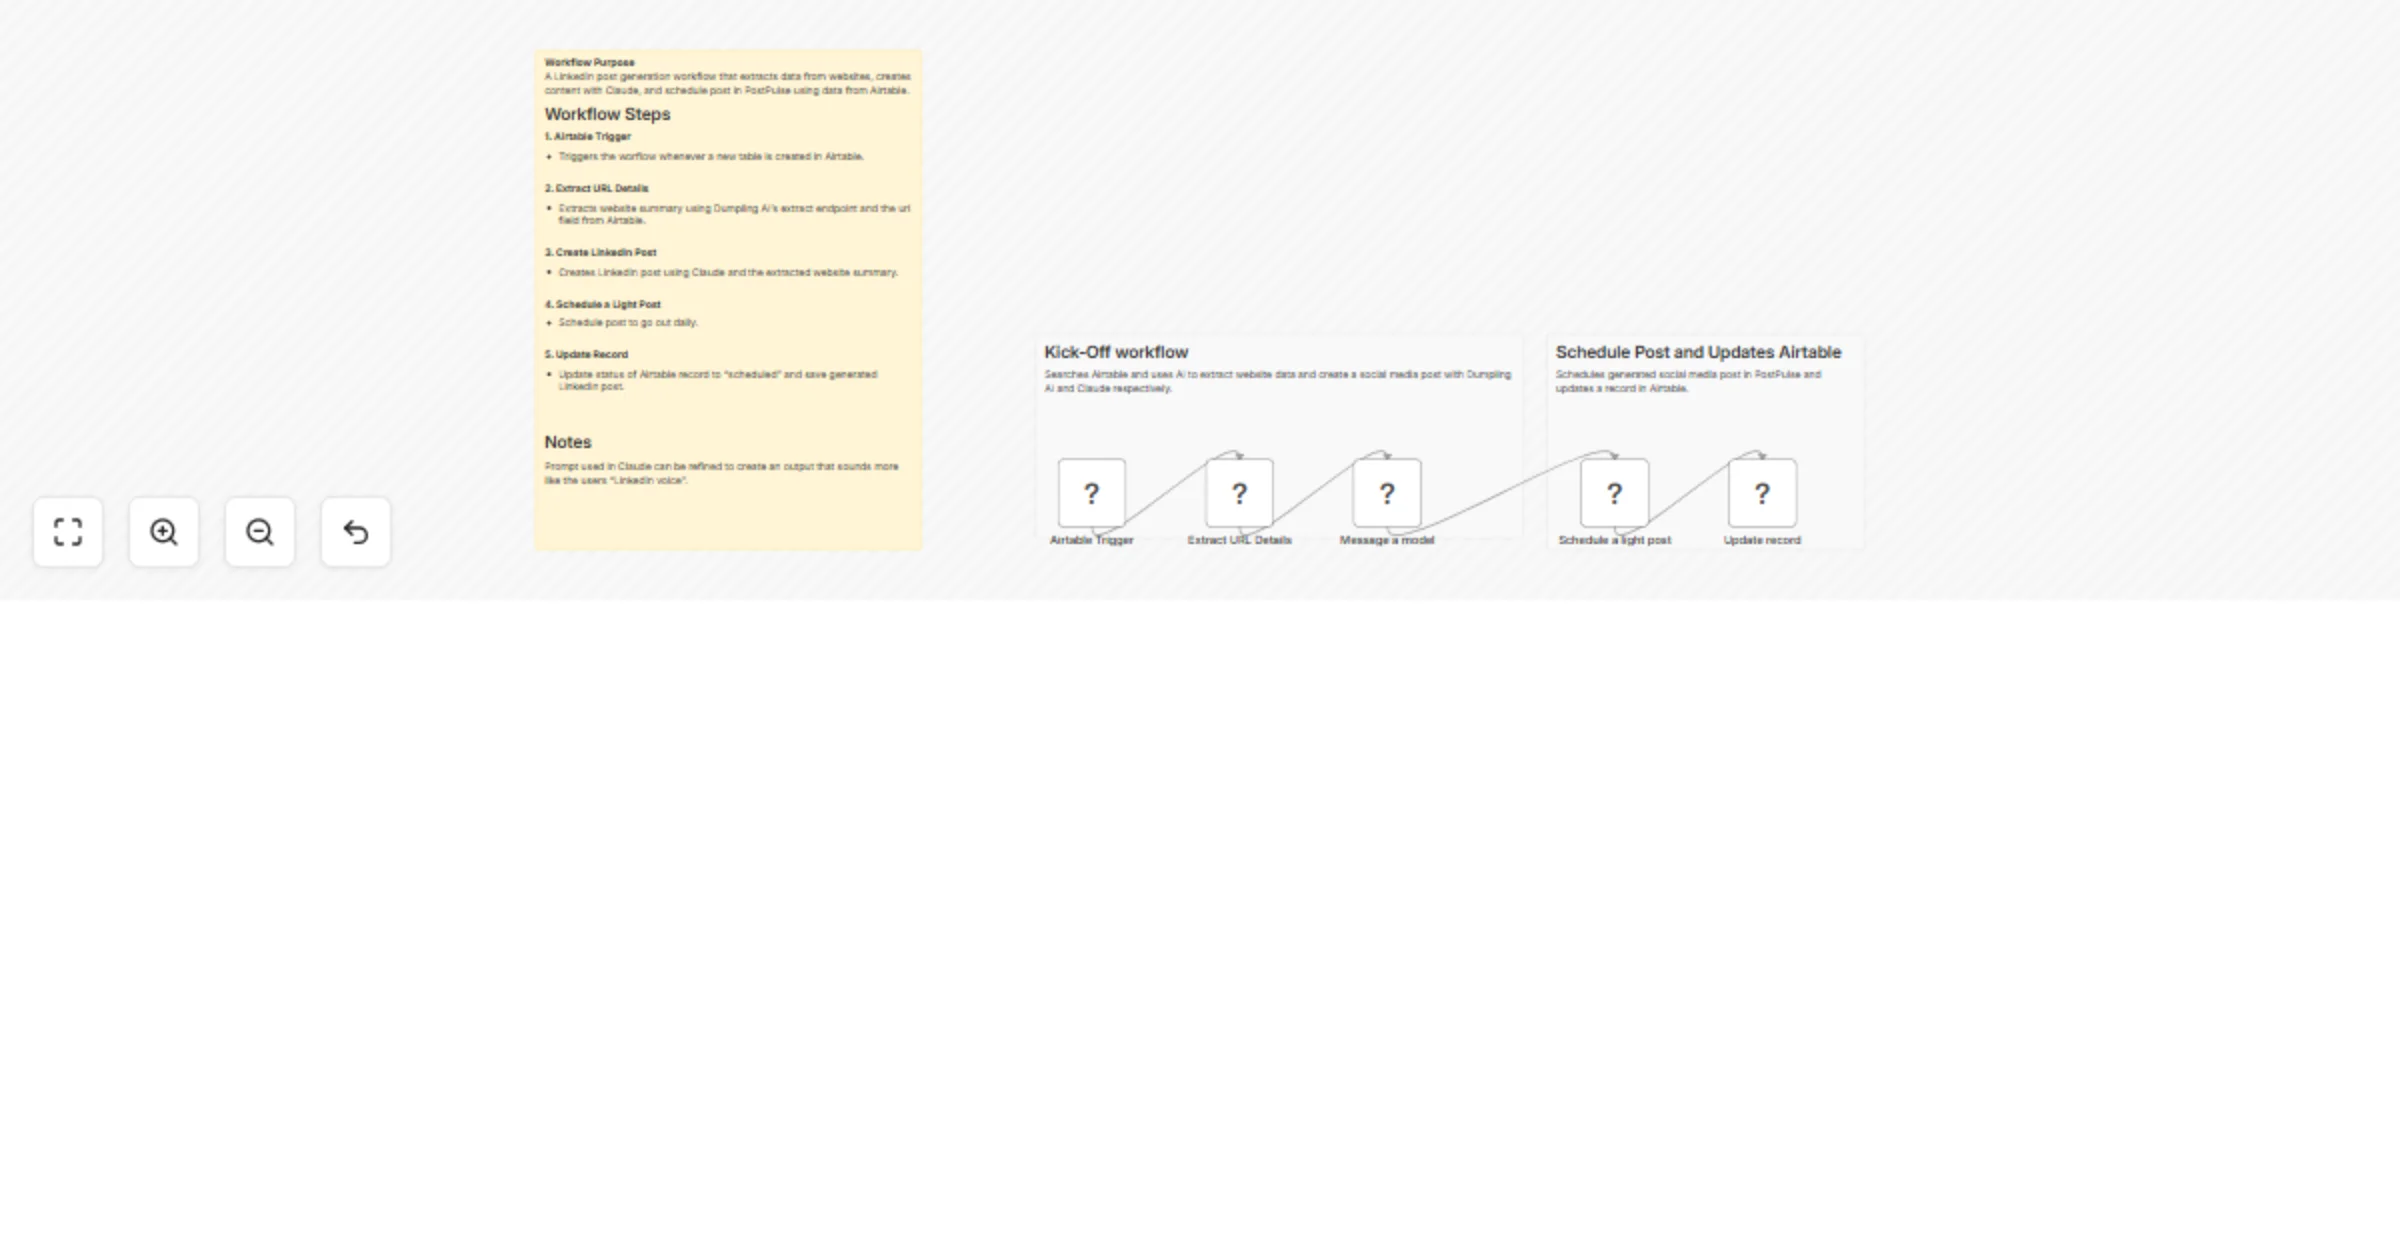
Create LinkedIn posts from web pages using Airtable, Dumpling AI, Claude and PostPulse
How it Works This workflow takes web URL's from Airtable, extract URL data with Dumpling AI, creates attention grabbi...
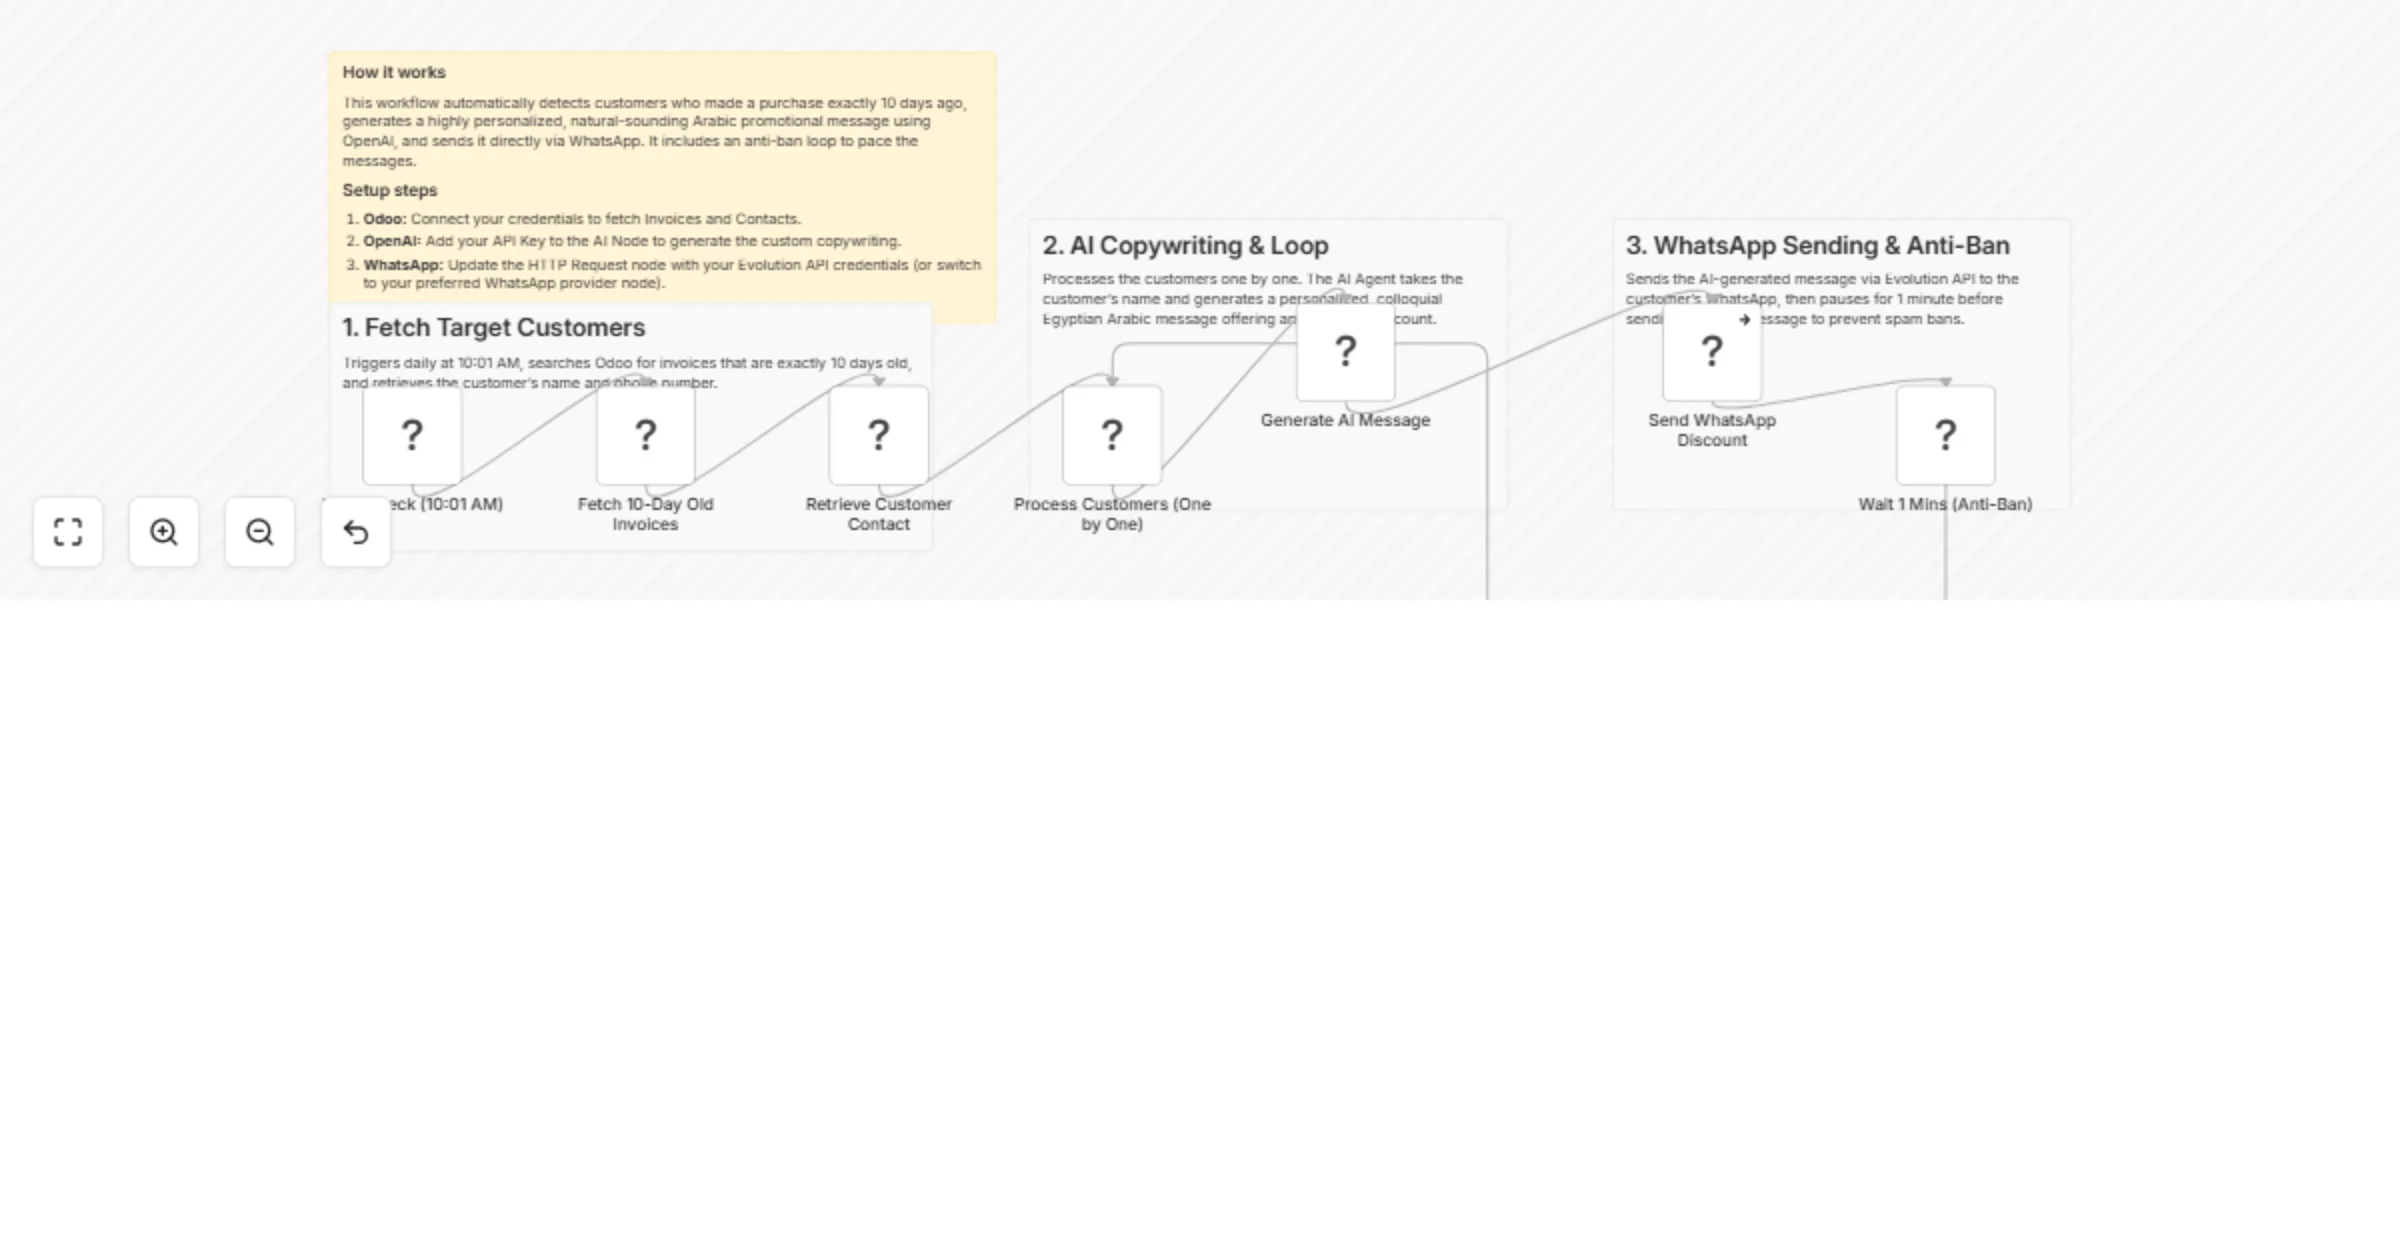
Send 10-day post-purchase WhatsApp offers with Odoo, OpenAI and Evolution API
What Problem Does It Solve? Generic, automated retention messages often feel like spam and fail to engage returning c...
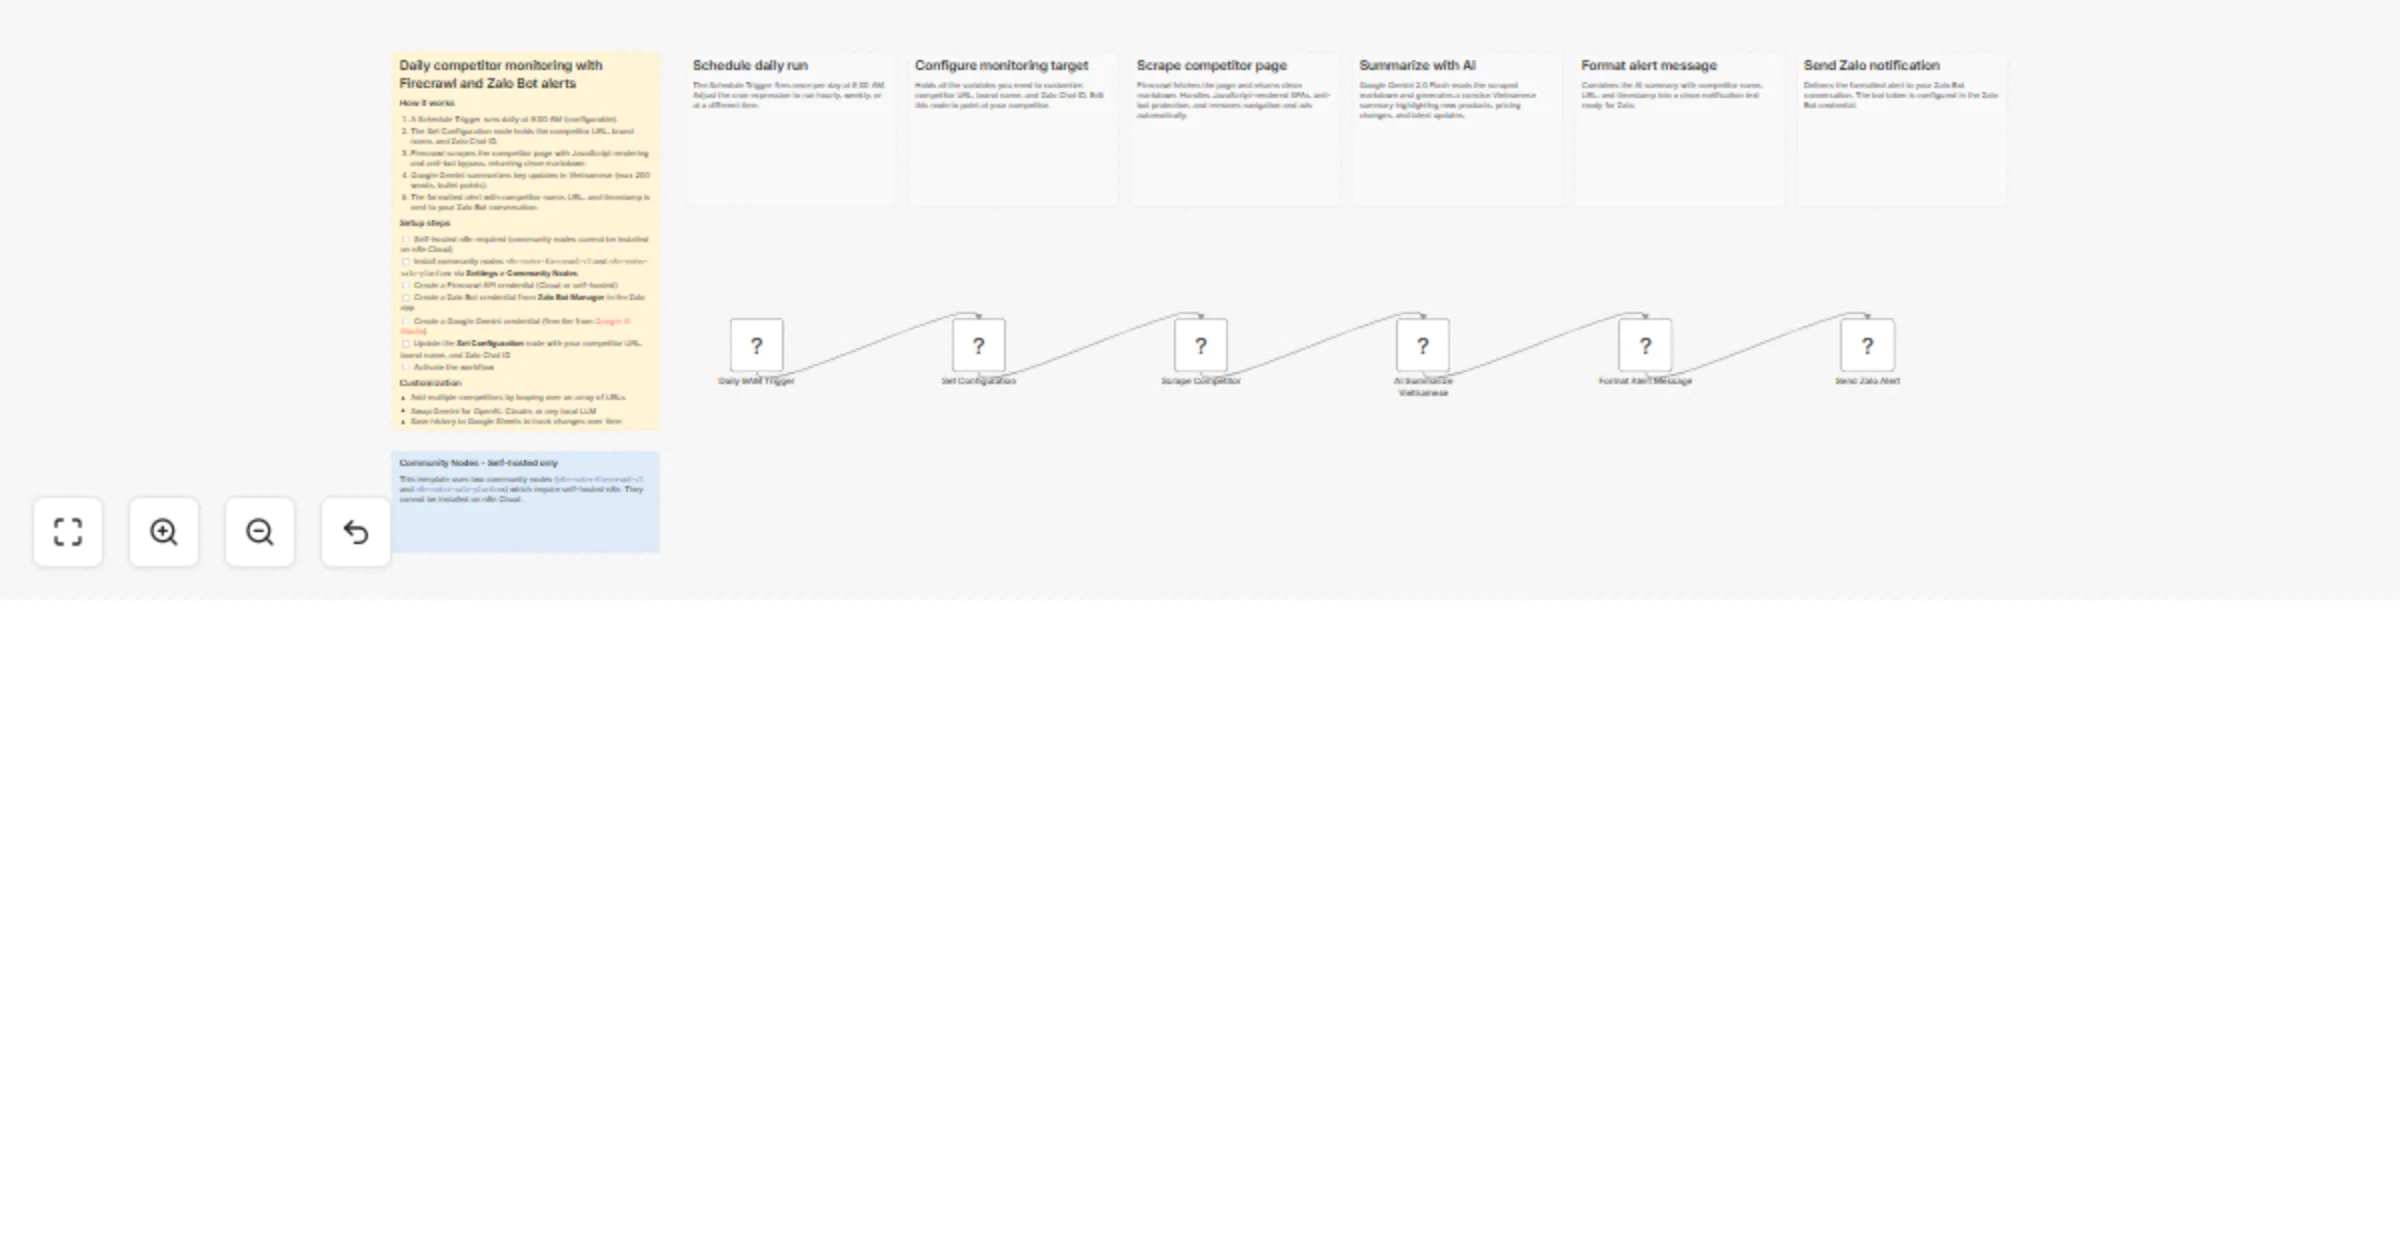
Monitor competitor websites daily with Firecrawl, Gemini, and Zalo Bot alerts
Who is this for? Vietnamese businesses, marketers, and product managers who need daily competitive intelligence about...
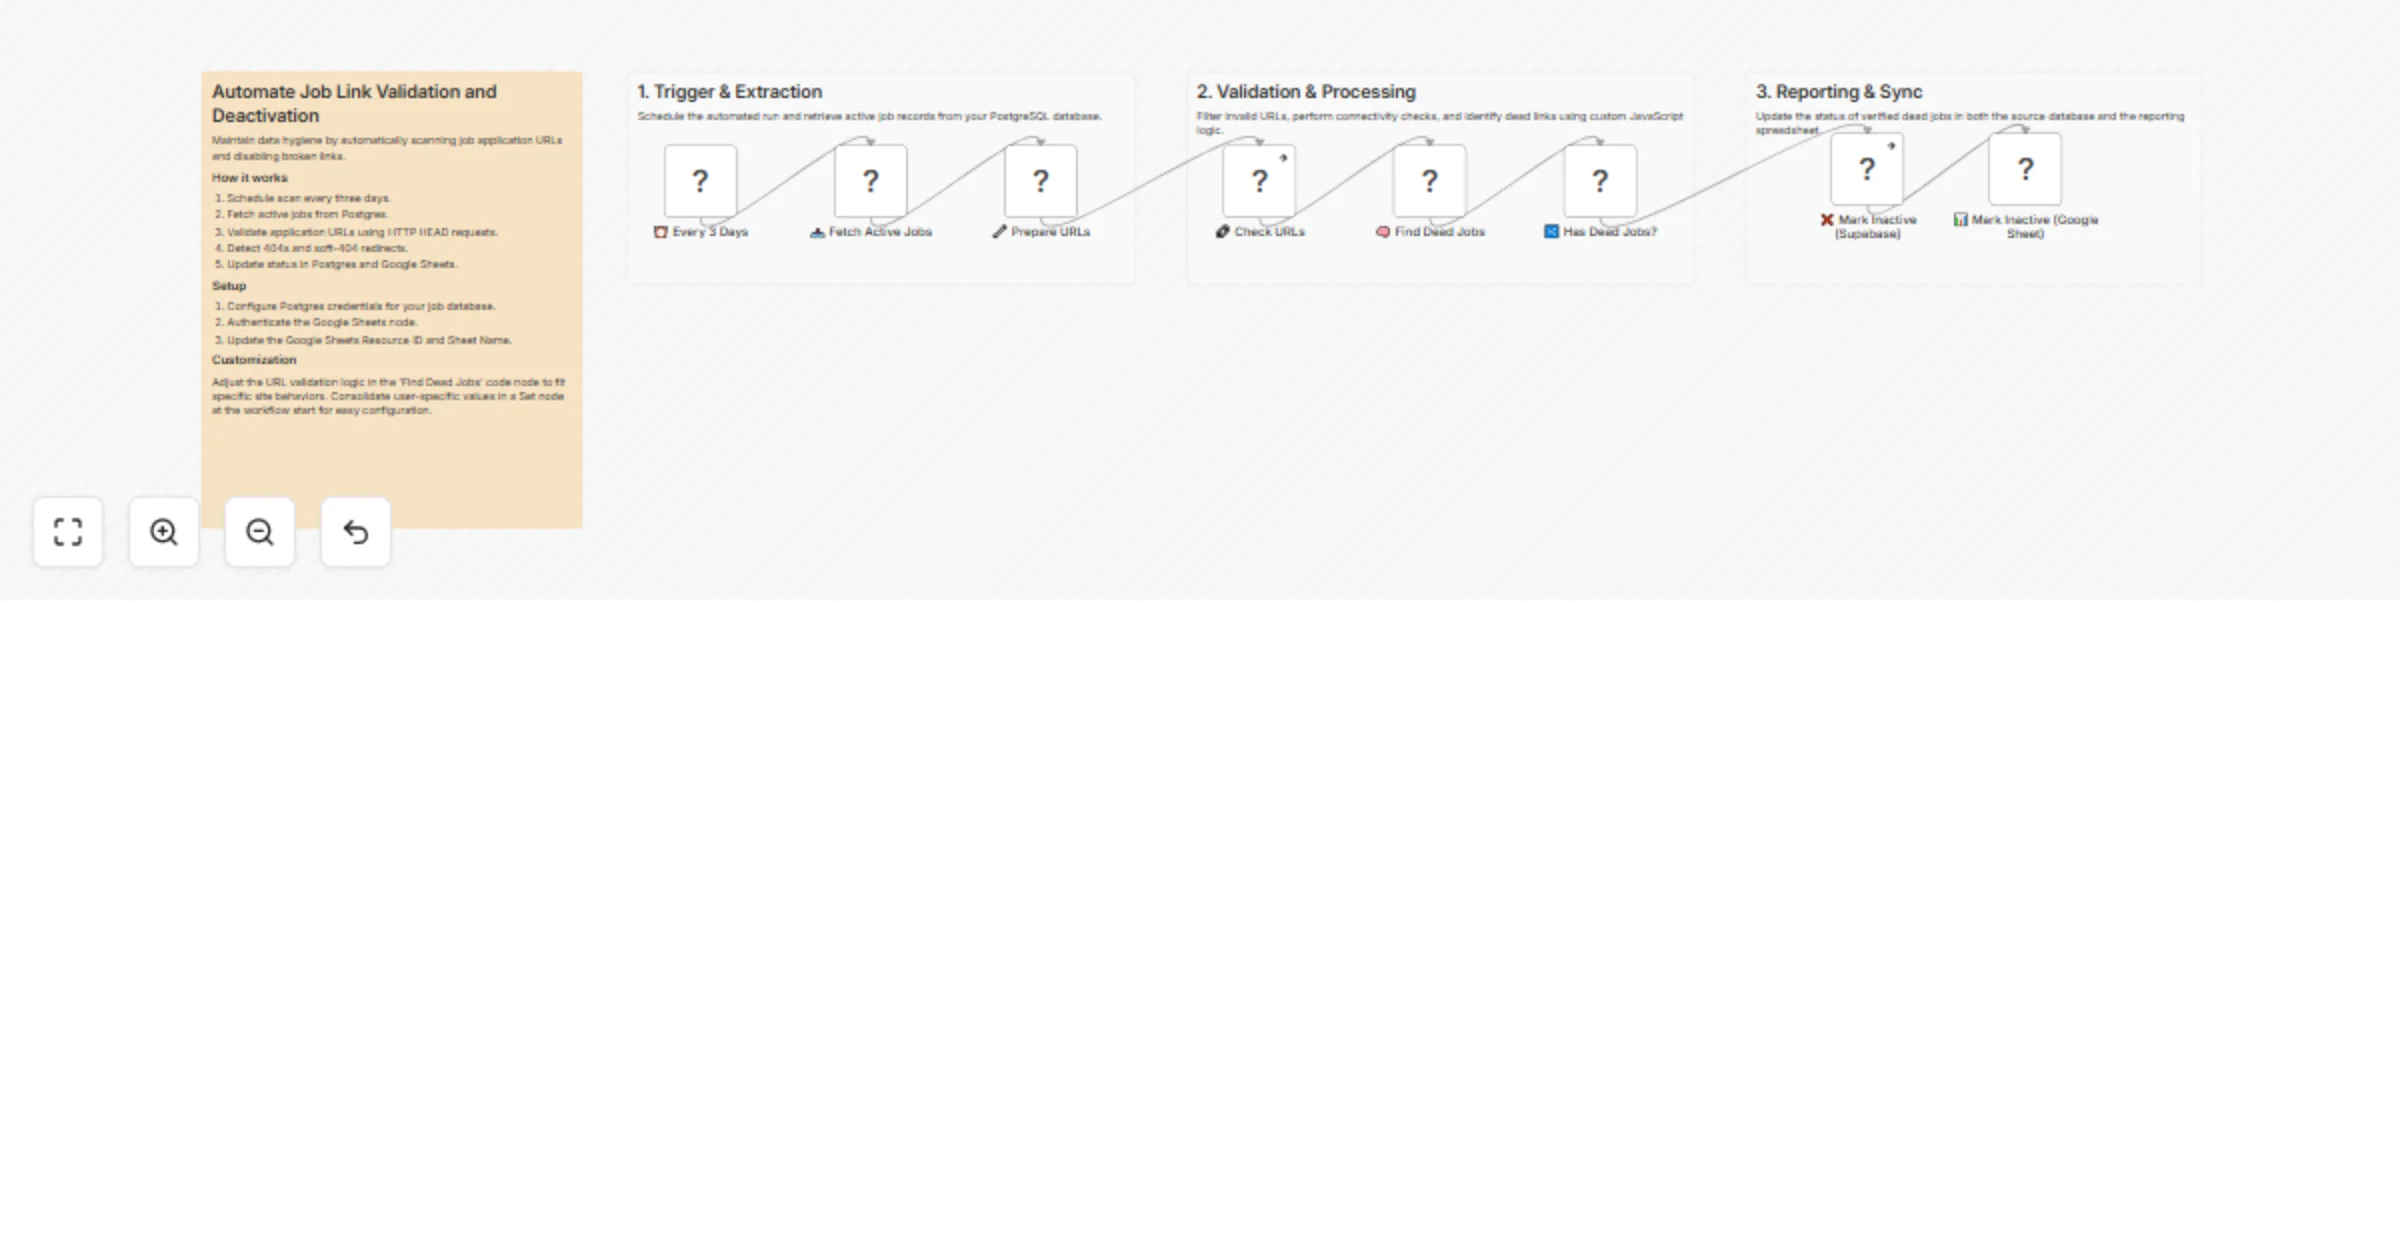
Check job apply URLs and deactivate dead links in Postgres and Google Sheets
Keep your job listings database clean without manual checks. Every three days, this workflow fetches all active jobs...
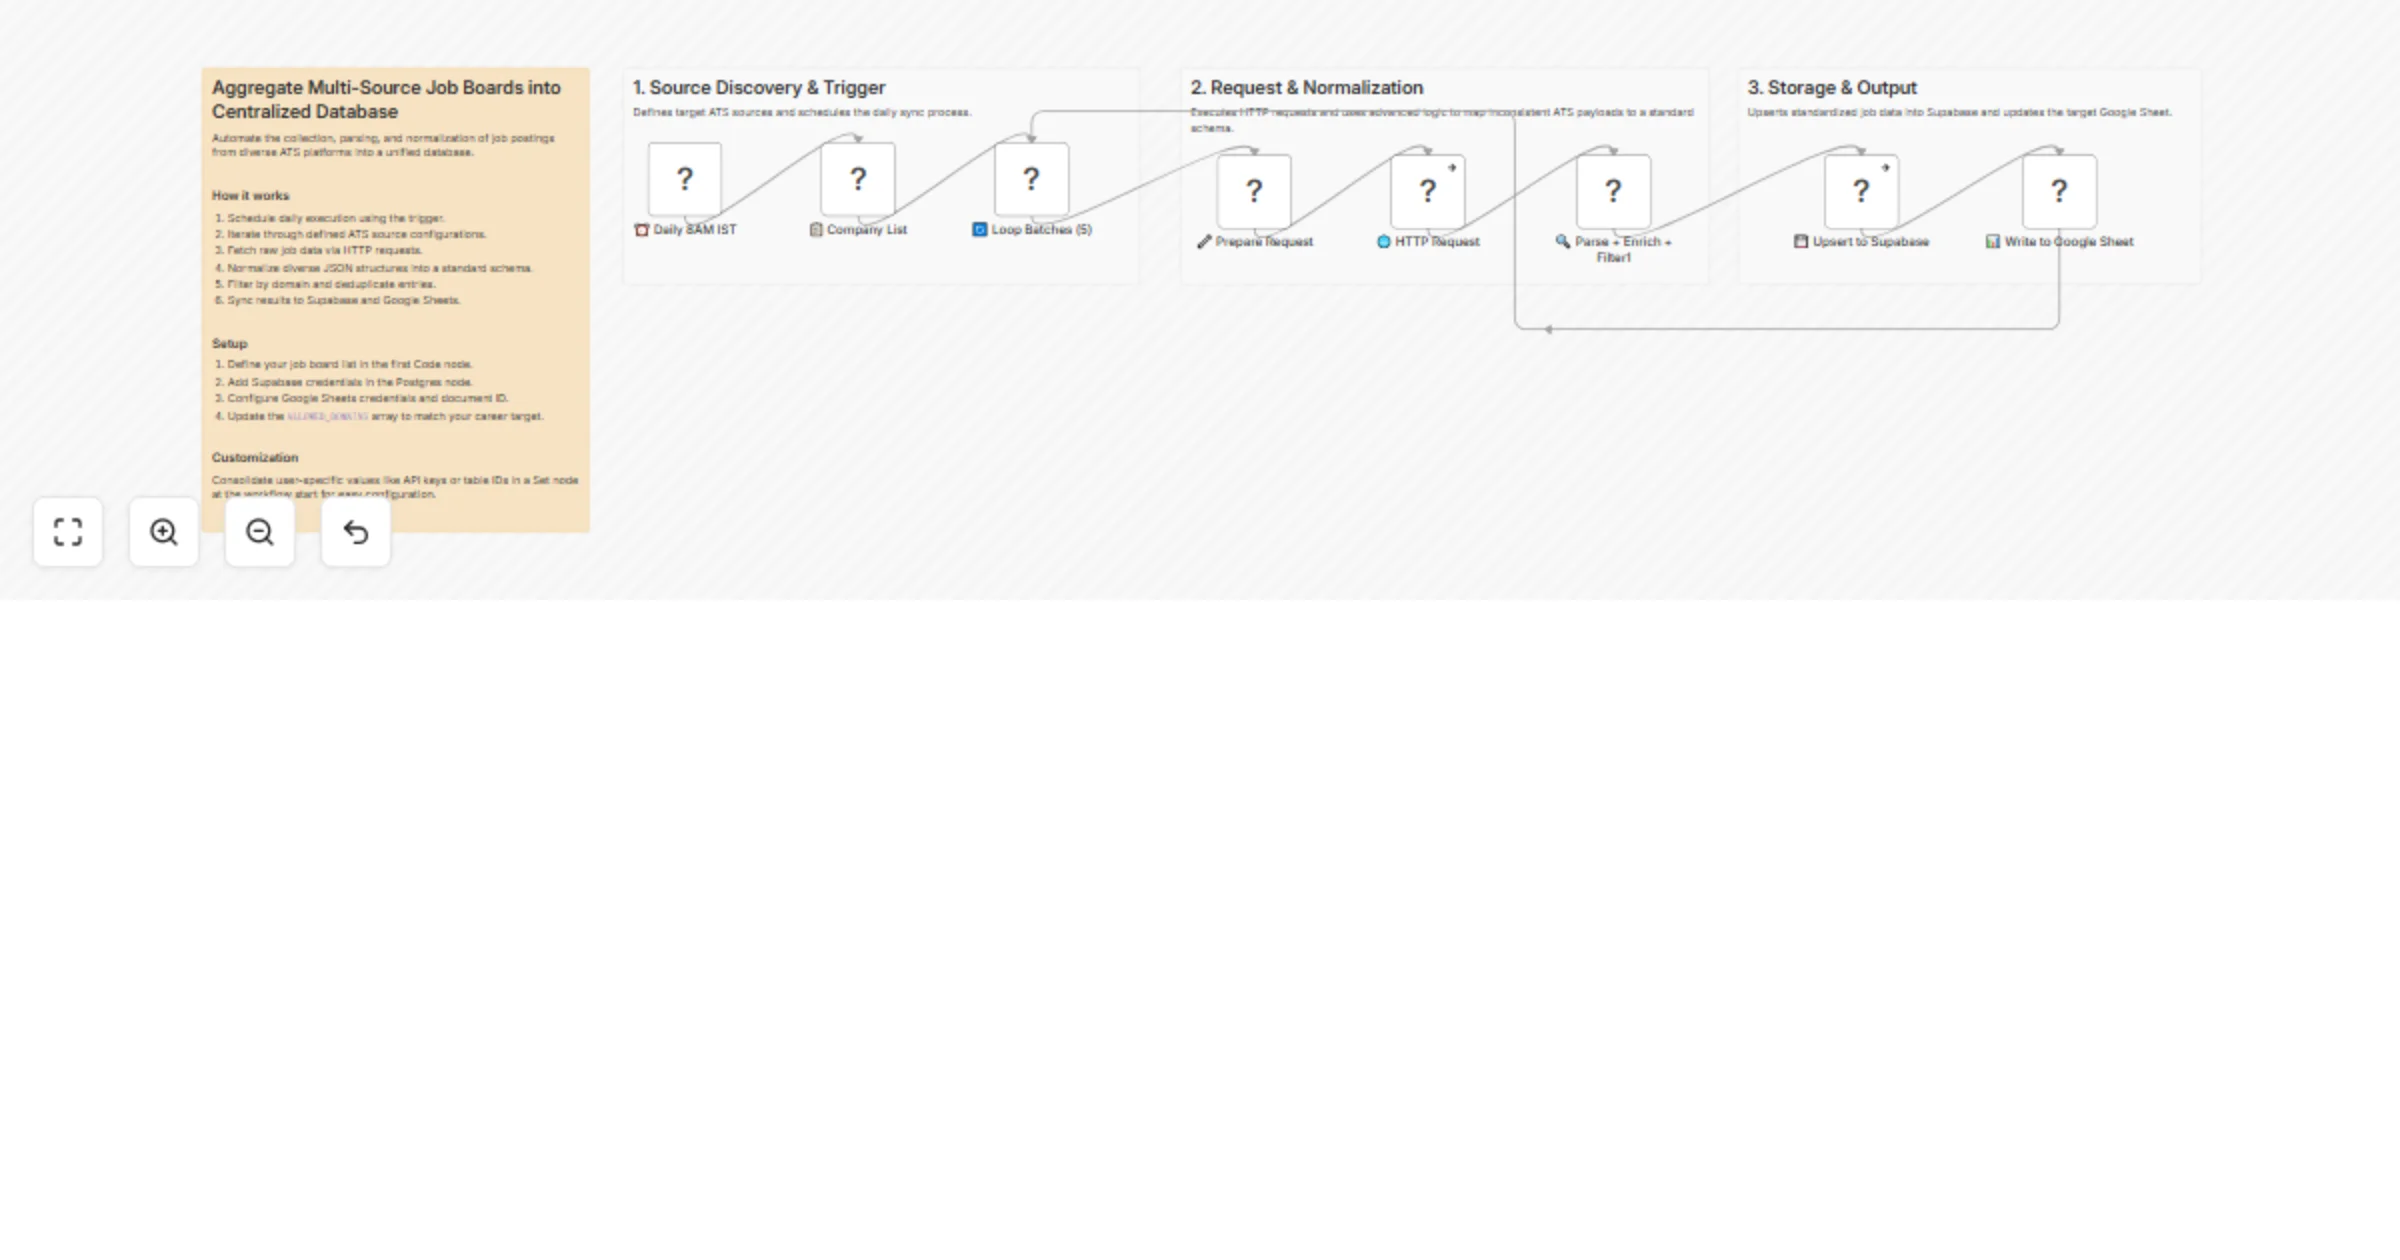
Aggregate multi-source job boards into Supabase and Google Sheets
Stop manually checking dozens of career pages. This workflow runs every morning, hits the public APIs of 8+ ATS platf...
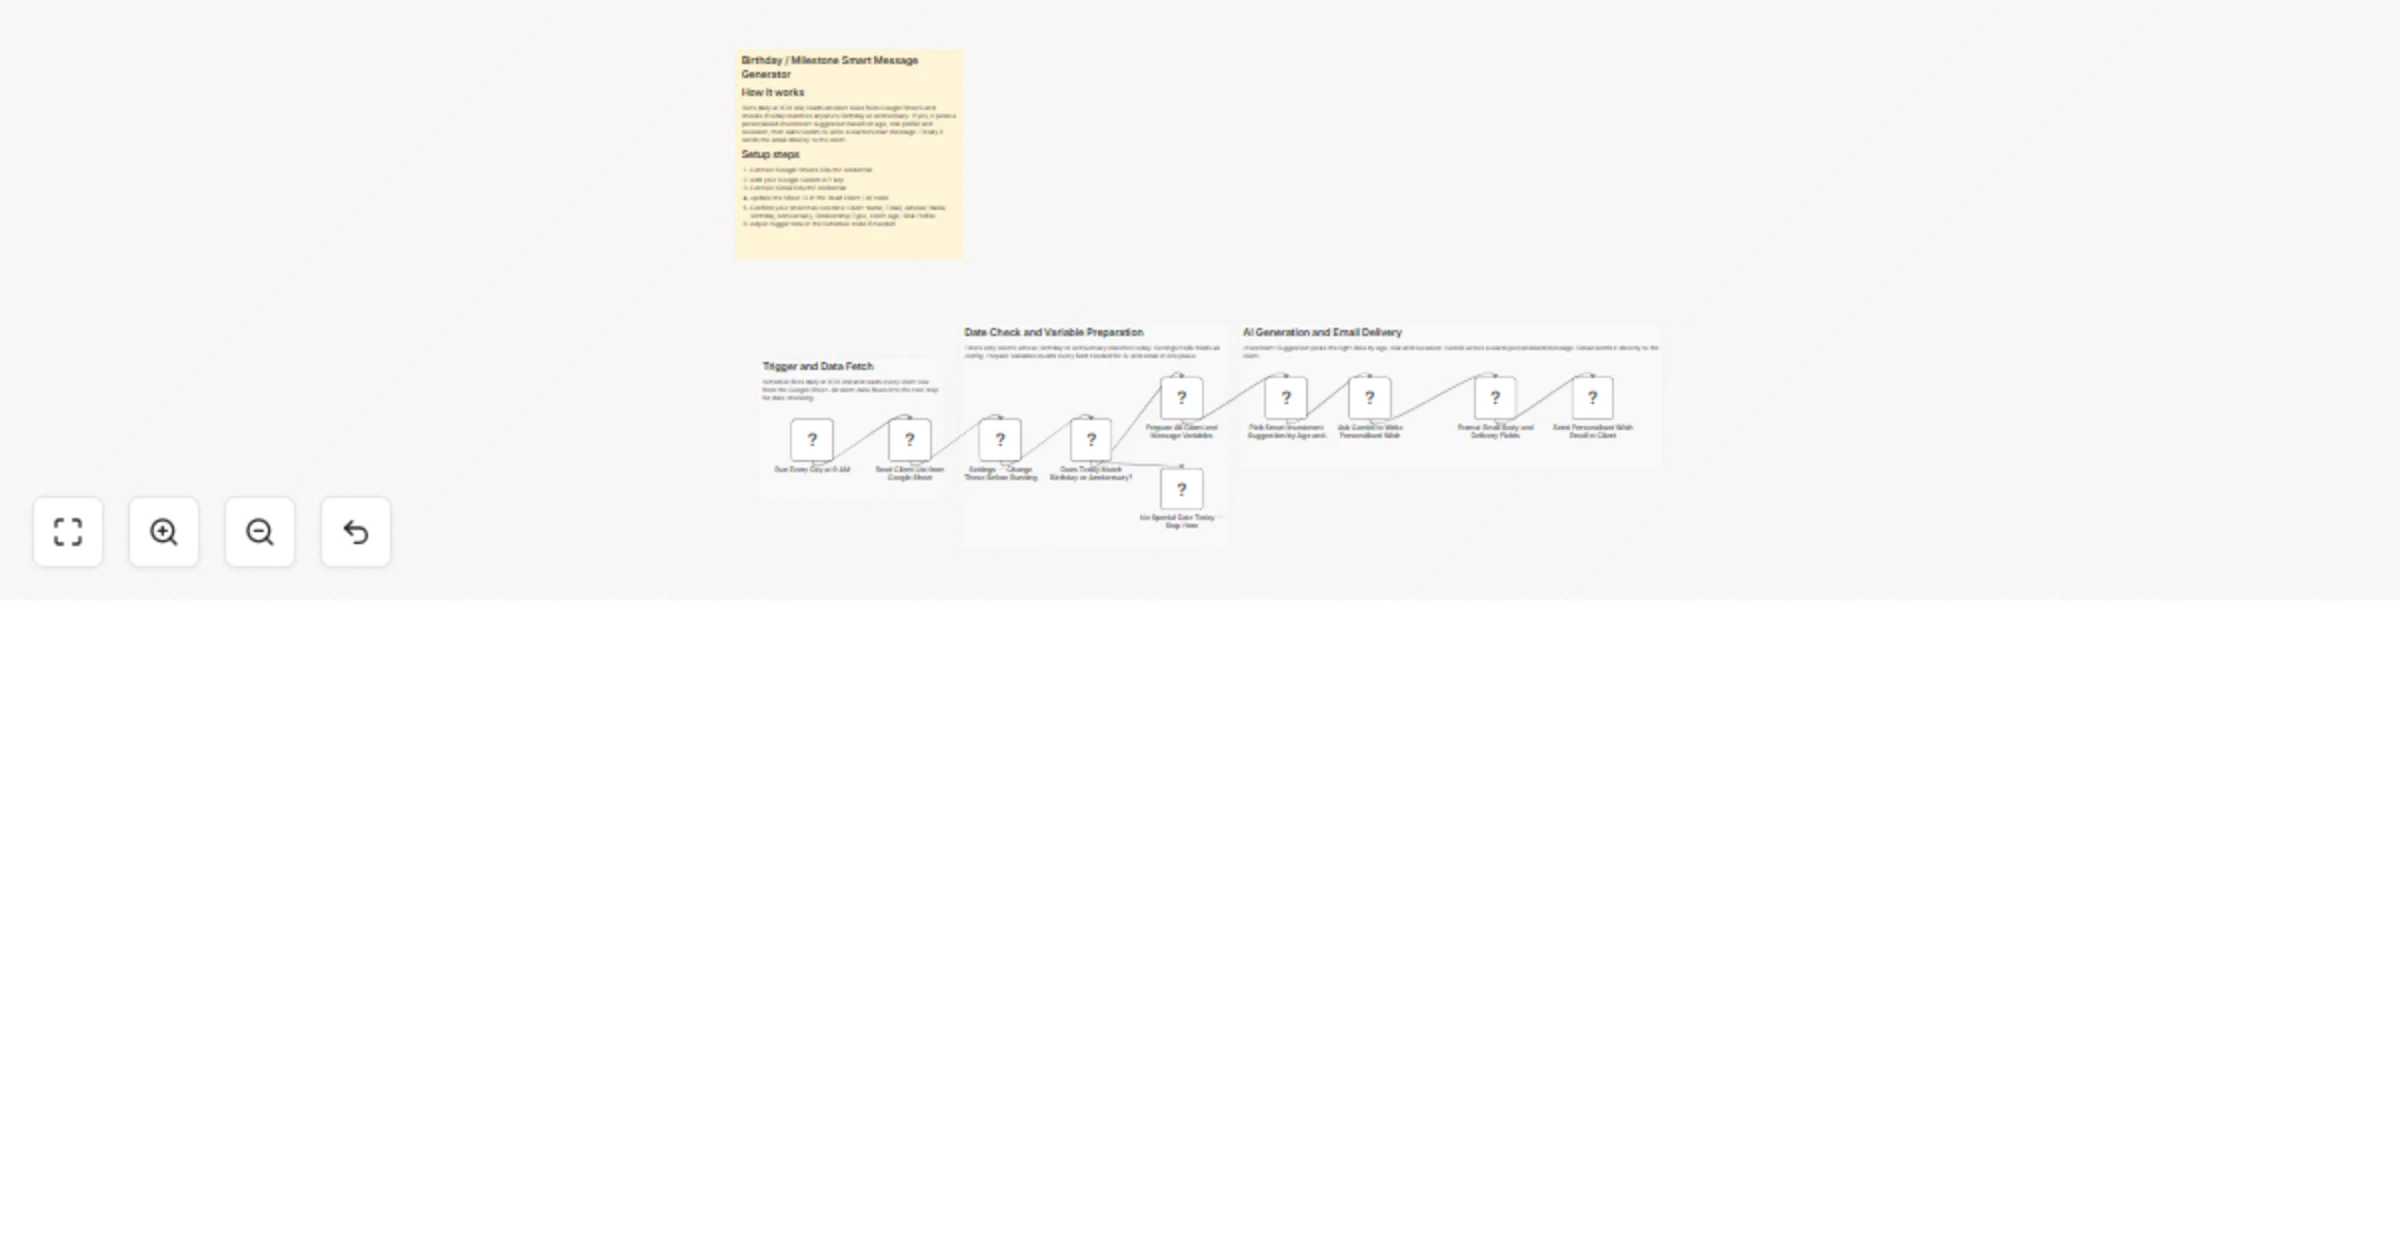
Send personalized birthday and anniversary emails with Google Sheets, Gemini, and Gmail
Birthday & Milestone Message Automation (n8n Google Sheets + Gemini AI + Gmail) This workflow automatically sends per...