
Intuz
Workflows by Intuz
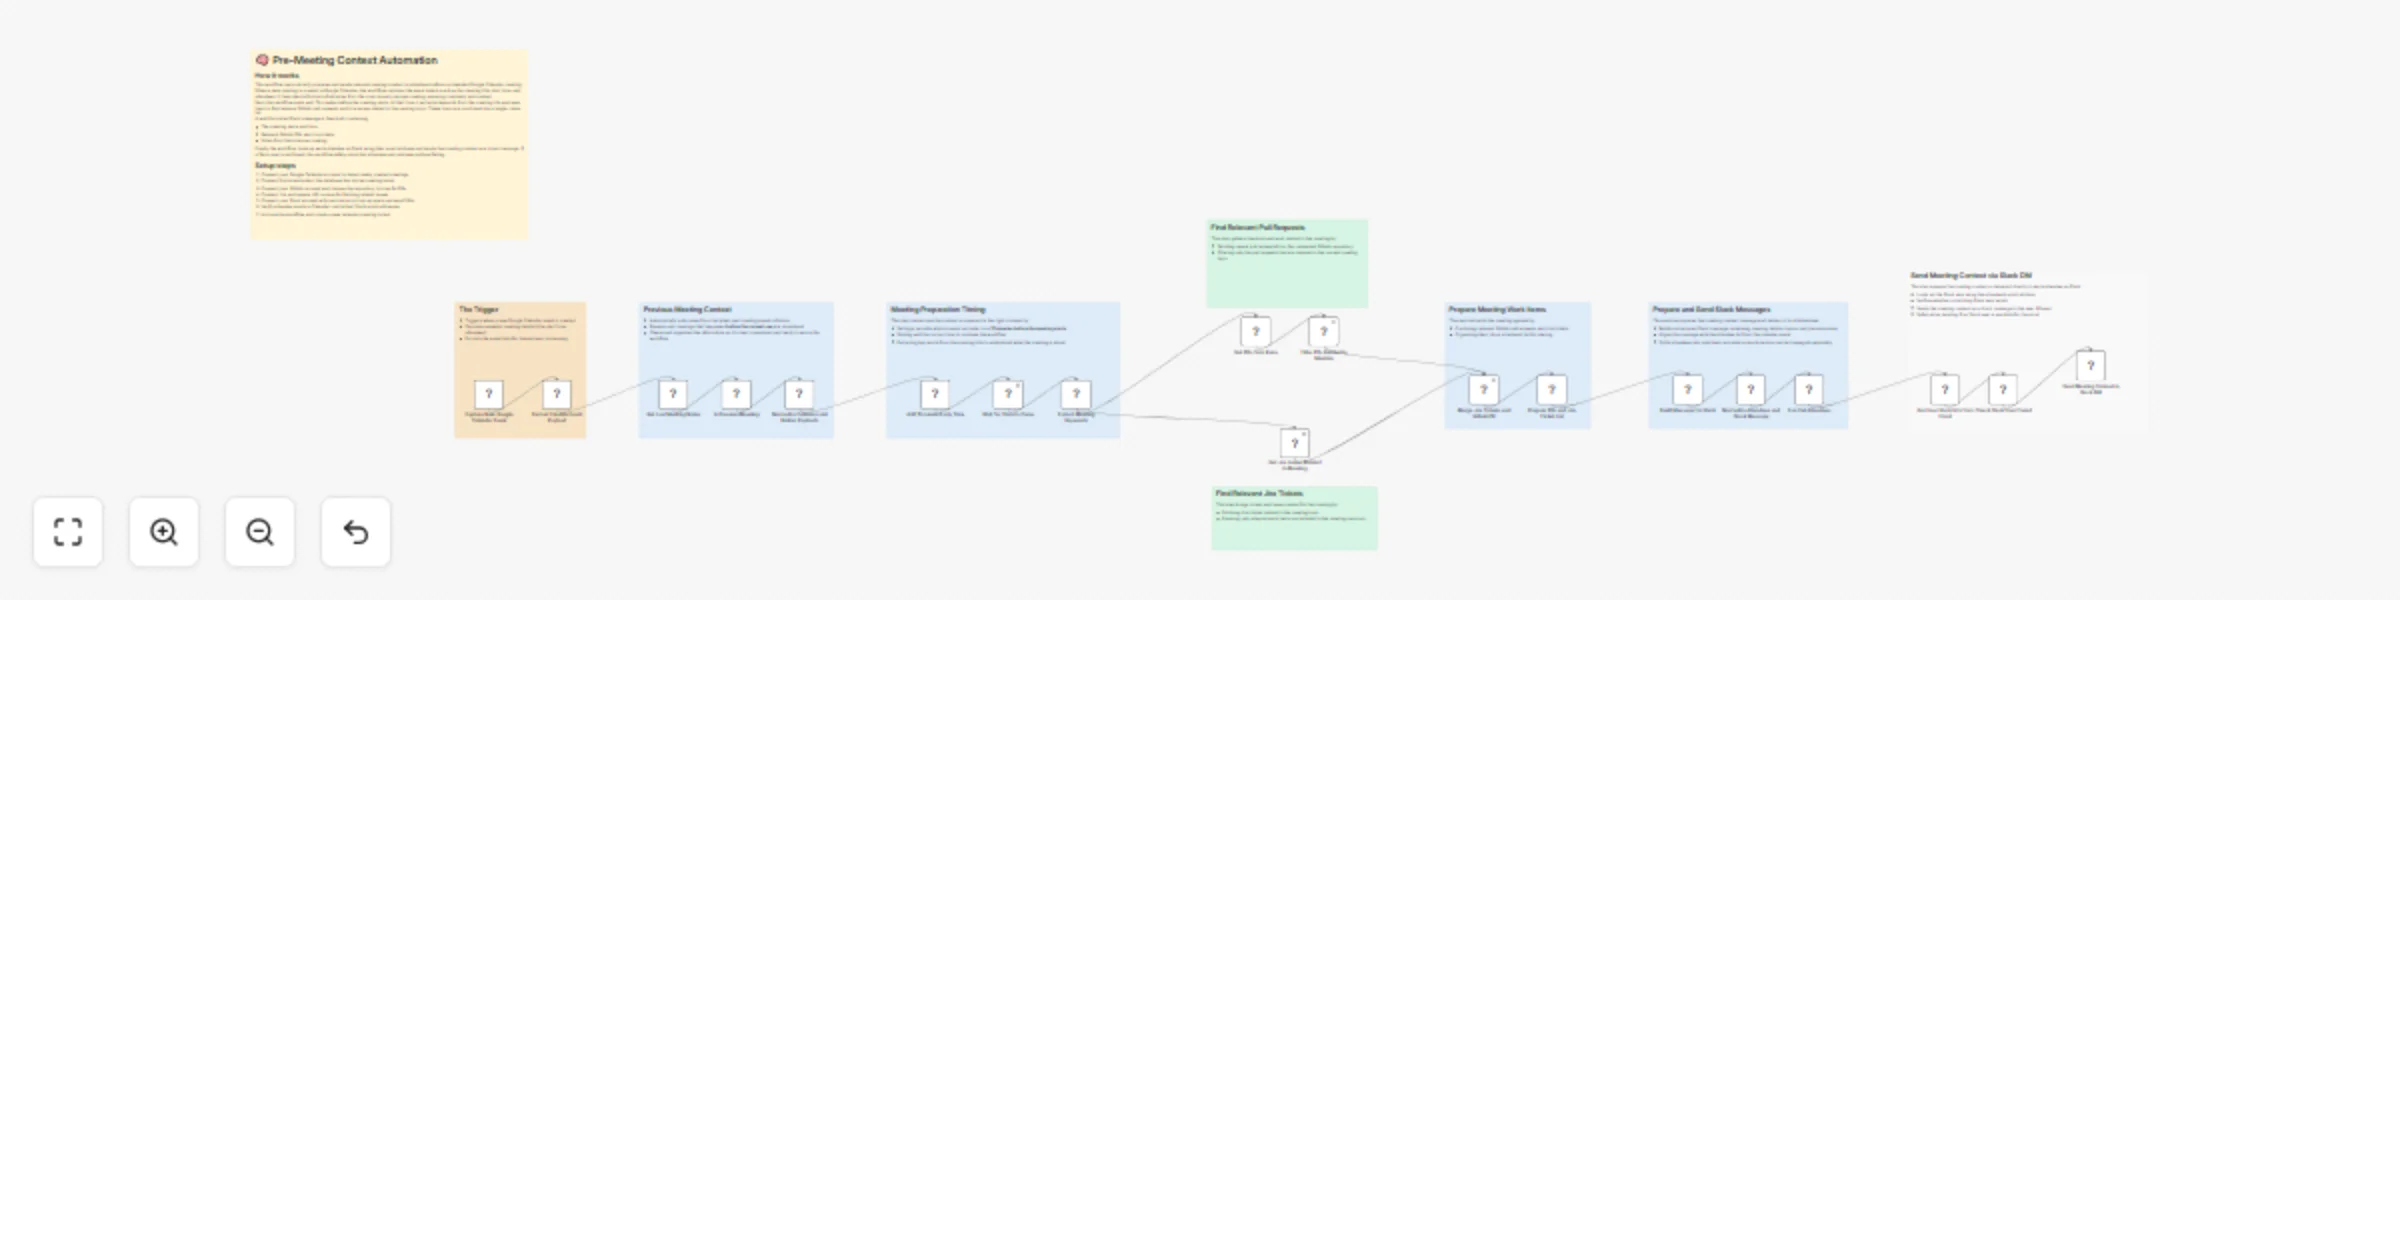
Send pre-meeting Slack briefings using Google Calendar, Notion, GitHub, and Jira
This n8n template from Intuz provides a complete and automated solution for preparing and delivering context rich bri...
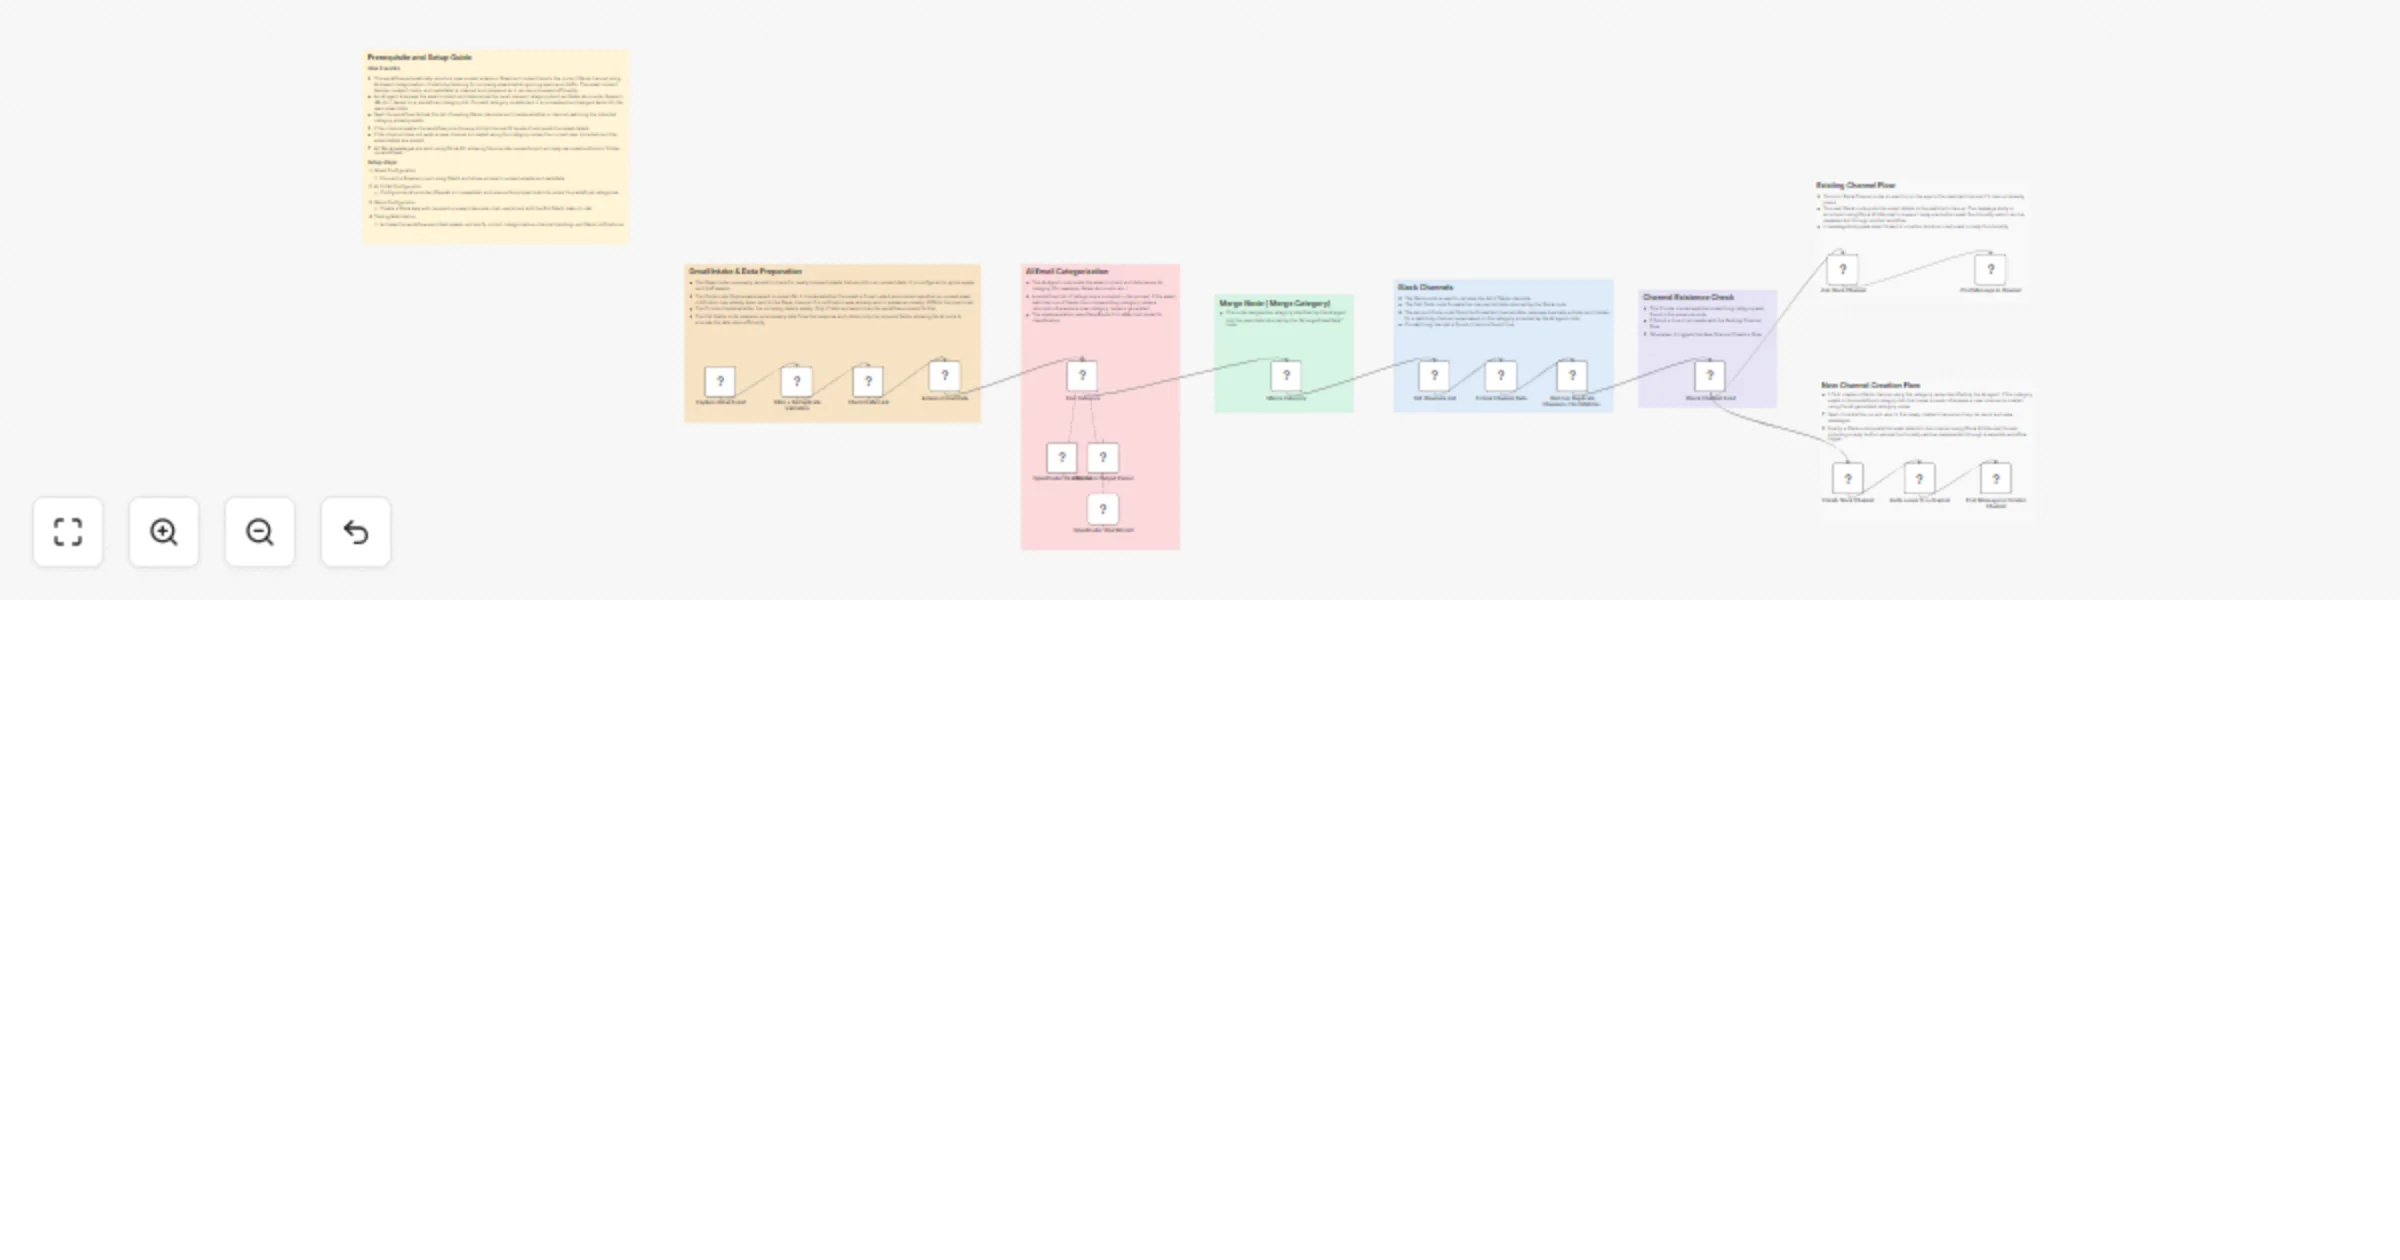
Route and categorize Gmail emails to Slack with Llama 3 via OpenRouter
This n8n template from Intuz provides a complete and automated solution to transform your team's inbox management. It...

Automate a 'Chat with your PDF' Bot on Telegram with Google Gemini & Pinecone
This n8n template from Intuz provides a complete solution to automate a powerful, AI driven 'Chat with your PDF' bot...

Automate lead generation from Google Search & Maps to Google Sheets
This n8n template from Intuz provides a complete solution to automate on demand lead generation. It acts as a powerfu...

Automate Shopify orders from Airtable with Gmail confirmations
This n8n template from Intuz provides a complete solution to automate your order creation process. It seamlessly sync...

Generate personalized sales outreach from LinkedIn job signals with Apify & Google Gemini
This n8n template from Intuz provides a complete and automated solution for identifying high intent leads from Linked...

Automate QuickBooks invoicing & customer creation from Airtable sales orders
This n8n template from Intuz provides a complete solution to automate your entire invoicing process. It intelligently...

Automate AI video ad generation with Google Veo 3, Gemini, and Airtable
This n8n template from Intuz provides a complete and automated solution for transforming a static product image and a...
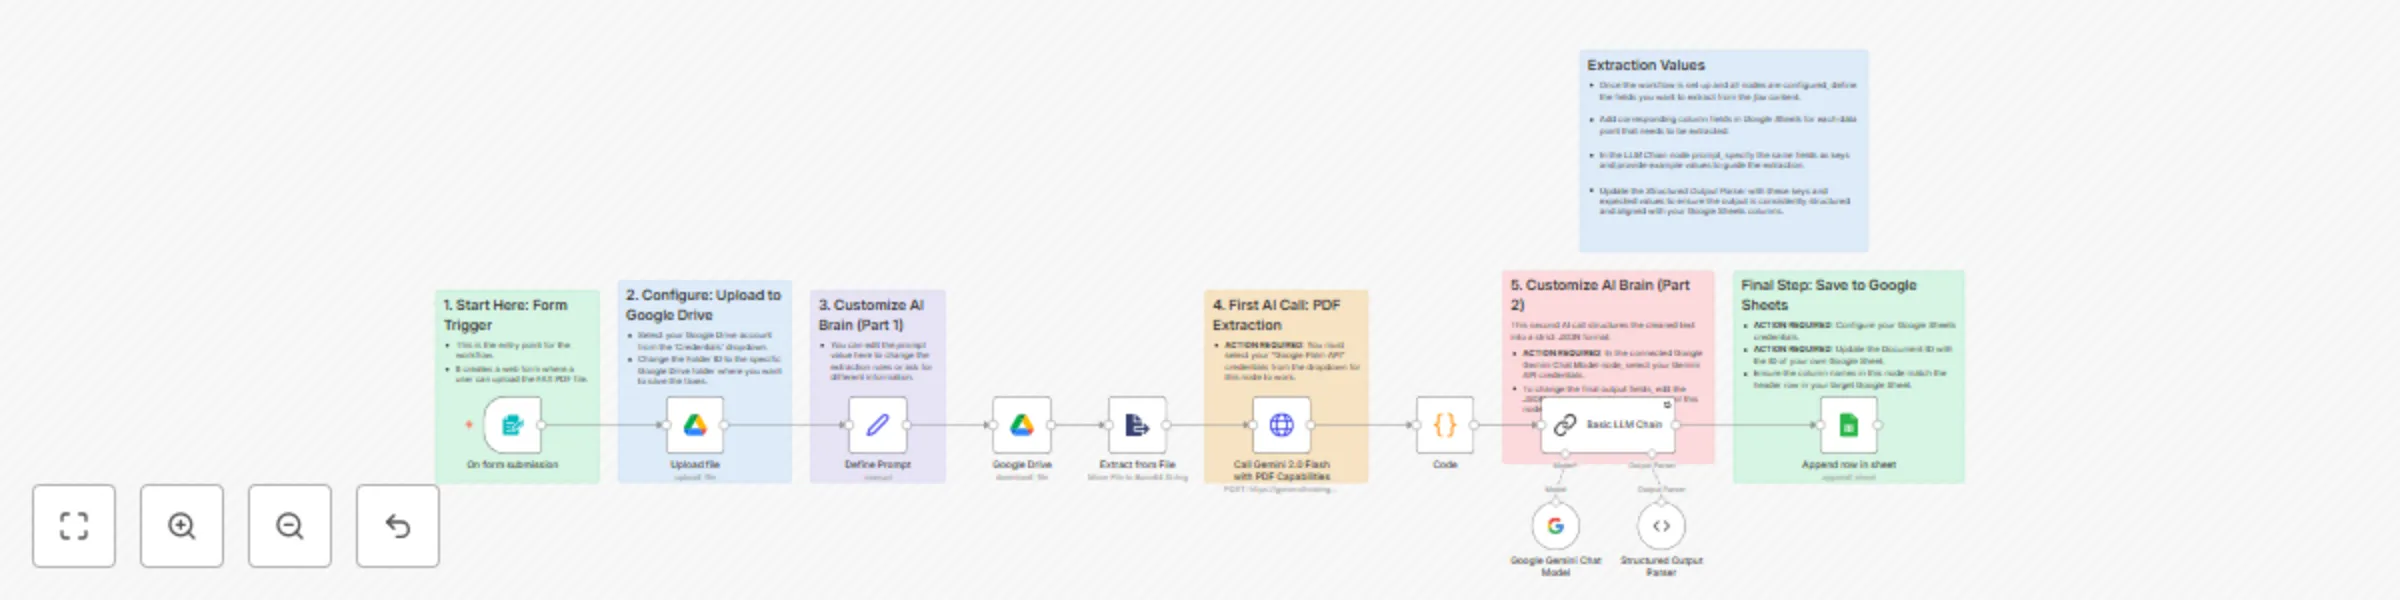
Automate data extraction from faxes & PDFs using Google Gemini and Google Sheets
This n8n template from Intuz provides a complete solution to automate the extraction of critical information from PDF...

Automate AI video creation & multi-platform publishing with Gemini & Creatomate
This n8n template from Intuz provides a complete end to end content factory to automate the entire lifecycle of creat...

Automate QuickBooks sales receipts & customer creation from Stripe payments
This n8n template from Intuz provides a complete solution to automate your accounting by instantly creating QuickBook...

Automate AI Upwork proposal generation with Apify, Google Gemini & sheets
Disclaimer Community nodes are used, and template can only be used on self hosted n8n instances. This n8n template fr...

Automate scraping Y Combinator startups with Apify & Google Sheets
Disclaimer Community nodes are used, and template can only be used on self hosted n8n instances. This n8n template fr...
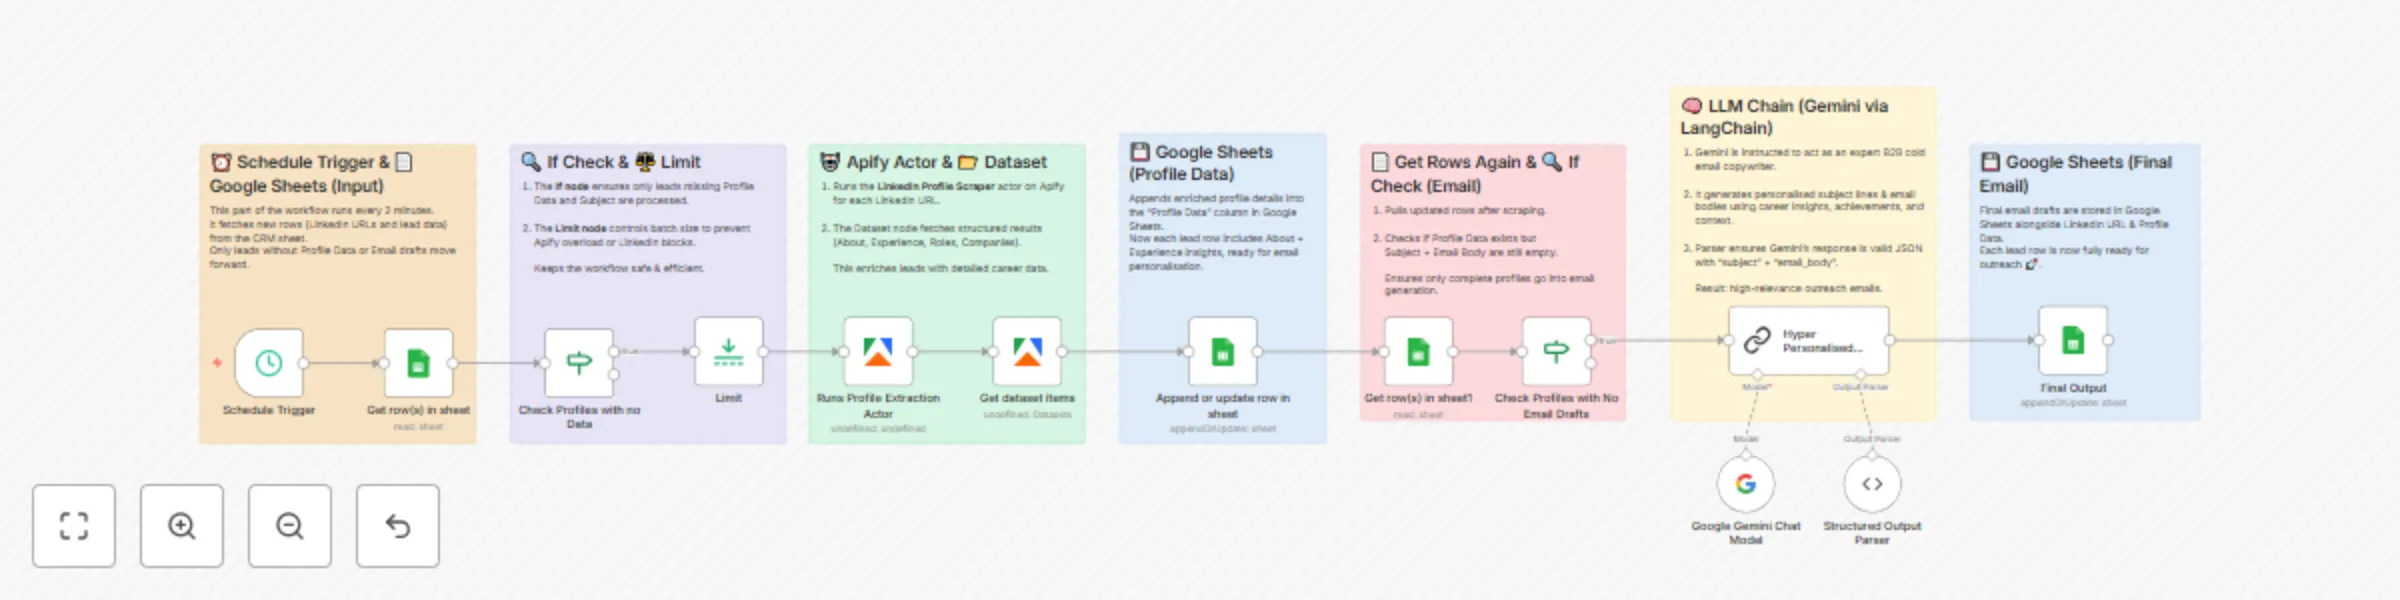
Automate LinkedIn profile research & email outreach with Apify, Gemini & Sheets
This n8n template from Intuz provides a complete and automated solution for deep dive lead research and hyper persona...
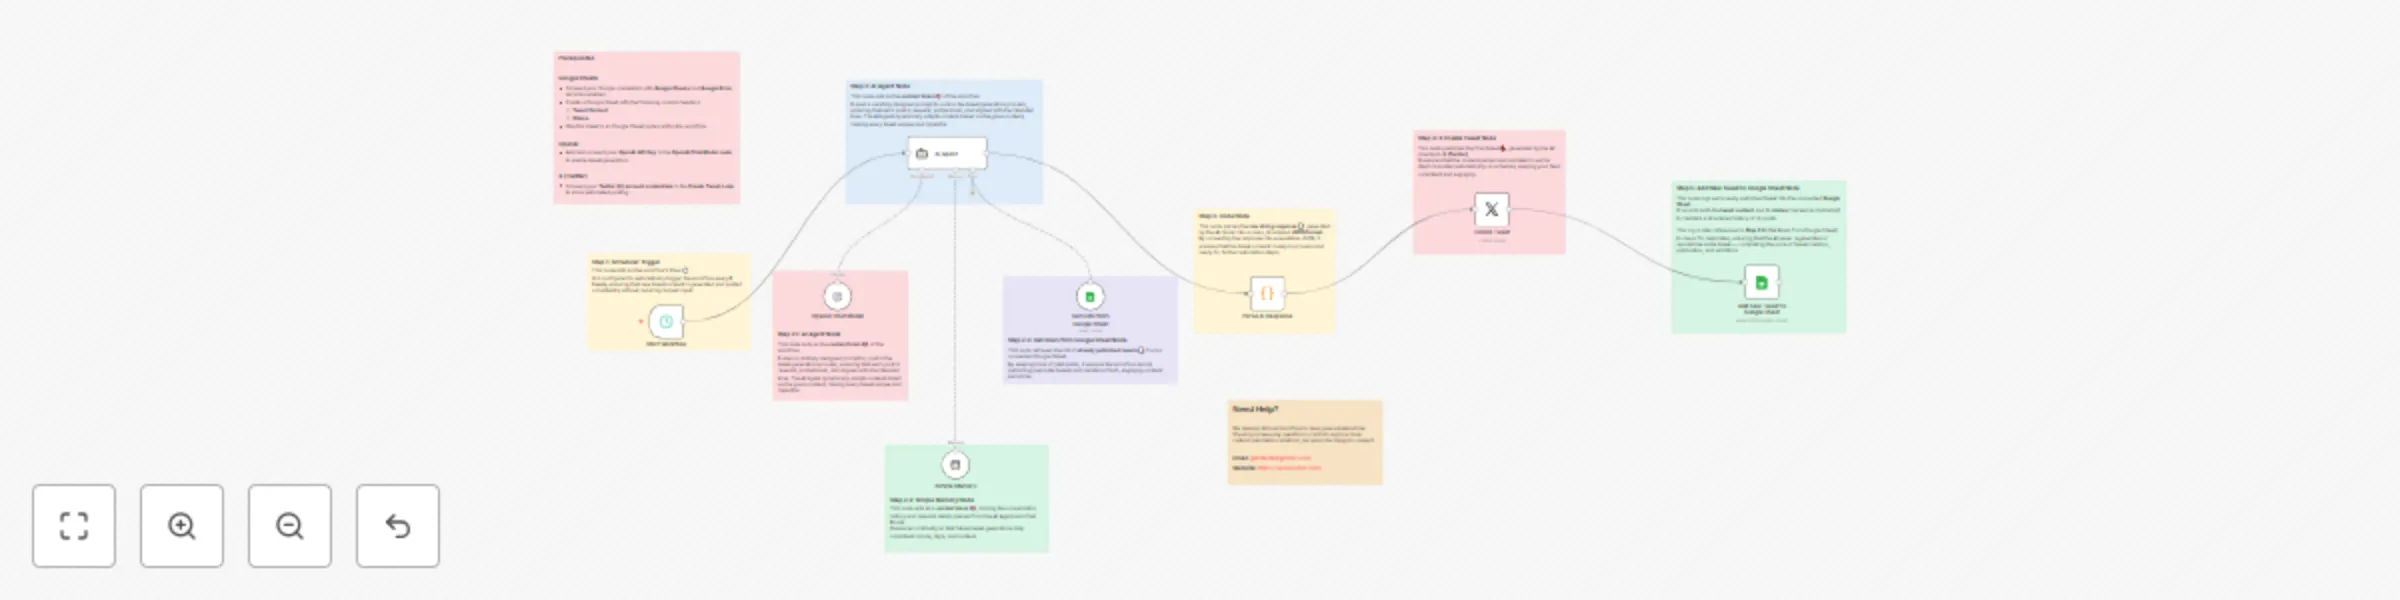
Automate Twitter posting with GPT-4 content generation & Google Sheets tracking
This n8n template from Intuz provides a complete and automated solution for creating an autonomous social media manag...

Automate lead gen & email outreach with Apify, Apollo.io, GPT-4 & Google Sheets
Disclaimer: Community nodes are used, and template can only be used on self hosted n8n instances. This n8n template f...

Sync new subscribers from Google Sheets to MailerLite without duplicates
This n8n template from Intuz provides a complete solution to automate the syncing of new subscribers from Google Shee...

Automate expense reporting from Airtable to QuickBooks
This n8n template from Intuz provides a complete solution to automate your expense approval and accounting process. I...

Full-cycle invoice automation: Airtable, QuickBooks & Stripe
This n8n template from Intuz provides a complete and automated solution for full cycle invoicing, orchestrating a sea...
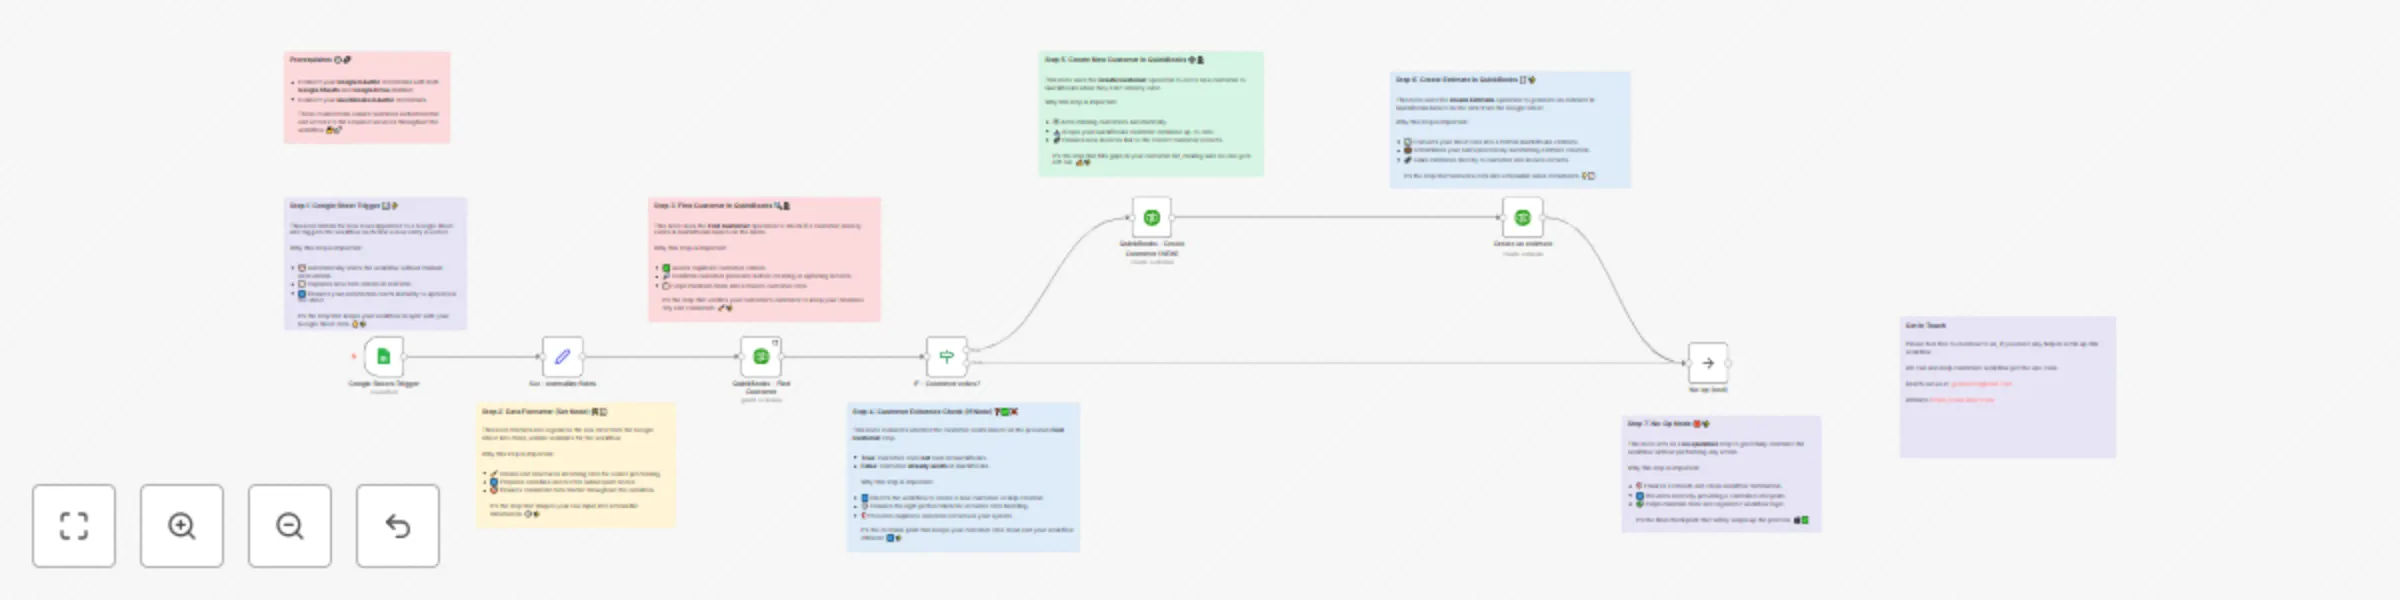
Automate QuickBooks customer & estimate creation from Google Sheets
This n8n template from Intuz provides a complete and automated solution to accelerate your sales and quoting process...

Automatically save QuickBooks invoice PDFs to Google Drive
This n8n template from Intuz provides a complete and automated solution for secure document archiving. It automatical...

Automate real-time QuickBooks invoice alerts in Slack
This n8n template from Intuz provides a complete and automated solution for instant team wide financial visibility. I...

Automate real-time QuickBooks invoice sync to Google Sheets
This n8n template from Intuz provides a complete and automated solution for real time financial reporting. It instant...

Automate hyper-personalized email outreach with AI, Gmail & Google Sheets
This n8n template from Intuz provides a complete and automated solution for hyper personalized email outreach. It pow...