Issam AGGOUR
Workflows by Issam AGGOUR

Manage recipes with AI-powered Telegram bot and Google Sheets database
Transform Your Telegram into a Smart Recipe Assistant! Tired of scrolling through messy notes and bookmarks to find y...
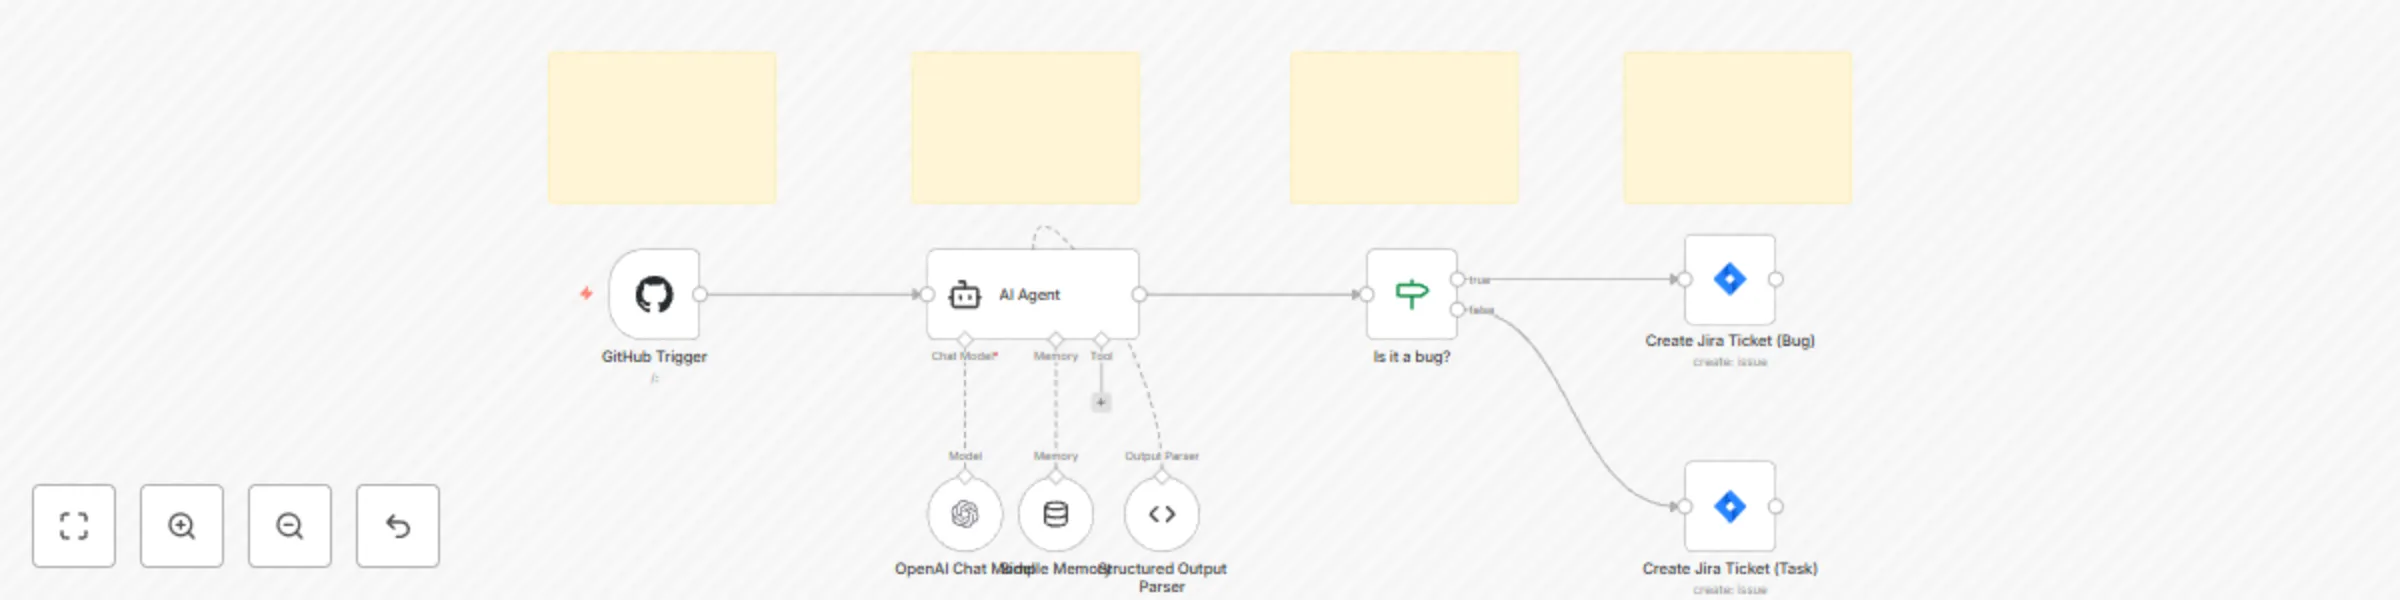
Classify and convert GitHub issues to Jira tickets with OpenAI
AI Powered GitHub Issue to Jira Ticket Automation Bridge the gap between your development and project management work...

Auto-track Amazon prices with Google Gemini & send alerts to Telegram
AI Powered Amazon Price Tracker to Telegram Overview Automate your deal hunting with this intelligent Amazon price tr...

Generate professional changelogs from Git commits with GPT-4 and GitHub
AI Powered Git Changelog Generator for Automated Release Notes This workflow transforms your software release process...

Automated expense tracking with AI receipt analysis & Google Sheets
This workflow contains community nodes that are only compatible with the self hosted version of n8n. Your Pocket Book...
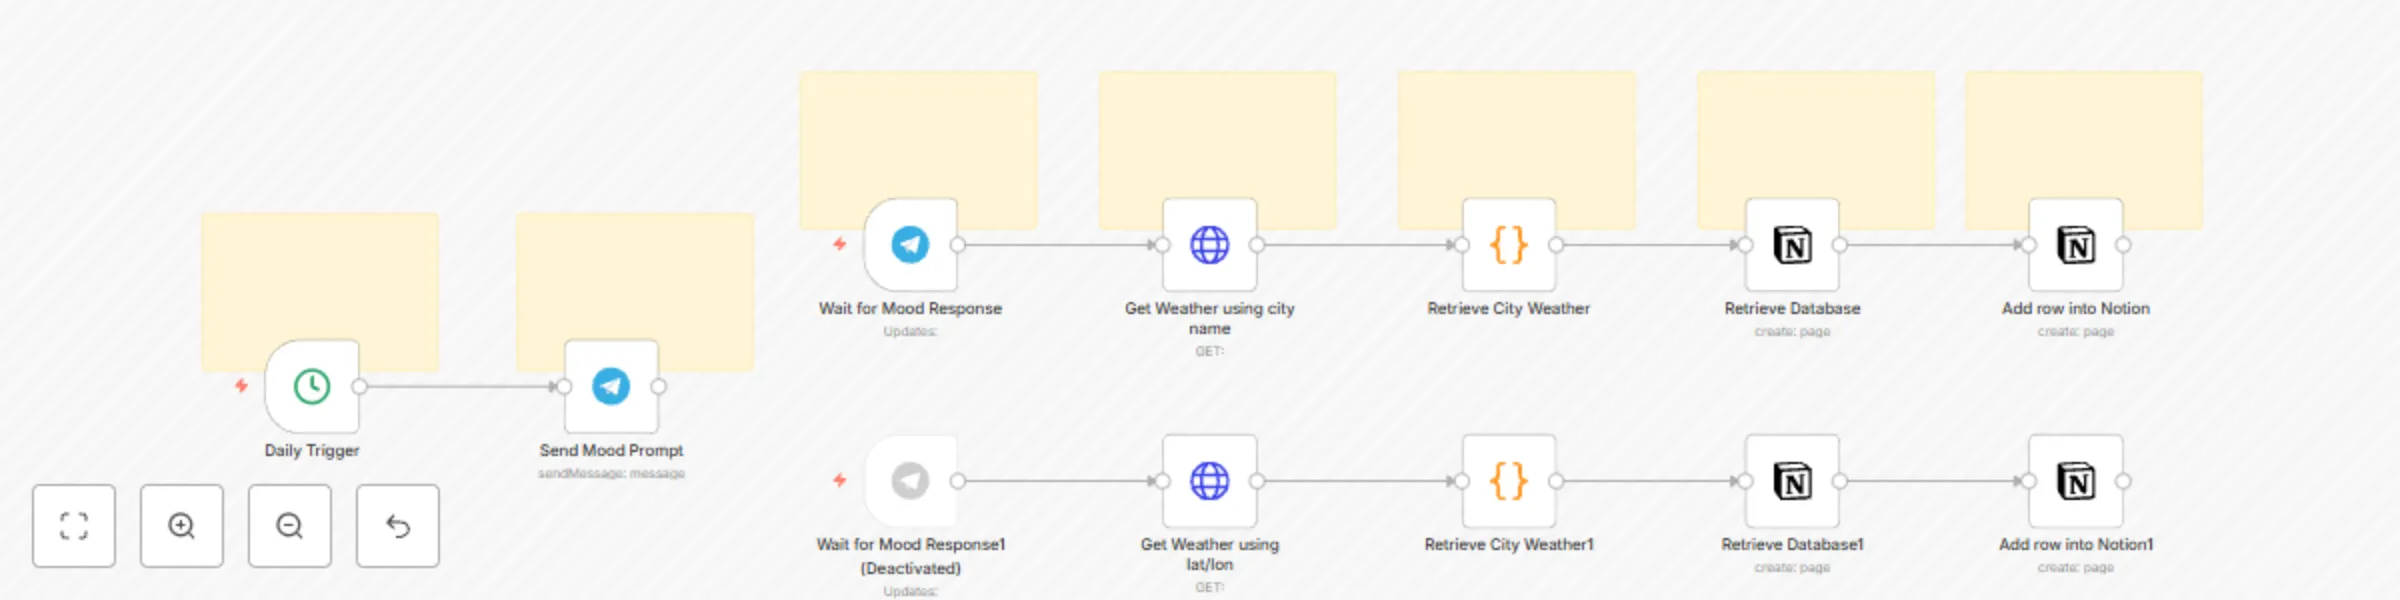
Log daily mood & weather to Notion with Telegram and OpenWeatherMap
The Daily Mood & Weather Logger 🚀 is more than just a utility; it's a hands on n8n workflow designed to teach you co...

Family assistant: Schedule, meal & routine management with Email & Telegram
The FamilyFlow Assistant is your n8n powered 🚀 companion designed to streamline daily parenting tasks, reduce mental...

Build a multi-functional Telegram bot with Gemini, RAG PDF search & Google Suite
The Ultimate Beginner's Guide to an AI Powered Telegram Assistant (PDF, Brave search & Google Suite) This comprehensi...