Amit Mehta
Workflows by Amit Mehta

Automate paid Zoom meetings with Stripe, Gmail & Google Sheets tracking
Streamline Your Zoom Meetings with Secure, Automated Stripe Payments This comprehensive workflow automates the entire...

AI-powered multi-platform social media content factory with dynamic system prompts & GPT-4o
Automated Social Media Content Publishing Factory + System Prompt Composition This workflow is a powerful automation...

Auto-generate SEO product titles & descriptions with GPT-4o-mini for Printify
N8N Workflow: Printify Automation Update Title and Description AlexK1919 This workflow automates the process of getti...

Extract and analyze web data with Bright Data & Google Gemini
This workflow performs structured data extraction and data mining from a web page by combining the capabilities of Br...

Two-factor authentication with ClickSend voice calls and email verification
N8N Workflow: Send and Check TTS (Text to speech) Voice Calls with Email Verification This workflow automates a two f...

Automate newsletter creation & client delivery with GPT-4O, Google Sheets
How it Works This workflow automates the complete newsletter management process from content creation to client deliv...

AI-Powered Cold Calling Automation with Vapi.ai, GPT-4o & Google Sheets
📞AI Powered Cold Calling Automation with Vapi.ai, GPT 4o & Google Sheets Overview Transform your lead list into an A...

Google Sheets duplication & enrichment automation
How it Works This workflow reads sheet details from a source Google Spreadsheet, creates a new spreadsheet, replicate...
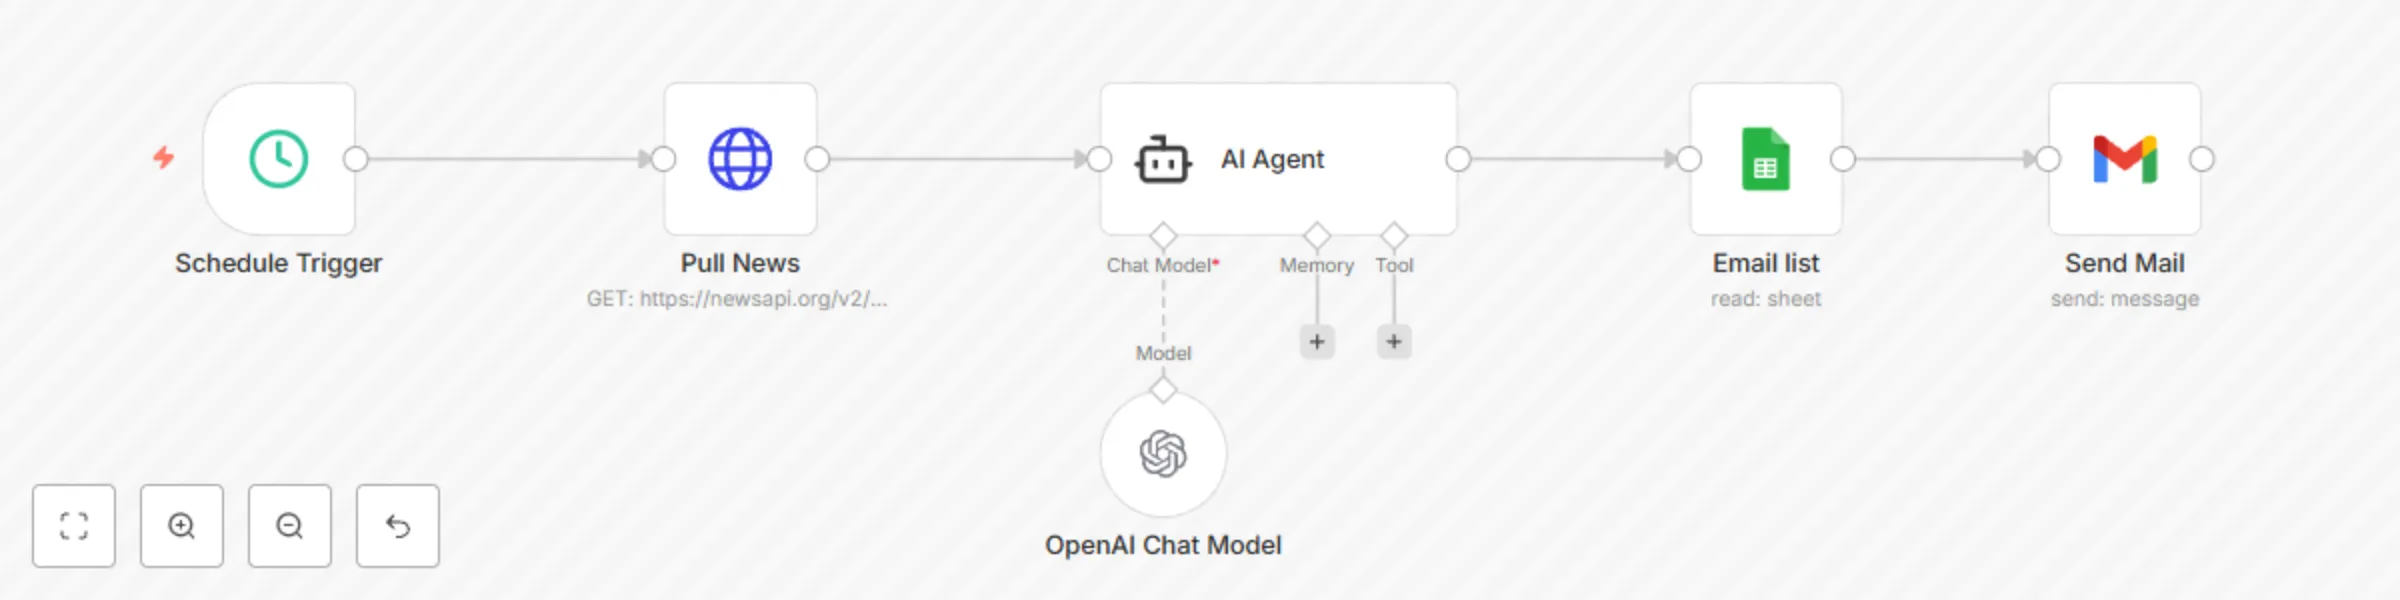
Automated news summarizer with GPT-4o + email delivery
How it Works This workflow fetches top news headlines every 10 minutes from NewsAPI, summarizes them using OpenAI's G...

YouTube comment scraper & analyzer with GPT-4o + email summary report
How it Works This workflow automates the collection and analysis of YouTube comments from a video and sends a summary...
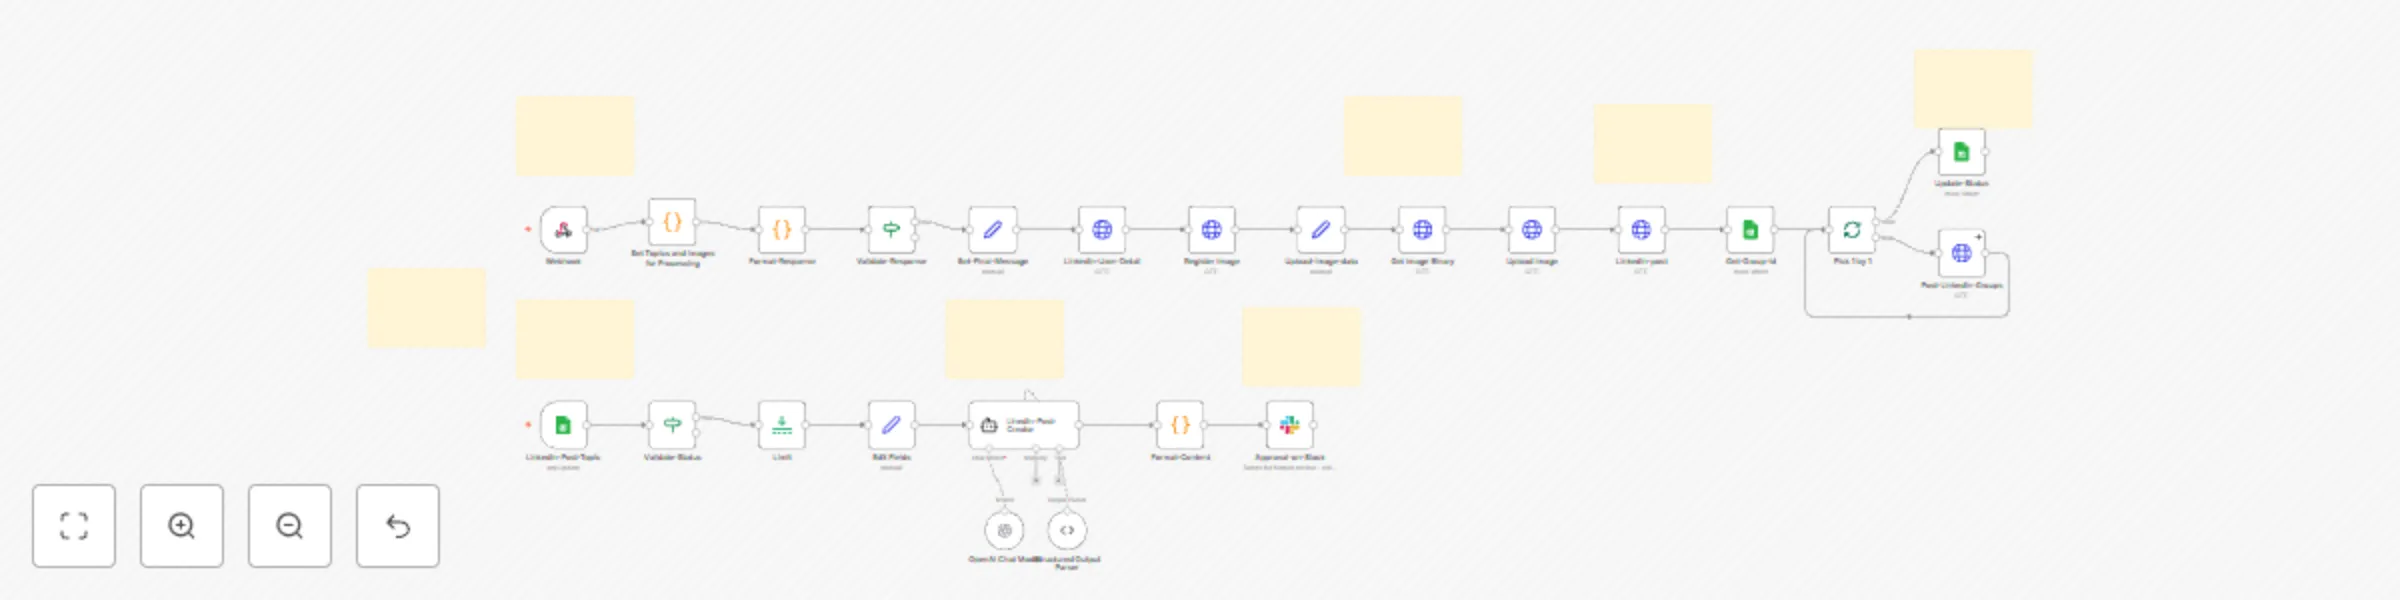
LinkedIn post automation with AI (GPT-4o) generation & Slack approval
LinkedIn Post Automation with AI Generation (Gpt 4o) & Slack Approval How it Works This workflow automates the creati...
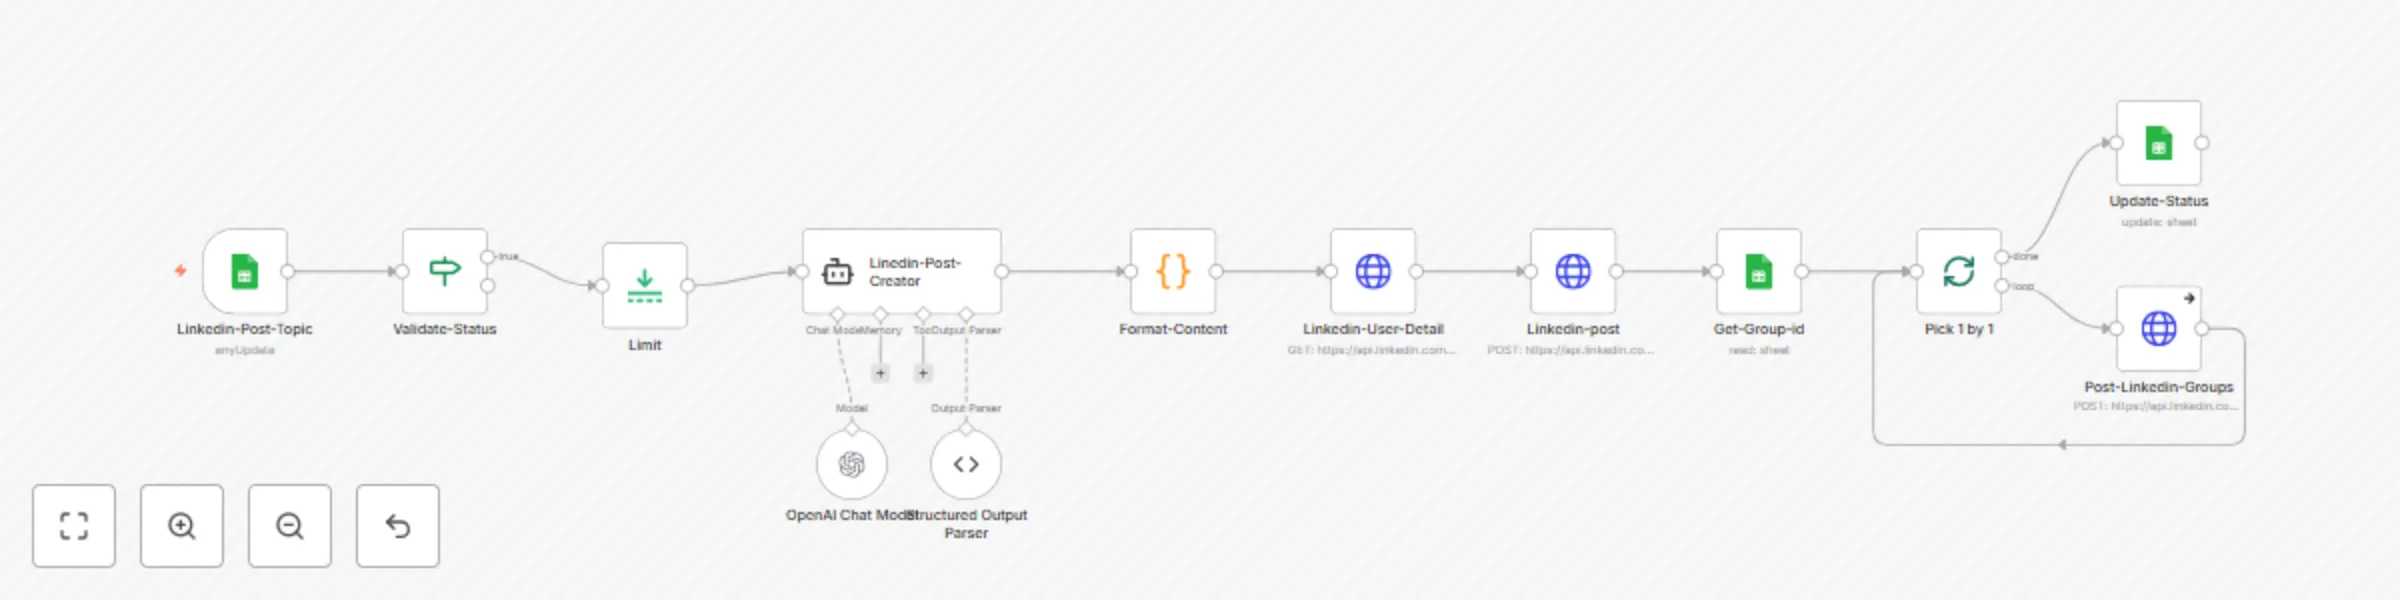
Auto-post LinkedIn updates from spreadsheet topics using GPT-4o
How it works: This workflow automates the entire LinkedIn content distribution process — from AI powered post creatio...