Internal Wiki Workflows
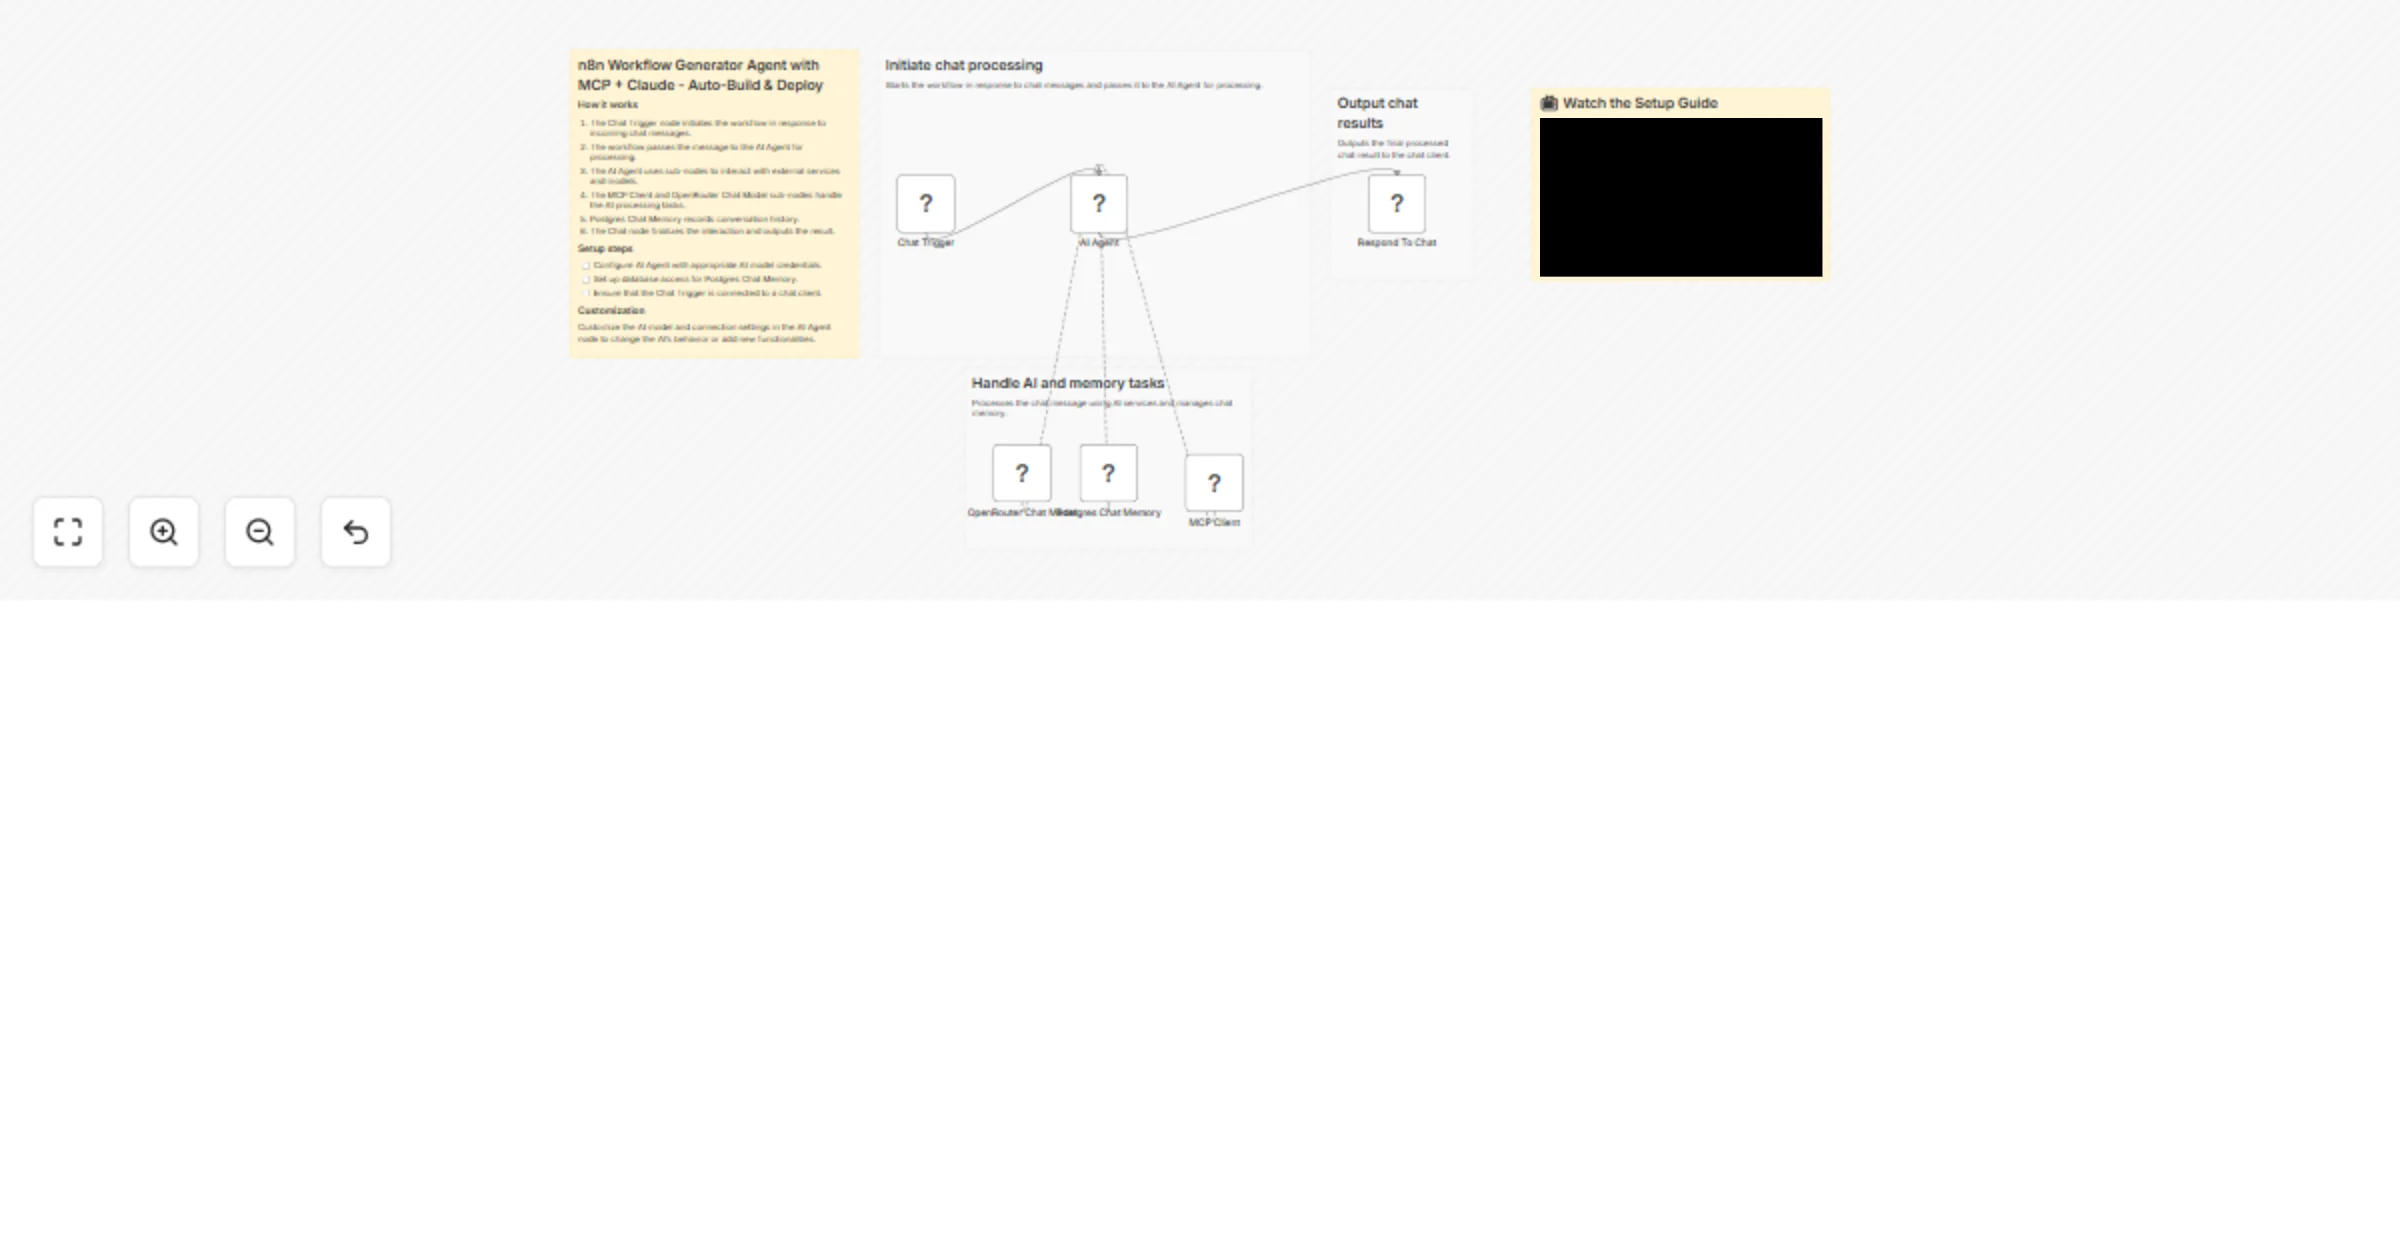
Generate n8n workflows from chat using MCP tools, Claude and Postgres
Describe any automation in plain English. This AI agent builds, validates, and deploys a working n8n workflow into yo...
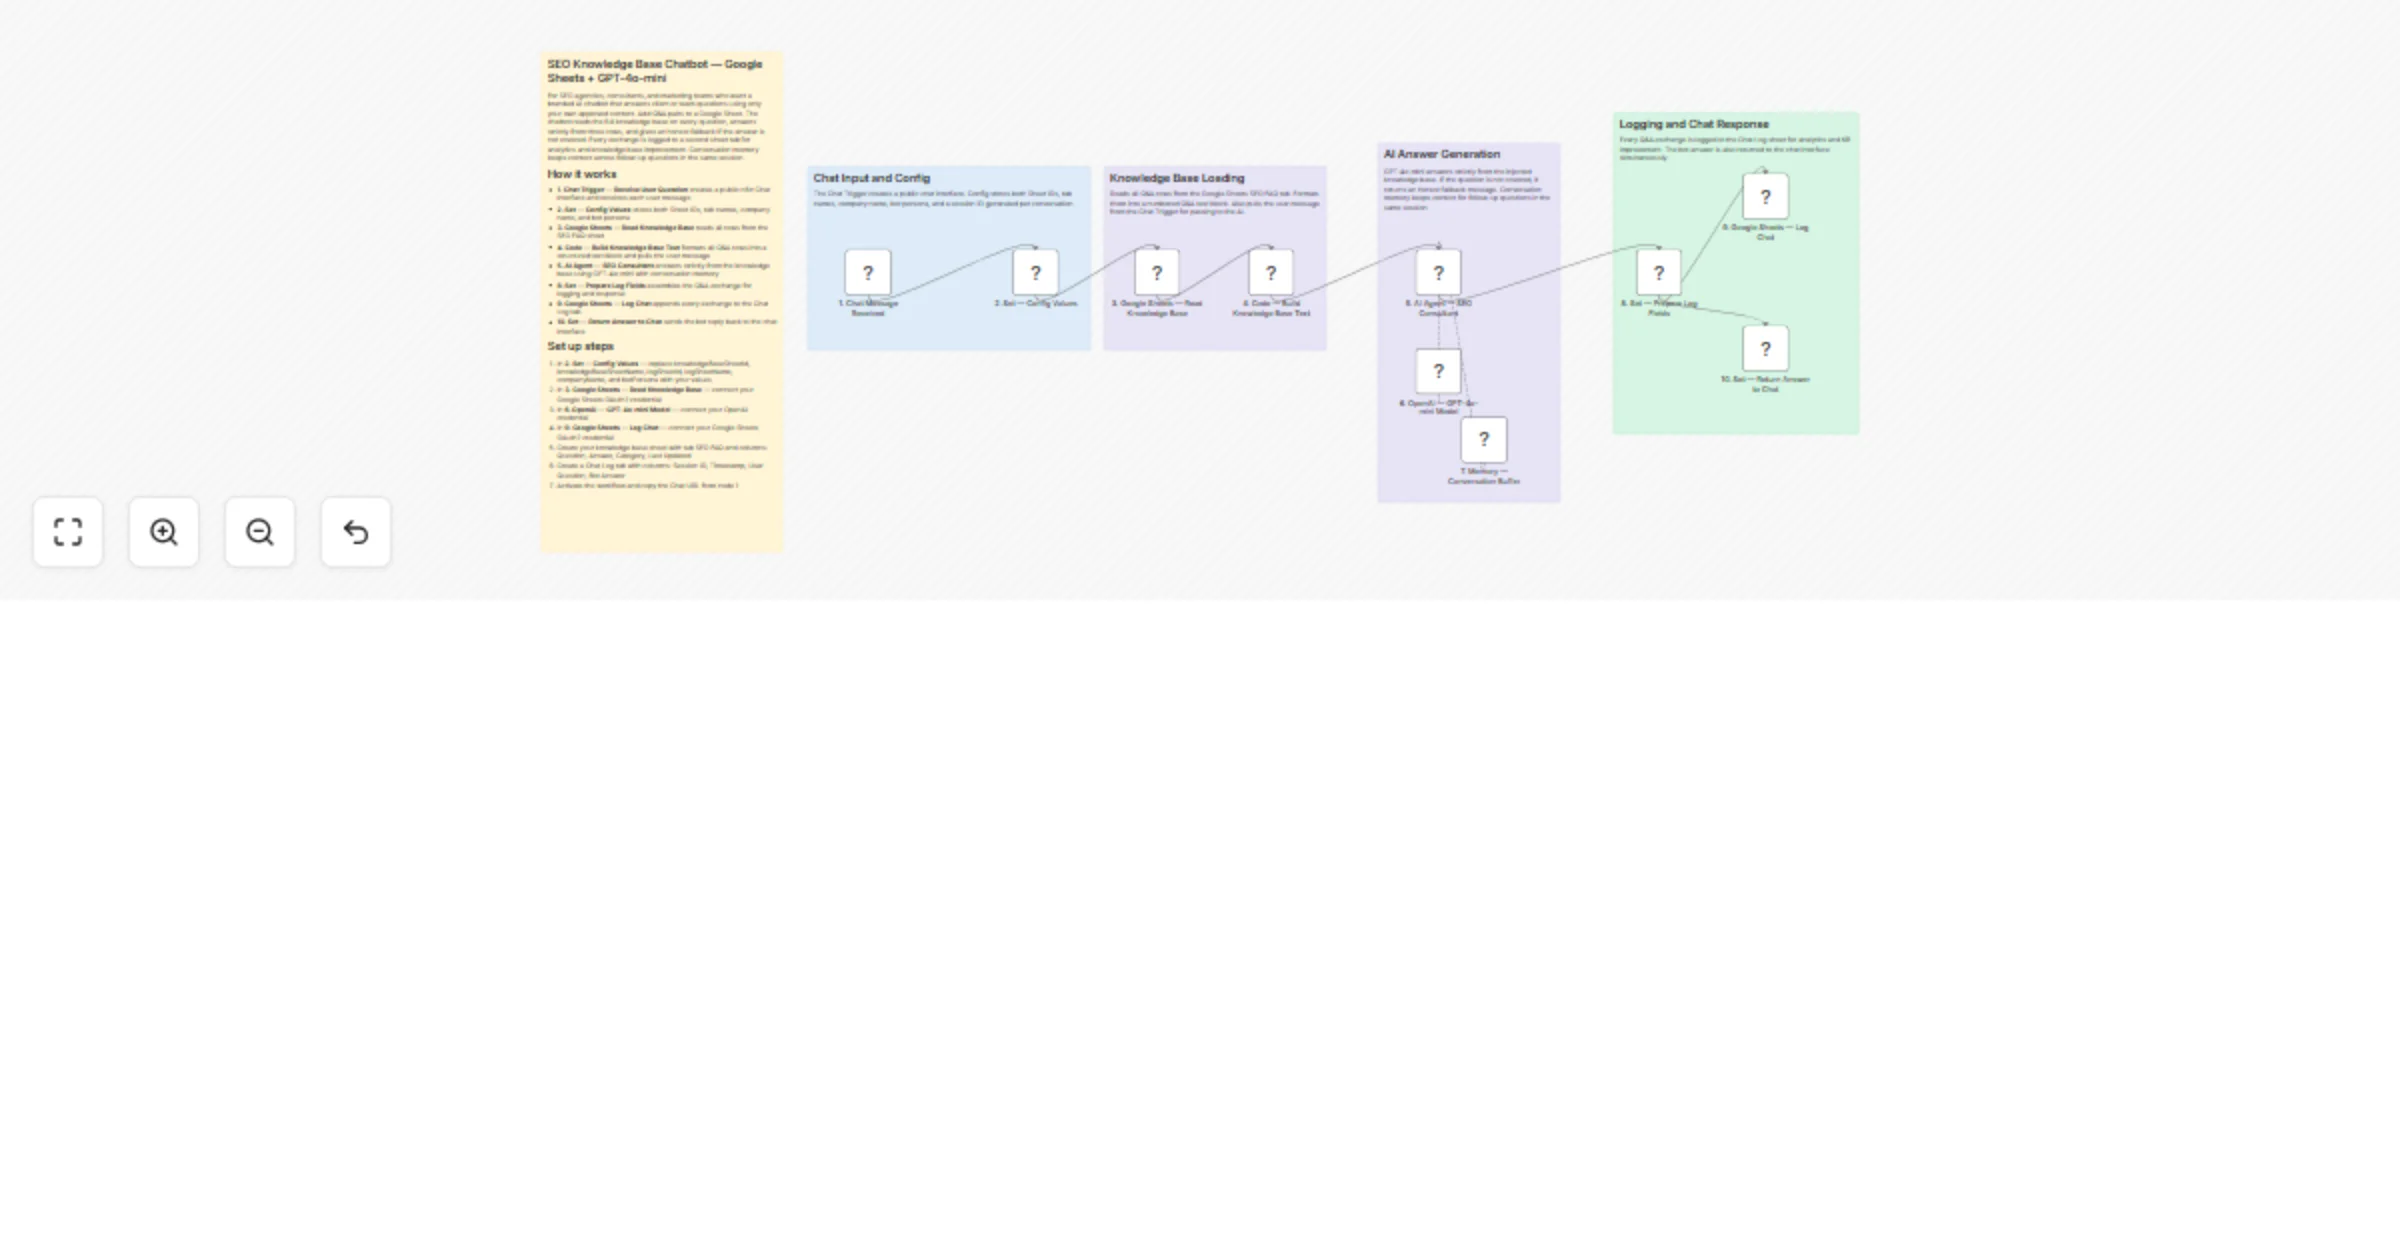
Build an SEO chatbot with GPT-4o-mini using your Google Sheets data
Description Add your approved SEO Q&A pairs to a Google Sheet, activate the workflow, and share the chat URL with you...

Build an OpenAI RAG system with document upload, semantic search and caching
Overview This workflow implements a complete Retrieval Augmented Generation (RAG) system for document ingestion and i...

Build a local RAG chatbot with Ollama, Qwen, BGE-M3 and Postgres PGVector
Build a fully local RAG chatbot using Ollama that works without tool calling — ideal for smaller open source models l...
Get AI insights from Databox in Slack using OpenAI
Stop switching between Slack and your analytics dashboards. Mention the bot in any Slack channel, ask a business ques...
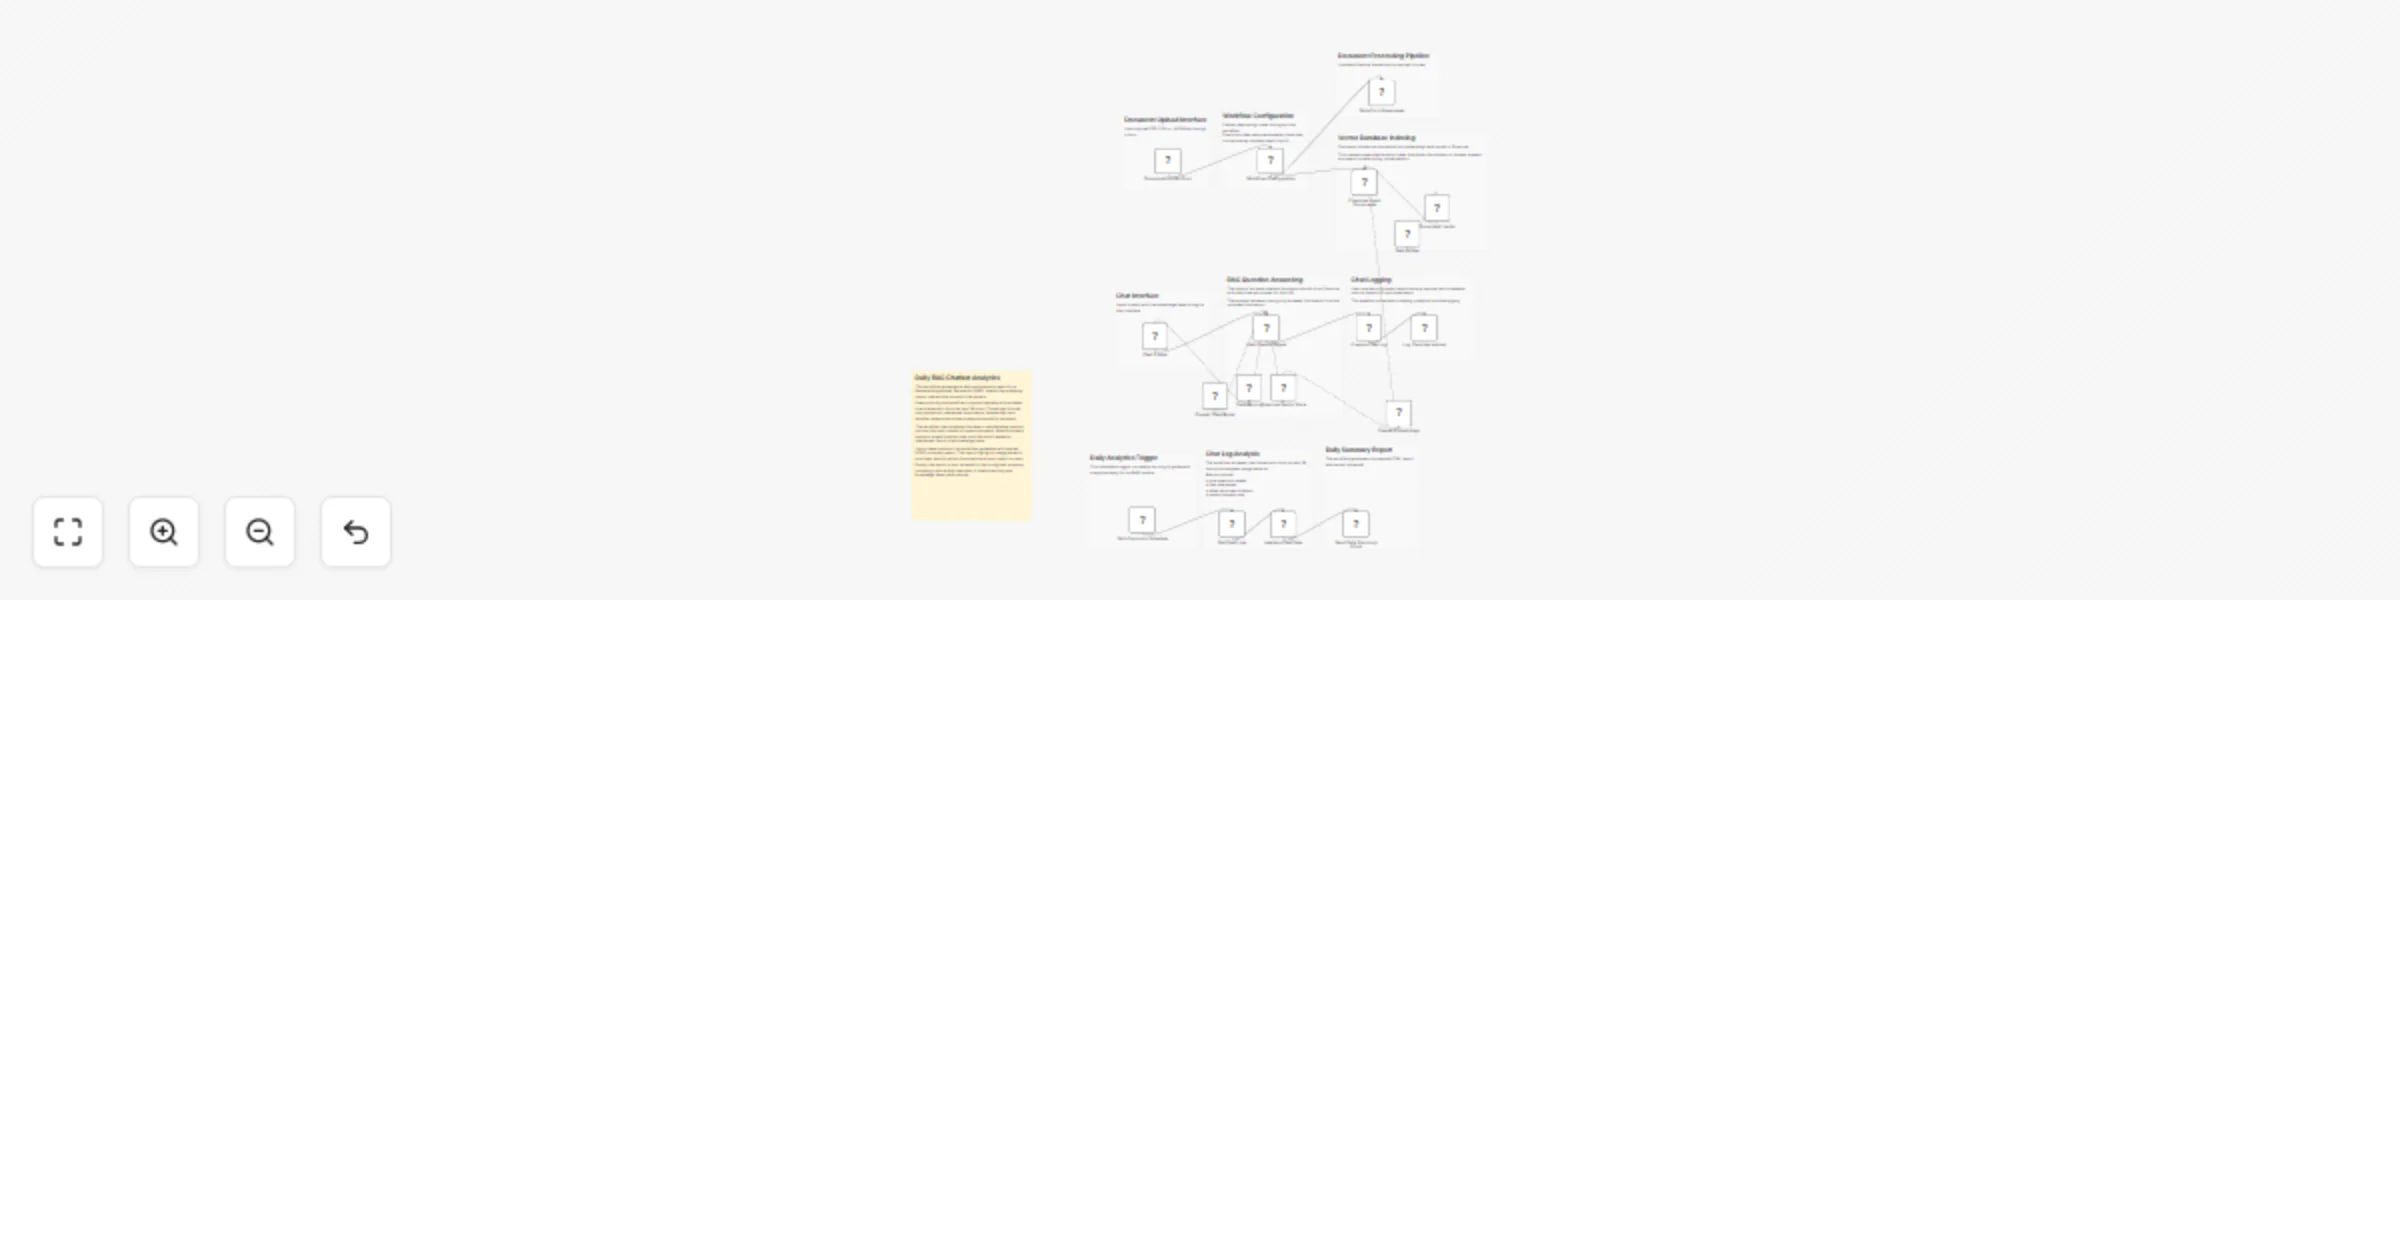
Build a document-upload RAG chatbot with OpenAI, Pinecone and daily analytics
Overview This workflow implements a complete Retrieval Augmented Generation (RAG) knowledge assistant with built in d...
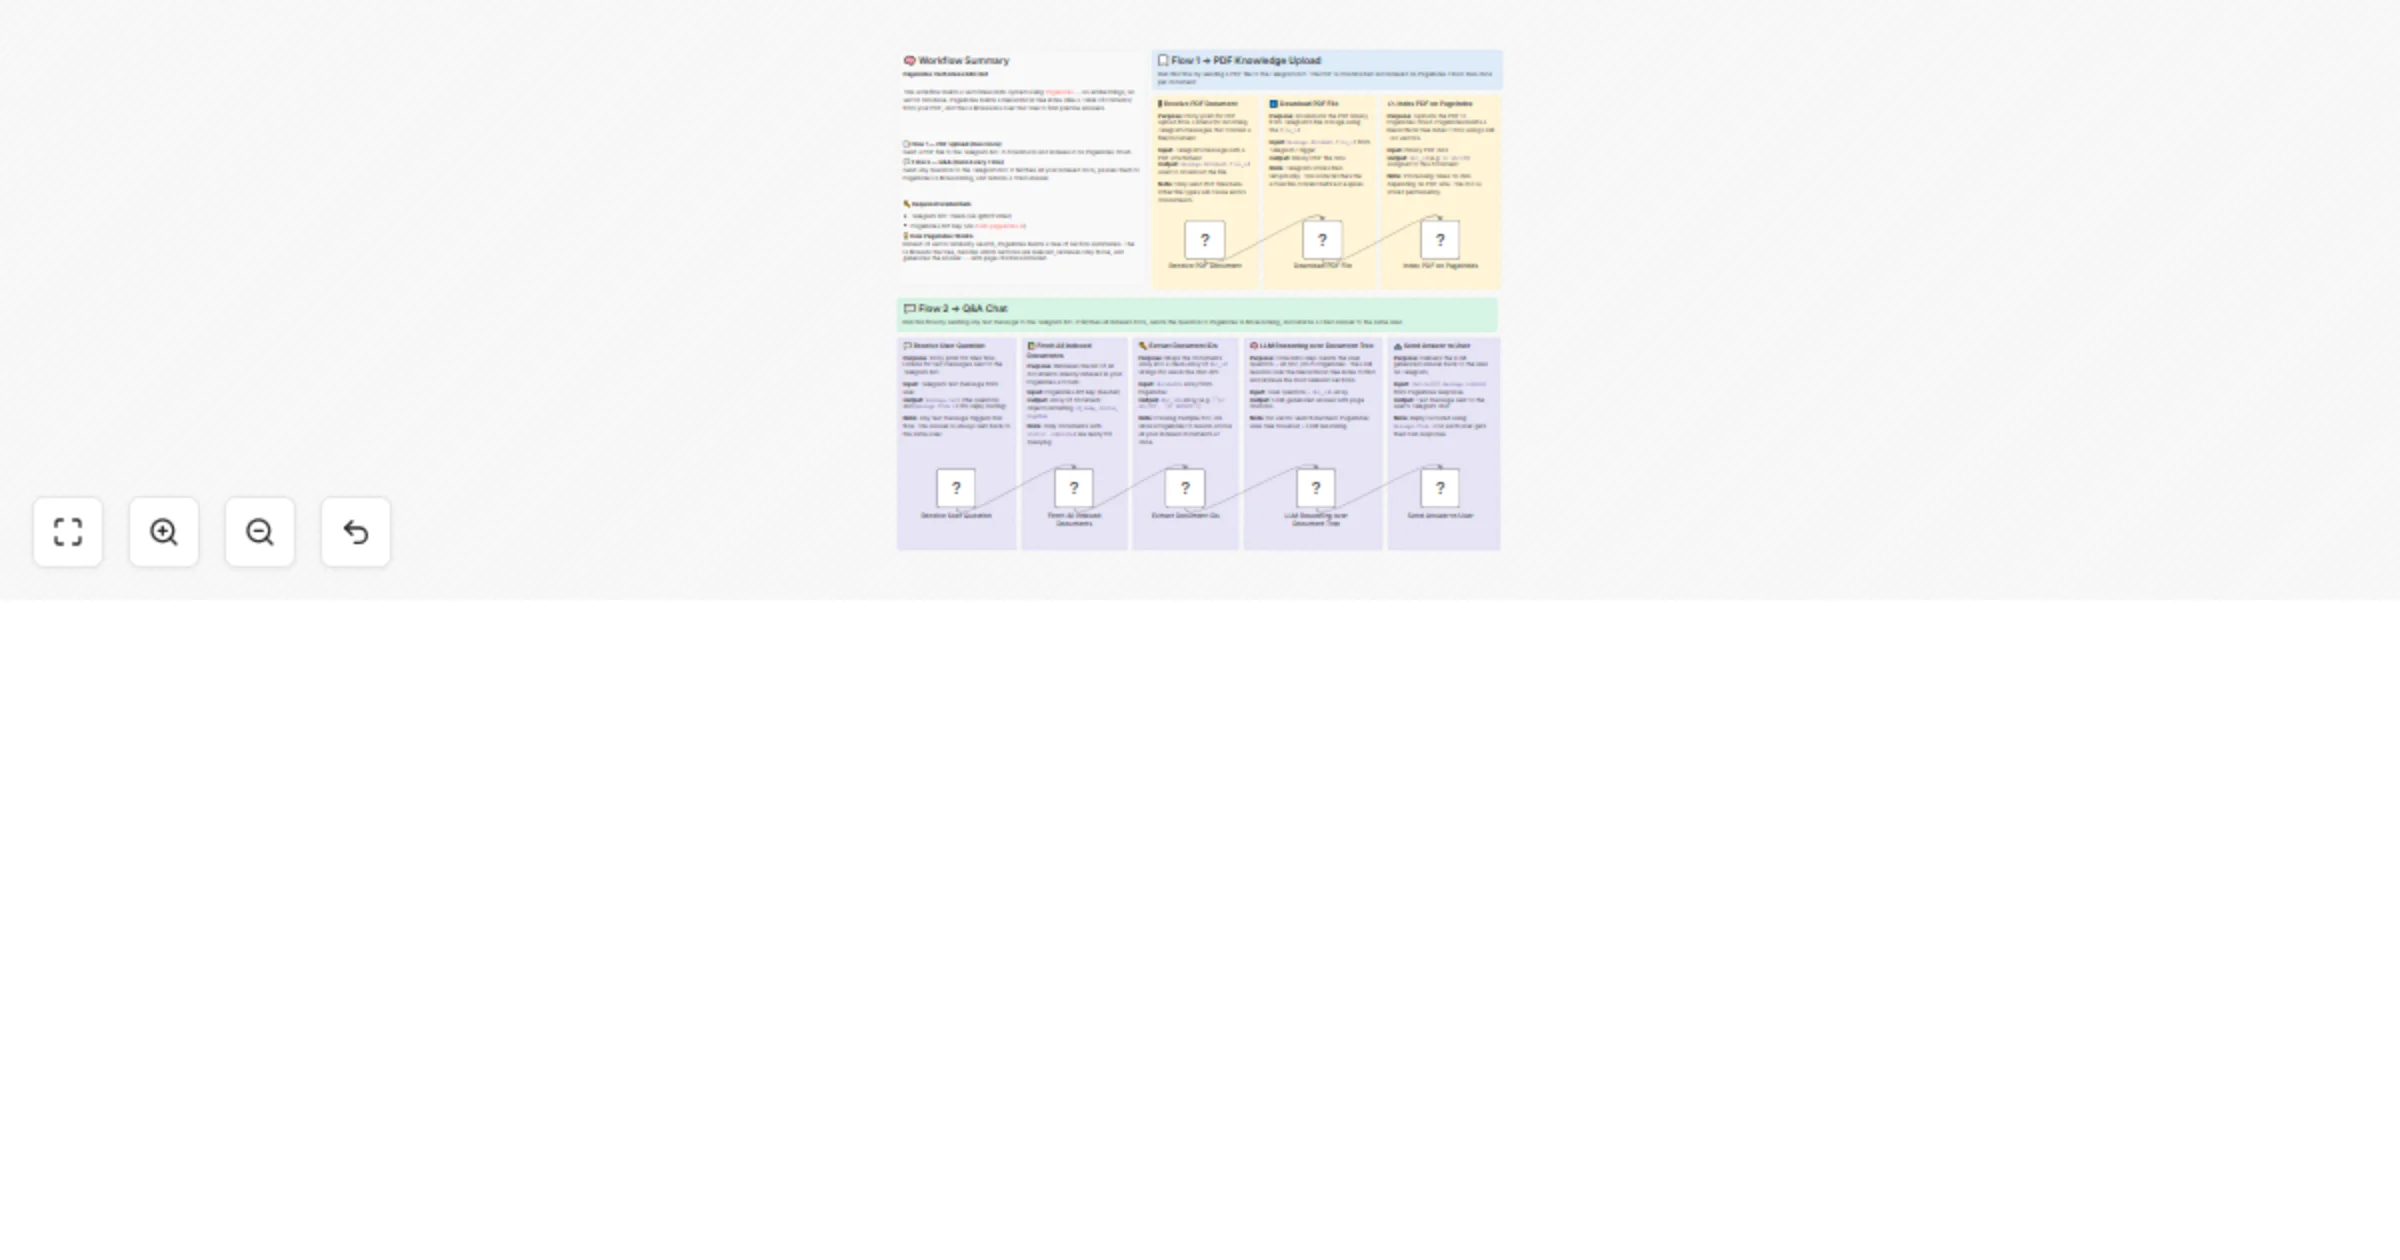
Chat with your PDF documents using PageIndex vectorless RAG via Telegram
Build a Vectorless PDF Knowledge Bot on Telegram Using PageIndex RAG 👤 Who Is This For? This template is built for d...
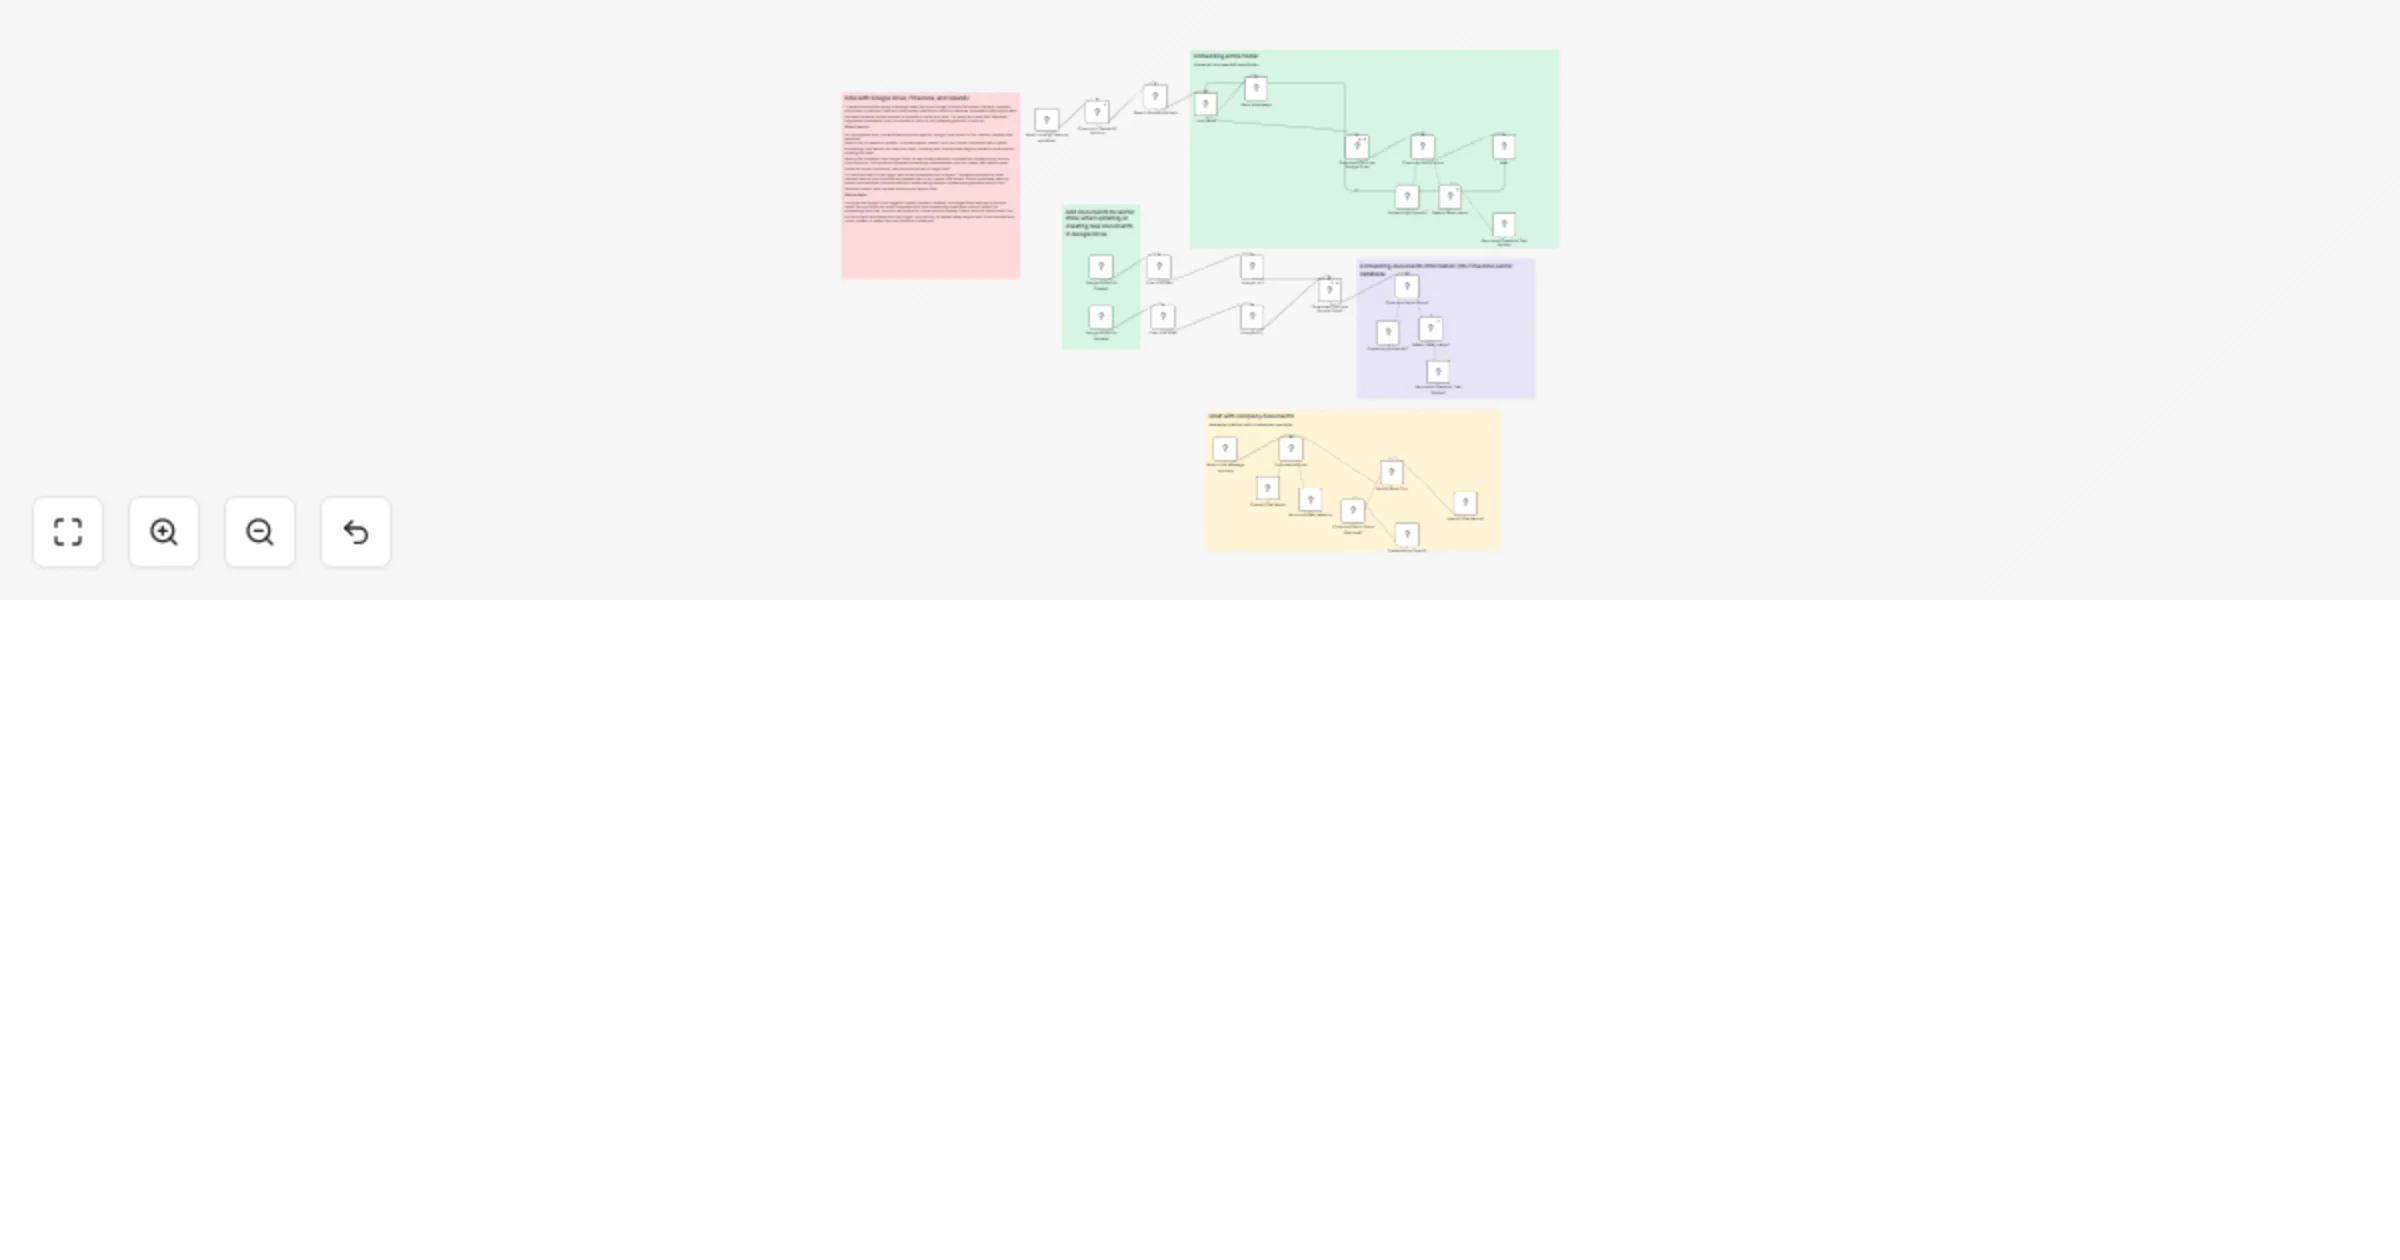
Build a Google Drive internal knowledge base with OpenAI and Pinecone
📊 Description Every company has documents sitting in Google Drive that nobody reads. HR policies, sales playbooks, p...
AI Agent to Chat with Airtable
Video Introduction Want to automate your i...
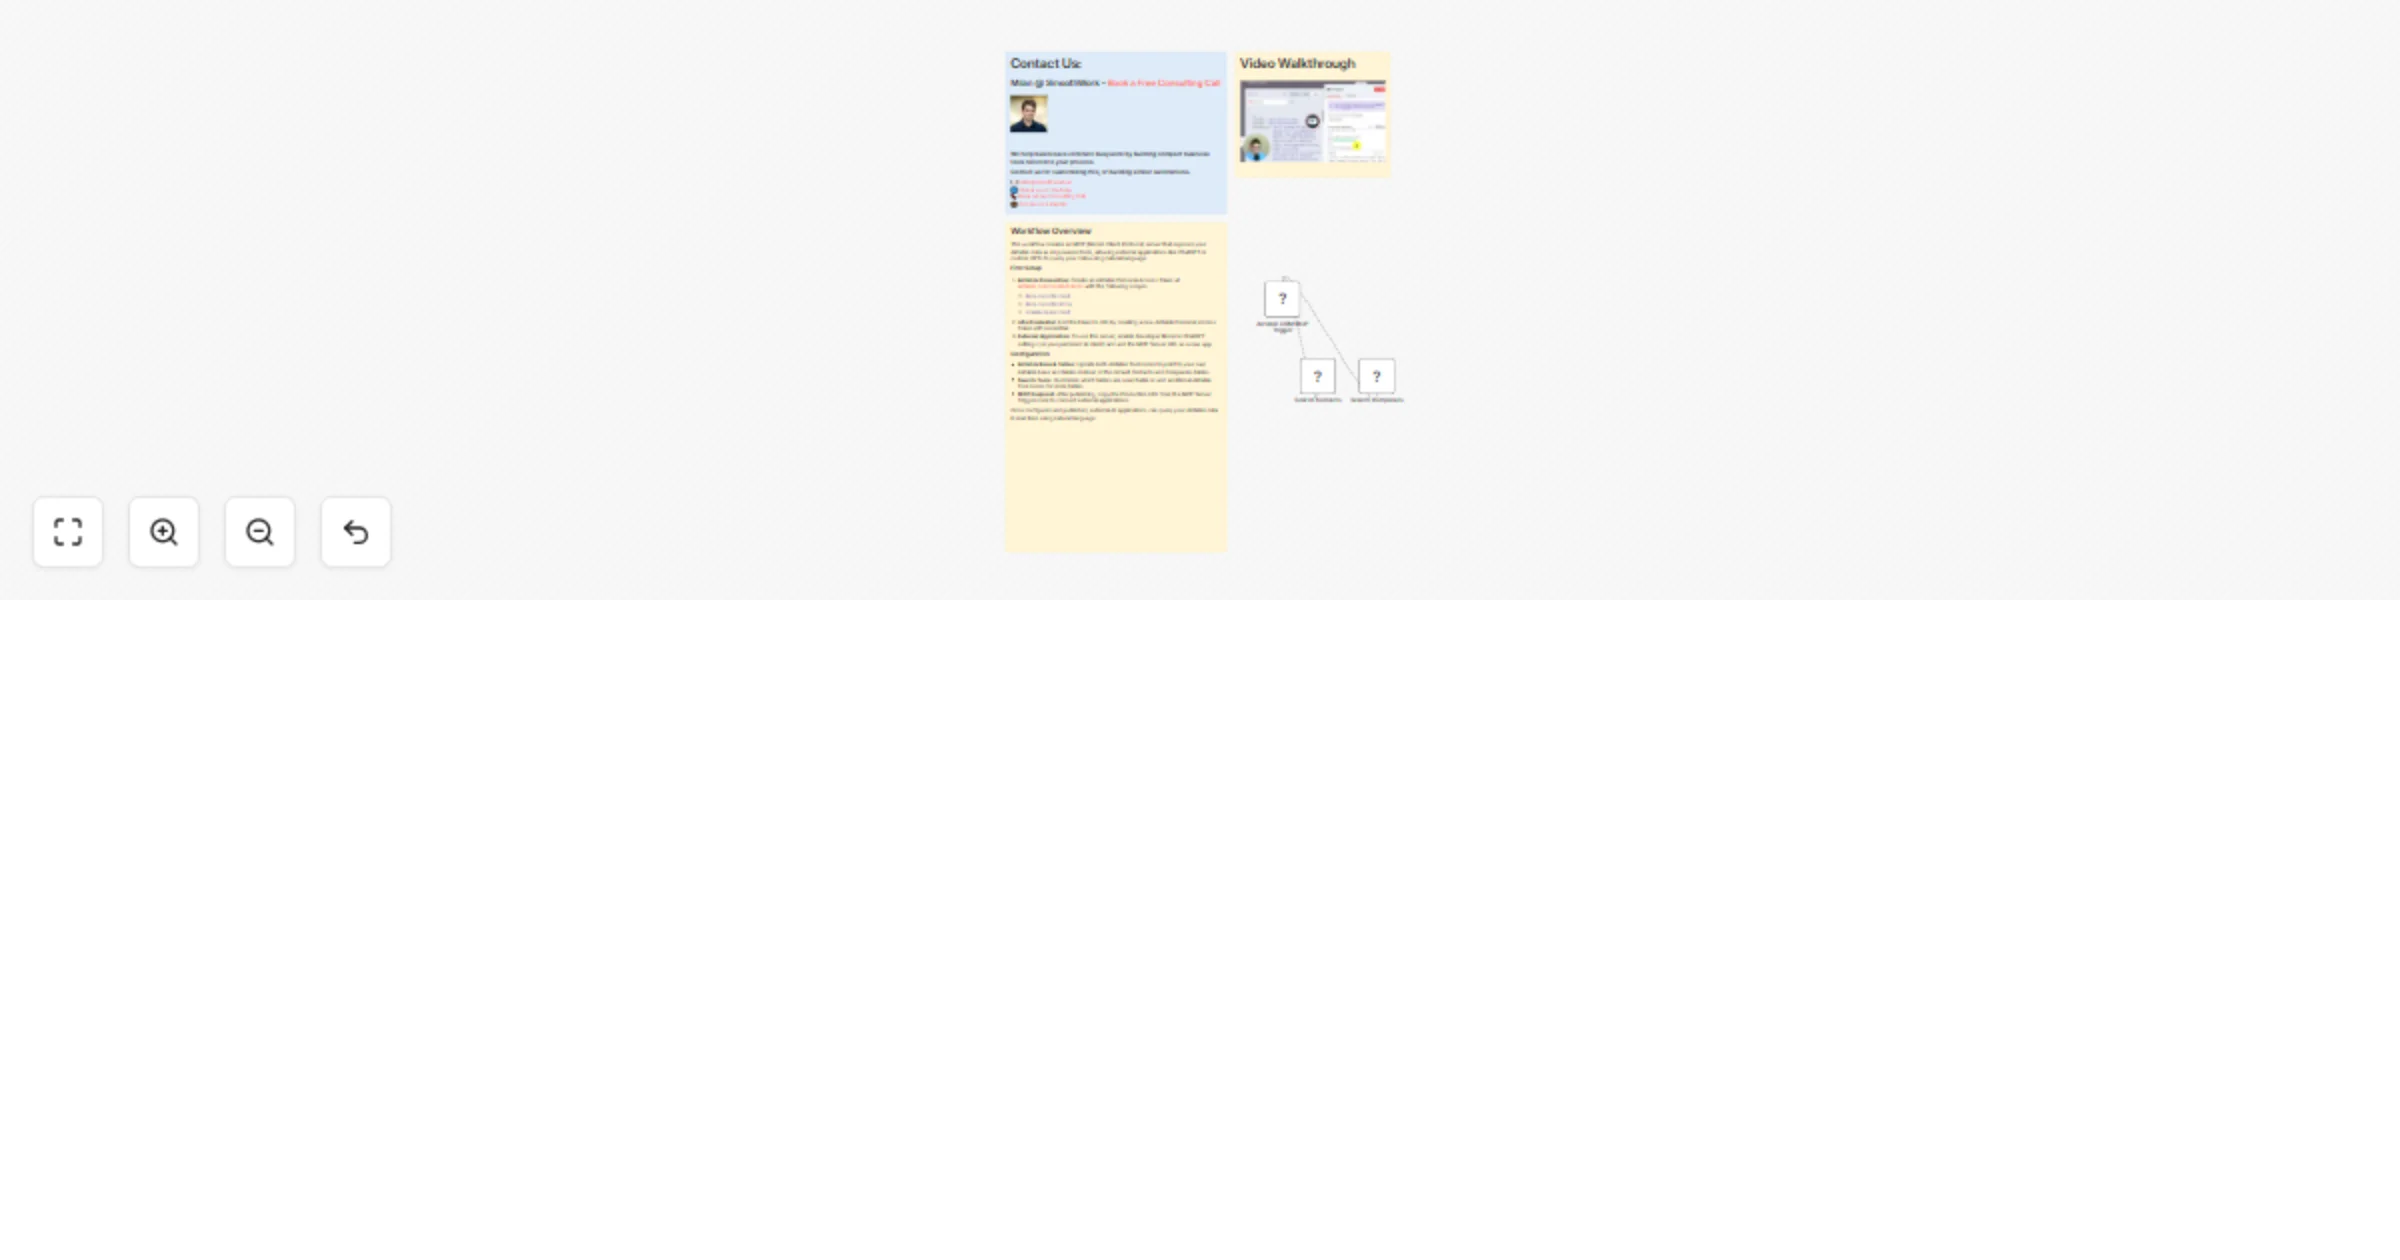
Connect your Airtable data to your AI (ChatGPT, Claude etc.) with an MCP
Video Introduction Want to automate your i...
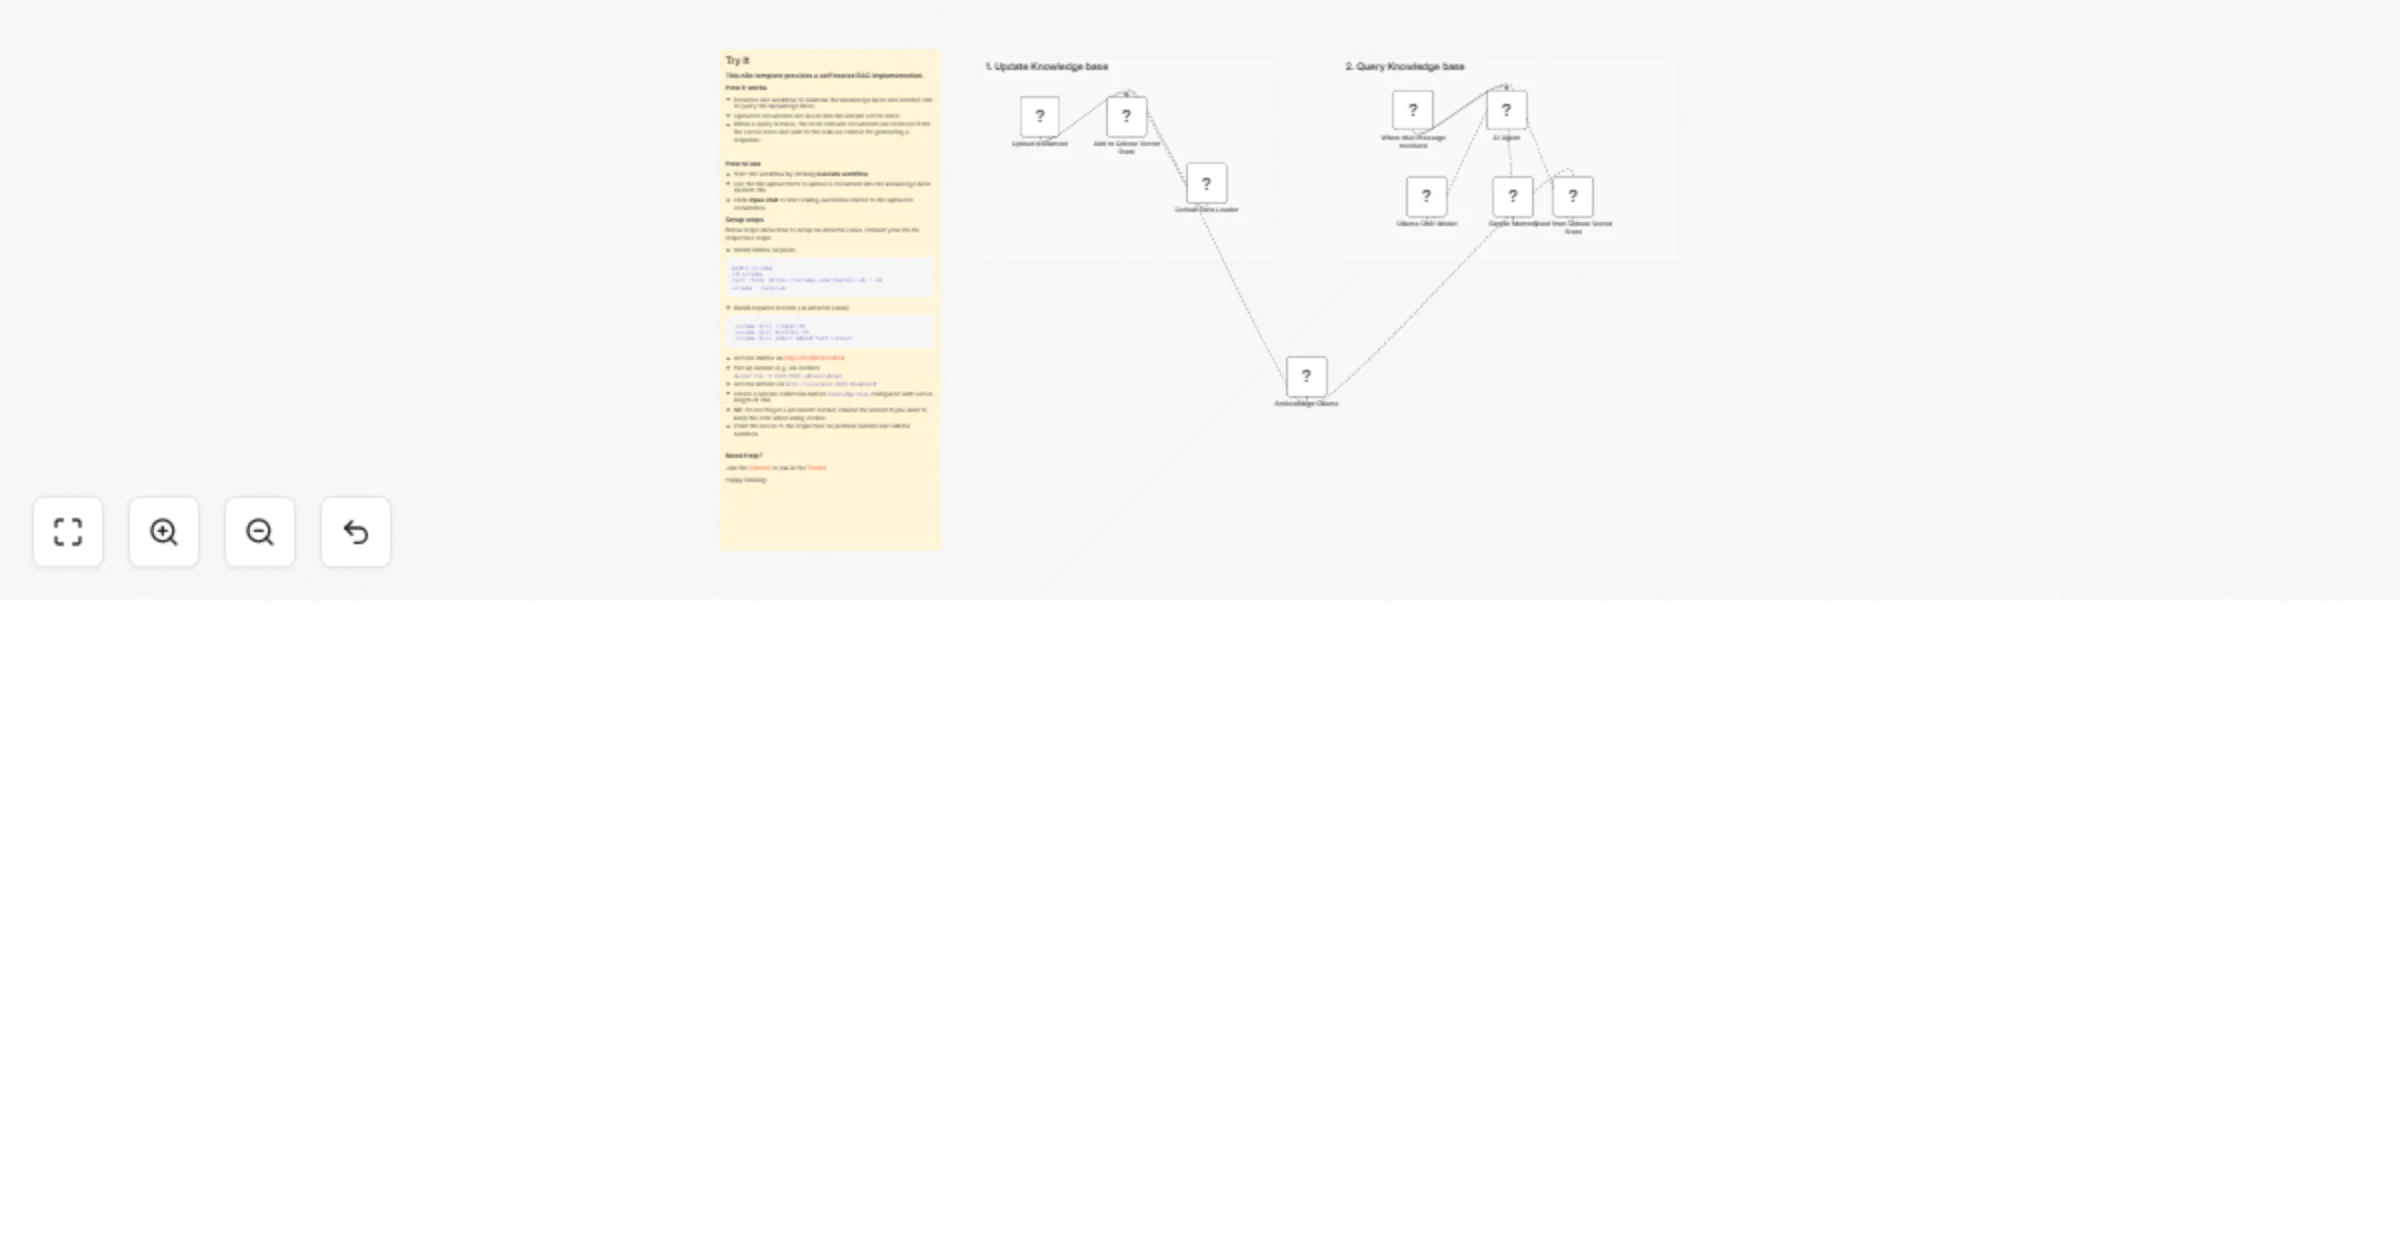
Implement on-prem RAG with Qdrant and Ollama for a self-hosted KB
Try It This n8n template provides a self hosted RAG implementation. How it works Provides one workflow to maintain th...
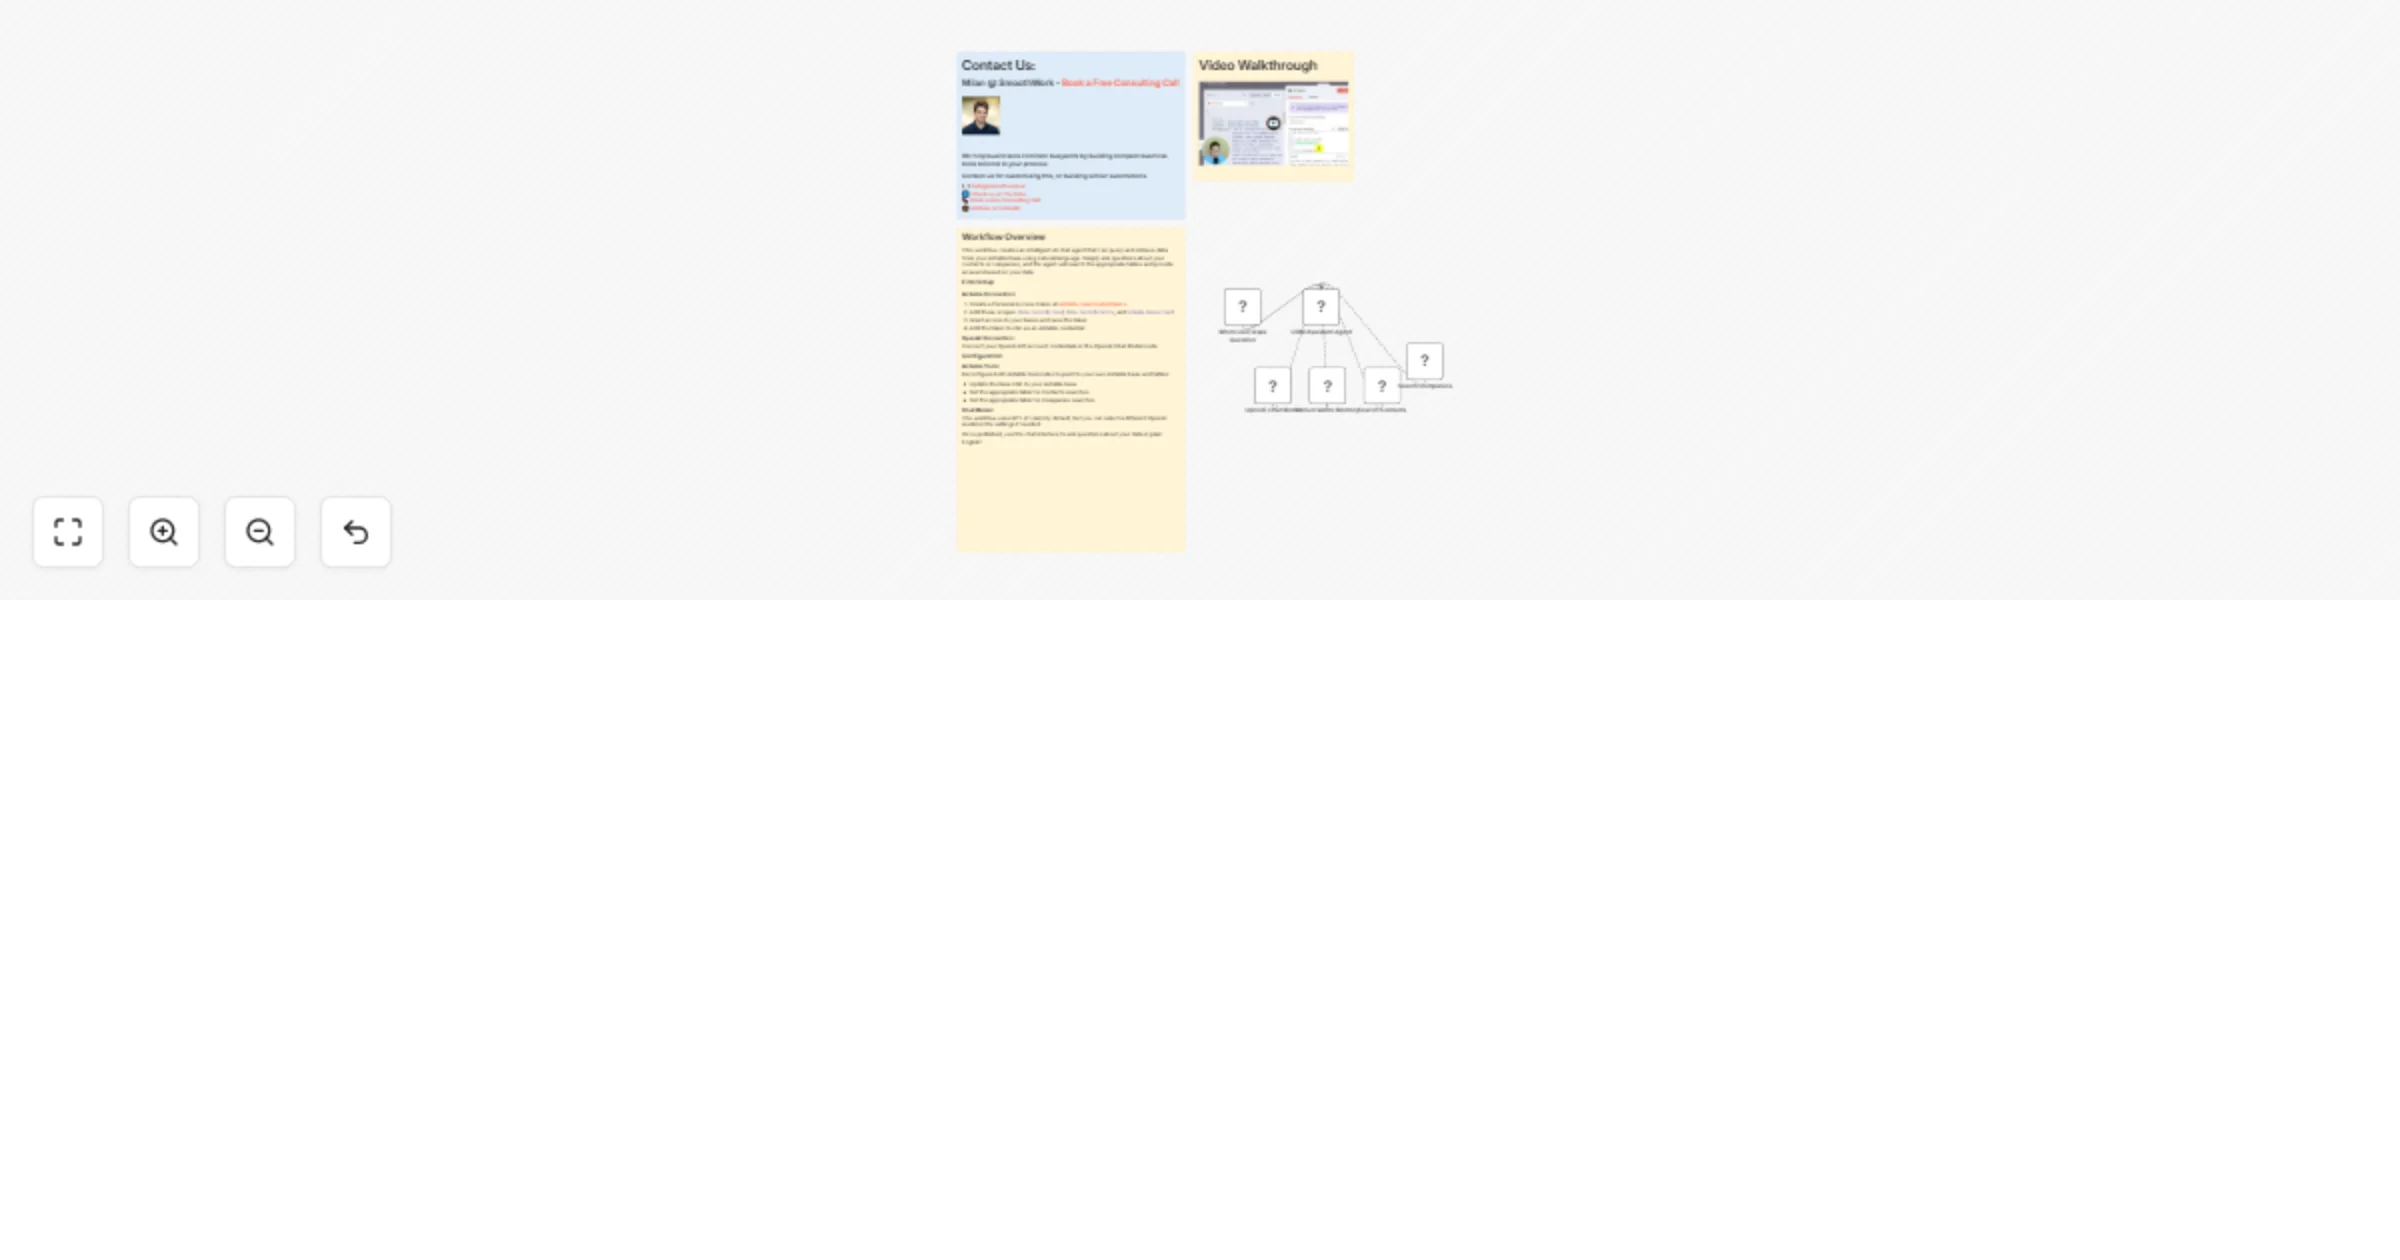
Turn your portfolio into an AI assistant with OpenAI, Claude, Pinecone and Gmail
Deploy a personal AI assistant that answers recruiter questions about your skills and projects, then automatically em...
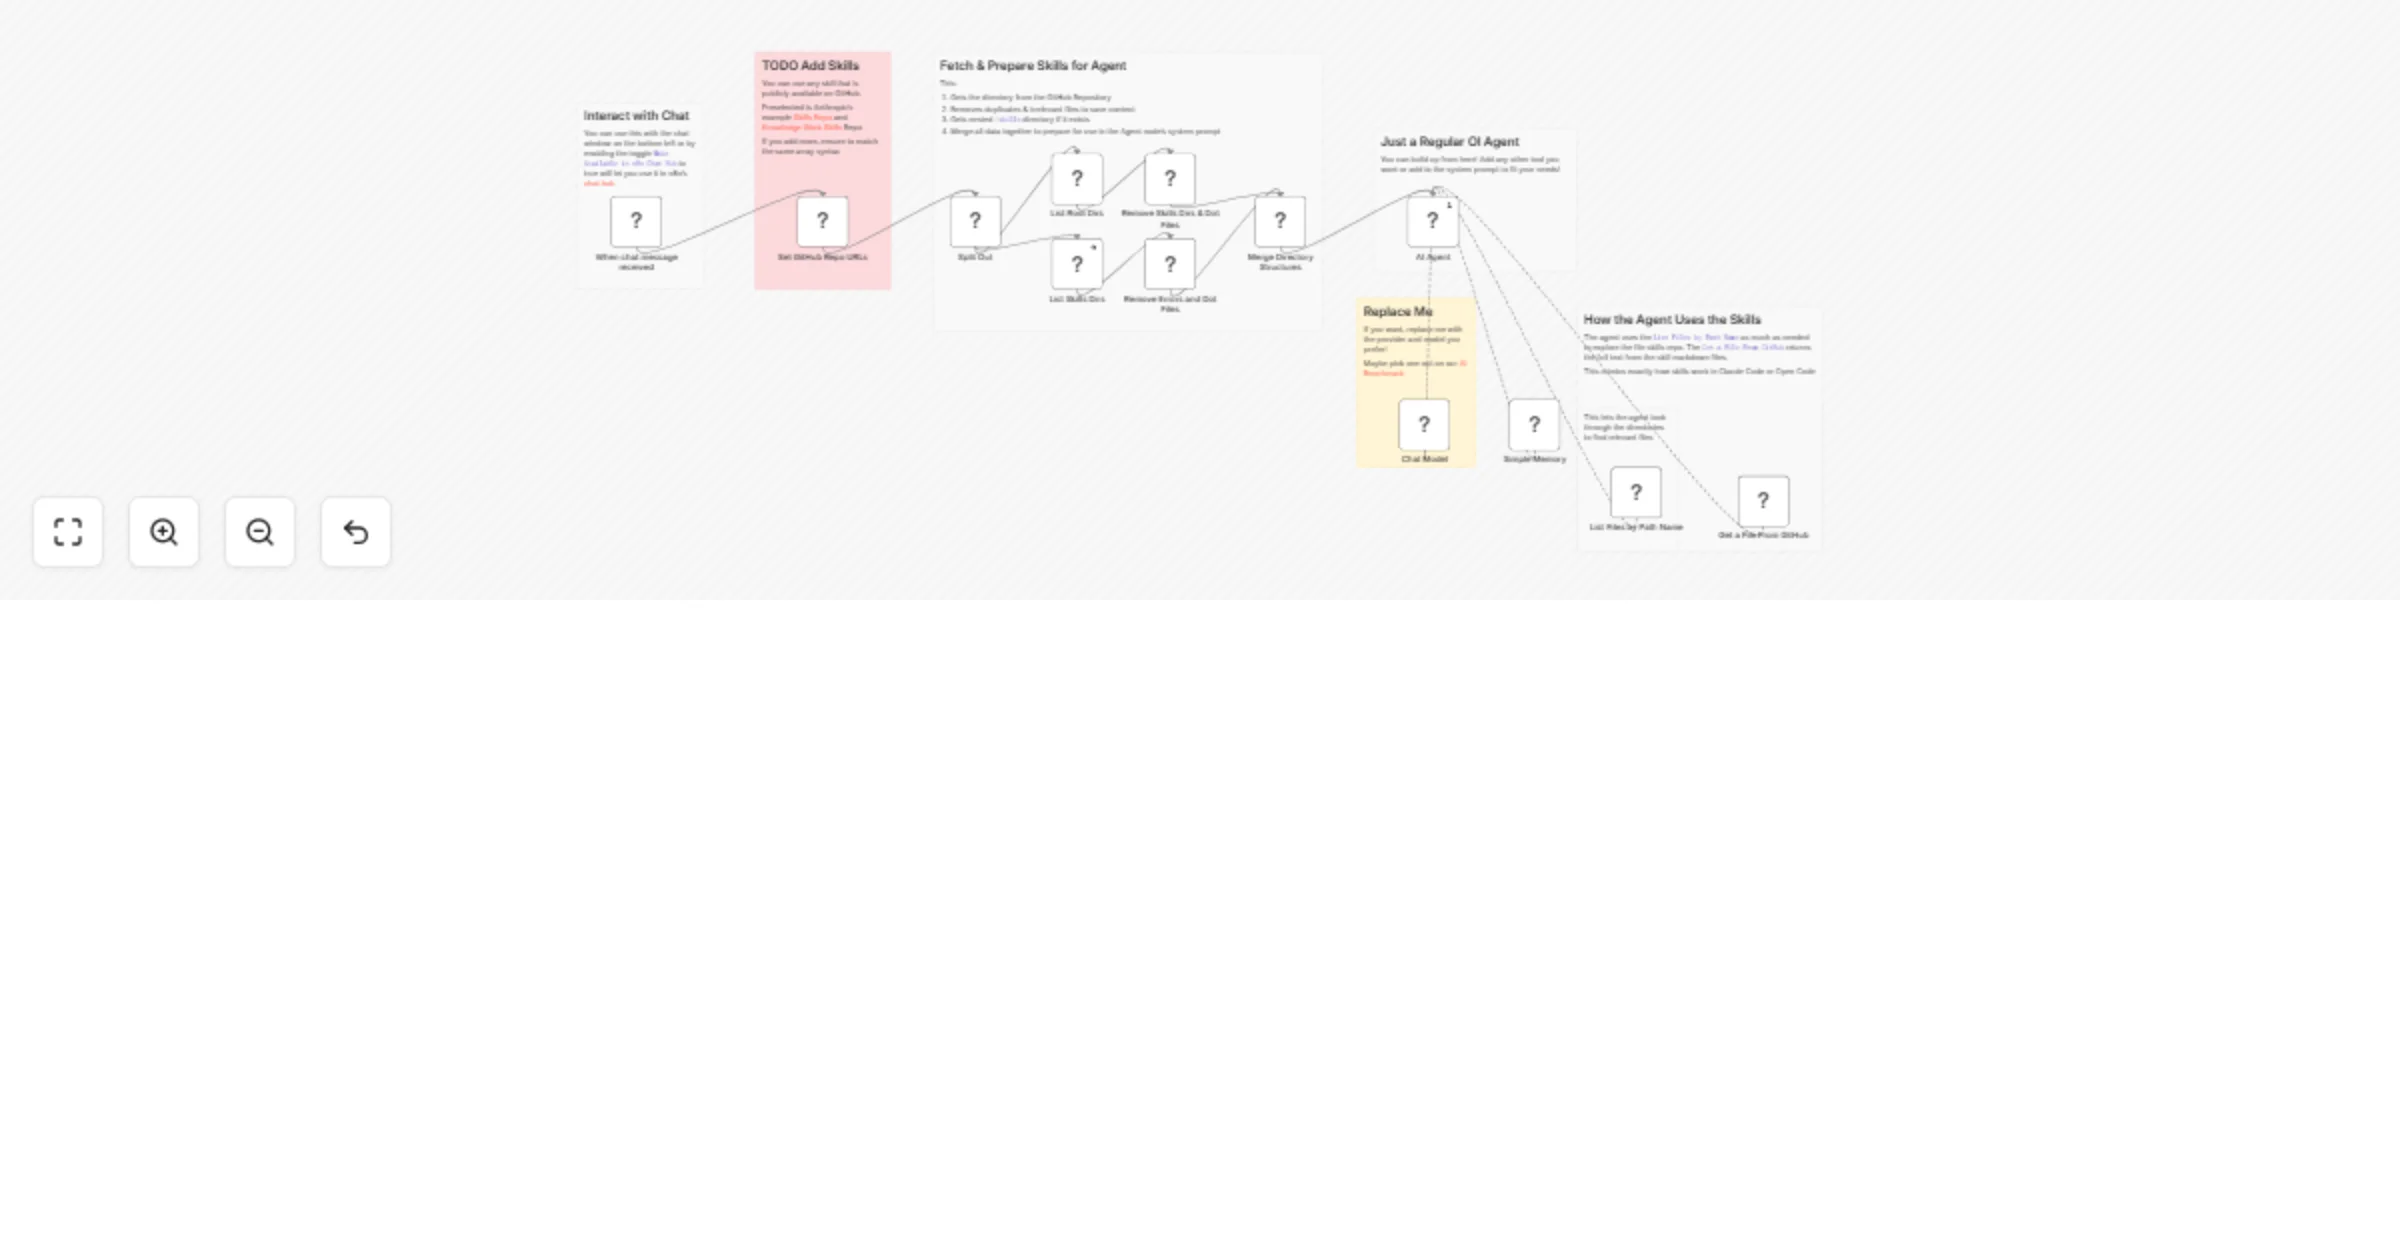
Use skills In n8n agent node
This template gives you a framework to use skills in any n8n agent. You can use this as a starting point and add any...
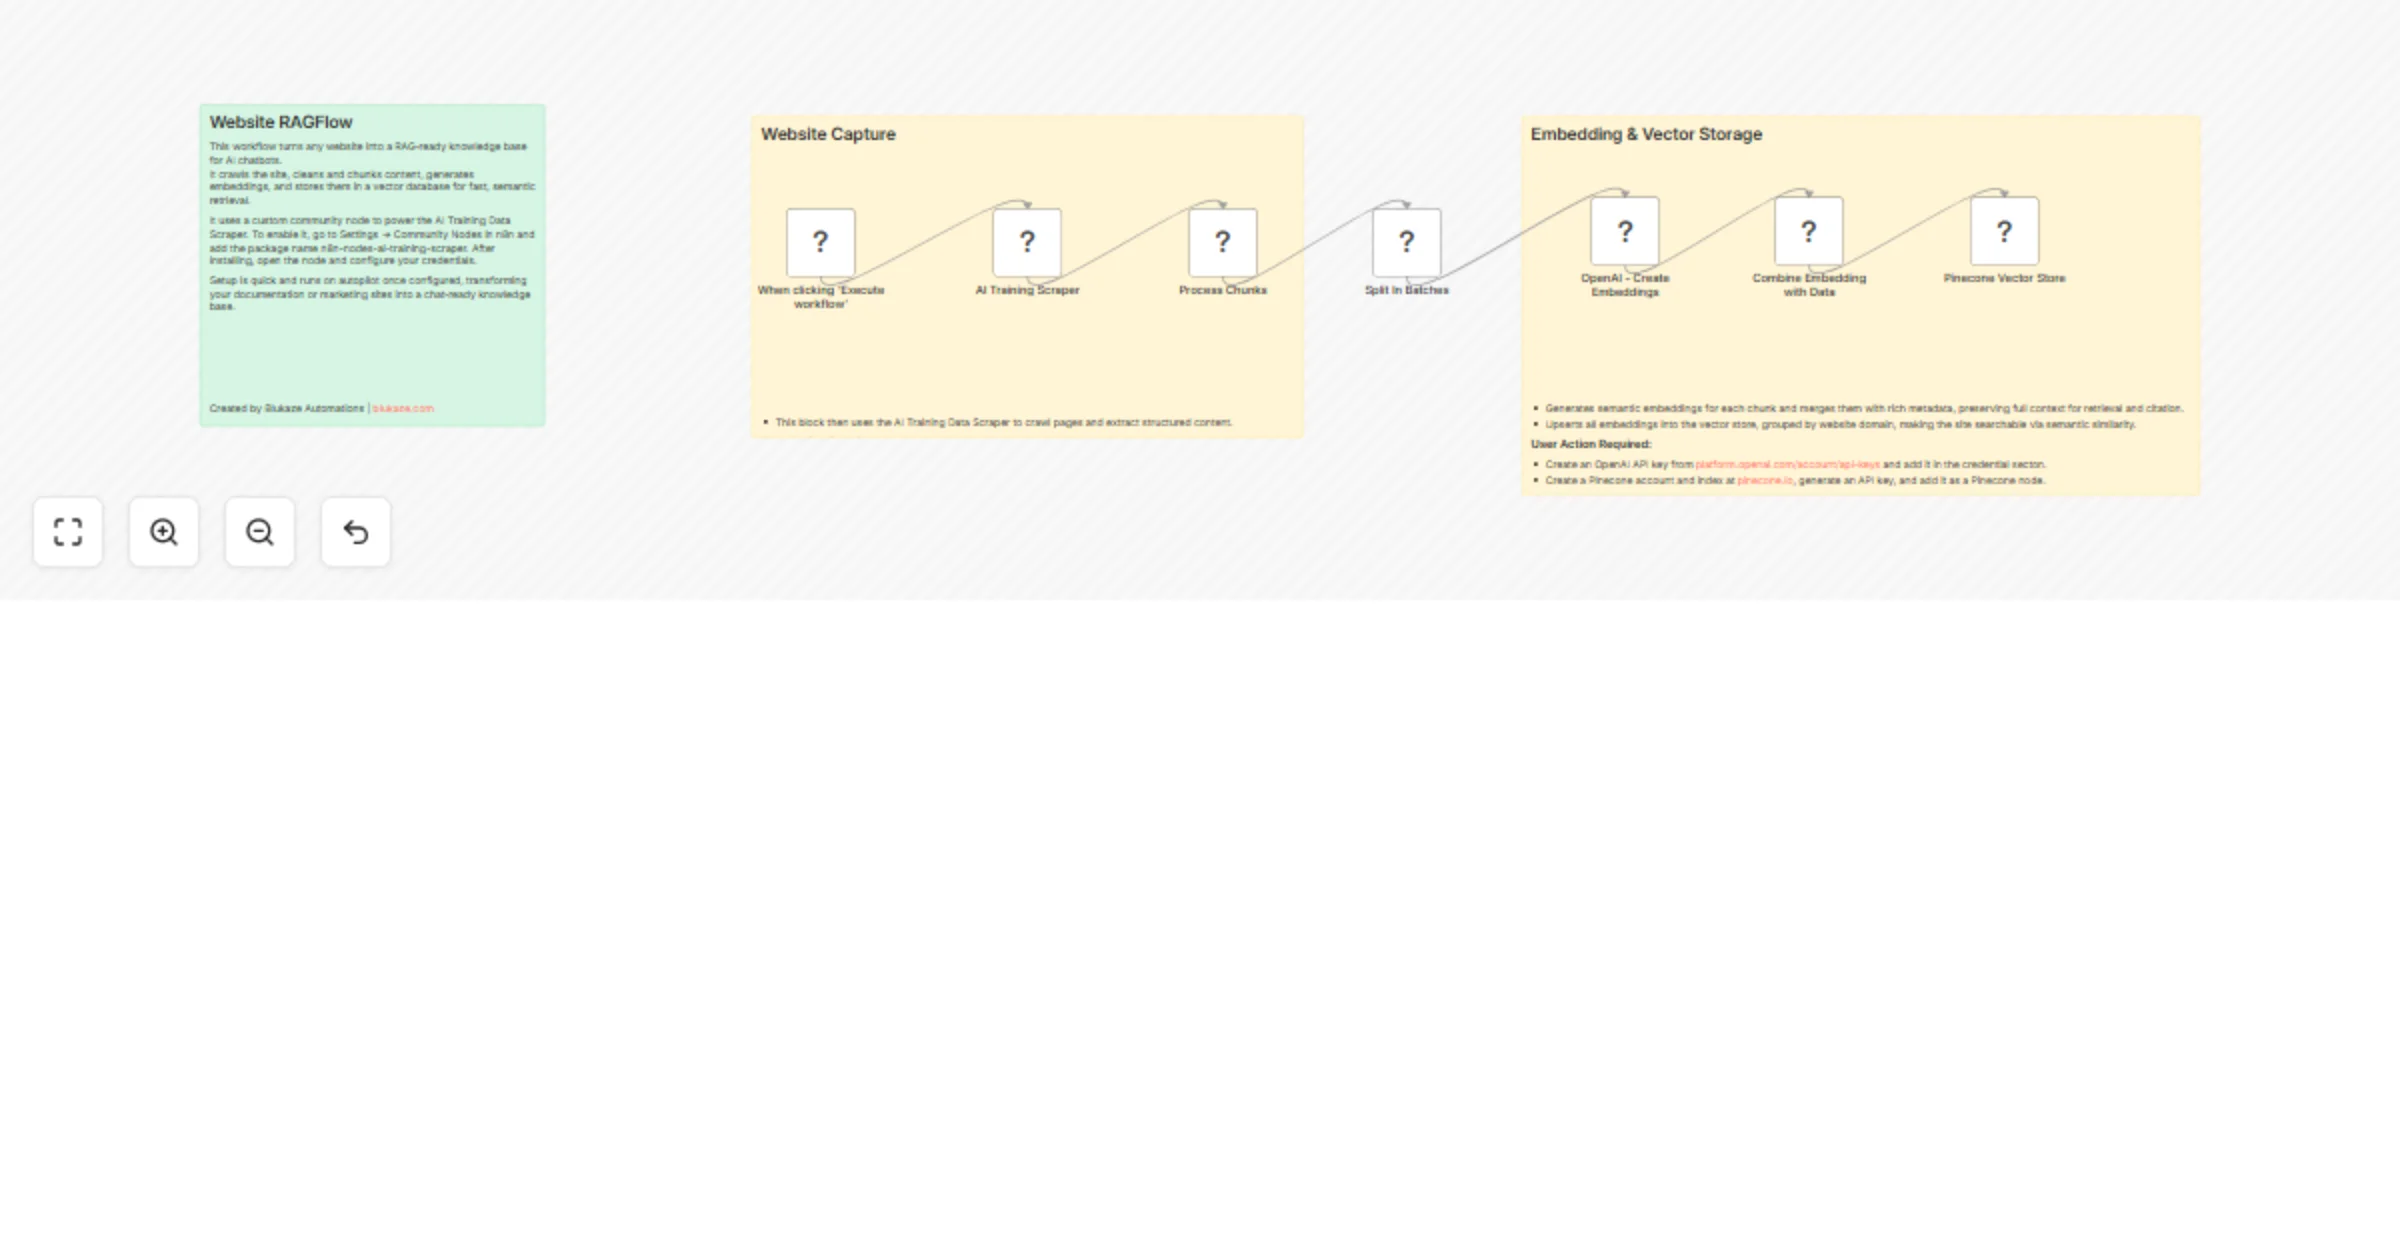
Turn websites into RAG chatbot knowledge bases with Apify, OpenAI and Pinecone
This n8n template transforms any website into a fully functional RAG ready chatbot knowledge base. It crawls sites us...
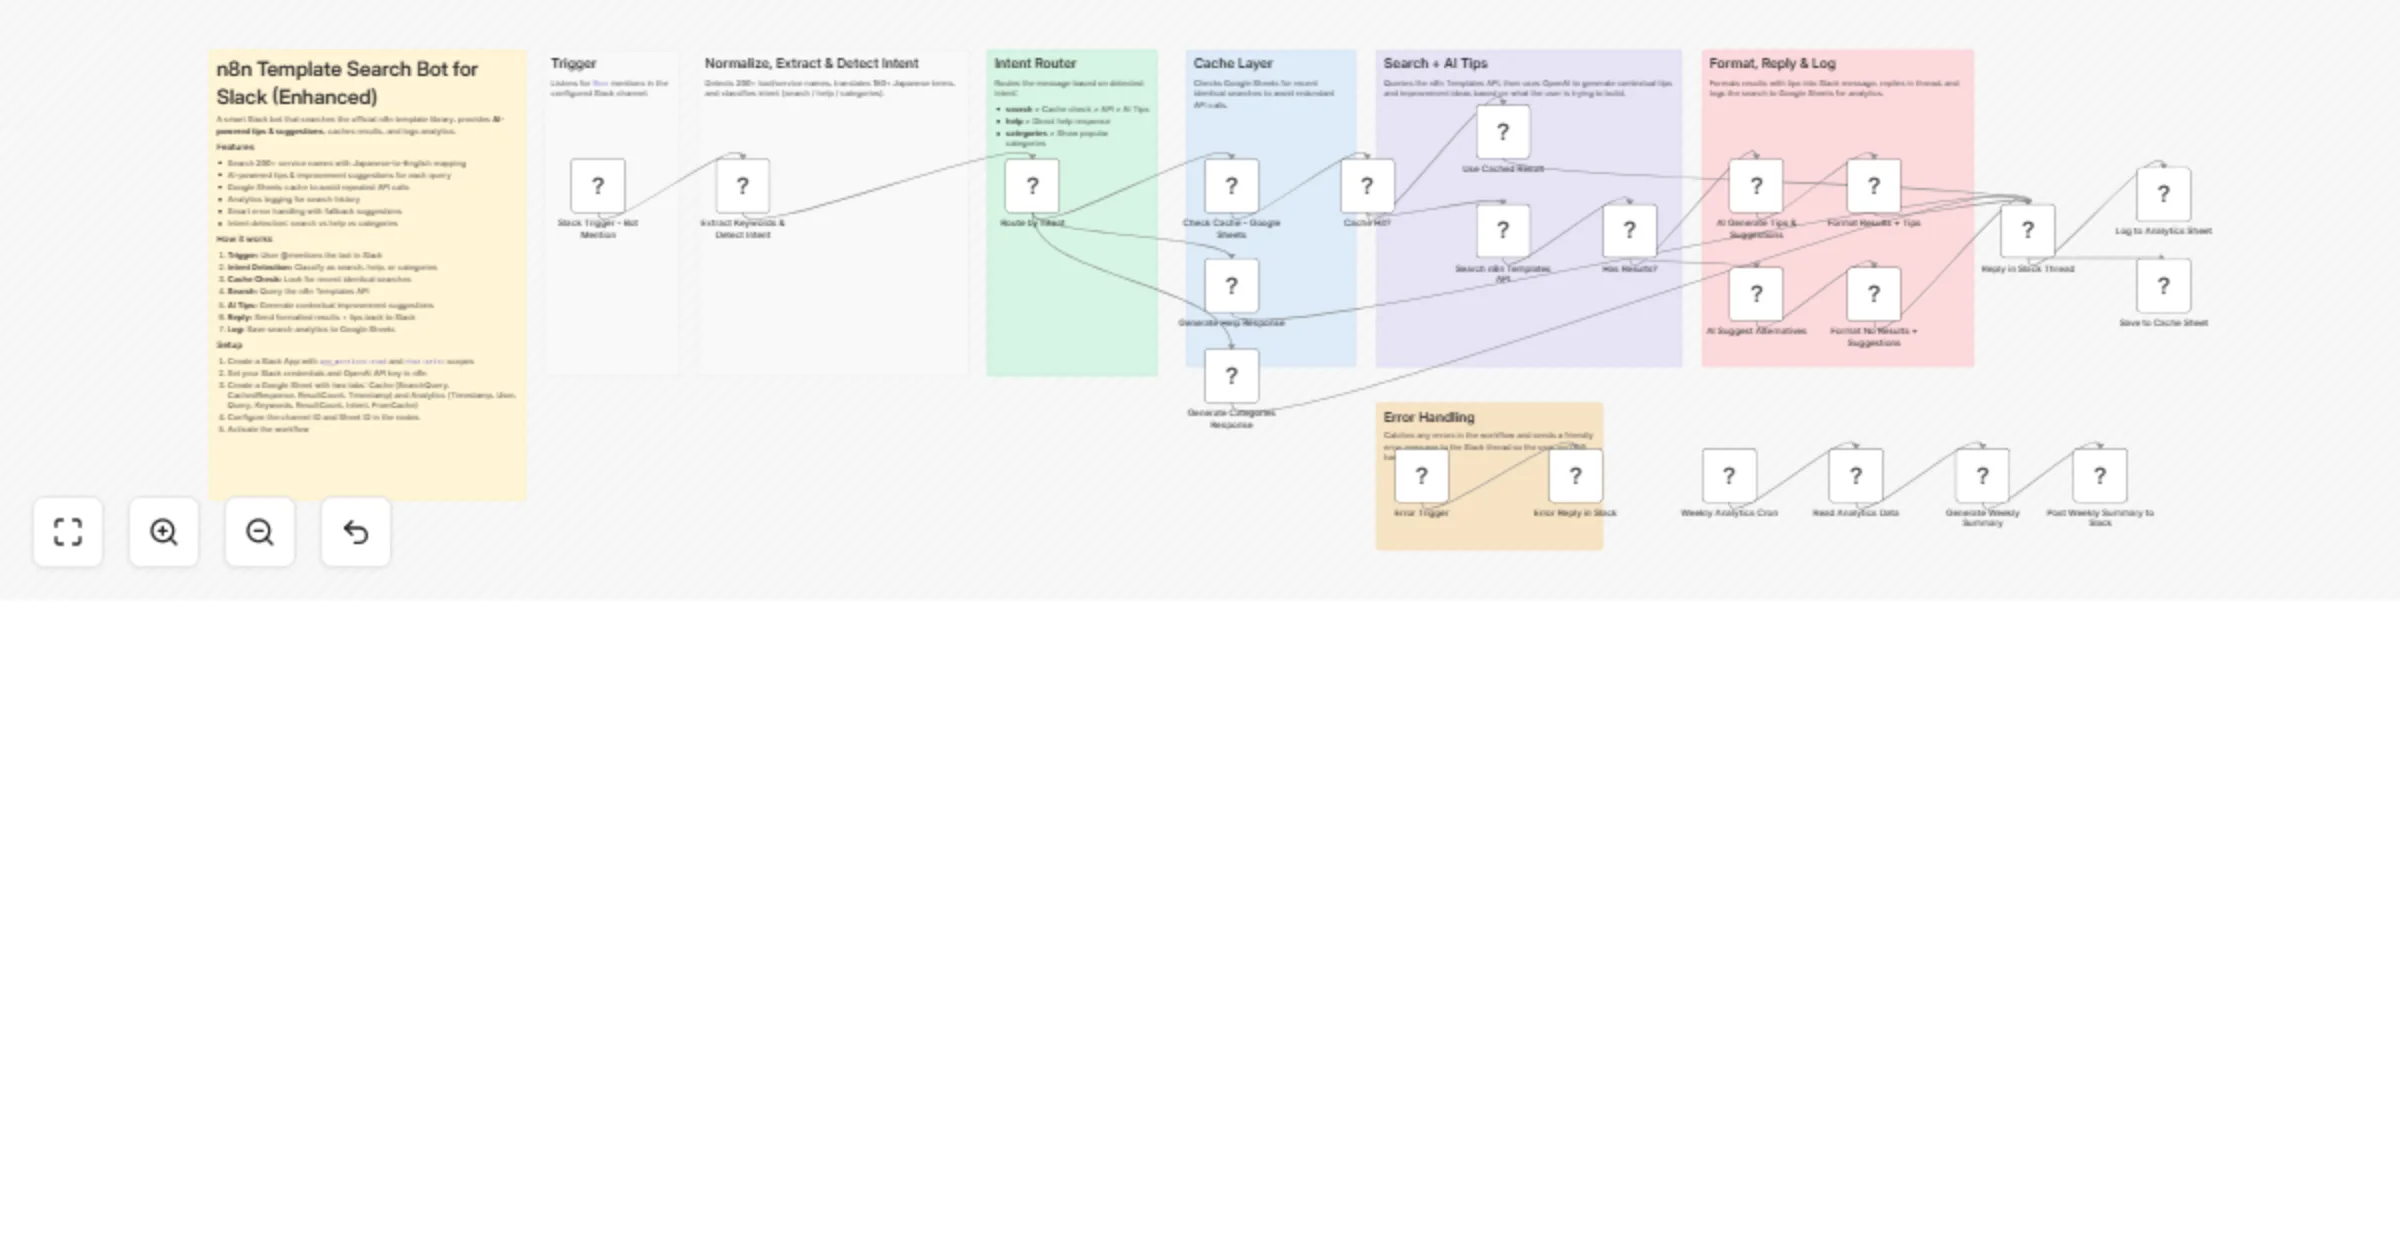
Search Slack for n8n templates with OpenAI tips, Google Sheets cache and weekly analytics
Slack Bot for n8n Template Search with AI Tips, Cache and Analytics Search n8n workflow templates directly from Slack...
Chat with Google Drive documents using Pinecone and OpenAI RAG
Google Drive → Pinecone RAG Chatbot (Auto Sync & Query) This n8n workflow implements a fully automated Retrieval Augm...
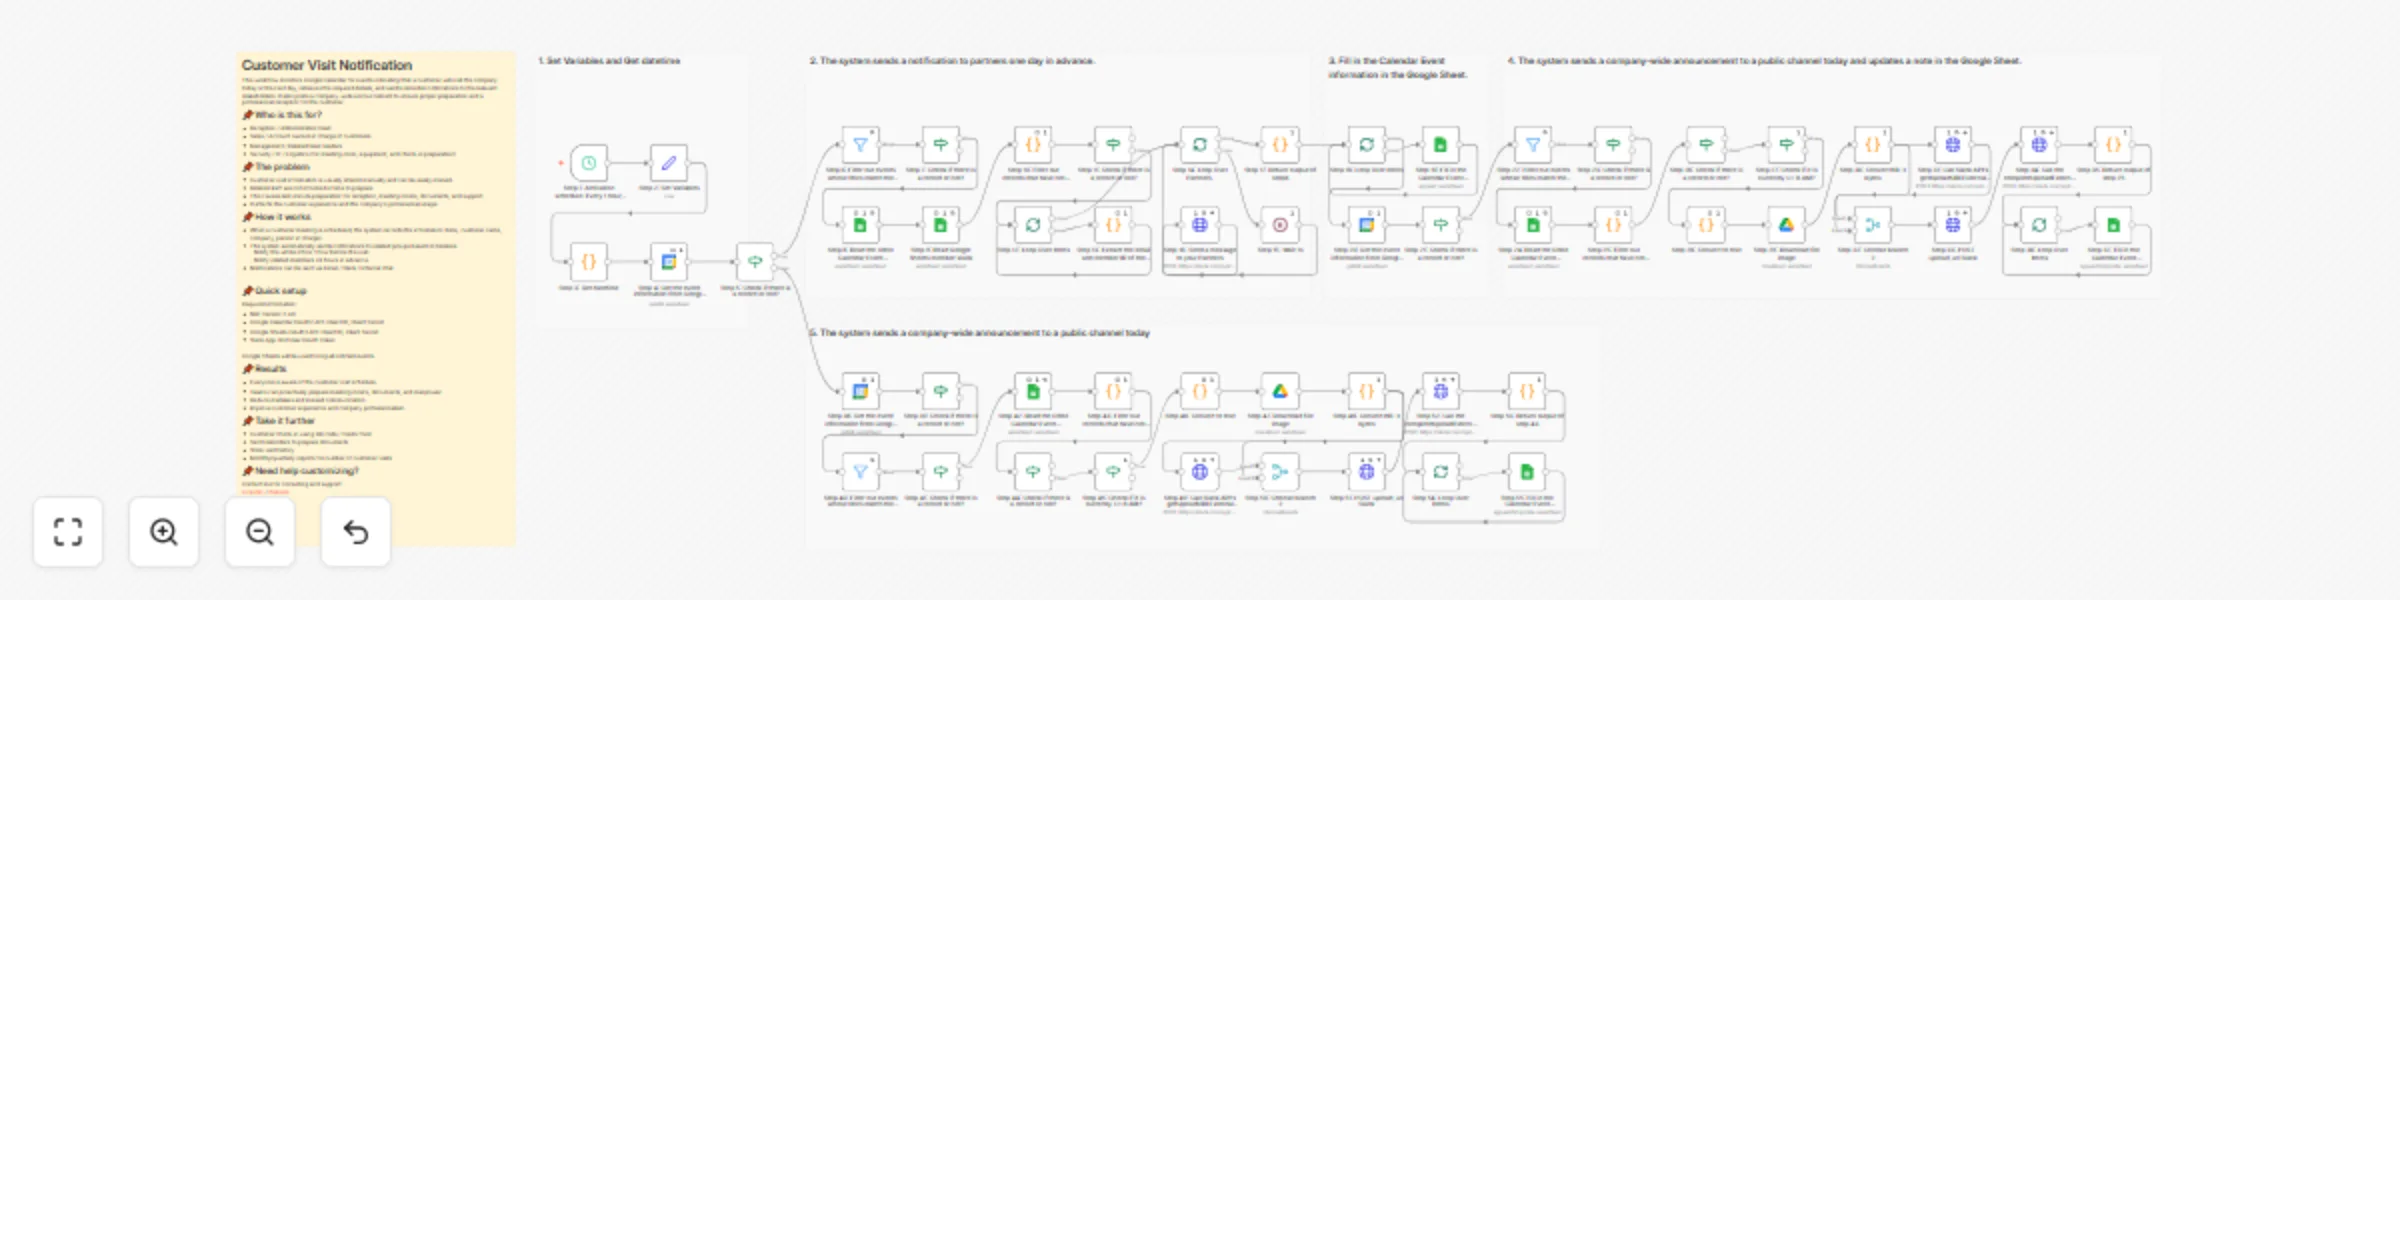
Send customer visit notifications from Google Calendar to Slack and Sheets
Customer Visit Notification This workflow monitors Google Calendar for events indicating that a customer will visit t...
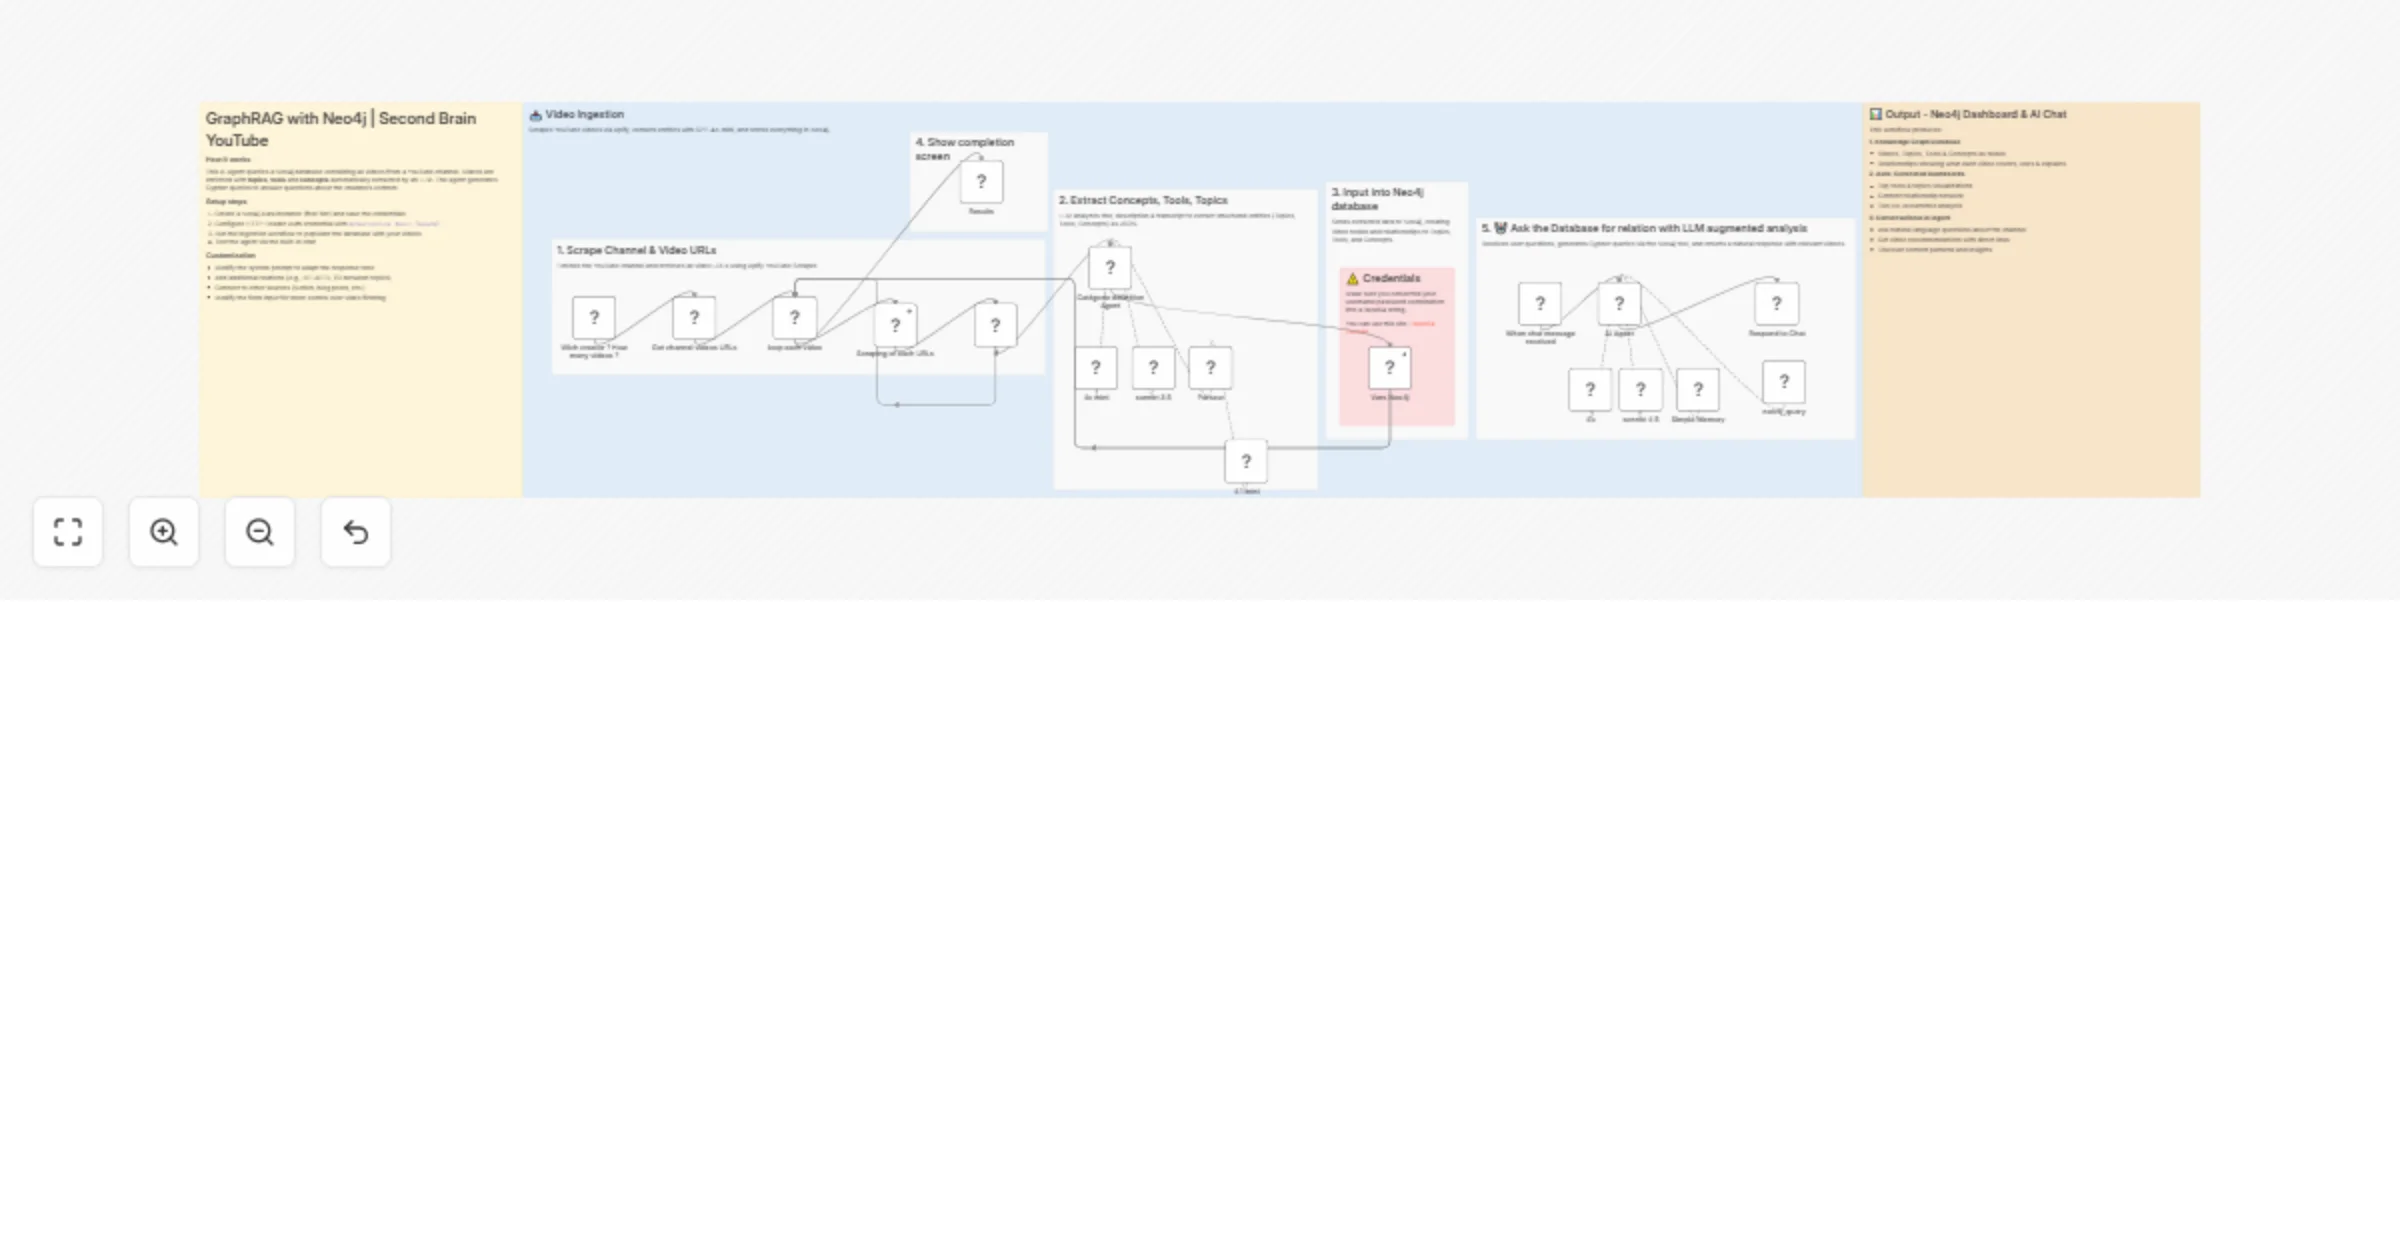
Turn a YouTube channel into a second brain with Neo4j GraphRAG and GPT-4o-mini
AI powered "Second Brain" that can answer questions about any YouTube channel's content using Neo4j Graph Database an...
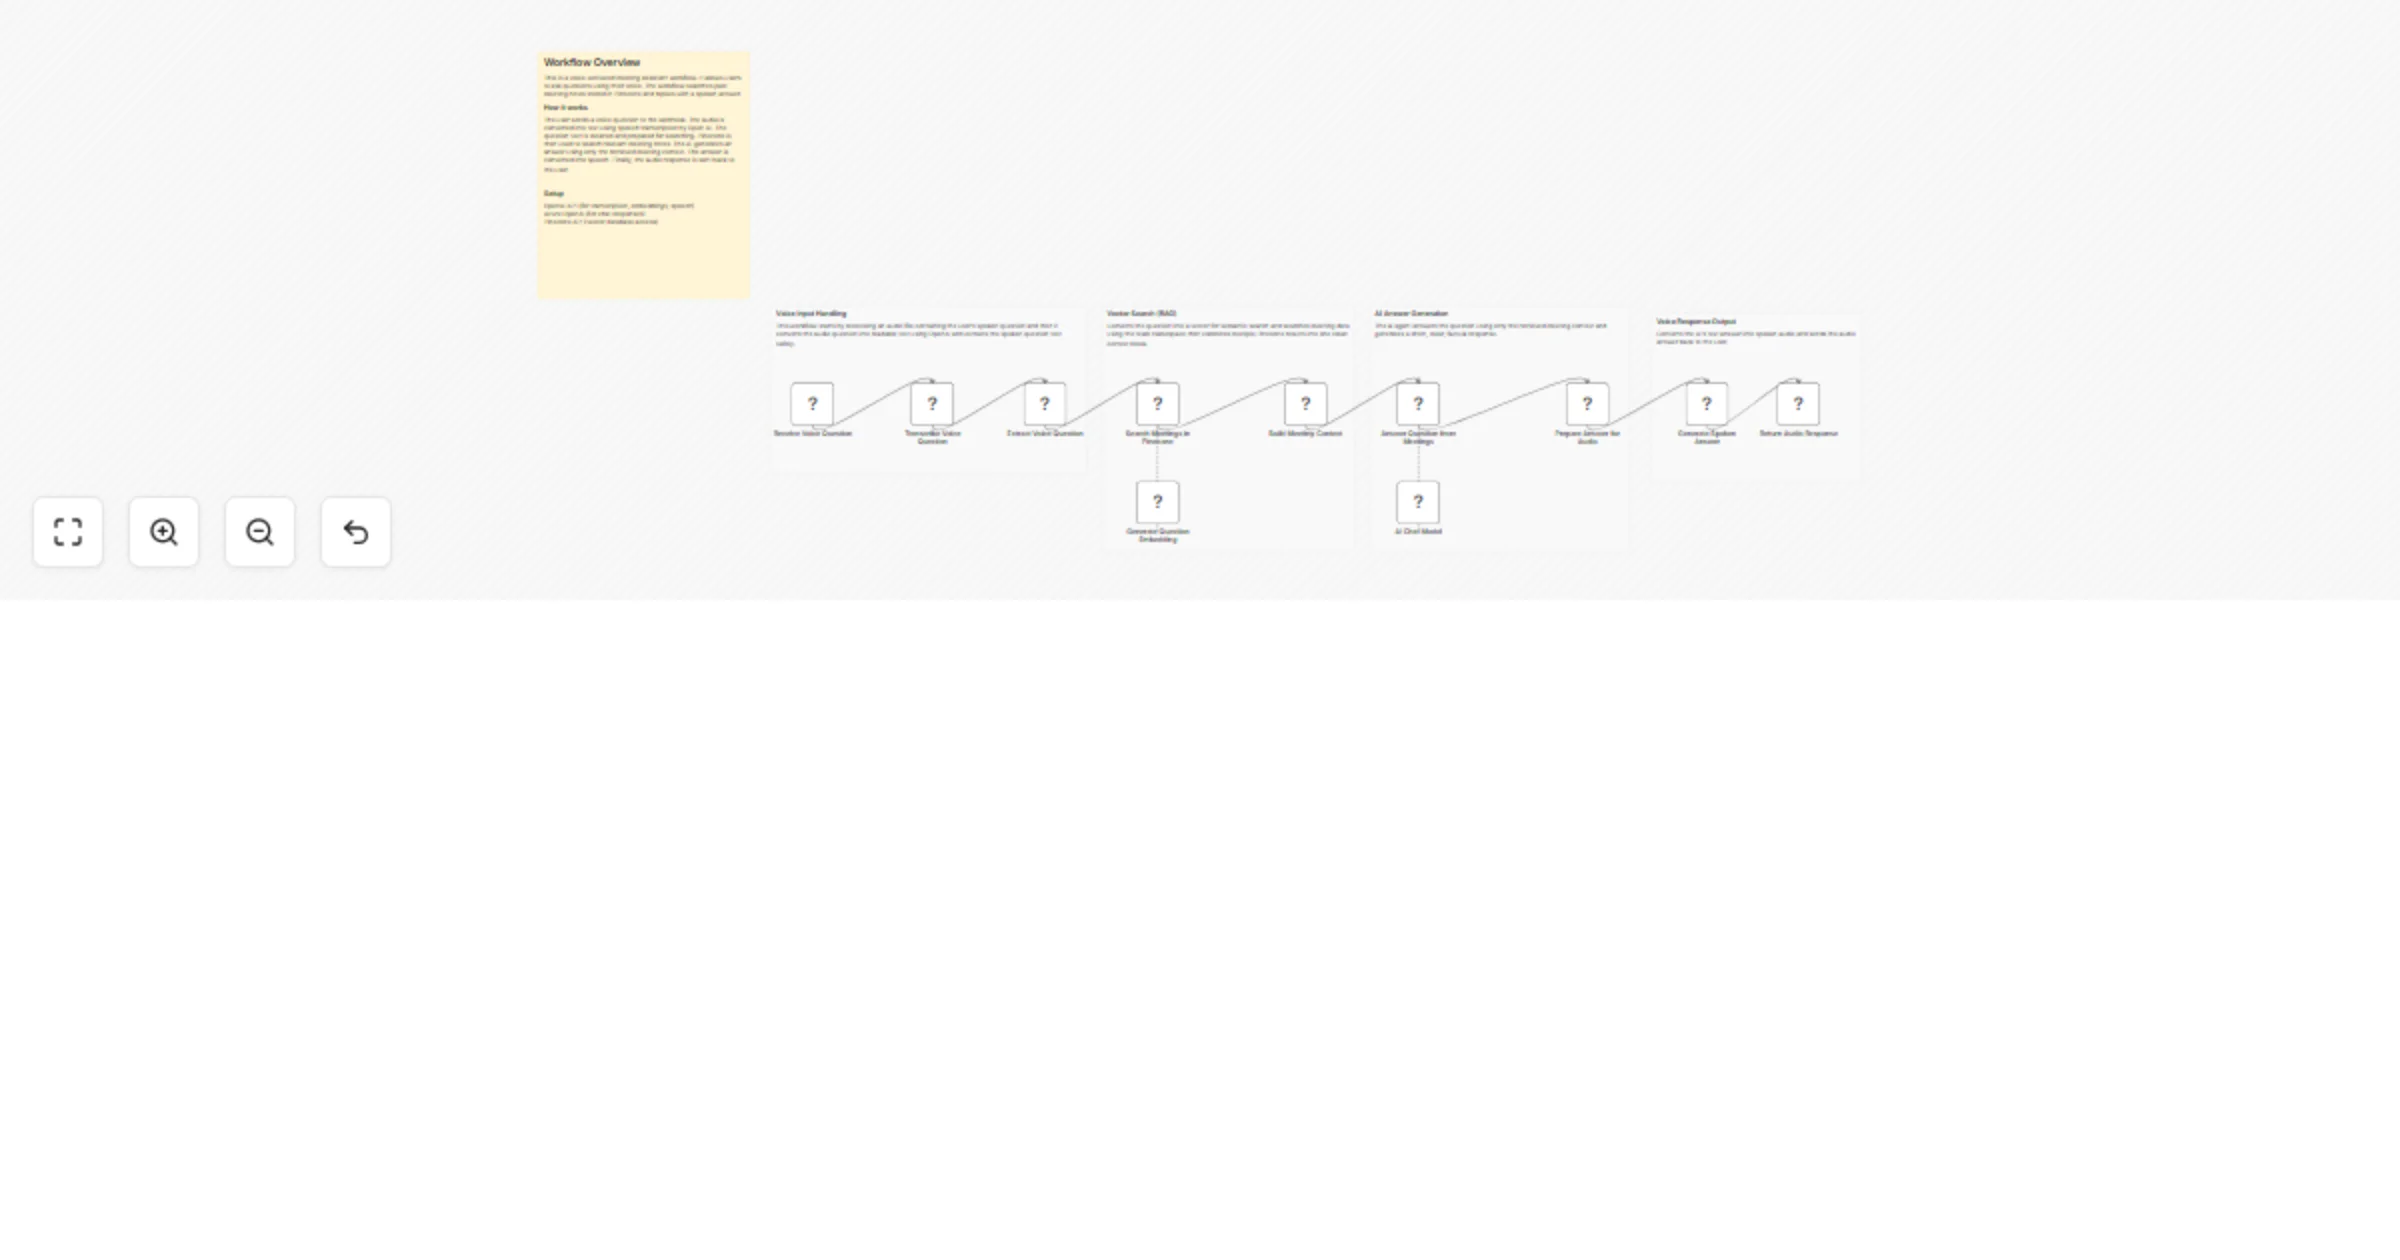
Ask questions about past meetings using voice with OpenAI and Pinecone
📊 Description This workflow allows users to ask questions about past meetings using their voice. It converts the voi...

Create an AI Telegram bot using Google Drive, Qdrant, and OpenAI GPT-4.1
How it works This workflow creates an intelligent Telegram bot with a knowledge base powered by Qdrant vector databas...
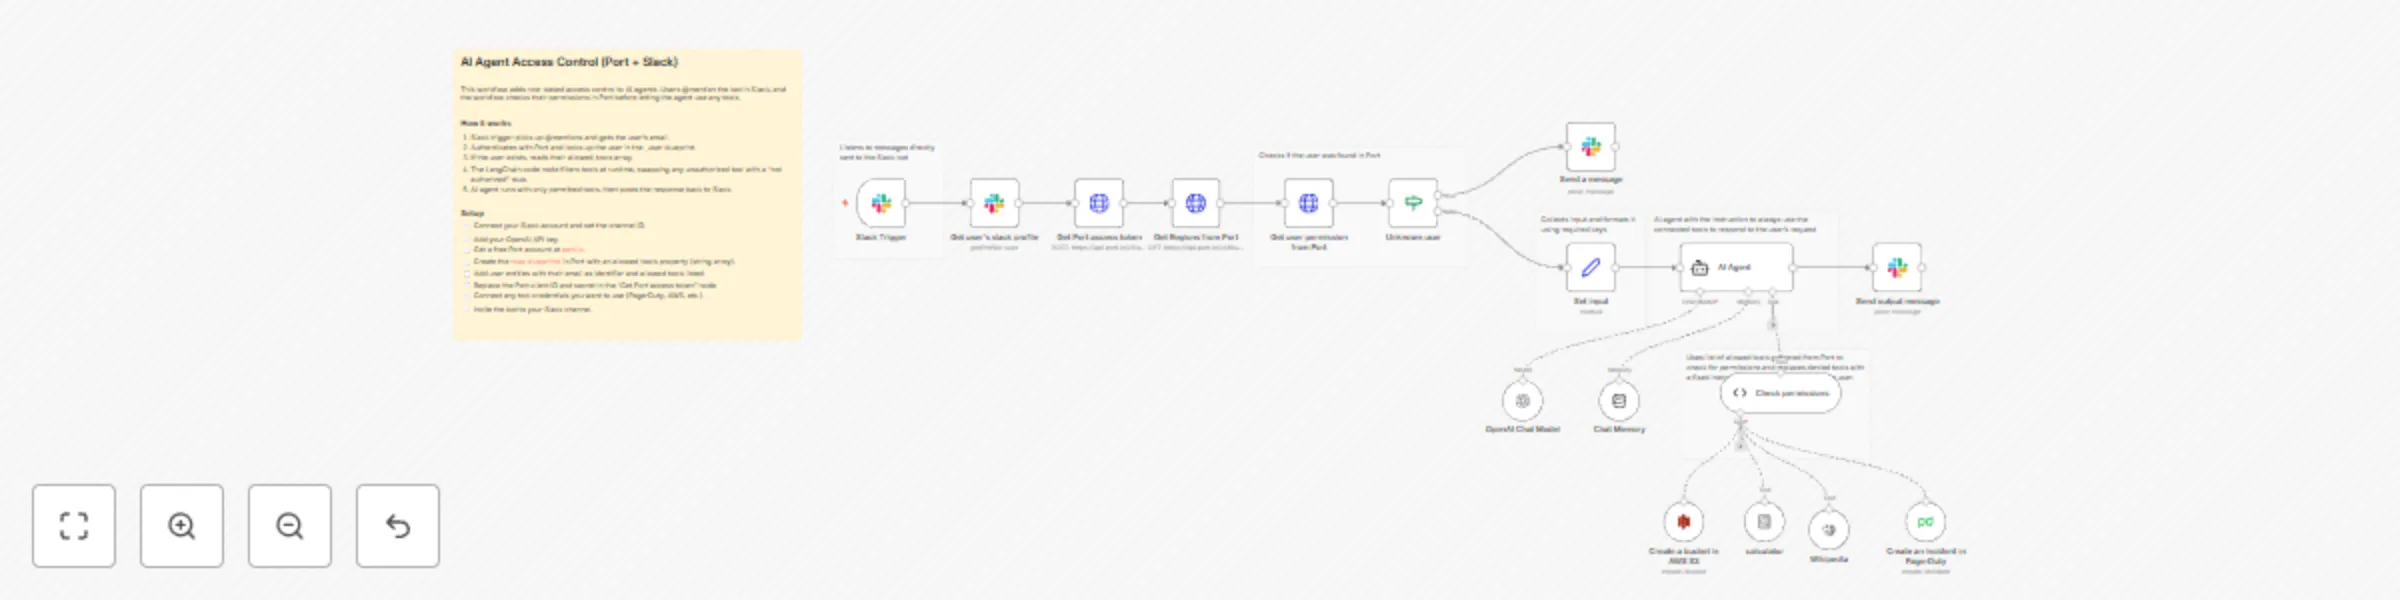
Control AI agent tool access with Port RBAC and Slack mentions
RBAC for AI agents with n8n and Port This workflow implements role based access control for AI agent tools using Port...
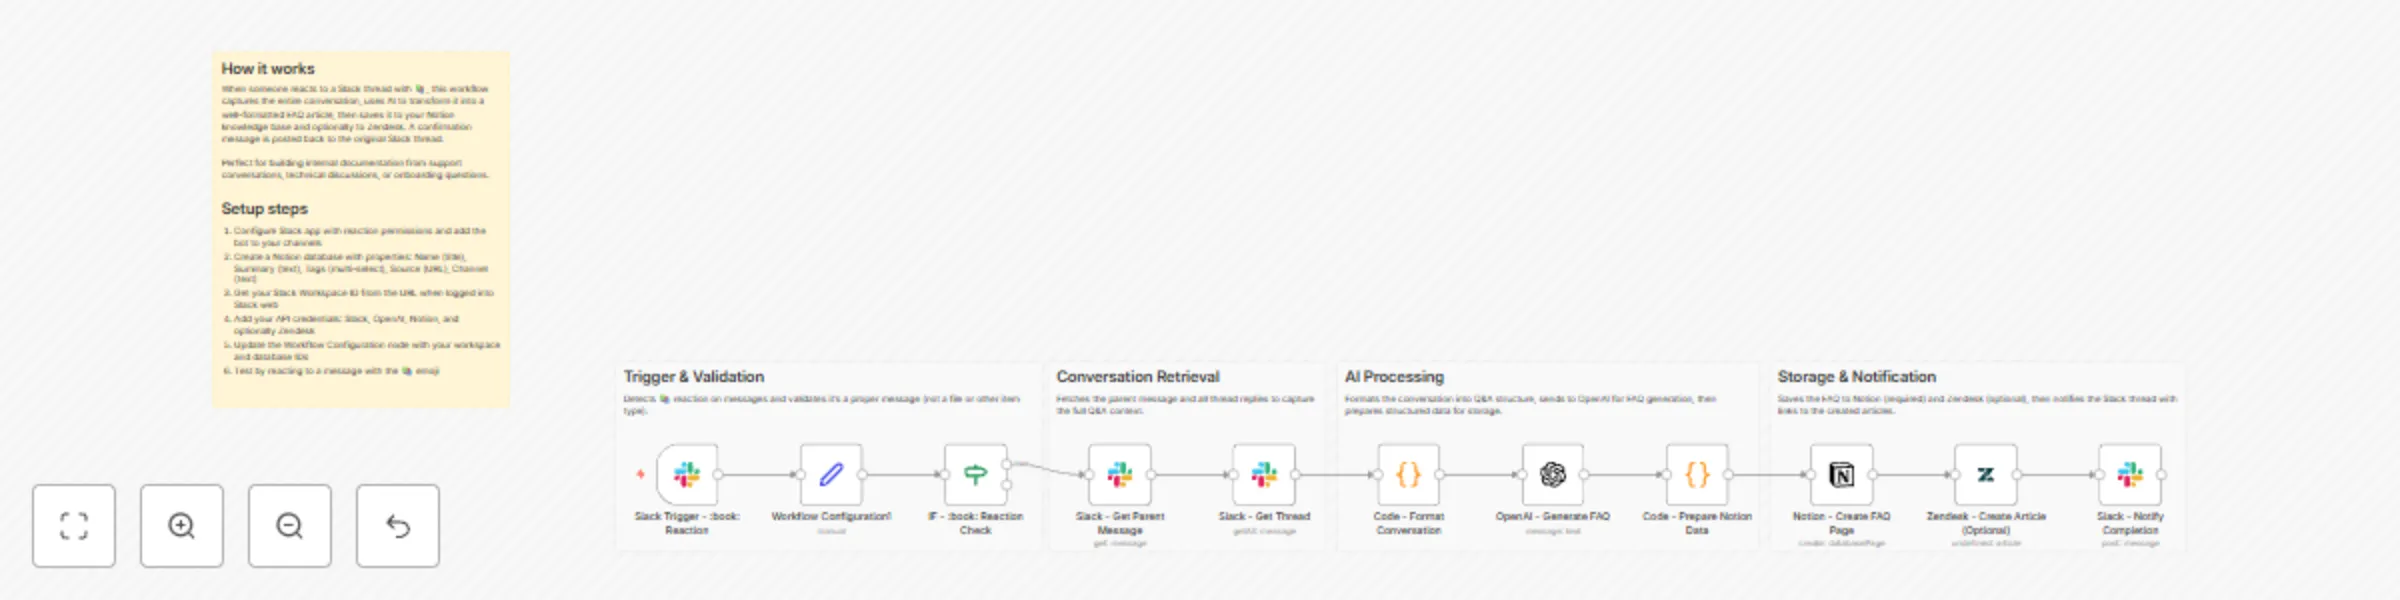
Create AI FAQ articles from Slack threads into Notion and Zendesk
Create FAQ articles from Slack threads to Notion and Zendesk This workflow helps you capture "tribal knowledge" share...
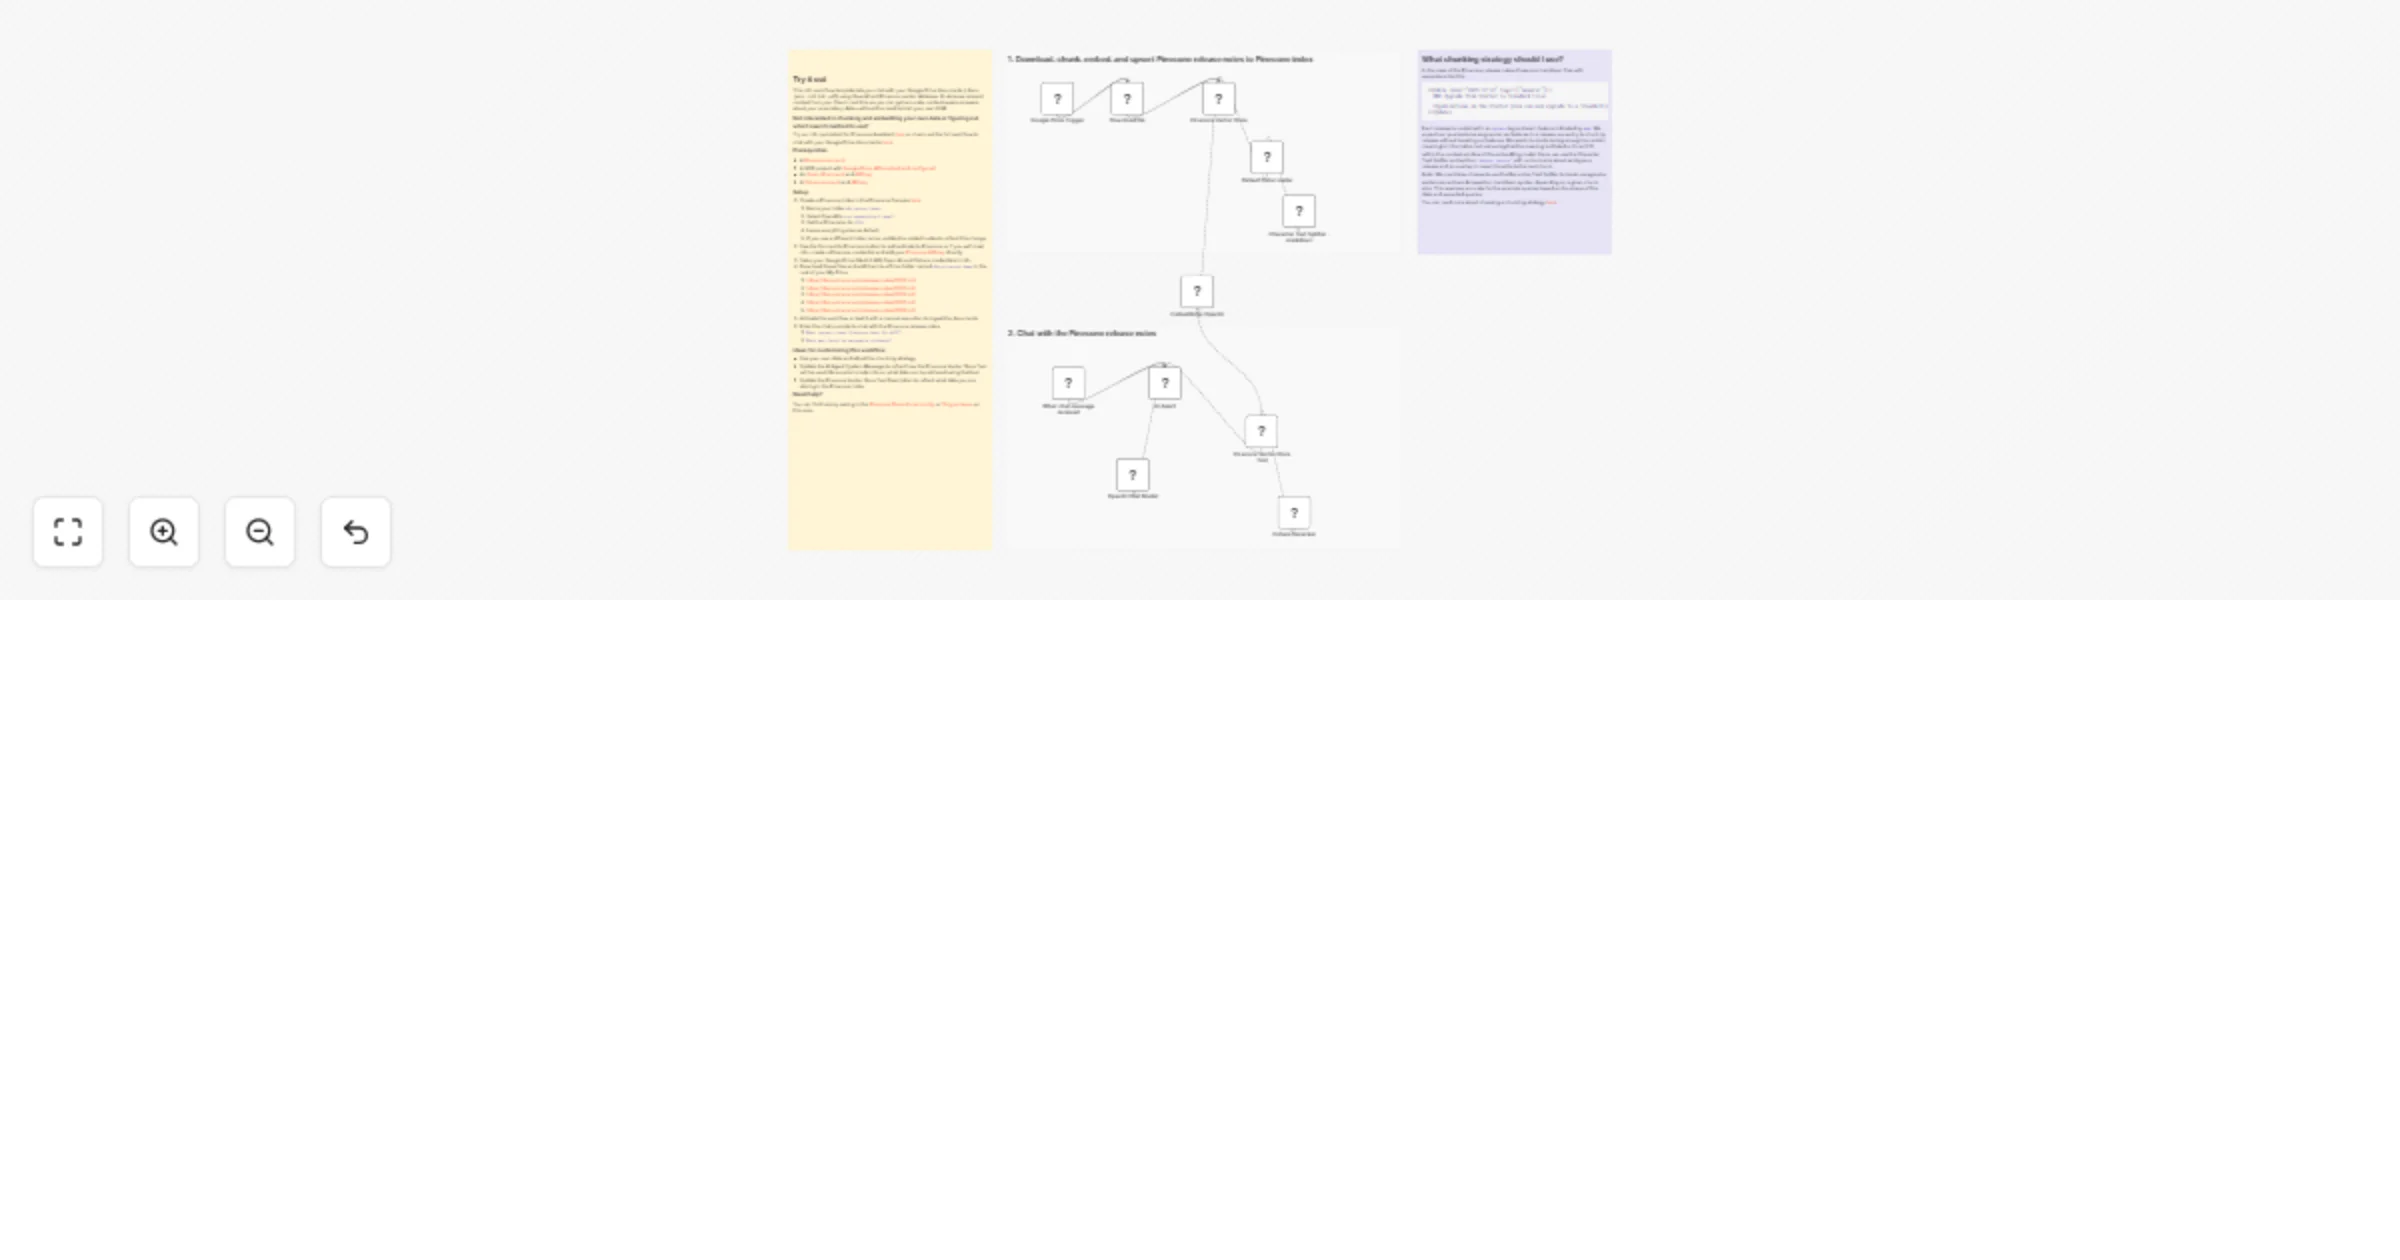
Chat with Google Drive documents using OpenAI and Pinecone RAG search
Try it out This n8n workflow template lets you chat with your Google Drive documents (.docx, .json, .md, .txt, .pdf)...

Chat with Gemini AI through local CLI via SSH
This workflow allows you to integrate the Google Gemini CLI into your n8n AI Agents. It is designed for self hosted n...