K
Konstantin
3
Workflows
Workflows by Konstantin

Free advanced
Create an AI Telegram bot using Google Drive, Qdrant, and OpenAI GPT-4.1
How it works This workflow creates an intelligent Telegram bot with a knowledge base powered by Qdrant vector databas...
K
Konstantin Internal Wiki
28 Dec 2025
126
0

Free advanced
AI chatbot for Max Messenger with voice recognition (GigaChat +SaluteSpeech)
Name: AI Chatbot for Max Messenger with Voice Recognition (GigaChat + Sber) Description: How it works This workflow p...
K
Konstantin Support Chatbot
22 Dec 2025
239
0
Free advanced
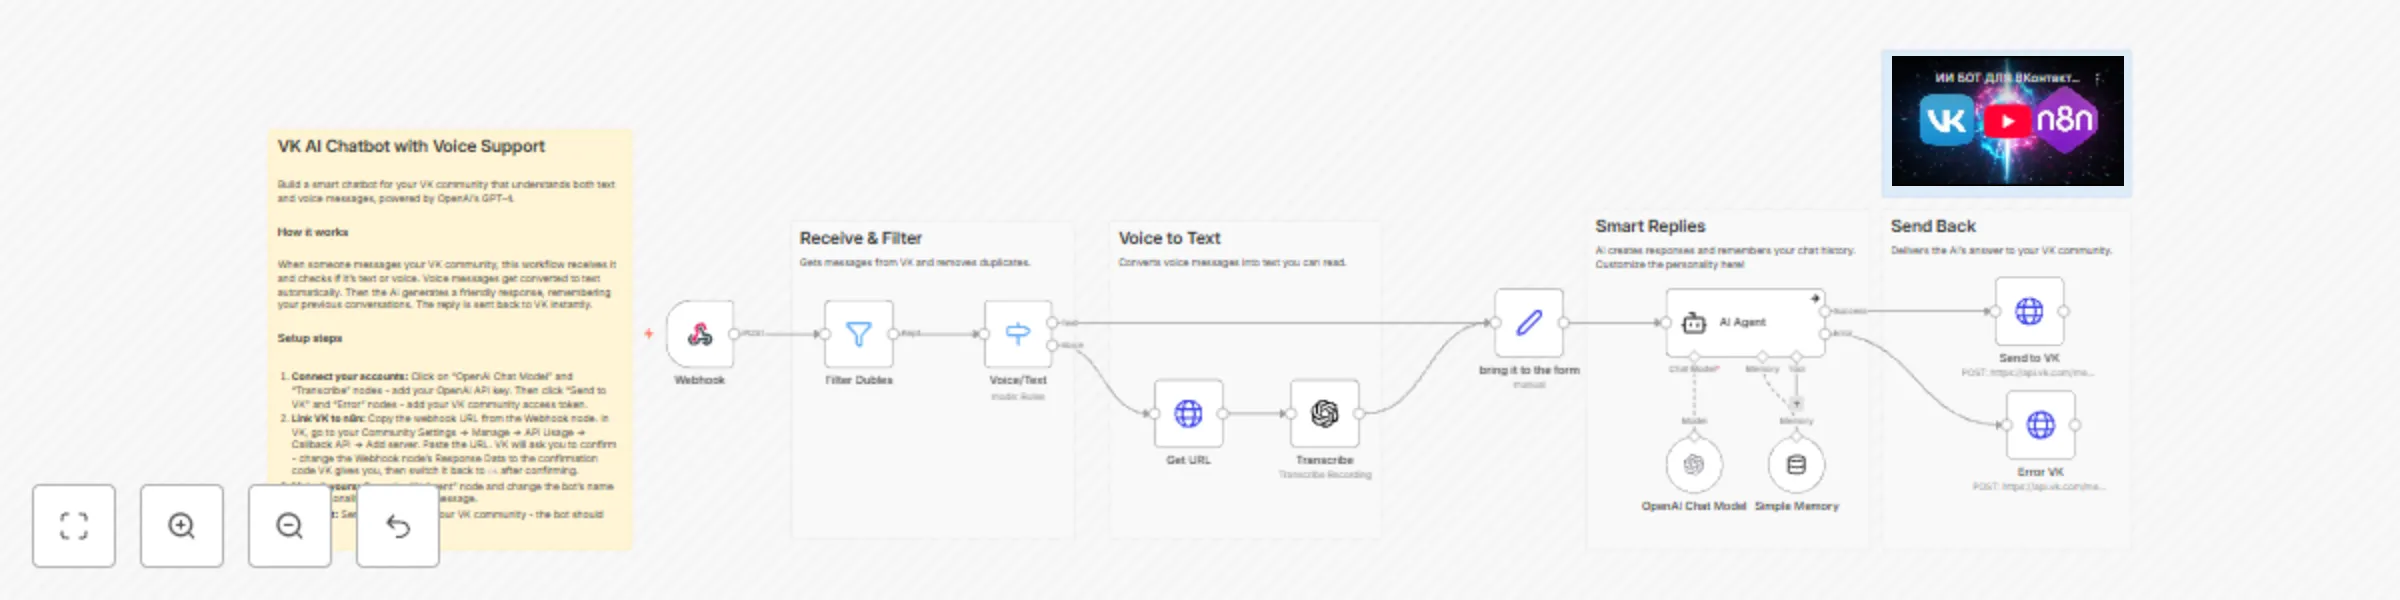
Conversational VK bot with GPT-4 mini & Whisper voice transcription
How it works This workflow powers an intelligent, conversational AI bot for VK that can understand and respond to bot...
K
Konstantin Support Chatbot
7 Nov 2025
145
0