
Beex
5
Workflows
Workflows by Beex
Free intermediate
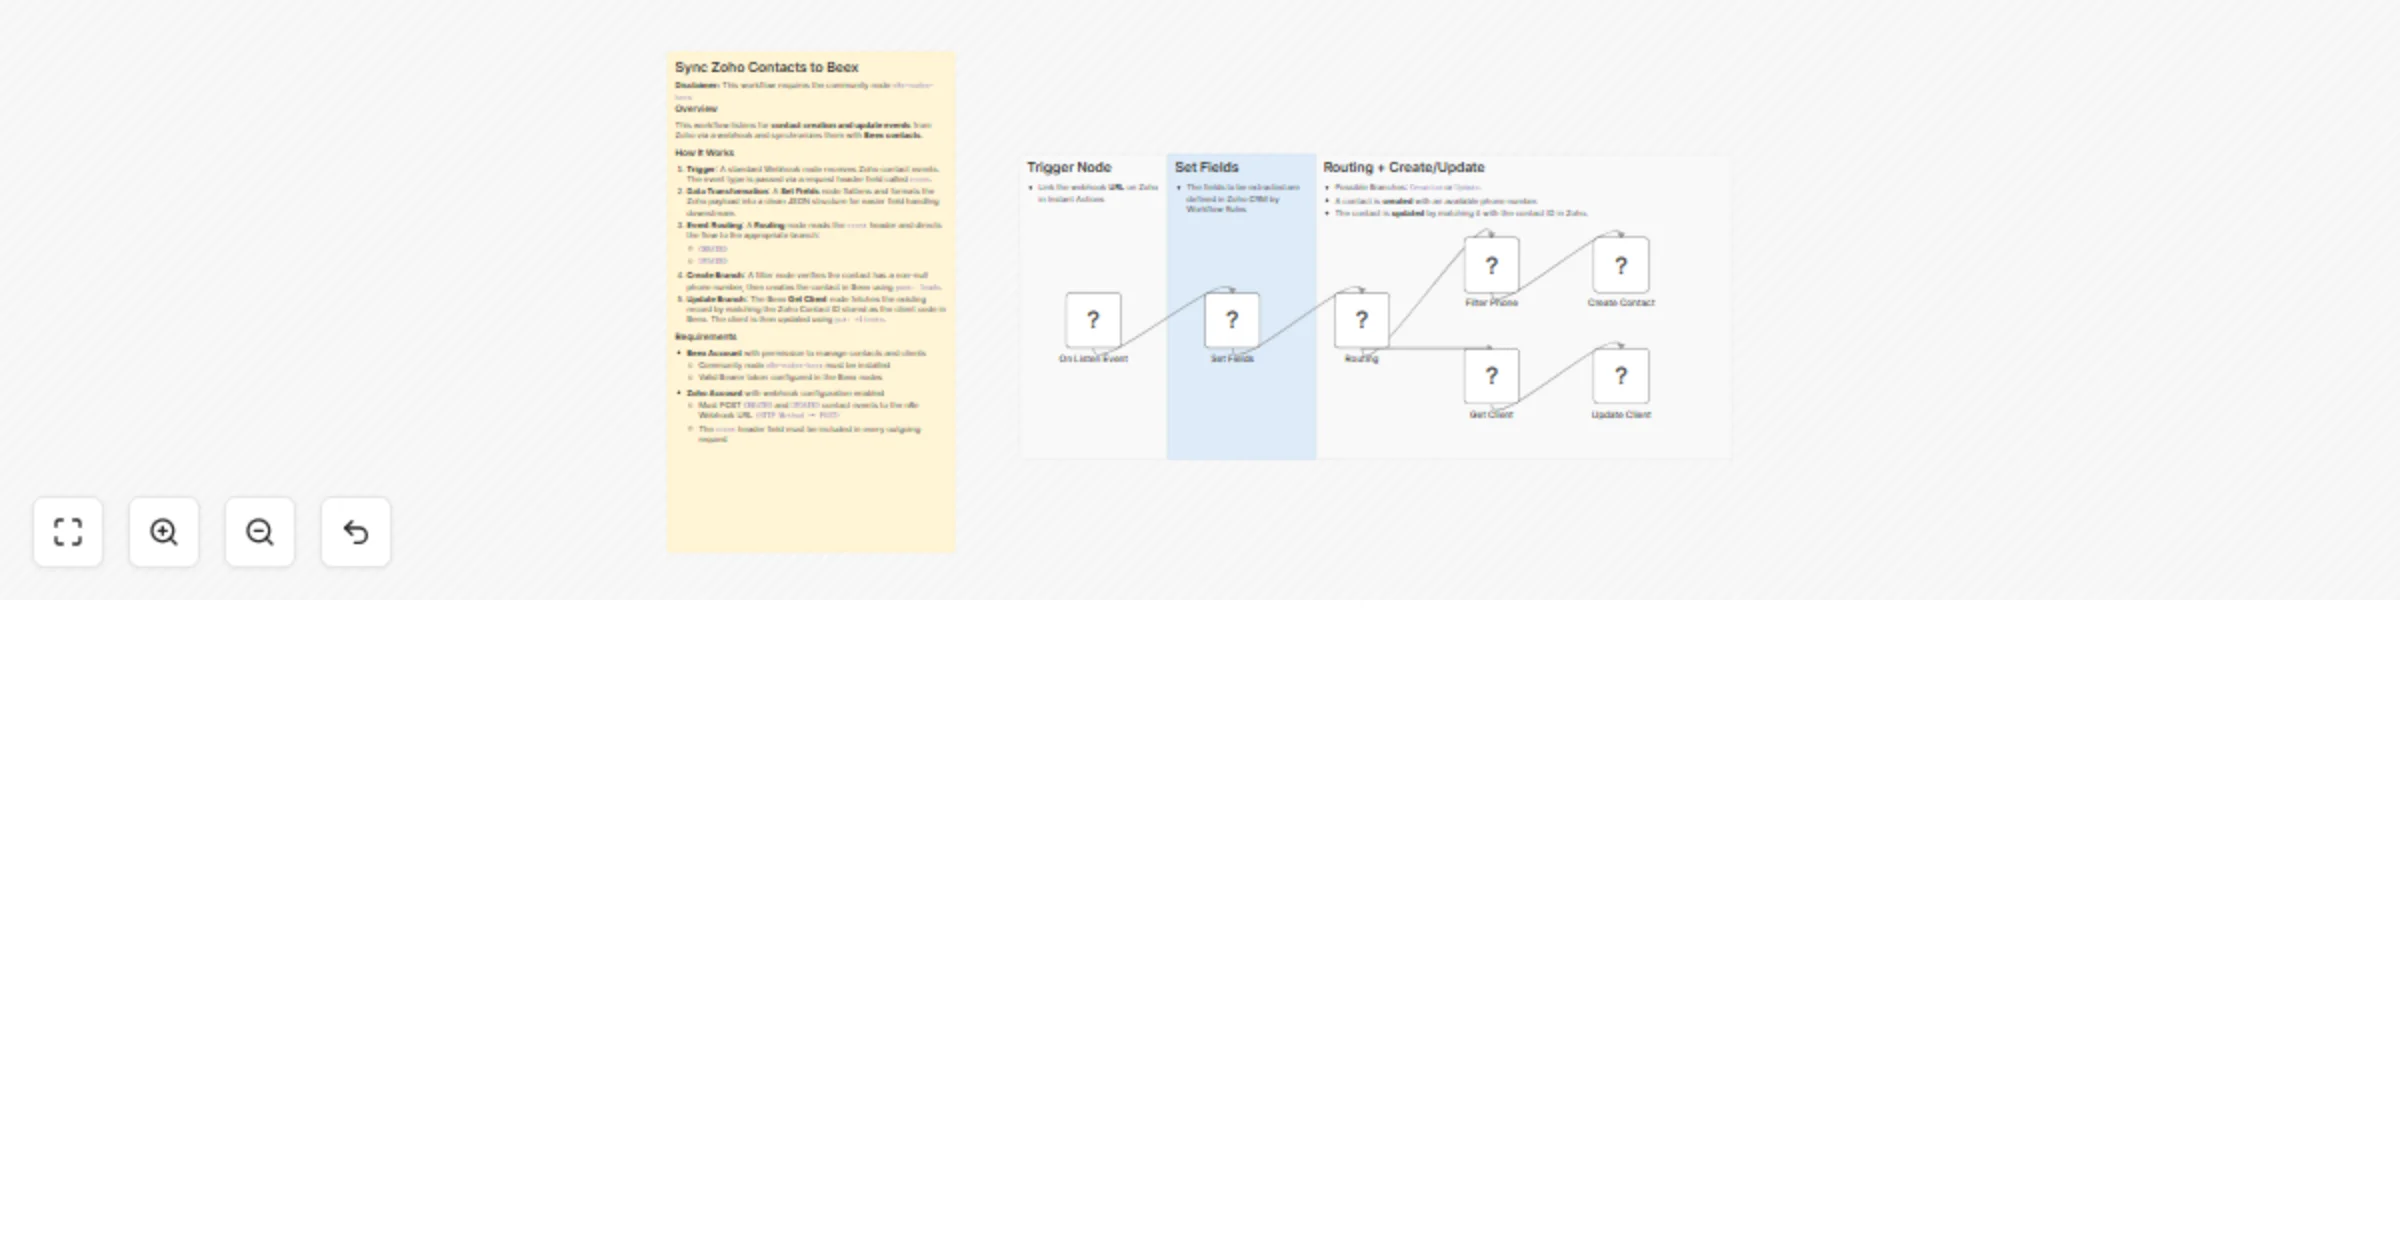
Sync Zoho CRM contacts with Beex Contact Center in real time
Summary Automatically syncs your Zoho contacts with Beex Contact Center by handling creation and update events in rea...
CRM
9 Apr 2026
0
0
Free advanced
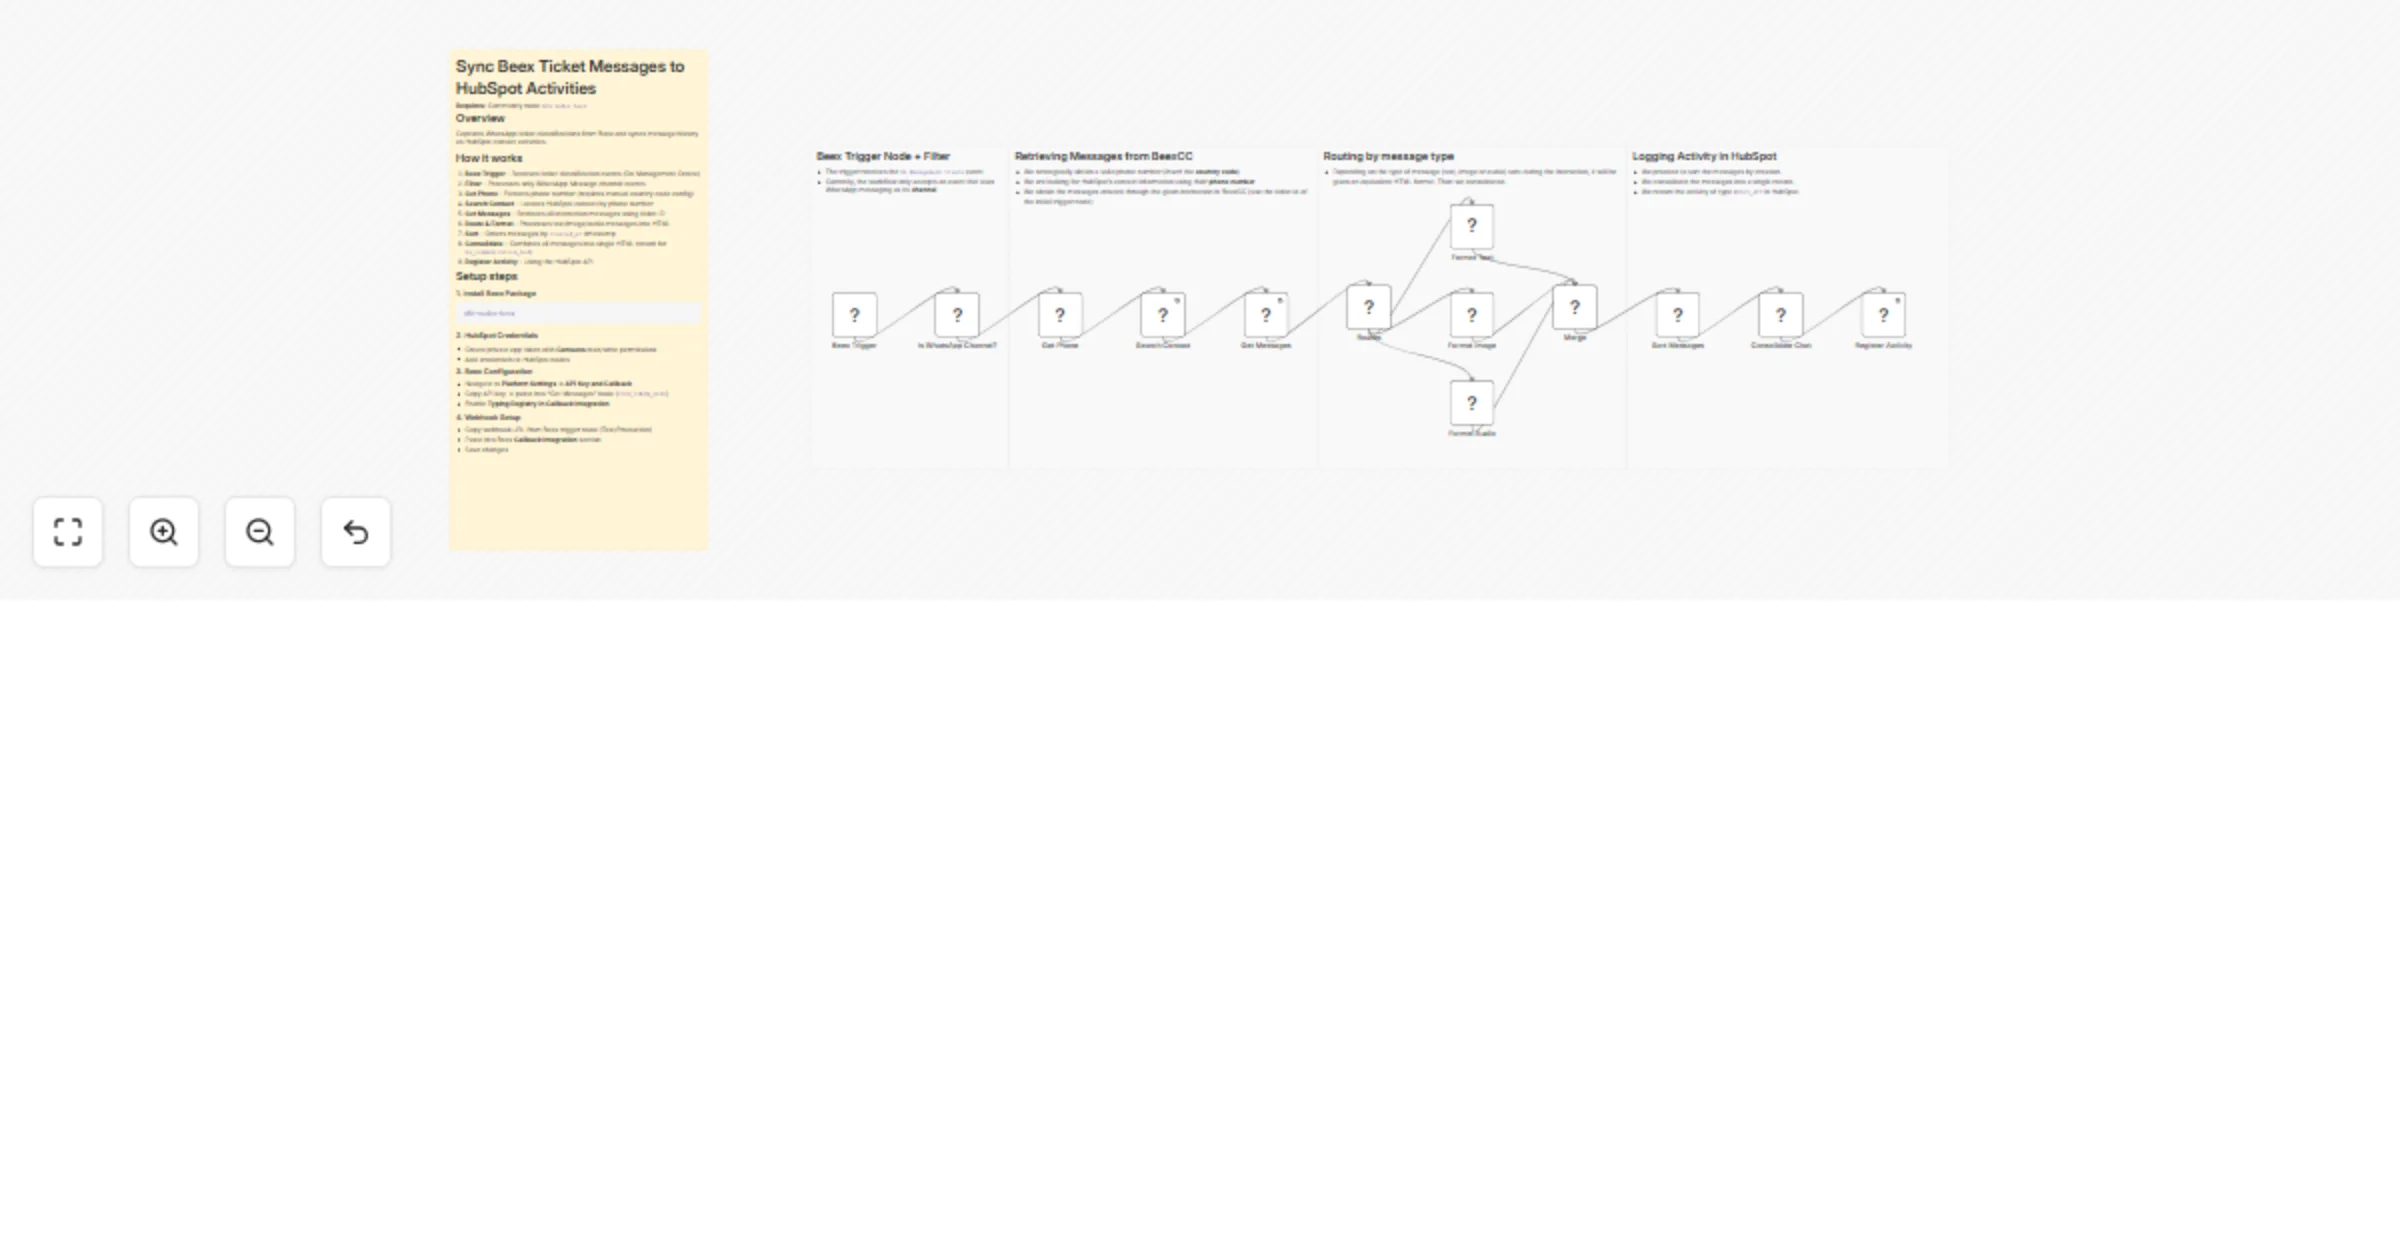
Sync Beex WhatsApp ticket messages with HubSpot contact activities
Summary This workflow detects ticket classification events in Beex where the communication channel was WhatsApp, extr...
Ticket Management
16 Jan 2026
10
0

Free intermediate
Send welcome WhatsApp messages to new HubSpot contacts with Beex templates
Summary This workflow listens for HubSpot contact creation events via a webhook, standardizes the data, and sends a W...
Lead Nurturing
12 Dec 2025
38
0

Free intermediate
Automatically sync Beex leads to HubSpot (Create & Update)
Summary Automatically sync your Beex leads to HubSpot by handling both creation and update events in real time. How I...
CRM
22 Nov 2025
52
0

Free advanced
Automatic re-engagement for inactive Shopify customers via Beex
Summary Re engage your customers with your Shopify store through a personalized contact sequence. How it works 1. The...
Lead Nurturing
2 Oct 2025
162
0