yatolstoy
Workflows by yatolstoy
Upload large files to Kommo/AmoCRM with automatic file chunking
Upload files from any source to your account Kommo or AmoCRM with a simple and reusable workflow. ## Advantages of workflow - It can split a large file into small ones and upload chunks. - Works for Kommo and amoCRM - There are 3 required parameters in total (drive_url, file_name and file_base64) ## Where it can be useful - To send files in a message to clients chat in Kommo or amoCRM - To upload the generated files to the transaction or contact fields - To upload files to notes ## How it works 1. Checking the file availability 2. Opening the session to download the file 3. Split the file into chunks, if necessary. 4. Send parts of the file to CRM one at a time. ## Installation Steps 1. Import workflow 2. Configuring Oauth2 credentials in Kommo or amoCRM 3. Applying credentials for specific workflow steps 4. Specifying the link to the file and the disk_url address 5. Launching a workflow to upload a file to a Kommo or amoCRM account
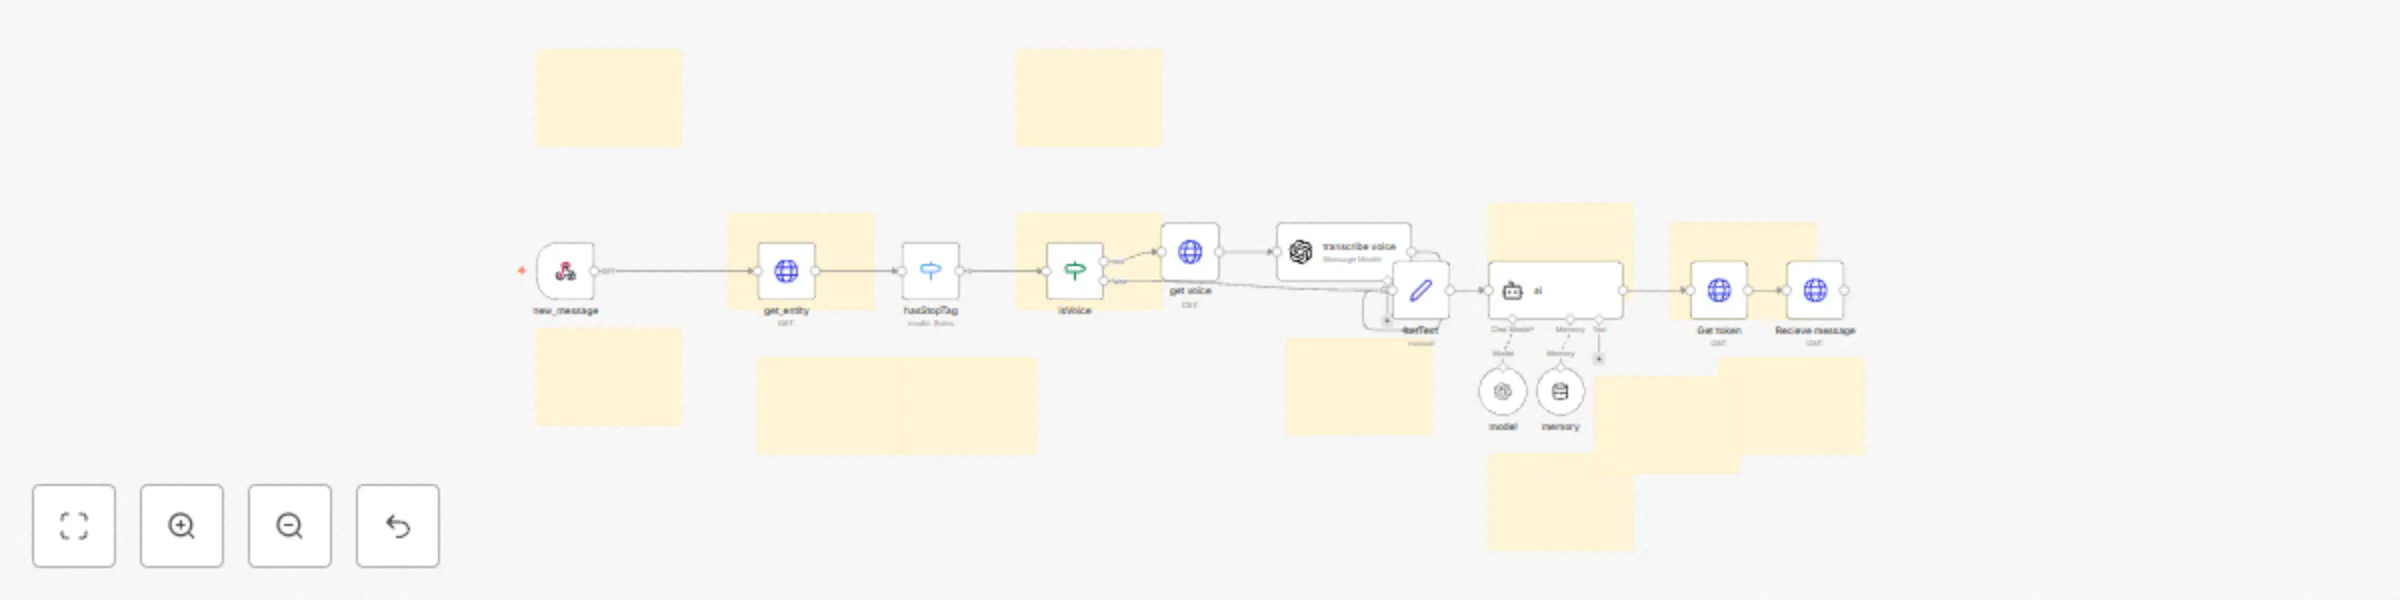
Connect AI to any chats in Kommo
Entrust customer service to AI using n8n and Kommo! Using this workflow, you can make the AI agent answer customer questions for your managers. See how it works in the [video](https://youtu.be/yFqkp-HrCeY). ## Advantages of integration - Works with any message channel that is connected to Kommo (telegram, whatsapp, facebook) - Understands voice and text messages - You can stop for a specific transaction or contact if you need a person's help. - It is possible to supplement the AI agent with additional tools to suit your needs ## Where it can be useful - In customer support - In the qualification of clients - When invoicing ## How it works 1) Any incoming message to the Kommo chats is sent by the webhook to n8n 2) n8n processes the webhook according to the specified logic 3) n8n sends a reply message to the Kommo chat ## Installation Steps 1) Install workflow 2) Follow the instructions to connect the kommo to the n8n 3) Set up Credentials for OpenAI 4) Fill in the Credentials as shown in the workflow notes 5) Activate Workflow 6) Write your first message as client