W
Websensepro
5
Workflows
Workflows by Websensepro
Free advanced
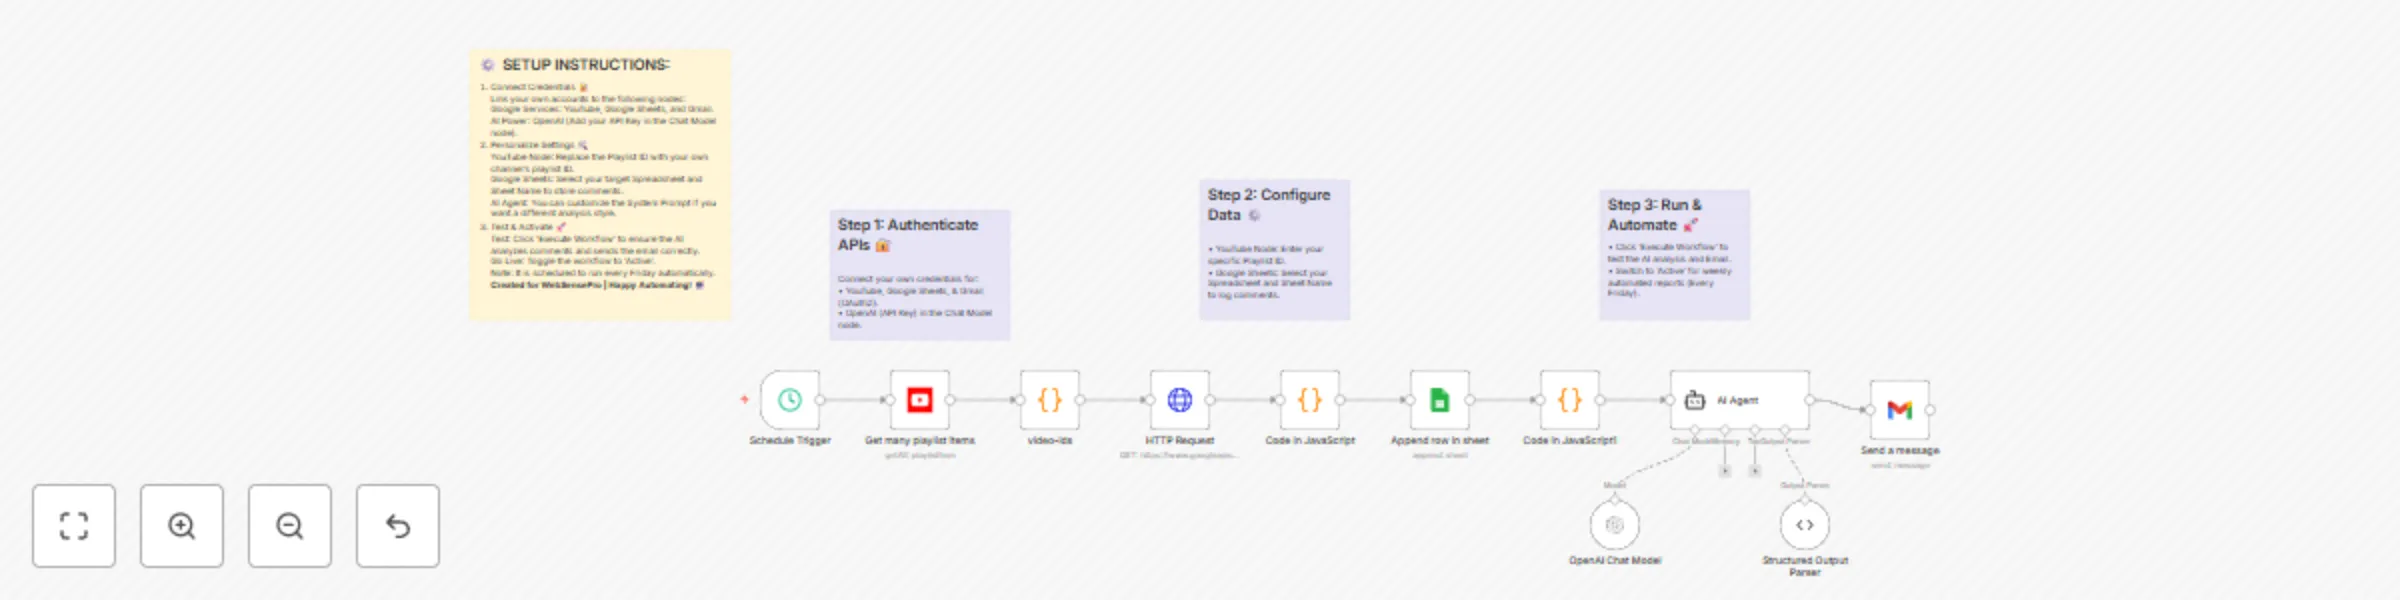
Generate YouTube video ideas from comments with GPT-4o-mini and Google Sheets
Analyse YouTube Comments via AI Agent and Create Video Topics Description...
W
Websensepro Market Research
19 Dec 2025
133
0

Free advanced
Transform Shopify products into SEO blog content with DeepSeek AI and Google Sheets
Stop struggling with content creation for your e commerce store. This workflow acts as your automated AI Content Mark...
W
Websensepro Content Creation
1 Dec 2025
542
0
Free advanced
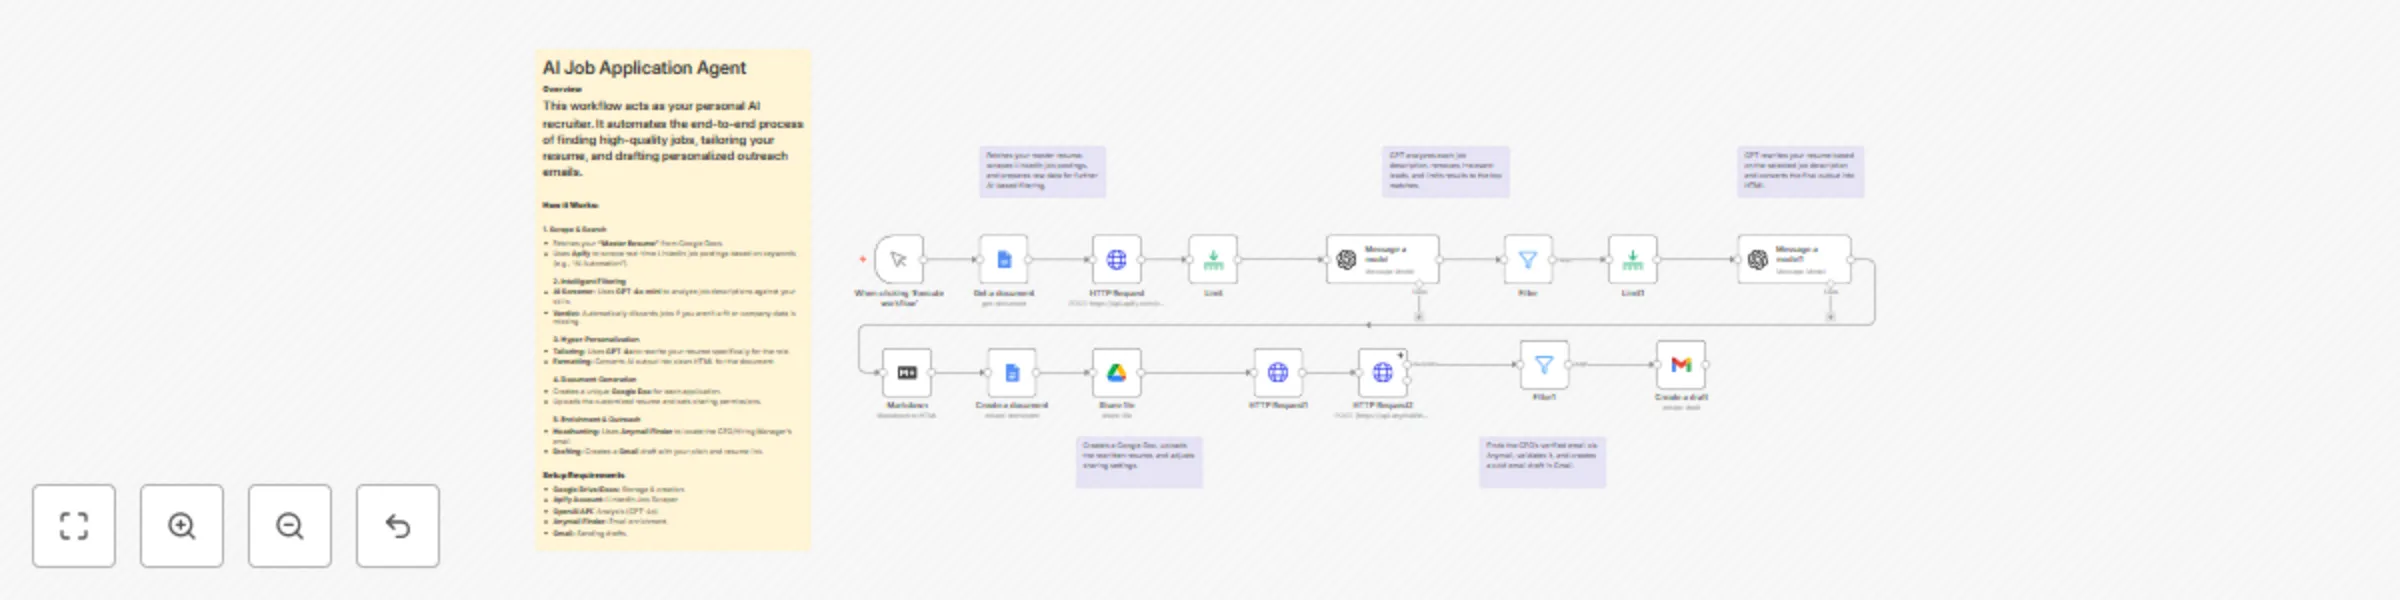
Automate job applications with AI resume tailoring using GPT-4o, LinkedIn & Gmail
Stop applying manually. This workflow acts as your personal AI recruiter, automating the end to end process of findin...
W
Websensepro Personal Productivity
25 Nov 2025
1013
0

Free intermediate
Generate personalized sales follow-ups from Fireflies transcripts with Gemini & Google Drive
Automatically Generate AI Follow Up Messages from Fireflies Transcripts This workflow automates creating personalized...
W
Websensepro Lead Nurturing
17 Nov 2025
40
0
Free intermediate
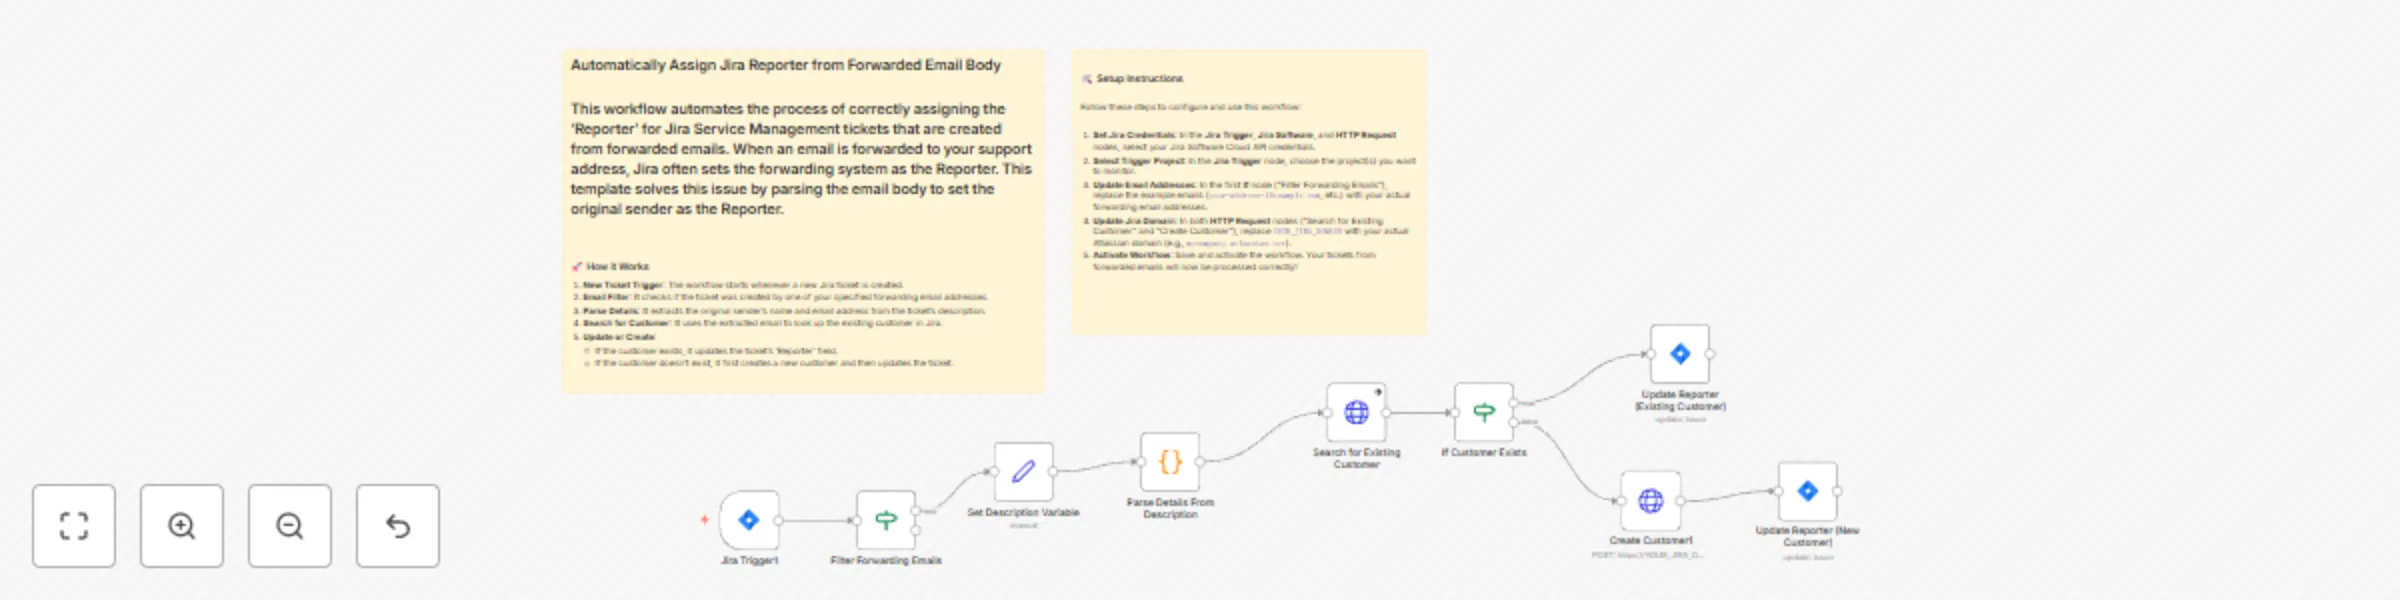
Automatically assign Jira Service Management reporter from forwarded emails
Automatically Assign Jira Service Management Reporter from Forwarded Emails This workflow solves a common problem in...
W
Websensepro Ticket Management
29 Oct 2025
243
0