
WeblineIndia
Workflows by WeblineIndia
Compare physical vs digital 24K gold costs and returns with GoldAPI, IBJA, Groq and Google Sheets
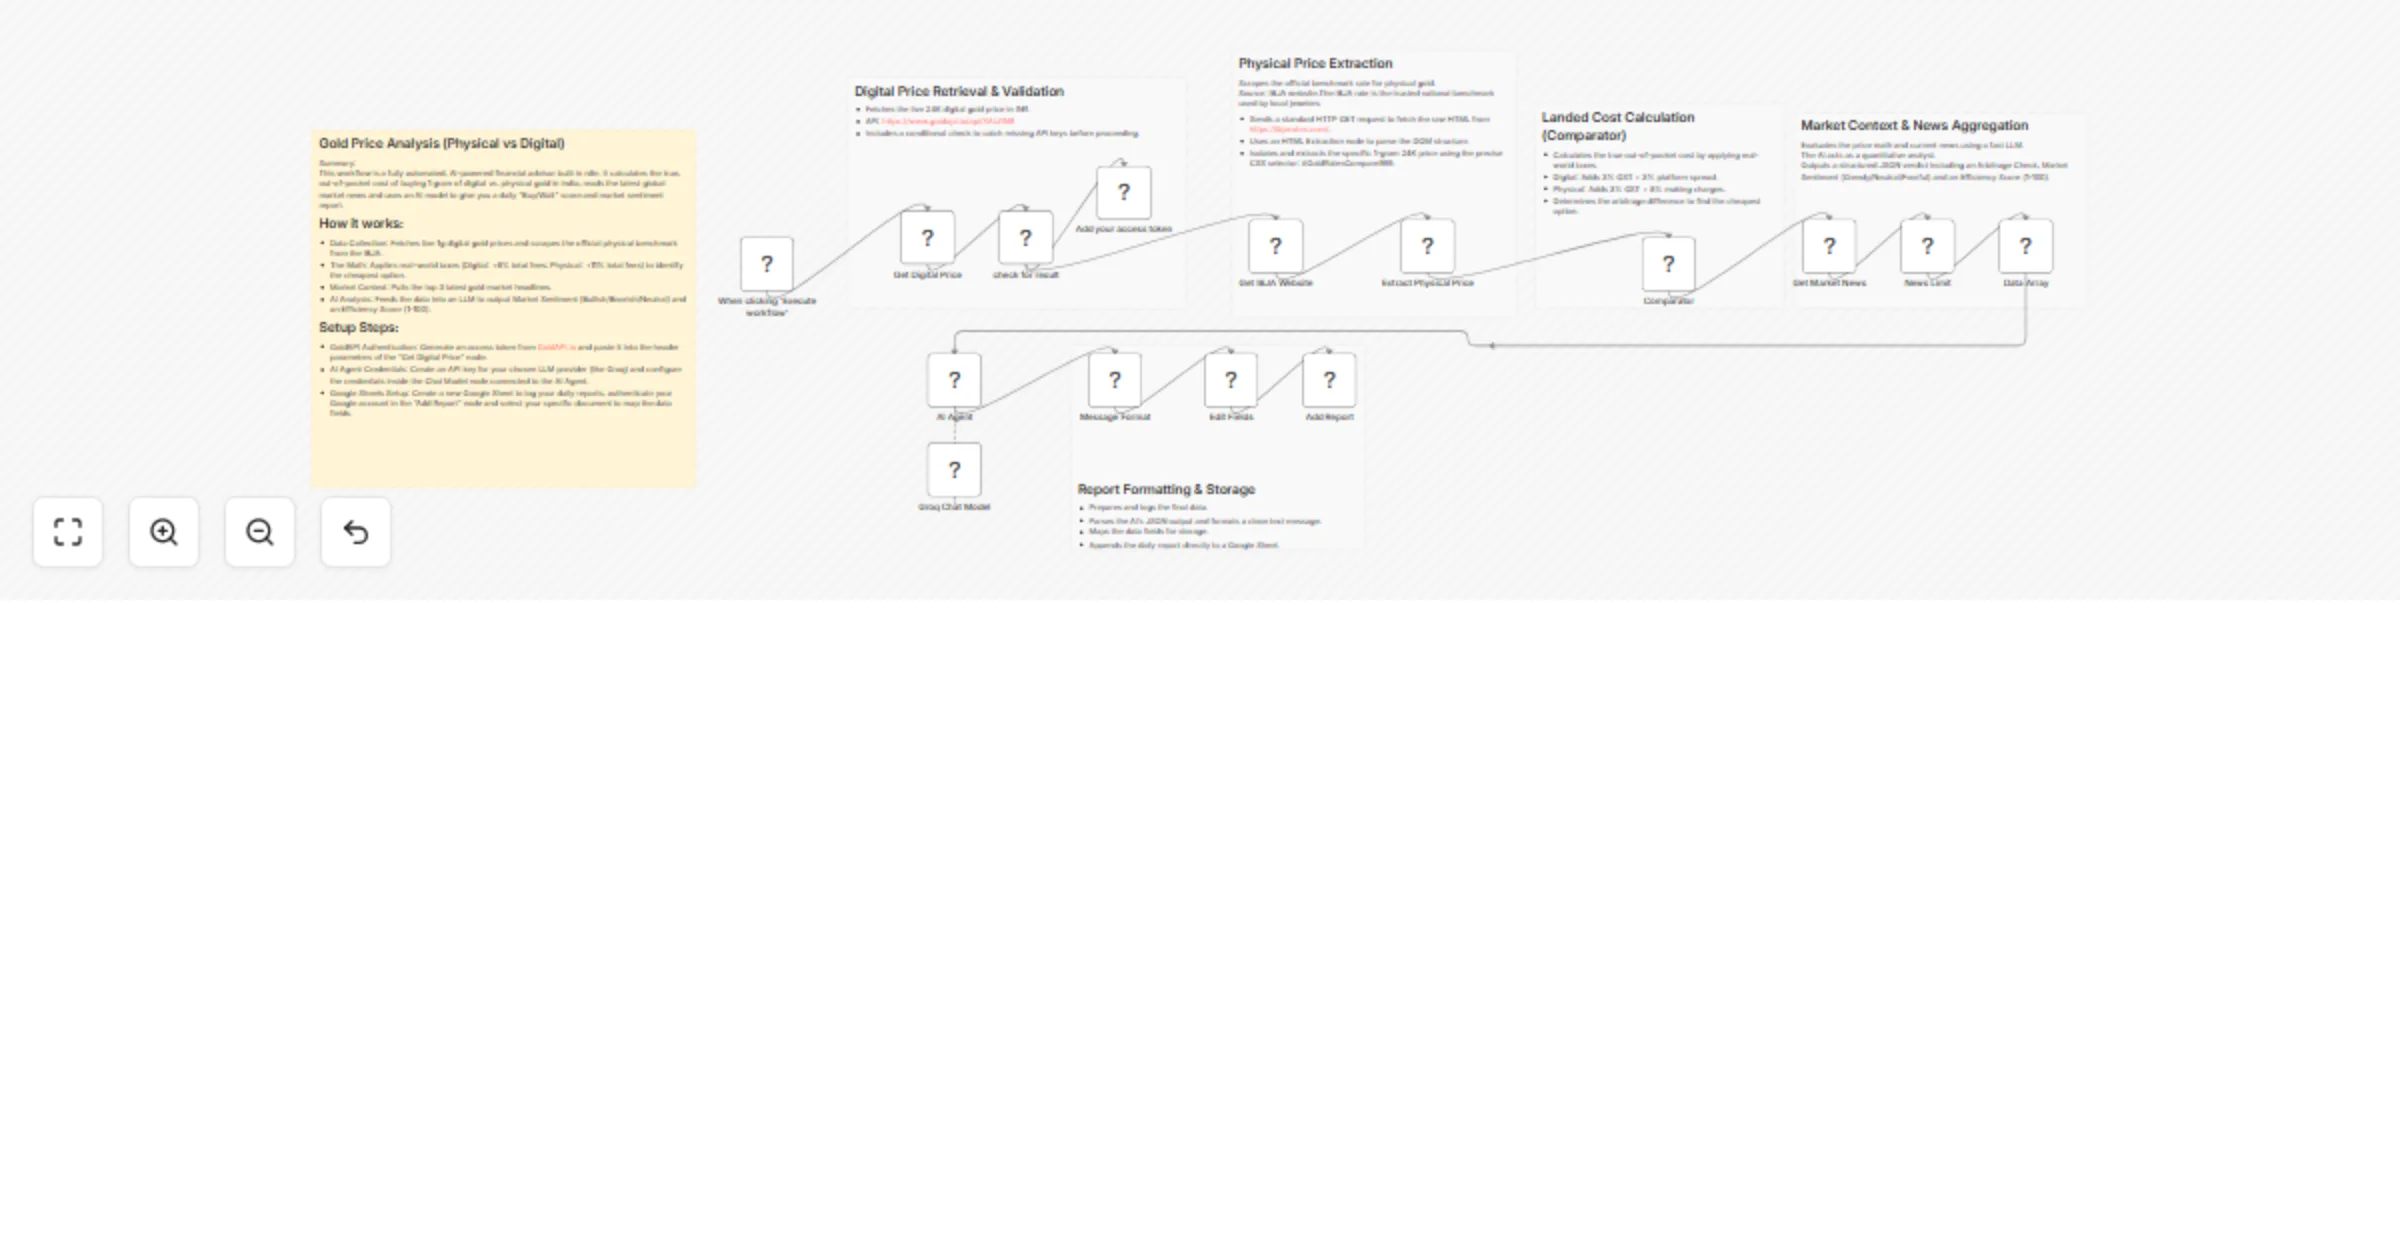
Gold Investment Intelligence: Physical vs. Digital 24K Cost & Return Analysis This high performance n8n workflow auto...
Track and analyze Google Sheets expenses with Gemini and Gmail alerts
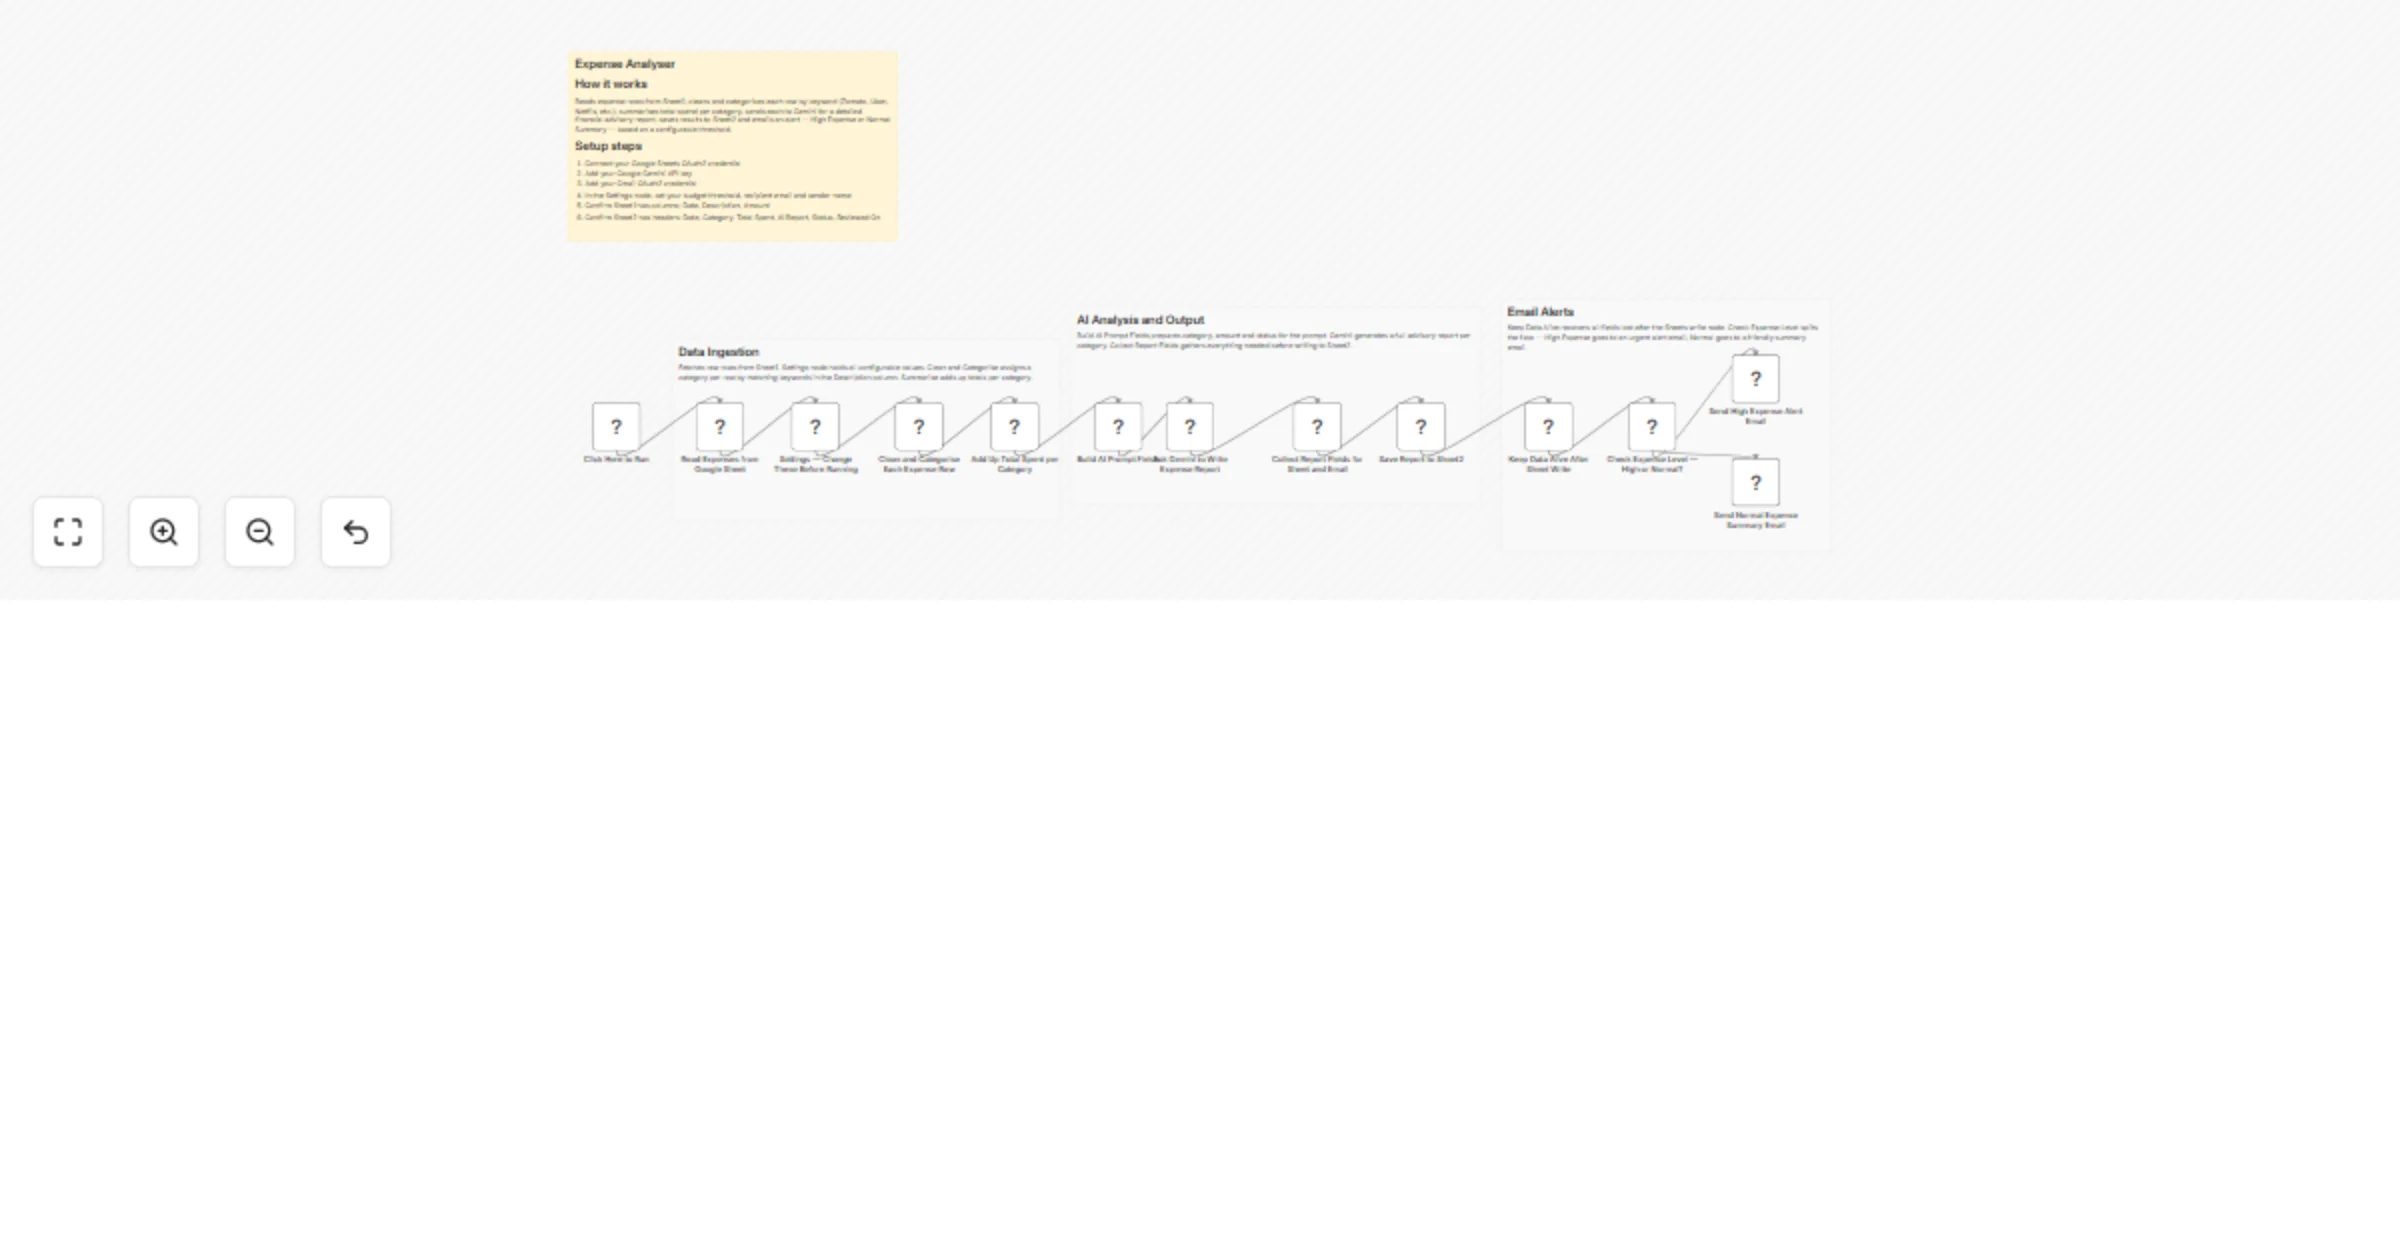
Expense Leak Detector Smart Expense Monitoring in Minutes This n8n workflow reads your expenses from Google Sheets, c...
Analyze real estate RSS deals with Groq, Google Sheets and Gmail
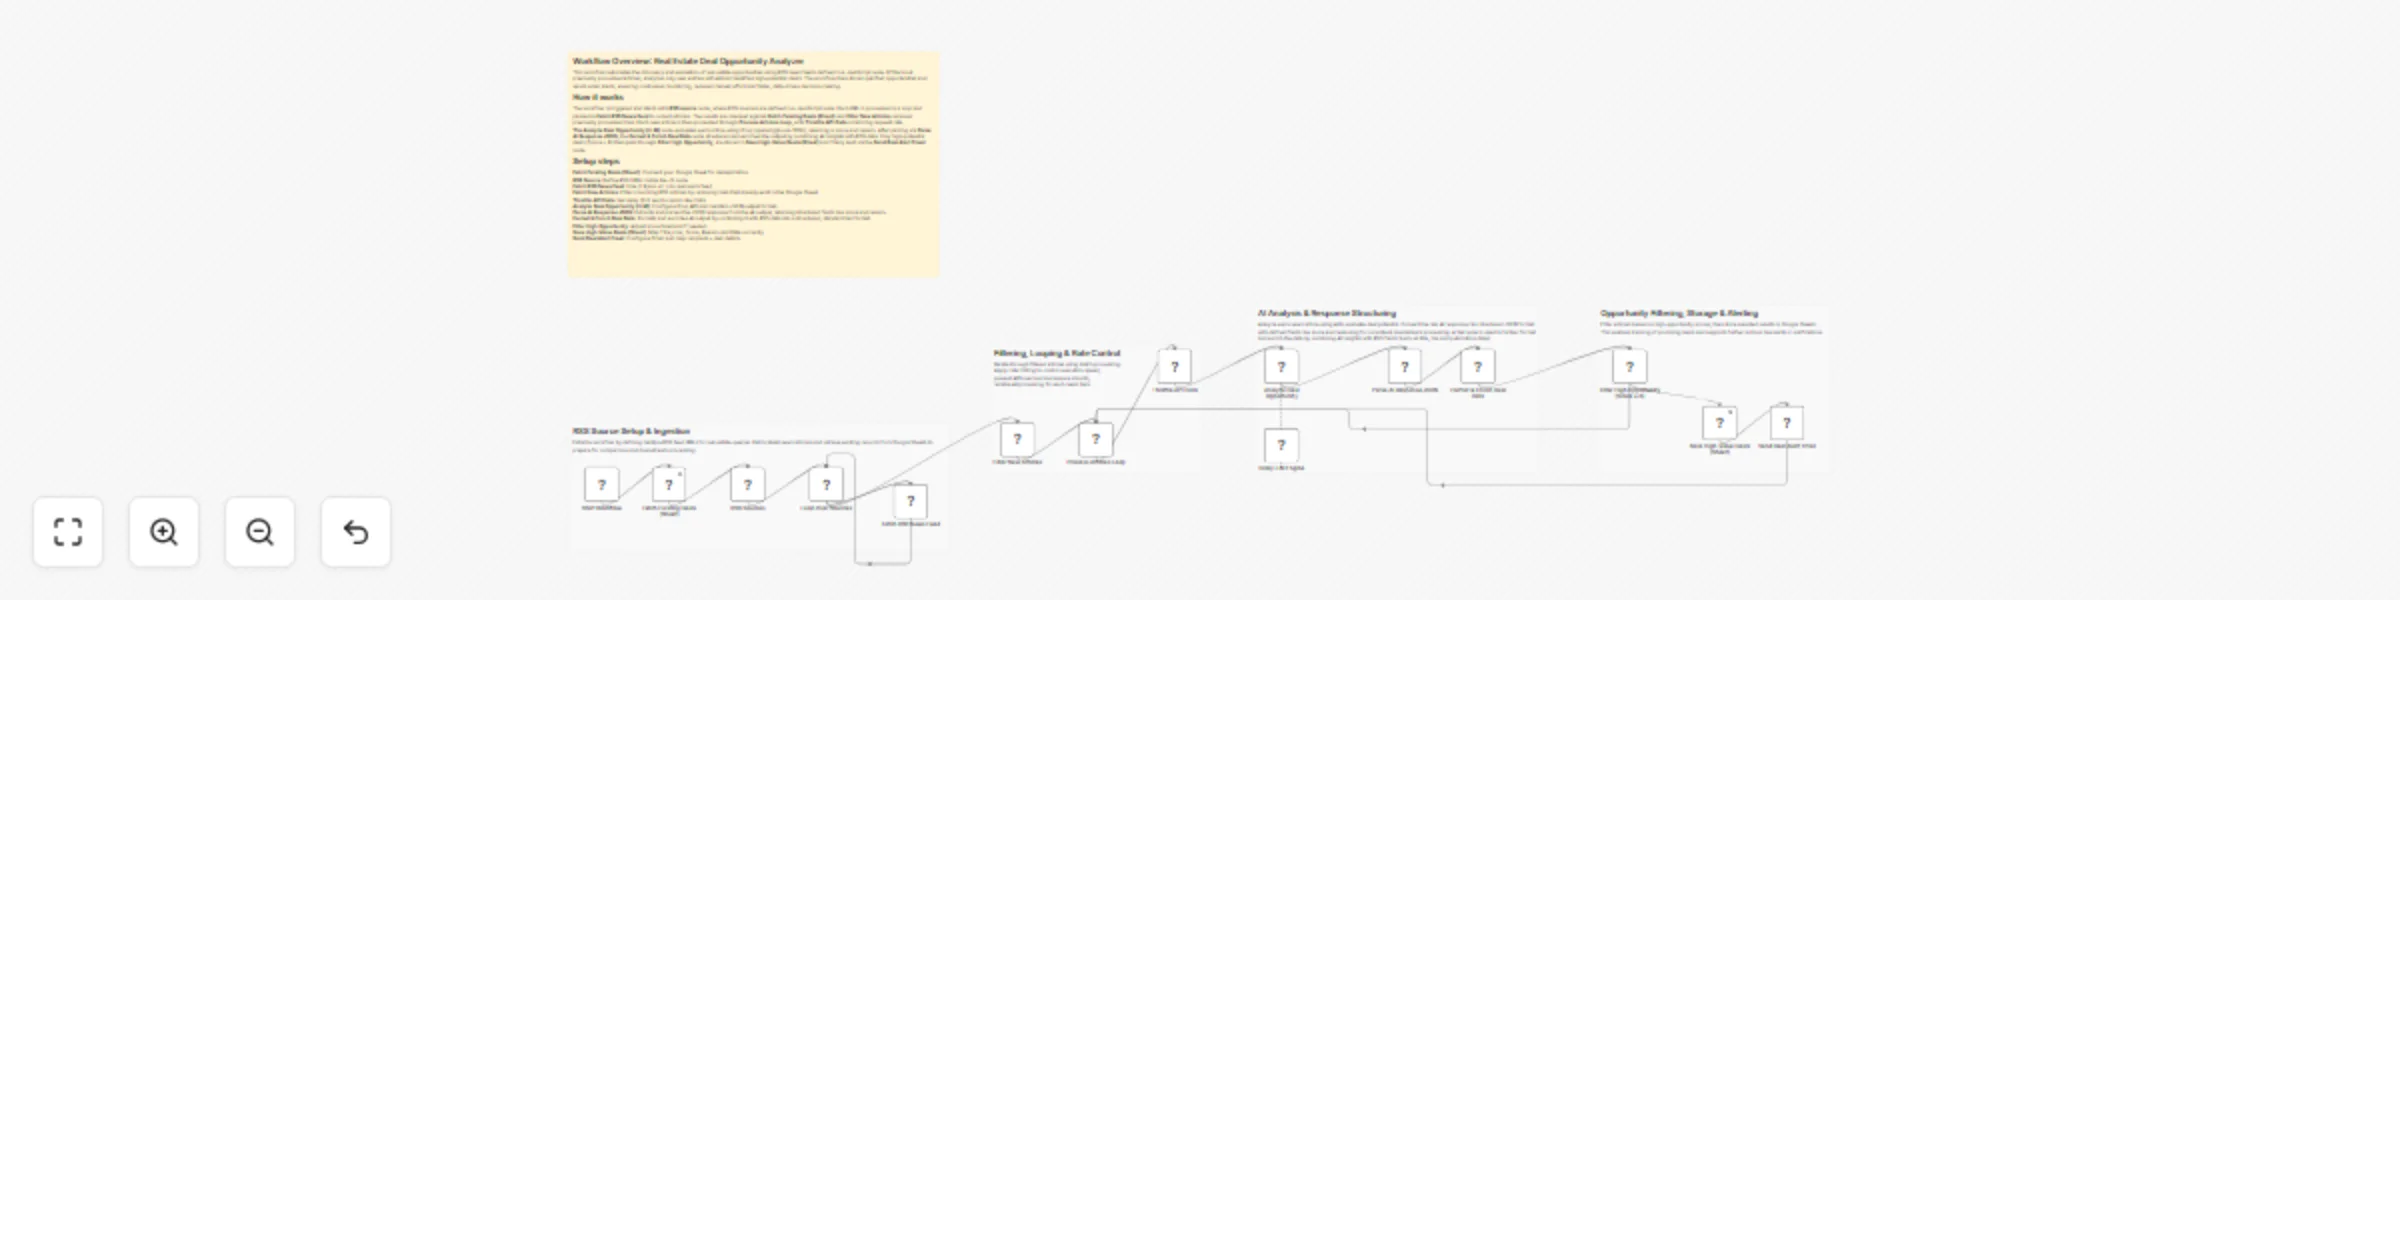
Real Estate News RSS to AI Deal Analyzer This workflow acts as a 24/7 digital real estate scout. It automatically mon...
Generate Indian stock investment ideas using Groq AI, Google Sheets and stock API
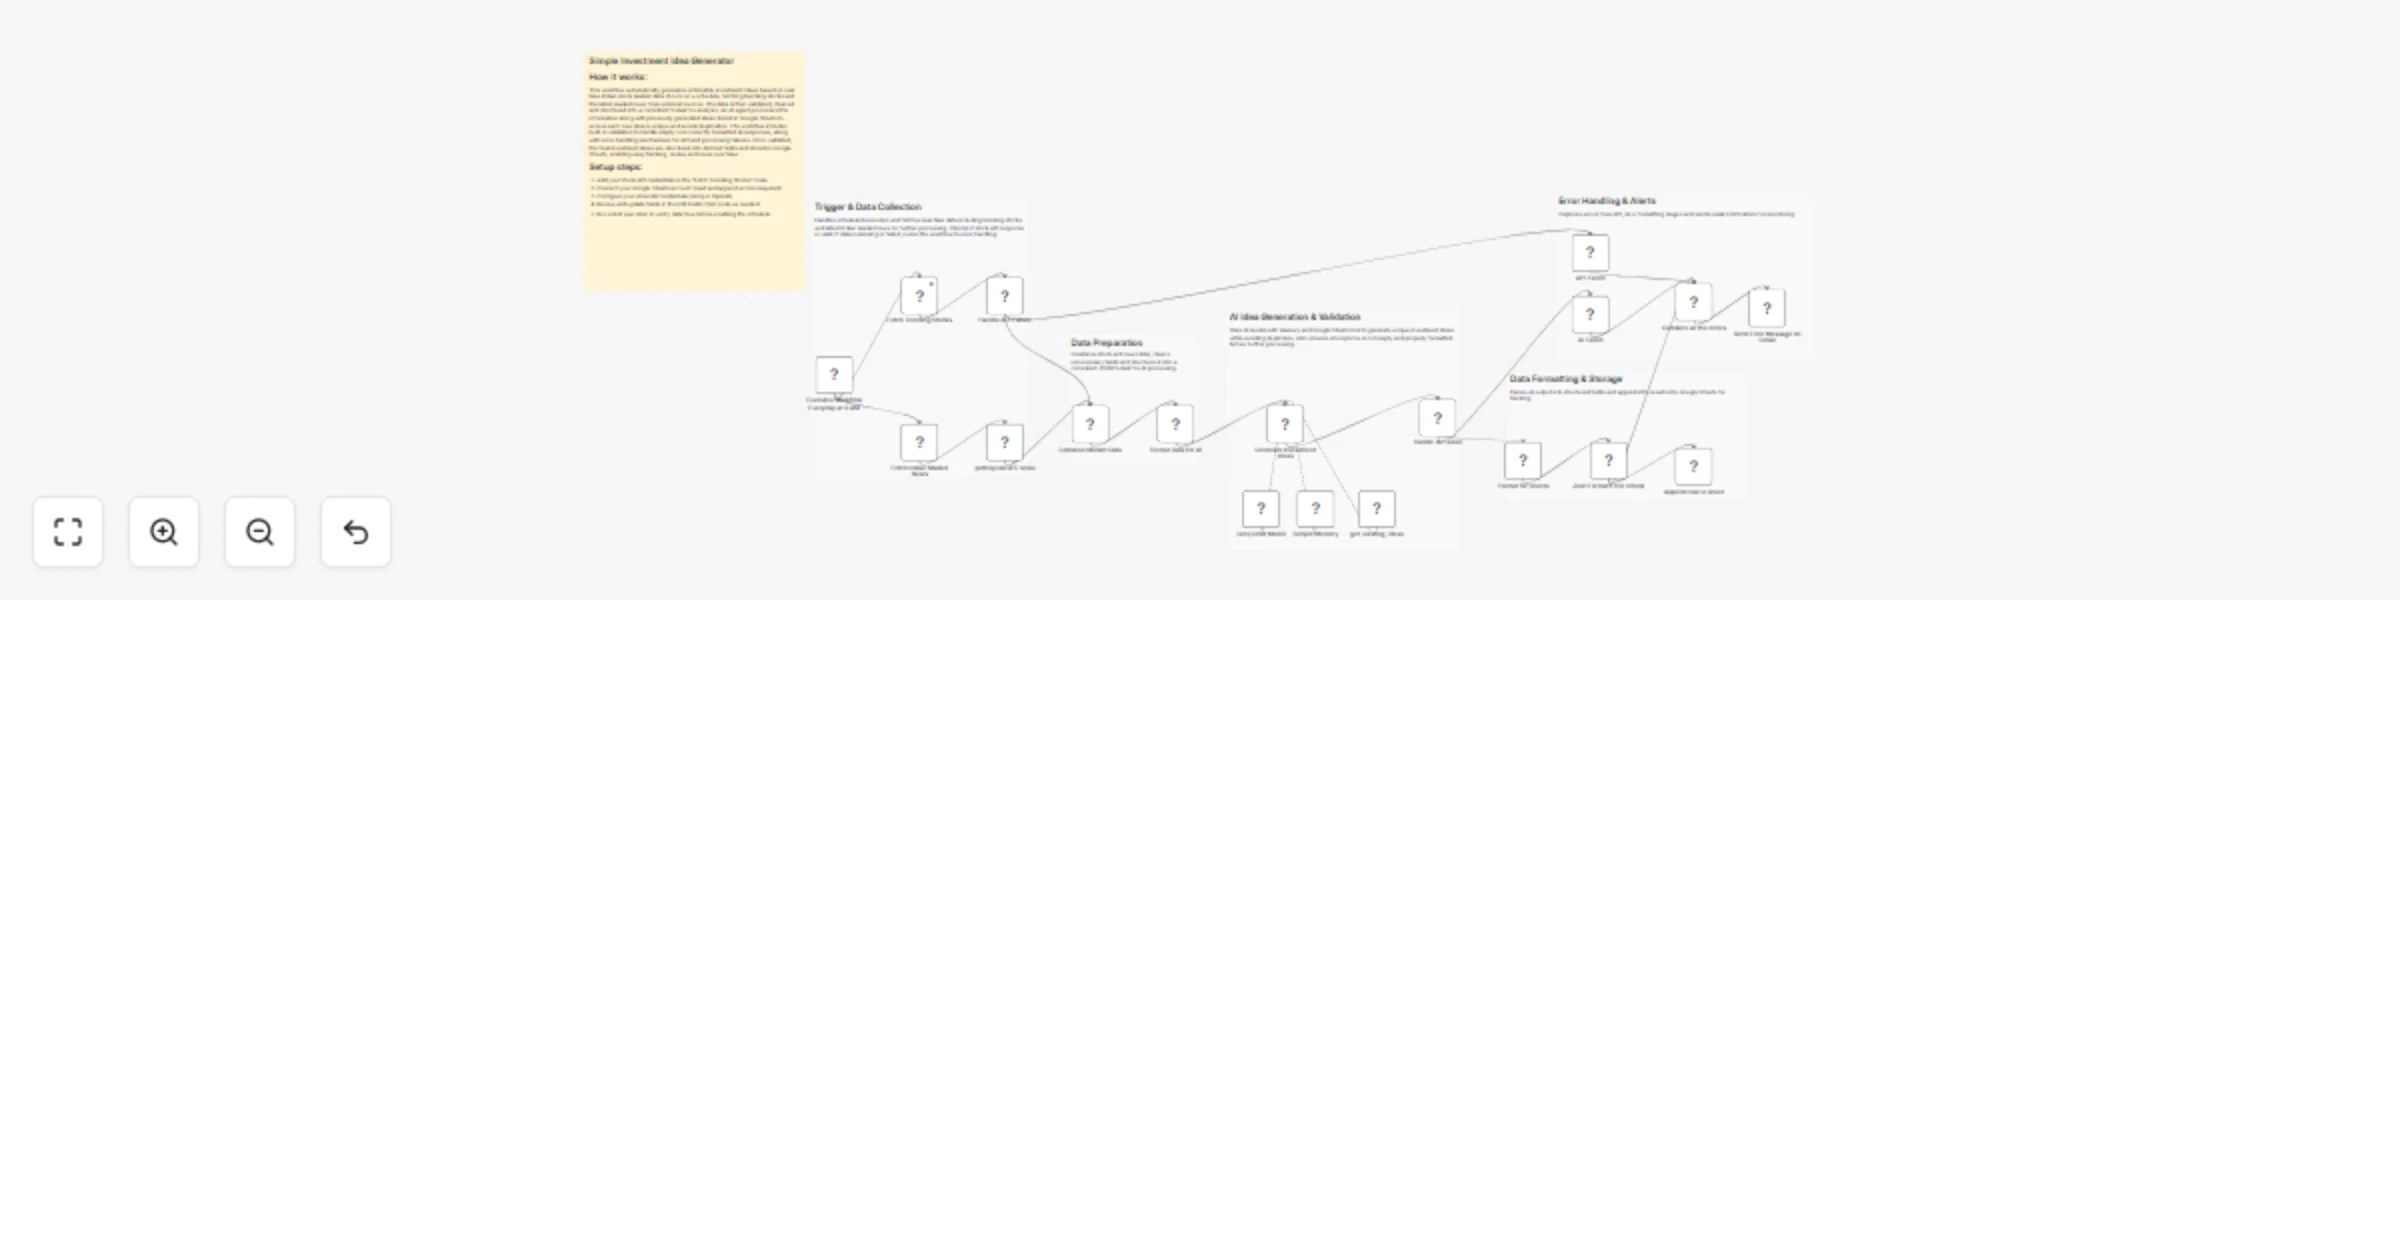
AI Investment Idea Generator using n8n, Groq AI, Google Sheets & Stock API This workflow automatically generates 2–3...
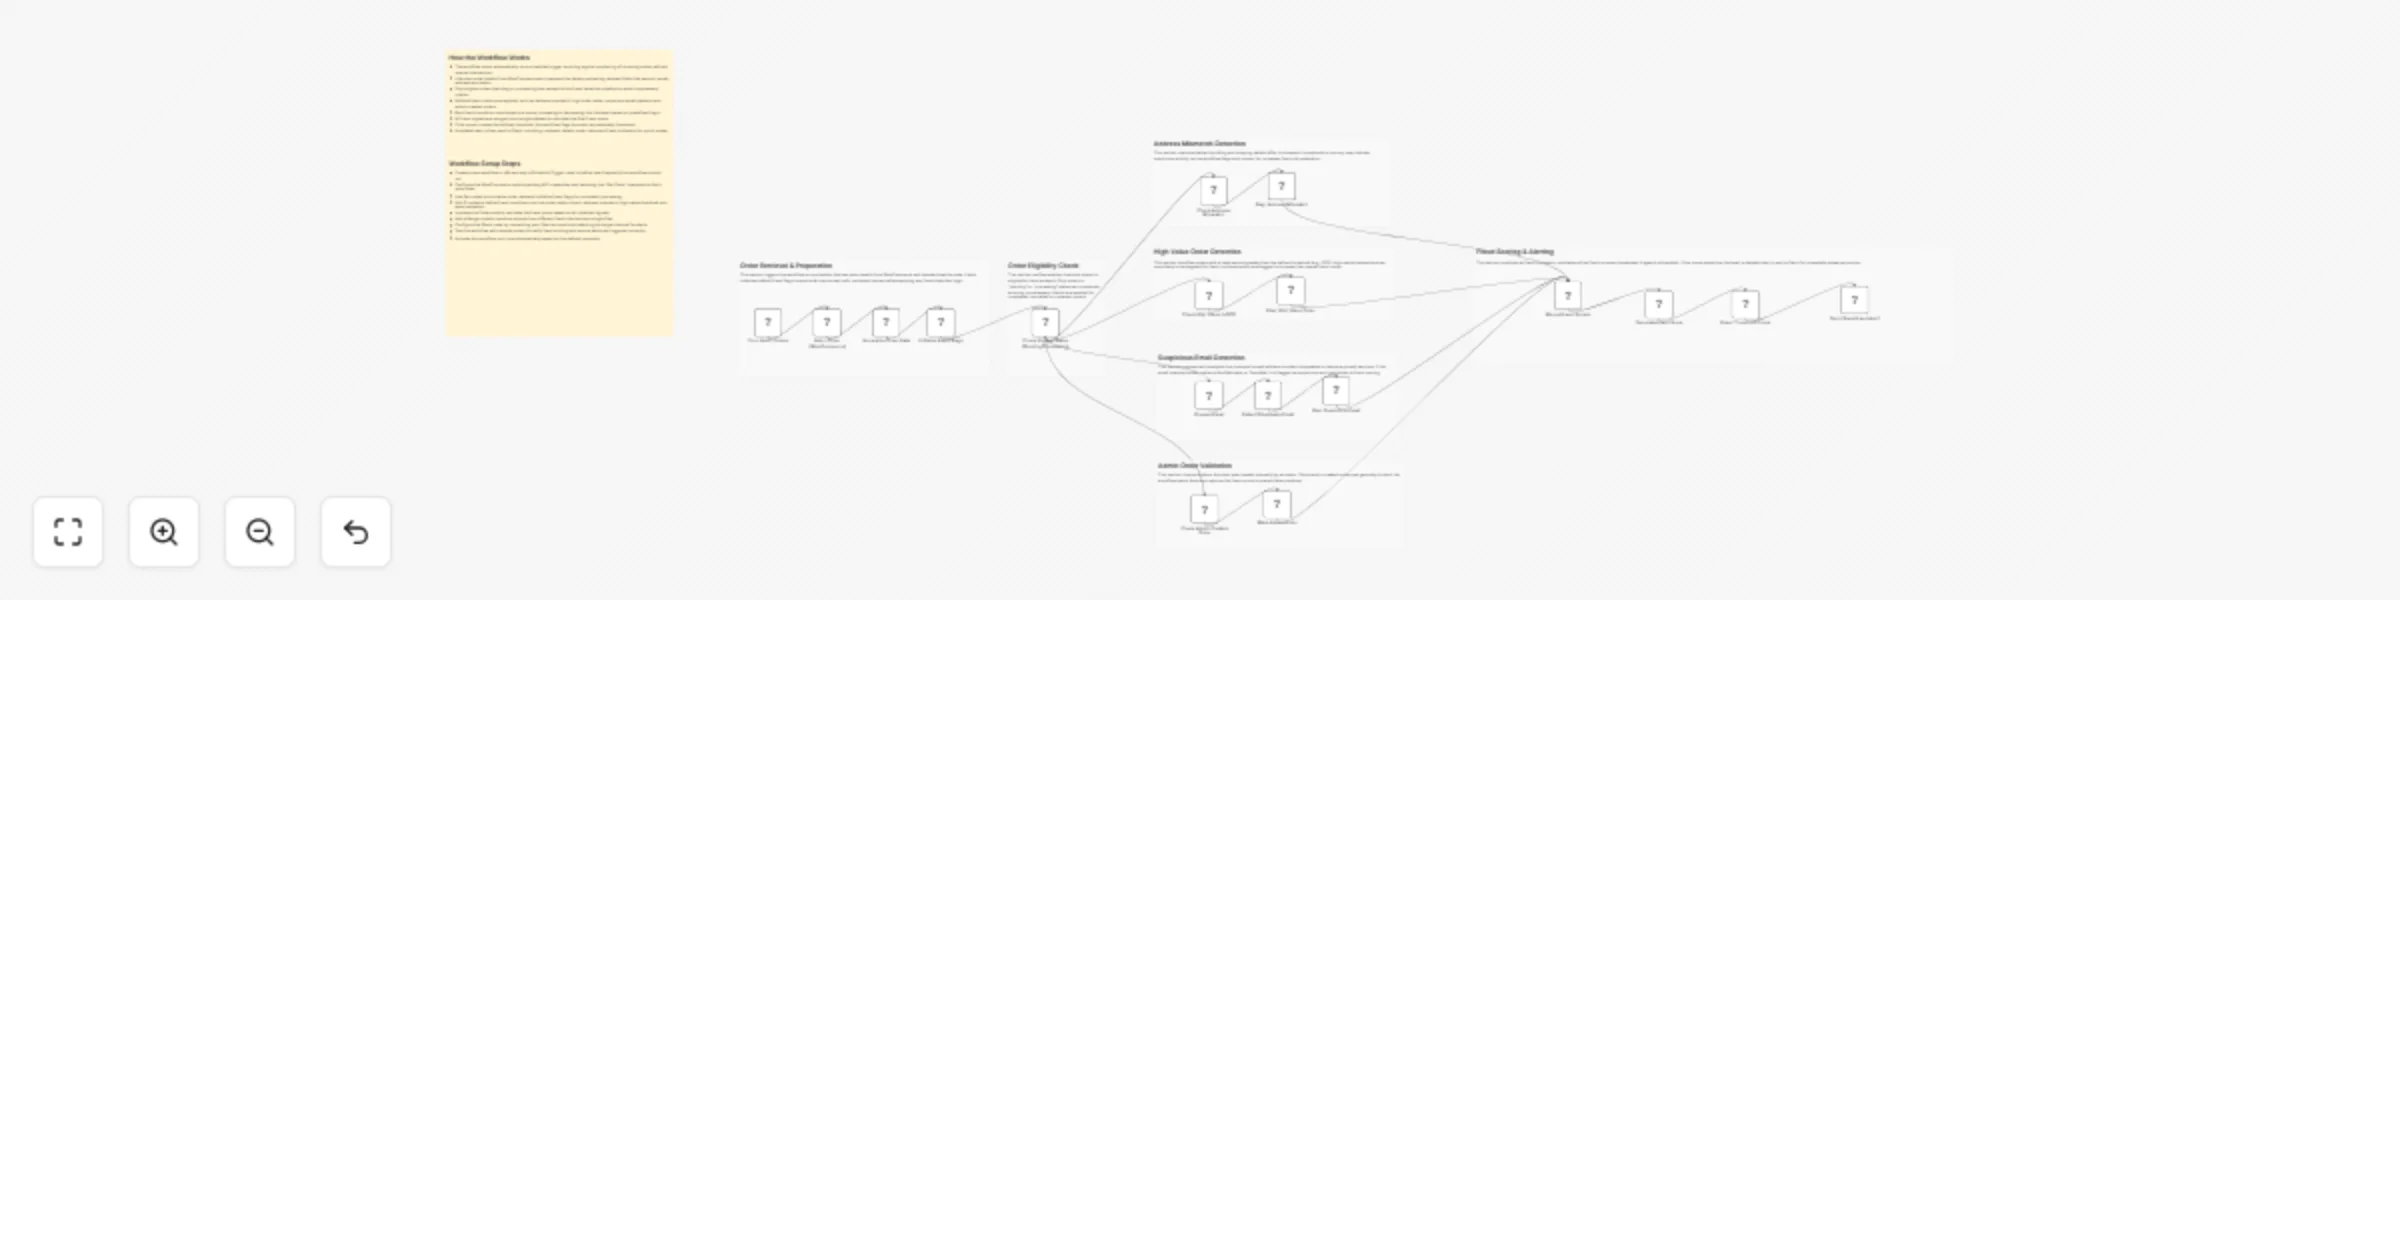
Detect WooCommerce order fraud and send alerts to Slack
WooCommerce Fraud Detection & Slack Alert Workflow This workflow automatically monitors WooCommerce orders, evaluates...
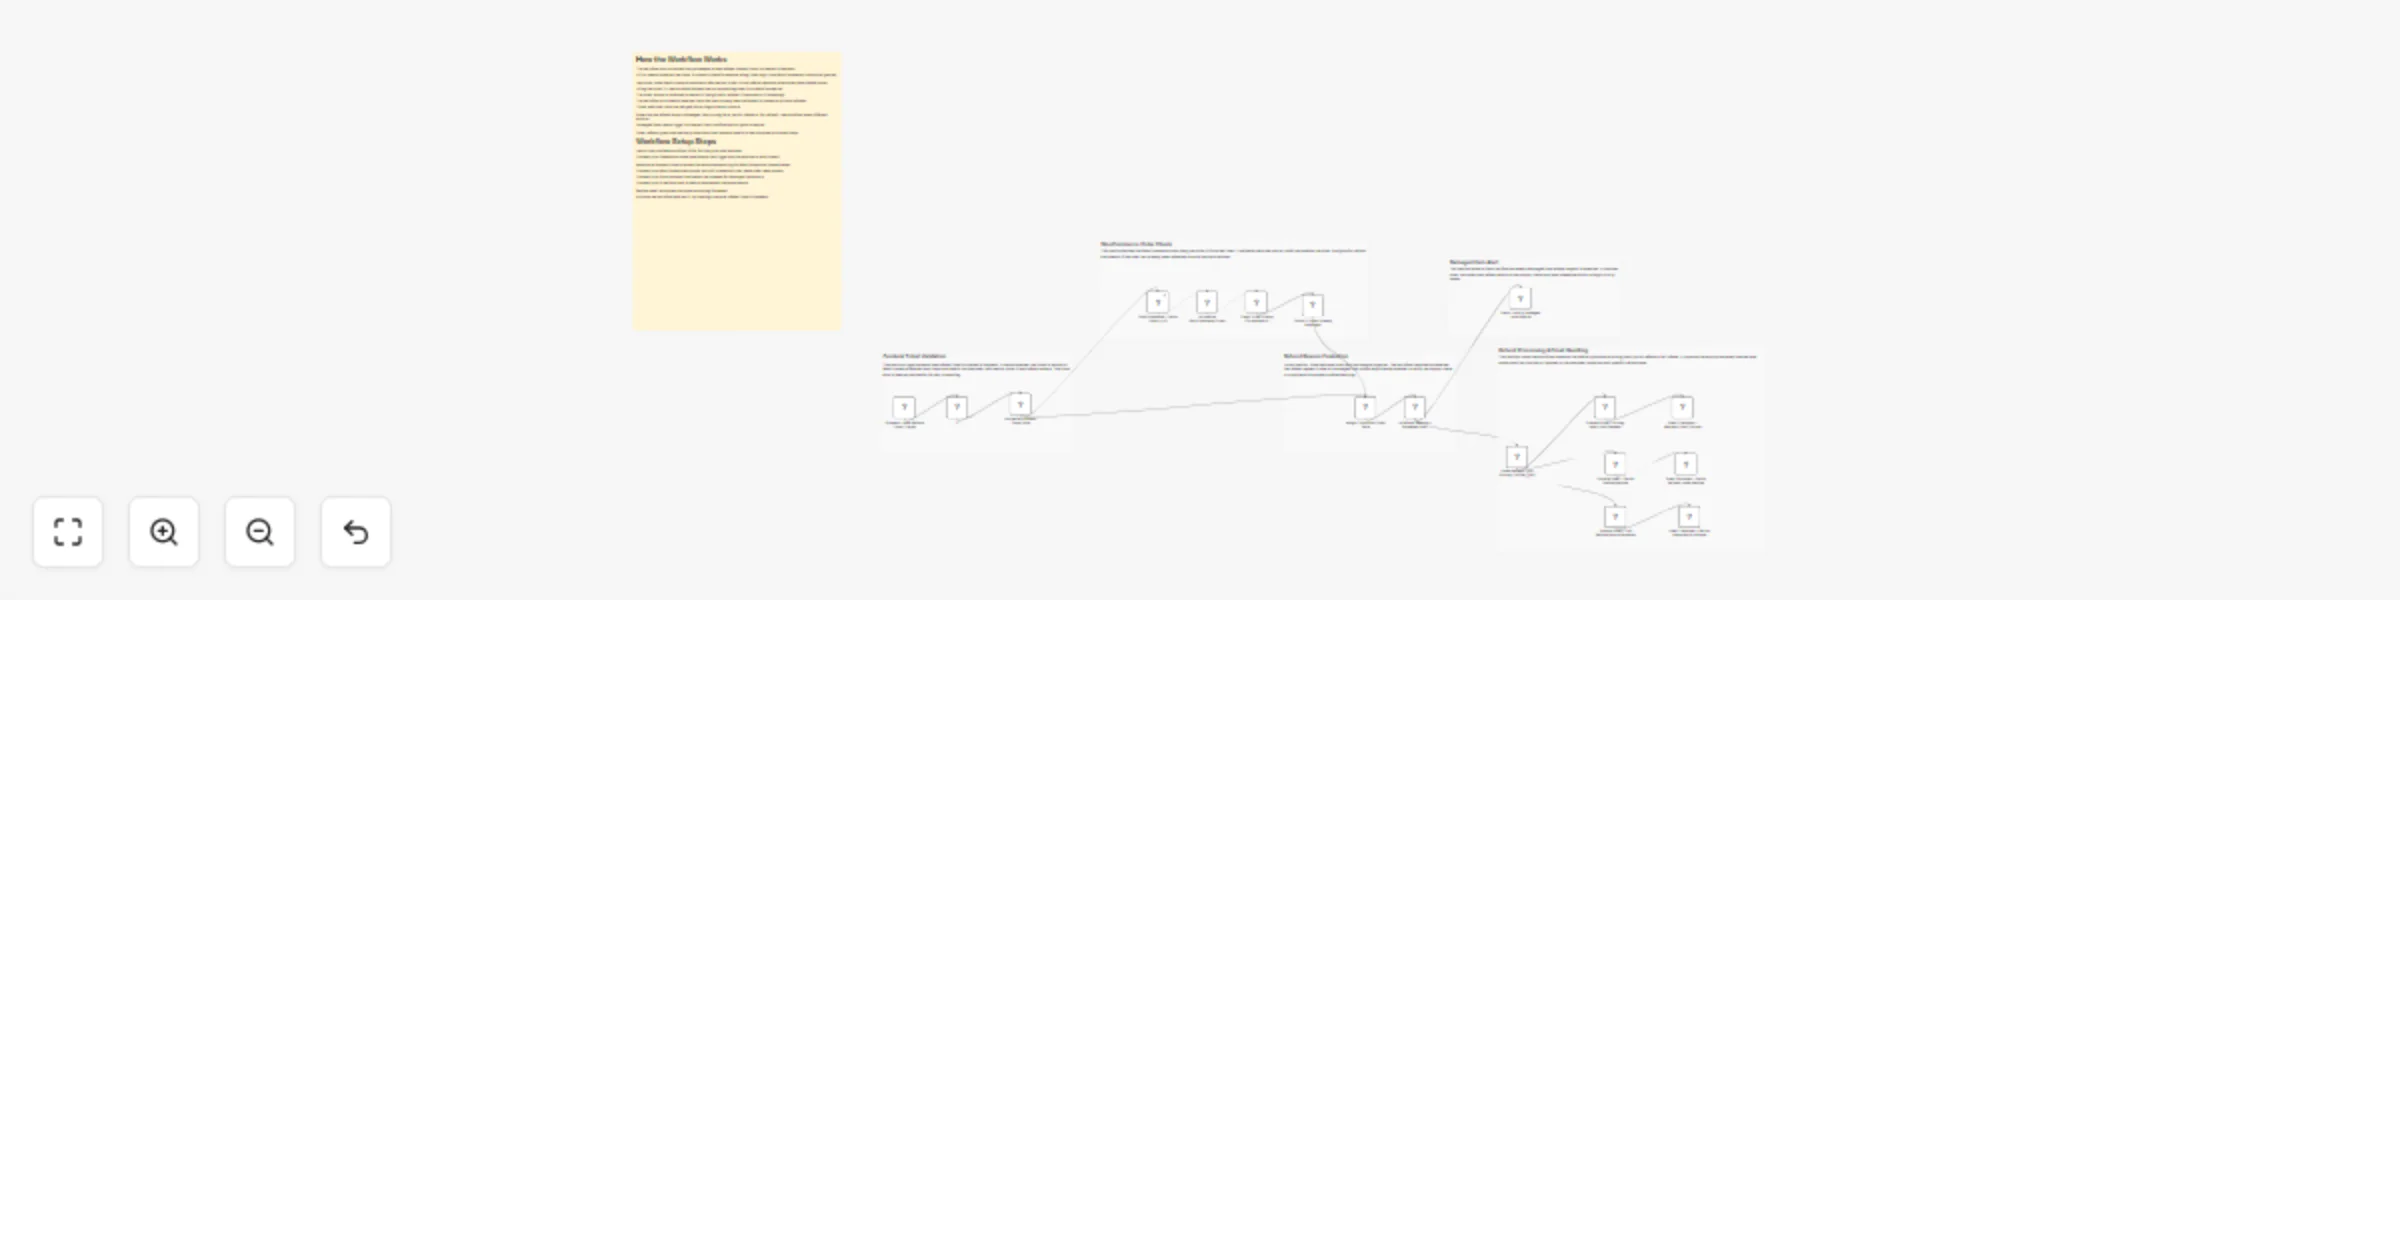
Handle Zendesk WooCommerce refund tickets with Slack and Gmail
Zendesk Refund Ticket Automation with WooCommerce Order Lookup, Slack Alerts & Gmail Emails This workflow automatical...
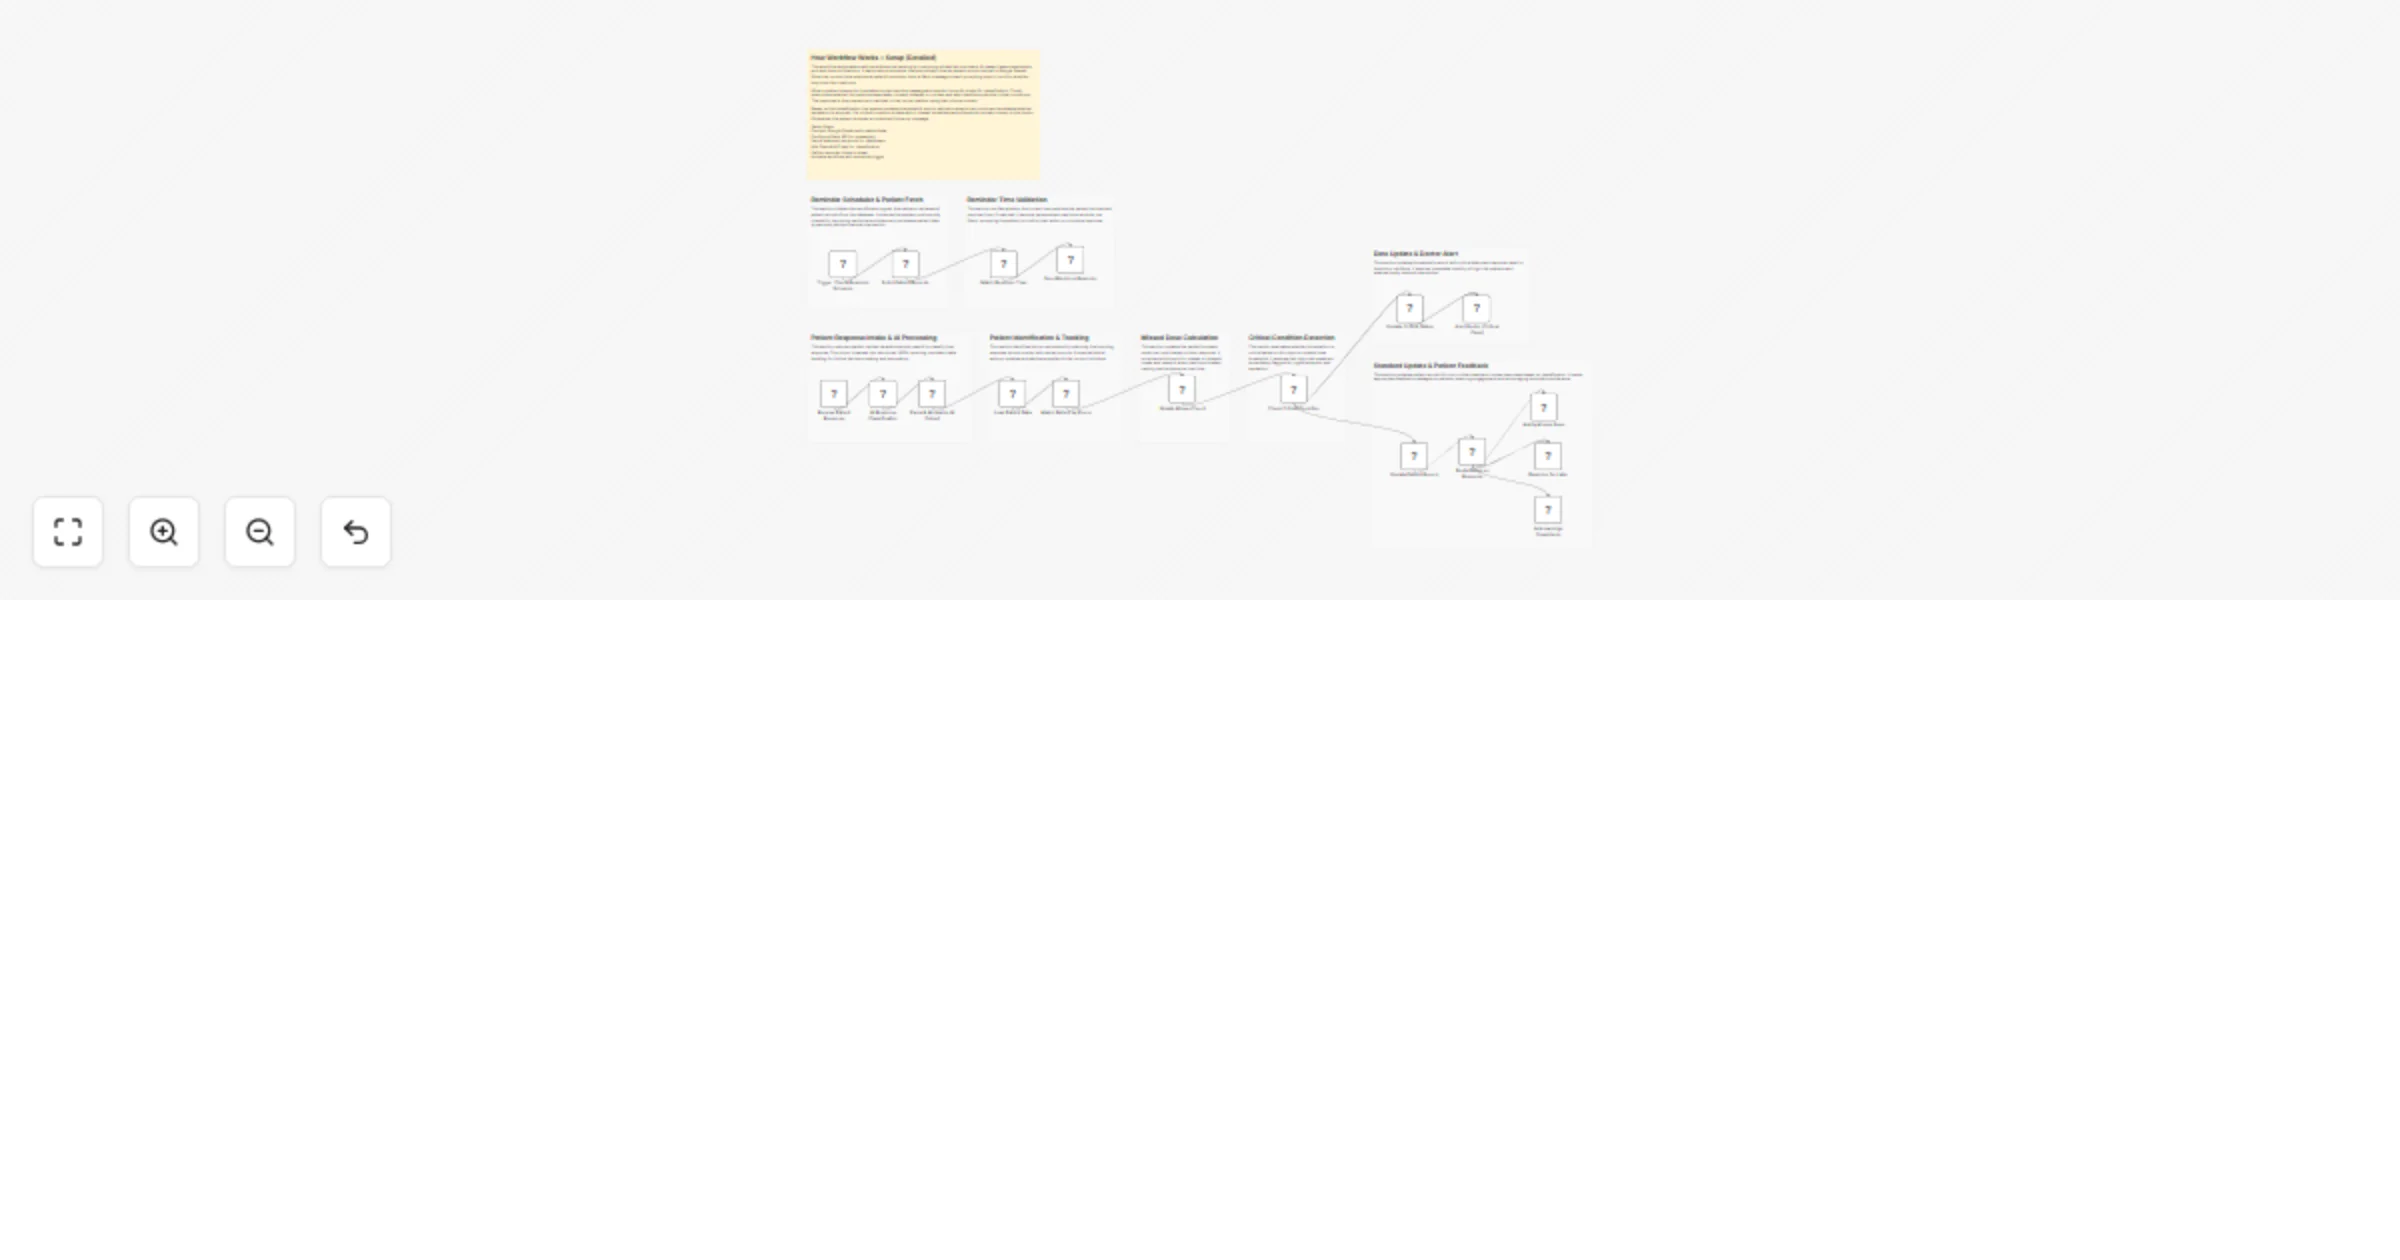
Track medicine adherence and monitor patients with Google Sheets, OpenAI and Slack
🩺 AI Powered Medicine Reminder & Patient Monitoring Workflow (n8n + Google Sheets + OpenAI + Slack) This workflow au...
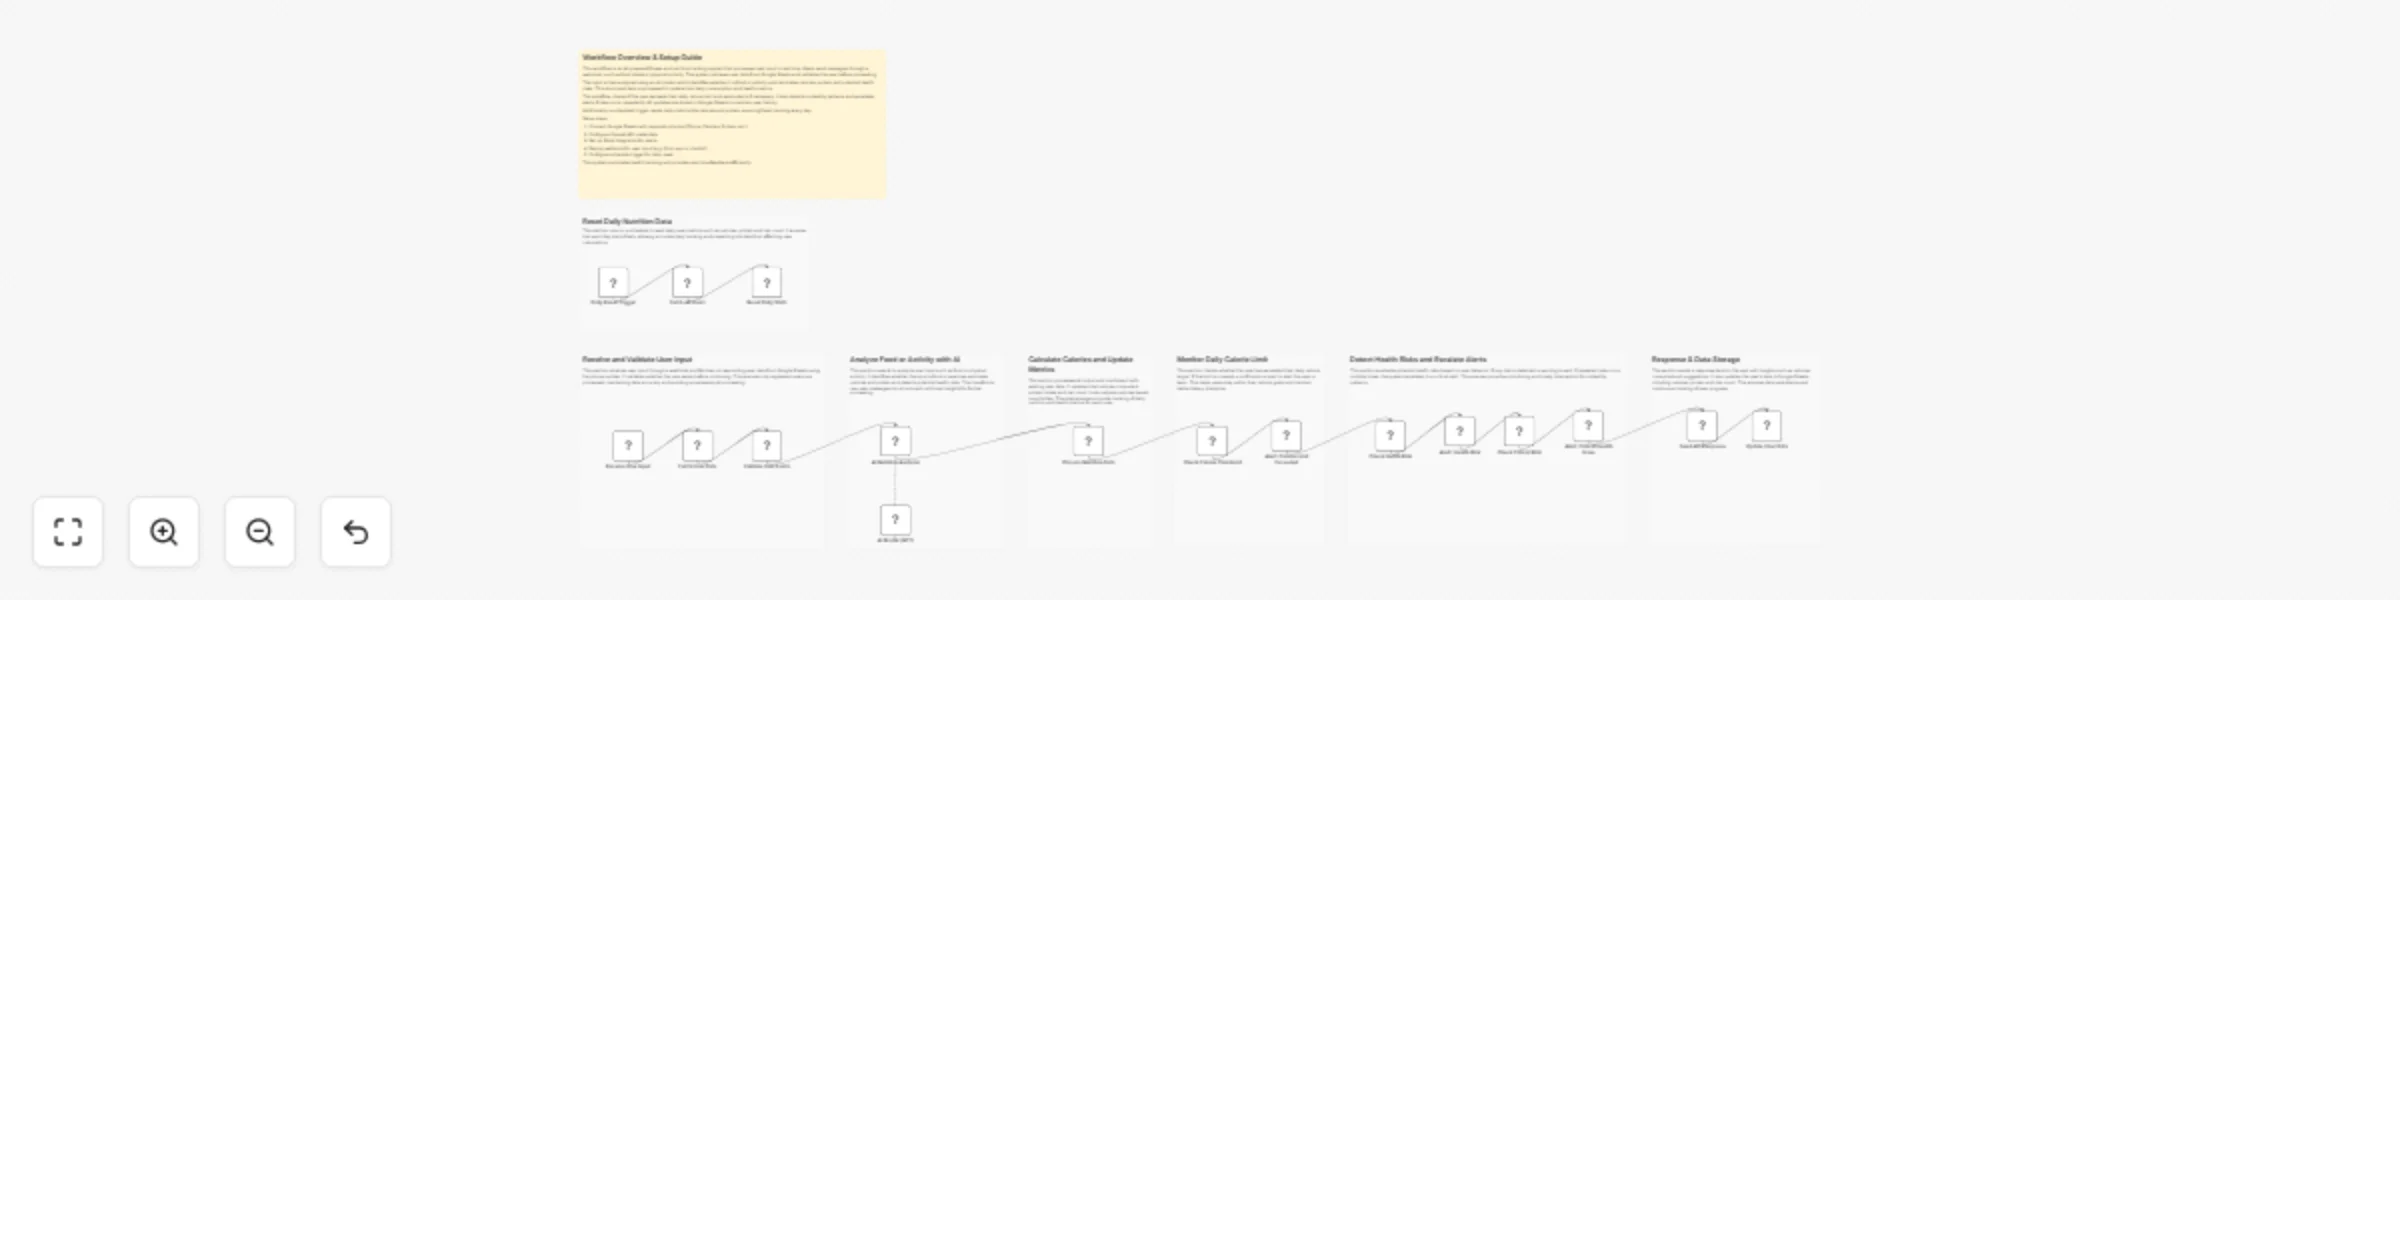
Track nutrition and fitness via webhook with OpenAI, Google Sheets and Slack alerts
AI Nutrition Tracker with Webhook, OpenAI, Google Sheets & Slack Alerts This workflow is an AI powered nutrition and...
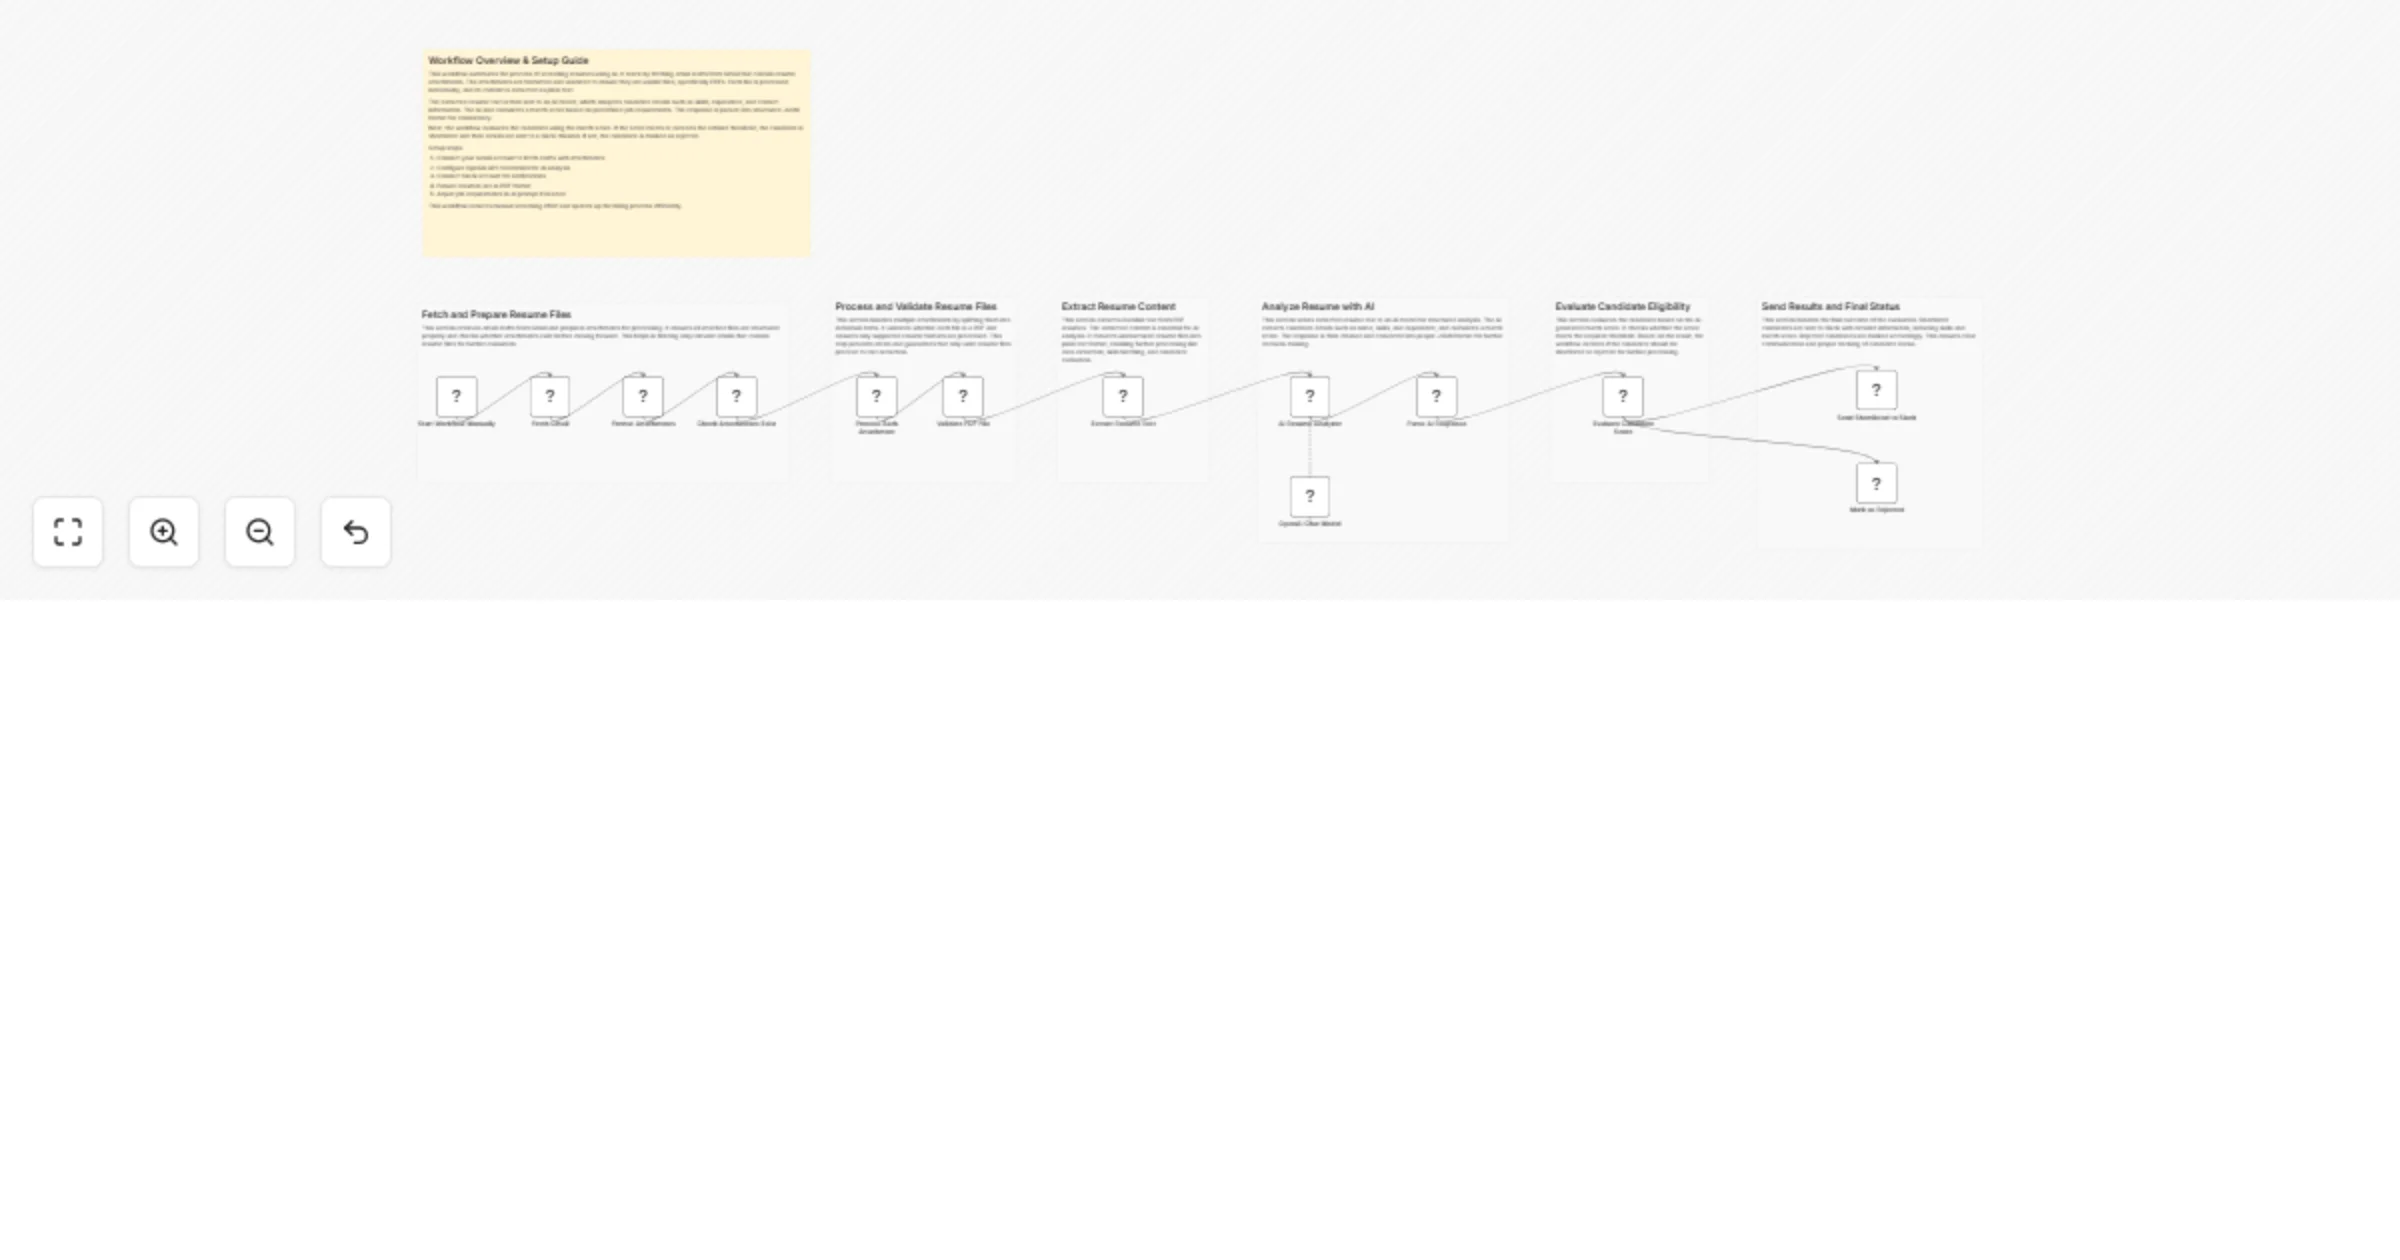
Screen resumes with GPT-4 Turbo from Gmail and send shortlisted to Slack
AI Resume Screening Workflow using Gmail, OpenAI (GPT 4 Turbo) & Slack This workflow automatically fetches resumes fr...
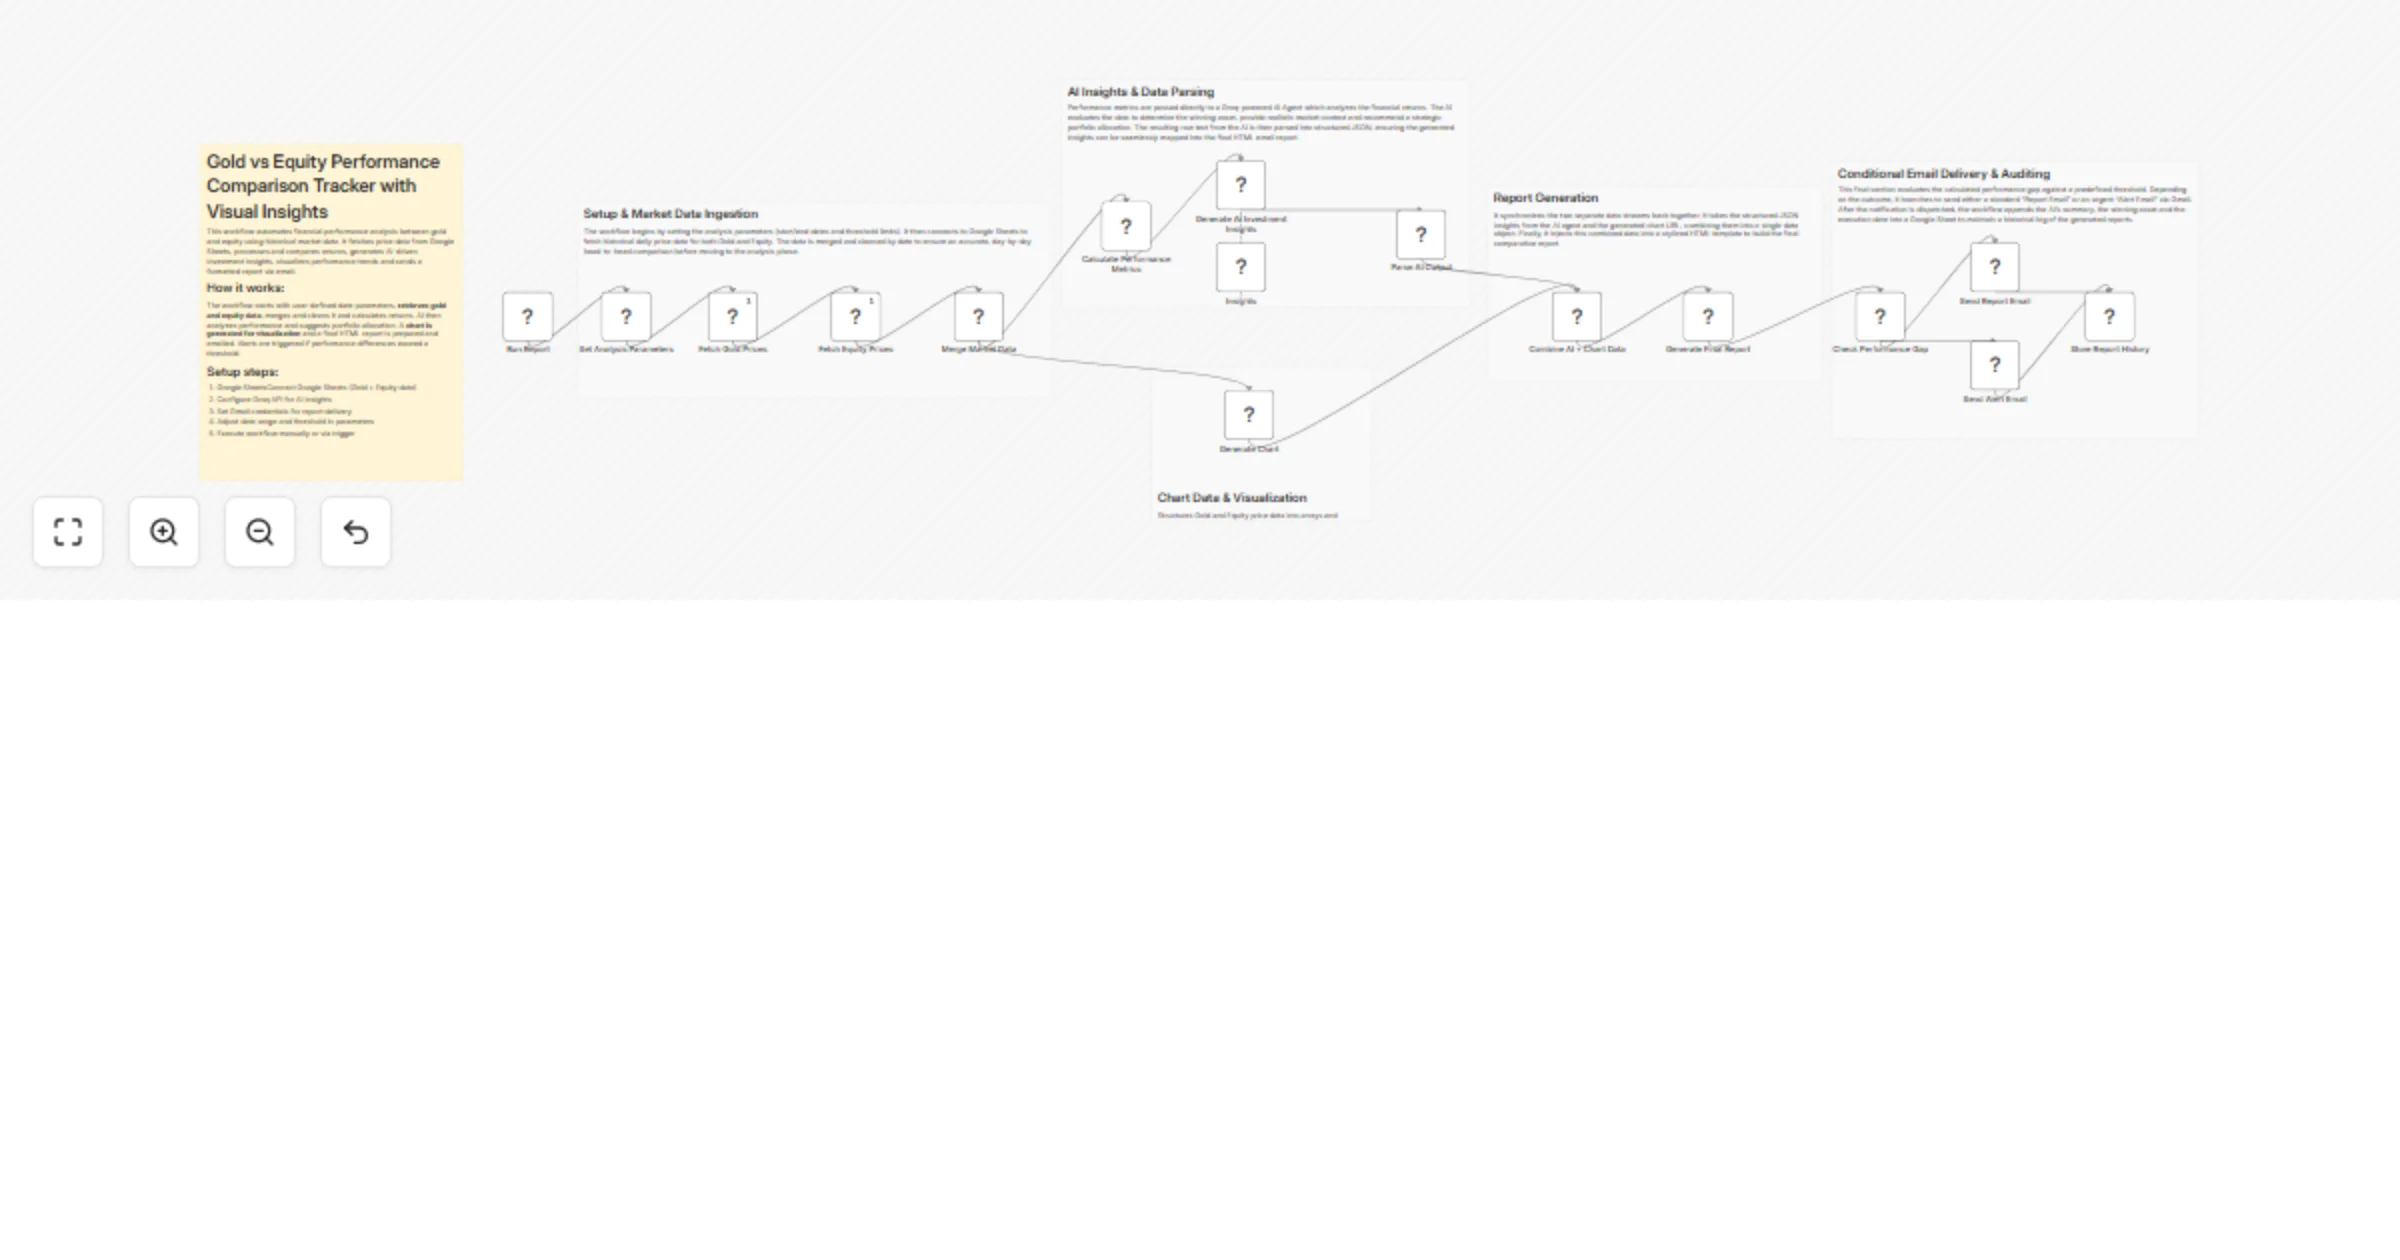
Compare gold and equity performance with Google Sheets, Groq, QuickChart and Gmail
Gold vs Equity Performance Comparison Tracker with Visual Insights This automated n8n workflow evaluates the historic...
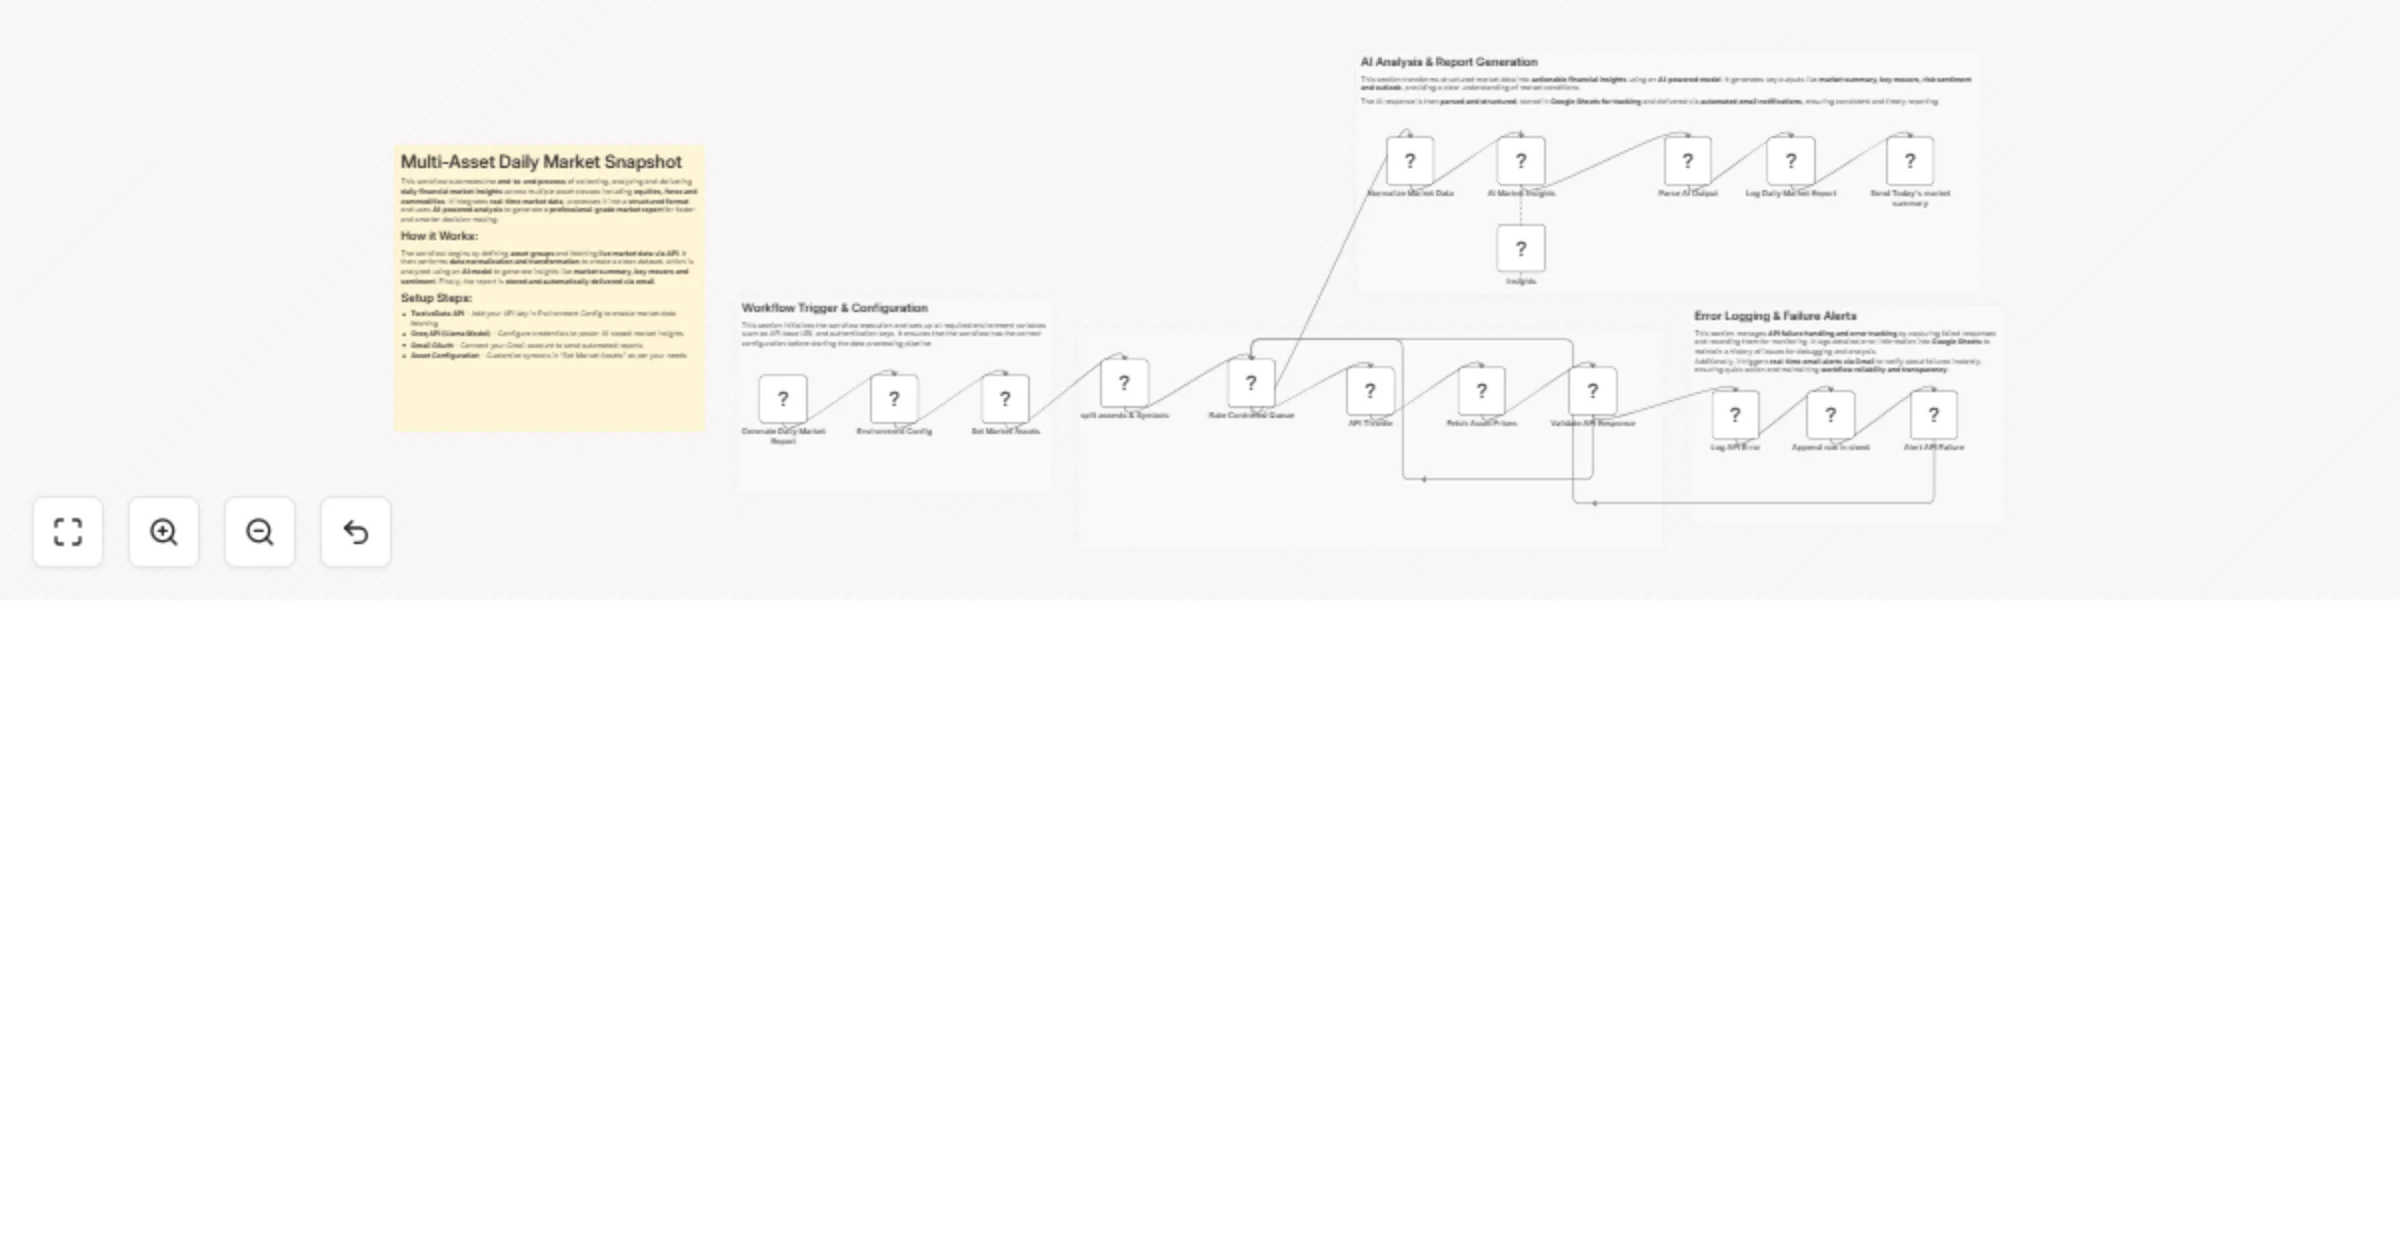
Generate a daily multi-asset market report with TwelveData, Groq and Google Sheets
Multi Asset Daily Market Snapshot This workflow fully automates the creation of a daily multi asset market report. It...
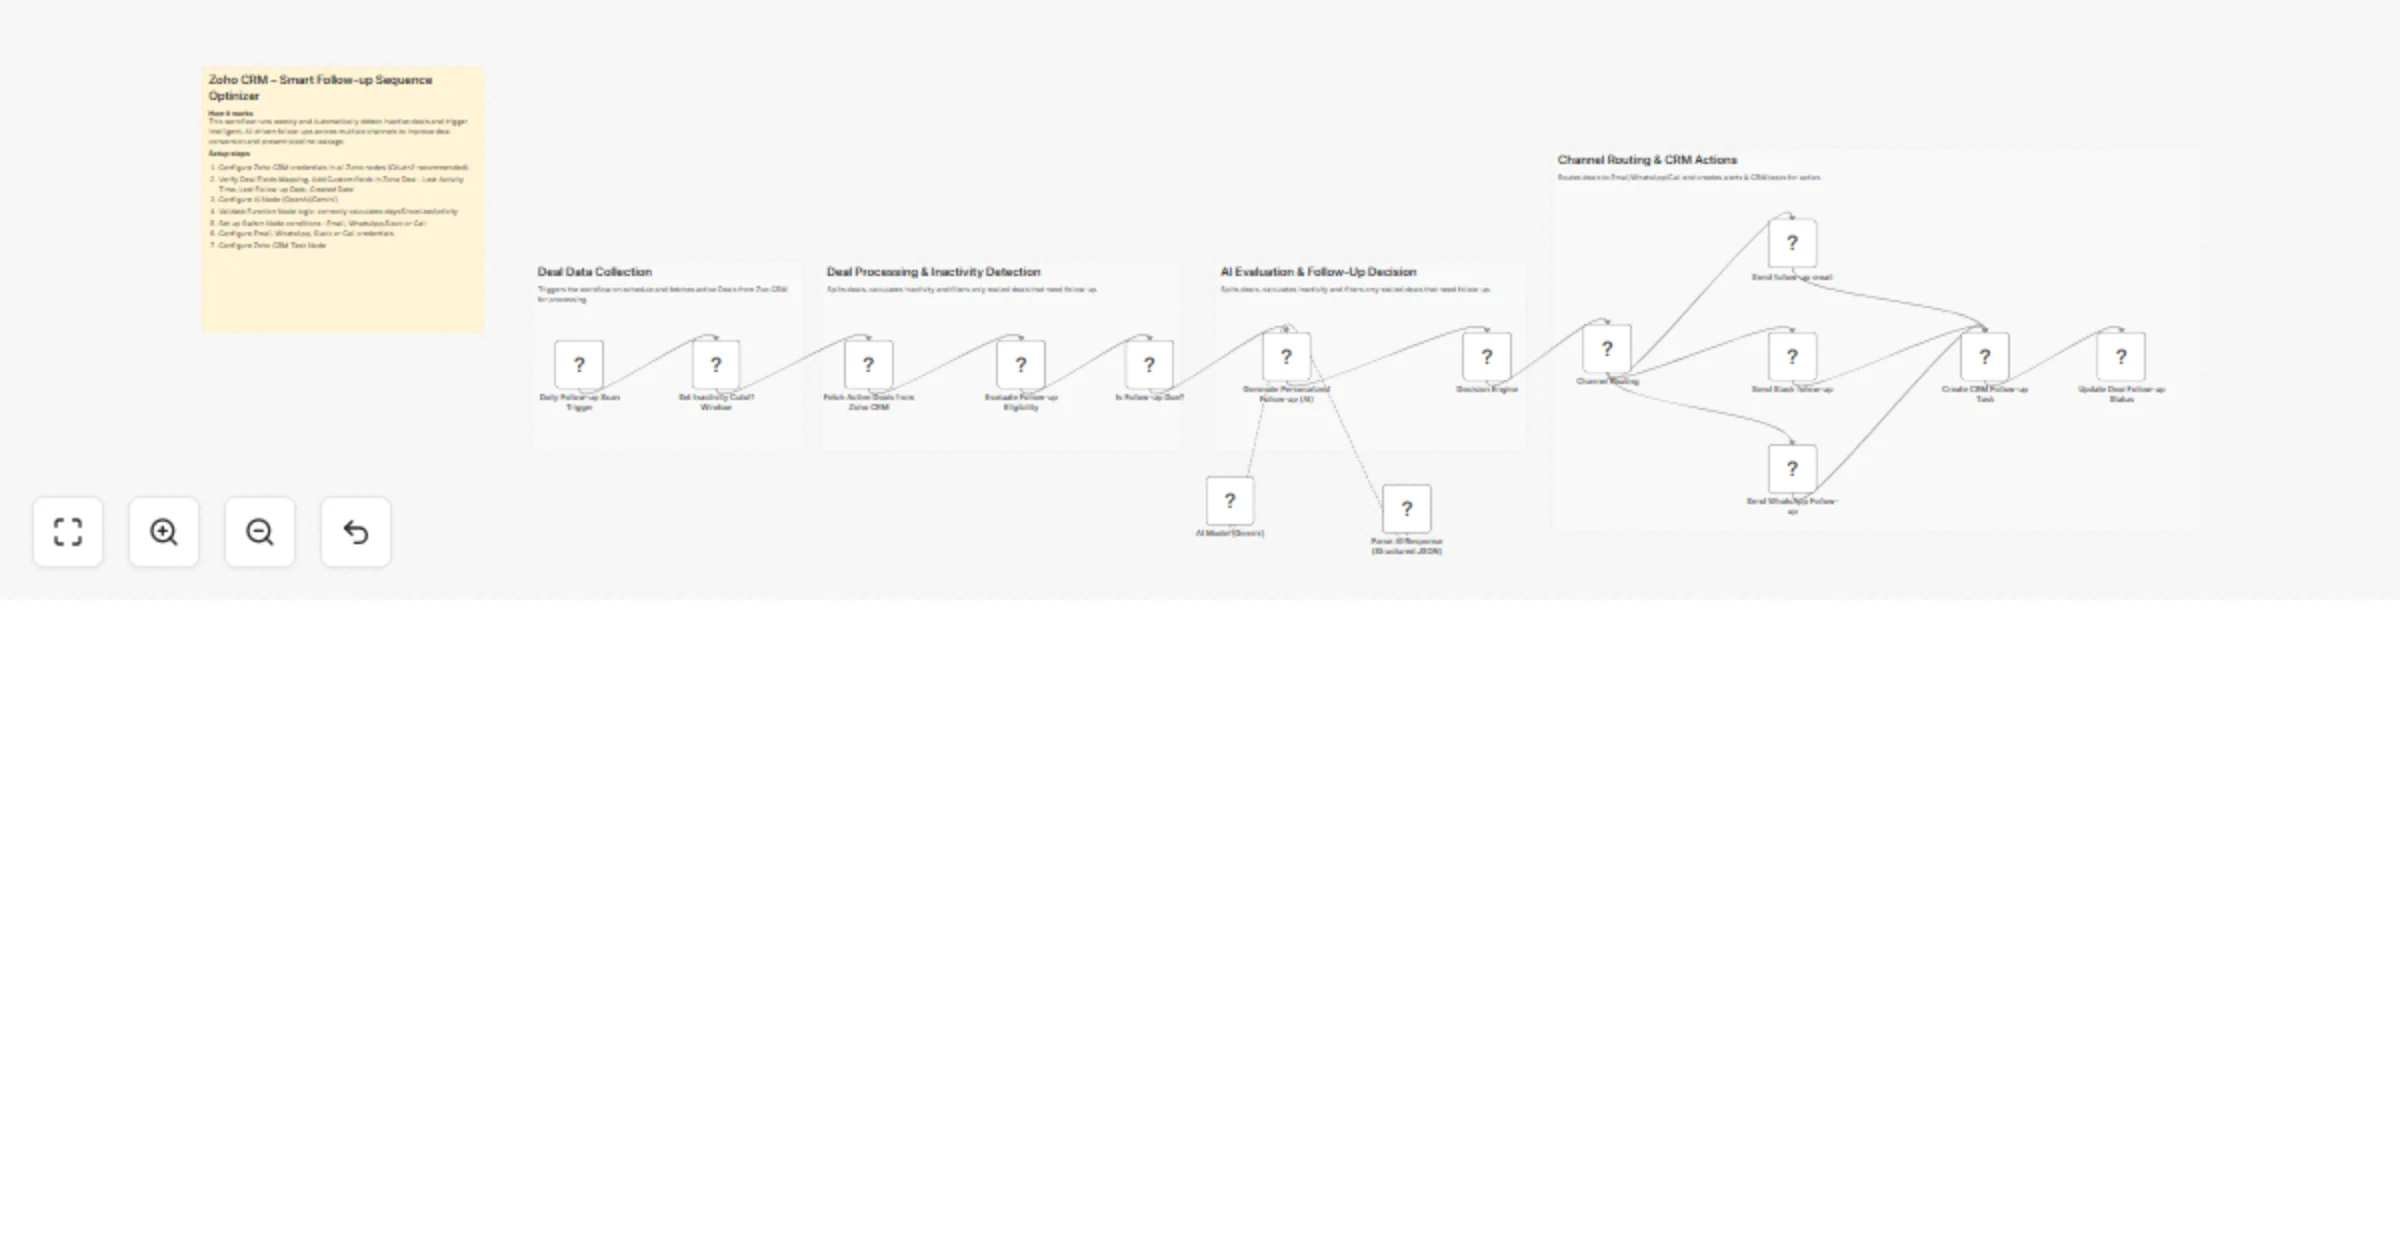
Send AI-personalized deal follow-ups from Zoho CRM via email, Slack and WhatsApp with Gemini
Intelligent Deal Follow Up Automation (n8n + Zoho CRM + AI) This workflow automatically detects inactive deals in Zoh...
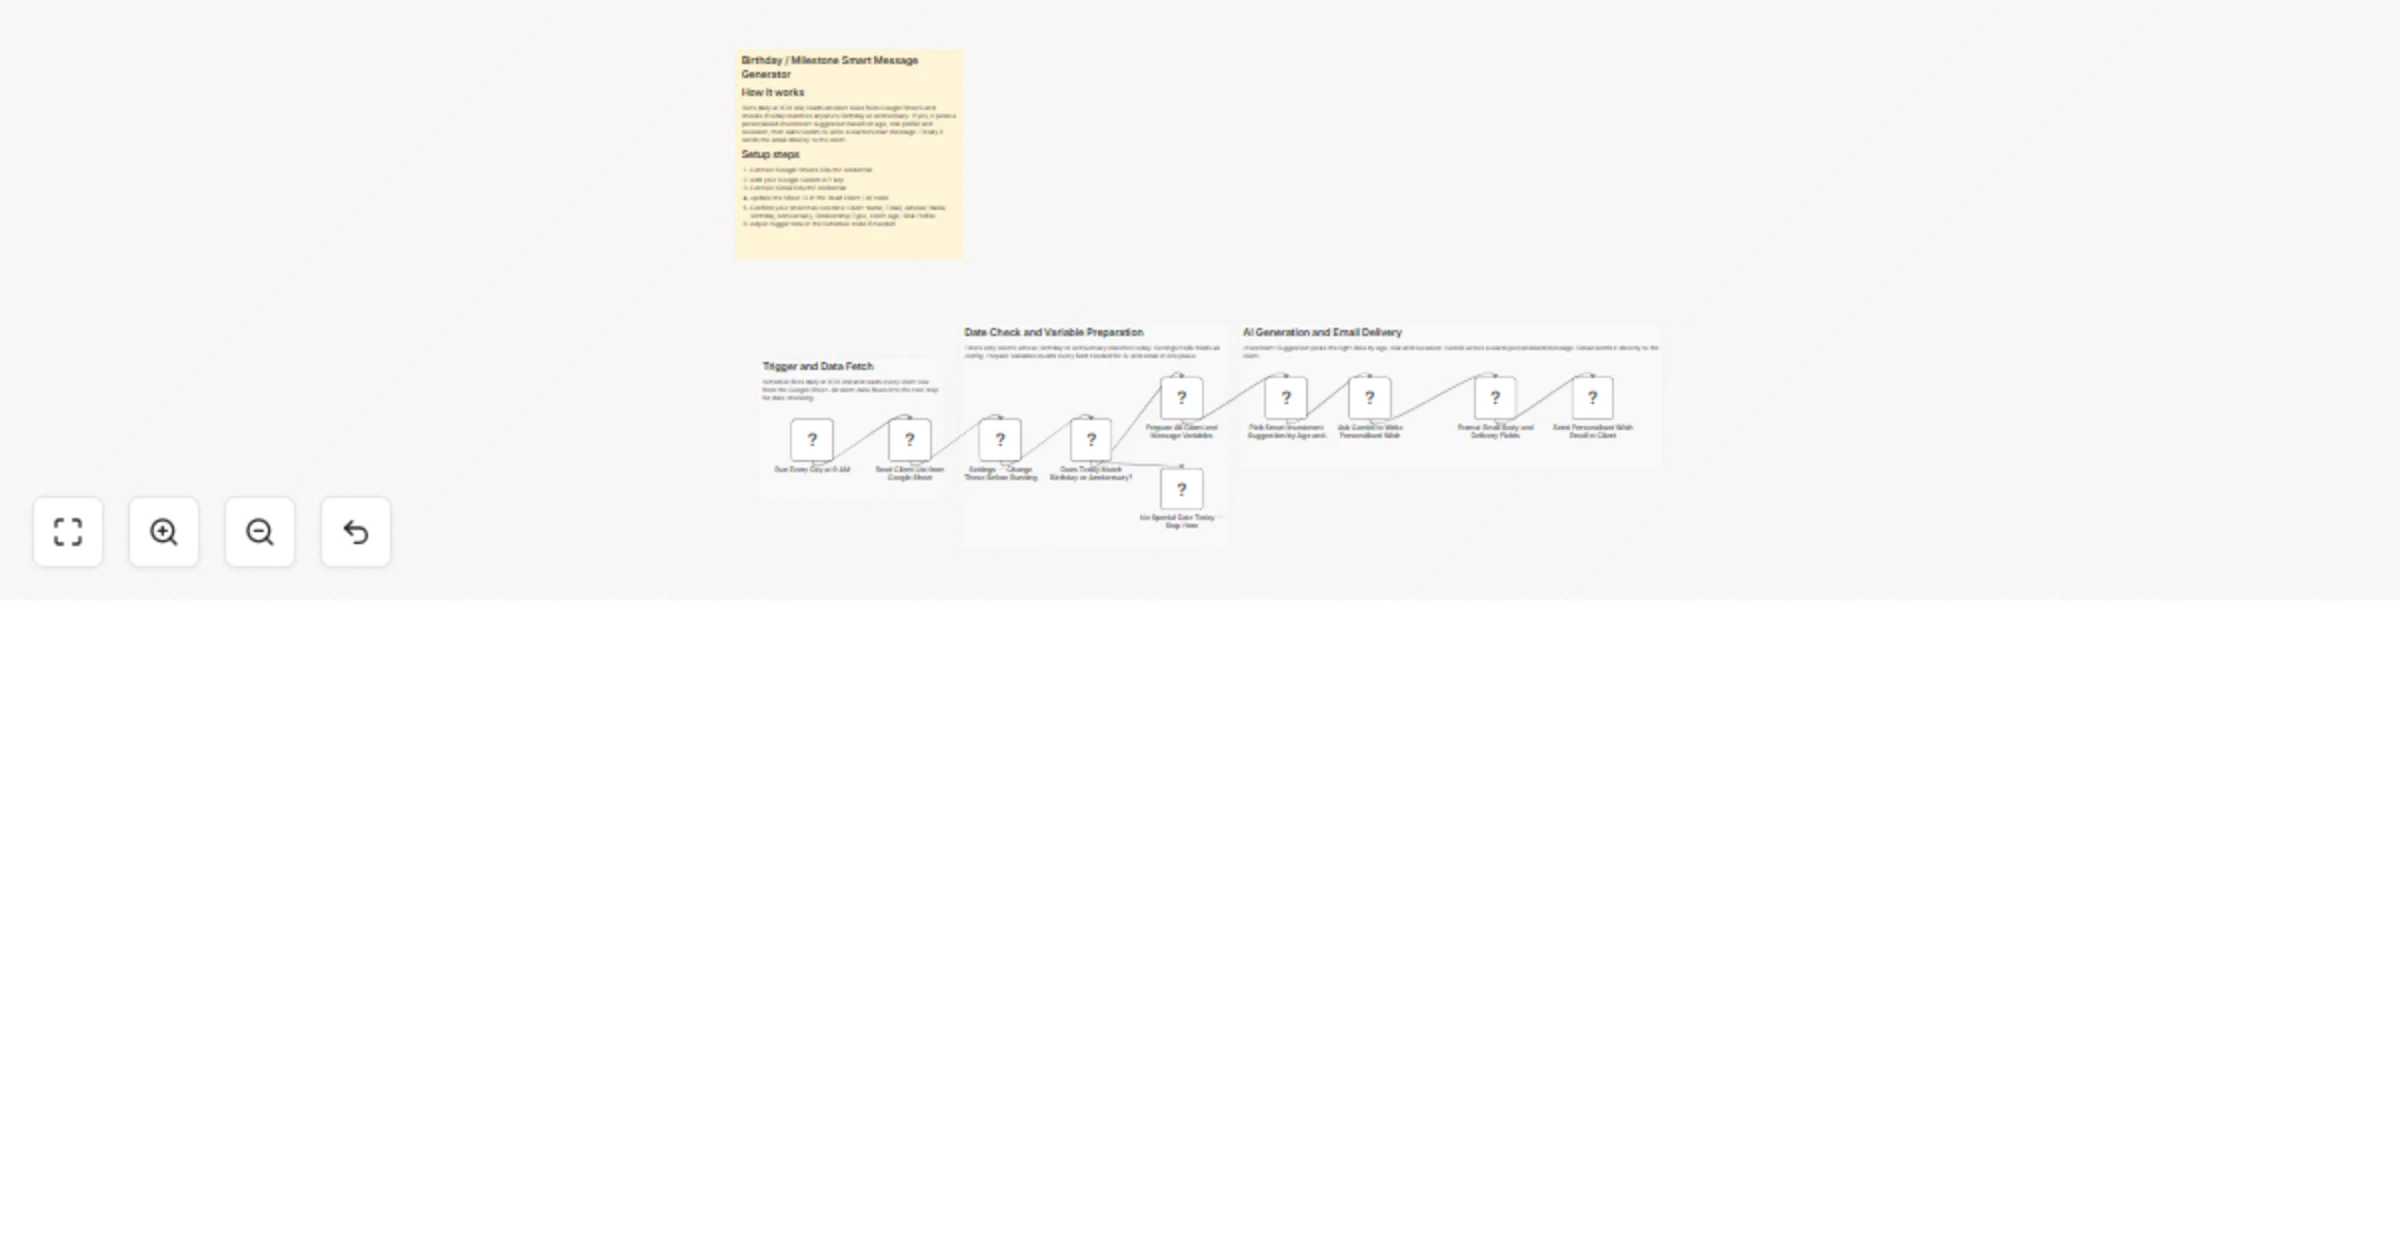
Send personalized birthday and anniversary emails with Google Sheets, Gemini, and Gmail
Birthday & Milestone Message Automation (n8n Google Sheets + Gemini AI + Gmail) This workflow automatically sends per...
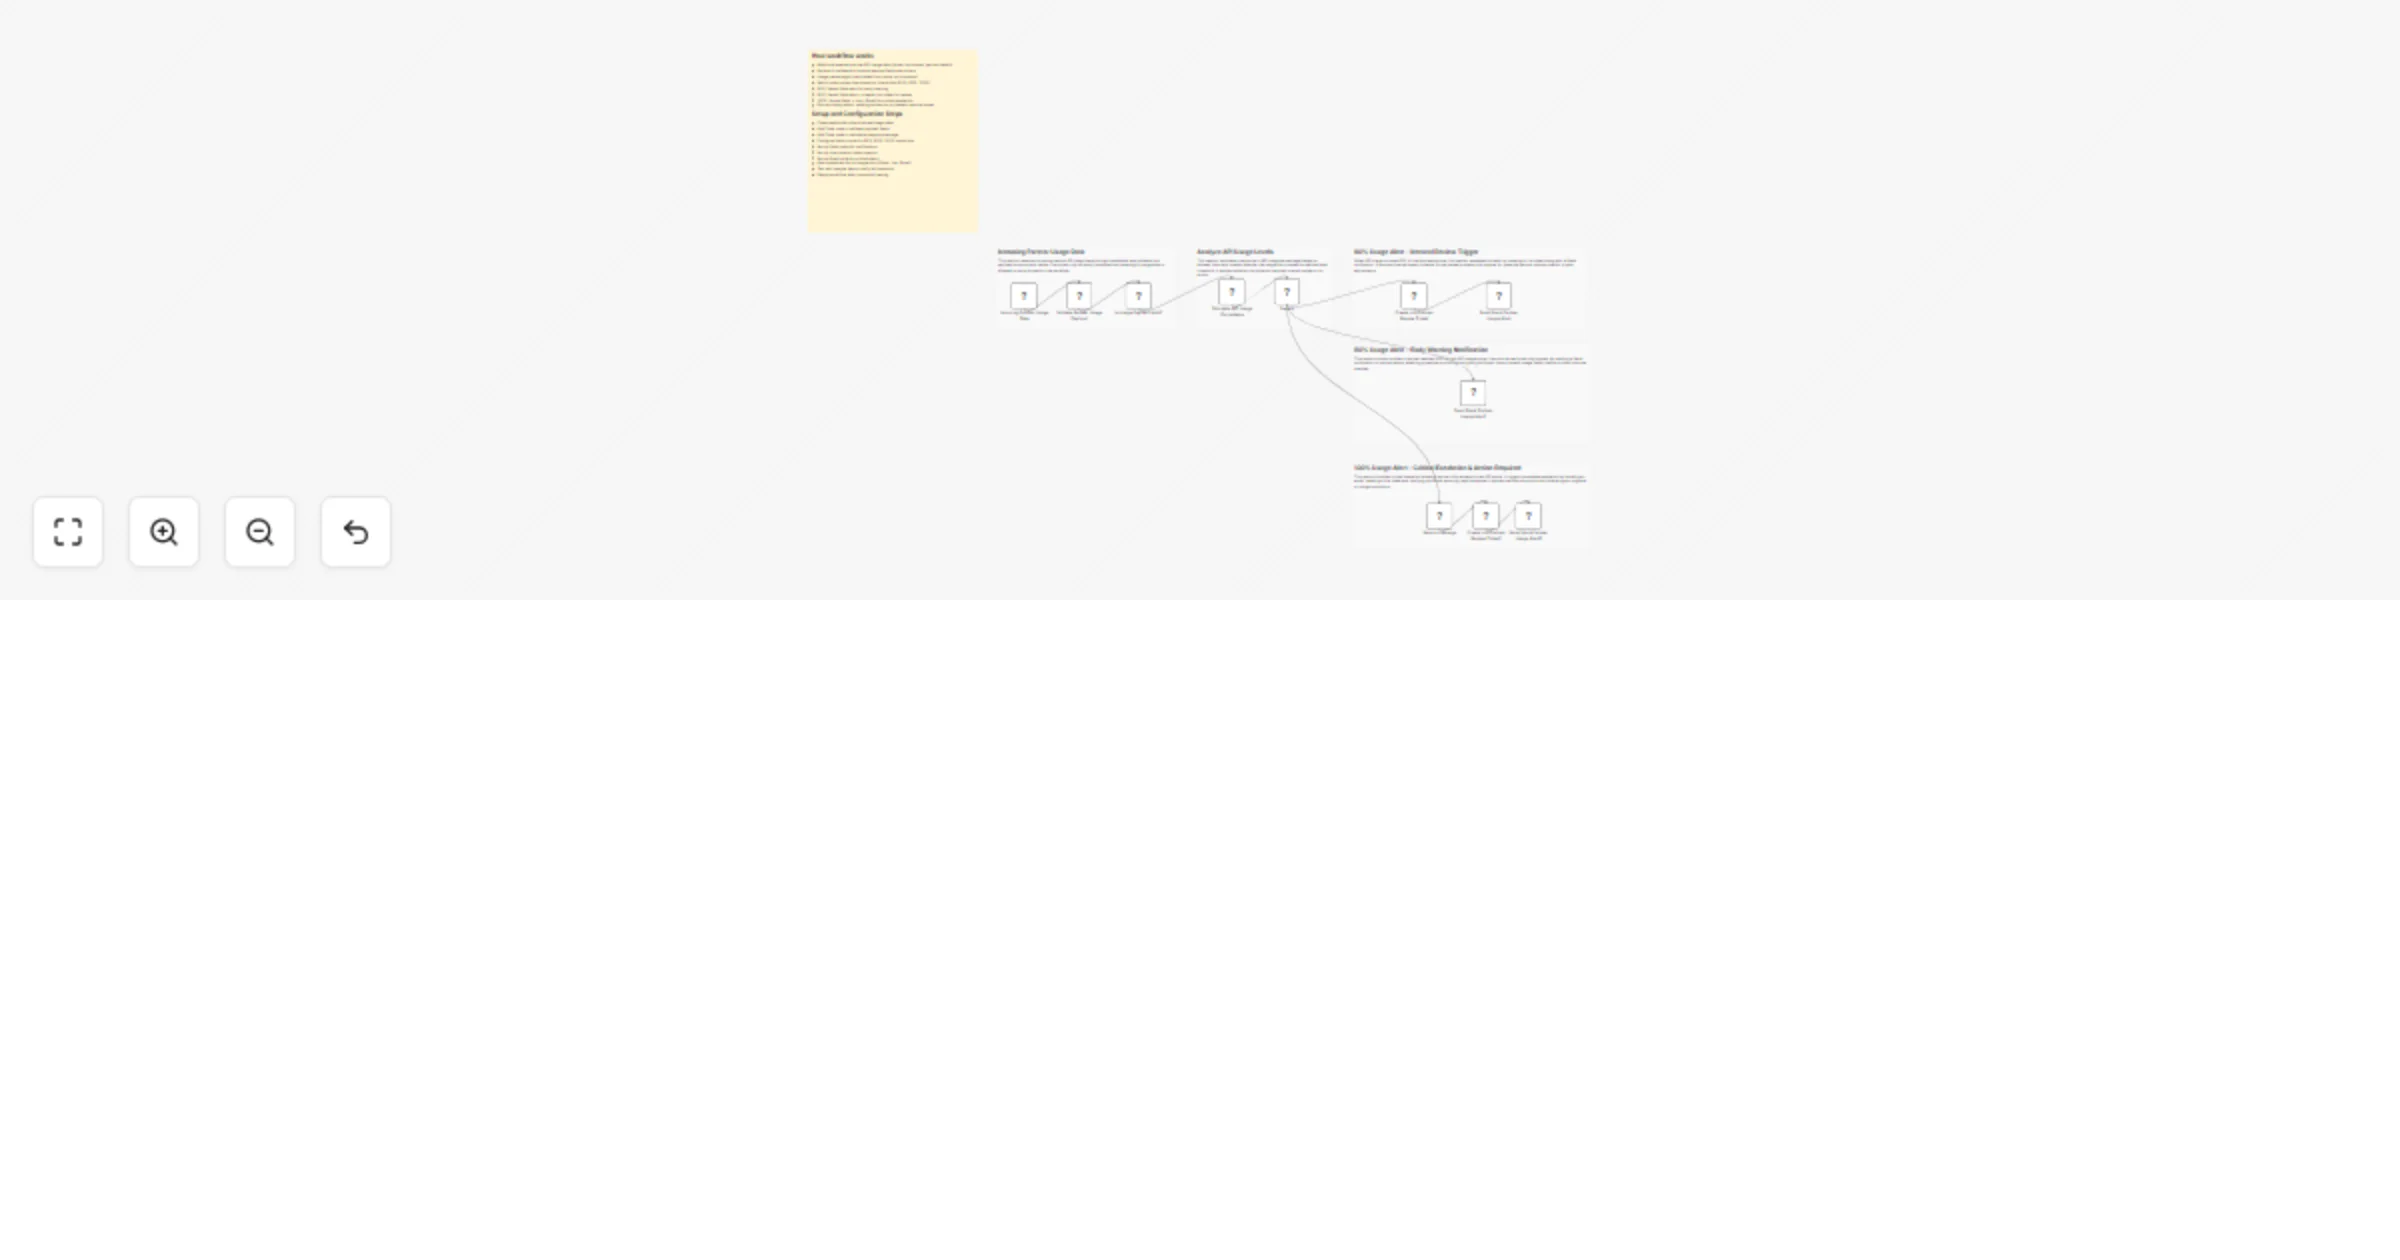
Monitor partner API usage with Slack, Jira and Gmail alerts
Smart Partner API Usage Monitoring with Slack, Jira & Gmail Alerts This workflow monitors partner API usage in real t...
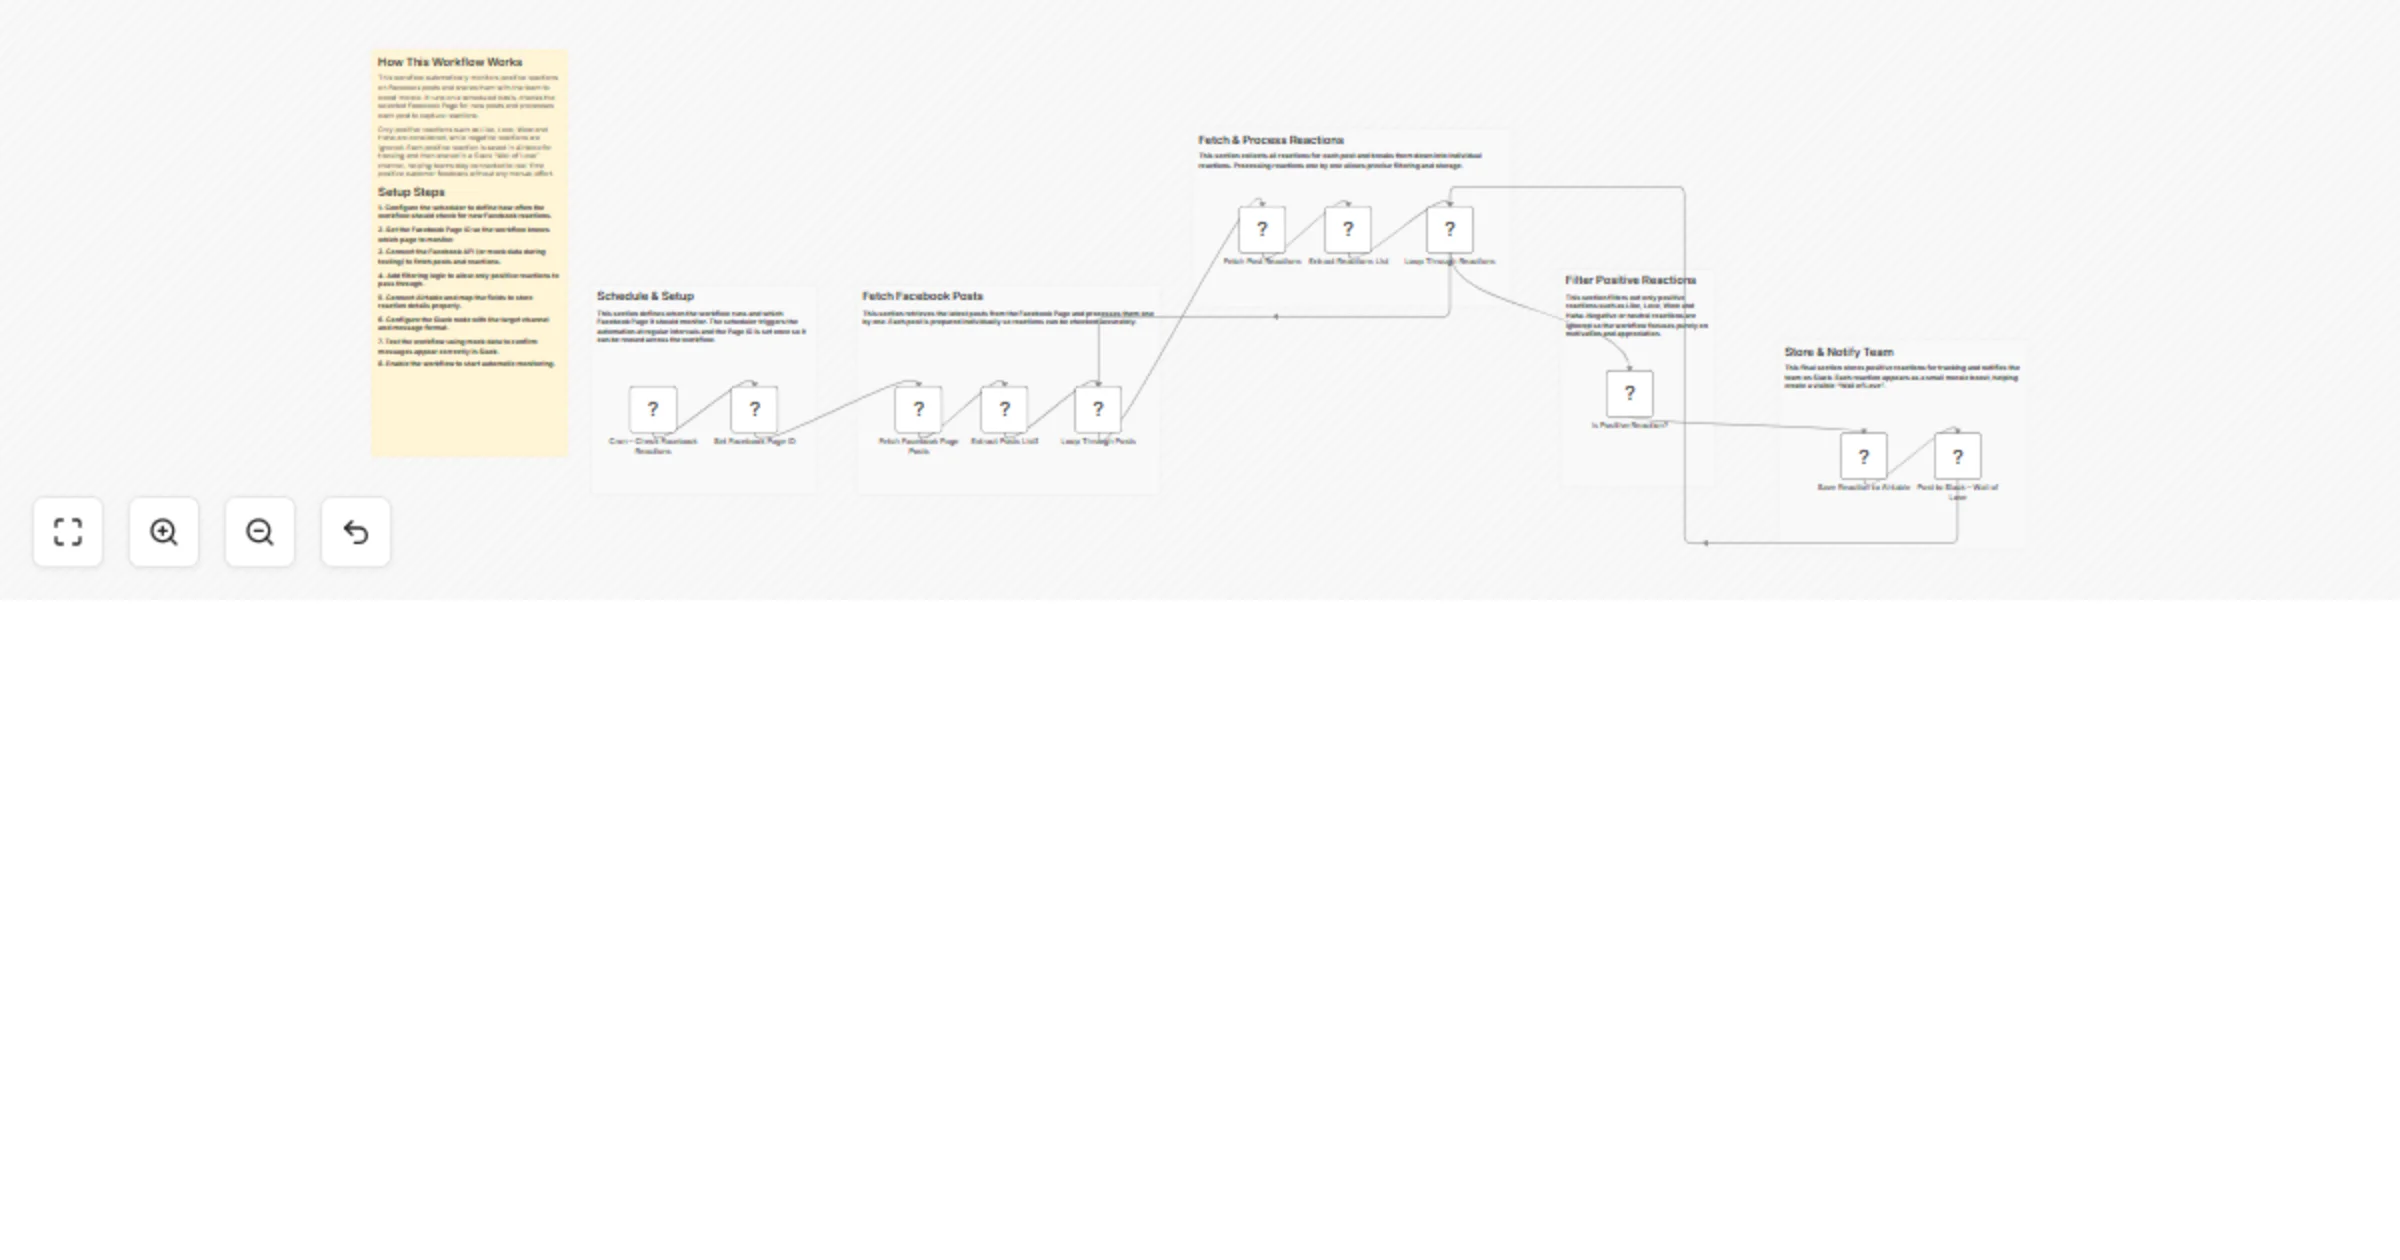
Send positive Facebook reactions to Airtable and Slack for a Wall of Love
Facebook Reactions → Airtable → Slack “Wall of Love” Automation This n8n workflow automatically monitors positive rea...
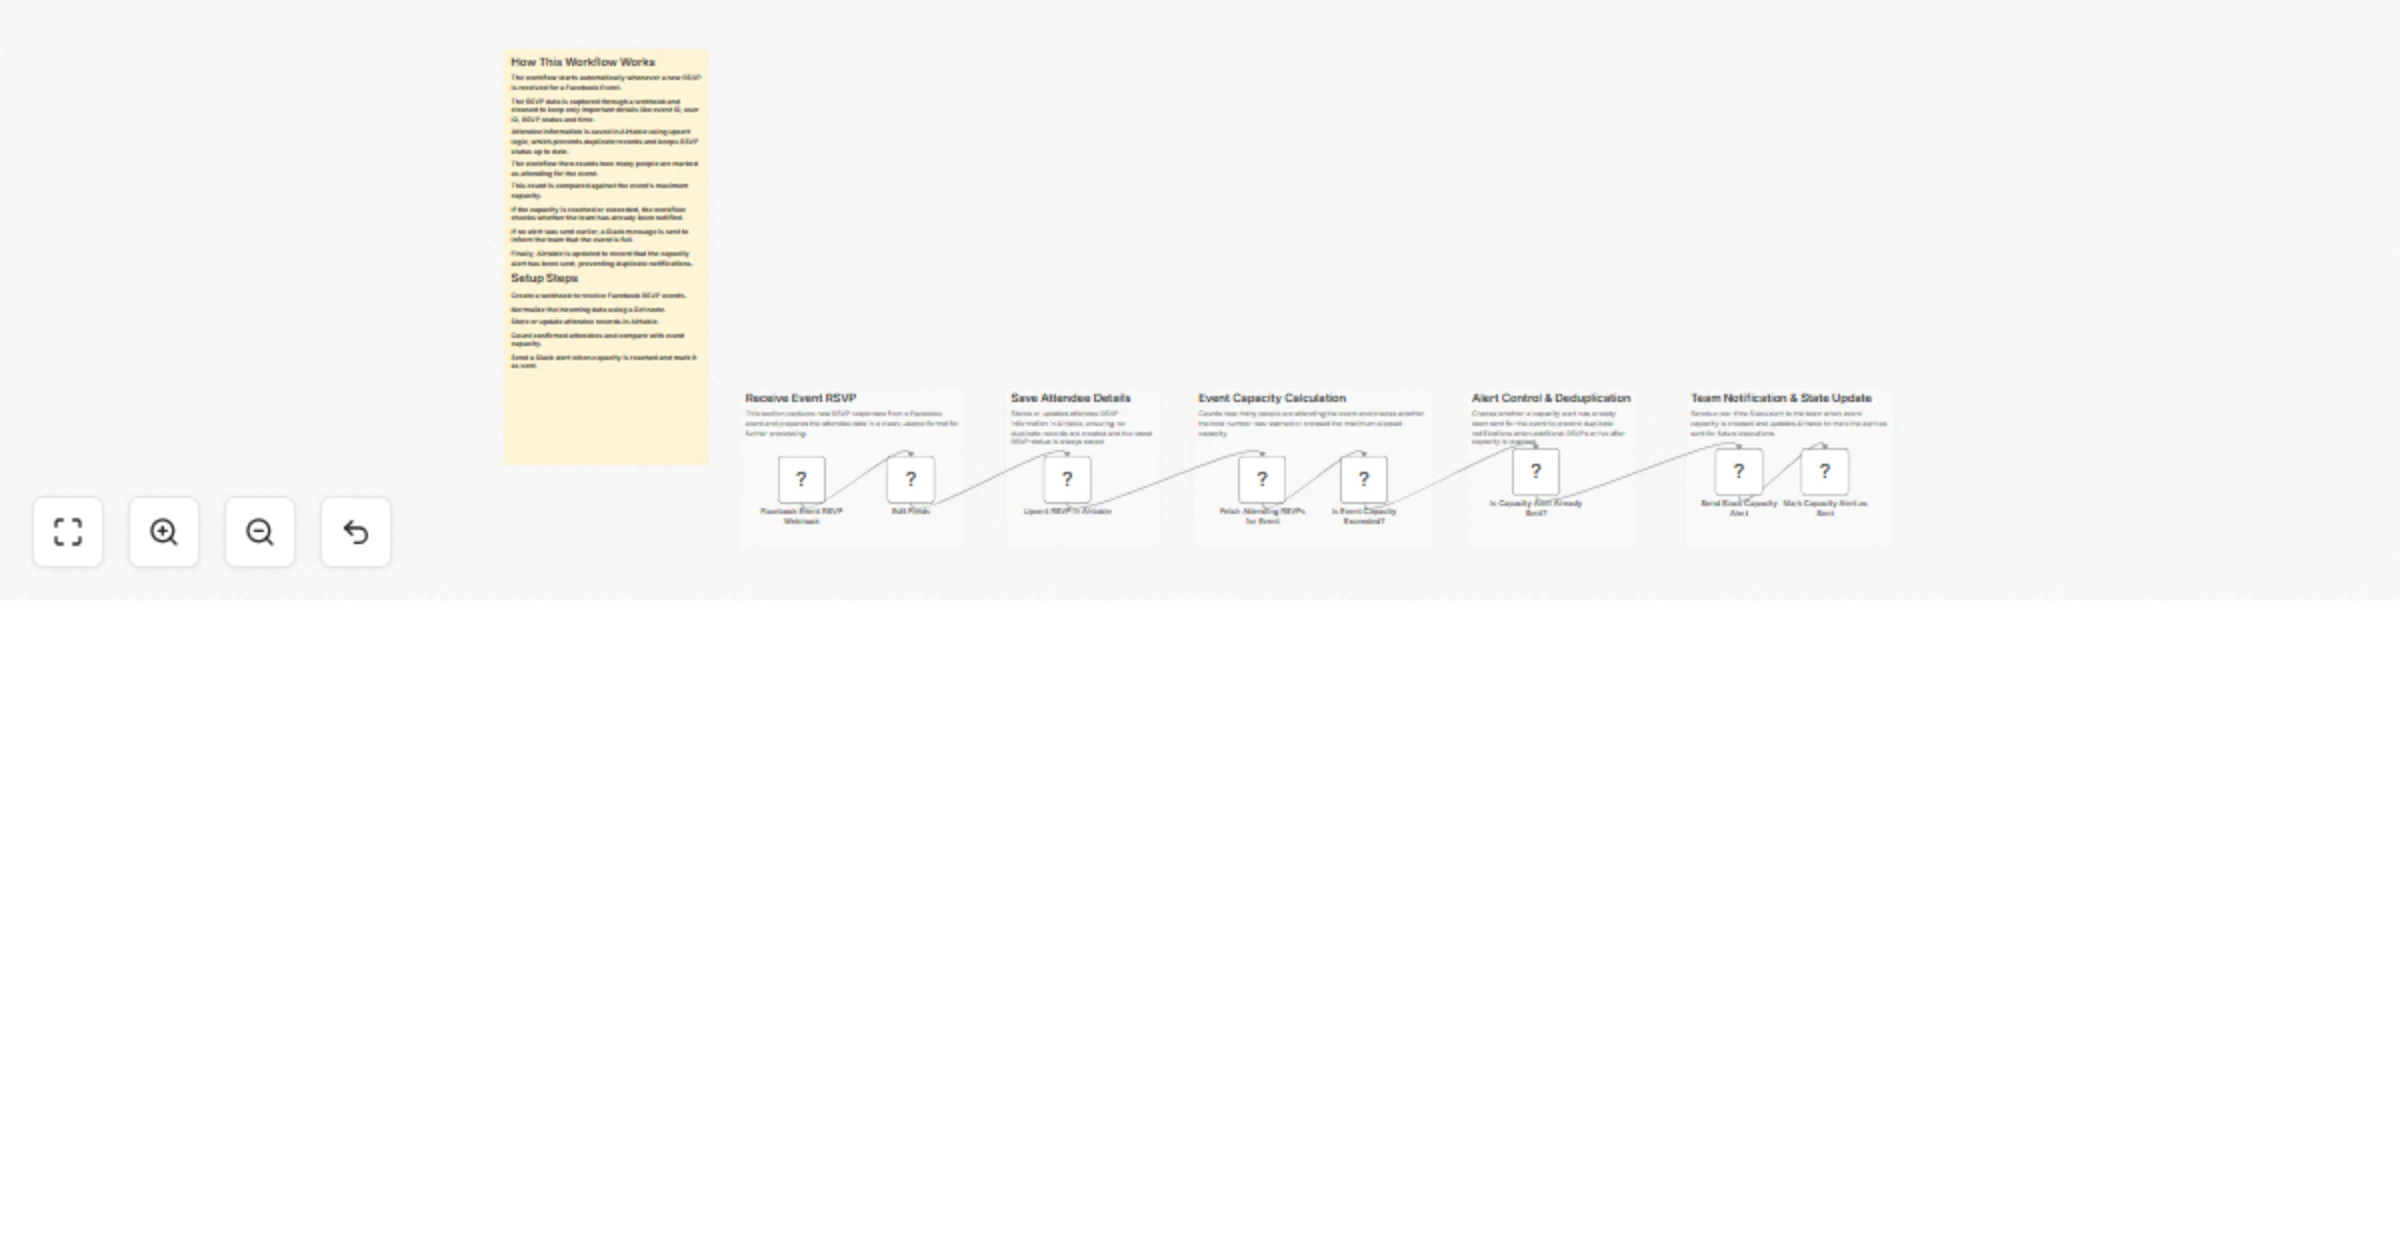
Track Facebook event RSVPs in Airtable and send Slack capacity alerts
Facebook Event RSVP Webhook → Airtable Attendee Tracking → Slack Capacity Alerts This workflow automatically tracks F...
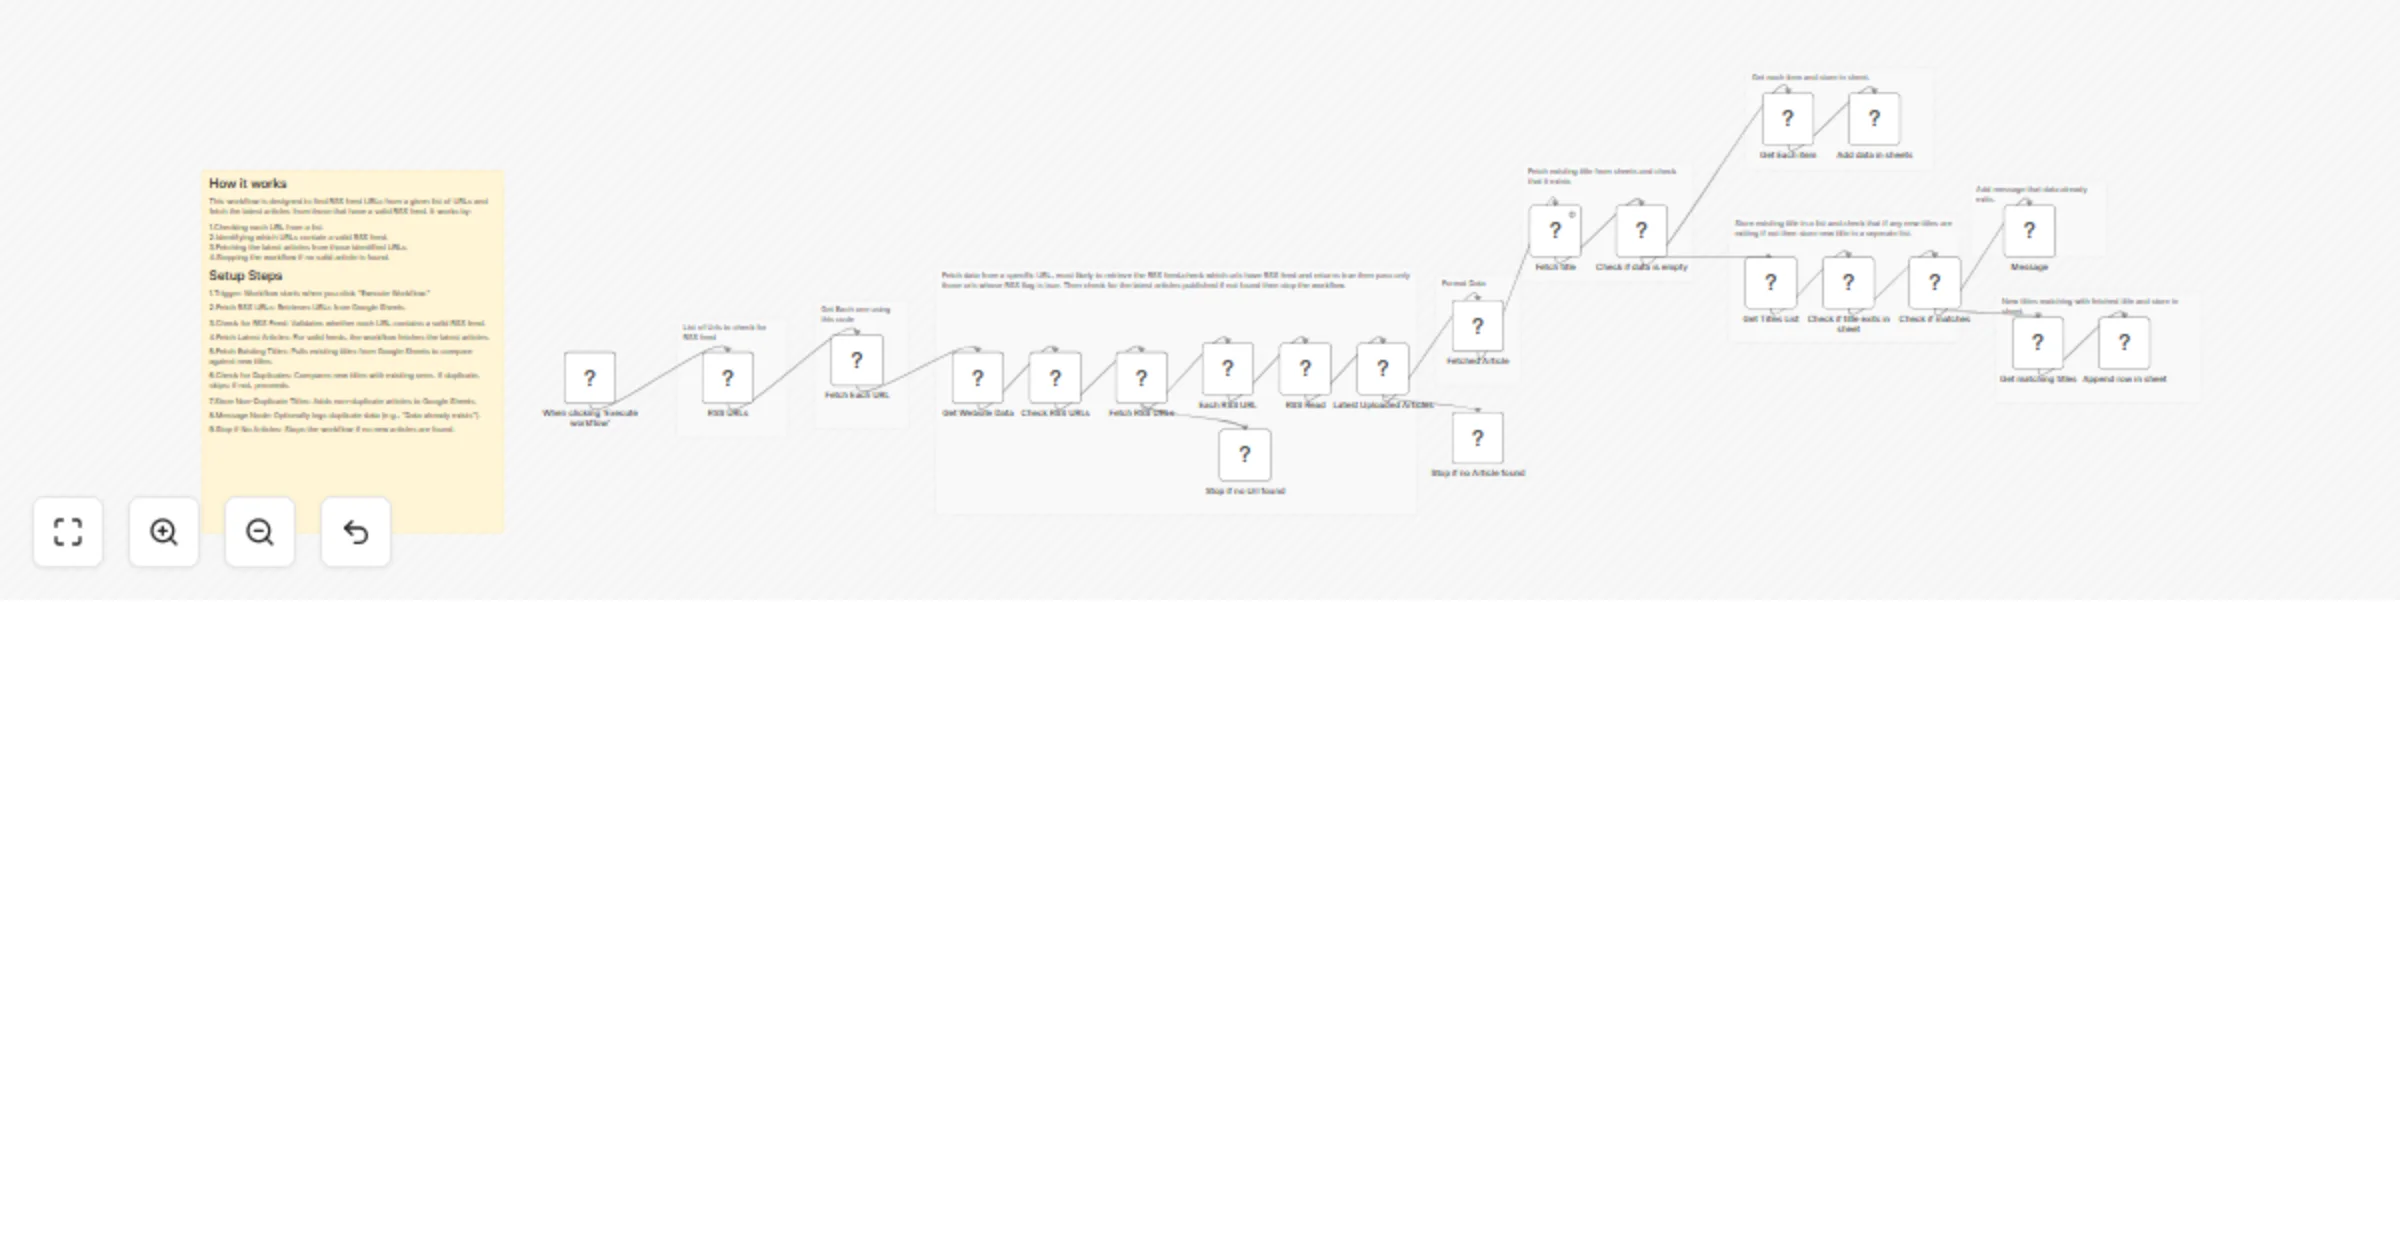
Fetch latest RSS articles and store non-duplicates in Google Sheets
RSS Feed Latest Article Fetcher Workflow This n8n workflow fetches URLs from an RSS feed, checks which URLs have a va...
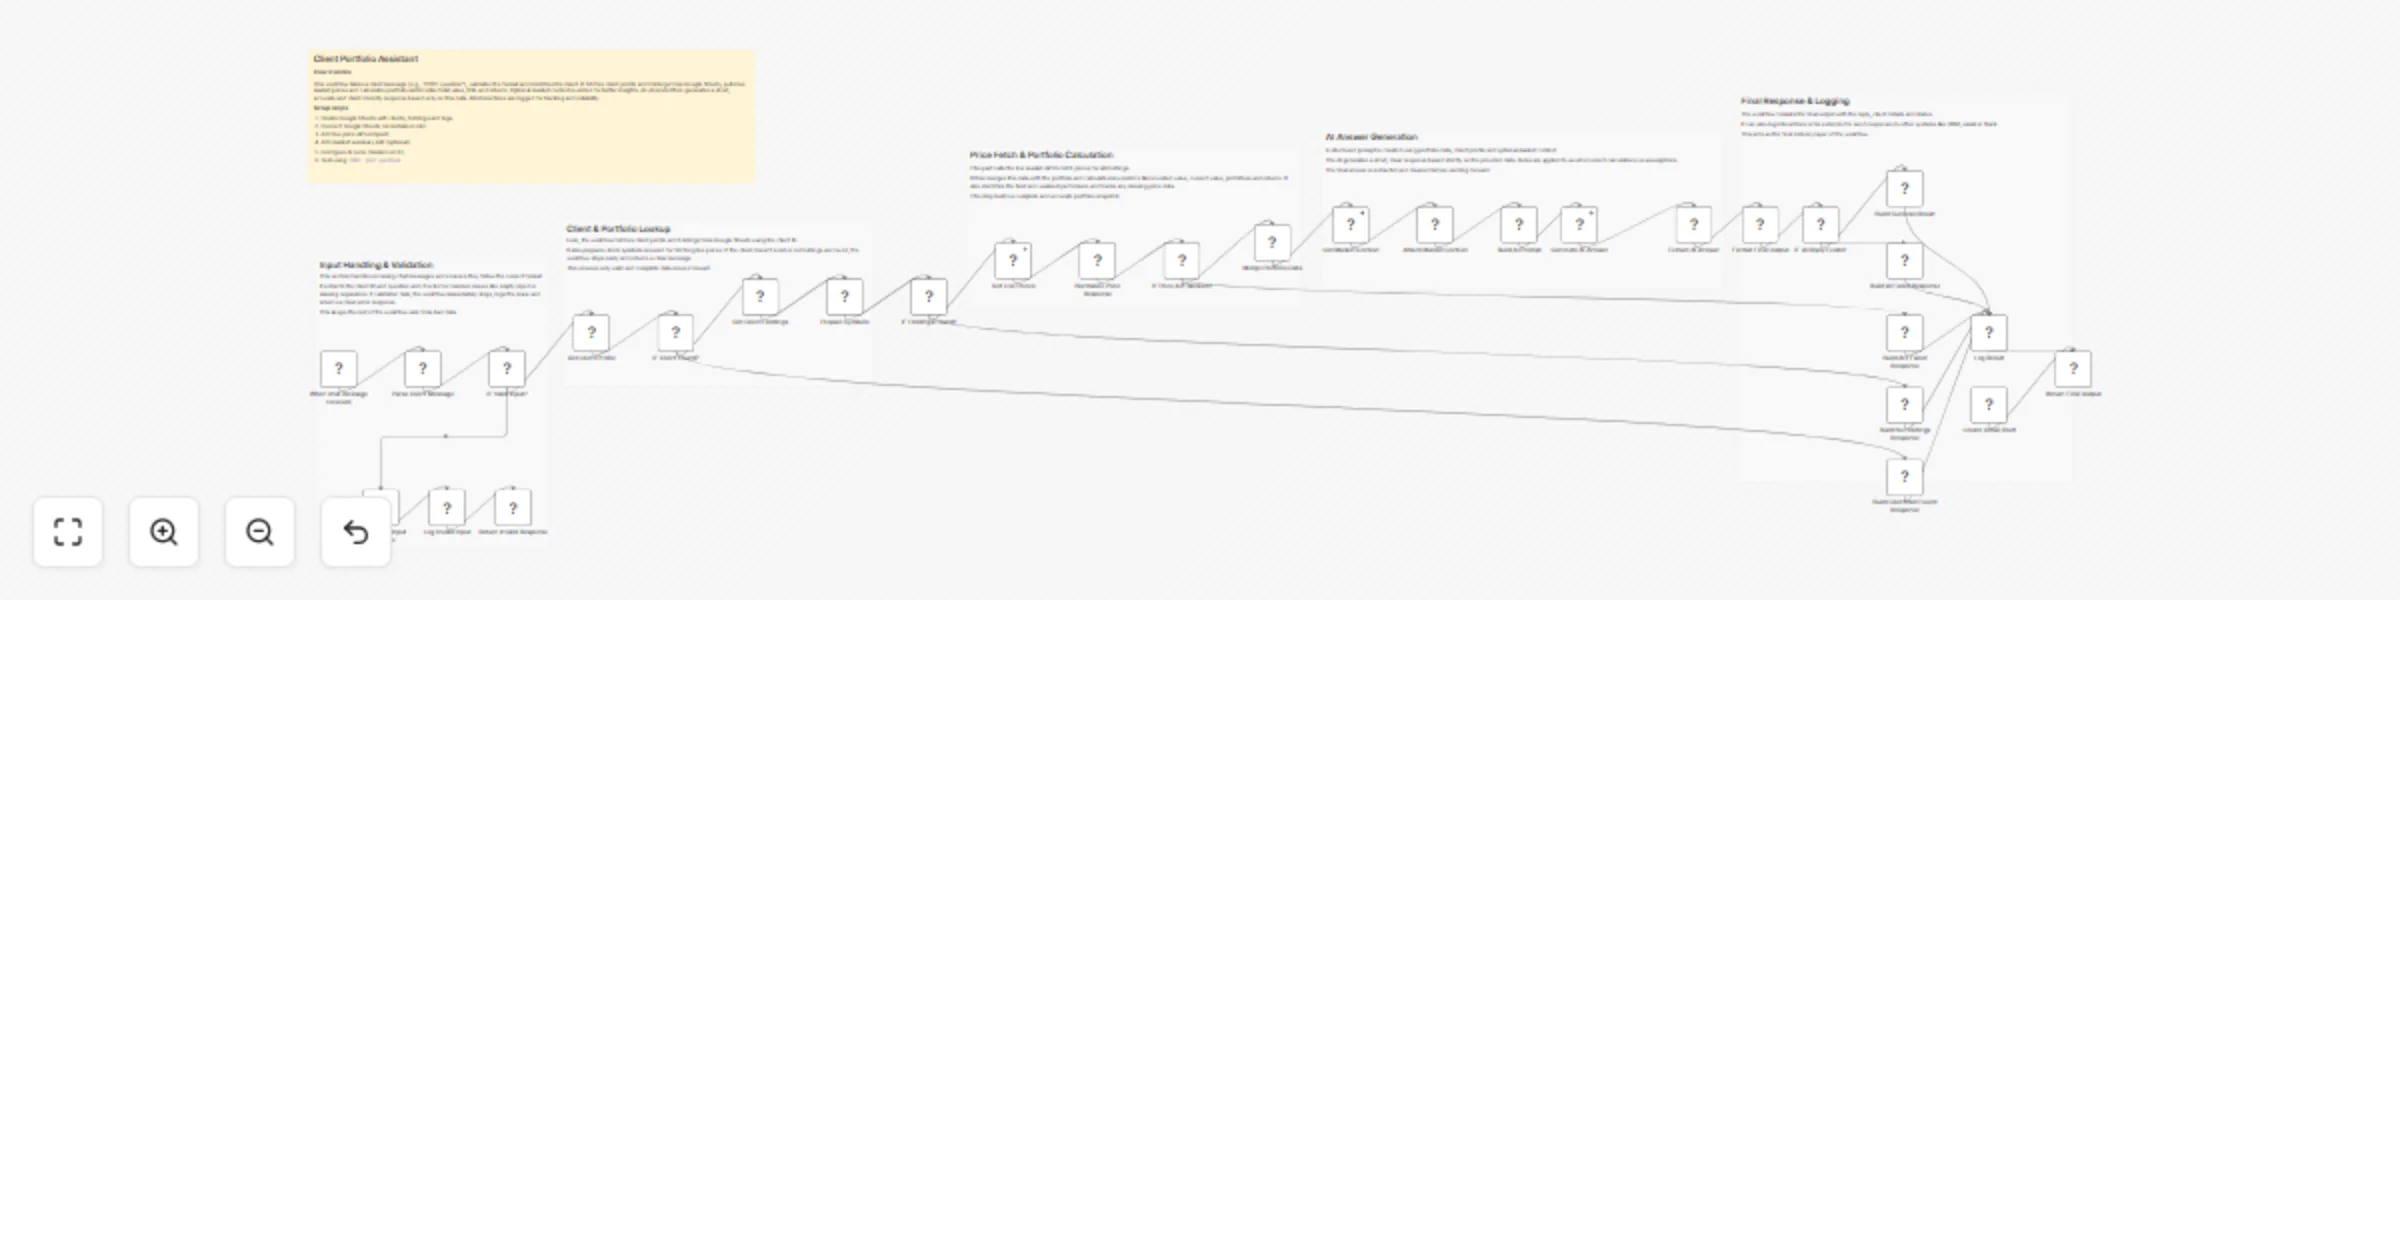
Answer wealth management portfolio questions with Google Sheets, live prices and Google Gemini
(Wealth Management) Client Question → Instant Answer Assistant (n8n + Google Sheets + AI + API) This workflow allows...
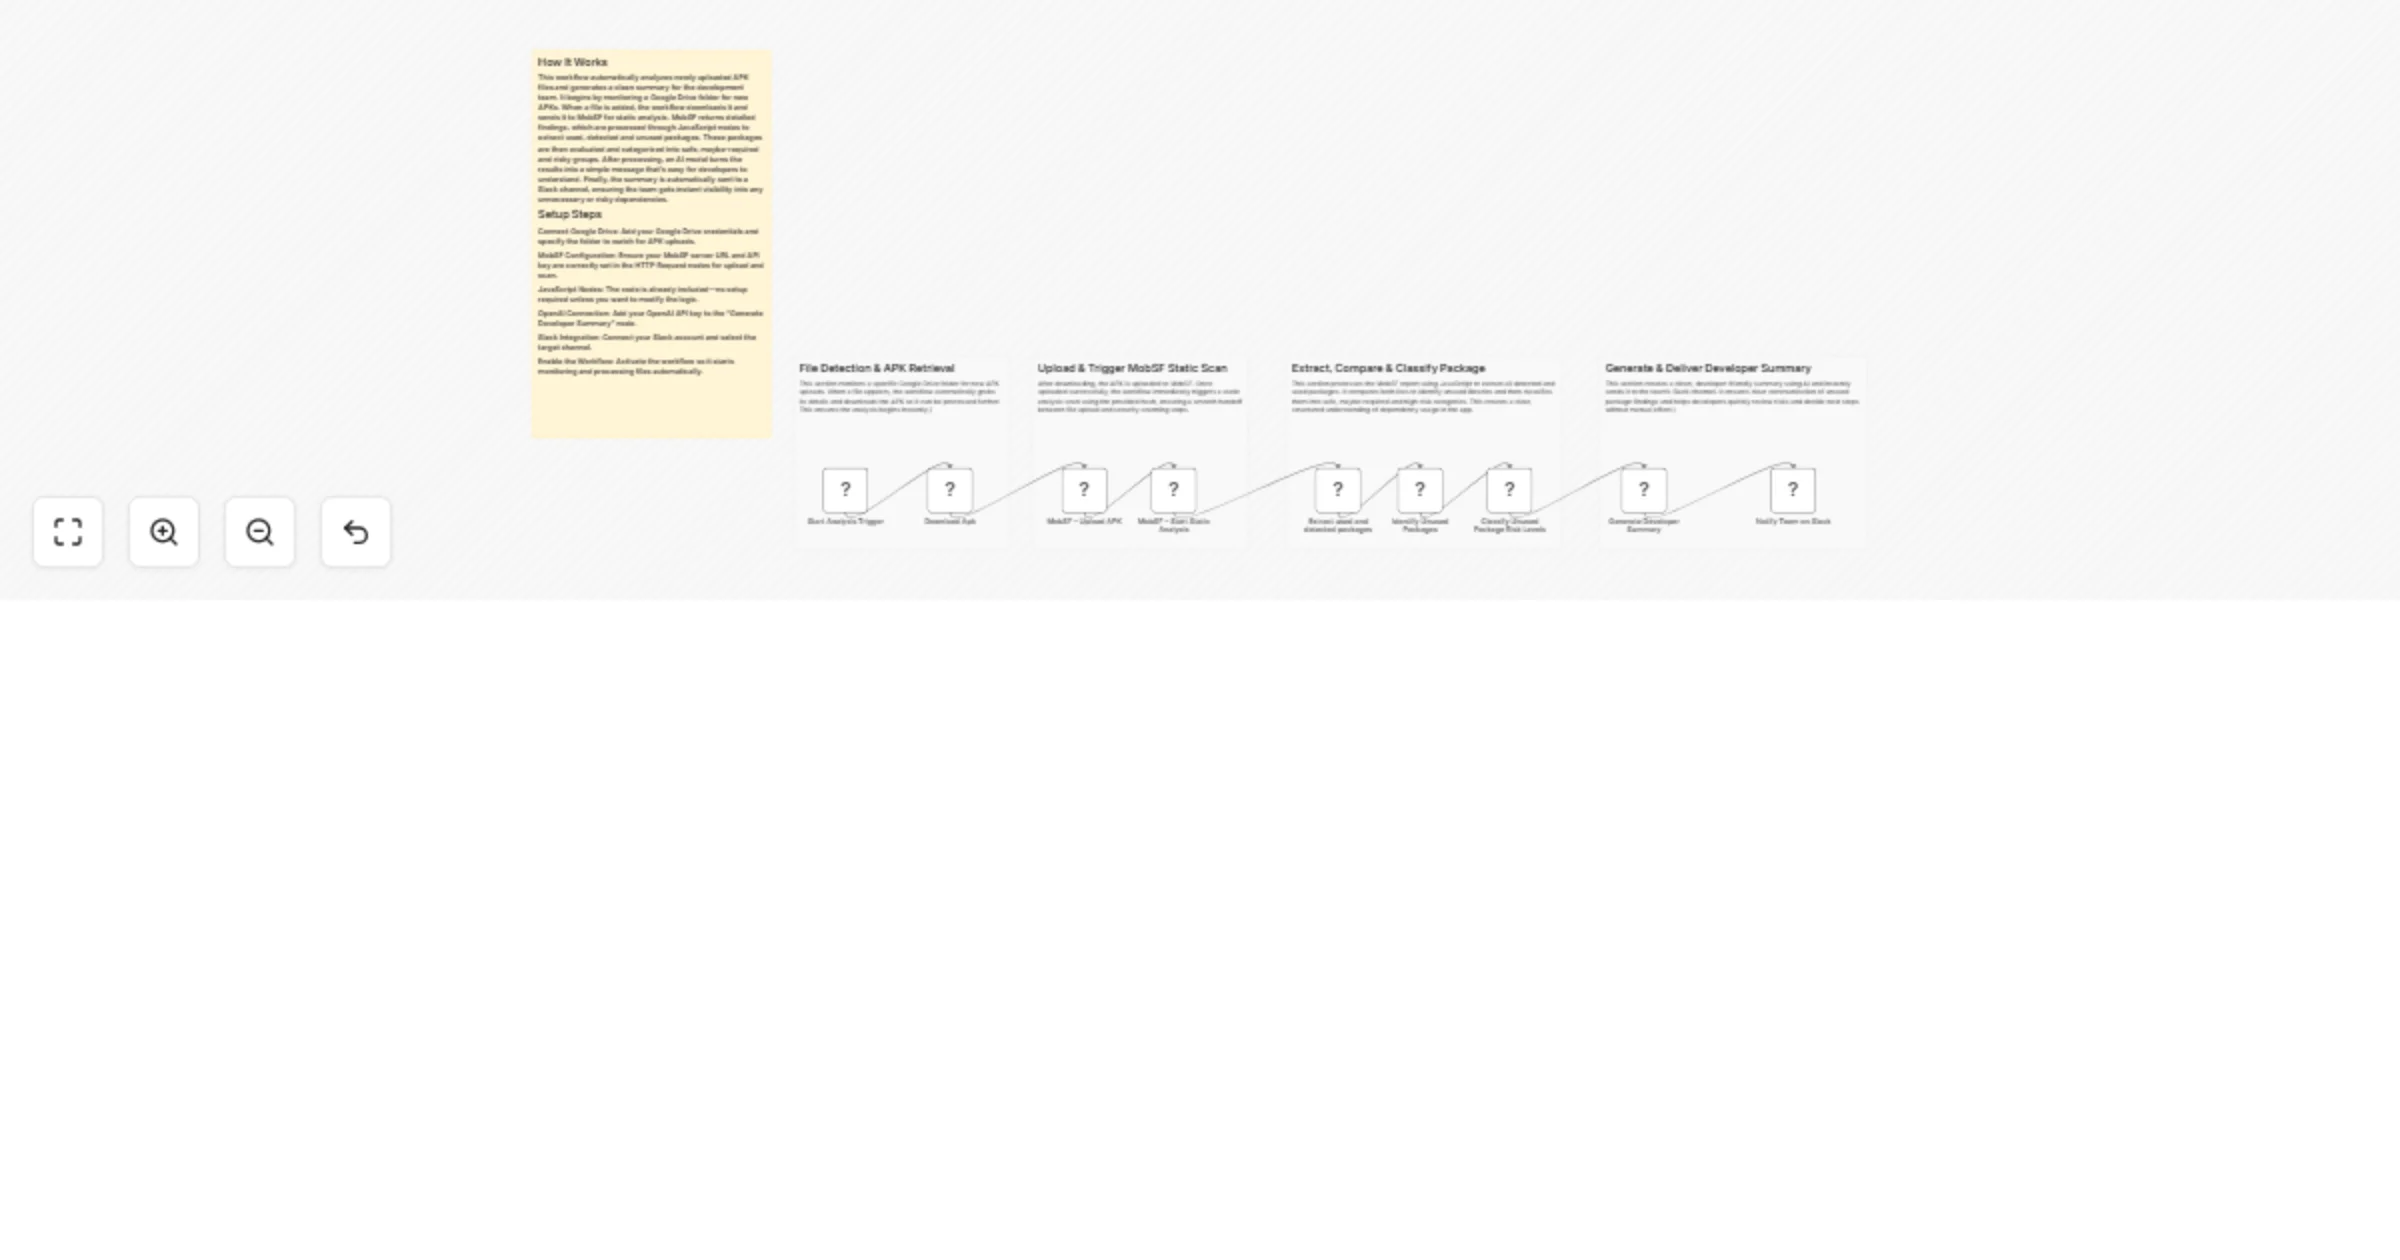
Monitor APK uploads and run MobSF analysis with OpenAI and Slack alerts
APK Upload Monitoring and Automated MobSF Analysis with Slack Reporting This workflow monitors a Google Drive folder...
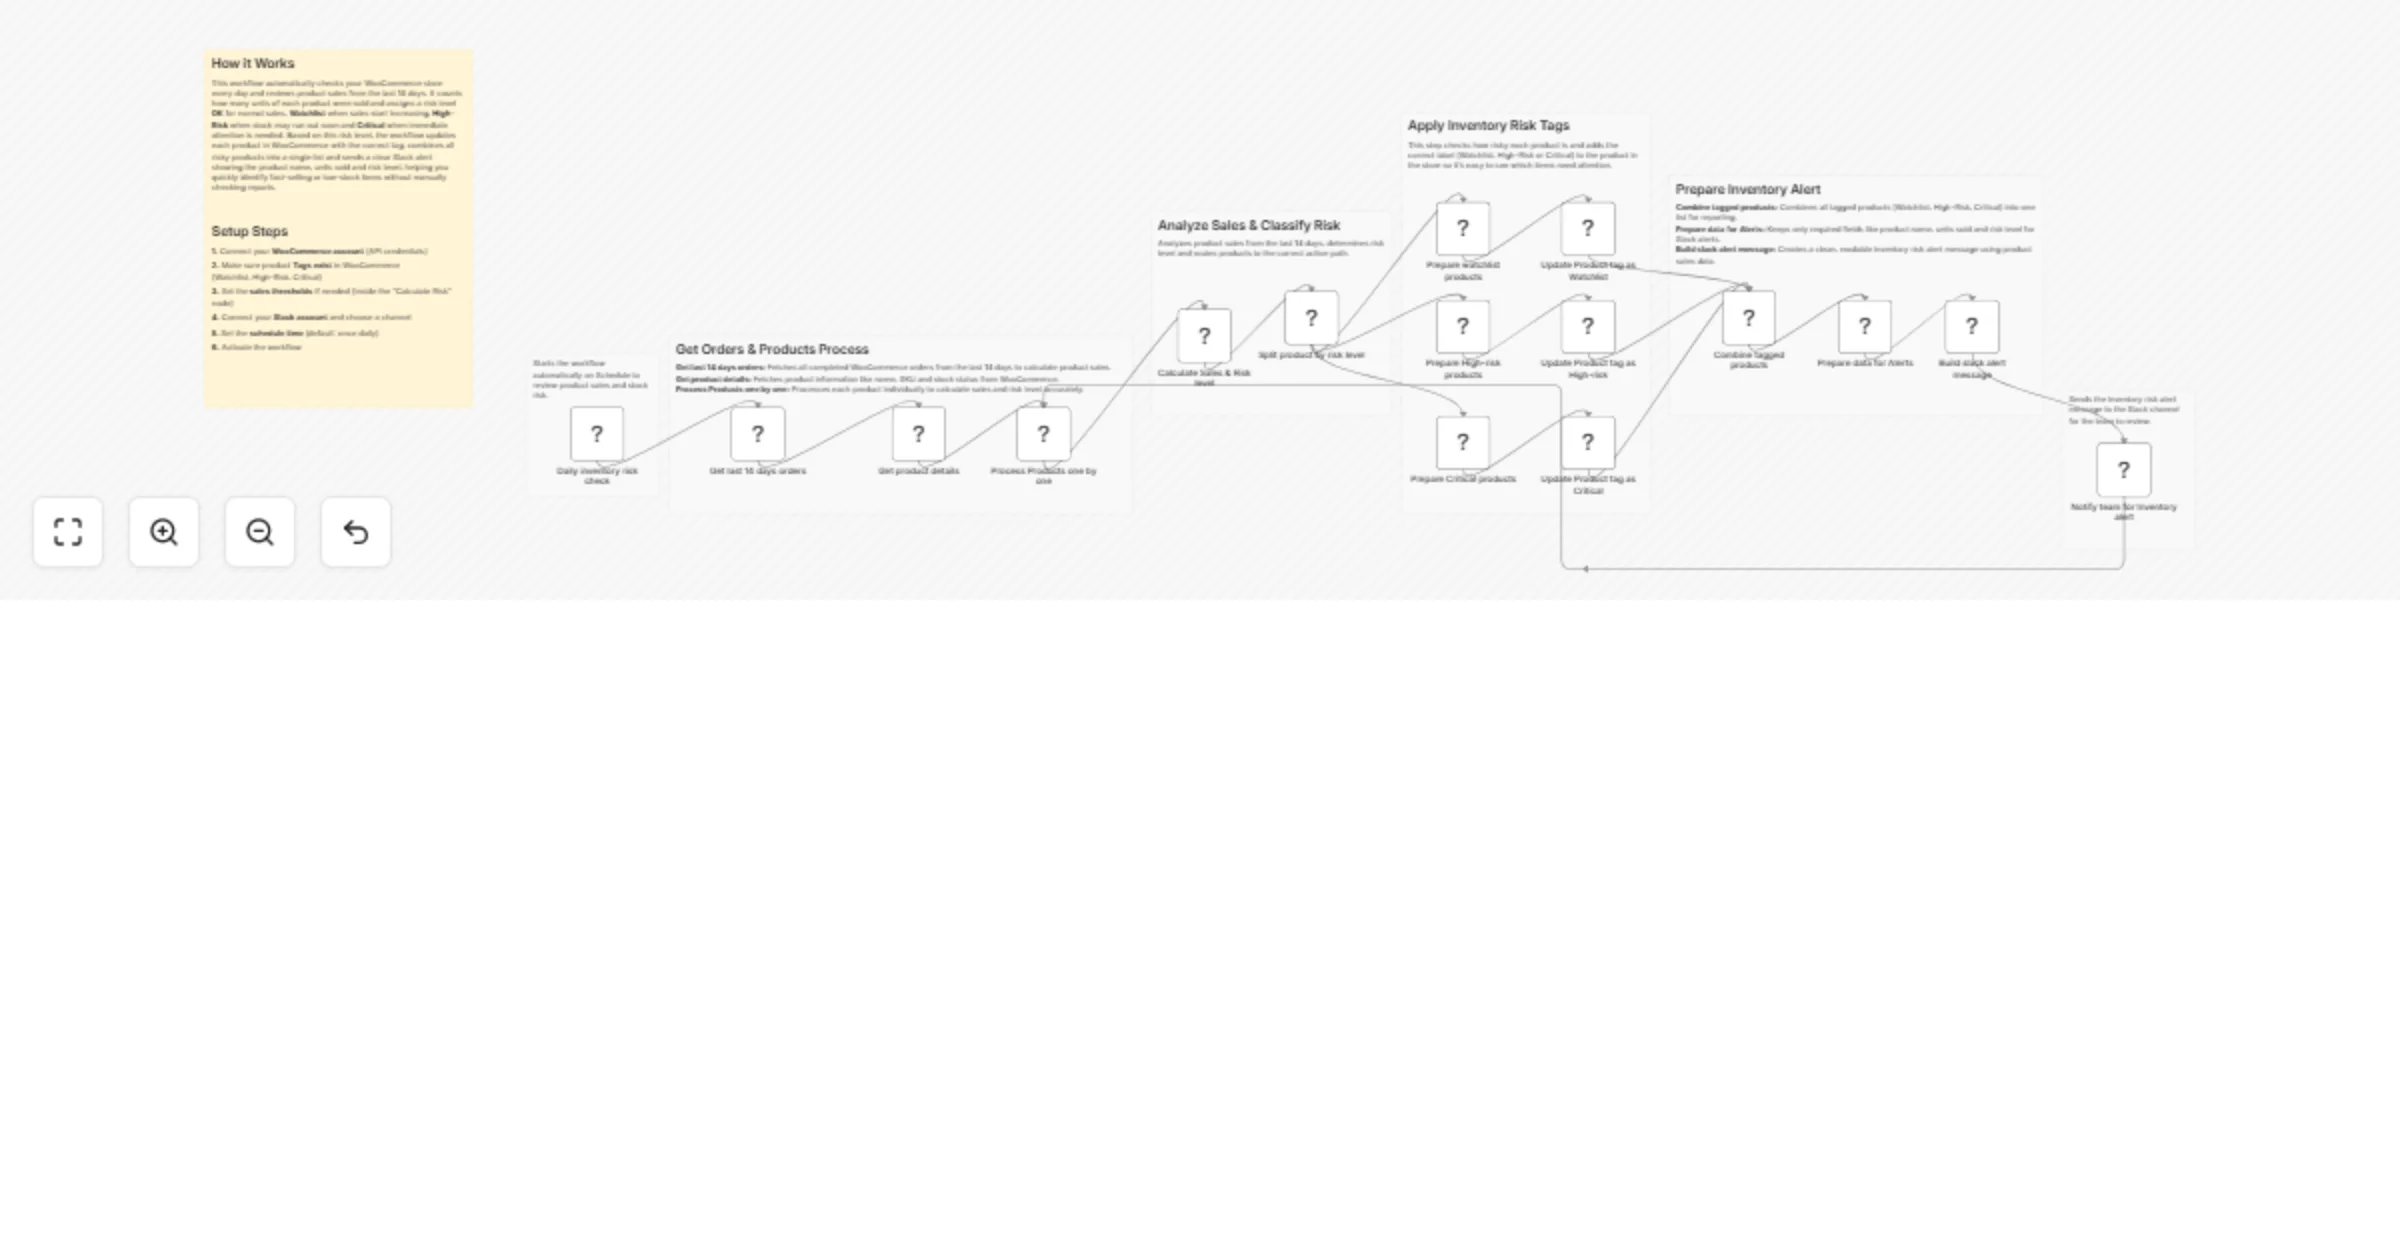
Tag high-risk WooCommerce SKUs and send daily alerts to Slack
(Retail) Auto Tag High Risk SKUs This workflow automatically monitors product sales in your WooCommerce store, detect...
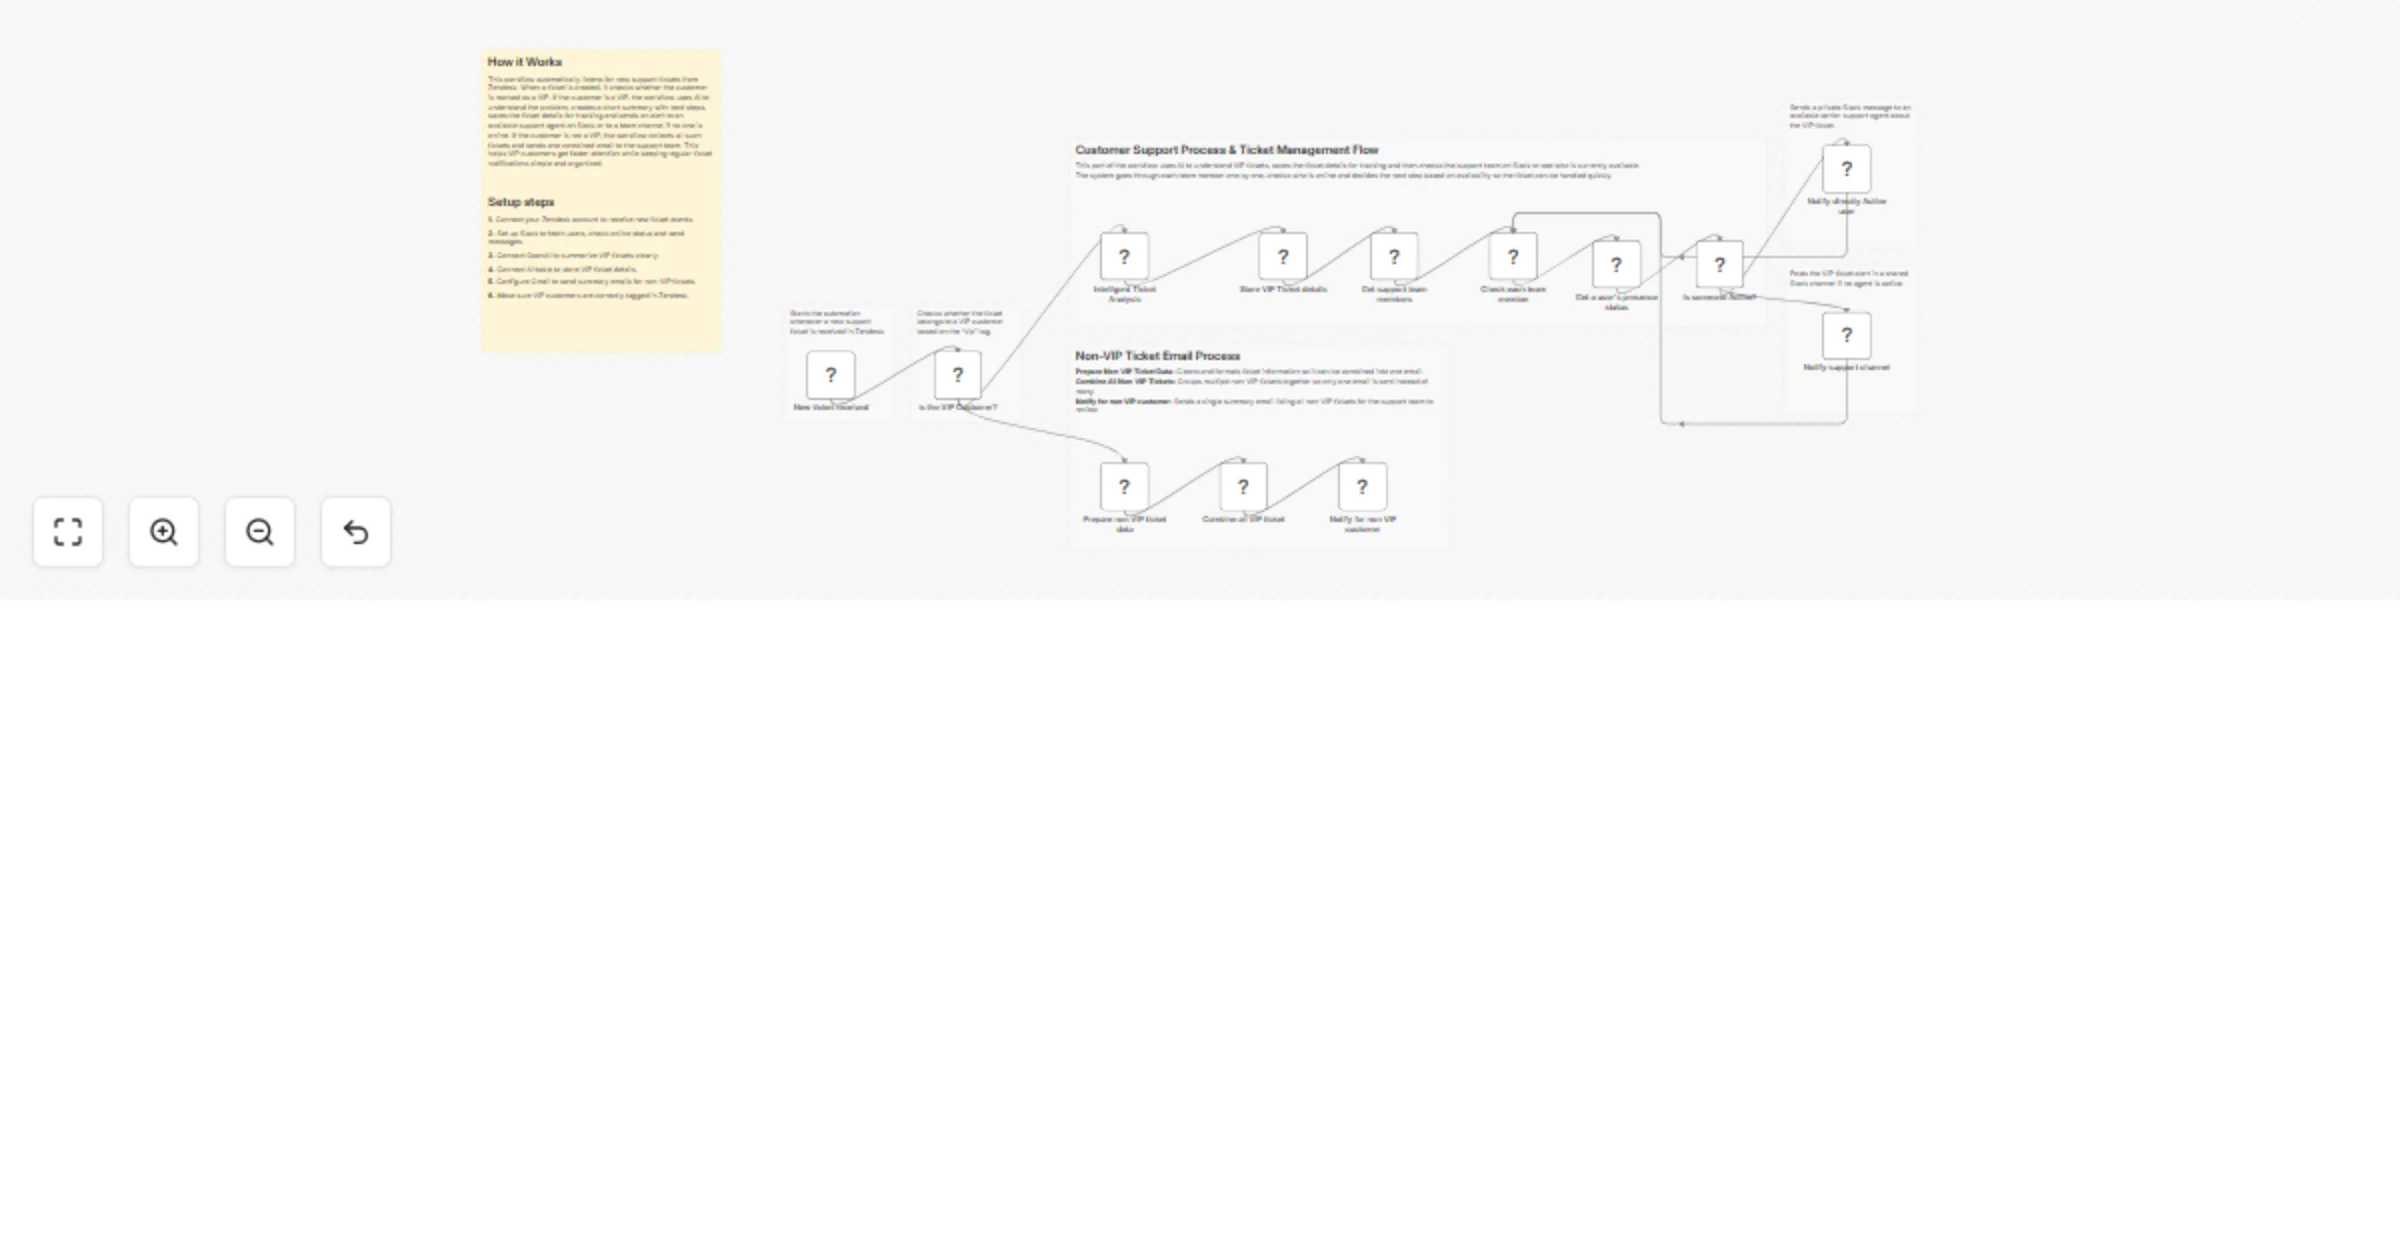
Escalate VIP Zendesk tickets with GPT-4, Slack alerts and email summaries
(Retail) VIP Customer Escalation Flow This workflow automatically monitors new Zendesk support tickets, identifies VI...

Monitor low-rated WooCommerce reviews with Google Sheets, Slack and OpenAI
(Retail) Social Review Monitoring This workflow automatically monitors WooCommerce product reviews, detects low rated...
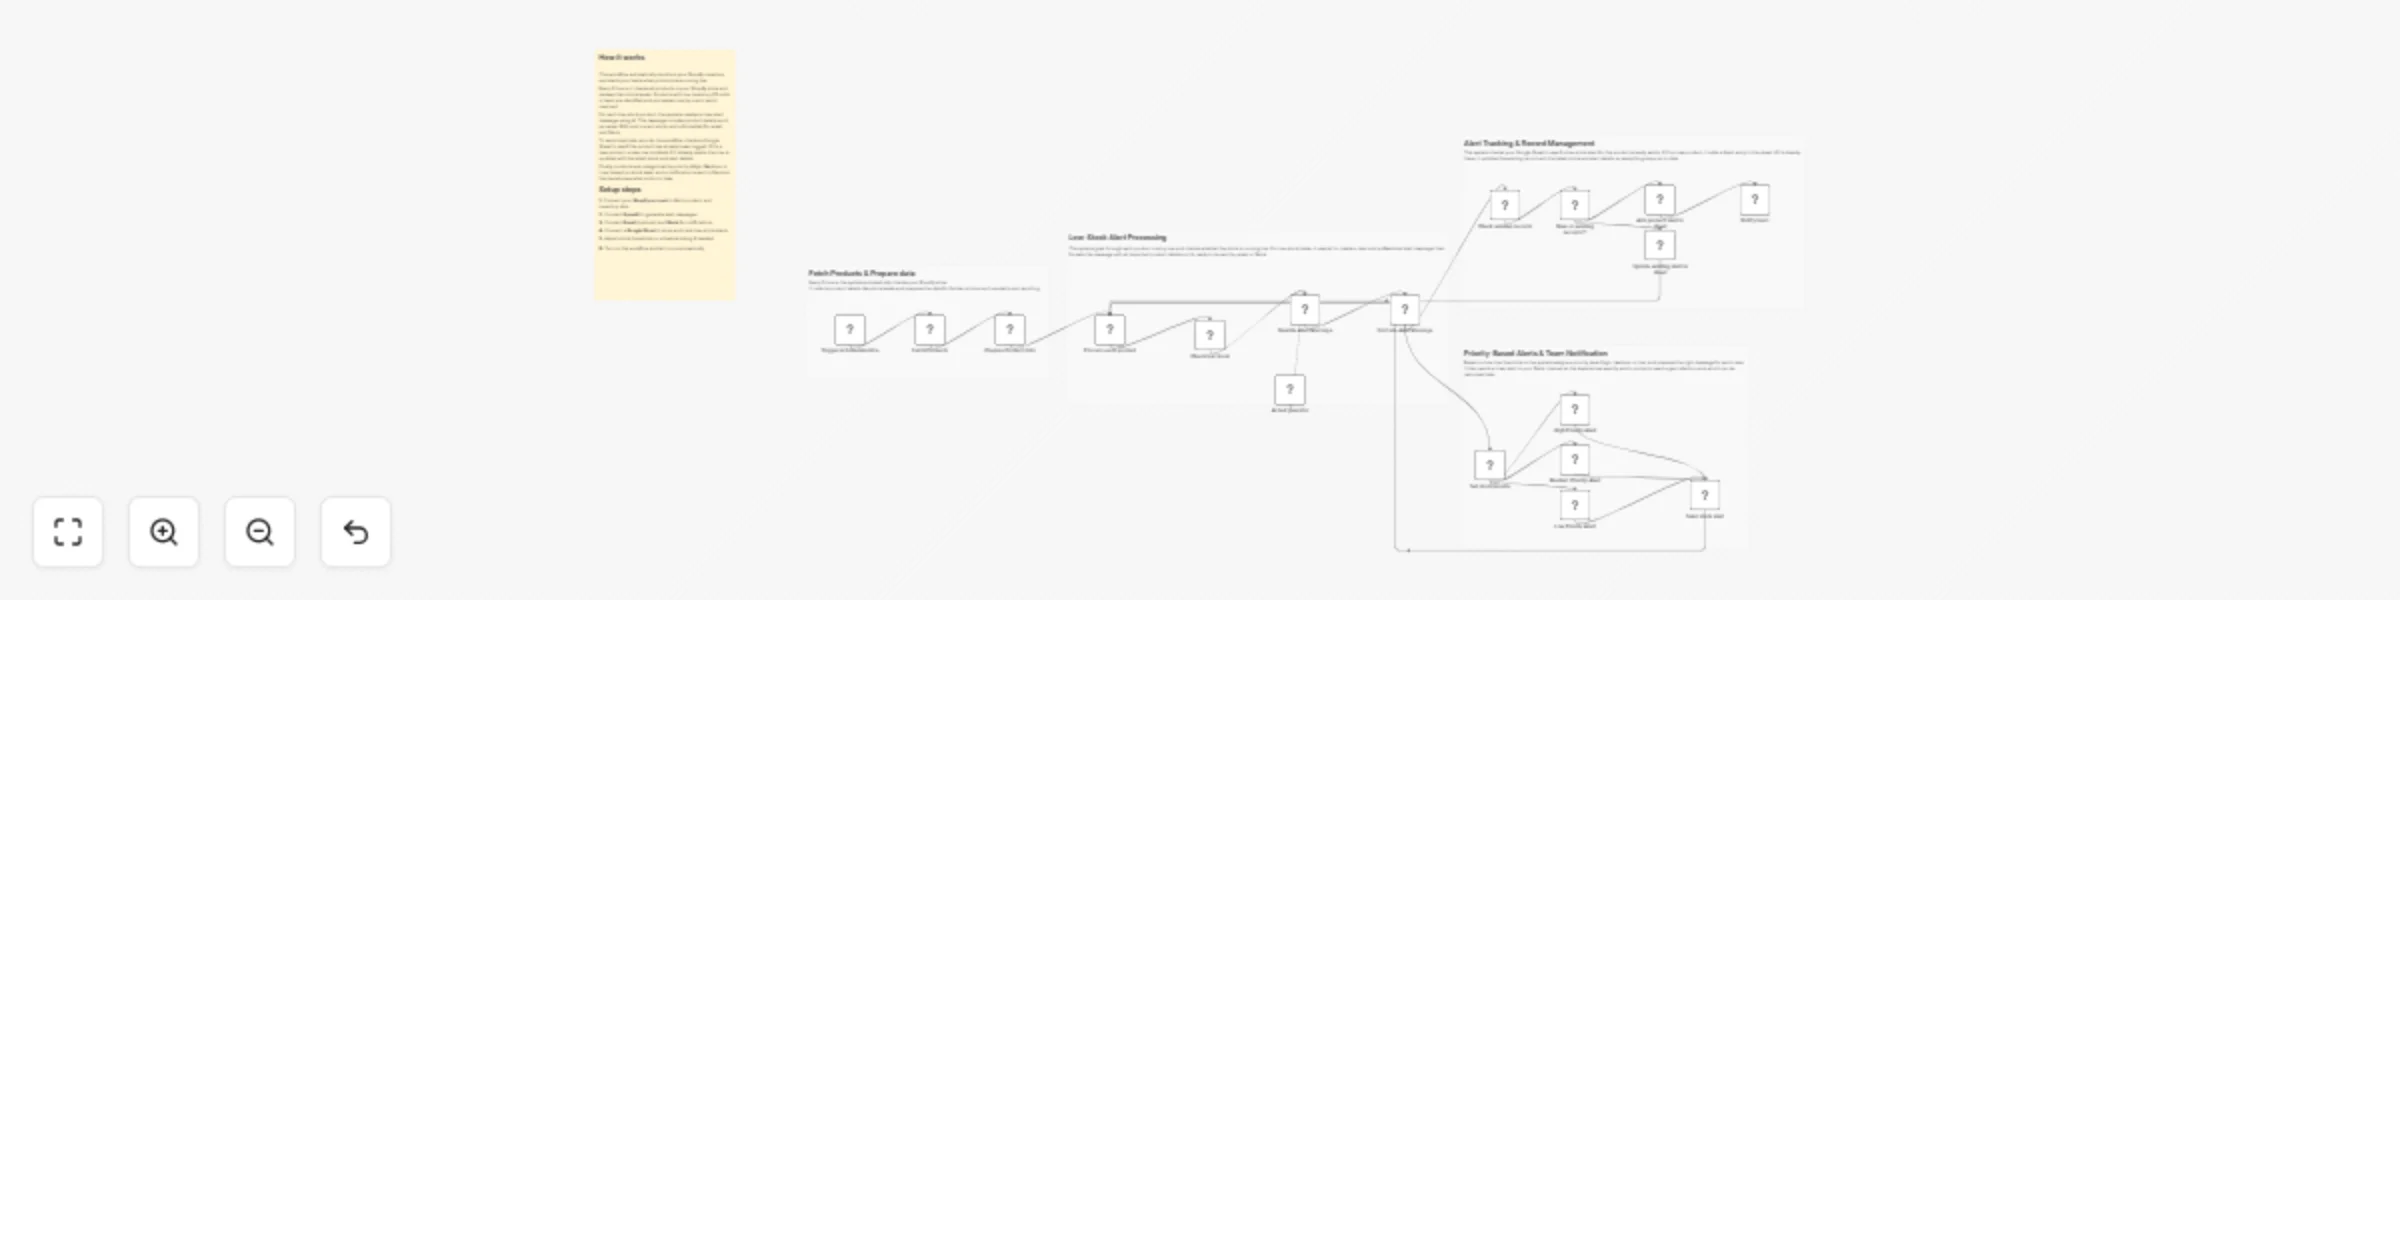
Monitor Shopify low-stock items with OpenAI, Google Sheets, Slack and email
(Retail) Supplier Restock Request Trigger This workflow automatically monitors your Shopify inventory, detects low st...
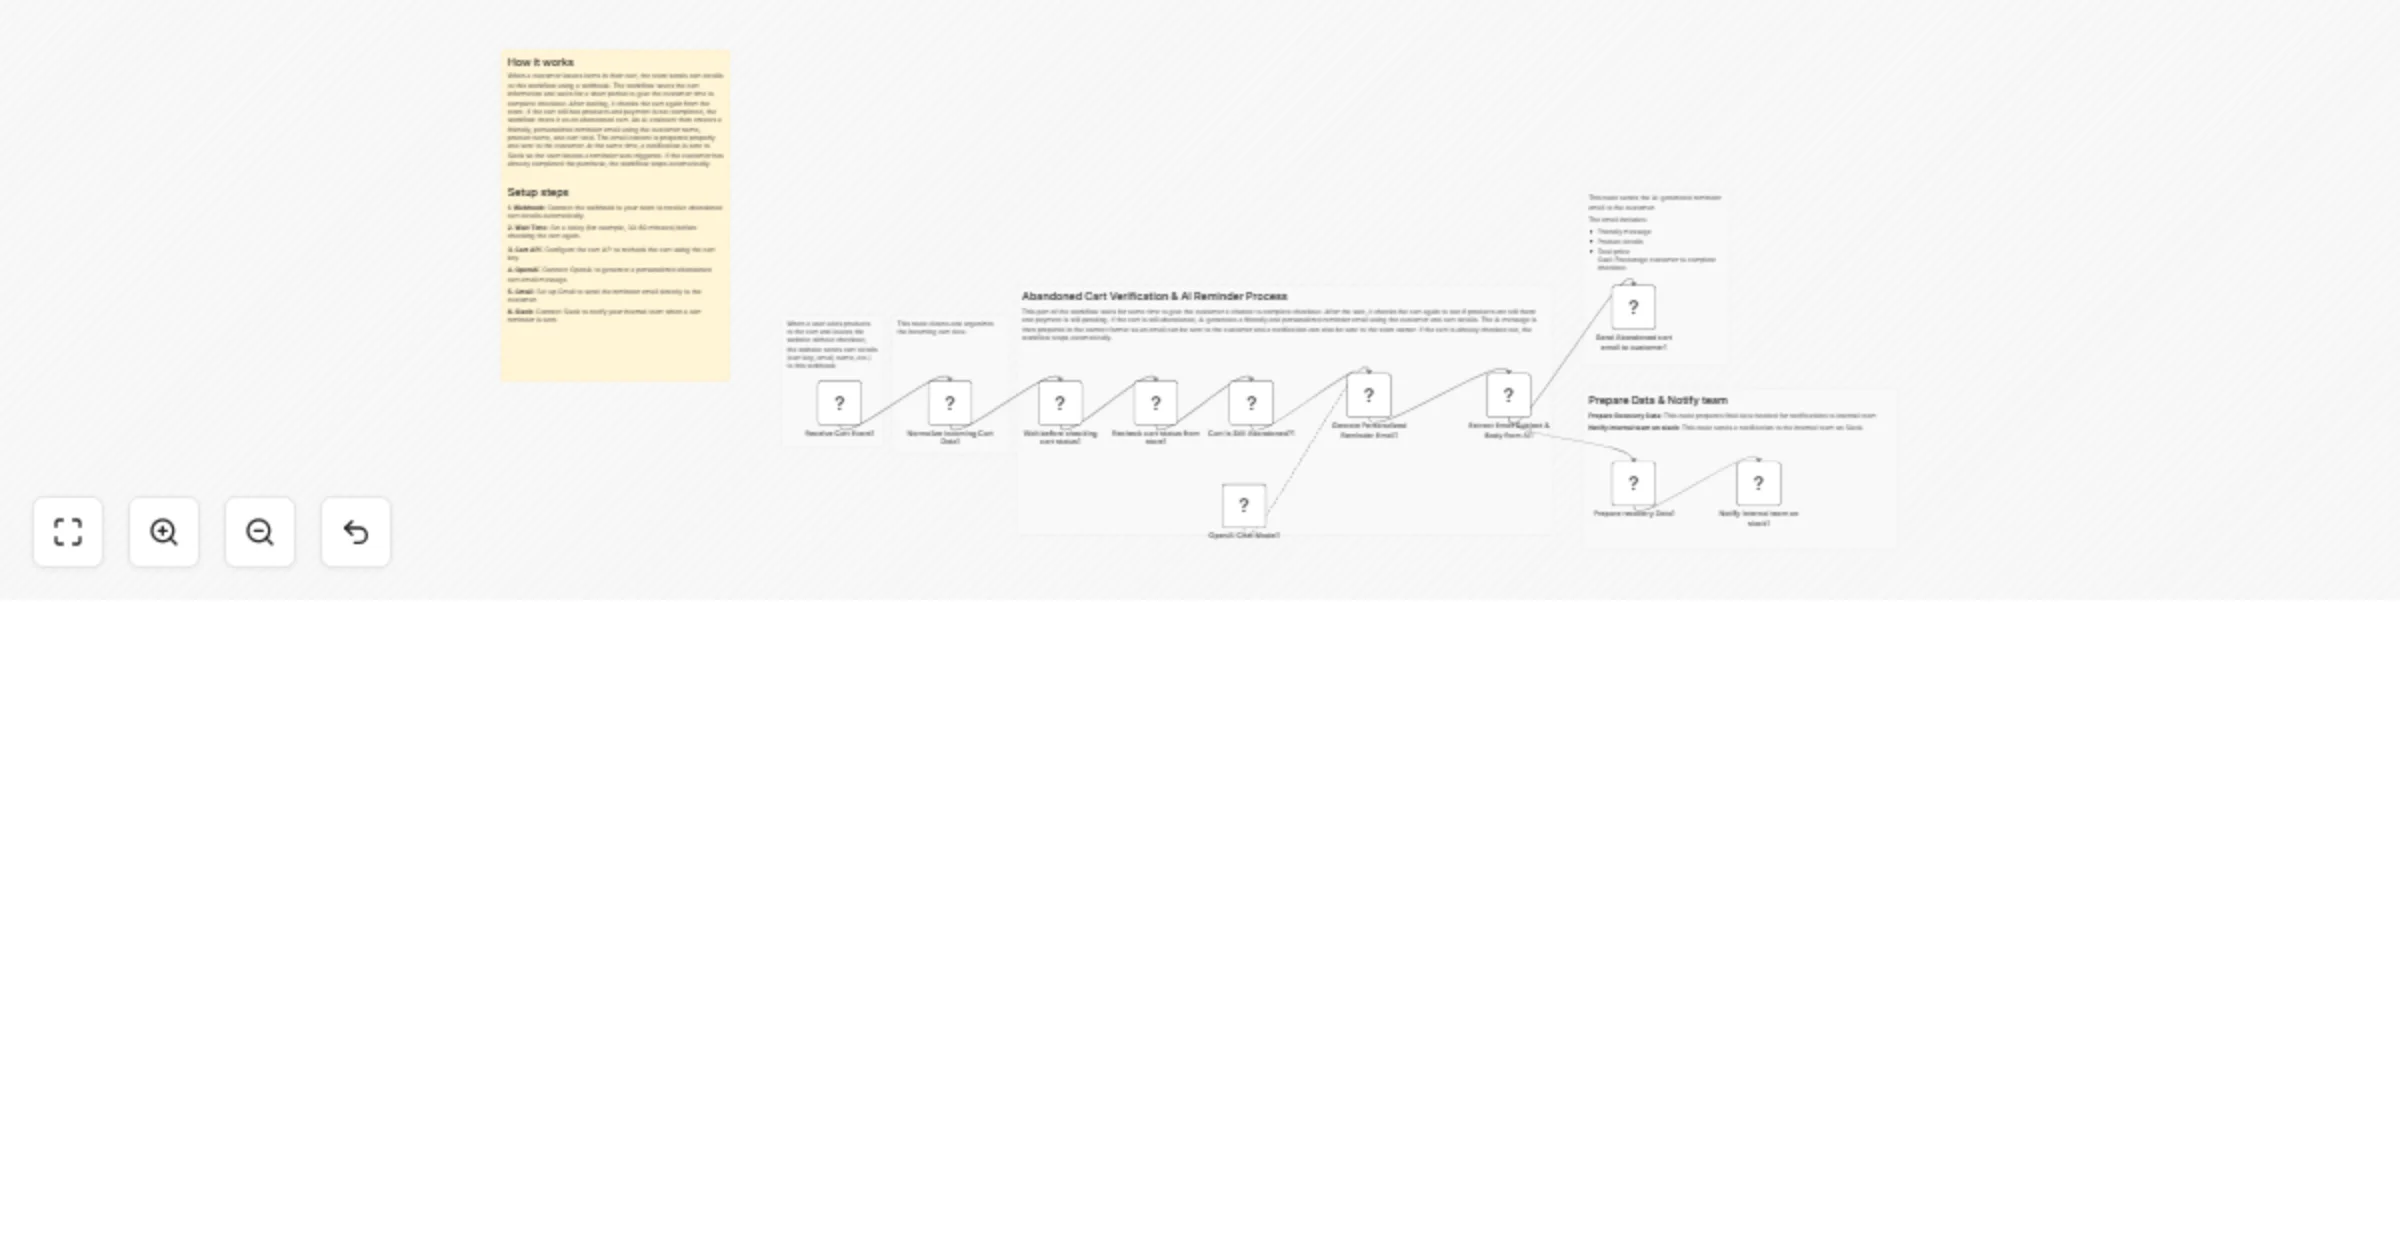
Recover abandoned WooCommerce carts using OpenAI GPT-4.1-mini, Gmail and Slack
AI Powered Abandoned Cart Recovery (WooCommerce + CoCart + n8n) This workflow automatically tracks abandoned carts fr...