
Viktor Klepikovskyi
Workflows by Viktor Klepikovskyi

Filter sitemap URLs and inspect indexing status with Google Search Console
This workflow provides a data driven approach to SEO by automating the indexing process. Instead of bulk submitting e...
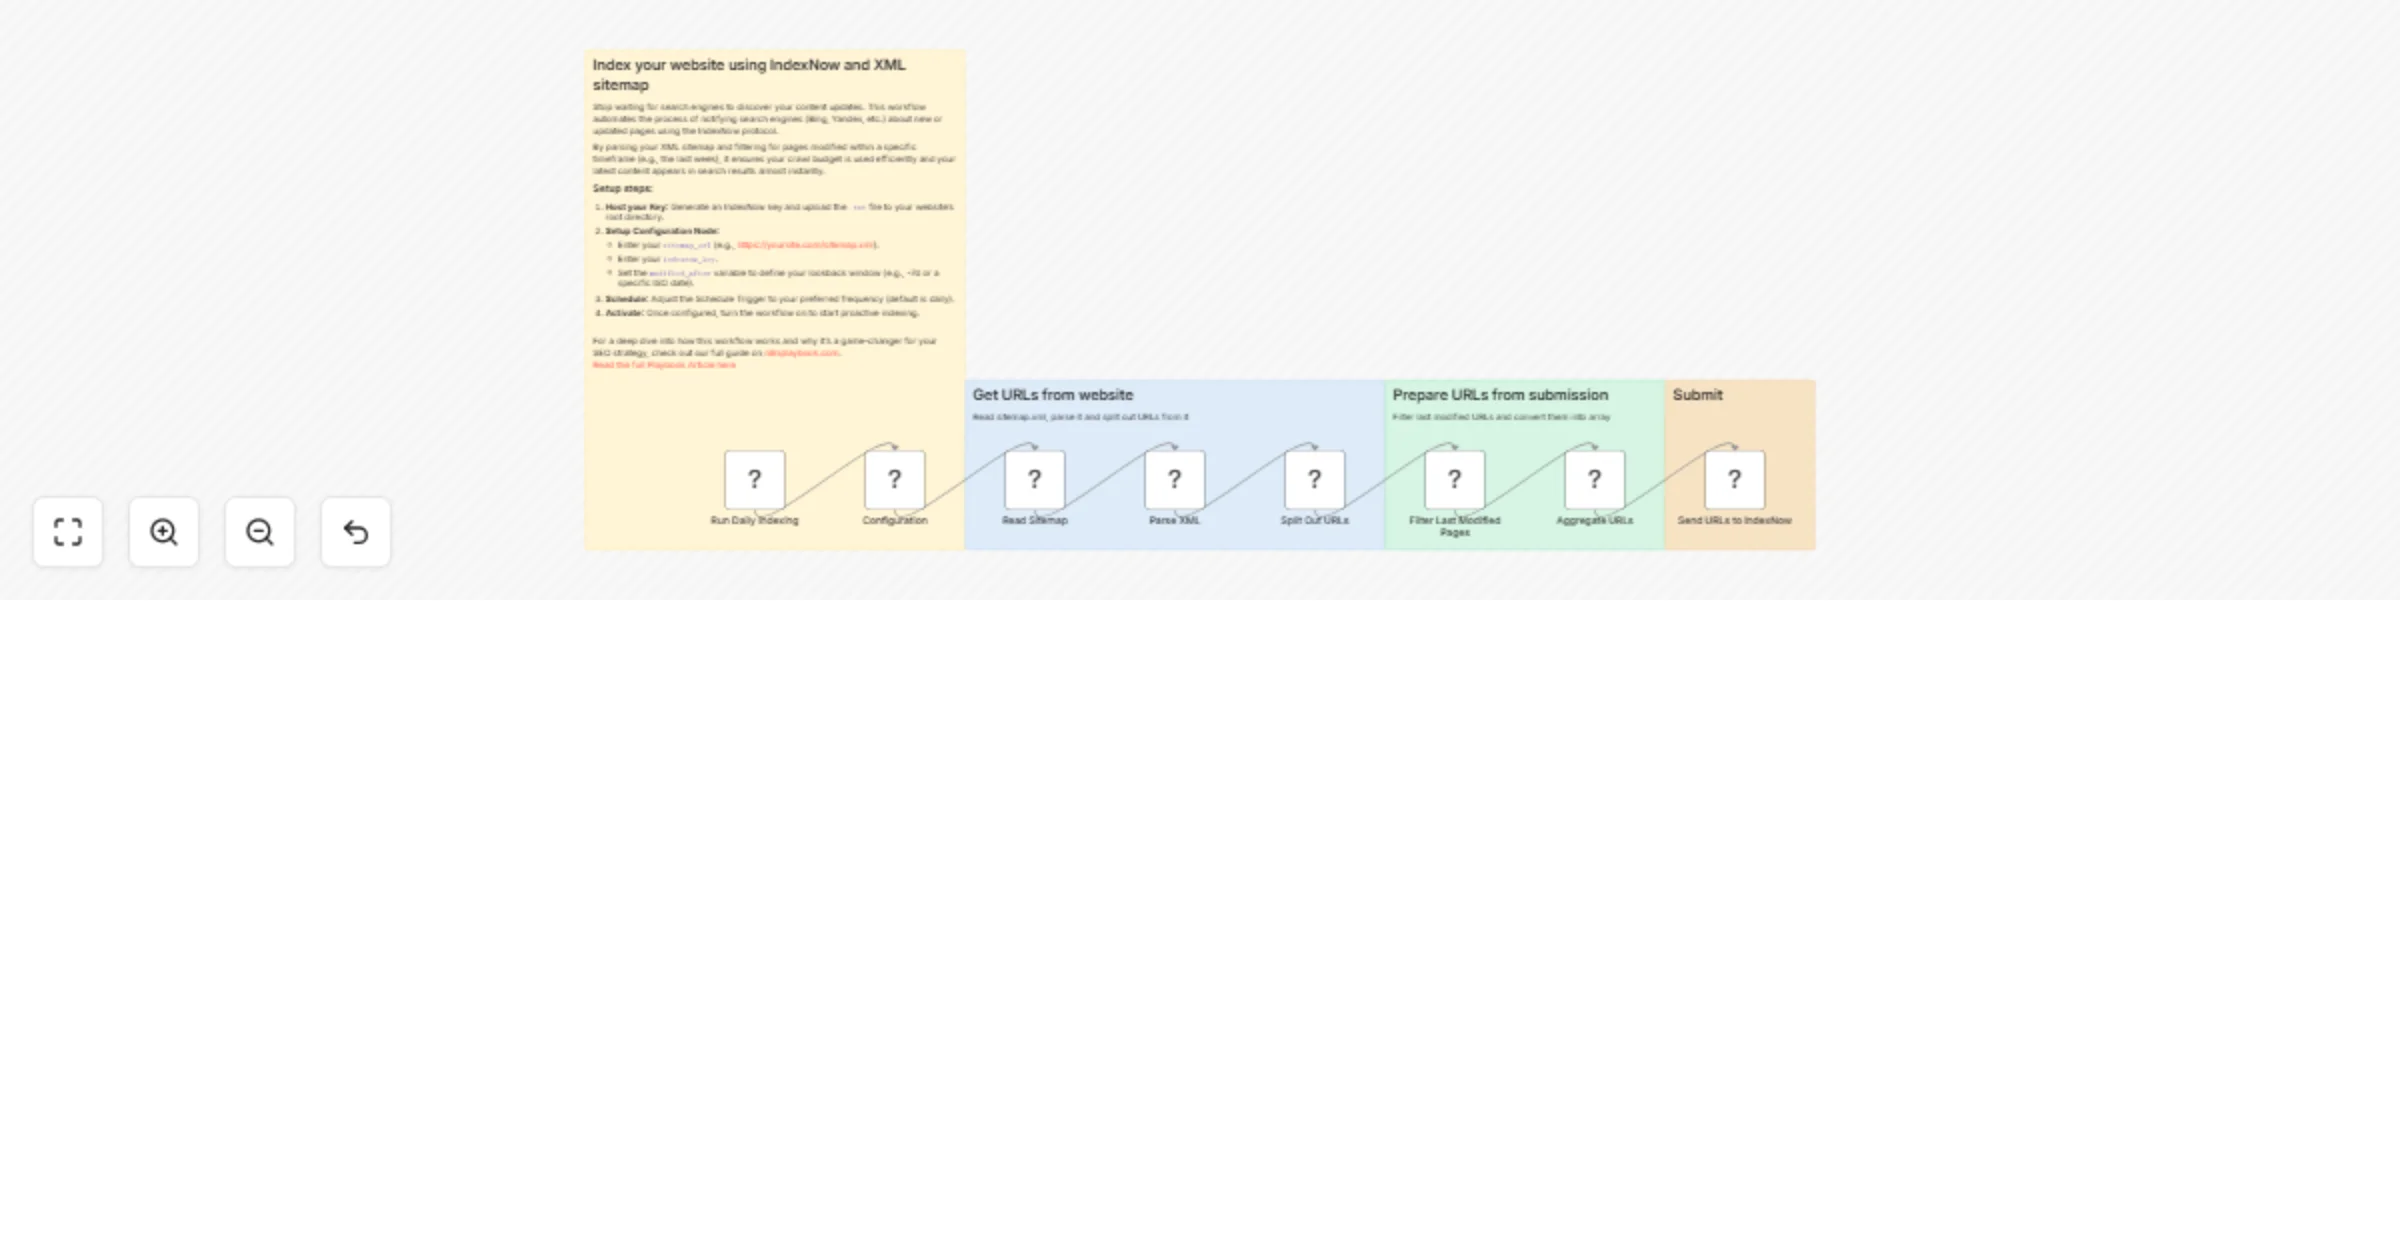
Index your website using IndexNow and your XML sitemap
Index your site using IndexNow and XML sitemap Stop waiting for search engines to discover your content updates. This...
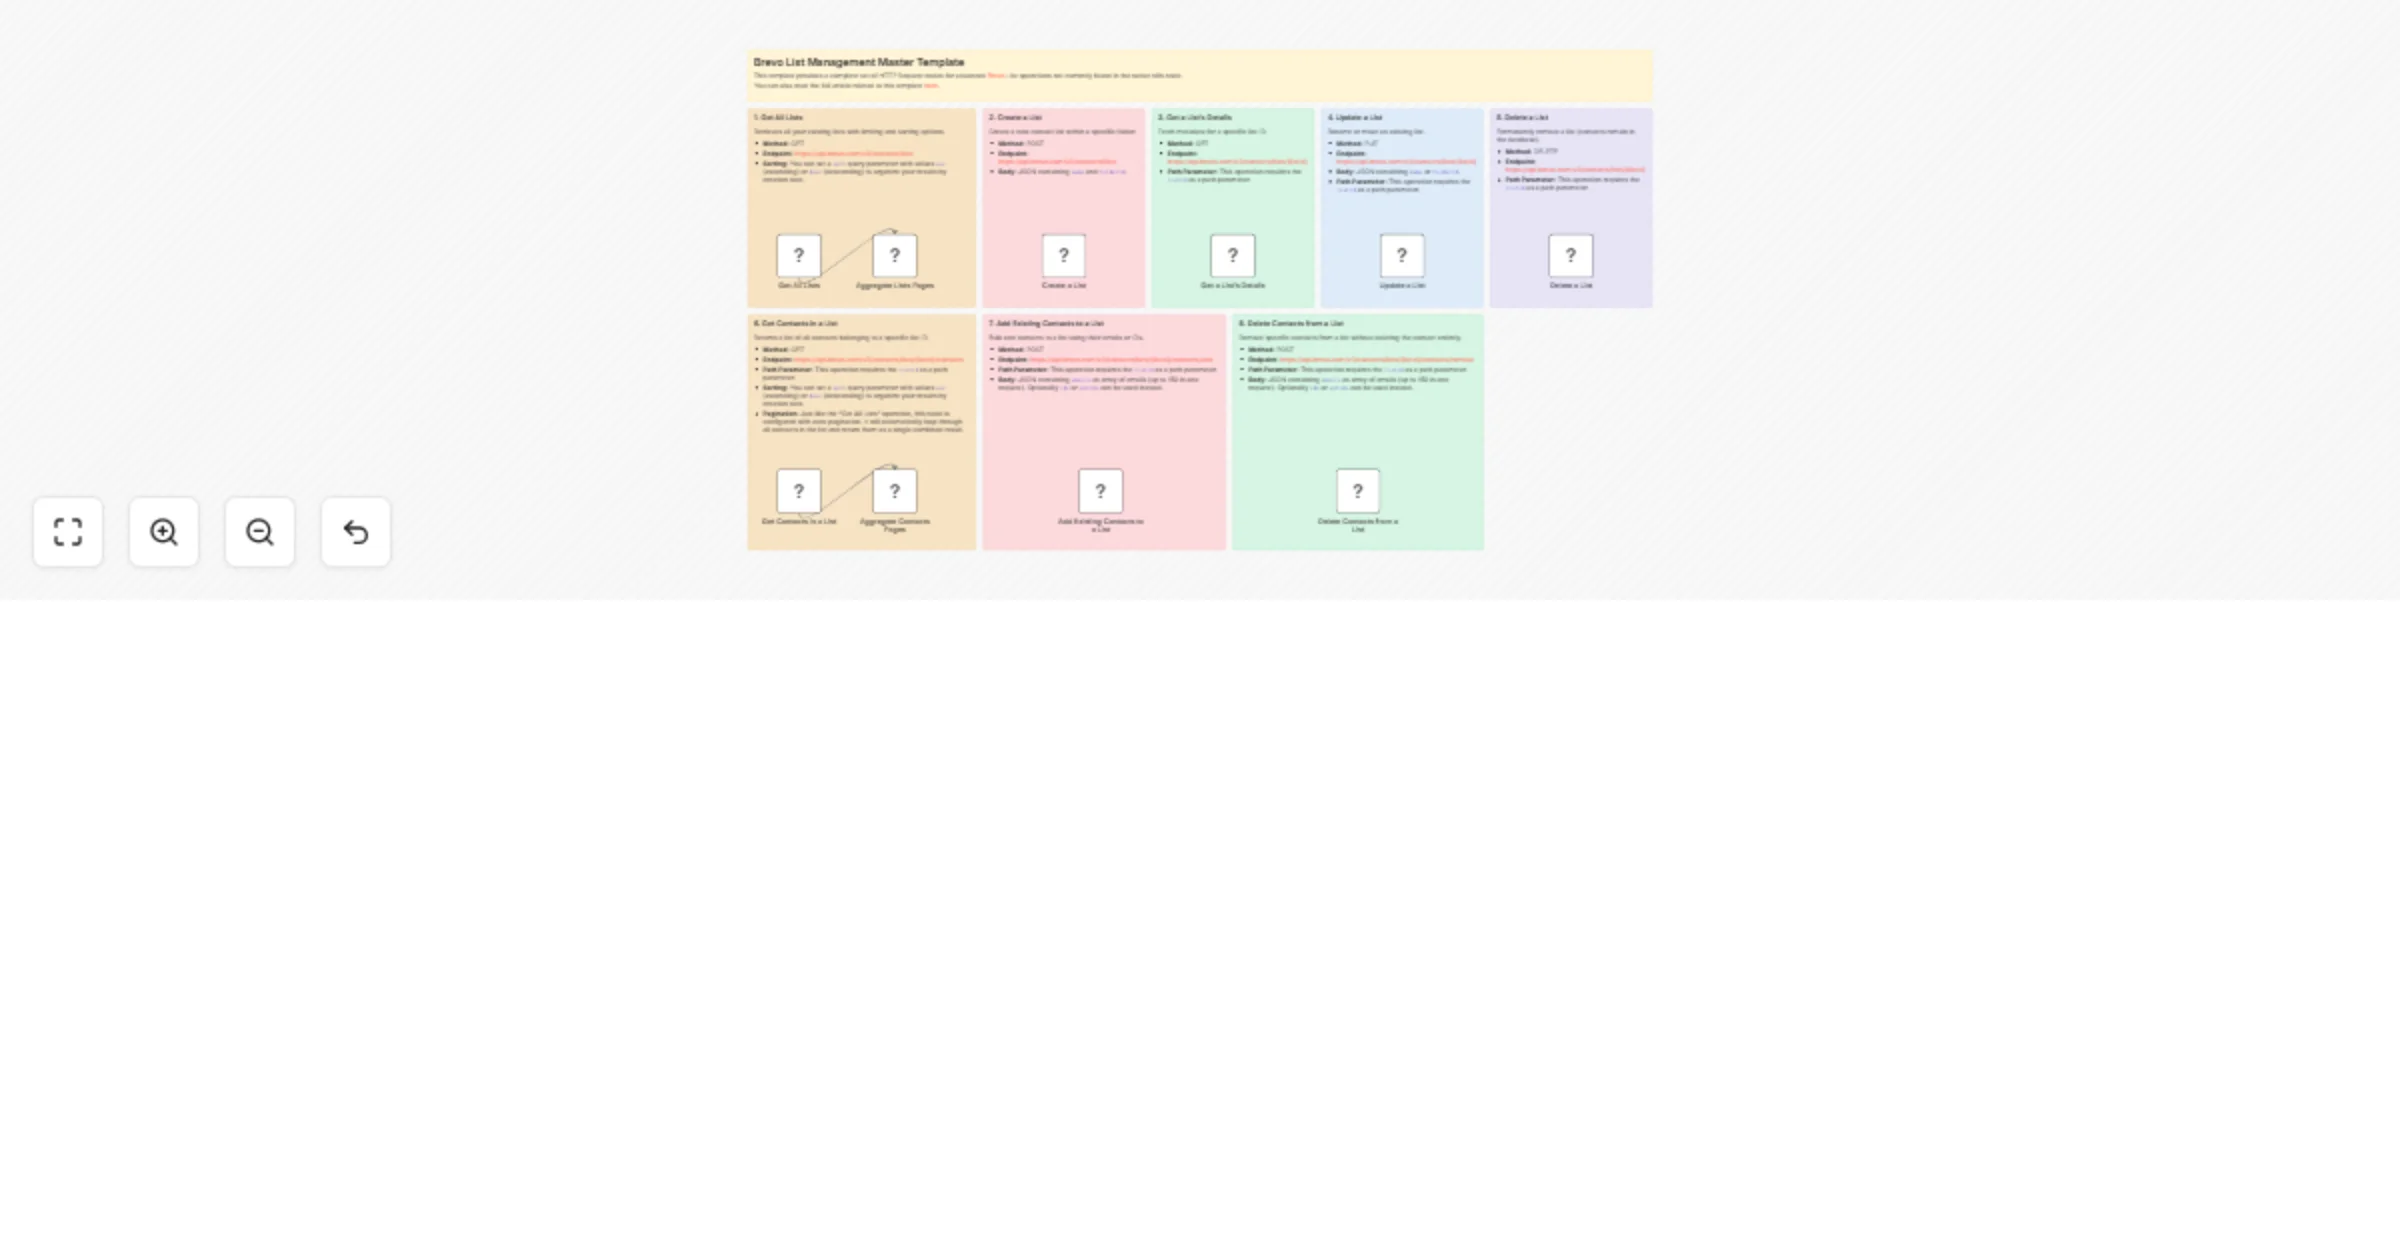
Manage Brevo contact lists with full CRUD and bulk membership control
Brevo List Management Master Template Master advanced Brevo list operations that go beyond the native n8n node. This...

Search hardware inventory with Supabase vector RAG and Google Gemini
Advanced AI Inventory Agent: Supabase Vector RAG & Gemini This workflow upgrades your AI agent from simple sheet read...

Scrape multi-page websites recursively with Google Sheets storage
Configurable Multi Page Web Scraper Introduction This n8n workflow provides a robust and highly reusable solution for...

Convert multiple binary files to base64 JSON arrays with no custom code
No Code: Convert Multiple Binary Files to Base64 Introduction This template provides a robust, purely no code solutio...
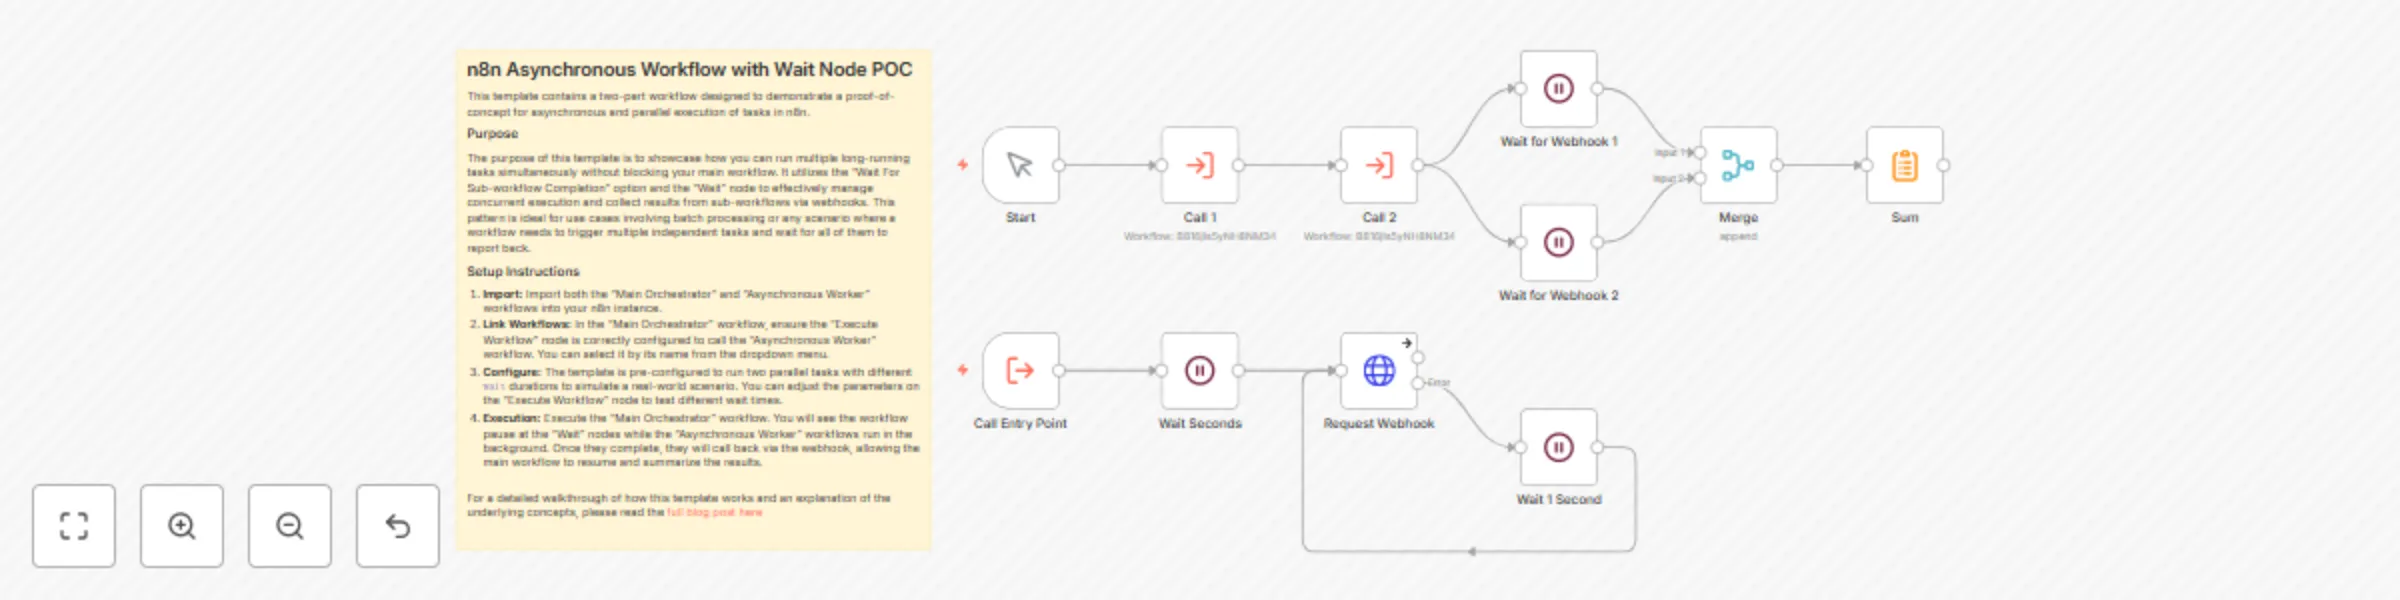
Run multiple tasks in parallel with asynchronous processing and webhooks
n8n Asynchronous Workflow with Wait Node POC This template contains a two part workflow designed to demonstrate a pro...
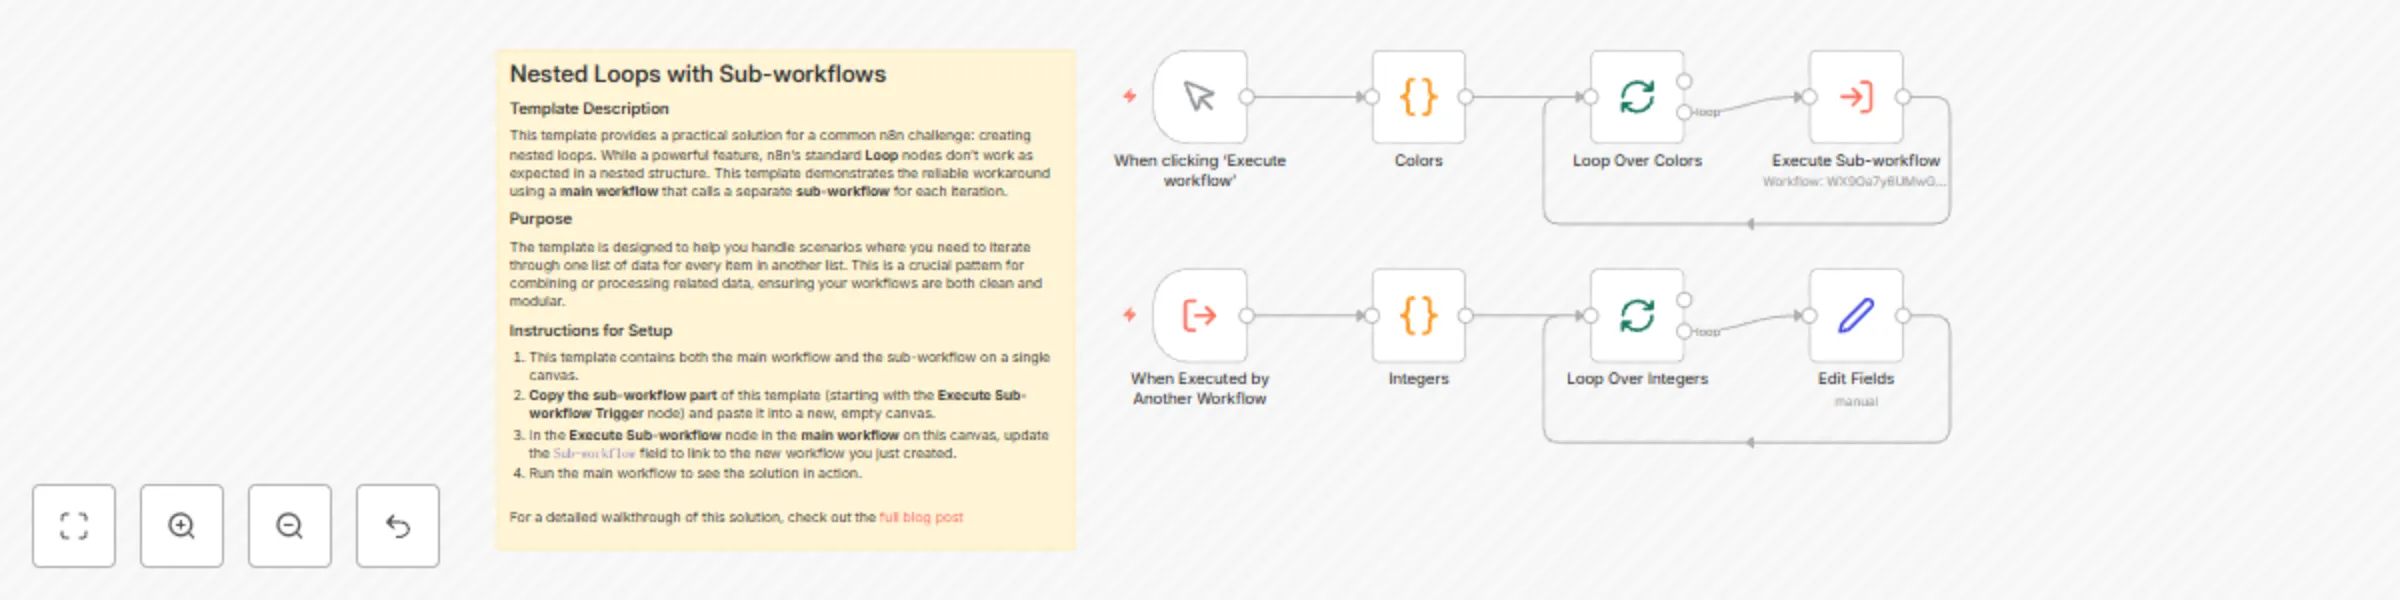
Create nested data processing loops using n8n sub-workflows
Nested Loops with Sub workflows Template Description This template provides a practical solution for a common n8n cha...

Create a CRUD REST API with Google Sheets database
Simple REST API with Google Sheets Introduction This workflow template demonstrates how to quickly and easily create...

Convert multiple files to base64 with JavaScript code
Base64 Encode Multiple Binary Files with a Code Node This template demonstrates how to handle multiple binary files i...

Sequential Google Sheets data processing with execution control
Preventing Simultaneous Executions of Scheduled Workflows This n8n template provides a robust solution for processing...

Preventing Google Sheets quota errors during batch processing
Preventing Google Sheets Quota Errors during Batch Processing This template provides a robust solution for dealing wi...

Advanced retry and delay logic
Advanced Retry and Delay Logic This template provides a robust solution for handling API rate limits and temporary se...

Google Sheets UI for n8n Workflow
Google Sheets UI for Workflow Control This n8n template provides a practical and efficient way to manage your n8n wor...

Reusable and independently testable sub-workflow
Reusable and Independently Testable Sub workflow This n8n workflow provides a standardized structure for building and...