J
JPres
5
Workflows
Workflows by JPres
Free intermediate
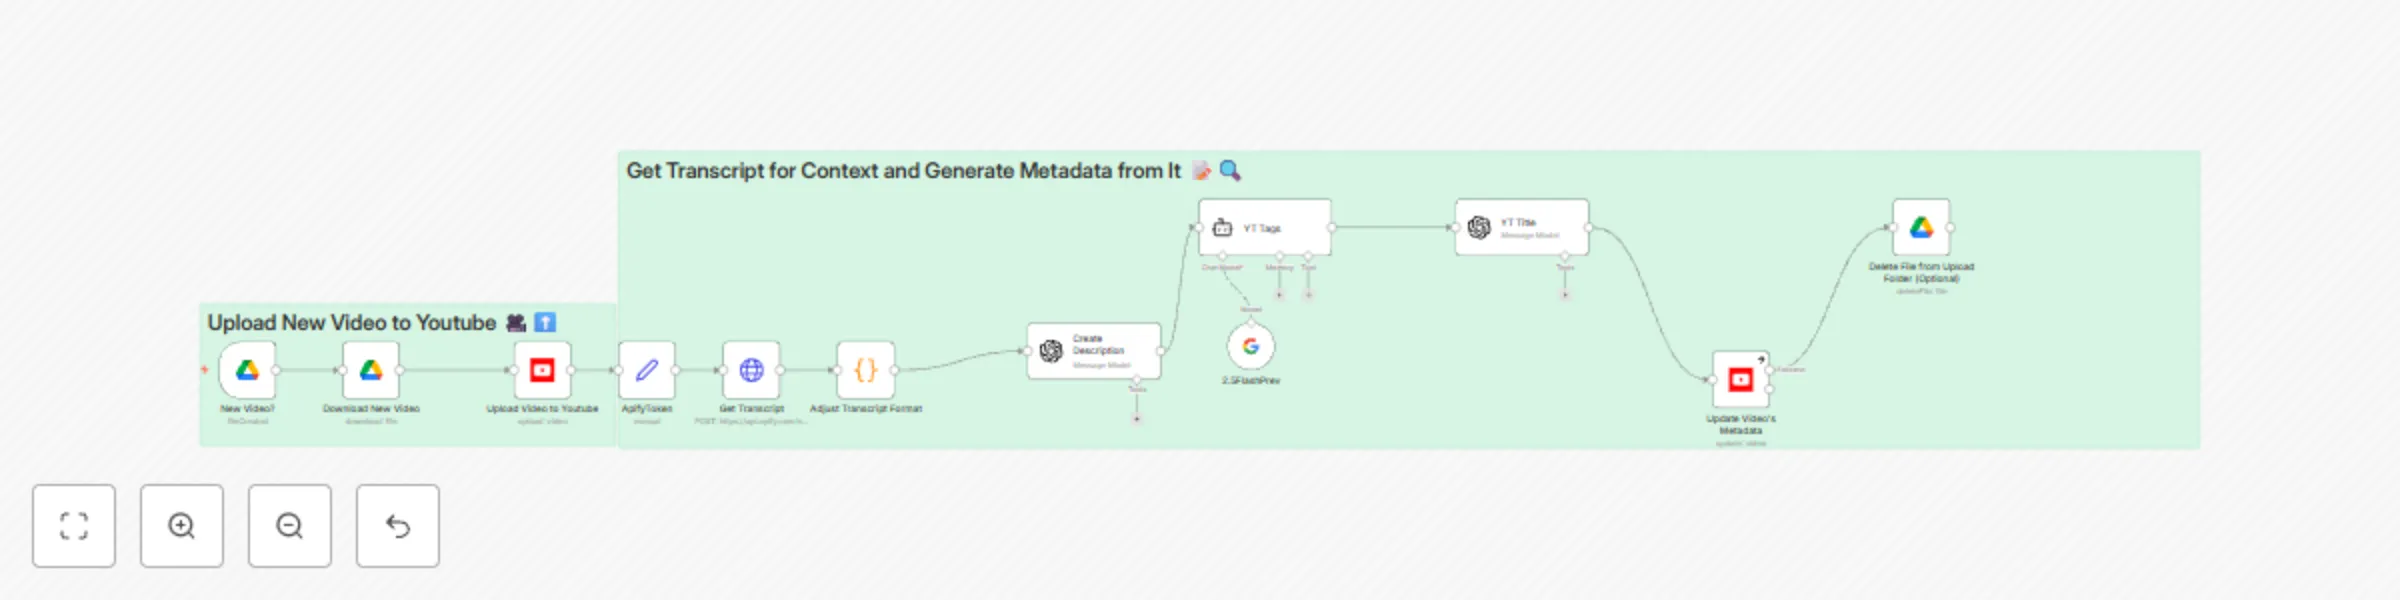
Automate YouTube uploads with AI-generated metadata from Google Drive
👥 Who Is This For? Content creators, marketing teams, and channel managers who want a simple, hands‑off solution to...
J
JPres Social Media
7 May 2025
12943
0

Free advanced
Automated YouTube video scheduling & AI metadata generation 🎬
👥 Who Is This For? Content creators, marketing teams, and channel managers who need to streamline video publishing w...
J
JPres Content Creation
6 May 2025
32840
0
Free intermediate
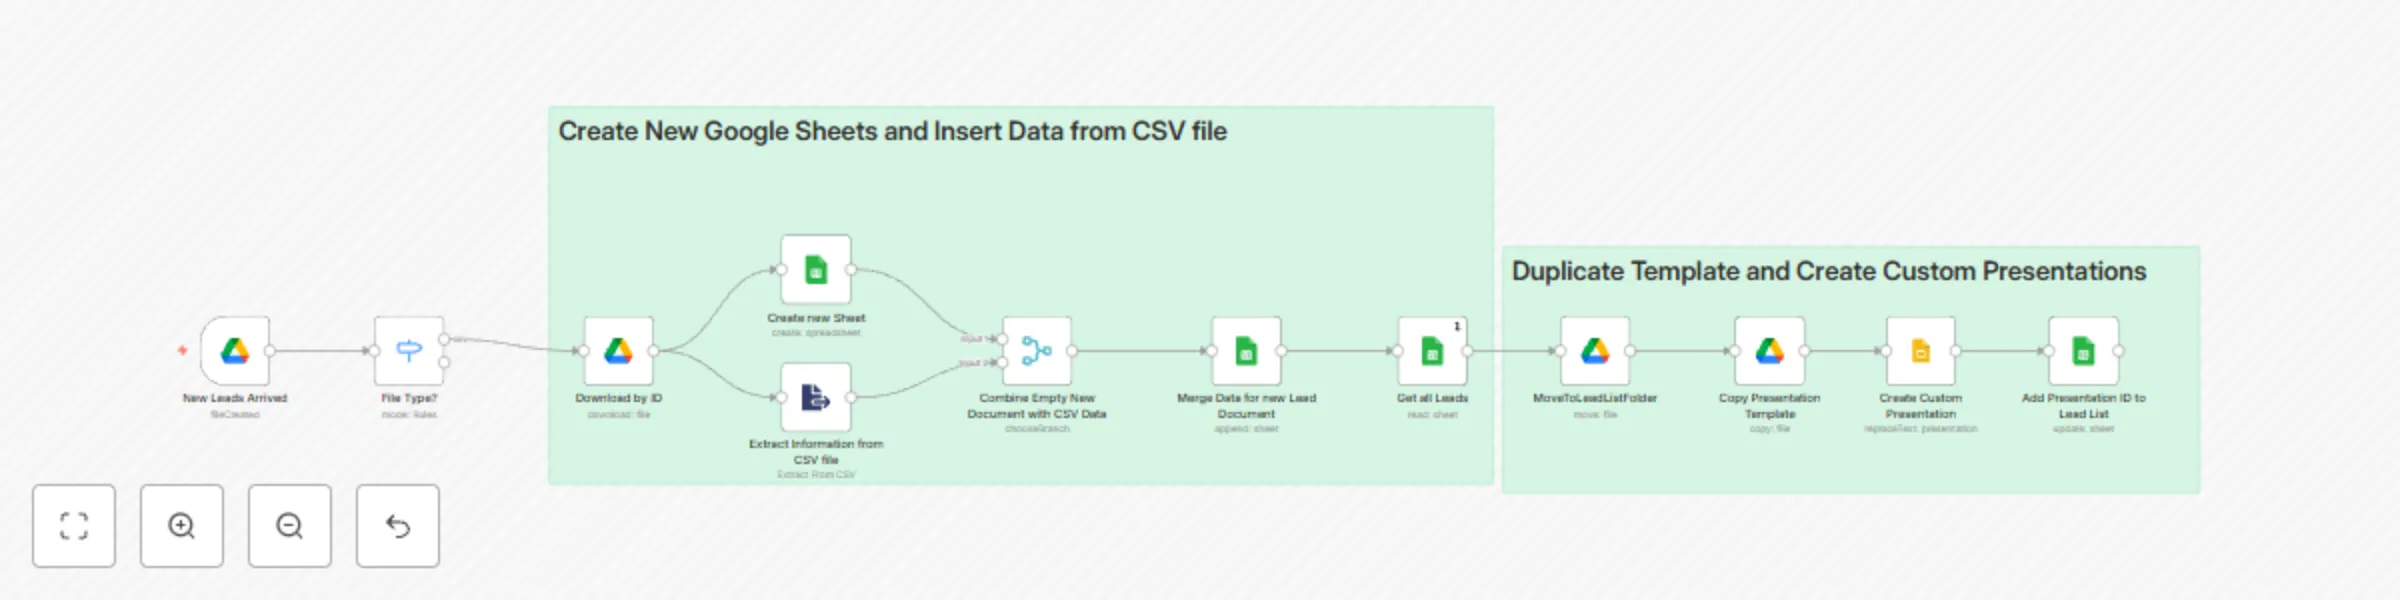
Create customized Google Slides presentations from CSV data for cold outreach 🚀
👥 Who Is This For? Sales and marketing teams seeking efficient, hands‑free generation of personalized slide decks fo...
J
JPres Content Creation
6 May 2025
3481
0
Free intermediate
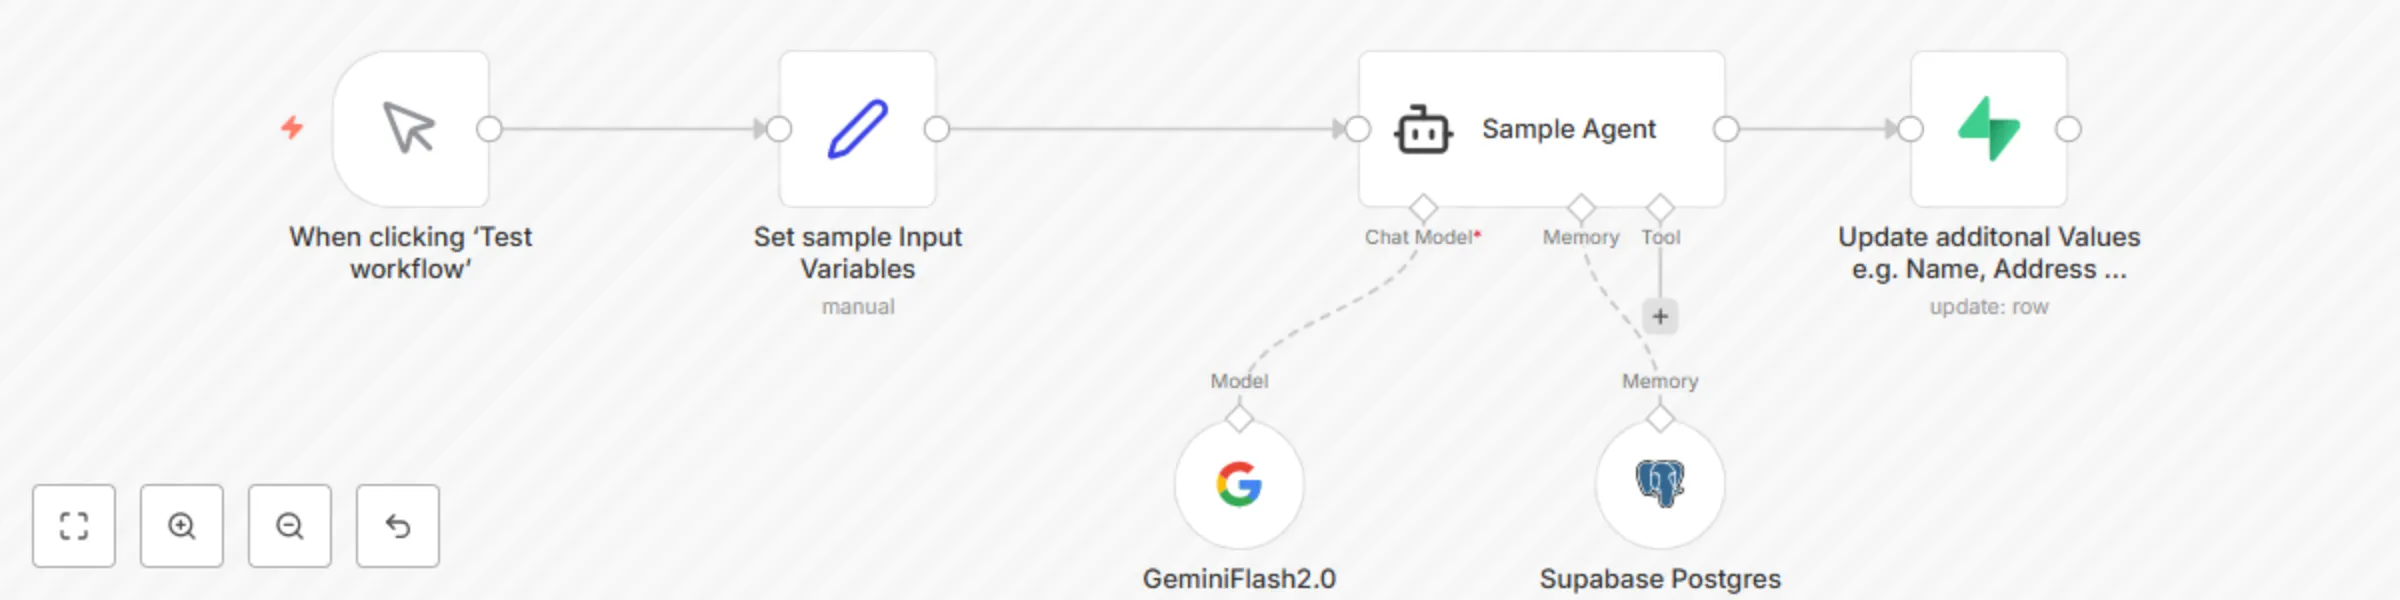
Store chat data in Supabase PostgreSQL for WhatsApp/Slack chatbot
n8n Template: Store Chat Data in Supabase PostgreSQL for WhatsApp/Slack Integration This n8n template captures chat d...
J
JPres Support Chatbot
5 May 2025
1081
0
Free intermediate
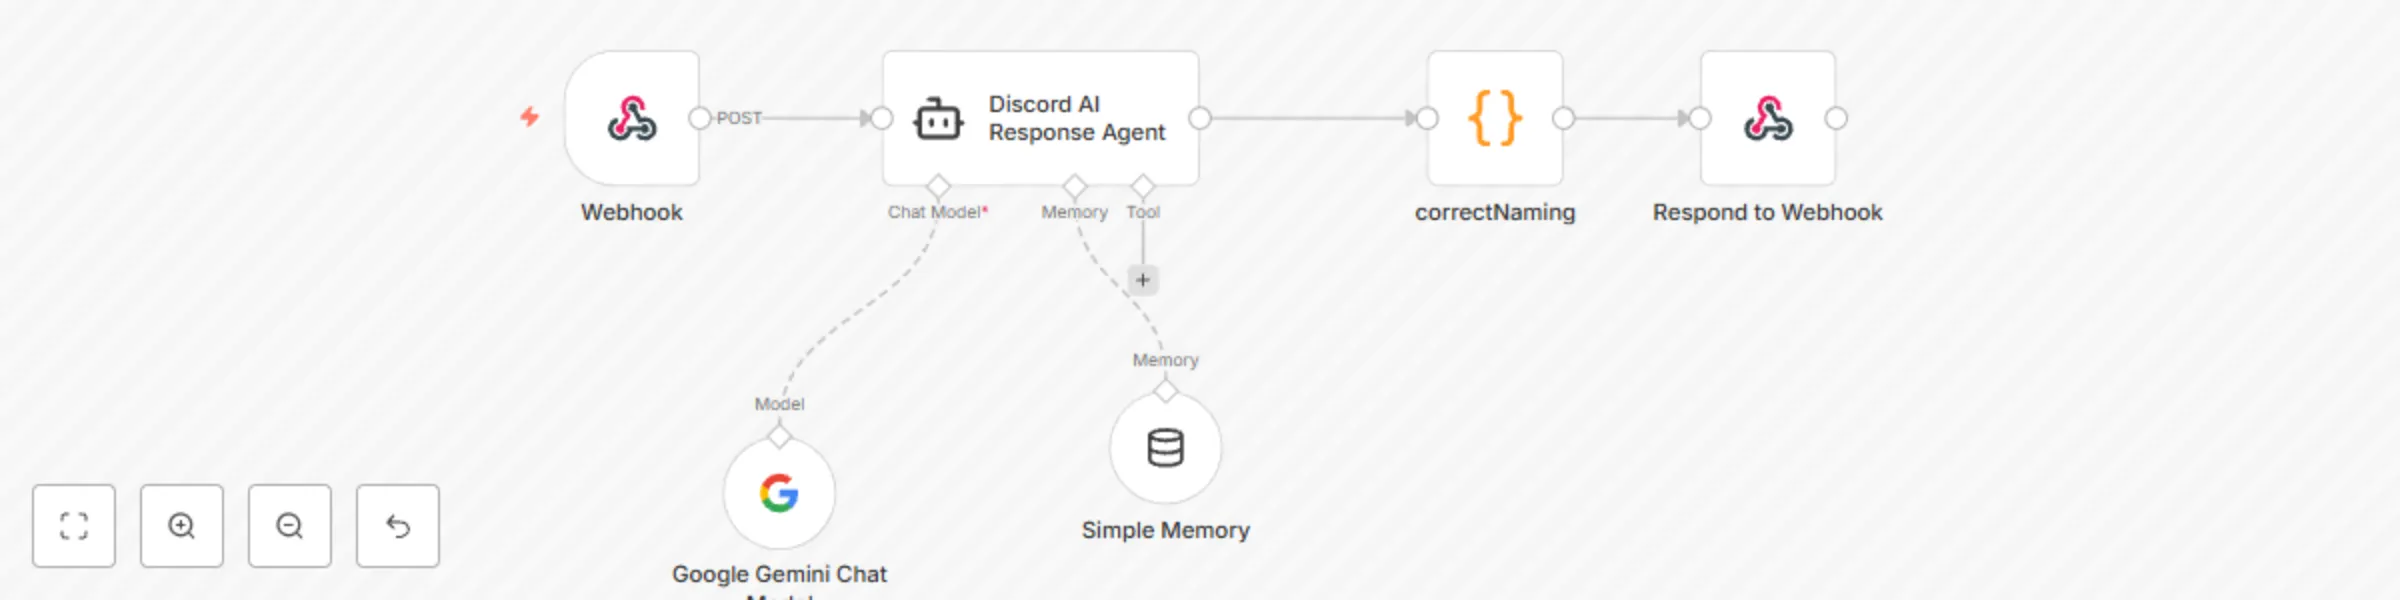
Automated Discord chatbot for chat interaction in channel using Gemini 2.0 Flash
A Discord bot that responds to mentions by sending messages to n8n workflows and returning the responses. Connects Di...
J
JPres Miscellaneous
7 Apr 2025
3341
0