P
Punit
4
Workflows
Workflows by Punit
Free advanced
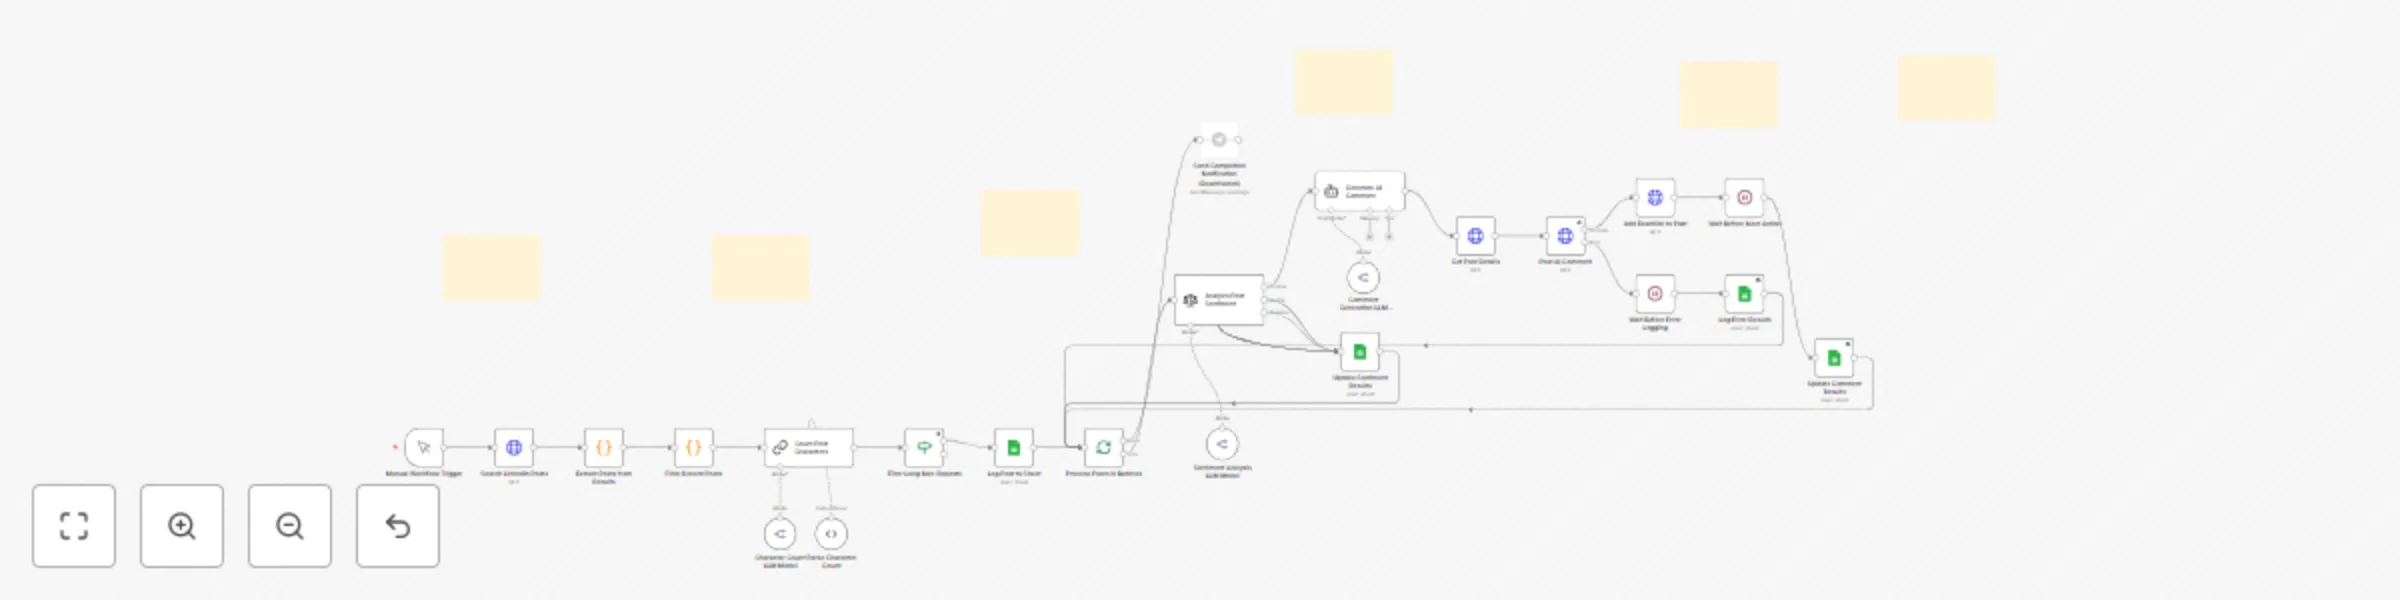
Automate LinkedIn engagement with GPT-4o sentiment analysis & smart comments
LinkedIn Auto Engagement AI Agent Automatically find, analyze, and engage with relevant LinkedIn posts using AI power...
P
Punit Social Media
9 Oct 2025
54
0

Free advanced
Automated customer onboarding with HubSpot, Gmail, and AI-powered scheduling
HubSpot Customer Onboarding Automation Overview Streamline your customer onboarding process with this intelligent aut...
P
Punit Lead Nurturing
28 Sep 2025
208
0

Free advanced
Automated blog post generator with GPT-4, DALL-E, and Wikipedia for WordPress
WordPress AI Content Creator Overview Transform a few keywords into professionally written, SEO optimized WordPress b...
P
Punit Content Creation
28 Sep 2025
1124
0
Free intermediate
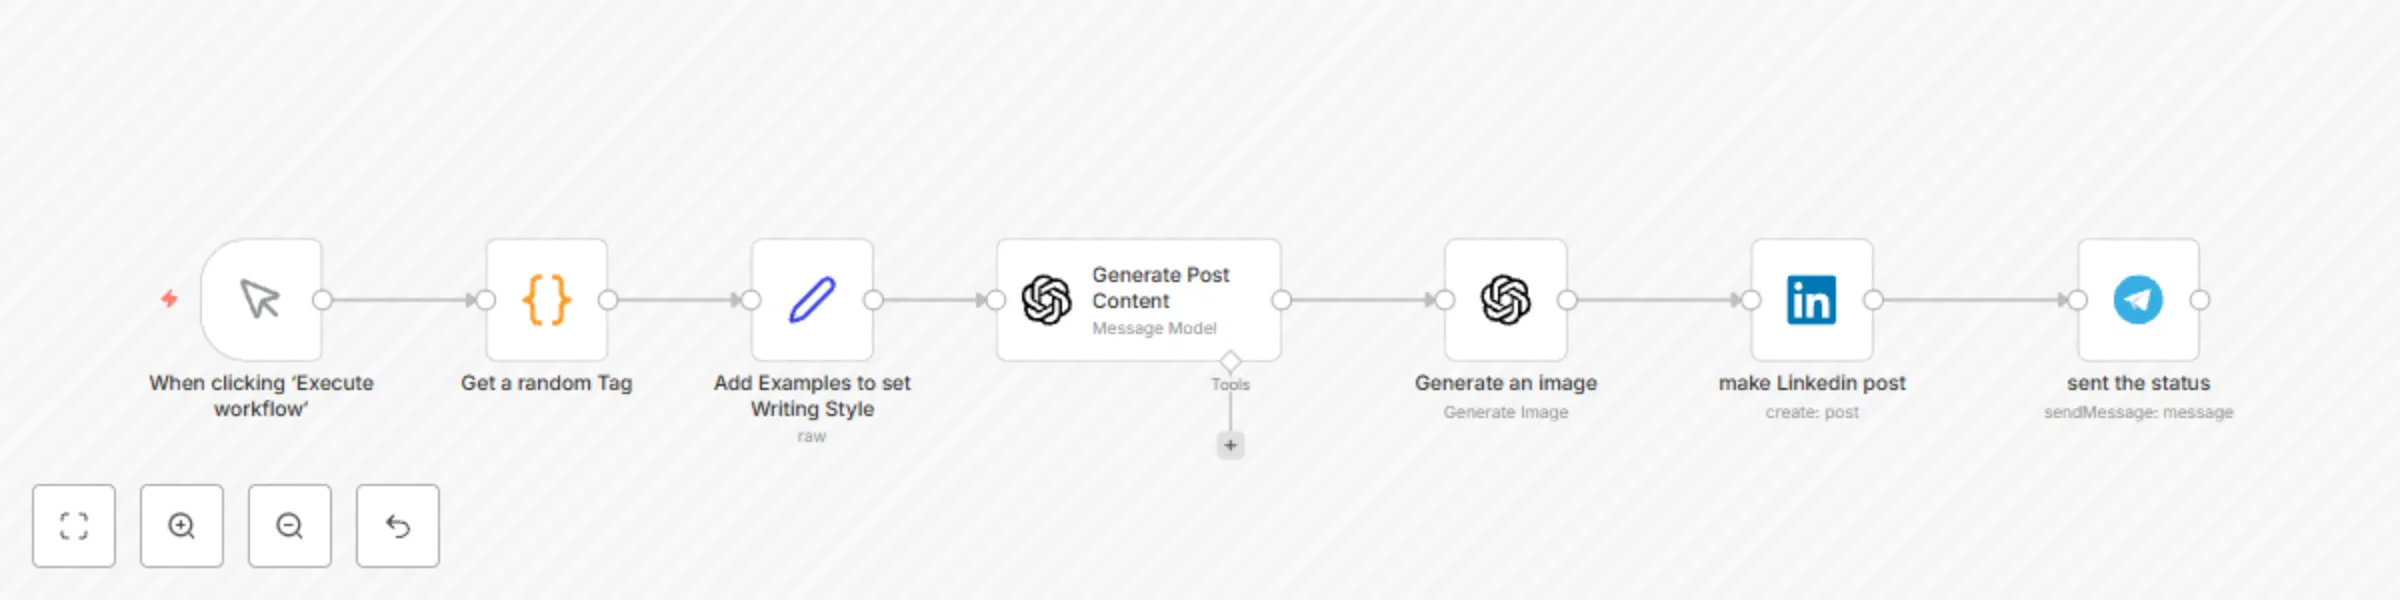
LinkedIn auto-posting with GPT-4o content & image generation + Telegram alerts
This n8n workflow automates the process of generating and publishing LinkedIn posts that align with your personal bra...
P
Punit Social Media
5 Aug 2025
1816
0