
Prueba
3
Workflows
Workflows by Prueba
Free advanced
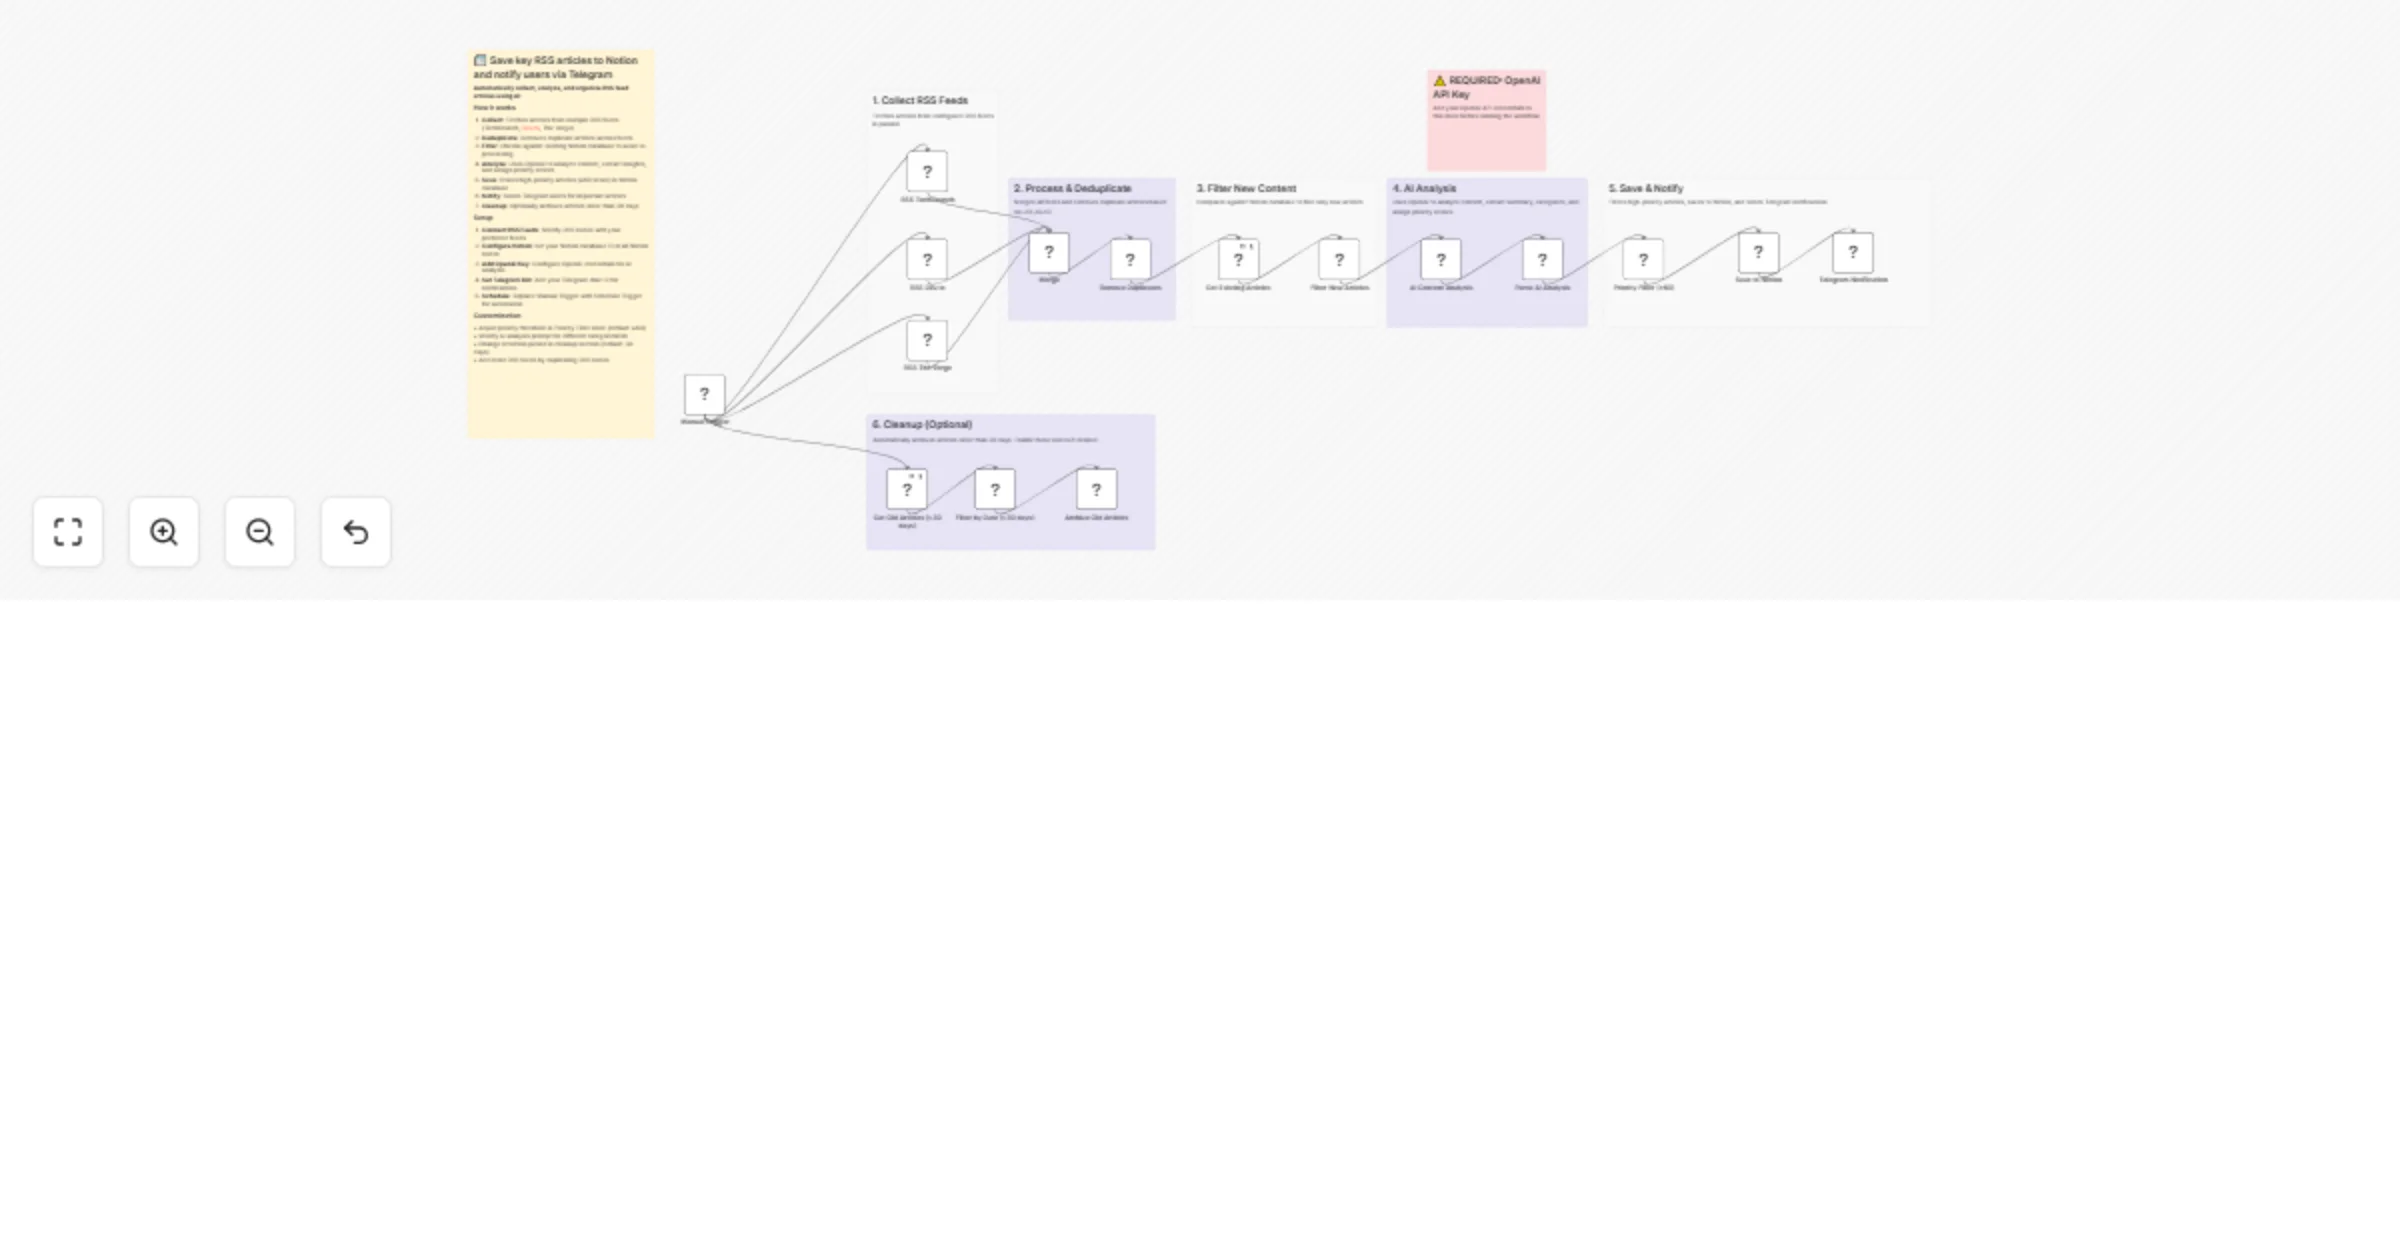
Curate key RSS articles with OpenAI, save to Notion, and notify via Telegram
Think of this workflow as your personal news assistant that: Monitors multiple technology websites 24/7 Uses AI to re...
Market Research
9 Jan 2026
21
0
Free advanced
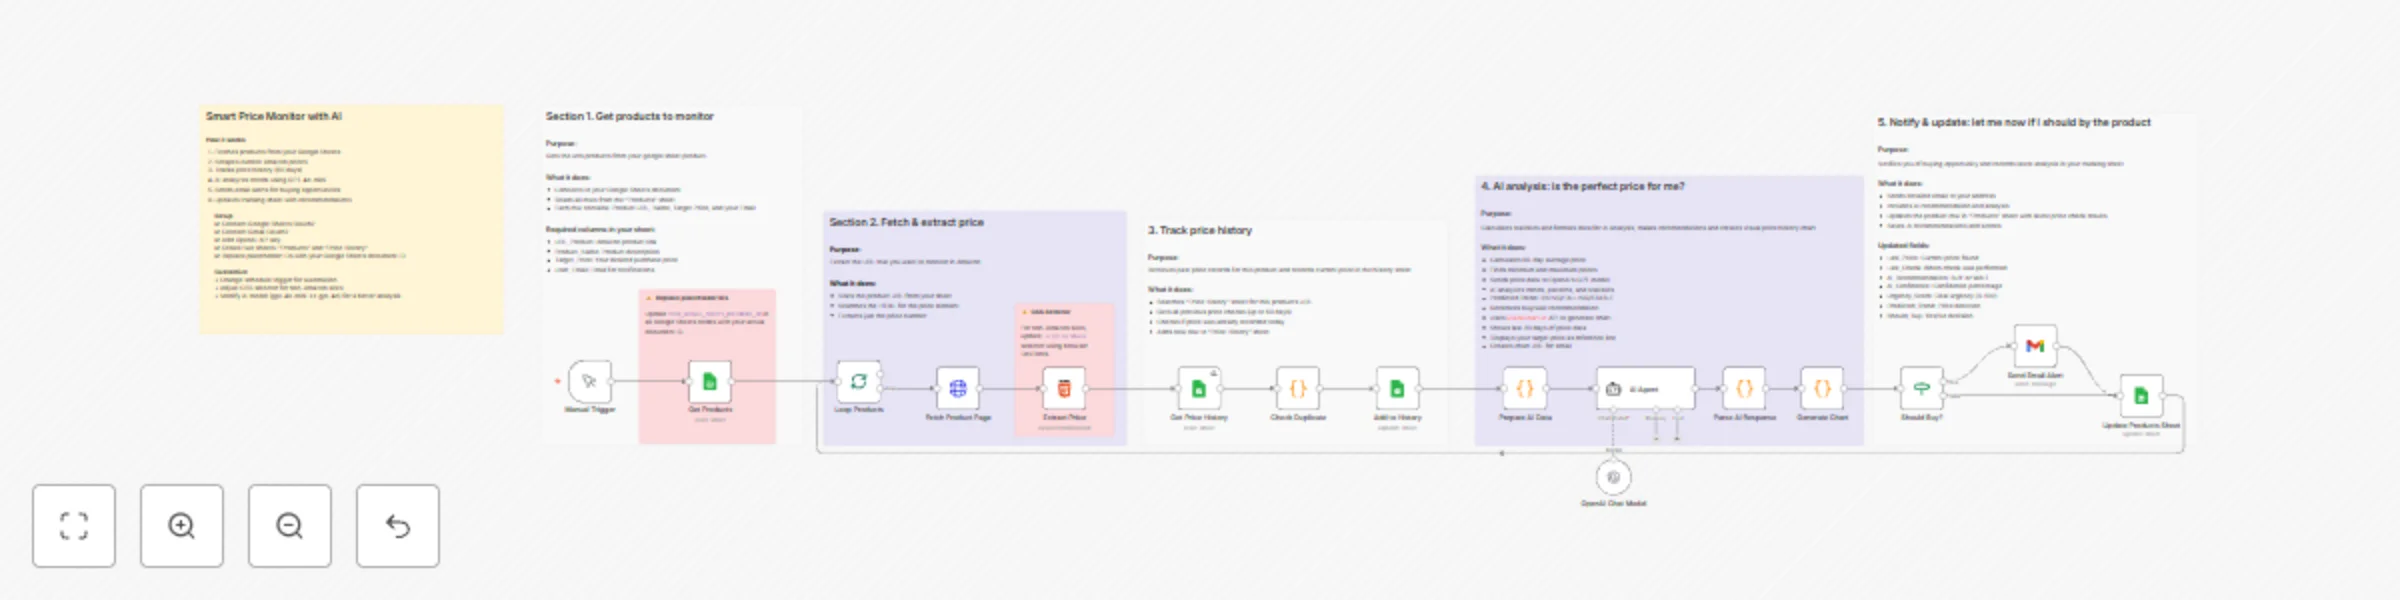
Automated smart price monitor with AI prediction, Google Sheets and Gmail
Think of this workflow as your personal shopping assistant that: Watches prices for you 24/7 Learns when prices are g...
Market Research
27 Nov 2025
27
0
Free advanced
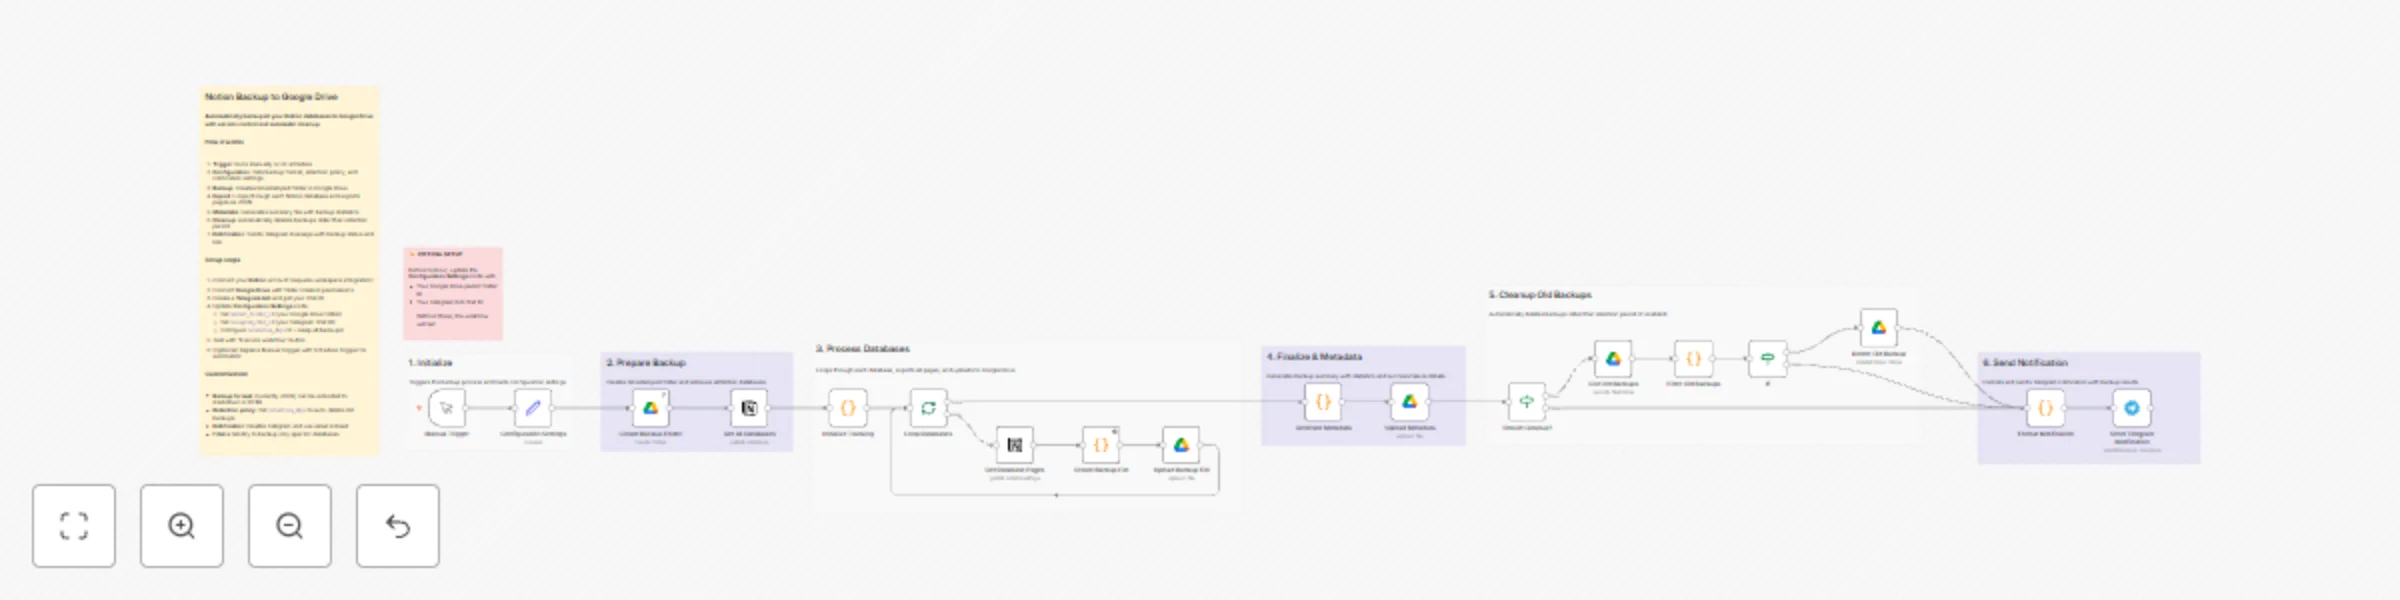
Automatic Notion database backup to Google Drive with Telegram notifications
What This Workflow Does This workflow automatically saves copies of all your Notion databases to Google Drive. It's l...
File Management
28 Oct 2025
33
0