
Mario
Workflows by Mario
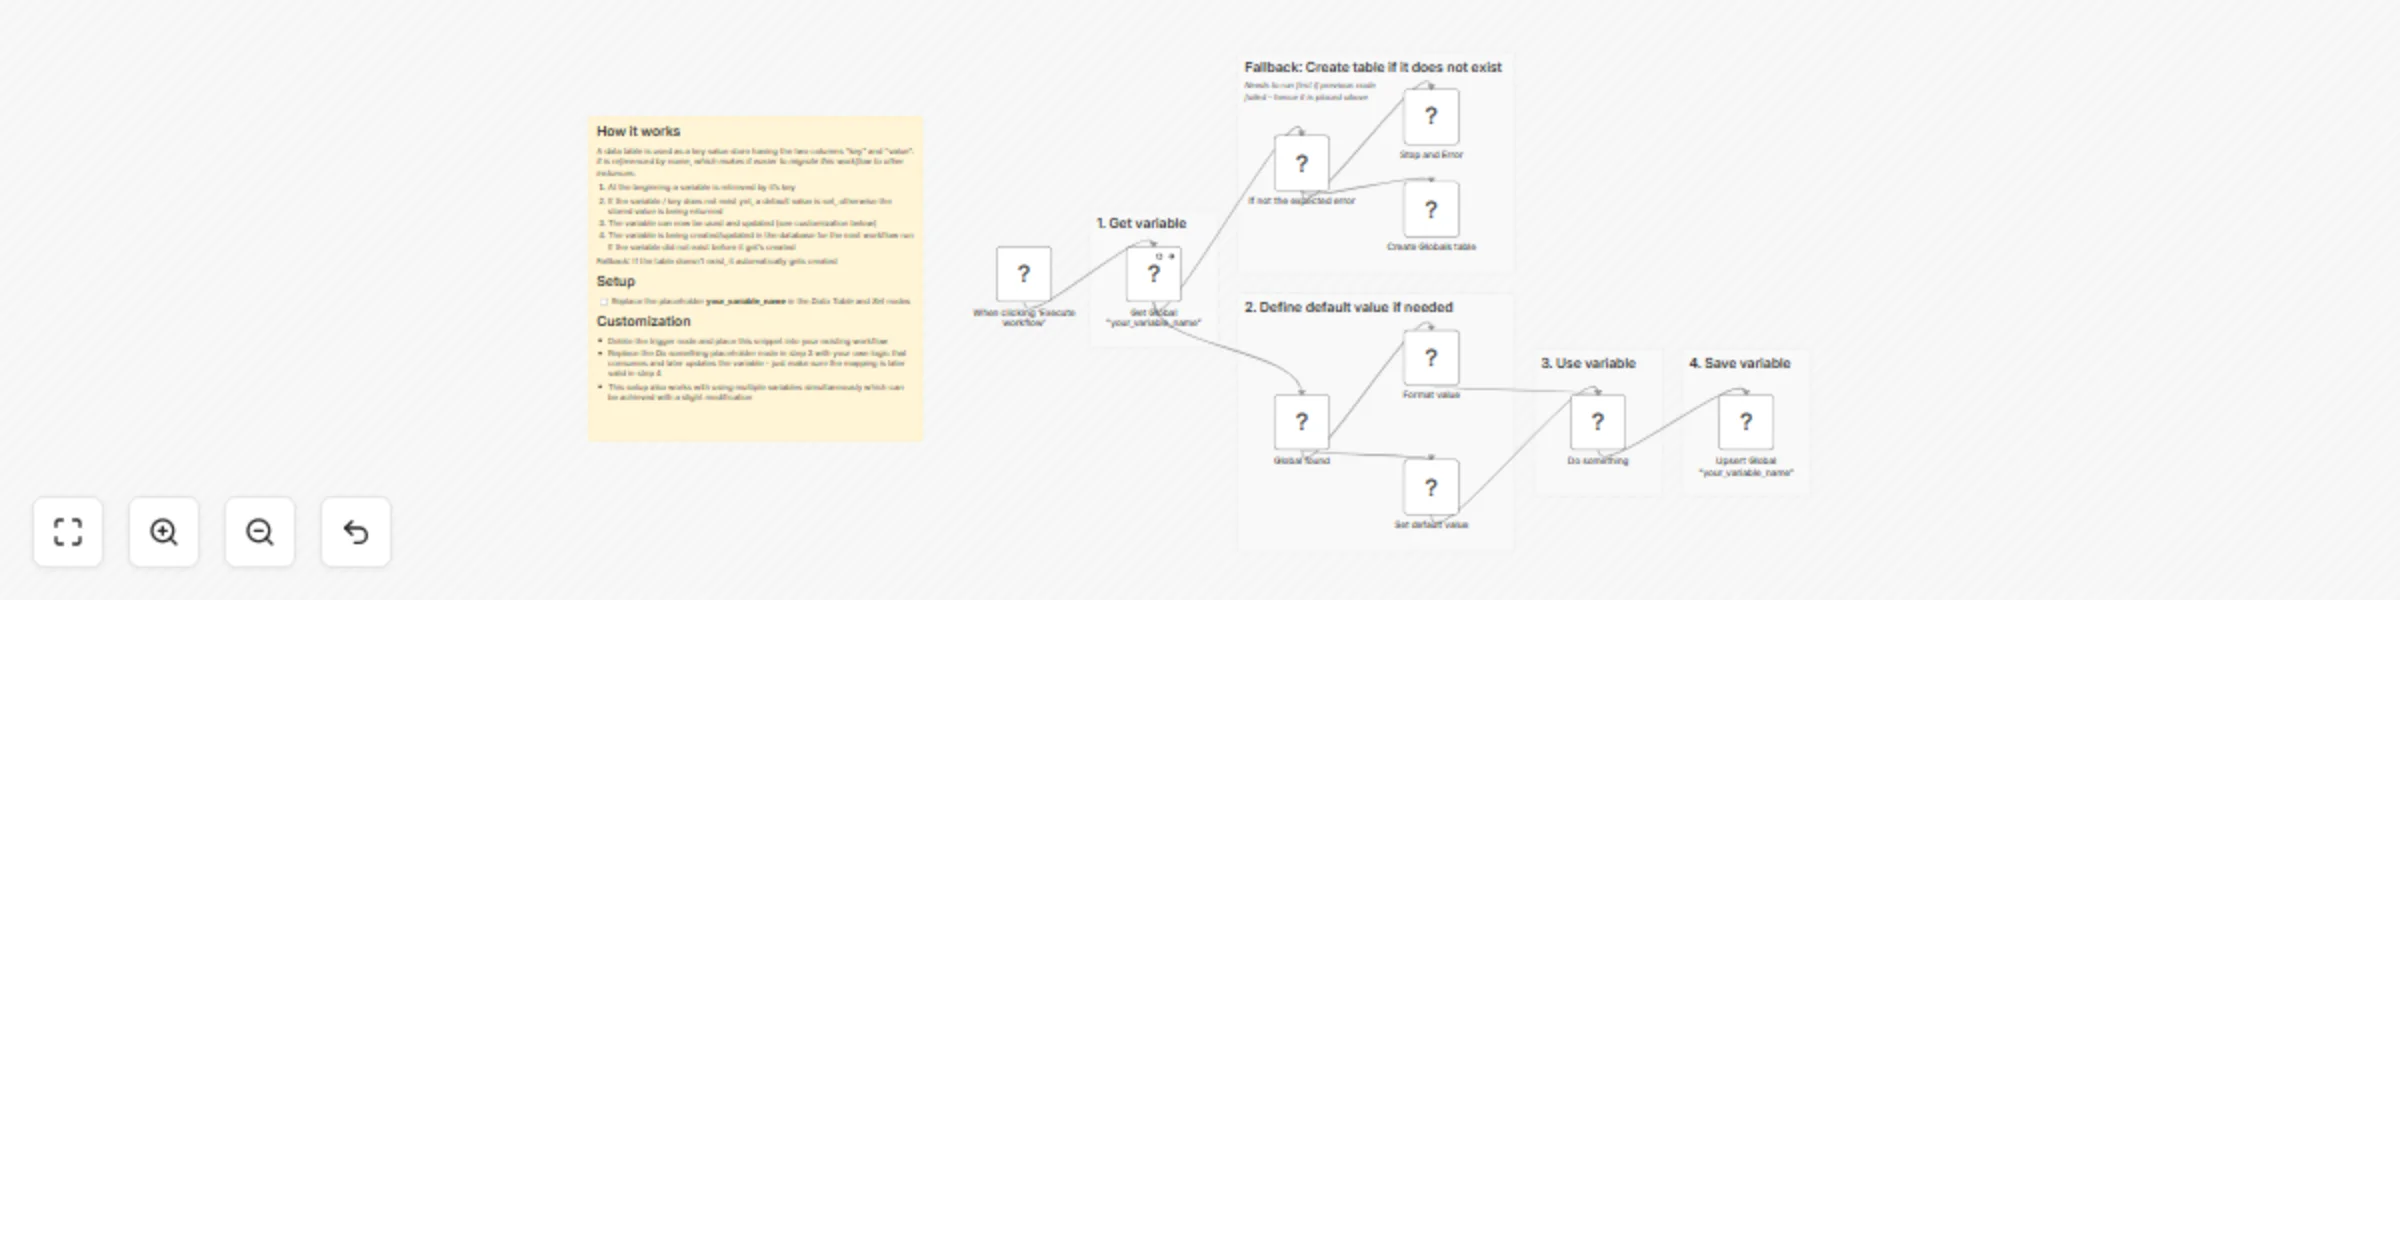
Store variables between workflow runs using data tables as a key-value store
Store Variables Between Workflow Runs Using n8n's Built In Data Tables (Key Value Store) Purpose This workflow implem...

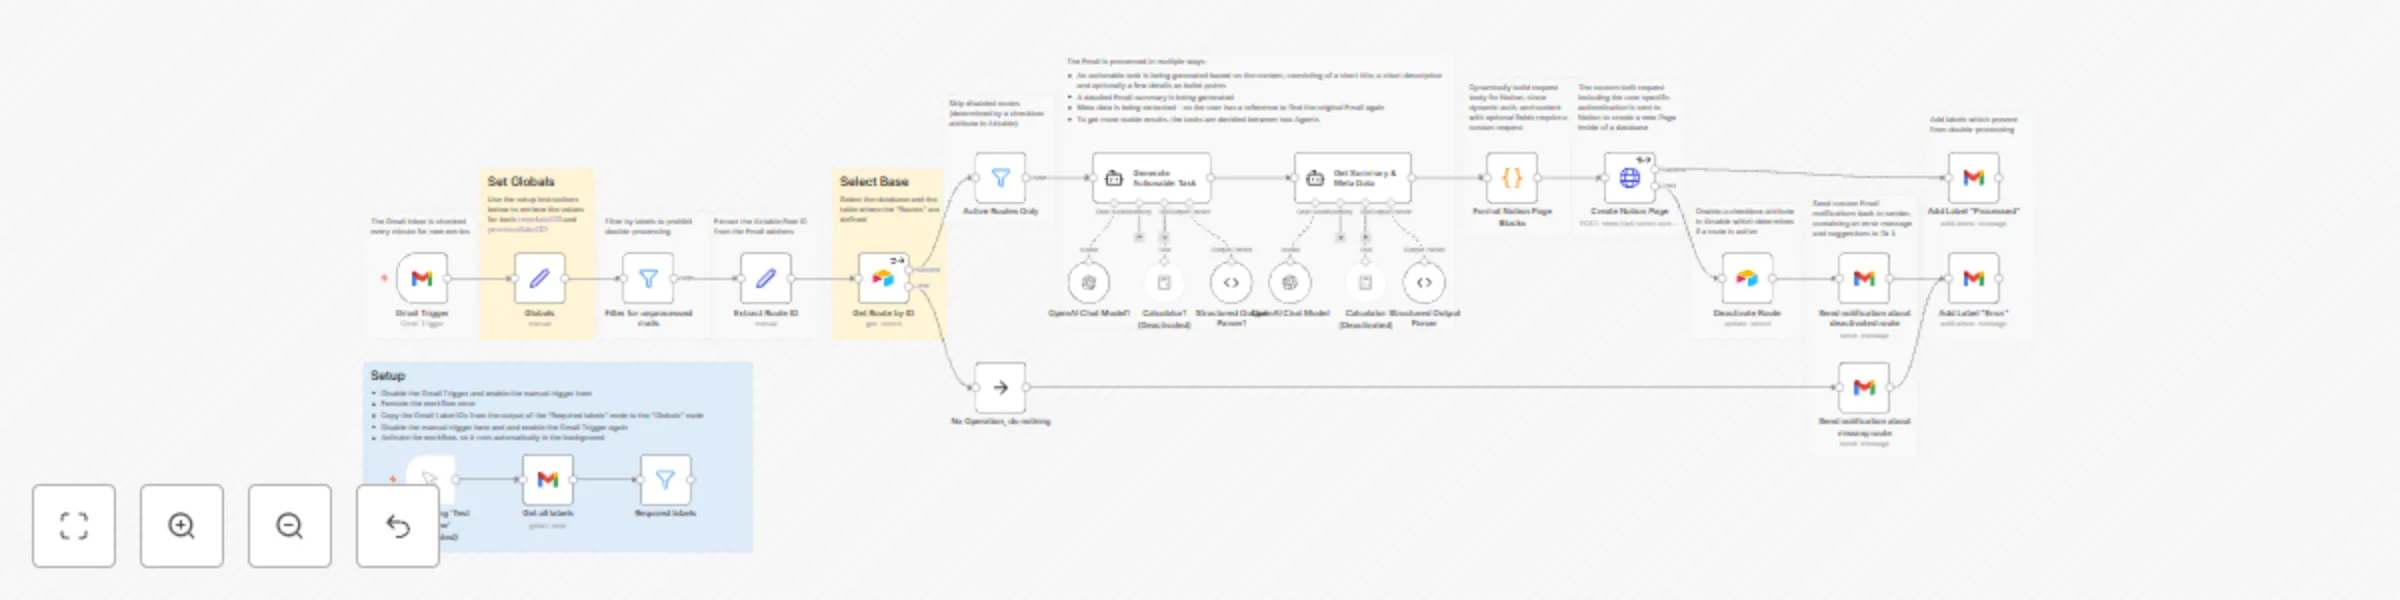
Access control for AI agents (RBAC) using Airtable and Telegram
Purpose This workflow allows granular control over the access to tools connected to AI Agents (including Multi Agent...

Dynamically switch between LLMs for AI agents using LangChain code
Dynamically switch between LLMs for AI Agents using LangChain Code Purpose This example workflow demonstrates a way t...

Sync Notion to Clockify including clients projects and tasks
Purpose This workflow synchronizes three entities from Notion to Clockify, allowing tracked time to be linked to clie...
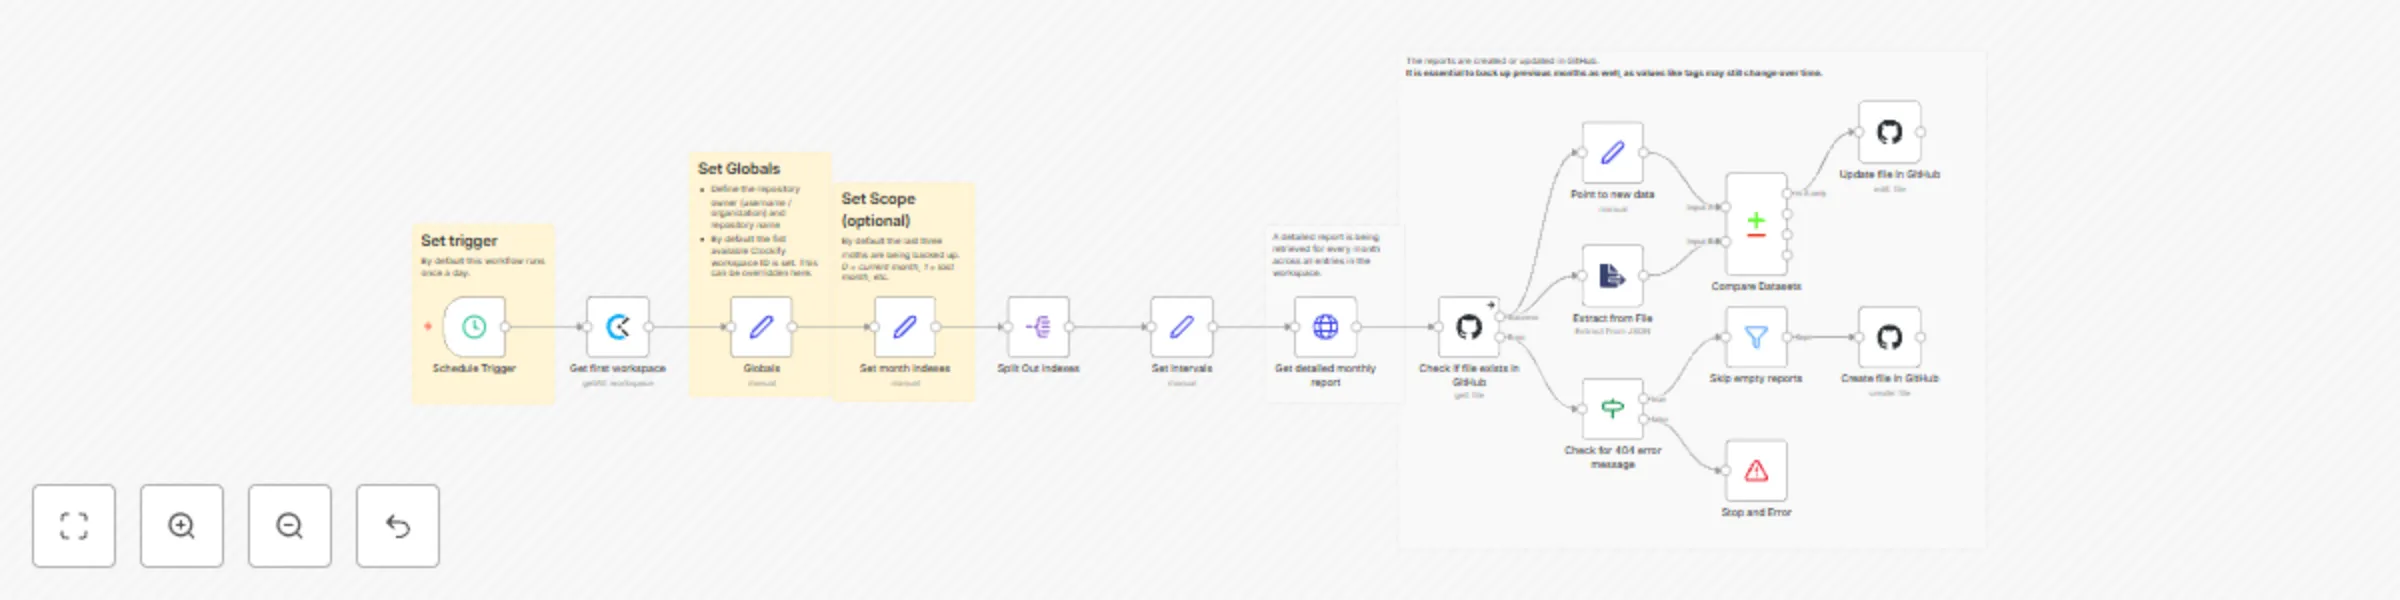
Backup Clockify to Github based on monthly reports
Purpose This workflow creates a versioned backup of an entire Clockify workspace split up into monthly reports. How i...

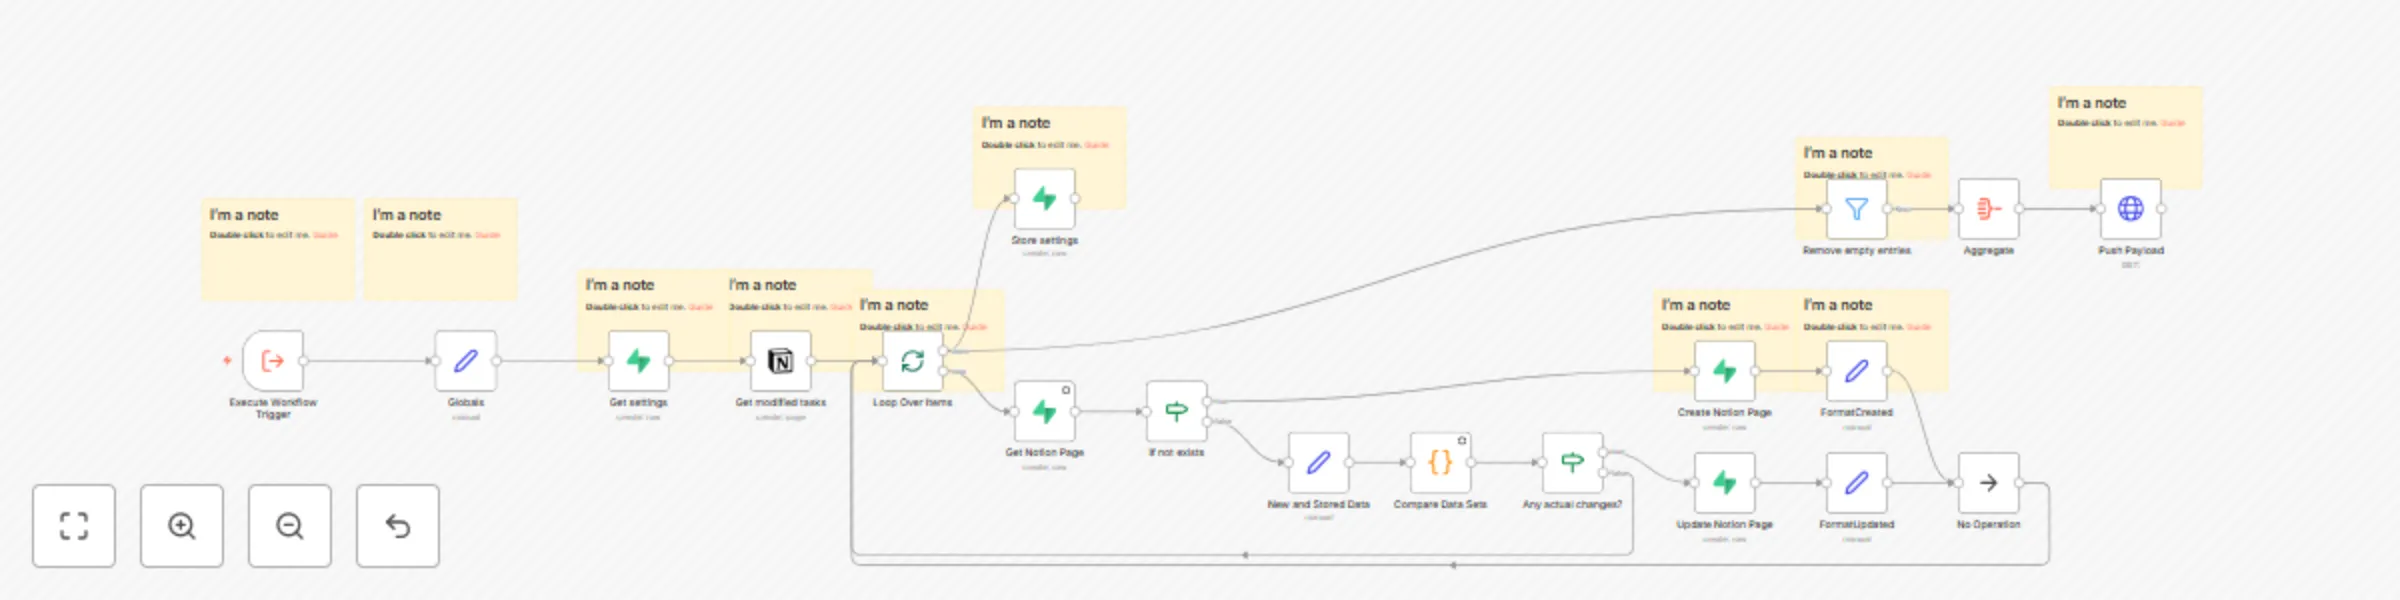
Realtime Notion Todoist 2-way sync with Redis
Purpose This solution enables you to manage all your Notion and Todoist tasks from different workspaces as well as yo...

Retry on fail except for known error
Purpose This workflow snippet allows for advanced error catching during retry attempts. There are cases, where you wa...

Upsert huge documents in a vector store with Supabase and Notion
Purpose This workflow adds the capability to build a RAG on living data. In this case Notion is used as a Knowledge B...

Transfer credentials to other n8n instances using a multi-form
Purpose This workflow allows you to transfer credentials from one n8n instance to another. How it works A multi f...

Import workflows and map their credentials using a multi-form
Purpose This workflow allows you to import any workflow from a file or another n8n instance and map the credentials e...

Mark outdated workflow nodes on canvas and send a summary with Gmail (add-on)
This is an add on for the template [Check if workflows contain build in nodes that are not of the latest version](htt...

Voice activated multi-agent demo for Vagent.io using Notion and Google Calendar
Purpose Use a lightweight Voice Interface, for you and your entire organization, to interact with an AI Supervisor, a...
Turn emails into AI-enhanced tasks in Notion (multi-user support) with Gmail, Airtable and Softr
Purpose This workflow automatically creates Tasks from forwarded Emails, similar to Asana, but better. Emails are pro...
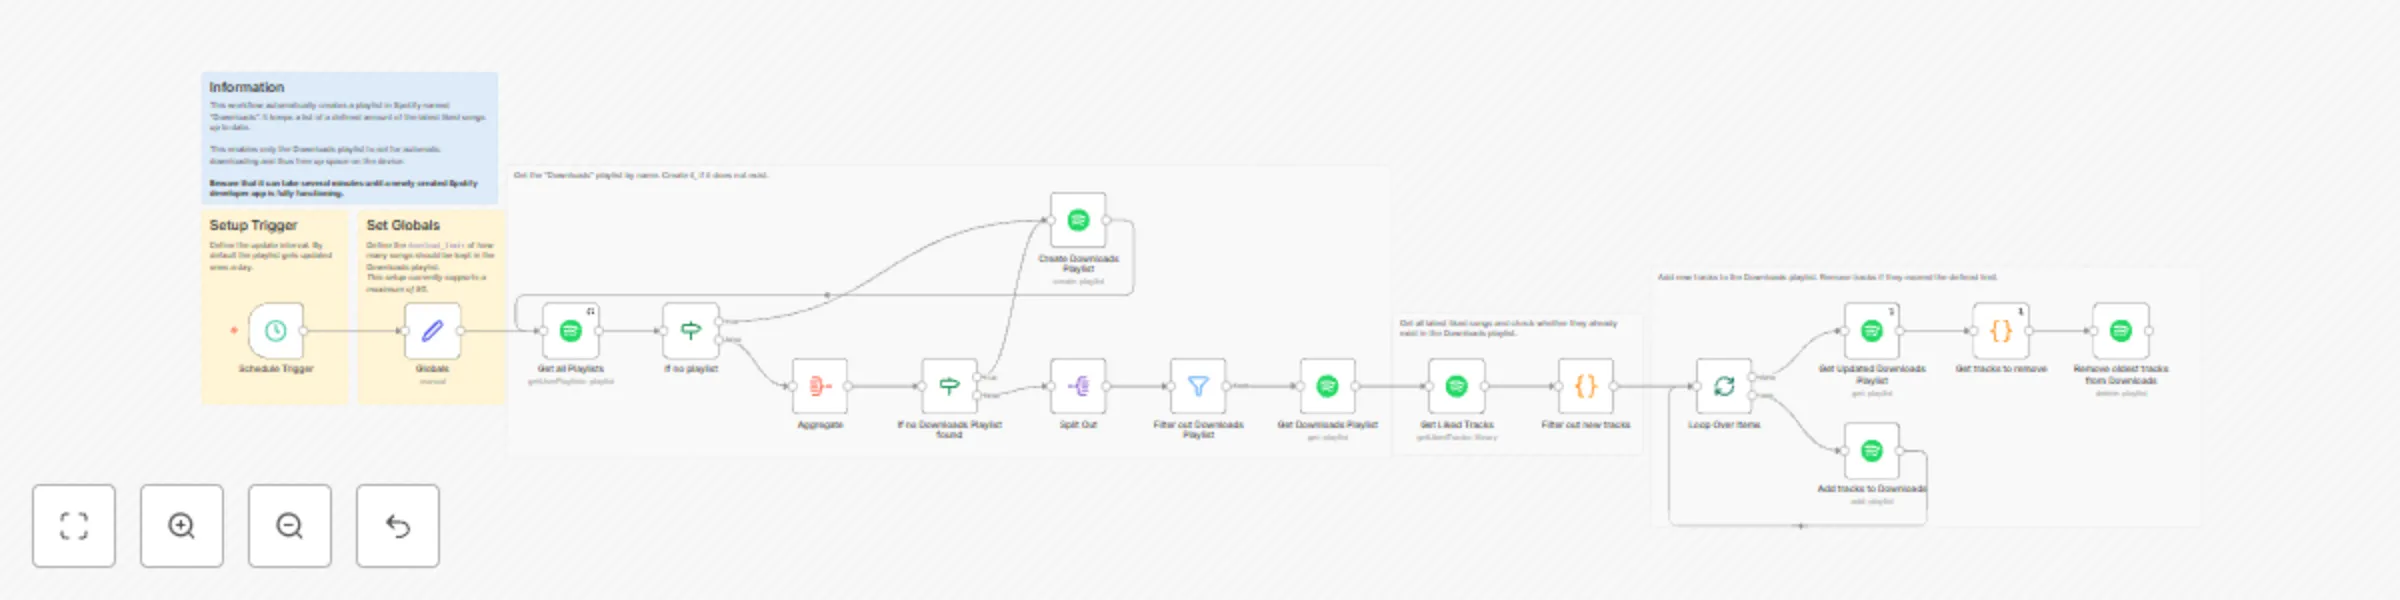
Download recently liked songs automatically with Spotify
Purpose This workflow enables you to listen to your recent favorites in very hight quality offline without sacrificin...
Provide real-time updates for Notion databases via webhooks with Supabase
Purpose This enables webhooks for nearly realtime updates (every 5 seconds) from Notion Databases. Problem Notion doe...

Prevent simultaneous workflow executions with Redis
Purpose This ensures that executions of scheduled workflows do not overlap when they take longer than expected. How i...