Marth
Workflows by Marth

Automate employee recognition with Slack, Sheets, Gmail & optional GPT-4
Automated Employee Recognition Bot with Slack + Google Sheets + Gmail Description Turn employee recognition into an a...

Create & publish YouTube Shorts on historical what-ifs with GPT-4o & Blotato
Workflow Description: Automated YouTube Short Viral History (Blotato + GPT 4.1) This workflow is a powerful, self sus...

Create and publish Instagram carousels automatically with GPT-4.1 and Blotato
Automated Instagram Carousel Post (Blotato + GPT 4.1) This workflow is an end to end solution for automating the crea...

Customer support ticket system for SMEs with Google Sheets and auto-emails
How it Works This workflow automates customer support for SMEs in five simple steps: 1. Capture requests via a Webhoo...

Automate birthday discount emails for e-commerce using Google Sheets and Gmail
⚙ How It Works & Setup Steps: Automated Birthday Discount How It Works This workflow is a powerful yet simple automat...
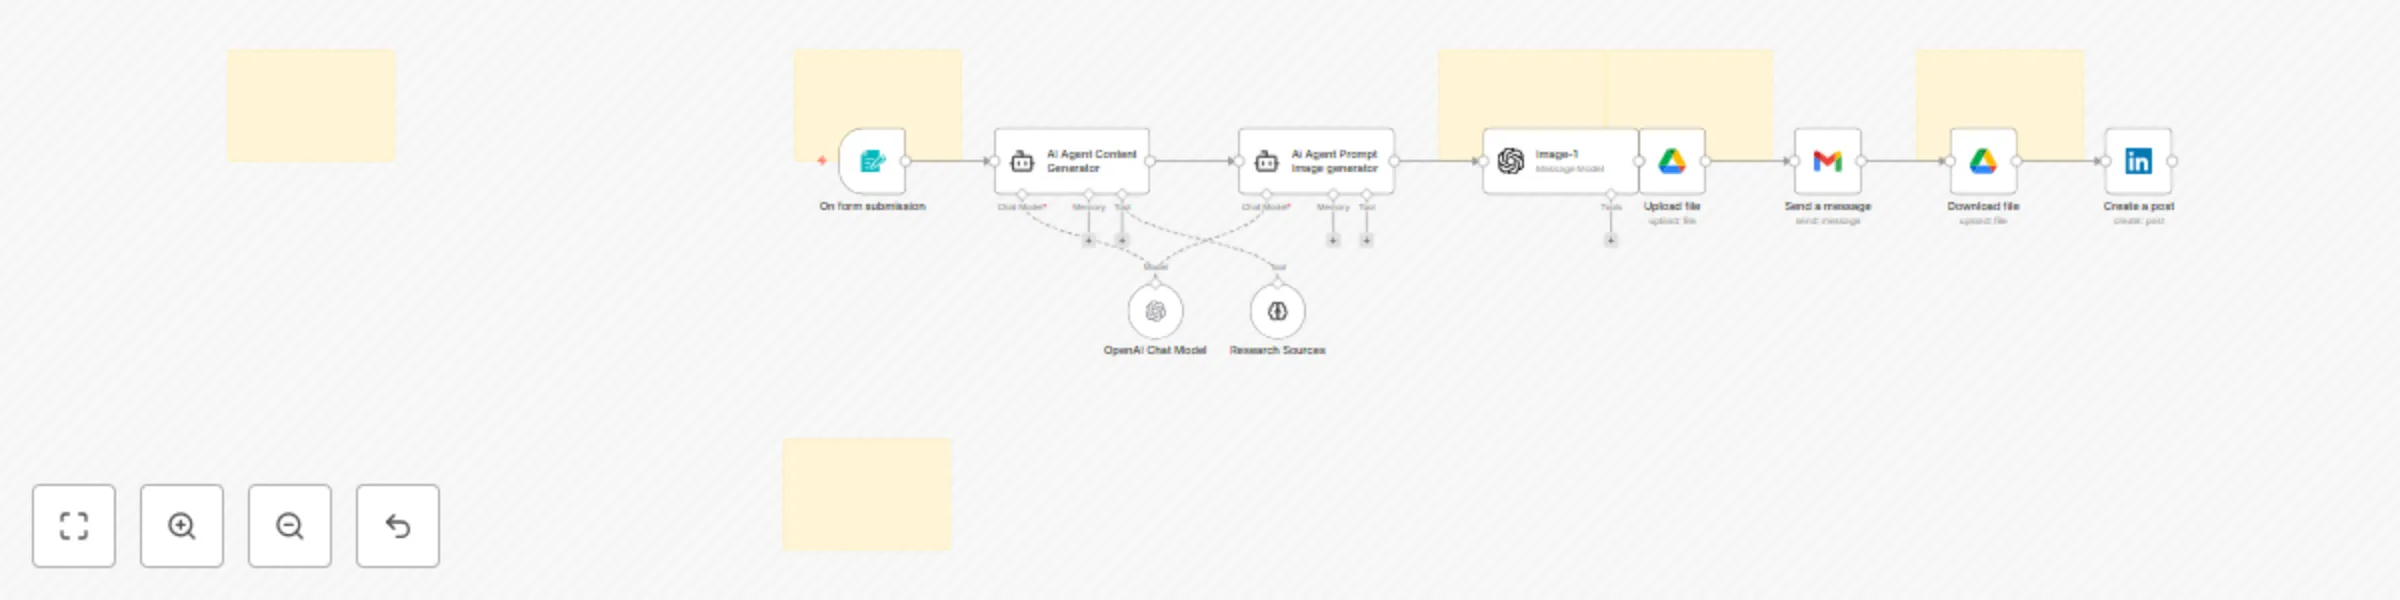
Generate & post LinkedIn content automatically with GPT-4 & GPT image 1
⚙ AI Powered Social Media Automation for LinkedIn How It Works This workflow automates the entire social media conten...

Automated support ticket system with Gmail, Trello, and Slack notifications
Automated Support Ticket & Customer Notification System Let's build this workflow to streamline your customer support...

Capture website leads with Slack notifications, Gmail responses & sheets archiving
Website Lead Notification System Let's build this simple and high value workflow. Here is a detailed, node by node ex...

Automate event scheduling from emails with Gmail & Google Calendar keywords
This workflow contains community nodes that are only compatible with the self hosted version of n8n. ⚙ How It Works T...

Automate contract employee lifecycle with Google Docs, DocuSign & Airtable
⚙ Automated Contract Employee Placement & Management System: Setup Guide This guide will walk you through setting up...

Automated recruitment process with Slack, DocuSign, Trello & Gmail notifications
How It Works & Setup Guide for the Automated Candidate Management & Feedback System This guide will walk you through...
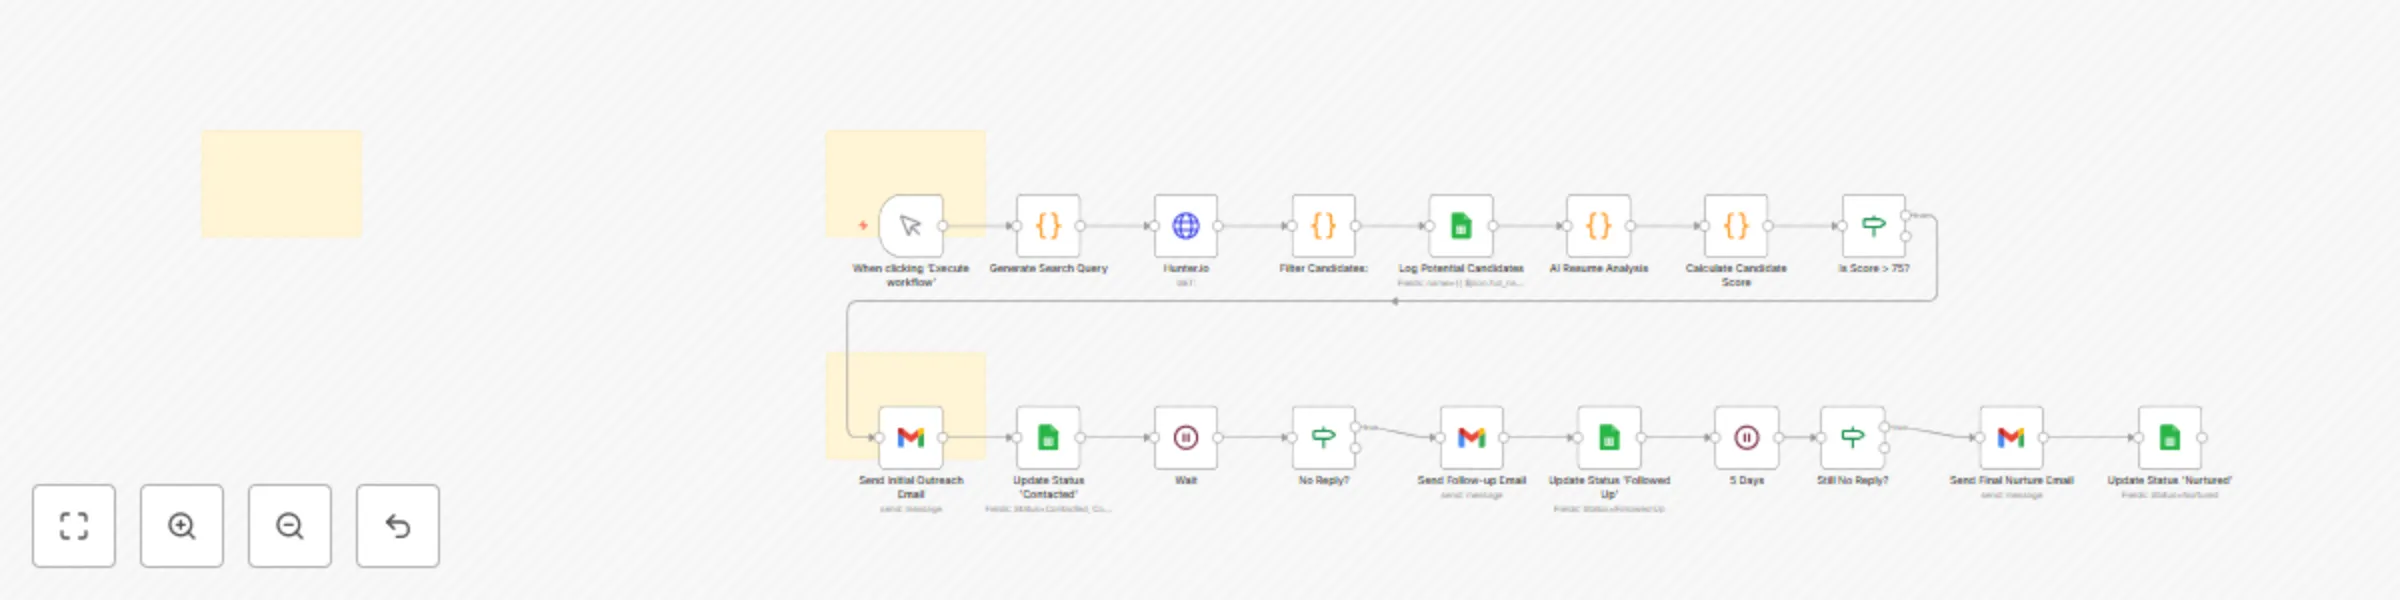
Automate passive candidate sourcing & engagement with Hunter.io, AI scoring & Gmail
How It Works: The AI Recruiter Engine This workflow is a powerful, two phase system designed to automate the entire p...

SSL/TLS certificate expiry monitor with Slack alert
How It Works: The 5 Node Certificate Management Flow 🗓️ This workflow efficiently monitors your domains for certific...

Monitor security logs for failed login attempts with Slack alerts
How It Works: The 5 Node Anomaly Detection Flow This workflow efficiently processes logs to detect anomalies. 1. Sche...

Monitor email data breaches with HIBP API and send Slack alerts
How It Works: The 5 Node Security Flow This workflow efficiently performs a scheduled data breach scan. 1. Scheduled...

Monitor domains & IPs on AbuseIPDB blacklist with Slack alerts
⚙ How It Works The automated blacklist monitor is designed to be a proactive, not reactive, tool. Here is the high le...

Monitor remote server file integrity with SSH and Slack alerts
How It Works: The 5 Node Security Flow This workflow efficiently performs a scheduled file integrity audit. 1. Schedu...

Monitor CISA critical vulnerability alerts with RSS feed & Slack notifications
How It Works: The 5 Node Monitoring Flow This concise workflow efficiently captures, filters, and delivers crucial cy...

Monitor cybersecurity brand mentions on X and send alerts to Slack
How It Works: The 5 Node Monitoring Flow This concise workflow efficiently captures, filters, and delivers crucial cy...

Automated lead capture & AI-personalized audio follow-up with OpenAI & ElevenLabs
How It Works: The Four Part Automated Lead Flow This system meticulously guides each lead through a fully automated j...
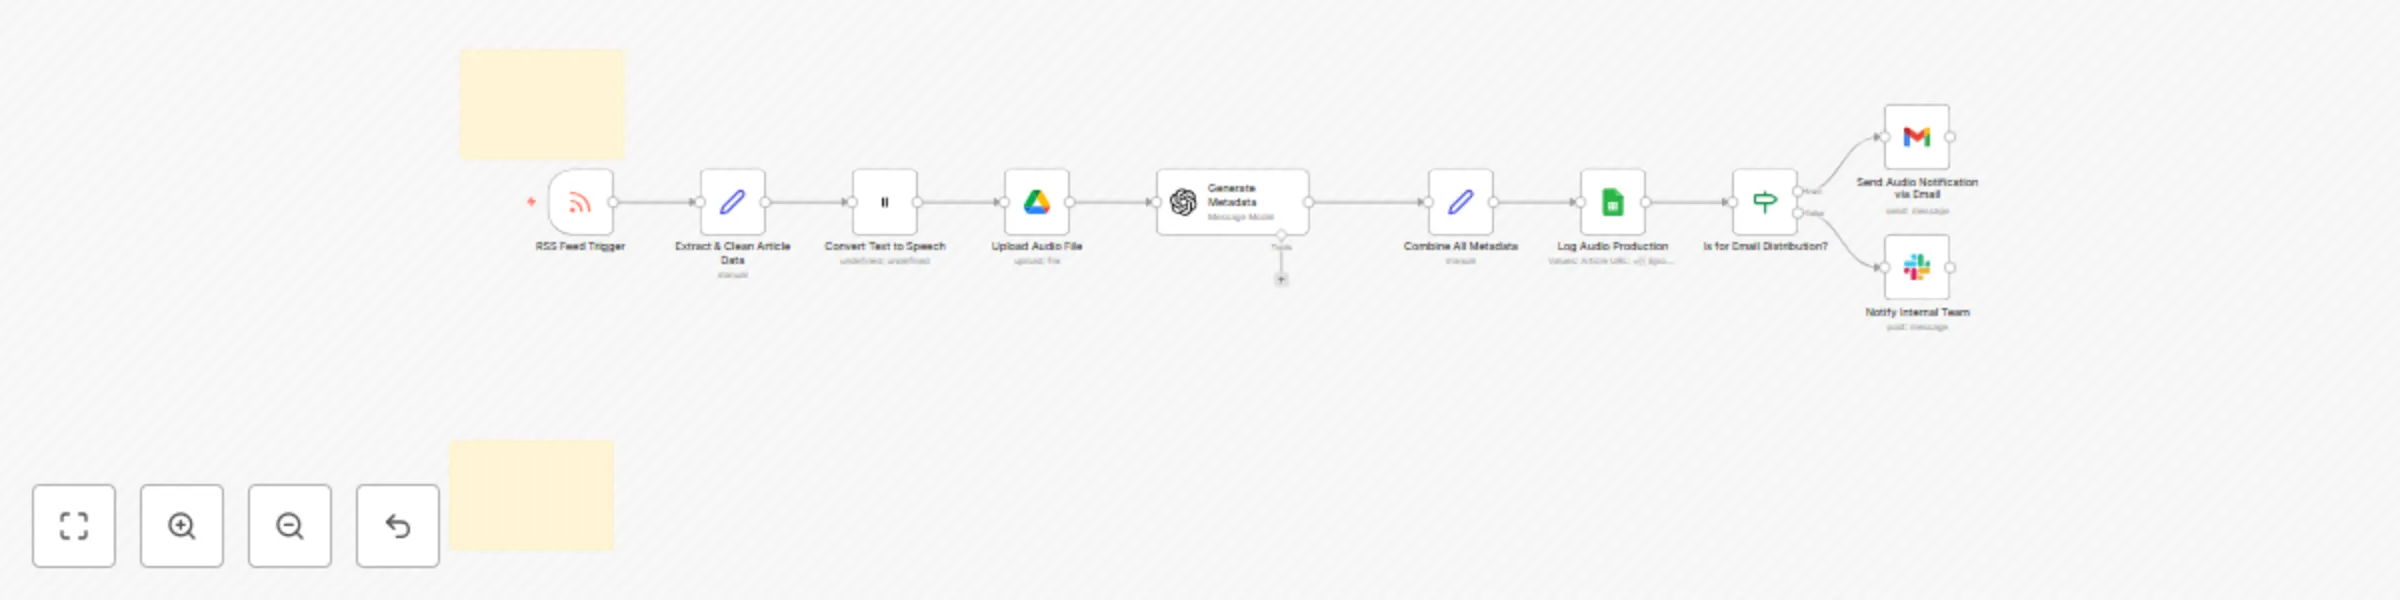
Convert blog posts to audio content with Eleven Labs & GPT-4
How It Works: Your Automated Audio Content System This n8n workflow streamlines the entire process of turning your wr...

AI-driven competitor & market intelligence with GPT 4 & Apify
Automated AI Driven Competitor & Market Intelligence System Problem Solved: Small and Medium sized IT companies often...

Automate social media content distribution with Google Sheets & Slack
Okay, here are the "How It Works" and "Setup Steps" for your "Automated Social Media Content Distribution System," pr...

AI-powered recruitment system for resume screening & automated outreach with GPT-4
How It Works ⚙️ Imagine your recruitment process transformed into a sleek, efficient, AI powered assembly line for ta...