S
Sascha
3
Workflows
Workflows by Sascha

Free intermediate
Baserow campaign database to Shopify with image upload & dynamic template update
Automating your marketing campaign management process can streamline your workflow and save you valuable time. With t...
S
Sascha File Management
20 Mar 2024
1293
0
Free intermediate
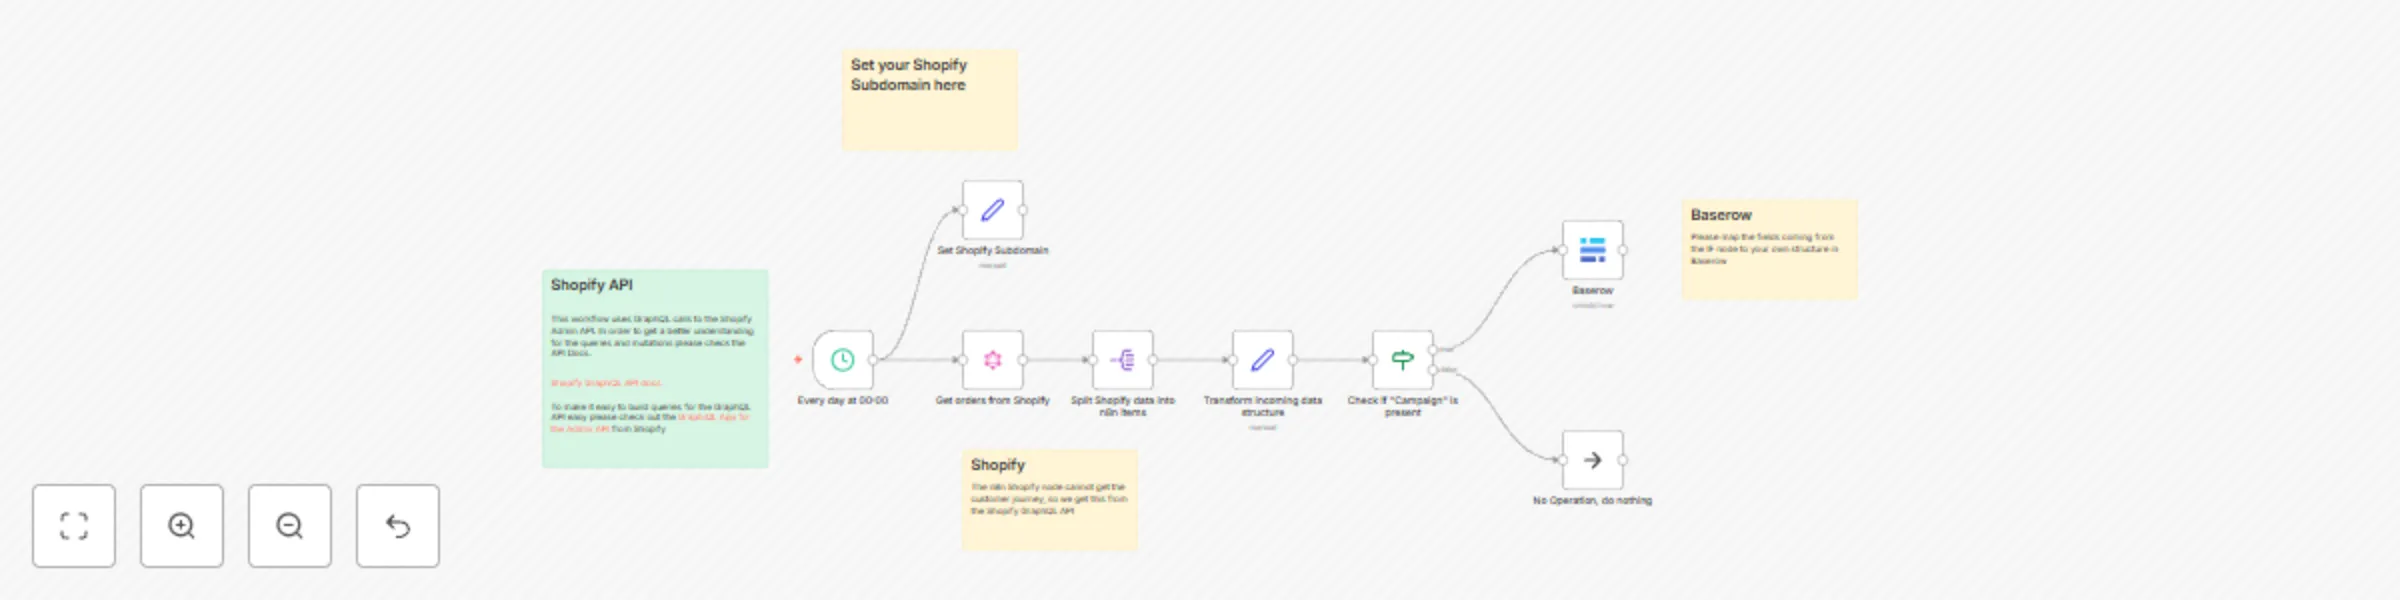
Automate your UTM campaign tracking: Shopify, n8n to Baserow
Campaign tracking is pivotal; it enables marketers to evaluate the efficacy of various strategies and channels. UTM p...
S
Sascha Market Research
23 Feb 2024
1447
0

Free advanced
Sync customer email subscriptions between Shopify and Mautic
Having a seamless flow of customer data between your online store and your marketing platform is essential. By keepin...
S
Sascha Social Media
16 Feb 2024
1518
0