M
Matheus Pedrosa
3
Workflows
Workflows by Matheus Pedrosa

Free advanced
Generate self-documenting API portal for webhooks with n8n API & Bootstrap
Keeping API documentation updated is a challenge, especially when your endpoints are powerful n8n webhooks. This proj...
M
Matheus Pedrosa Document Extraction
21 Aug 2025
185
0
Free intermediate
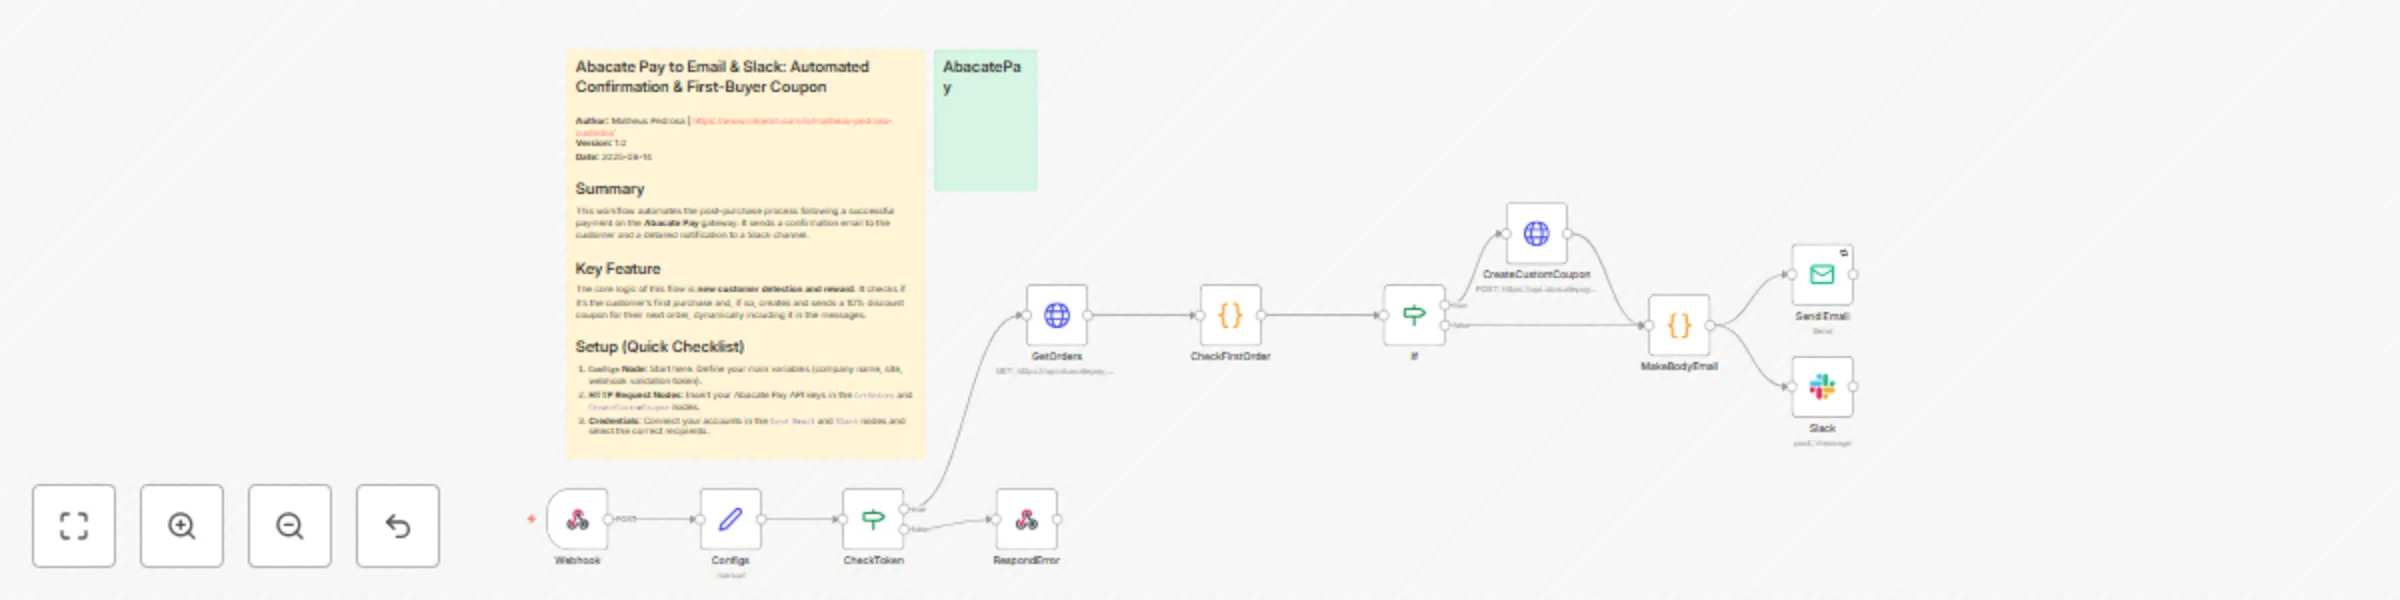
Automated order confirmations with Abacate Pay: first-buyer coupon rewards via email & Slack
This workflow provides a complete, automated post purchase solution triggered by a successful payment webhook from Ab...
M
Matheus Pedrosa CRM
15 Aug 2025
159
0
Free intermediate
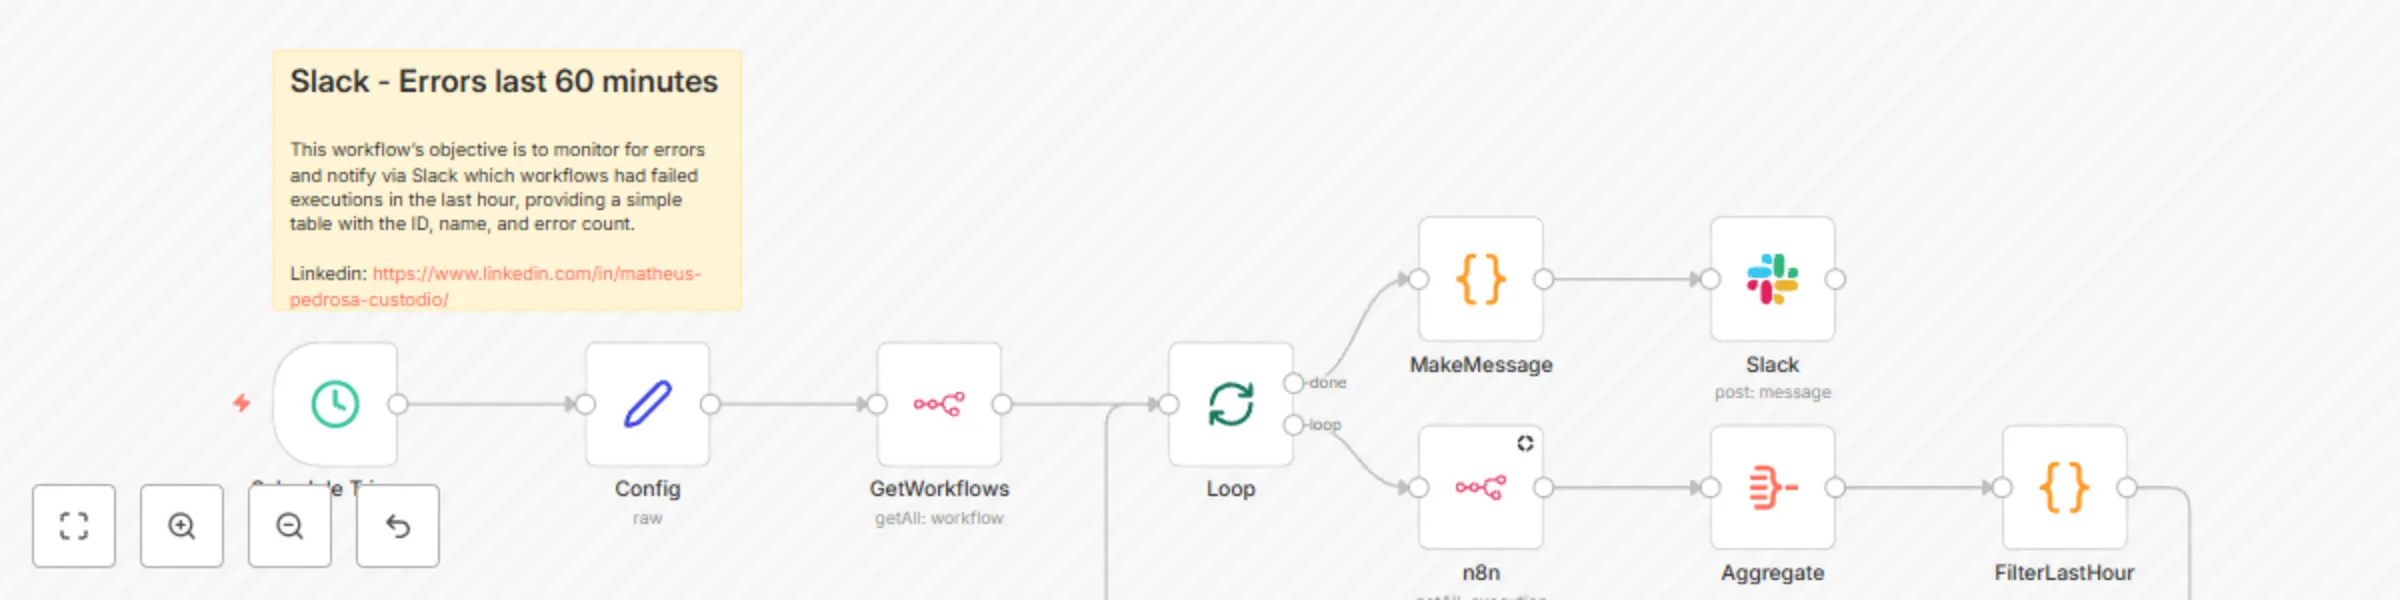
Automated hourly n8n error monitoring with Slack notifications
Who is this template for? This template is ideal for n8n instance administrators, developers, and DevOps teams who ne...
M
Matheus Pedrosa DevOps
7 Aug 2025
538
0