J
Jay Hartley
6
Workflows
Workflows by Jay Hartley

Free intermediate
Check for bargain flights and get notified using Amadeus and Gmail
What this template does This workflow uses the Amadeus API, every day to check for bargain flights for an itinerary a...
J
Jay Hartley Personal Productivity
8 Oct 2024
7599
0
Free advanced
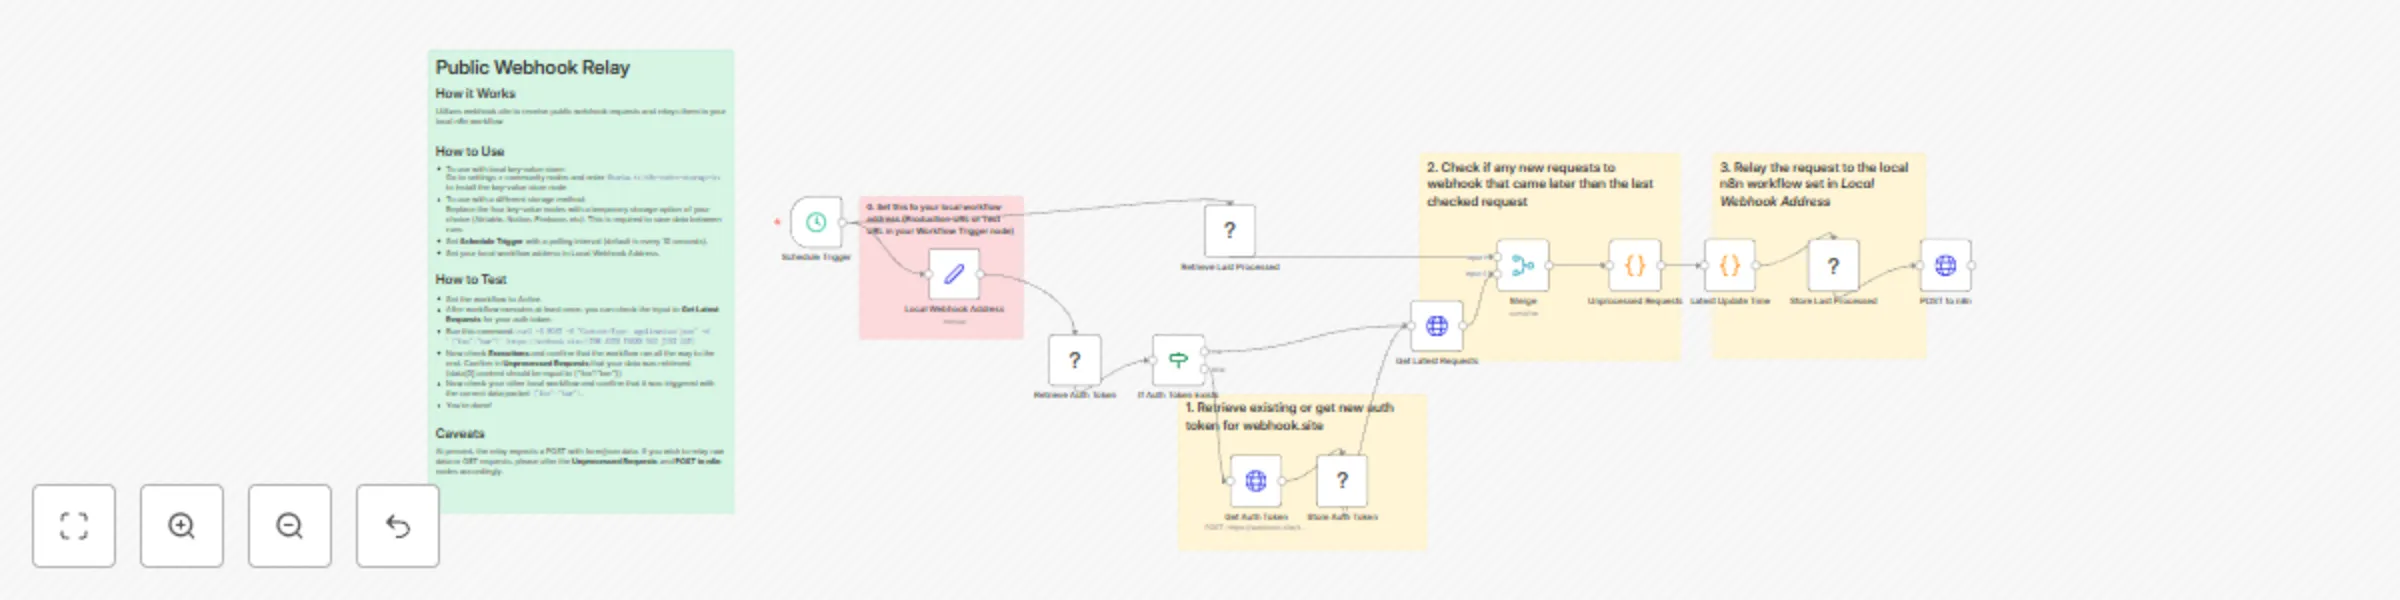
Public webhook relay
Disclaimer This template only works on n8n local instances! How it Works This workflow allows you to to receive webho...
J
Jay Hartley DevOps
30 Sep 2024
1513
0

Free advanced
Monitor multiple Github repos via webhook
What this workflow does This workflow allows you to monitor multiple Github repos simultaneously without polling due...
J
Jay Hartley DevOps
27 Sep 2024
6195
0
Free advanced
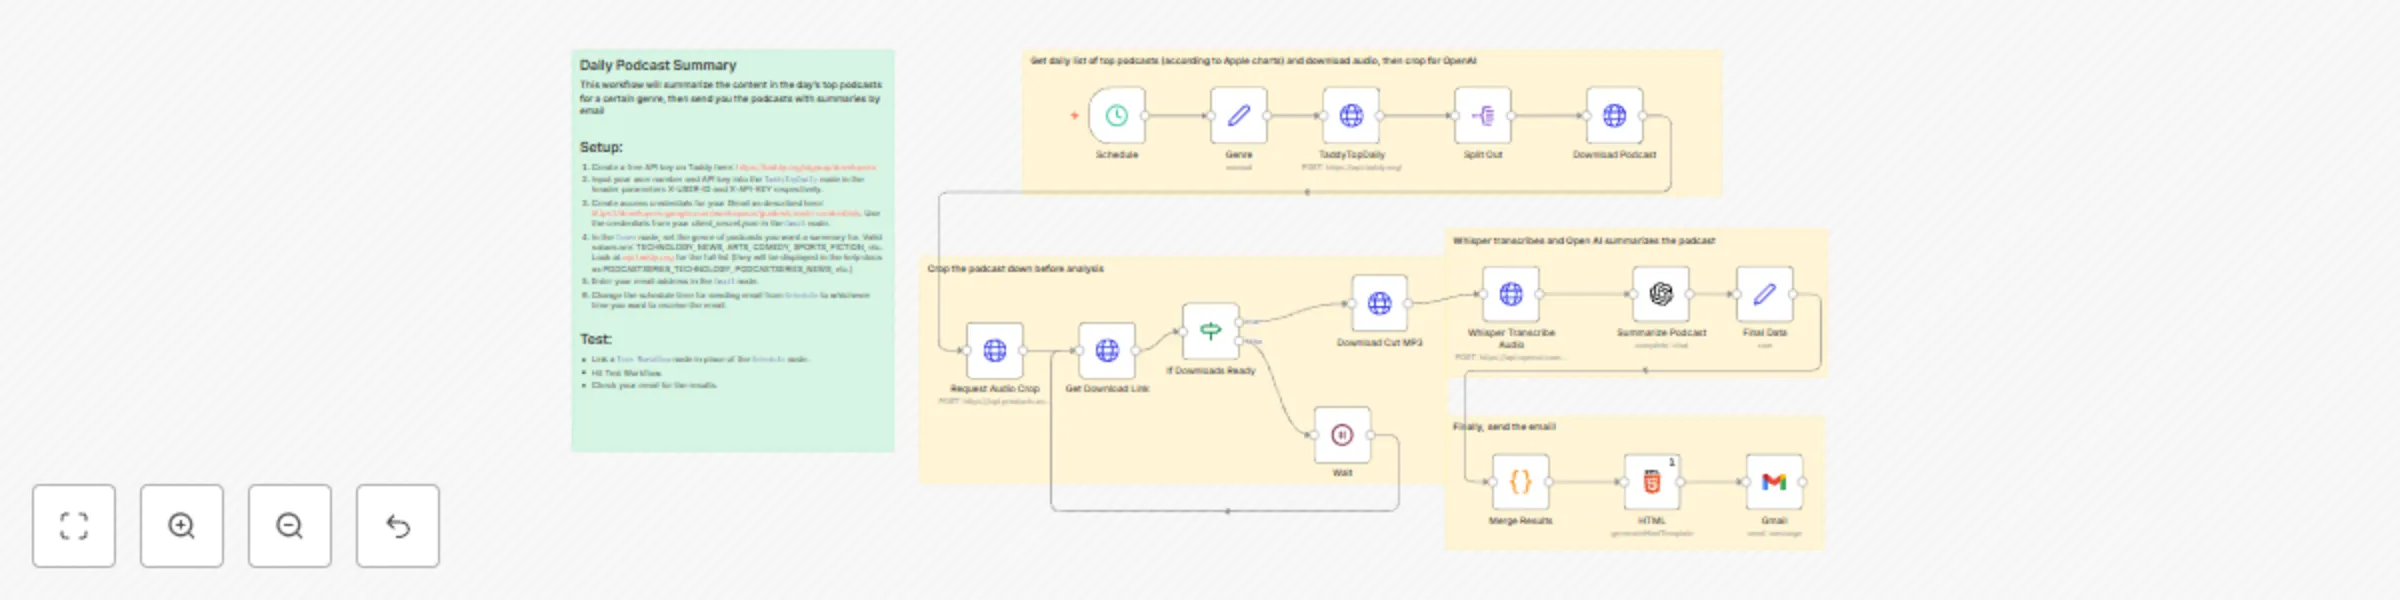
Daily podcast summary
What this workflow does Downloads the daily top podcasts of a selected genre Summarizes the content of each podcast i...
J
Jay Hartley Personal Productivity
26 Sep 2024
15757
0

Free advanced
User verification and login using Auth0
Release yourself from the pain of user login with this simple solution! Who this is for This is for everyone that wan...
J
Jay Hartley Miscellaneous
12 Sep 2024
17648
0

Free intermediate
Store new orders to Airtable and summarize daily orders through email
What this template does This workflow will collect order data as it is produced, then send a summary email of all ord...
J
Jay Hartley CRM
11 Sep 2024
1731
0