
iamvaar
Workflows by iamvaar
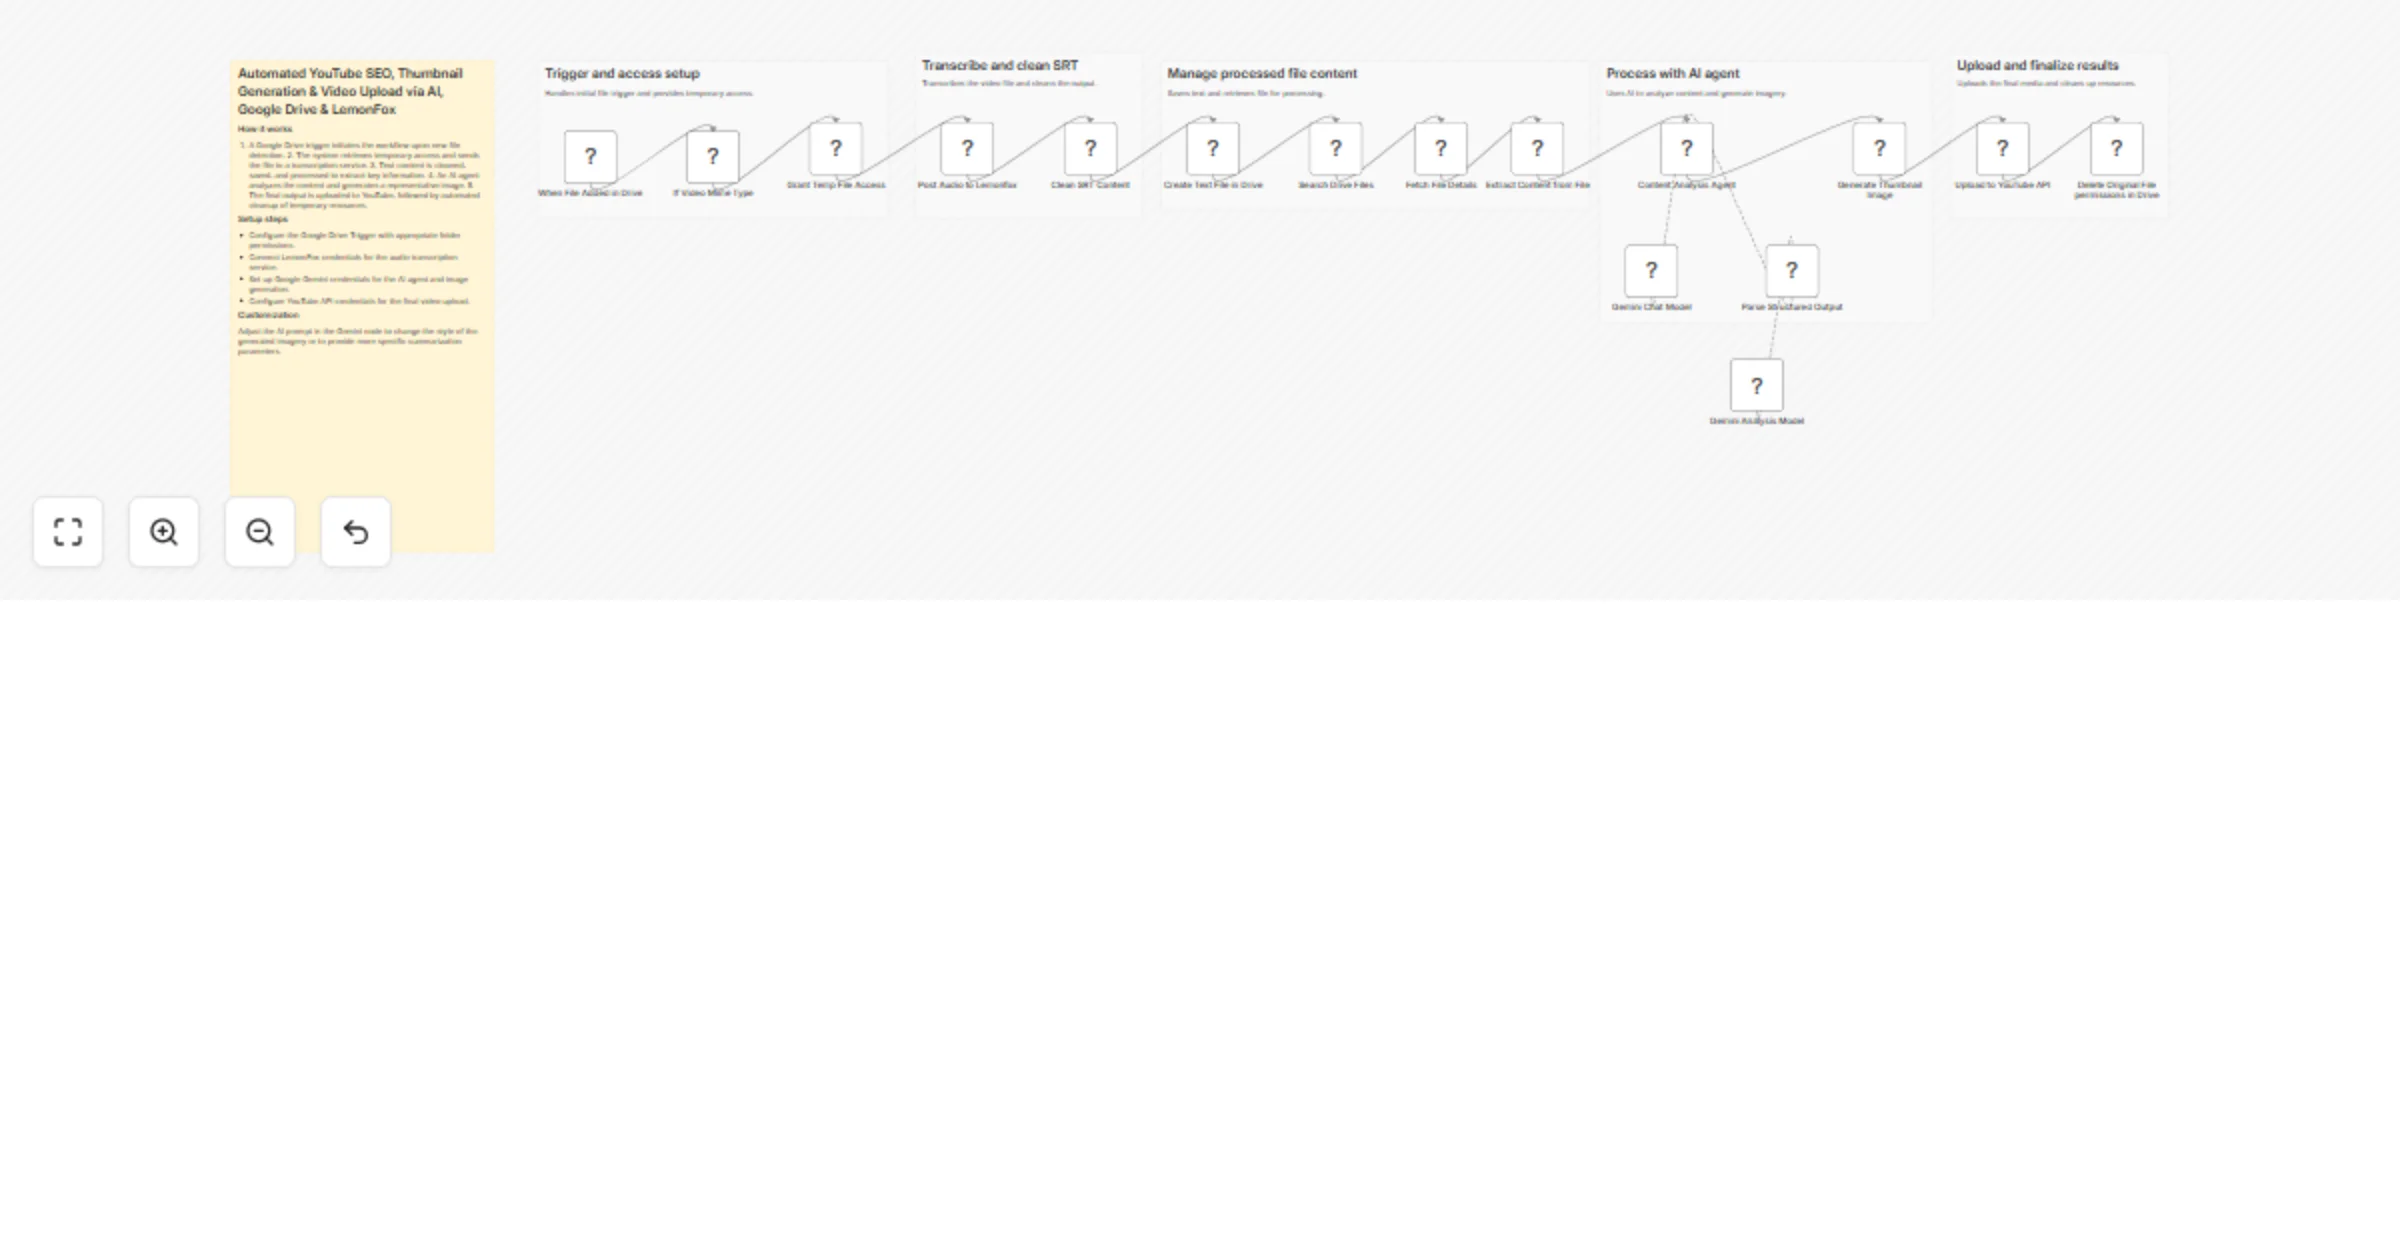
Create YouTube SEO metadata and thumbnails from Google Drive videos with Gemini, LemonFox and upload-post
Automated YouTube SEO, Thumbnail Generation & Video Upload via AI, Google Drive & LemonFox Pre requesties: Video uplo...
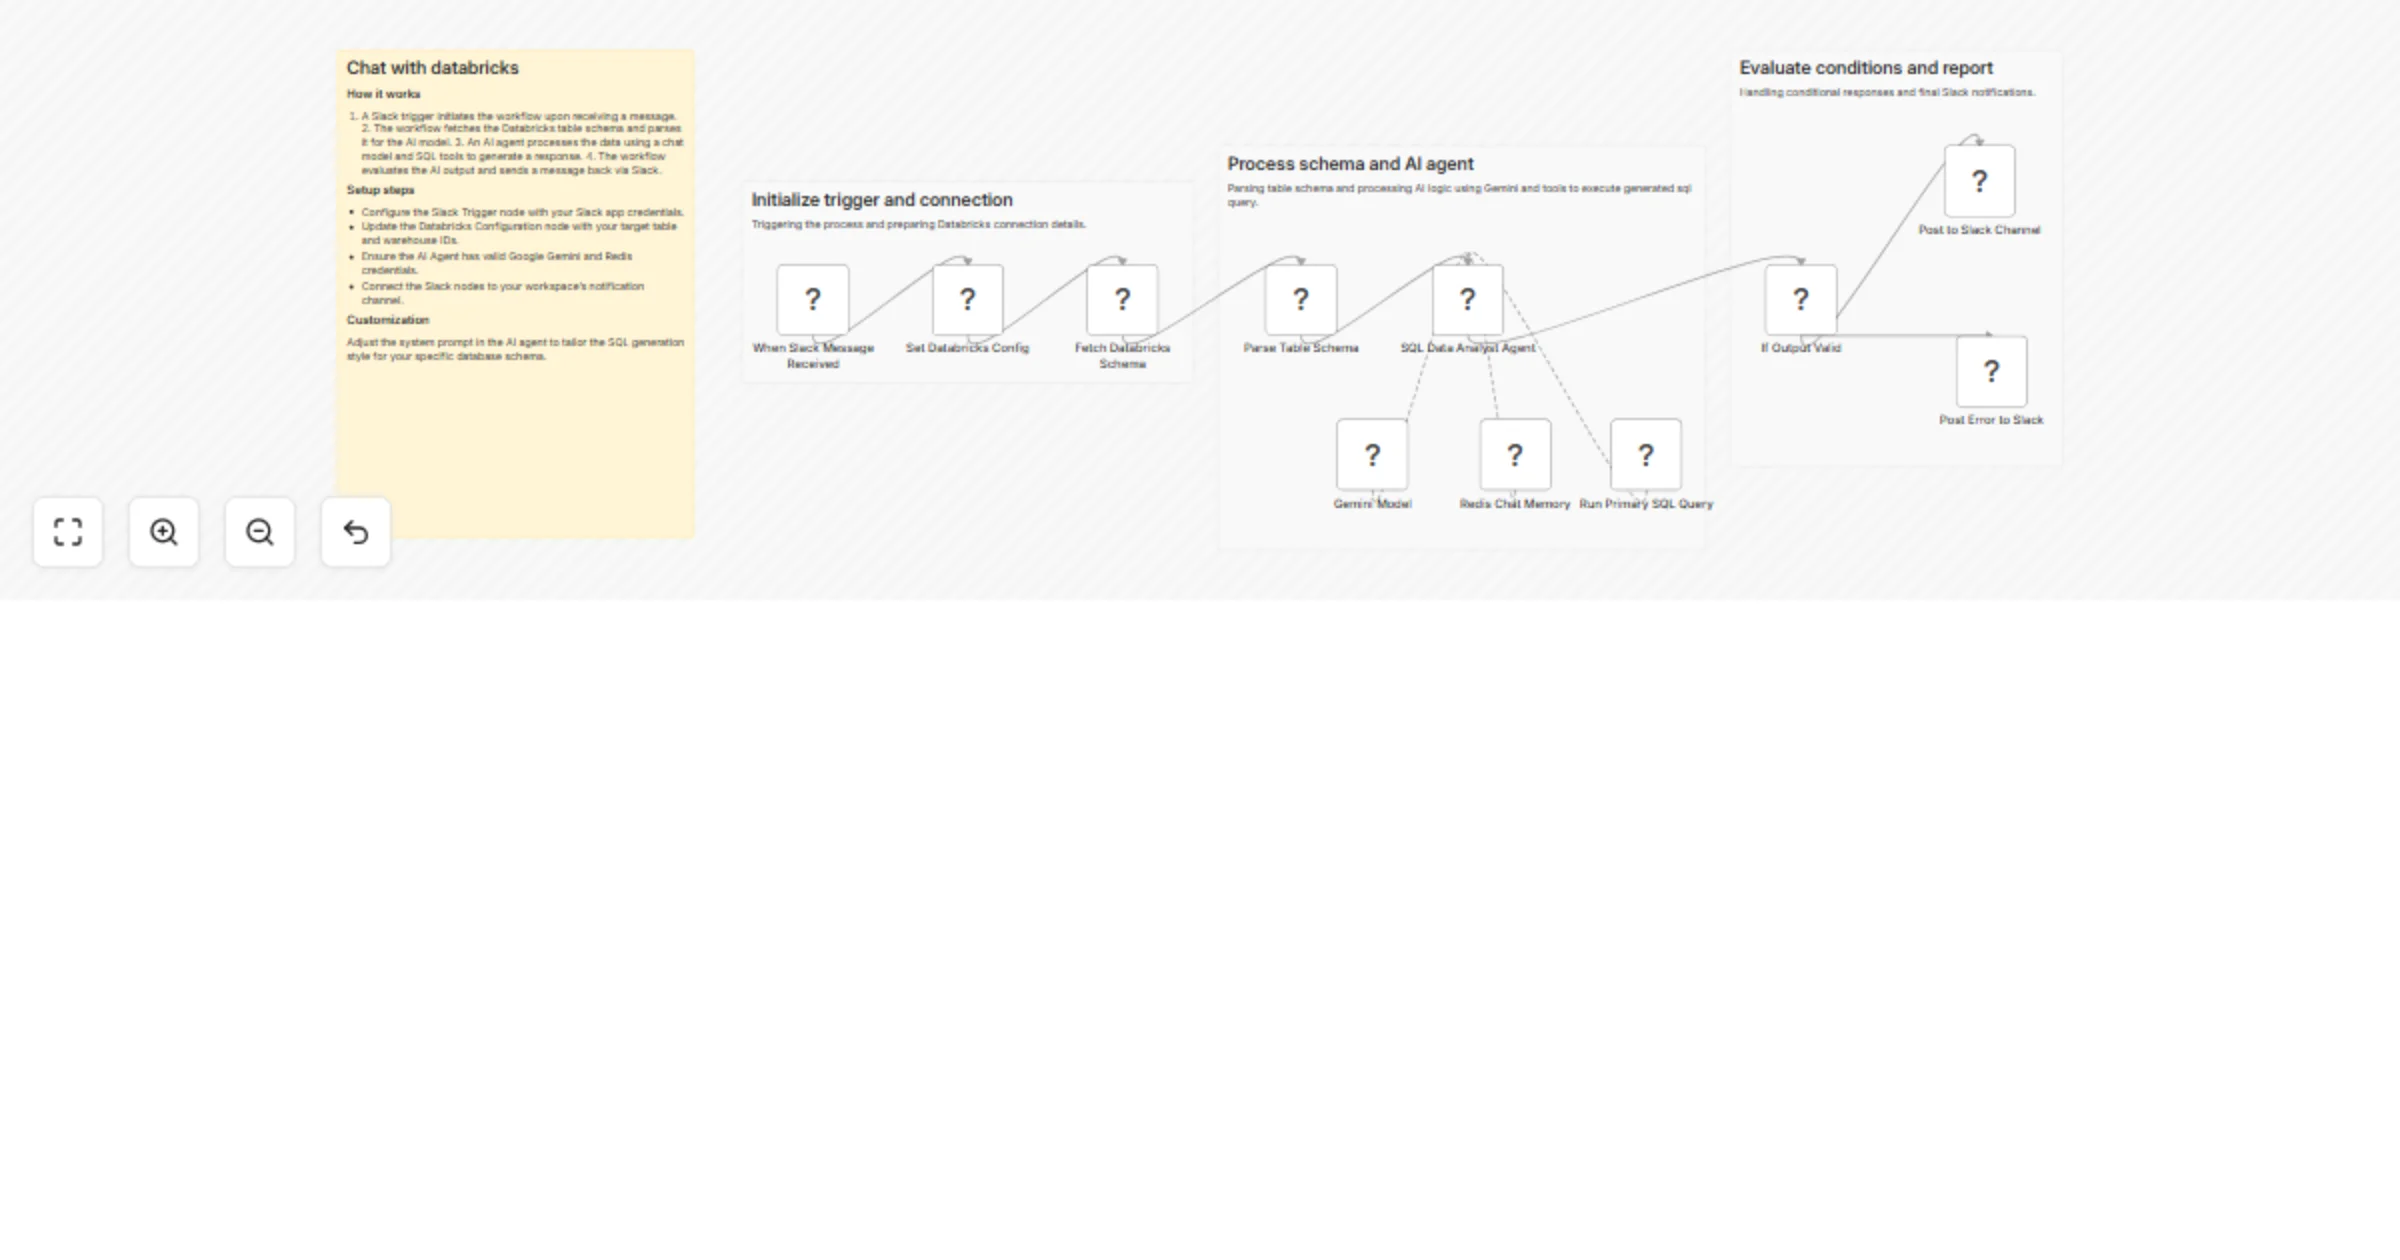
Query Databricks data and SQL insights via Slack with Gemini AI agent
Automated Databricks Data Querying & SQL Insights via Slack with AI Agent & Gemini Node by Node Explanation This work...
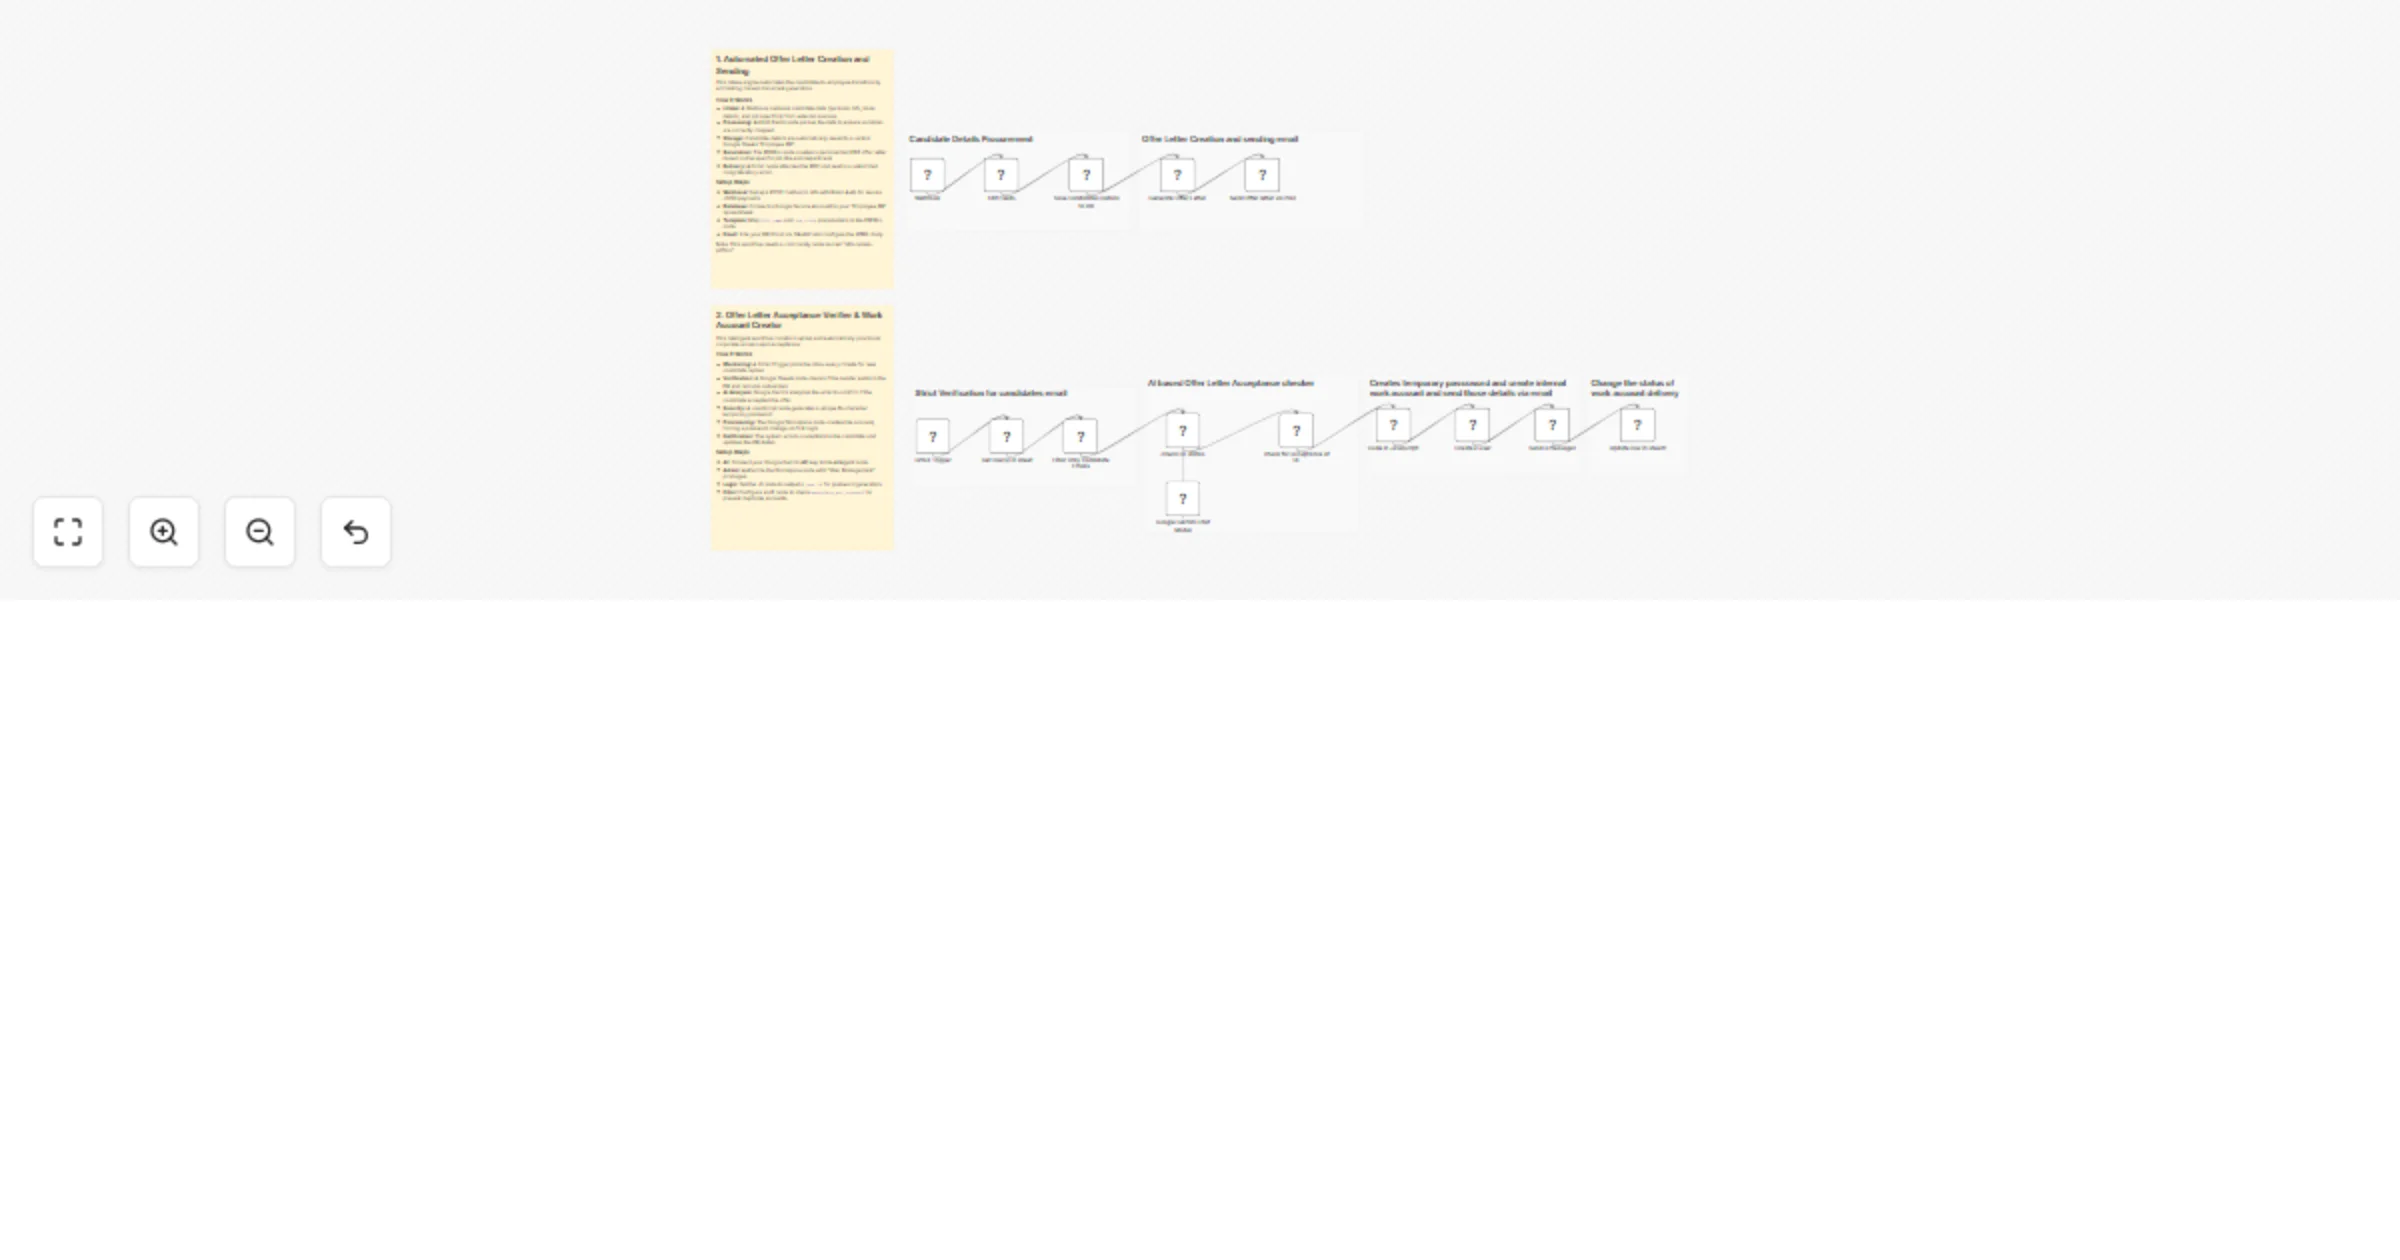
Automate employee onboarding and Google Workspace account creation with Gmail, Google Sheets, PDFBro and Google Gemini
📺 Watch the Video Demo For a visual walkthrough of this automation in action, check out the tutorial below: https://...
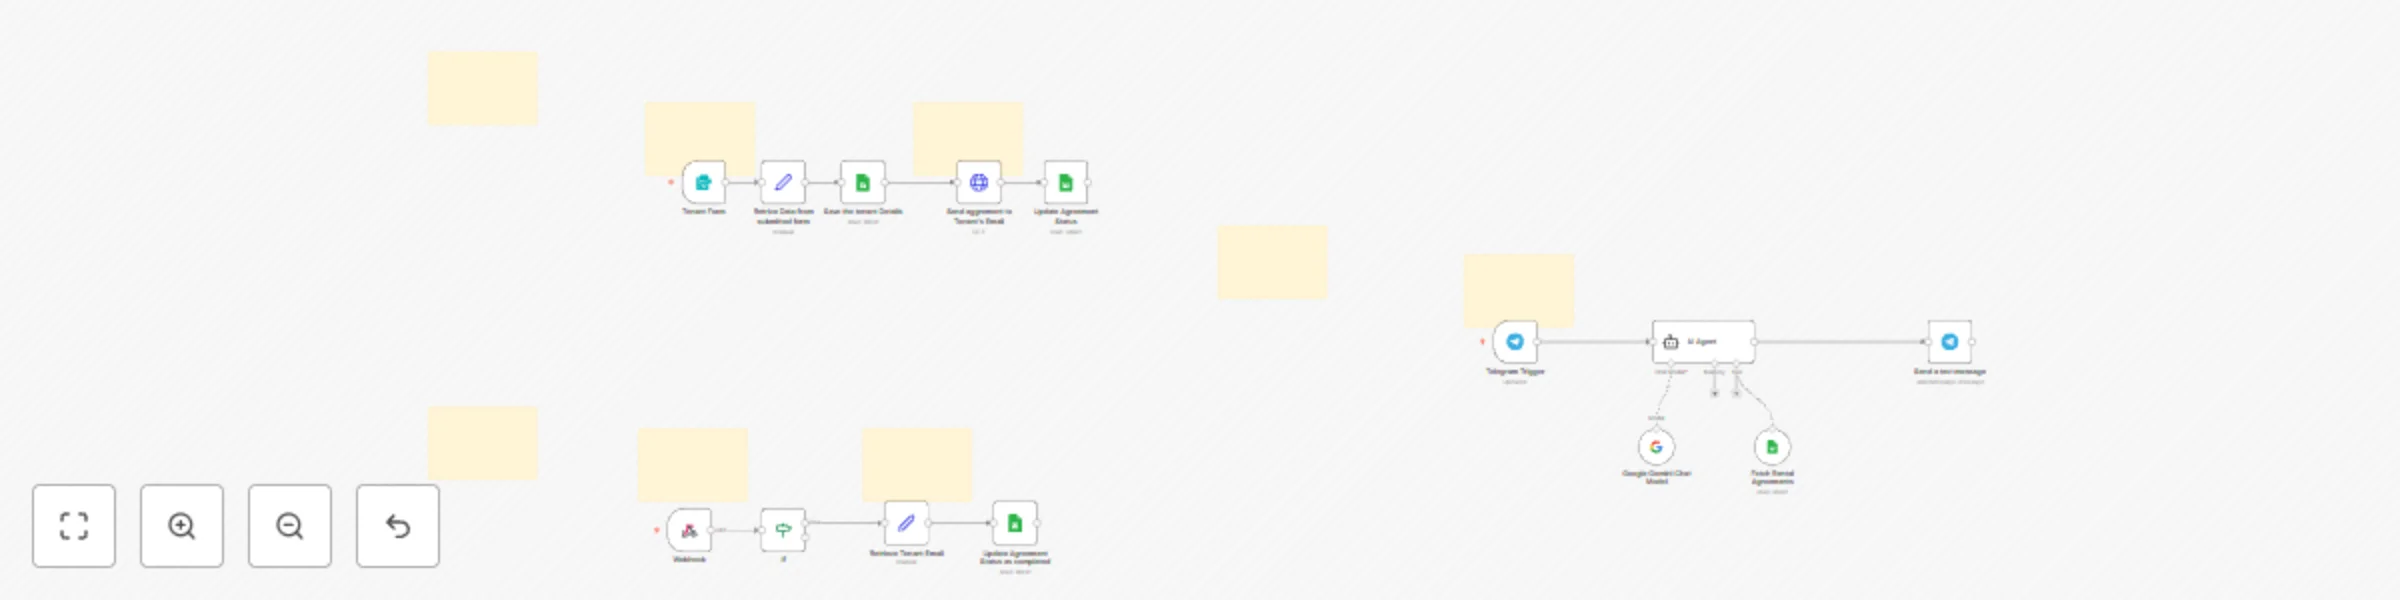
Automate rental agreements with BoldSign, Google Sheets & Gemini AI
Complete Video Documentation: https://youtu.be/O bKlX3G7 4 Explanation WITH clean Video timestamps: Prerequisites : Y...

Automate bug reports with Gemini AI: Jotform to GitHub with Telegram alerts
Execution video: https://youtu.be/Gj7uzz9cIfU?si=jTu8nktmxM dfKoZ This workflow automates the process of handling bug...

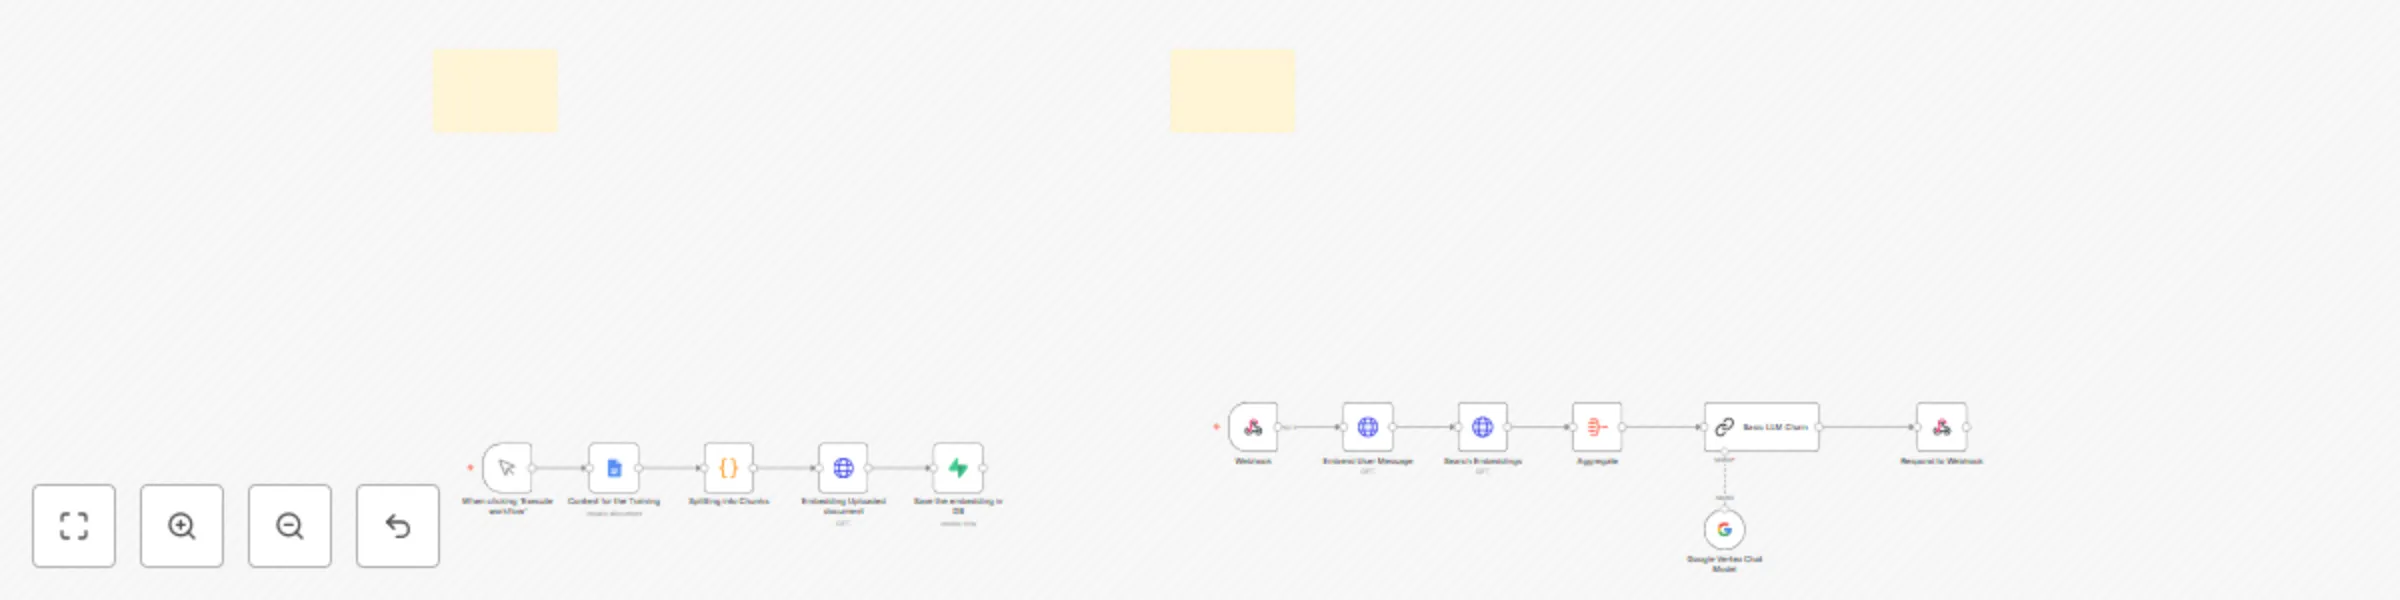
Build a knowledge base chatbot with Jotform, RAG Supabase, Together AI & Gemini
Youtube Video: https://youtu.be/dEtV7OYuMFQ?si=fOAlZWz4aDuFFovH Workflow Pre requisites Step 1: Supabase Setup First,...
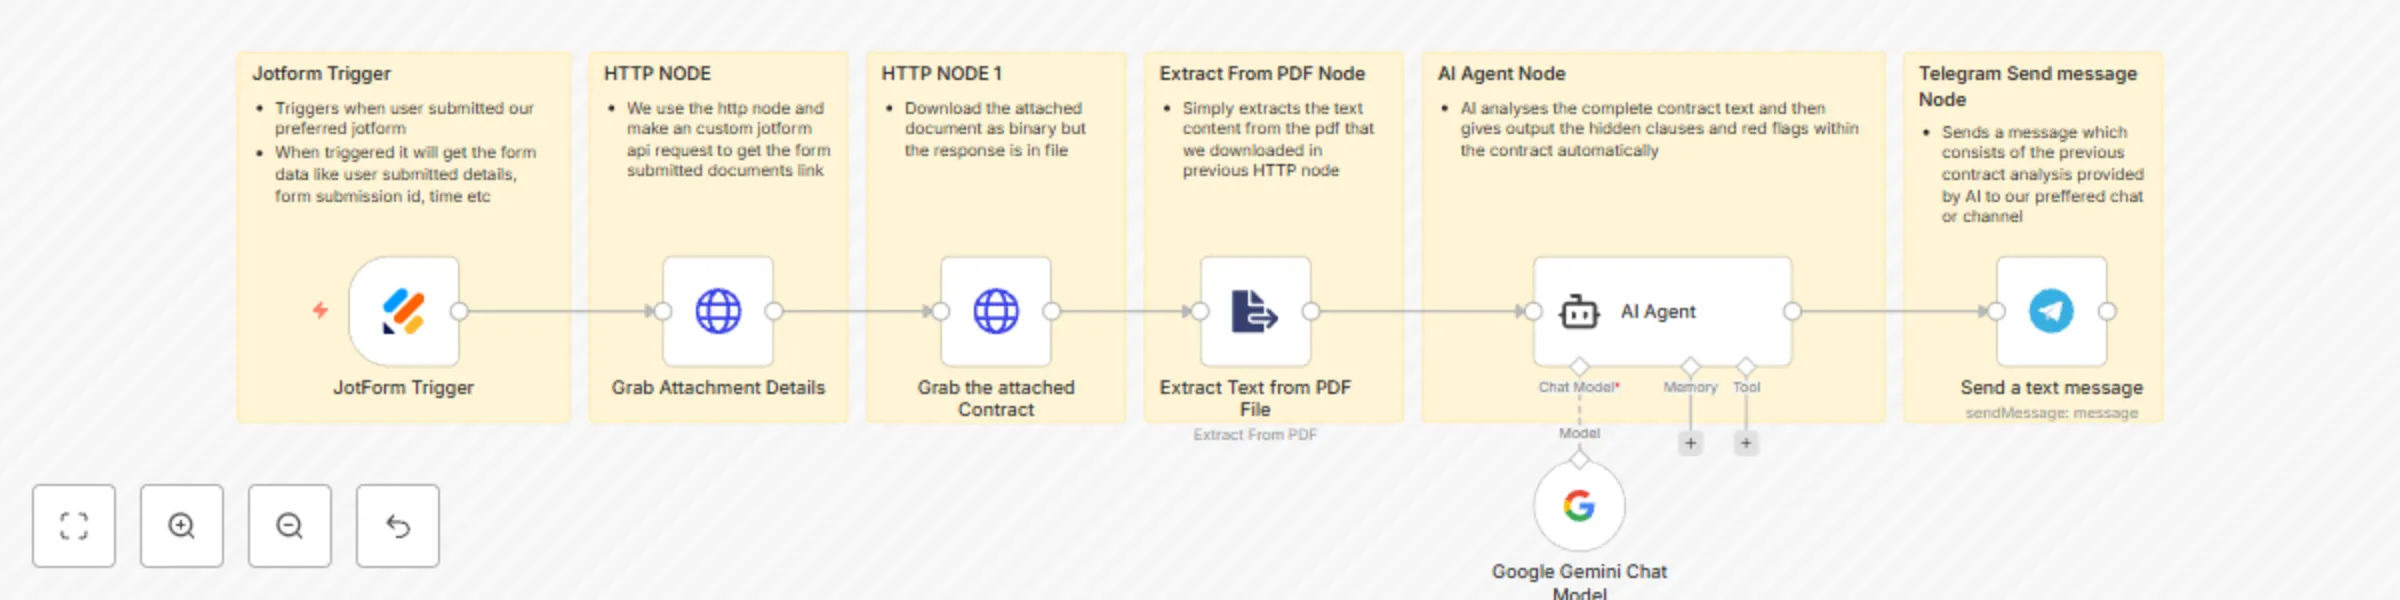
AI-powered NDA review & instant alert system - Jotform, Gemini, Telegram
This workflow automates the process of analyzing a contract submitted via a web form. It extracts the text from an up...

Automate internal complaint resolution with Jotform, Gemini AI & Google Sheets
Workflow explaination video: https://youtu.be/z1grVuNOXMk Prerequisites Before running this workflow, you need to hav...

Automated post-purchase product delivery & upsell with Jotform, GDrive, Gemini
Explanation video: https://youtu.be/QjbA tFYCFE?si= C36KlSgABzteoB Workflow Overview This automation handles what hap...

Automate freelance project intake with custom proposals using Jotform & Gemini
Workflow explaination: https://youtu.be/ecafBTFPuvE?si=7csA1yNsaUxUG72F This workflow is designed to automatically ha...
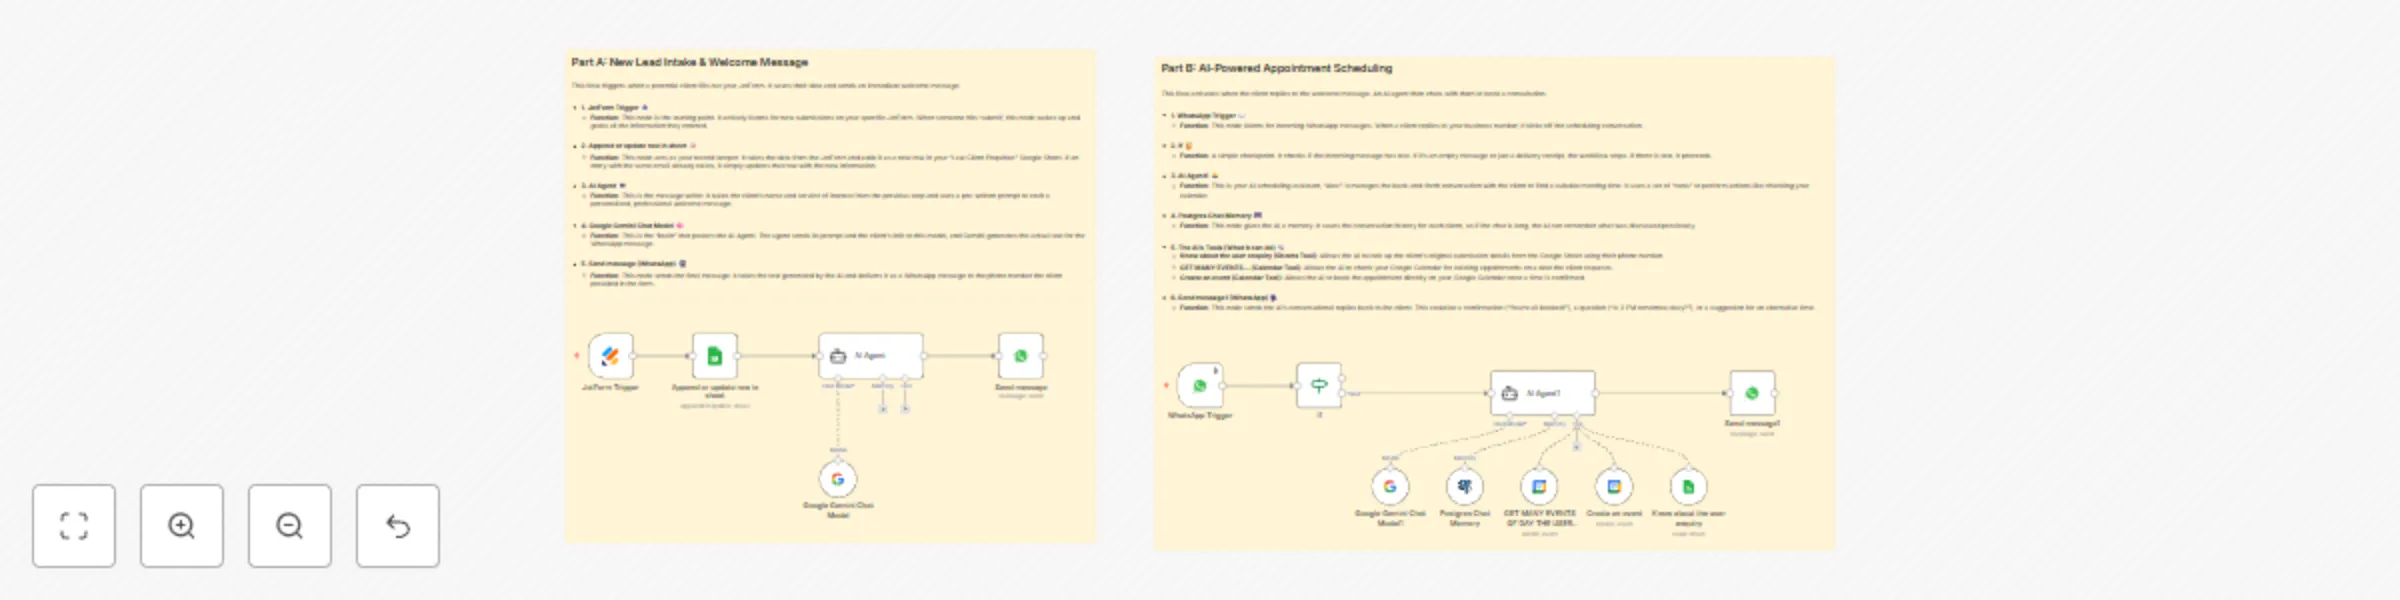
Automated law firm lead management & scheduling with AI, Jotform & Calendar
Youtube Explanation: https://youtu.be/KgmNiV7SwkU This n8n workflow is designed to automate the initial intake and sc...

Get real-time international space station visibility alerts with N2YO and Telegram
Workflow Execution Video: https://youtu.be/VV4D2aiFXsY Prerequisites & Setup Before you begin, you need to gather a f...
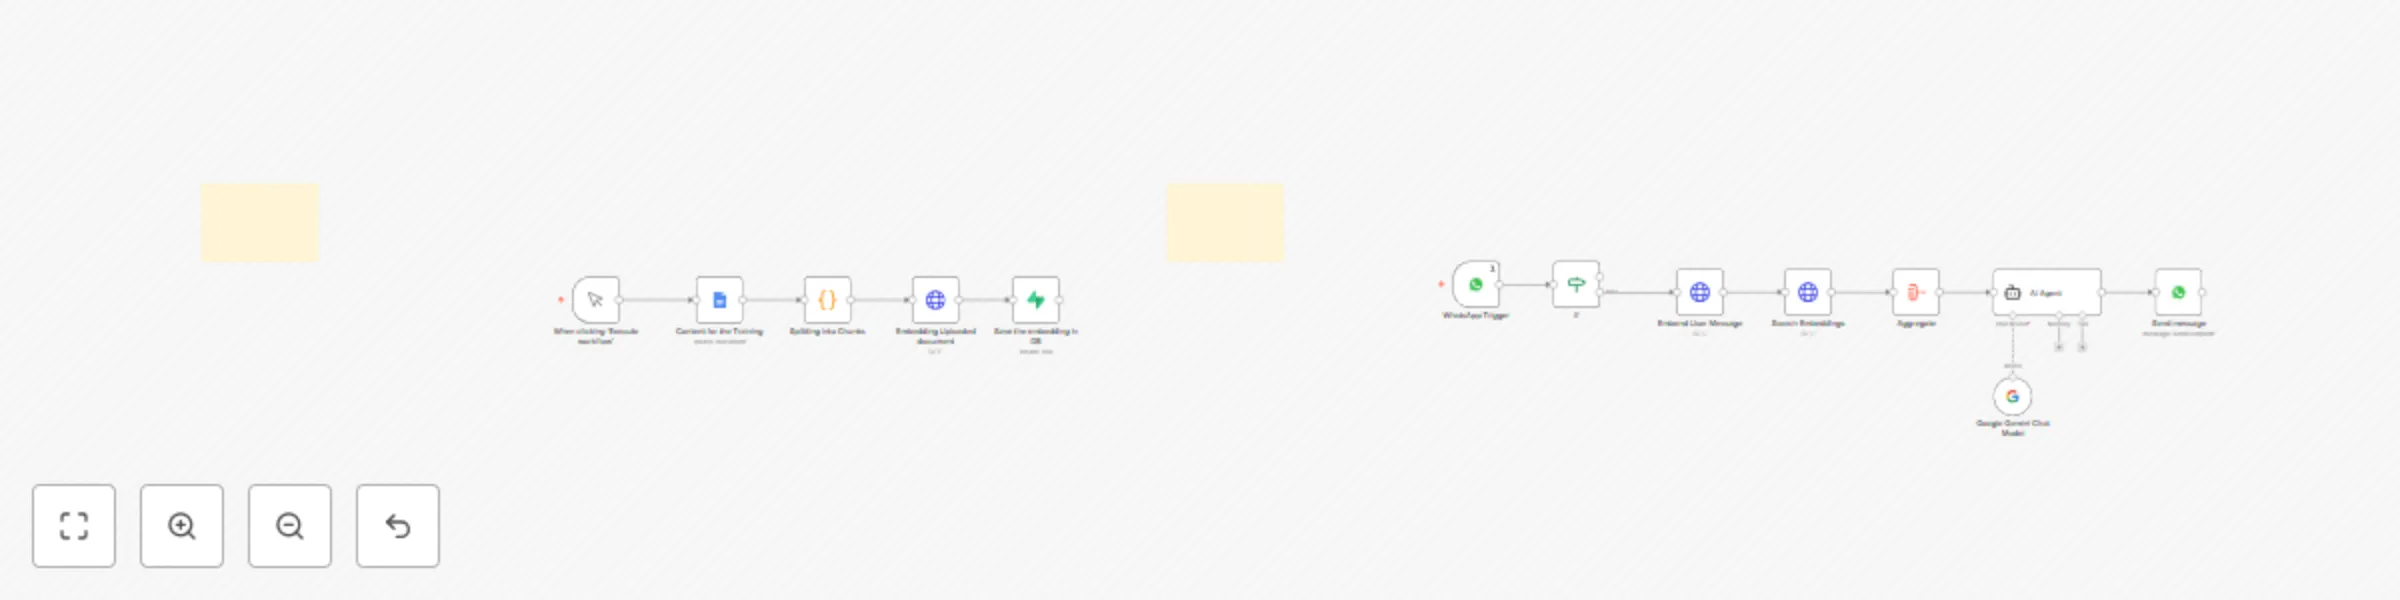
Build a knowledge-based WhatsApp assistant with RAG, Gemini, Supabase & Google Docs
Workflow Execution Link: Watch Execution Video Workflow Pre requisites Step 1: Supabase Setup First, replace the keys...
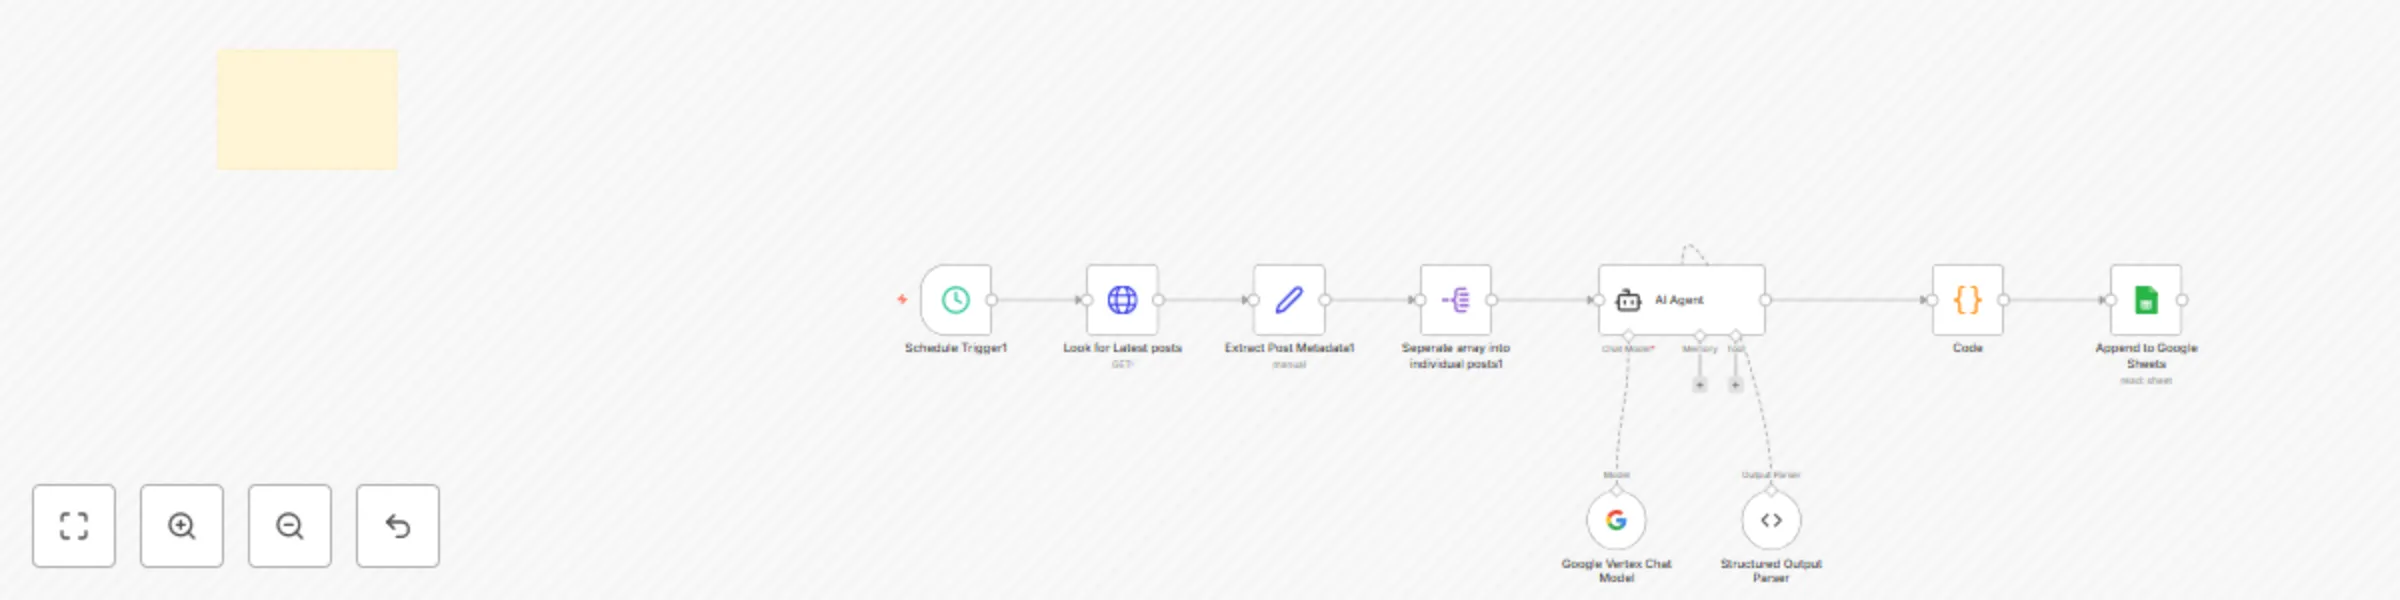
Monitor brand reputation for negative PR on Reddit with Gemini + LangChain + Sheets
🎥 Watch the Full Execution on YouTube Workflow Description (in depth): This workflow automates the entire process of...
RAG-powered AI voice customer support agent (Supabase + Gemini + ElevenLabs)
Execution video: Youtube Link I built an AI voice triggered RAG assistant where ElevenLabs’ conversational model acts...
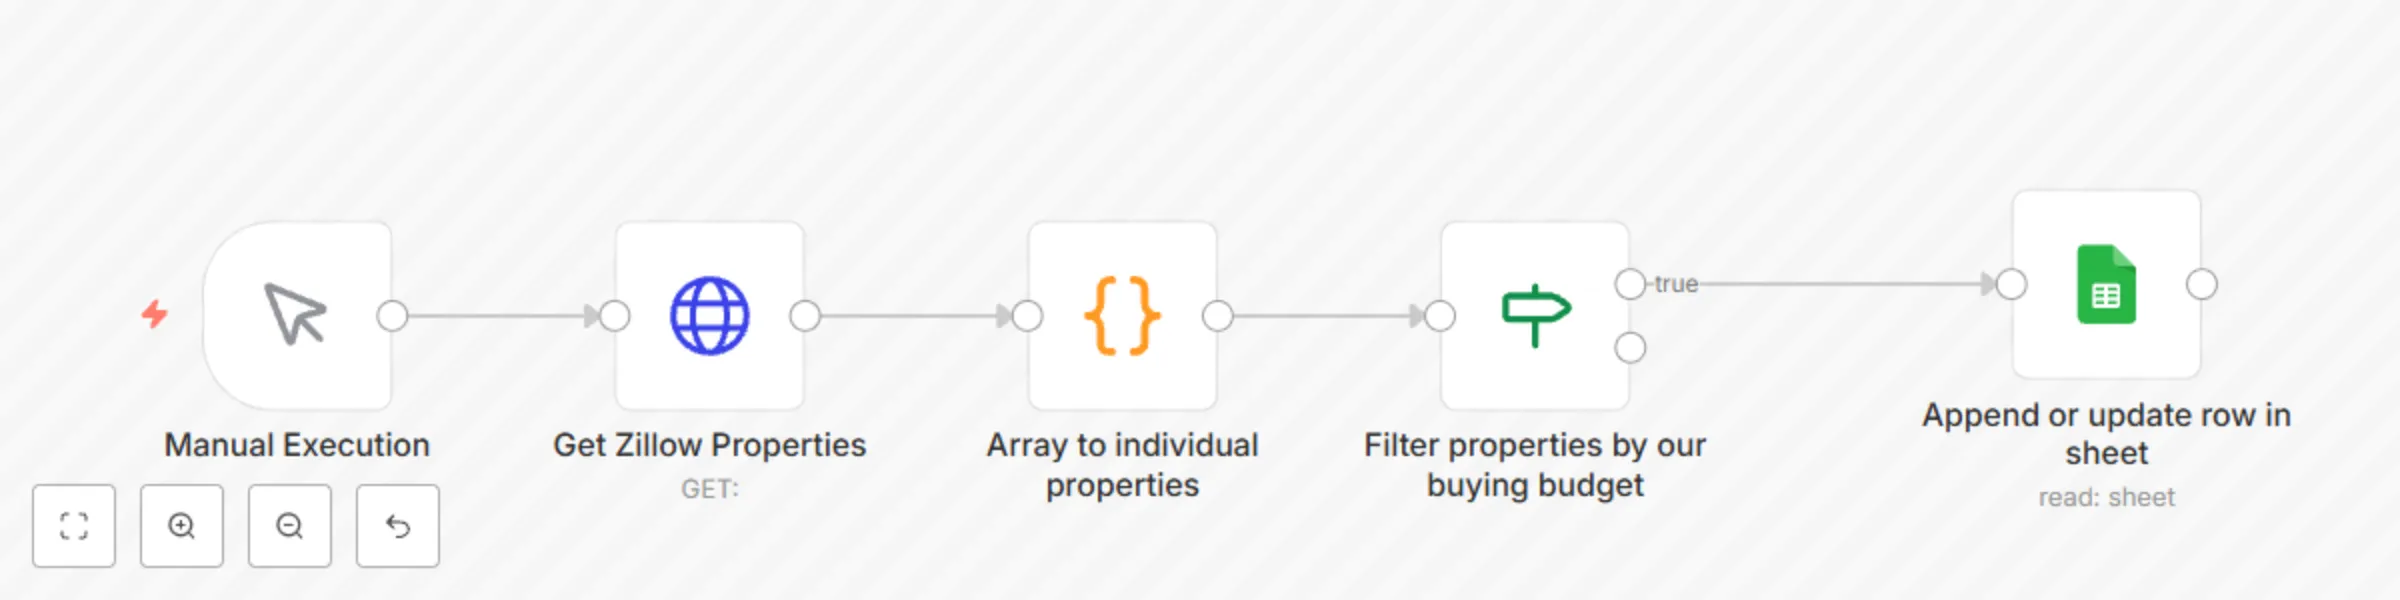
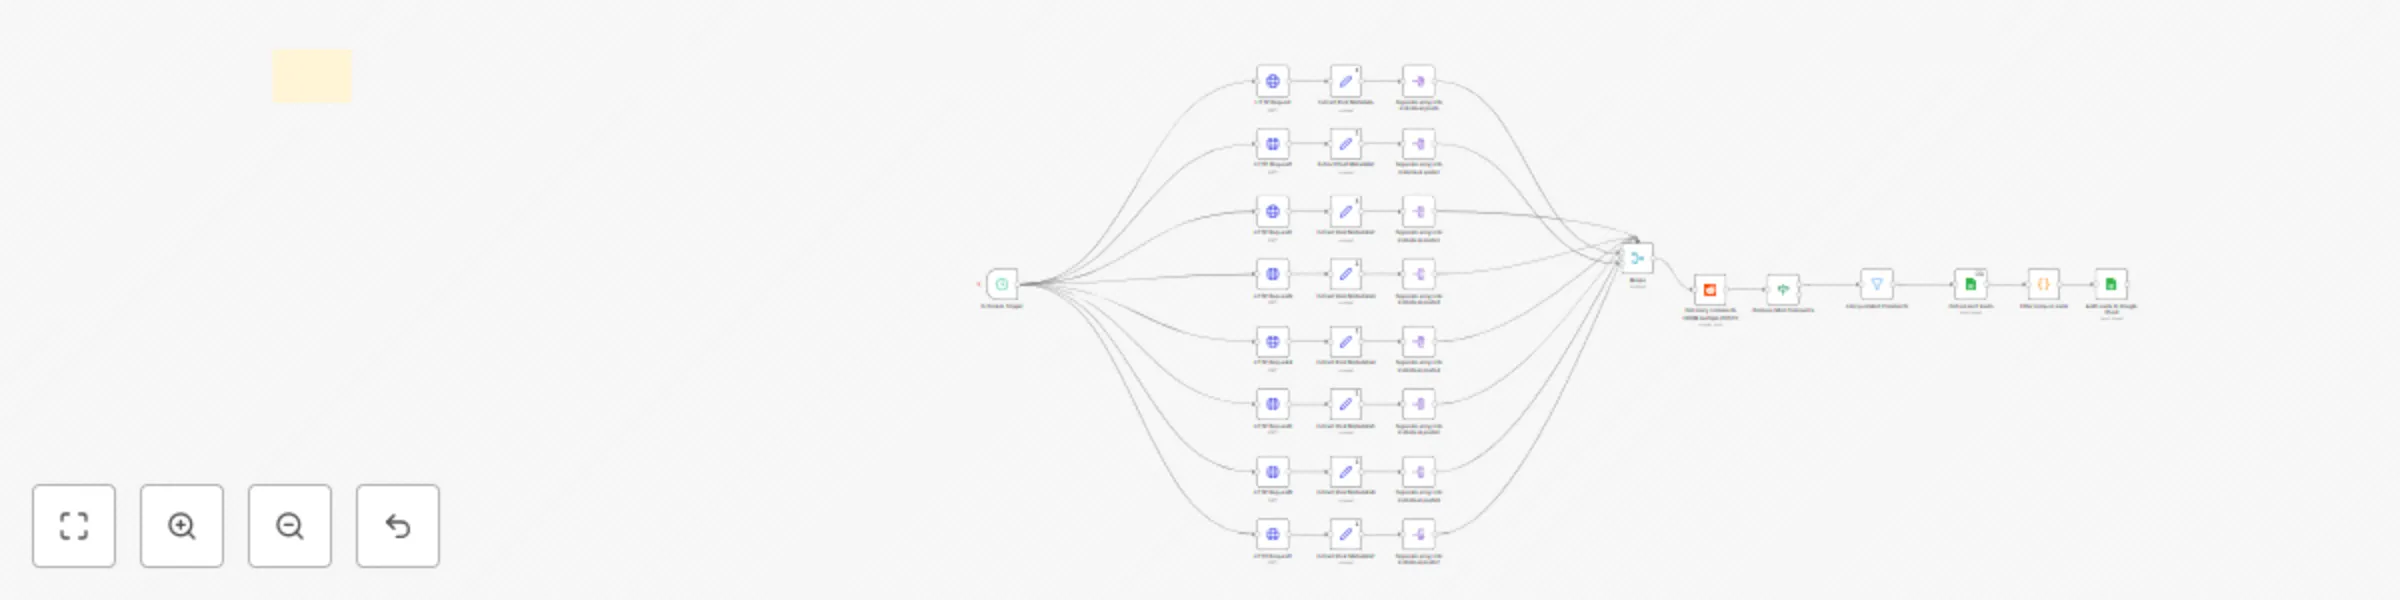
Automate Zillow property search with budget filtering to Google Sheets
Nodes Used: Manual Execution Trigger HTTP Request (Get Zillow Properties) Code Node (Split Listings Array) IF Node (F...
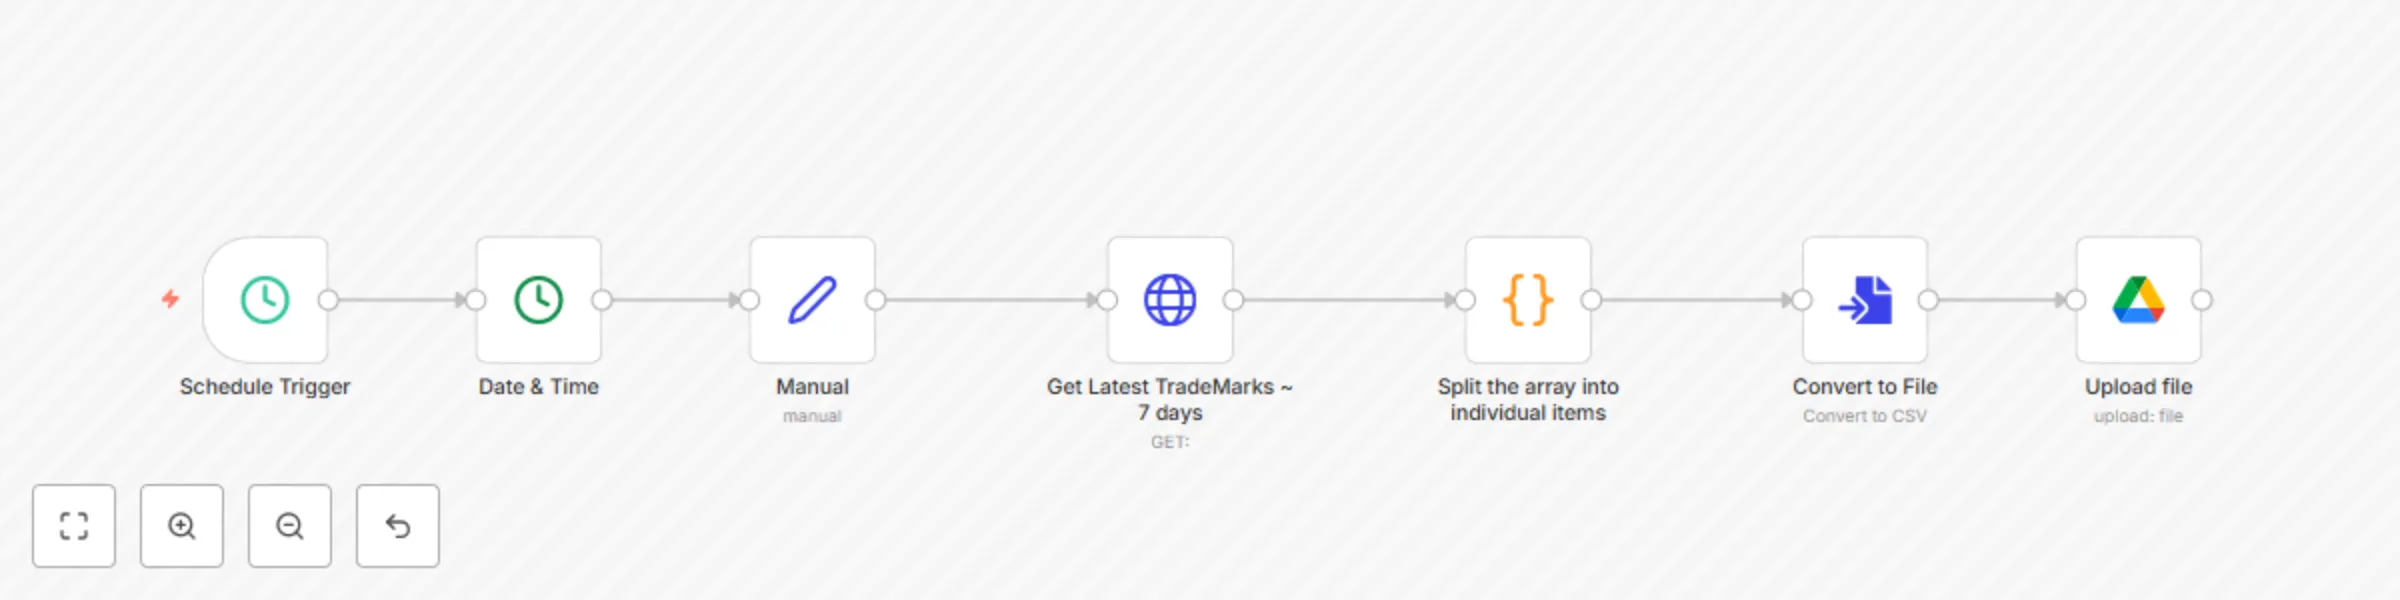
Automate weekly US trademark reports with USPTO API and Google Drive CSV export
Title: ⚙️ Deep Dive: Automating Weekly US Trademark Reports with n8n, RapidAPI & Google Drive (No Code Workflow) Full...
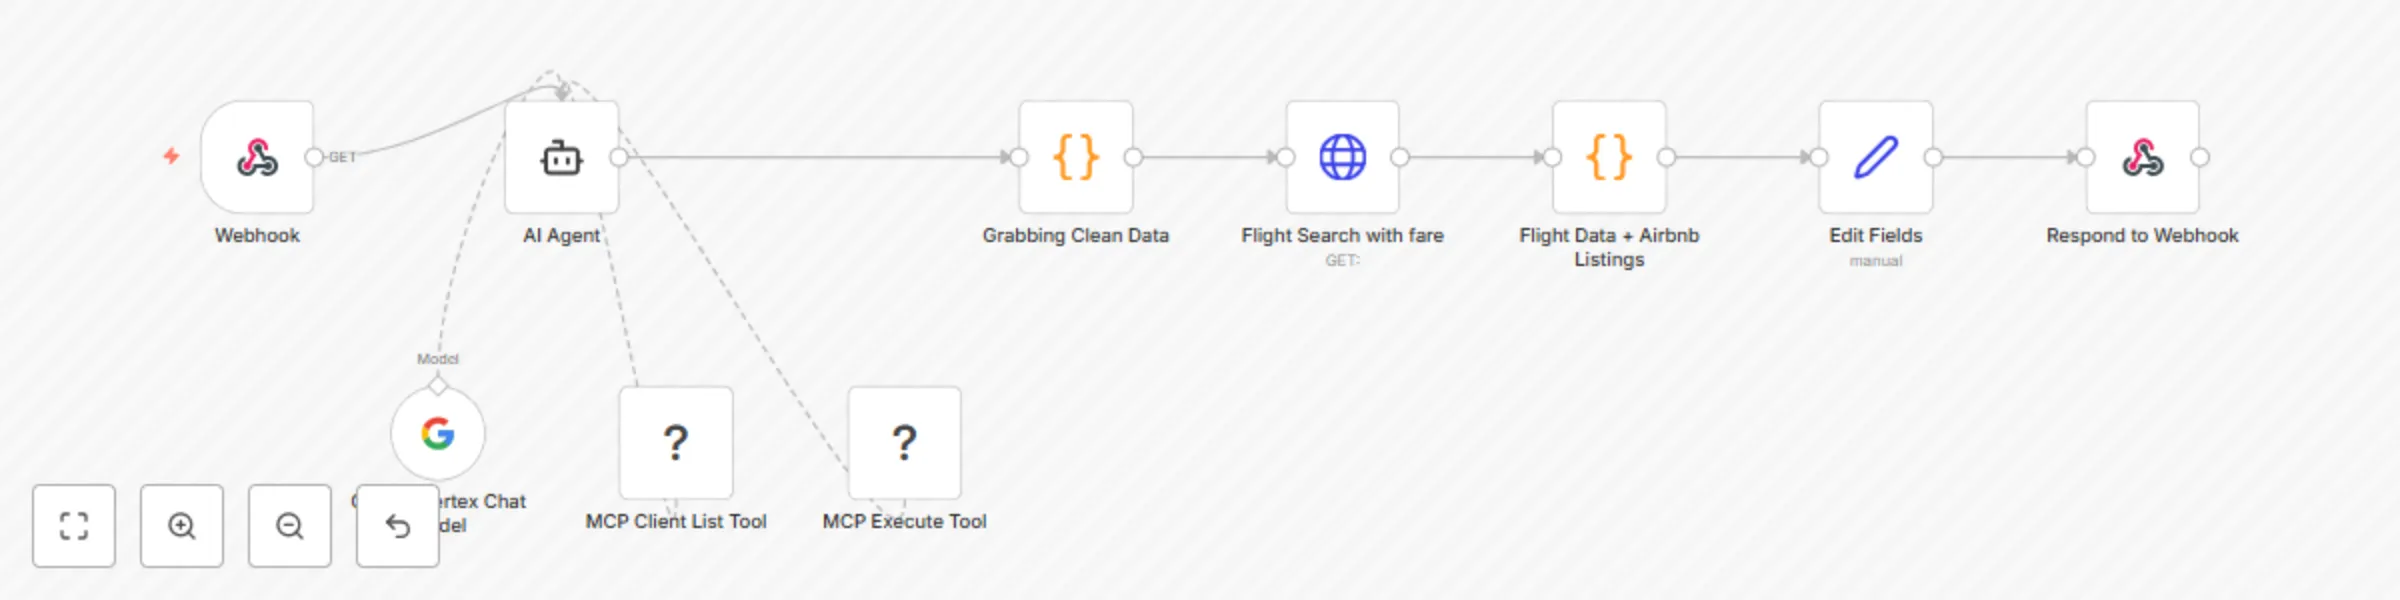
Plan travel itineraries with Gemini AI, live Amadeus flights, and Airbnb stays
This workflow contains community nodes that are only compatible with the self hosted version of n8n. Here is the Full...

Automate patient intake & symptom triage with AI, Cal.com and Google Services
🚨 DISCLAIMER (READ FIRST): This workflow is NOT HIPAA compliant and NOT intended for production use . It is a test/d...
Reddit to Google Sheets: tracking freelance/job leads
: Goal: Get Reddit posts from specific subreddits, filter those mentioning freelance/gigs and n8n, extract top level...
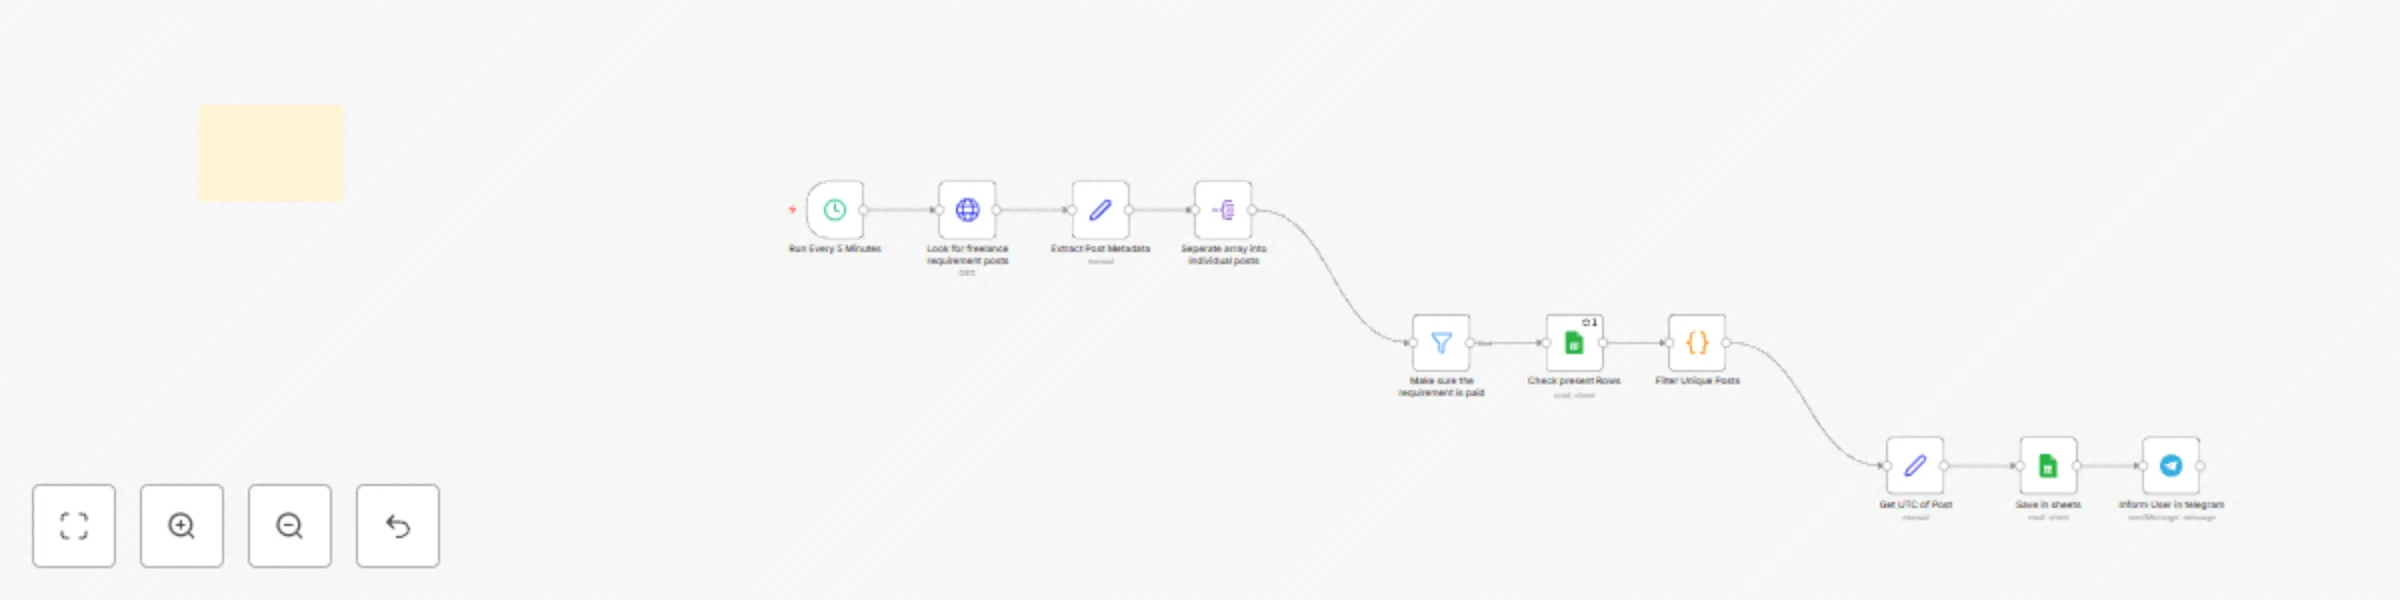
Reddit freelance job monitor with Google Sheets tracking and Telegram alerts
What It Does This n8n workflow monitors Reddit for freelance job posts related to n8n and sends alerts via Telegram w...

Personalized hotel reward emails for high-spenders with Salesforce, Gemini AI & Brevo
This n8n workflow automatically detects high‑spending hotel guests after checkout and emails them a personalized, one...
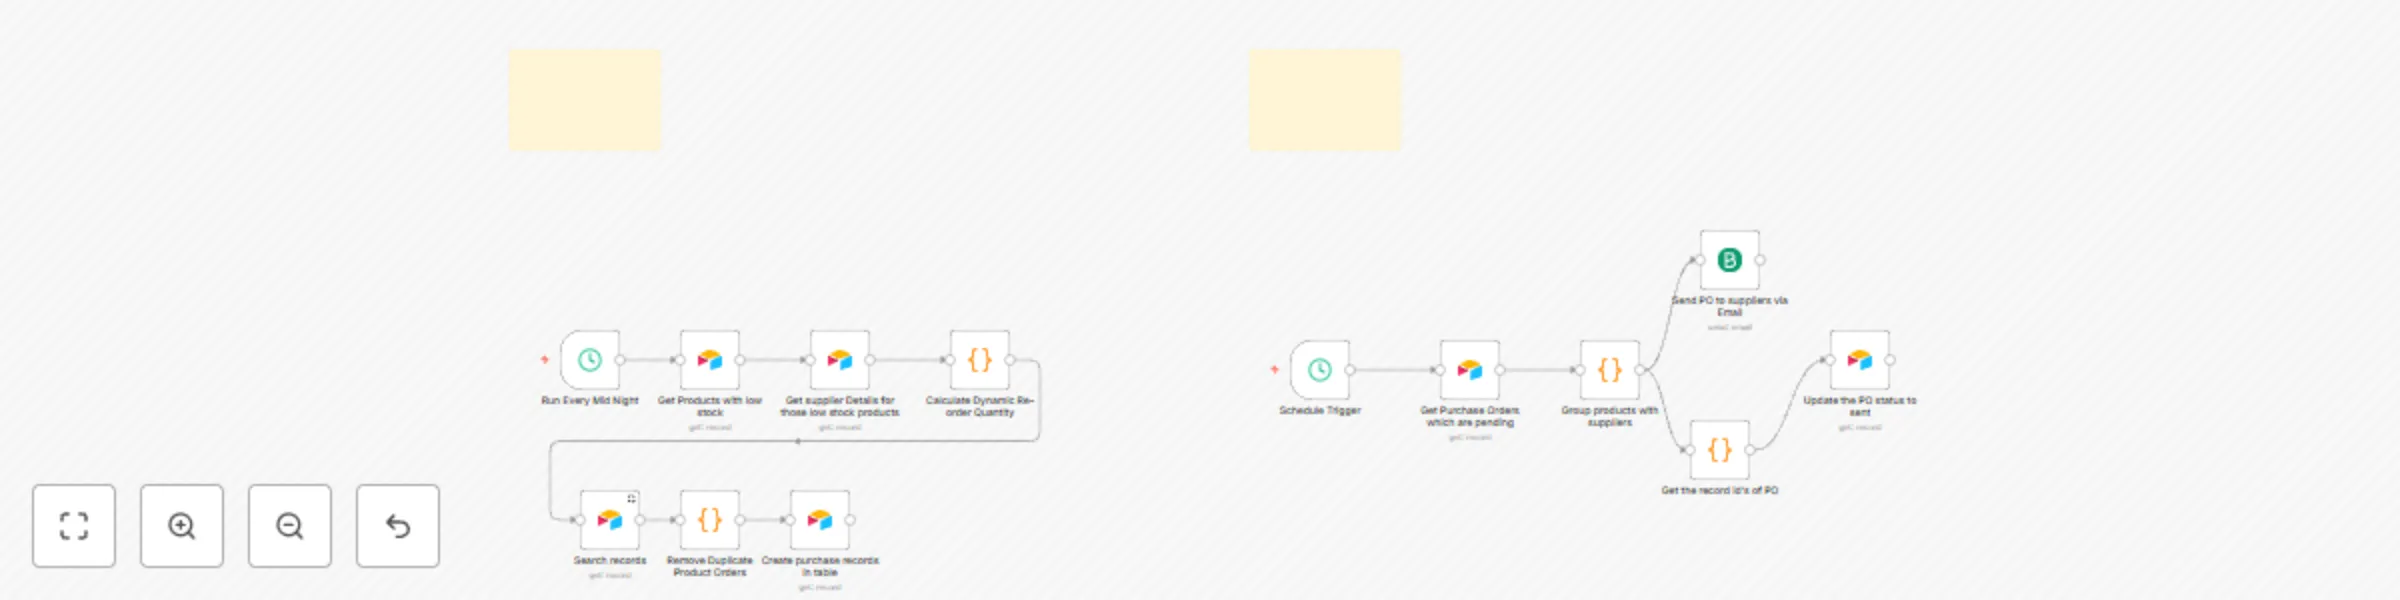
Automated inventory management with Airtable PO creation & supplier emails
In depth description of this automation: This is a fully automated daily supply chain and procurement workflow that k...
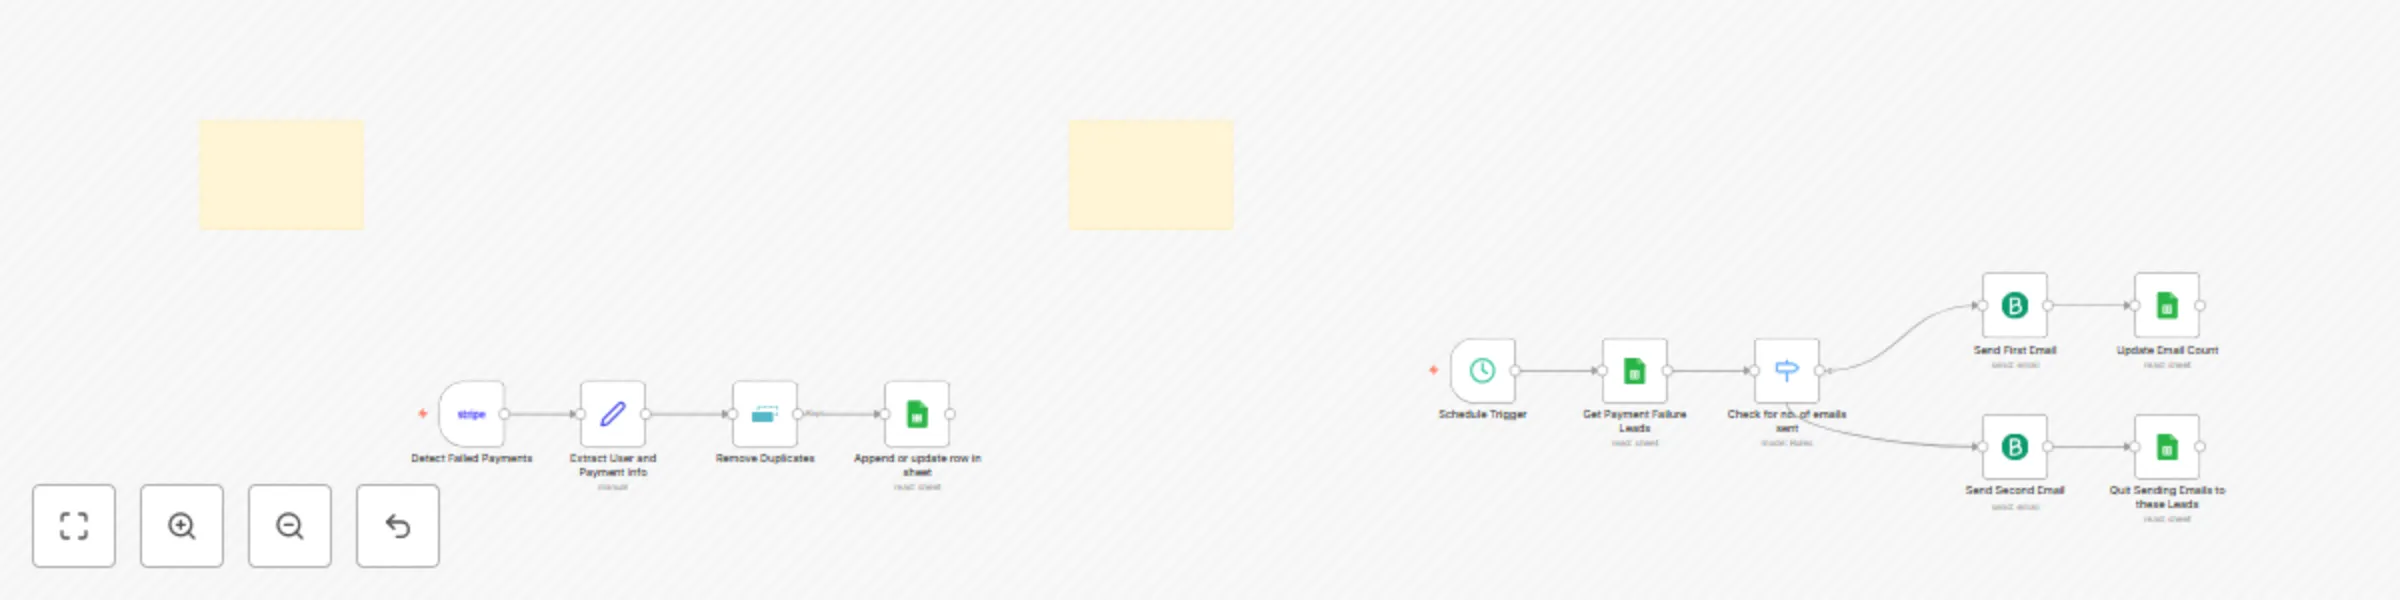
🚀 Automated Stripe payment recovery: track failures & follow-up emails
🚀 Automated Stripe Payment Recovery Workflow (n8n) Detect failed payments, log them, and send polite follow up email...