Harshil Agrawal
Workflows by Harshil Agrawal
Handle verification for Twitter webhook
This workflow handles the incoming call from Twitter and sends the required response for verification. On registering the webhook with the Twitter Account Activity API, Twitter expects a signature in response. Twitter also randomly ping the webhook to ensure it is active and secure.  **Webhook node:** Use the displayed URL to register with the Account Activity API. **Crypto node:** In the ***Secret*** field, enter your API Key Secret from Twitter. **Set node:** This node generates the response expected by the Twitter API. Learn more about connecting n8n with Twitter in the [Getting Started with Twitter Webhook](https://harshil.dev/writings/getting-started-with-twitter-webhook) article.
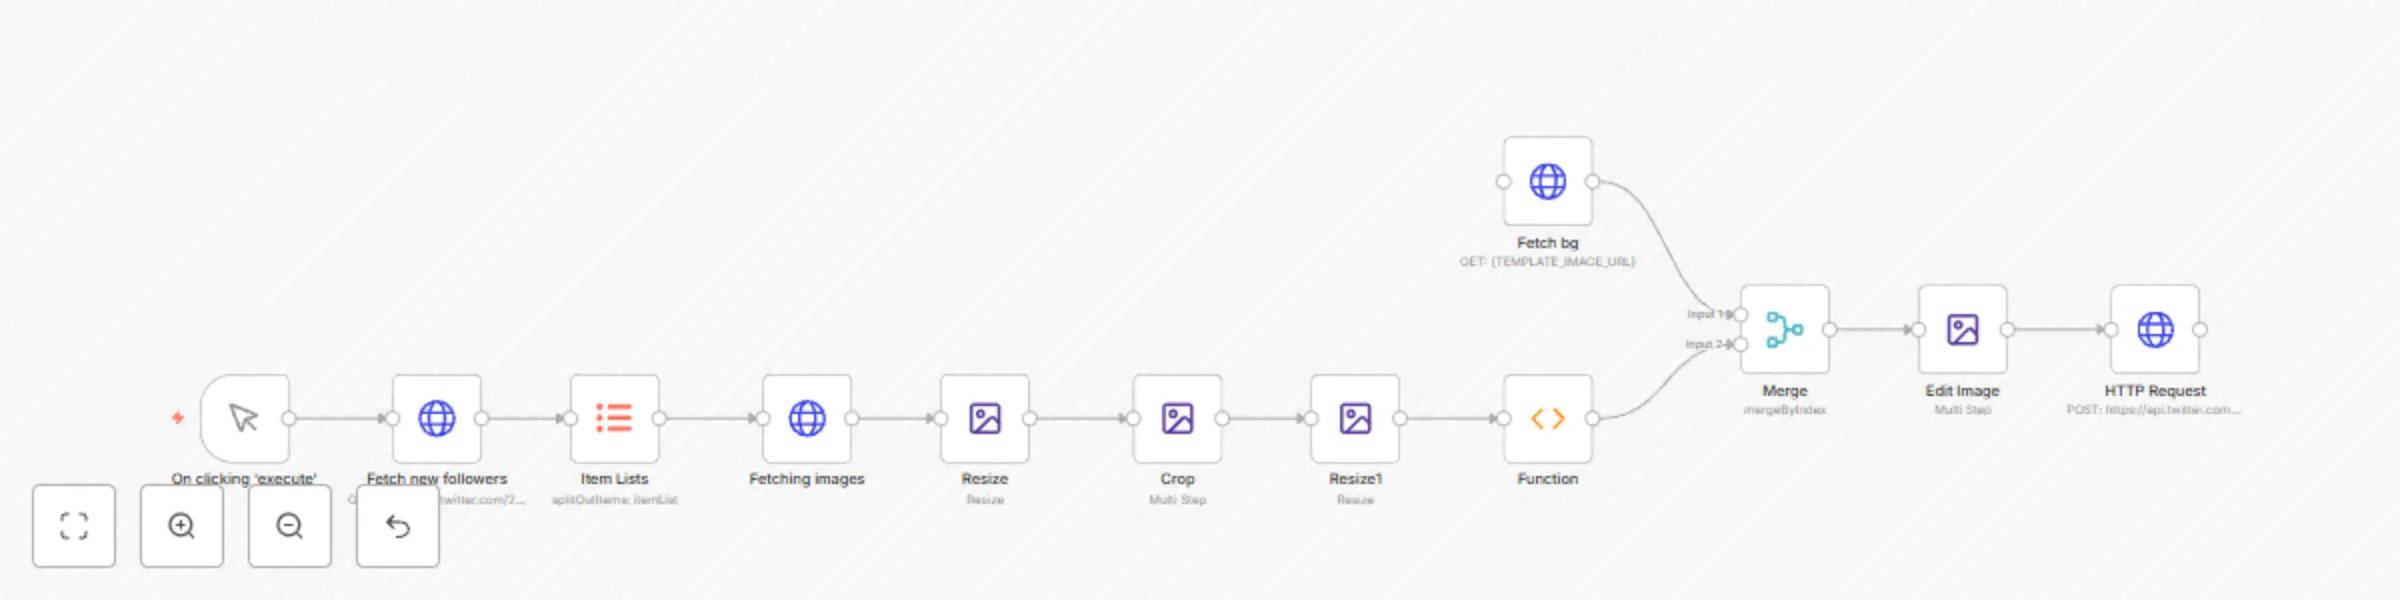
Create dynamic Twitter profile banner
This workflow updates your Twitter profile banner when you have a new follower.  To use this workflow: 1. Configure Header Auth in the **Fetch New Followers** to connect to your Twitter account. 2. Update the URL of the template image in the **Fetch BG** node. 3. Create and configure your Twitter OAuth 1.0 credentials in the last **HTTP Request** node. You can configure the size, and position of the avatar images in the Edit Image nodes. Check out this video to learn how to build it from scratch: [How to automatically update your Twitter Profile Banner](https://youtu.be/WgJgHWym7xQ)
Update Twitter banner using HTTP request
This workflow demonstrates the use of the HTTP Request node to upload binary files for form-data-multipart type. This example workflow updates the Twitter banner.  **HTTP Request node:** This node fetches an image from Unsplash. Replace this node with any other node to fetch the image file. **HTTP Request1 node:** This node uploads the Twitter Profile Banner. The Twitter API requires OAuth 1.0 authentication. Follow the Twitter documentation to learn how to configure the authentication.
Demonstrates the use of the $item(index) method
This workflow demonstrates the use of the `$item(index)` method. This method is useful when you want to reference an item at a particular index. This example workflow makes POST HTTP requests to a dummy URL.  **Set node:** This node is used to set the API key that will be used in the workflow later. This node returns a single item. This node can be replaced with other nodes, based on the use case. **Customer Datastore node:** This node returns the data of customers that will be sent in the body of the HTTP request. This node returns 5 items. This node can be replaced with other nodes, based on the use case. **HTTP Request node:** This node uses the information from both the Set node and the Customer Datastore node. Since, the node will run 5 times, once for each item of the Customer Datastore node, you need to reference the API Key 5 times. However, the Set node returns the API Key only once. Using the expression `{{ $item(0).$node["Set"].json["apiKey"] }}` you tell n8n to use the same API Key for all the 5 requests.
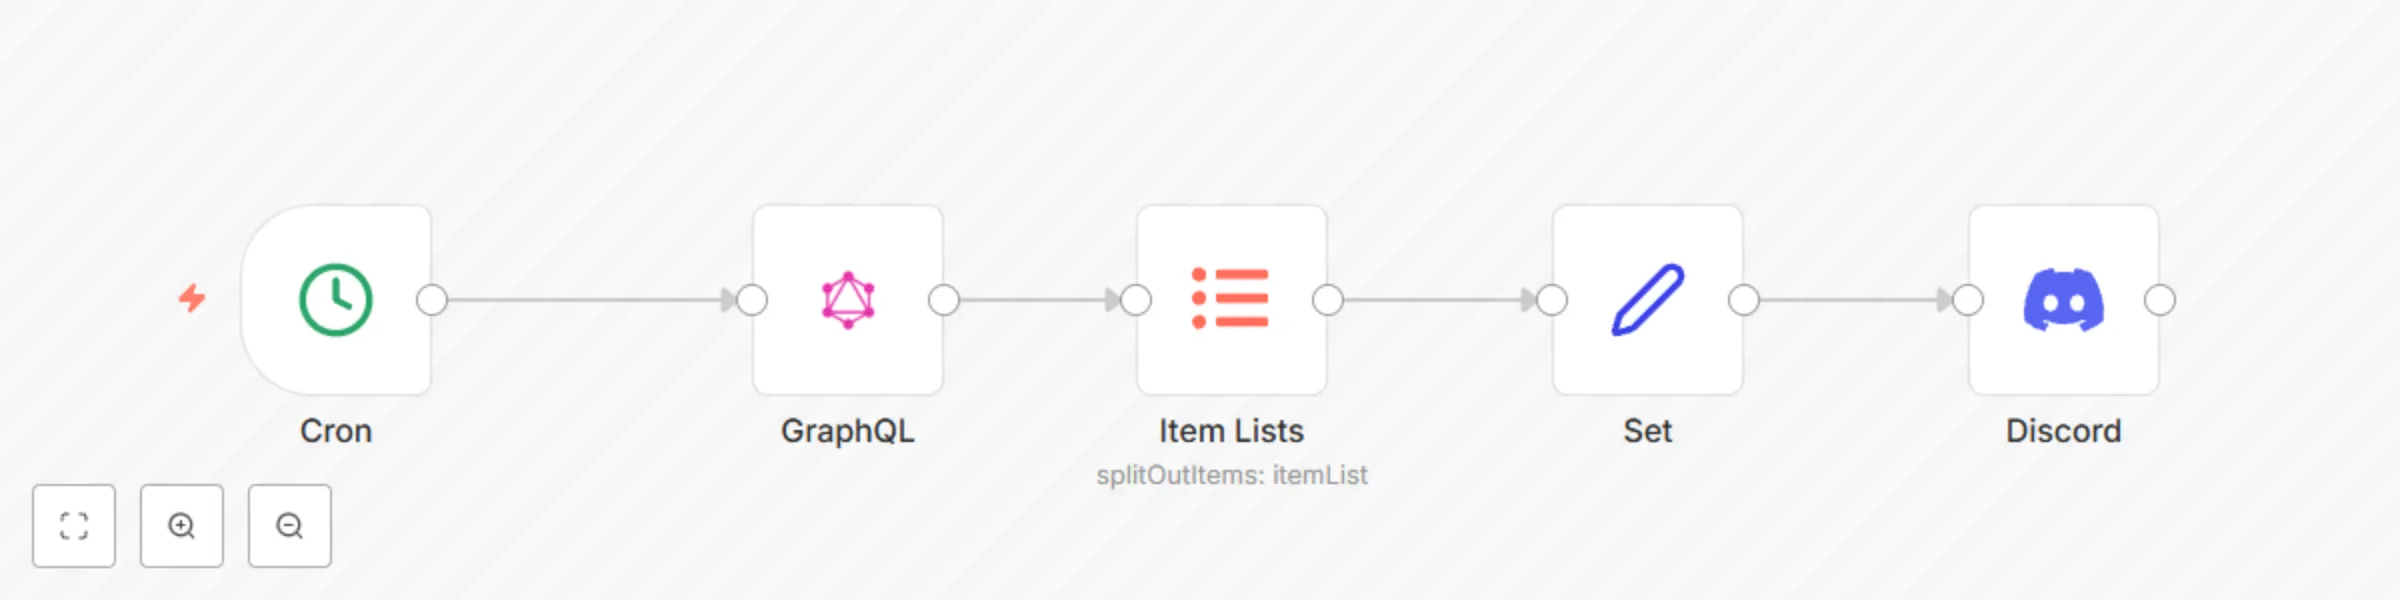
Get top 5 products on Product Hunt every hour
This workflow gets the top 5 products from Product Hunt and shares them on the Discord server.  **Cron node:** This node triggers the workflow every hour. Based on your use case, you can update the node to trigger the workflow at a different time. **GraphQL node:** This node makes the API call to the [Product Hunt GraphQL API](https://api.producthunt.com/v2/docs). You will need an API token from Product Hunt to make the call. **Item Lists node:** This node transforms the single item returned by the previous node into multiple items. **Set node:** The Set node is used to return only the name, description, and votes of the product. **Discord node:** This node is used to send the top 5 products to the Discord server.
Enrich contact information with HubSpot and ClearBit
This workflow enriches the information of a new contact that gets added to HubSpot.  **HubSpot Trigger:** This node triggers the workflow when a new contact gets added to HubSpot. **Get Contact:** This node fetches the information of the new contact. **Clearbit:** This node returns the data of the person and the company associated with the email address. **Update Contact:** This node will update the contact with the information returned by the Clearbit node. Based on your use case, you can select which fields you want to update.
Assign issues to interested contributors
This workflow handles the incoming issues and issues comments for your open-source project. If a contributor is interested, the workflow will assign them the issue.  **Note:** For organizations, you will have to use the Webhook node to trigger the workflow. You will also have to use the HTTP Request node instead of the regular GitHub node. You can learn more about this workflow by reading the blog on [https://n8n.io/blog](https://n8n.io/blog).
Send notification when deployment fails
This workflow sends a message on Slack when site deployment fails.  **Netlify Trigger node:** This node triggers the workflow when the site deployment fails. **Slack node:** This node sends a message on Slack alerting the team about the failed deployment. If you want to send a message to a different platform, replace the Slack node with the node of the respective platform.
Deploy site when new content gets added
This workflow demonstrates how to create a new deployment when new content gets added to the database. This example workflow can be used when building a JAMstack site.  **Webhook node:** This node triggers the workflow when new content gets added. For this example, we have configured the webhook in GraphCMS. **Netlify node:** This node will start the build process and deploy the website. You will have to select your site from the ***Site ID*** dropdown list. To identify the deployment, we are passing a title.
Add Netlify form submissions to Airtable
This workflow demonstrates how to use the Netlify Trigger node to capture form submissions and add it Airtable. You can reuse the workflow to add the data to another similar database by replacing the Airtable node with the corresponding node.  **Netlify Trigger node:** This node triggers the workflow when a new form is submitted. Select your site from the ***Site Name/ID*** dropdown list and the form from the ***Form ID*** dropdown list. **Set node:** This node extract the required data from the Netlify Trigger node. In this example, we only want to add the Name, Email, and Role of the user. **Airtable node:** This node appends the data to Airtable. If you want the data to Google Sheets or a database, replace this node with the corresponding node.
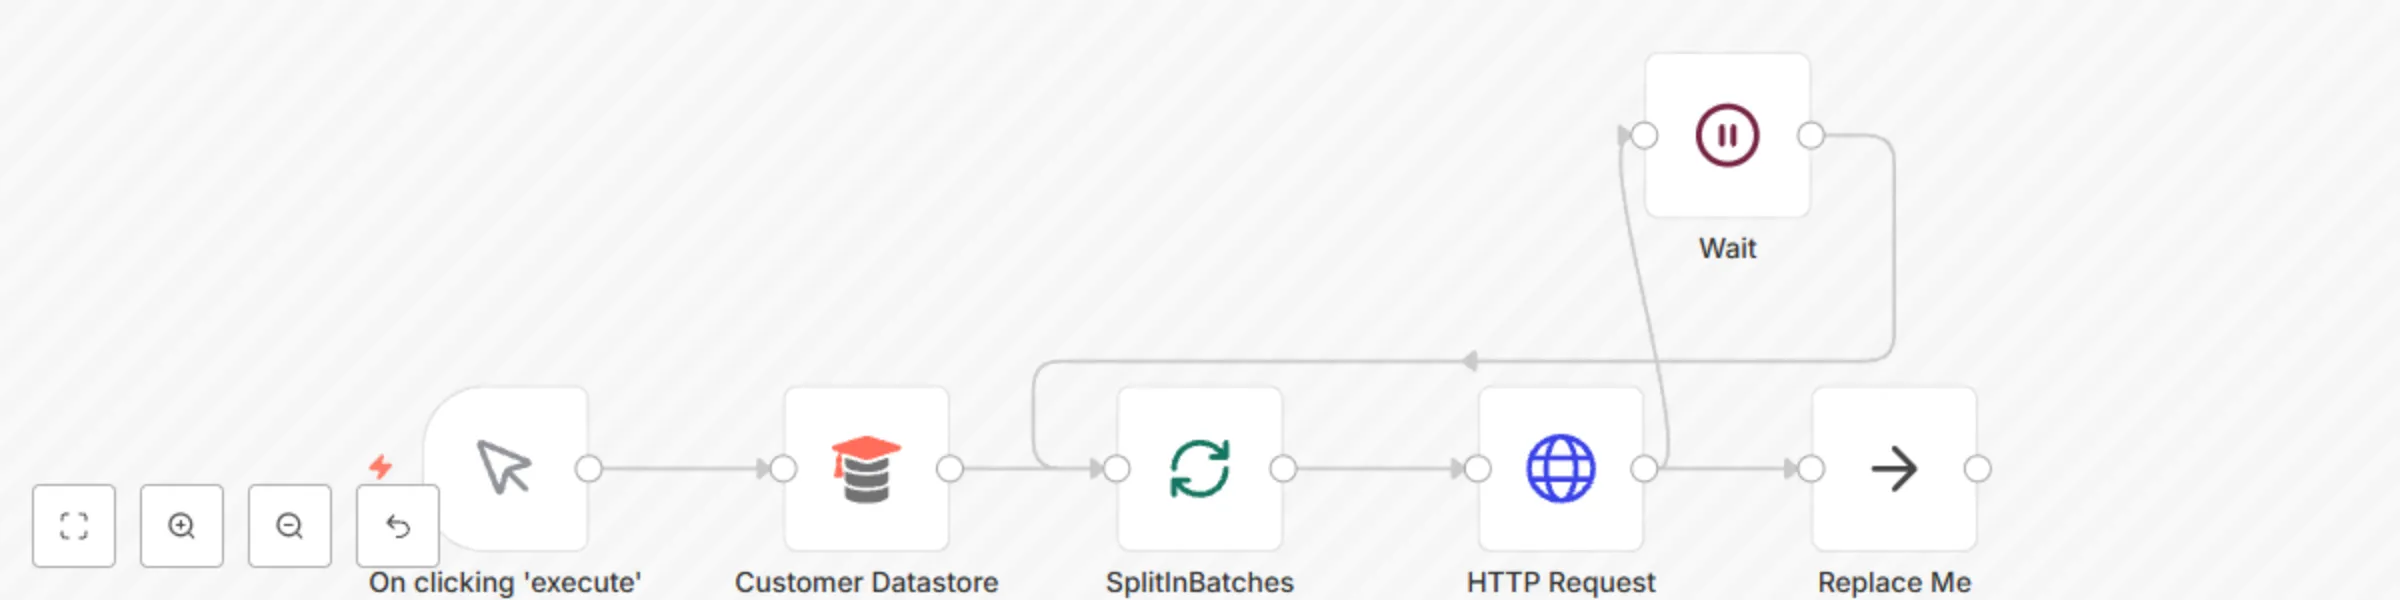
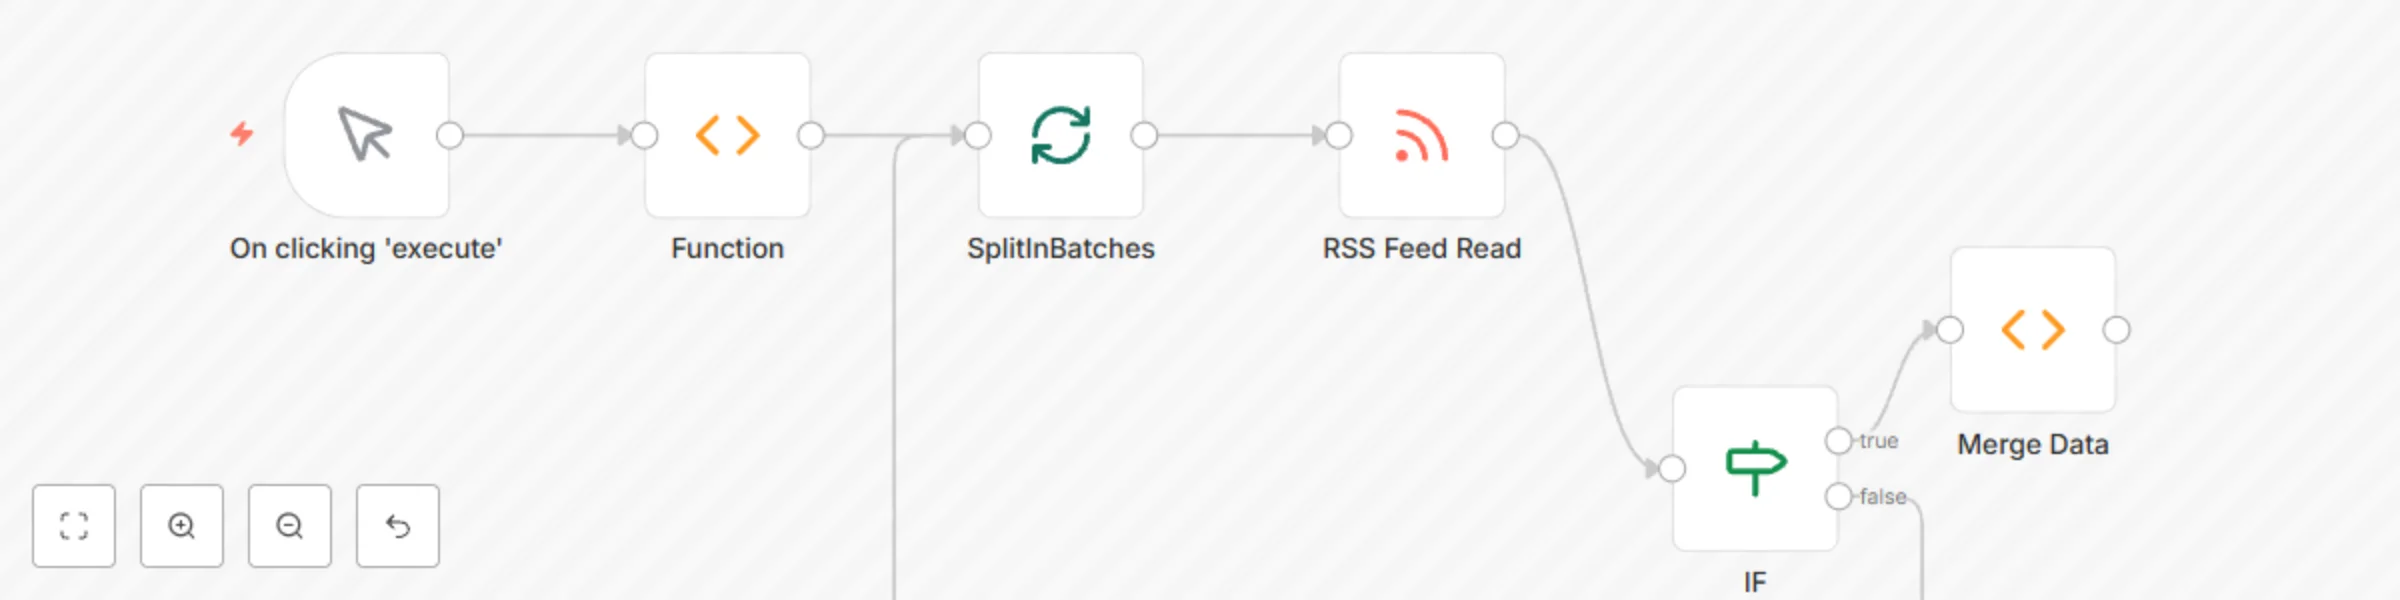
Avoid rate limiting by batching HTTP requests
This workflow demonstrates the use of the Split In Batches node and the Wait node to avoid API rate limits. **Customer Datastore node:** The workflow fetches data from the Customer Datastore node. Based on your use case, replace it with a relevant node. **Split In Batches node:** This node splits the items into a single item. Based on the API limit, you can configure the Batch Size. **HTTP Request node:** This node makes API calls to a placeholder URL. If the Split In Batches node returns 5 items, the HTTP Request node will make 5 different API calls. **Wait node:** This node will pause the workflow for the time you specify. On resume, the Split In Batches node gets executed node, and the next batch is processed. **Replace Me (NoOp node):** This node is optional. If you want to continue your workflow and process the items, replace this node with the corresponding node(s).
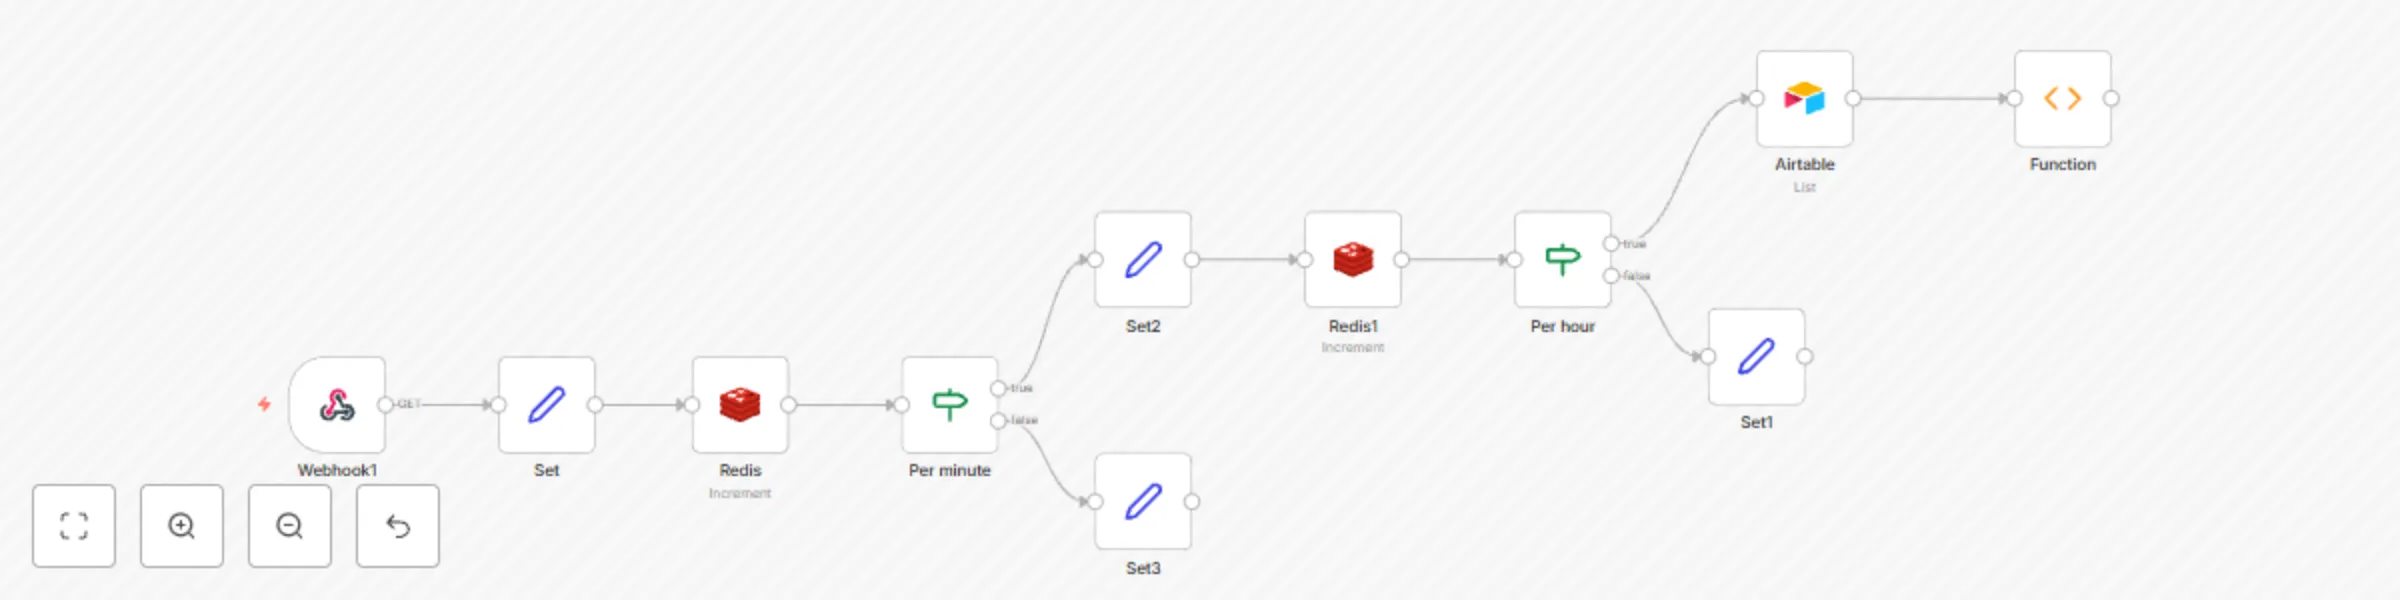
Use Redis to rate-limit your low-code API
This workflow demonstrates how to can use Redis to implement rate limits to your API.  The workflow uses the incoming API key to uniquely identify the user and use it as a key in Redis. Every time a request is made, the value is incremented by one, and we check for the threshold using the IF node. Duplicate the following Airtable to try out the workflow: https://airtable.com/shraudfG9XAvqkBpF
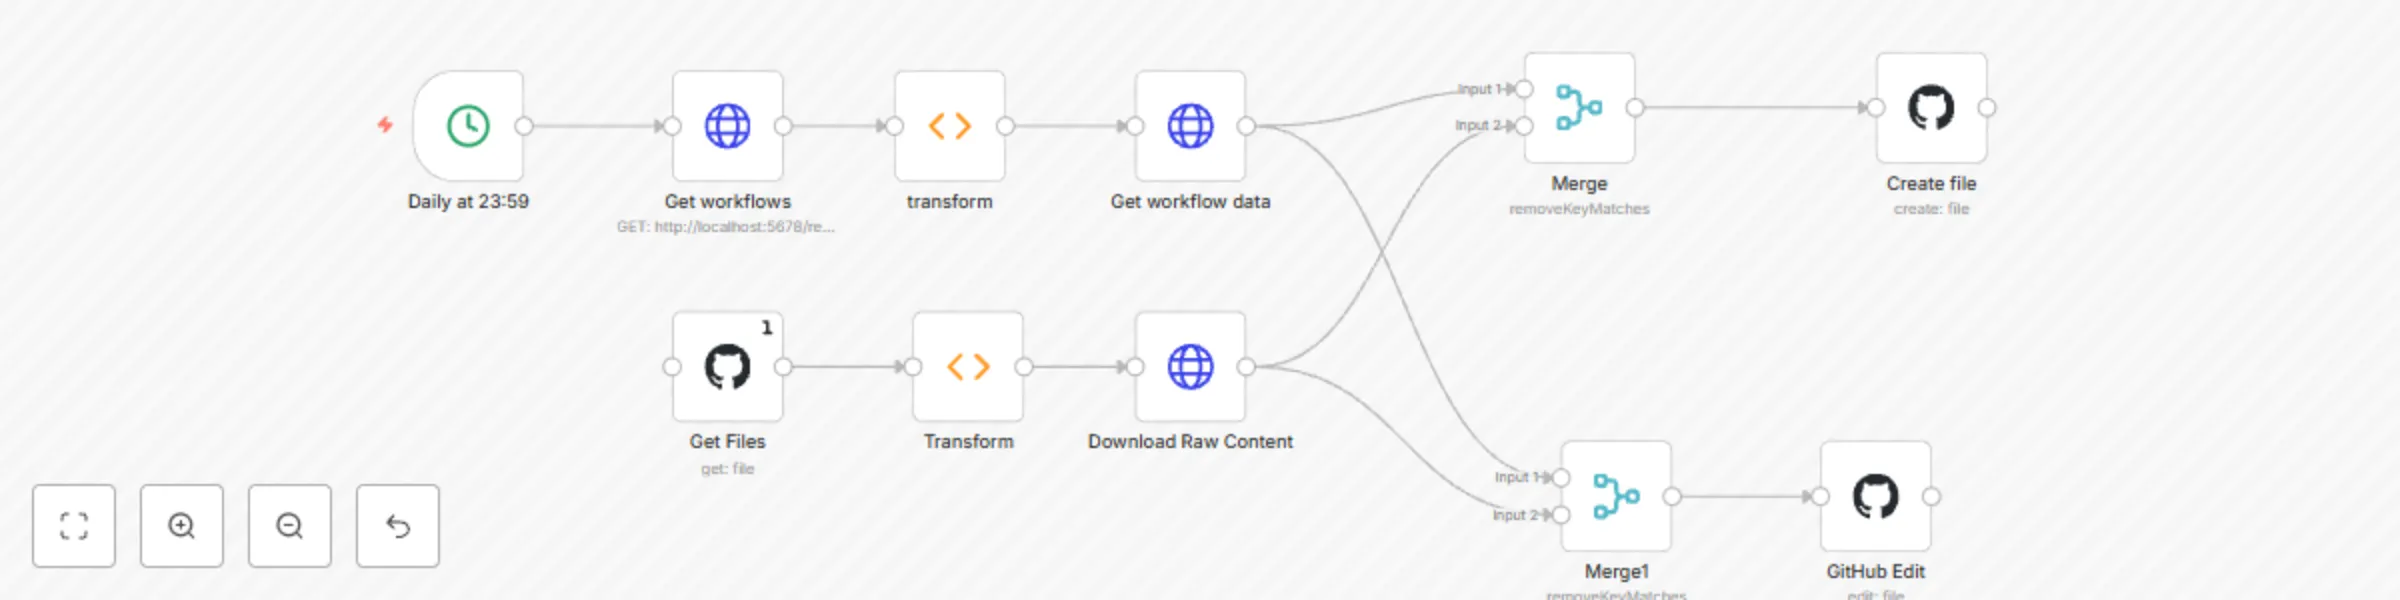
Backup workflows to GitHub
**Note:** This workflow uses the internal API which is not official. This workflow might break in the future. The workflow executes every night at 23:59. You can configure a different time bin the Cron node. Configure the GitHub nodes with your username, repo name, and the file path. In the HTTP Request nodes (making a request to `localhost:5678`), create Basic Auth credentials with your n8n instance username and password.
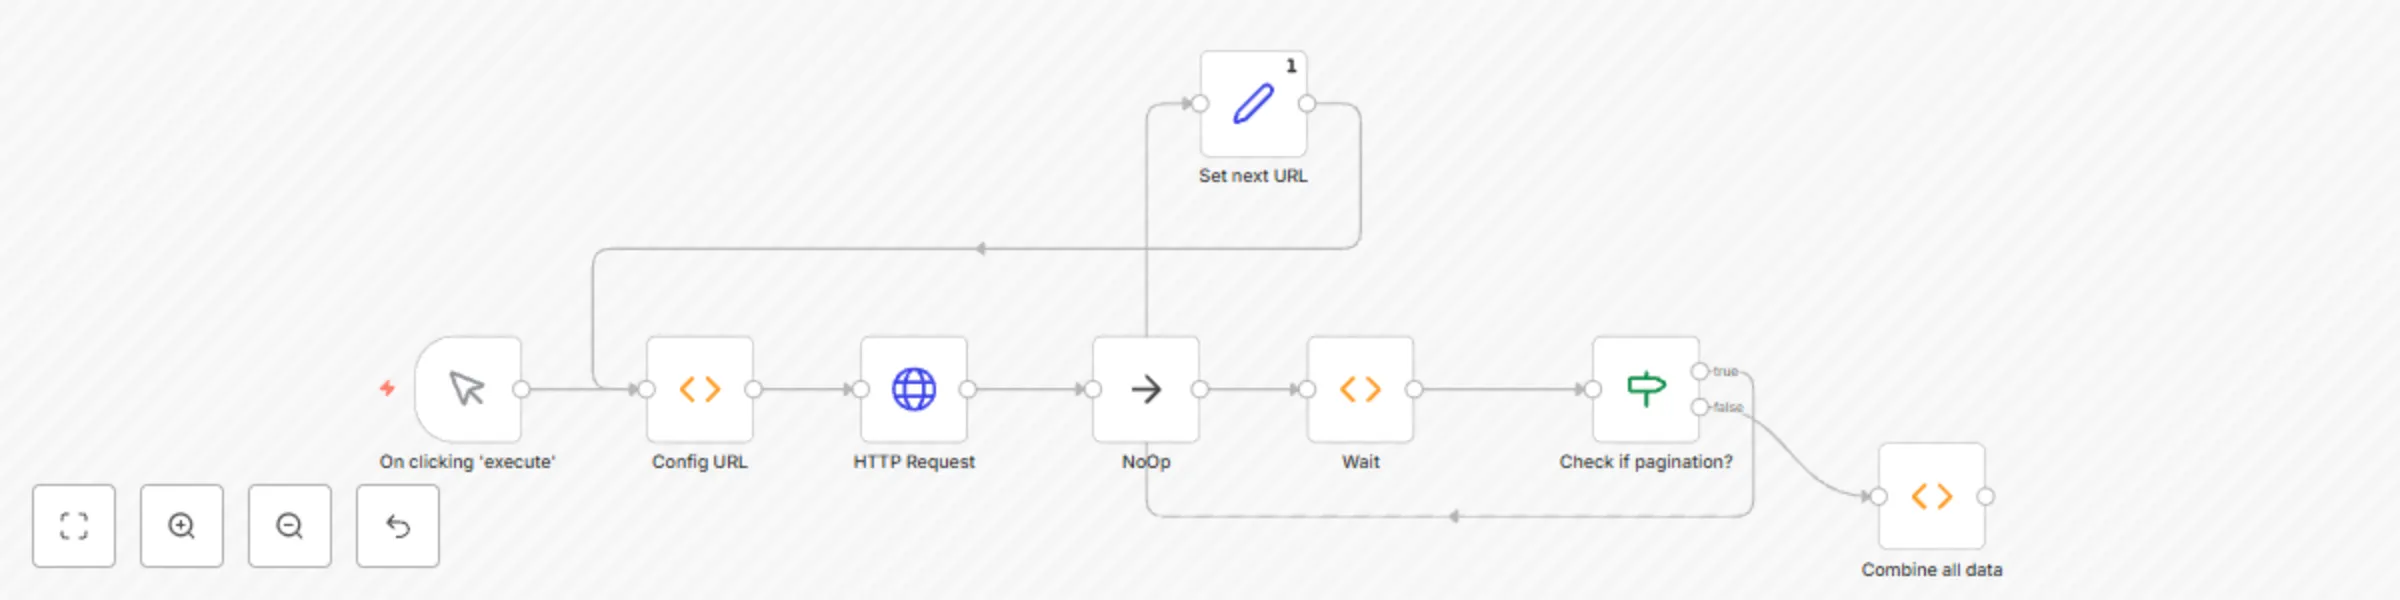
Handle pagination in HTTP requests
This example workflow demonstrates how to handle pagination. This example assumes that the API you are making the request to has pagination, and returns a cursor (something that points to the next page). This example workflow makes a request to the HubSpot API to fetch contacts. You will have to modify the parameters based on your API.  **Config URL node:** This node sets the URL that the HTTP Request node calls. **HTTP Request node:** This node makes the API call and returns the data from the API. Based on your API, you will have to modify the parameters of the node. **NoOp node and Wait node:** These nodes help me avoiding any rate limits. If you're API has rate limits, make sure you configure the correct time in the Wait node. **Check if pagination:** This IF node checks if the API returns any cursor. If the API doesn't return any cursor, it means that there is no data to be fetched, and the node returns false. If the API returns a cursor, it means that there is still some data that needs to be fetched. In this case, the node returns true. **Set next URL:** This Set node is used to set the URL. In the next cycle, the HTTP Request node makes a call to this URL. **Combine all data:** This node combines all the data that gets returned by the API calls from the HTTP Request node.
Merge data for multiple executions
This workflow demonstrates how to merge data for different executions.  The Merge Data Function node fetches the data from different executions of the RSS Feed Read node and merges them under a single object. **Note:** If you want to process the items that get merged, you will have to convert the single item into n8n understandable multiple items.
Release a new version via Telegram bot command
This workflow allows you to release a new version via a Telegram bot command. This workflow can be used in your Continous Delivery pipeline.  **Telegram Trigger node:** This node will trigger the workflow when a message is sent to the bot. If you want to trigger the workflow via a different messaging platform or a service, replace the Telegram Trigger node with the Trigger node of that service. **IF node** The IF node checks for the incoming command. If the command is not `deploy`, the IF node will return false, otherwise true. **Set node:** This node extracts the value of the version from the Telegram message and sets the value. This value is used later in the workflow. **GitHub node:** This node creates a new version release. It uses the version from the Set node to create the tag. **NoOp node:** Adding this node is optional.
Trigger a build in Travis CI when code changes are push to a GitHub repo
This workflow allows you to trigger a build in Travis CI when code changes are pushed to a GitHub repo or a pull request gets opened.  **GitHub Trigger node:** This node will trigger the workflow when changes are pushed or when a pull request is created, updated, or deleted. **IF node:** This node checks for the action type. We want to trigger a build when code changes are pushed or when a pull request is opened. We don't want to build the project when a PR is closed or updated. **TravisCI node:** This node will trigger the build in Travis CI. If you're using CircleCI in your pipeline, replace the node with the CircleCI node. **NoOp node:** Adding this node is optional.
Add a check condition for a loop in n8n
This workflow demonstrates the use of `$runIndex` expression. It demonstrates how the expression can be used to avoid an infinite loop. The workflow will create 5 Tweets with the content 'Hello from n8n!'. You can use this workflow by replacing the Twitter node with any other node(s) and updating the condition in the IF node.
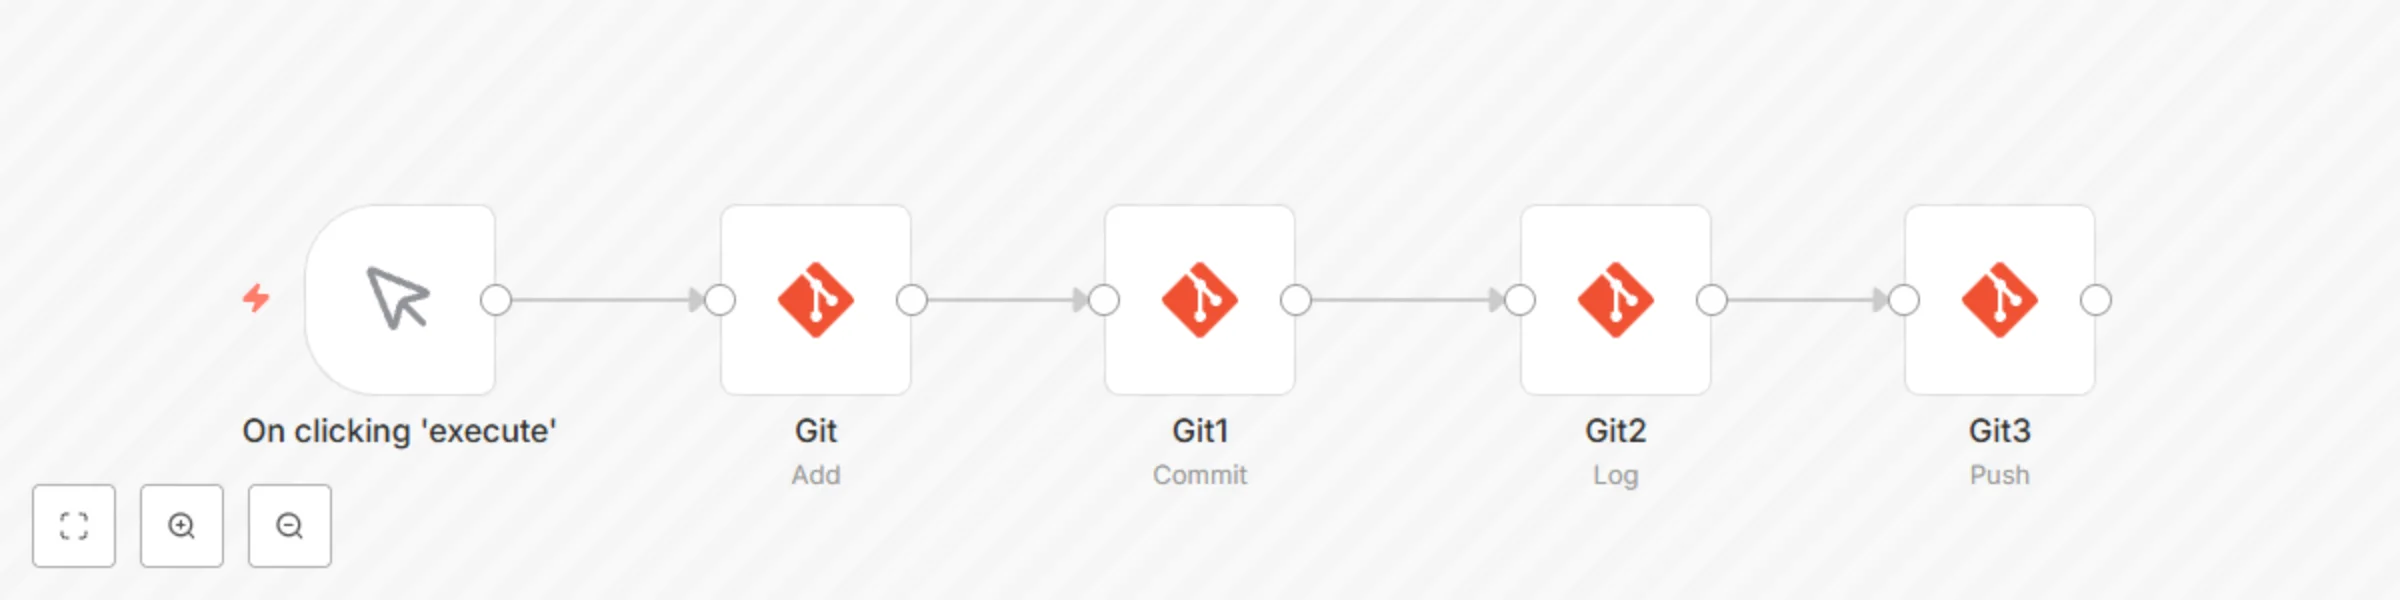
Manage changes using the Git node
This workflow allows you to add, commit, and push changes to a git repository.  **Git node:** This node will add the `README.md` file to the staging area. If you want to add a different file, enter the path of that file instead. **Git1 node:** This node will commit all the changes that were added to the staging area by the previous node. **Git2 node:** This node will return the commit logs of your repository. **Git3 node:** This node will push the changes to a cloud repository.
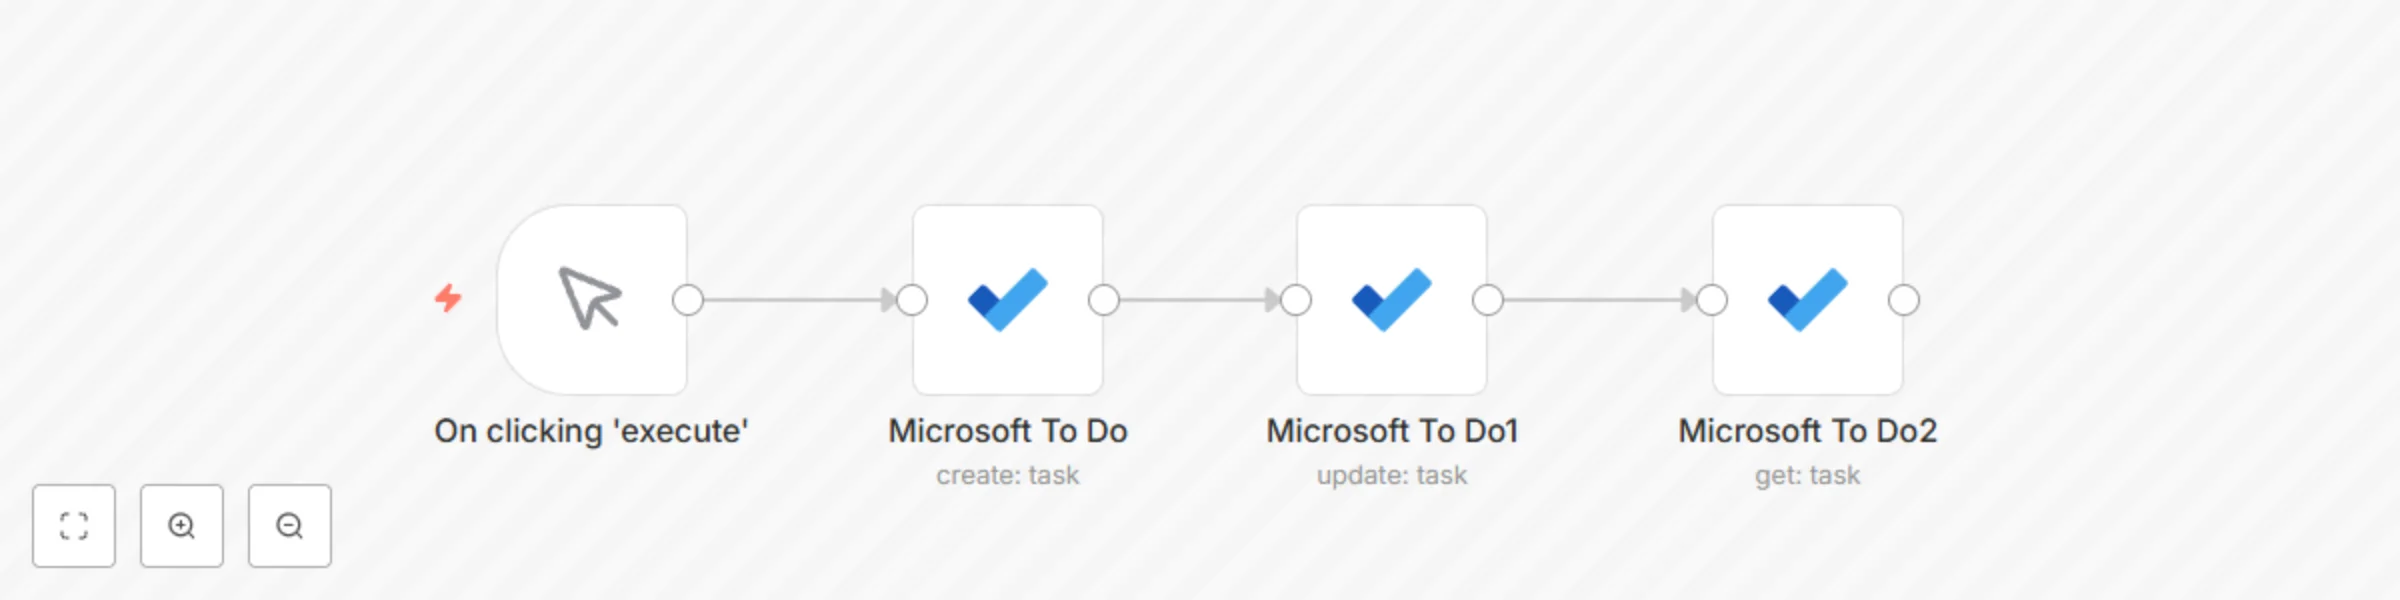
Create, update and get a task in Microsoft To Do
This workflow allows you to create, update and get a task in Microsoft To Do.  **Microsoft To Do node:** This node will create a task with the importance `High` in the Tasks list. You can select a different list as well as the importance level. **Microsoft To Do1 node:** This node will update the status of the task that we created in the previous node. **Microsoft To Do2 node:** This node will get the task that we created earlier.
Create, update, and get a monitor using UptimeRobot
This workflow allows you to create, update, and get a monitor using the UptimeRobot node.  **UptimeRobot node:** This node creates a new monitor of the type `HTTP(S)`. **UptimeRobot1 node:** This node will update the monitor that we created in the previous node. **UptimeRobot2 node:** This node will get the information of the monitor that we created in the previous node.
Create transcription jobs using AWS Transcribe
This workflow allows you to create transcription jobs for all your audio and video files stored in AWS S3.  **AWS S3:** This node will retrieve all the files from an S3 bucket you specify. **AWS Transcribe:** This node will create a transcription job for the files that get returned by the previous node.
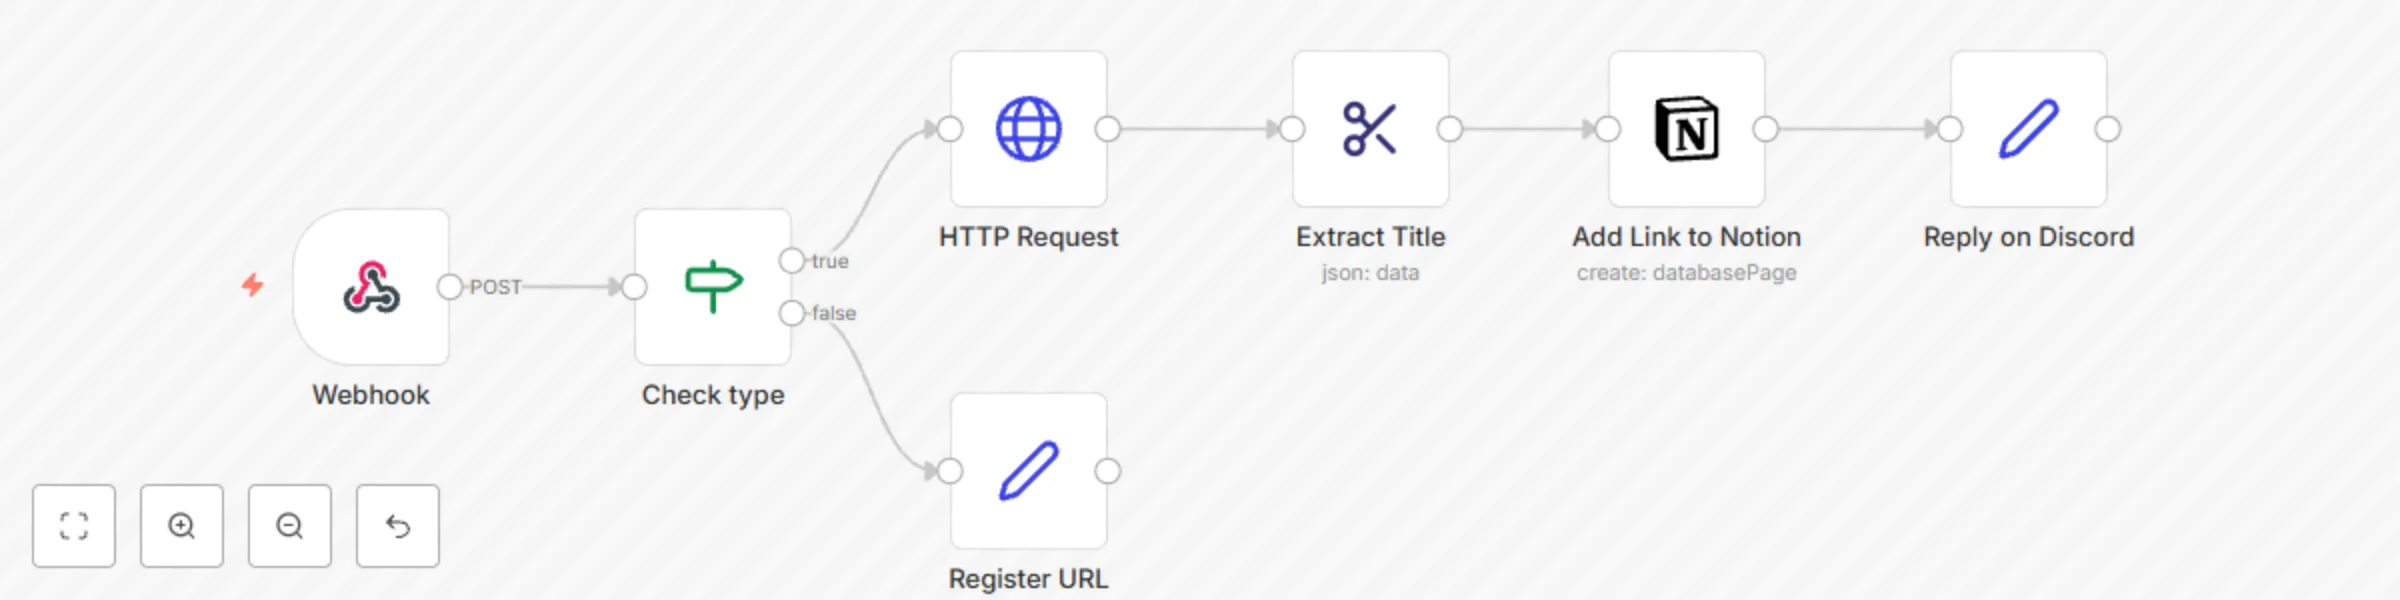
Add articles to a Notion list by accessing a Discord slash command
This workflow allows you to add articles to a Notion reading list by accessing a Discord slash command. ## Prerequisites - A Notion account and [credentials](), and a reading list similar to this [template](https://www.notion.so/n8n/Reading-List-9d64210e9fca411893ab79c302ccbeb9). - A Discord account and [credentials](), and [Discord Slash Command ](https://youtube.com/playlist?list=PL1IyzCekgLc1hkHdiIRmLJ-SexoPpL1fd) connected to n8n. ## Nodes - [Webhook node](https://docs.n8n.io/integrations/core-nodes/n8n-nodes-base.webhook/) triggers the workflow whenever the Discord Slash command is issued. - [IF node](https://docs.n8n.io/integrations/core-nodes/n8n-nodes-base.if/) checks the type returned by Discord. If the type is not equal to 1, it will return true, otherwise false. - [HTTP Request node](https://docs.n8n.io/integrations/core-nodes/n8n-nodes-base.httpRequest/) makes an HTTP call to the link and gets the HTML of the webpage. - [HTML Extract node](https://docs.n8n.io/integrations/core-nodes/n8n-nodes-base.htmlExtract/) extracts the title from the HTML which we will use in the next node. - [Notion node](https://docs.n8n.io/integrations/nodes/n8n-nodes-base.notion/) adds the link to your Notion reading list. - [Set nodes](https://docs.n8n.io/integrations/core-nodes/n8n-nodes-base.set/) set the reply values for Discord and register the Interaction Endpoint URL.
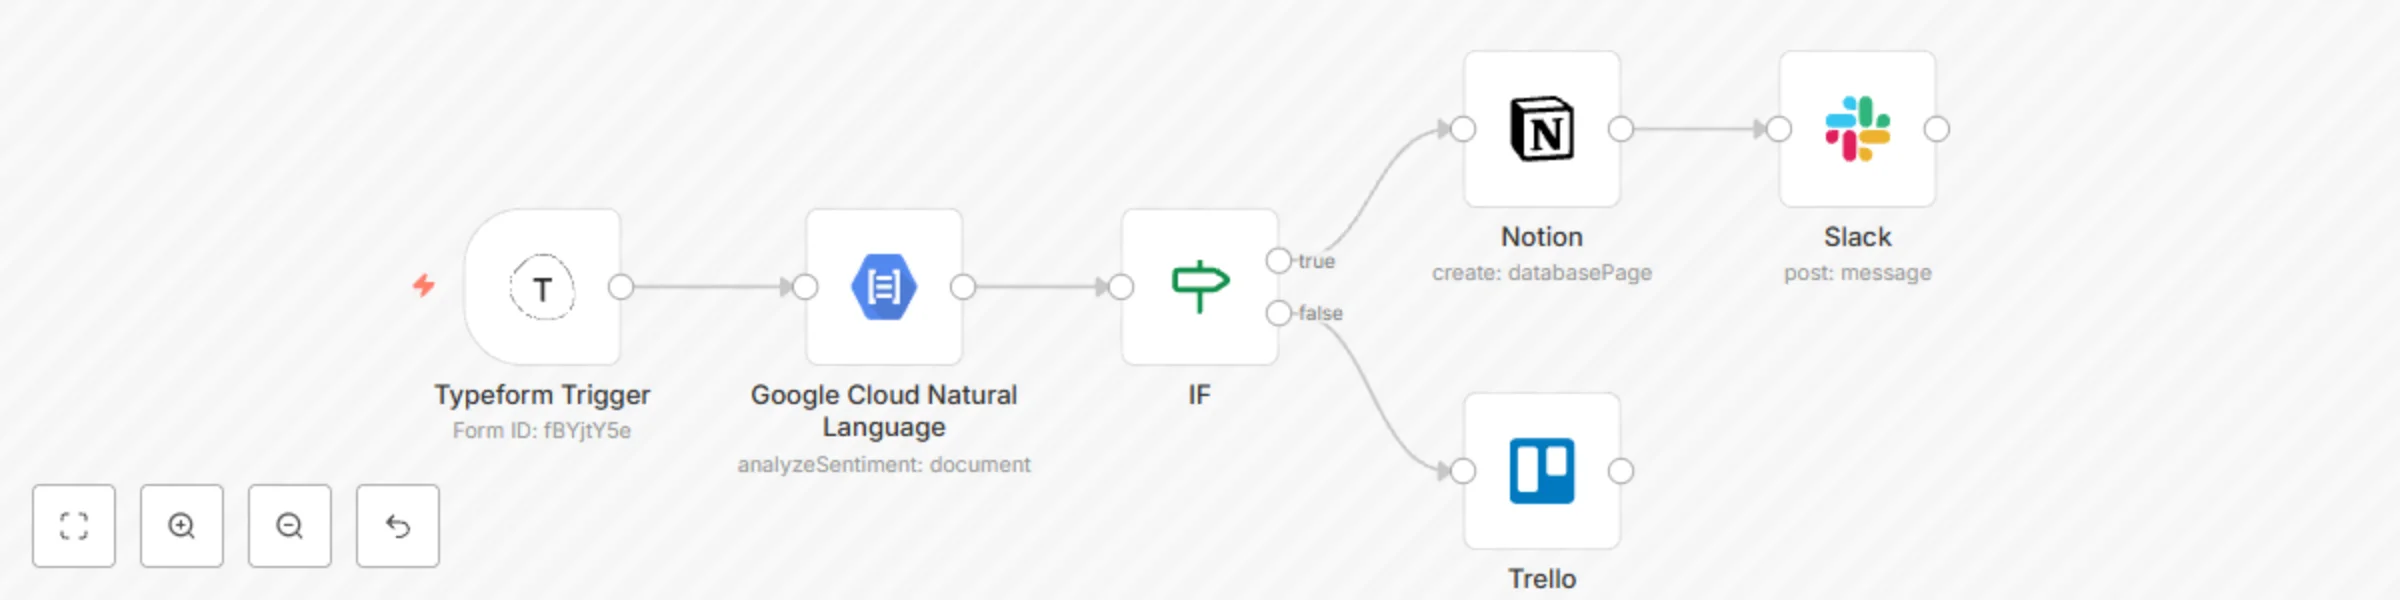
Add positive feedback messages to a table in Notion
This workflow allows you to add positive feedback messages to a table in Notion. ## Prerequisites 1. Create a Typeform that contains Long Text filed question type to accepts feedback from users. 2. Get your Typeform credentials by following the steps mentioned in the [documentation](https://docs.n8n.io/credentials/typeform). 3. Follow the steps mentioned in the [documentation](https://docs.n8n.io/credentials/google) to create credentials for Google Cloud Natural Language. 4. Create a page on Notion similar to this [page](https://www.notion.so/n8n/Compliments-ce00772bcd1b43758ae018dce1a0cd8c). 5. Create credentials for the Notion node by following the steps in the [documentation](https://docs.n8n.io/credentials/notion/). 6. Follow the steps mentioned in the [documentation](https://docs.n8n.io/credentials/slack) to create credentials for Slack. 7. Follow the steps mentioned in the [documentation](https://docs.n8n.io/credentials/trello) to create credentials for Trello.  **Typeform Trigger node:** Whenever a user submits a response to the Typeform, the Typeform Trigger node will trigger the workflow. The node returns the response that the user has submitted in the form. **Google Cloud Natural Language node:** This node analyses the sentiment of the response the user has provided and gives a score. **IF node:** The IF node uses the score provided by the Google Cloud Natural Language node and checks if the score is positive (larger than 0). If the score is positive we get the result as True, otherwise False. **Notion node:** This node gets connected to the true branch of the IF node. It adds the positive feedback shared by the user in a table in Notion. **Slack node:** This node will share the positive feedback along with the score and username to a channel in Slack. **Trello node:** If the score is negative, the Trello node is executed. This node will create a card on Trello with the feedback from the user.