Gegenfeld
Workflows by Gegenfeld

Automatically replace and relight the background of any image using APImage
This workflow takes an image URL and a description of the desired background, then uses the APImage AI API to produce...

Query and answer questions from Excel spreadsheets with GPT-4 Mini
This workflow creates an intelligent chatbot that uses your Microsoft Excel workbooks as a knowledge base. The AI age...

Dynamic MongoDB knowledge base chatbot with OpenAI GPT
This workflow creates an intelligent chatbot that uses your MongoDB database as a knowledge base. The AI agent can au...

AI chatbot with OpenAI GPT-4.1-Mini and Supabase database knowledge base
This workflow creates an intelligent chatbot that uses your Supabase database as a knowledge base. The AI agent can a...

AI chatbot that queries Baserow database with OpenAI GPT-4 mini
This workflow creates an intelligent chatbot that uses your Baserow database as a knowledge base. The AI agent can au...

Automated background removal from images with APImage AI
This workflow automatically removes backgrounds from images using the APImage API. Simply provide an image URL, and t...

Create a knowledge base chatbot with OpenAI and Notion for website embedding
This workflow creates an AI chatbot that uses your Notion database as a knowledge base and allows for website embeddi...

Create a smart chatbot using OpenAI GPT and Airtable knowledge base
This workflow creates an intelligent chatbot that uses your Airtable database as a knowledge base. The AI agent can a...

Remove image backgrounds with APImage AI: Airtable to Google Drive
AI Background Removal Workflow This workflow automatically removes backgrounds from images stored in Airtable using t...

Generate AI images with APImage and upload to Google Drive
AI Image Generator Workflow This workflow lets you automatically generate AI images with the APImage API 🡥 , downloa...

Monitor SEO keyword rankings with LLaMA AI & Apify Google SERP scraping
Who is this template for? This SEO Keyword Monitoring workflow template is perfect for SEO professionals, digital mar...
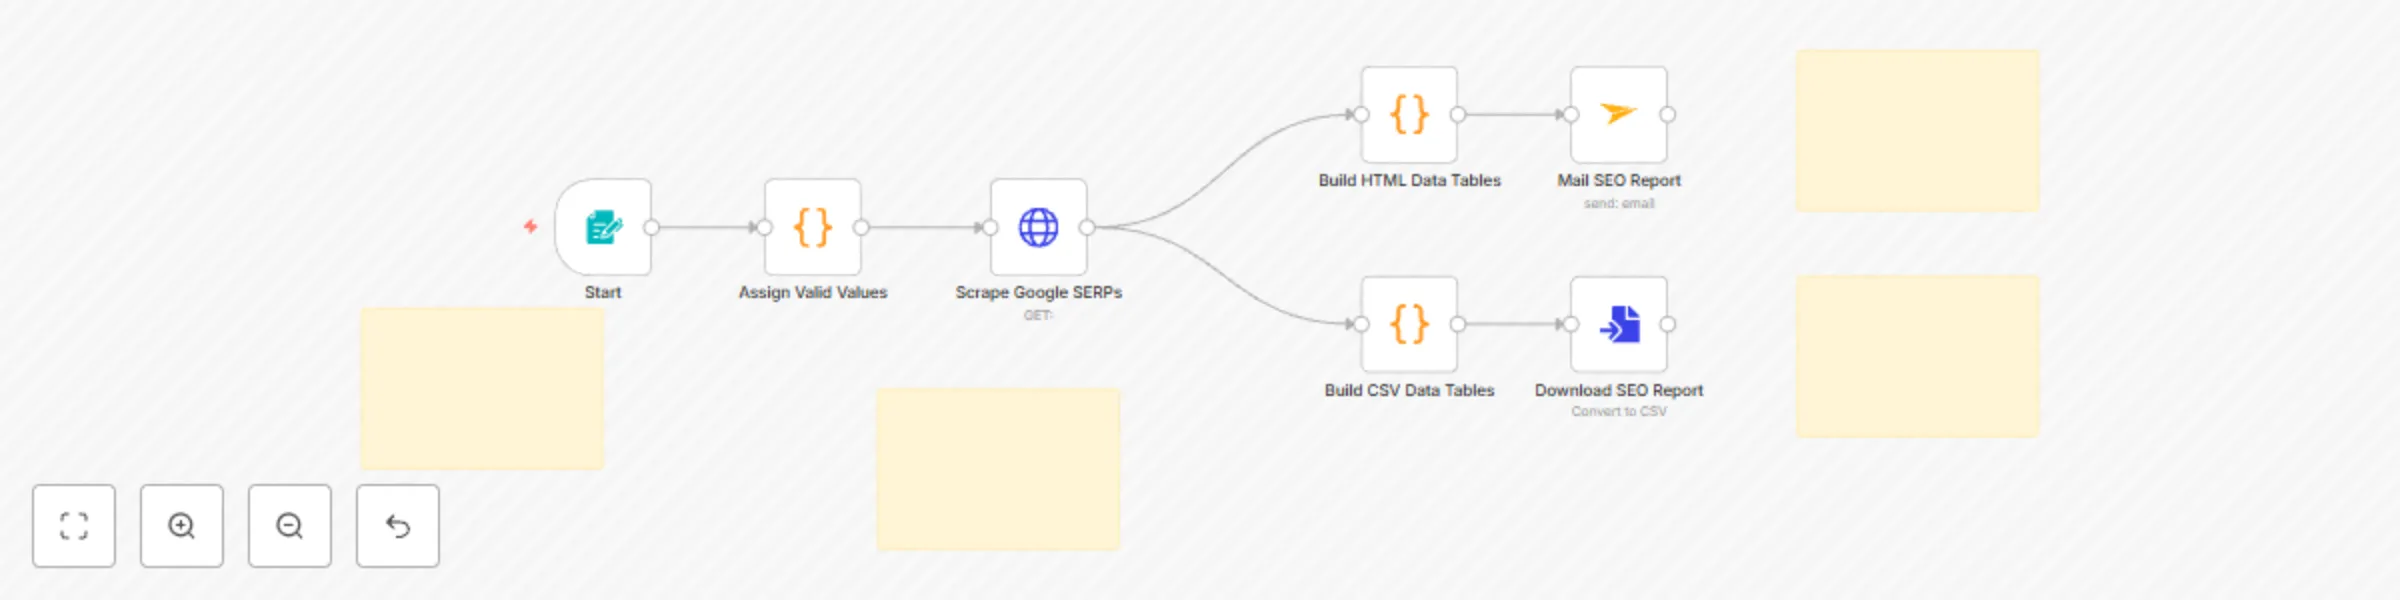
Track SEO keyword rankings in Google Search with ScrapingBee API
Who is this template for? This SEO Reporting workflow template is ideal for digital marketers, SEO consultants, conte...

Query PostgreSQL database with natural language using Groq AI chatbot
This guide shows you how to deploy a chatbot that lets you query your PostgreSQL database using natural language. You...
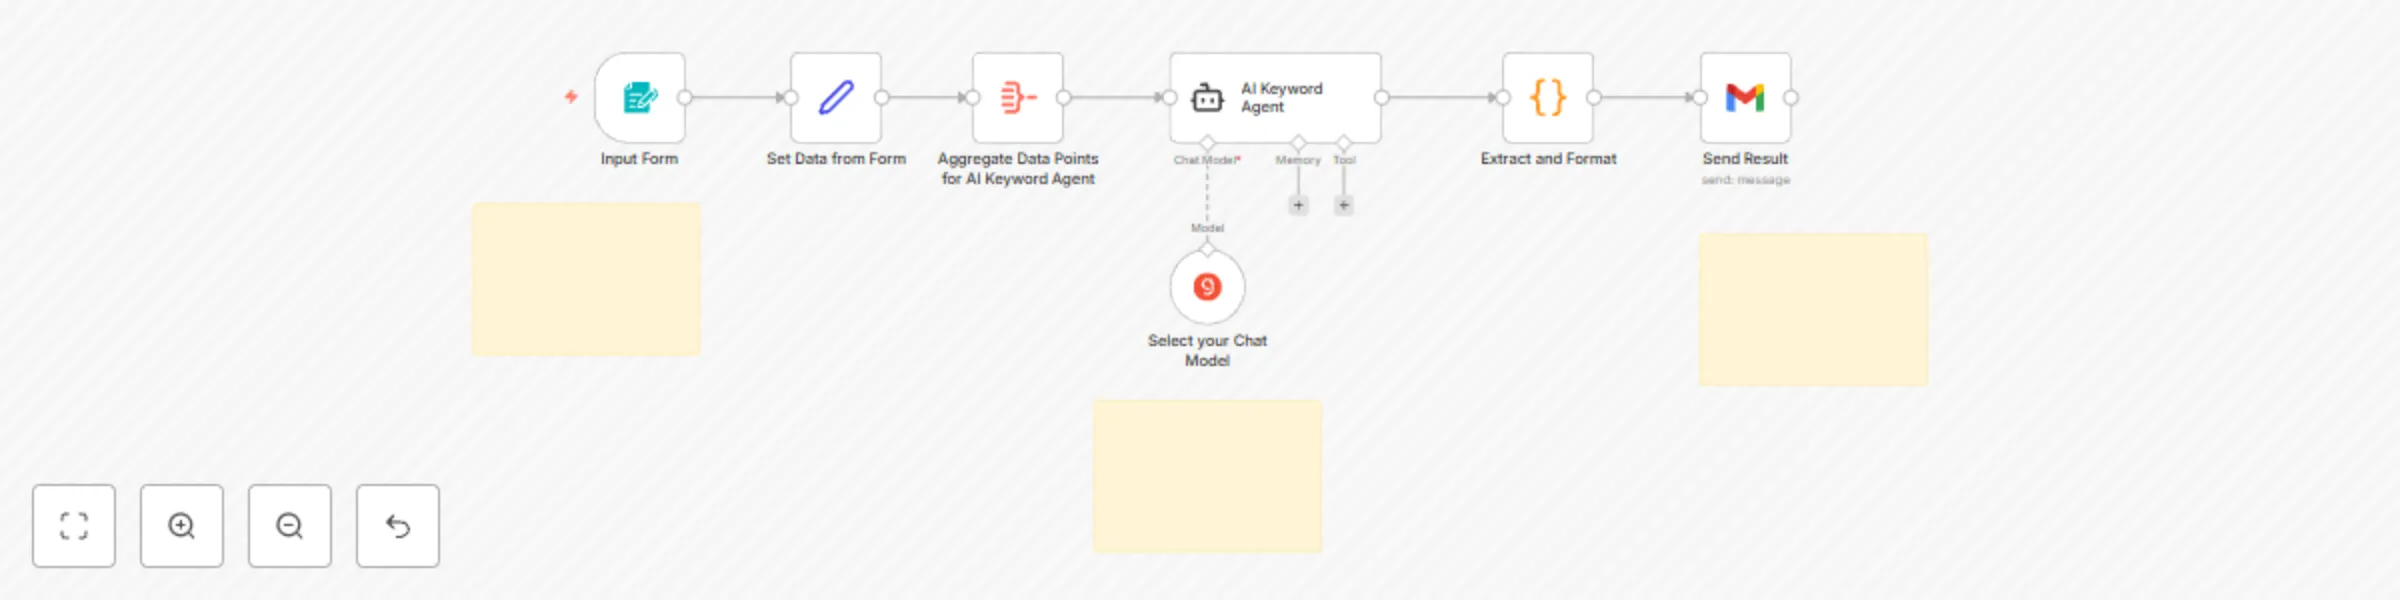
Generate SEO keywords with AI: topic to keyword list in seconds
Who is this template for? This AI Keyword Generator workflow template is designed for marketers , SEO specialists , a...

Build a website customer support chatbot with Groq AI and Google Sheets knowledge base
Build a Website Customer Support Chatbot with Groq AI and Google Sheets as its Knowledge Base. Setup Instructions Pre...

AI-powered chatbot workflow with MySQL database integration
AI Powered Chatbot Workflow with MySQL Integration This guide shows you how to deploy a chatbot that lets you query y...