G
Giulio
2
Workflows
Workflows by Giulio

Free advanced
Build an endpoint to perform CRUD operations with multiple HTTP methods
This n8n workflow template allows you to create a CRUD endpoint that performs the following actions: Create a new rec...
G
Giulio Engineering
24 Oct 2024
4566
0
Free advanced
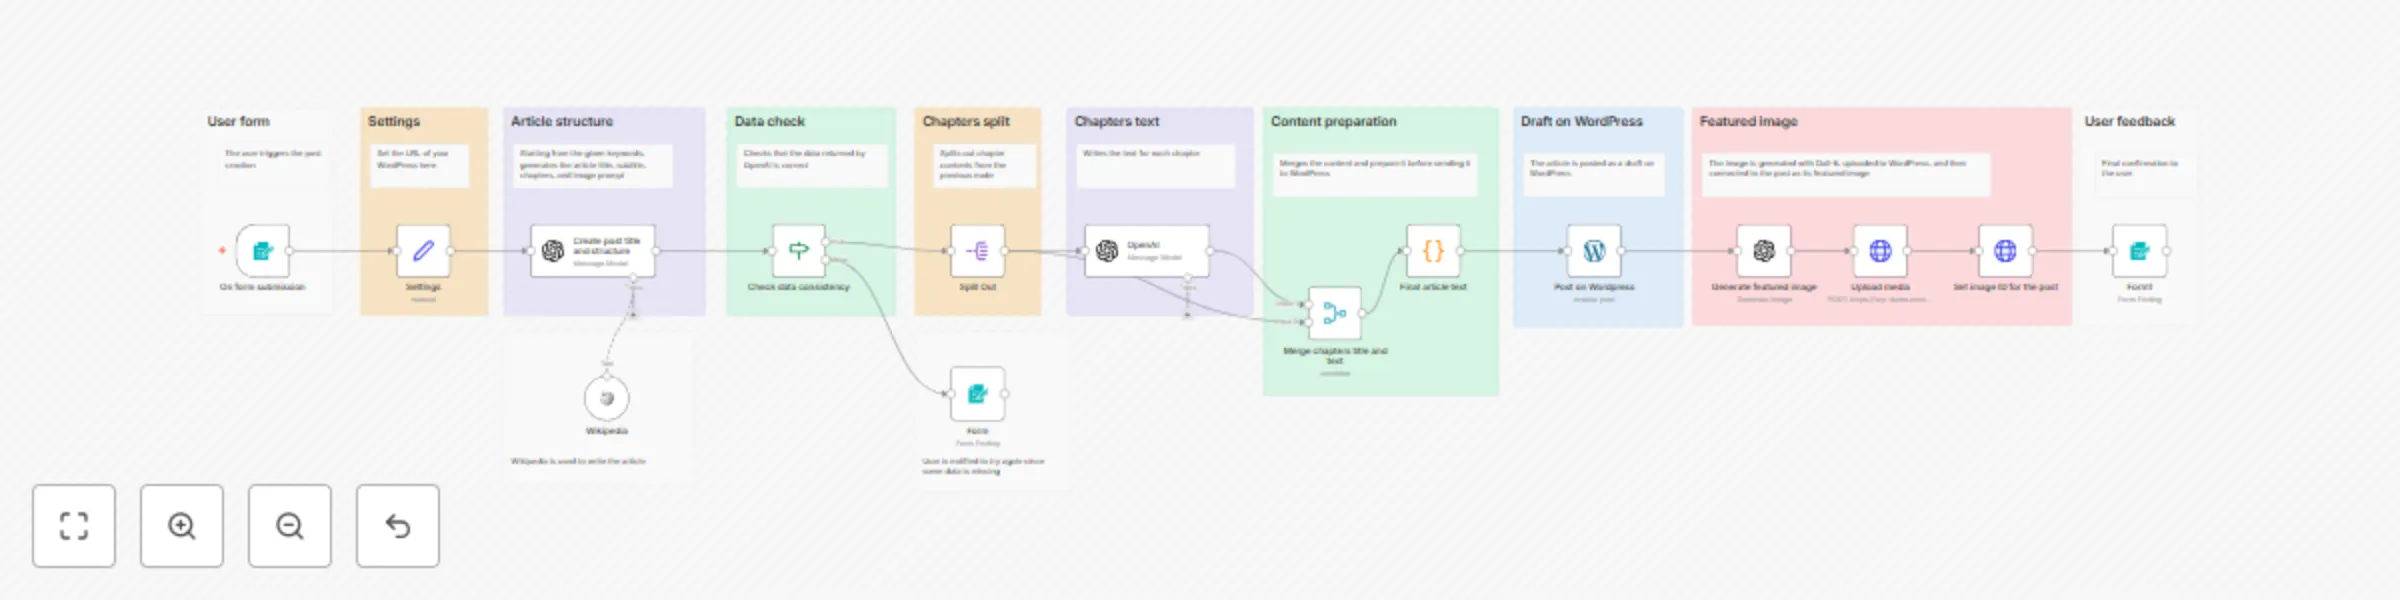
Write a WordPress post with AI (starting from a few keywords)
This n8n workflow template allows you to write WordPress posts by just providing a few keywords. It uses AI technolog...
G
Giulio Content Creation
22 Mar 2024
83269
0