
Guillaume Duvernay
Workflows by Guillaume Duvernay
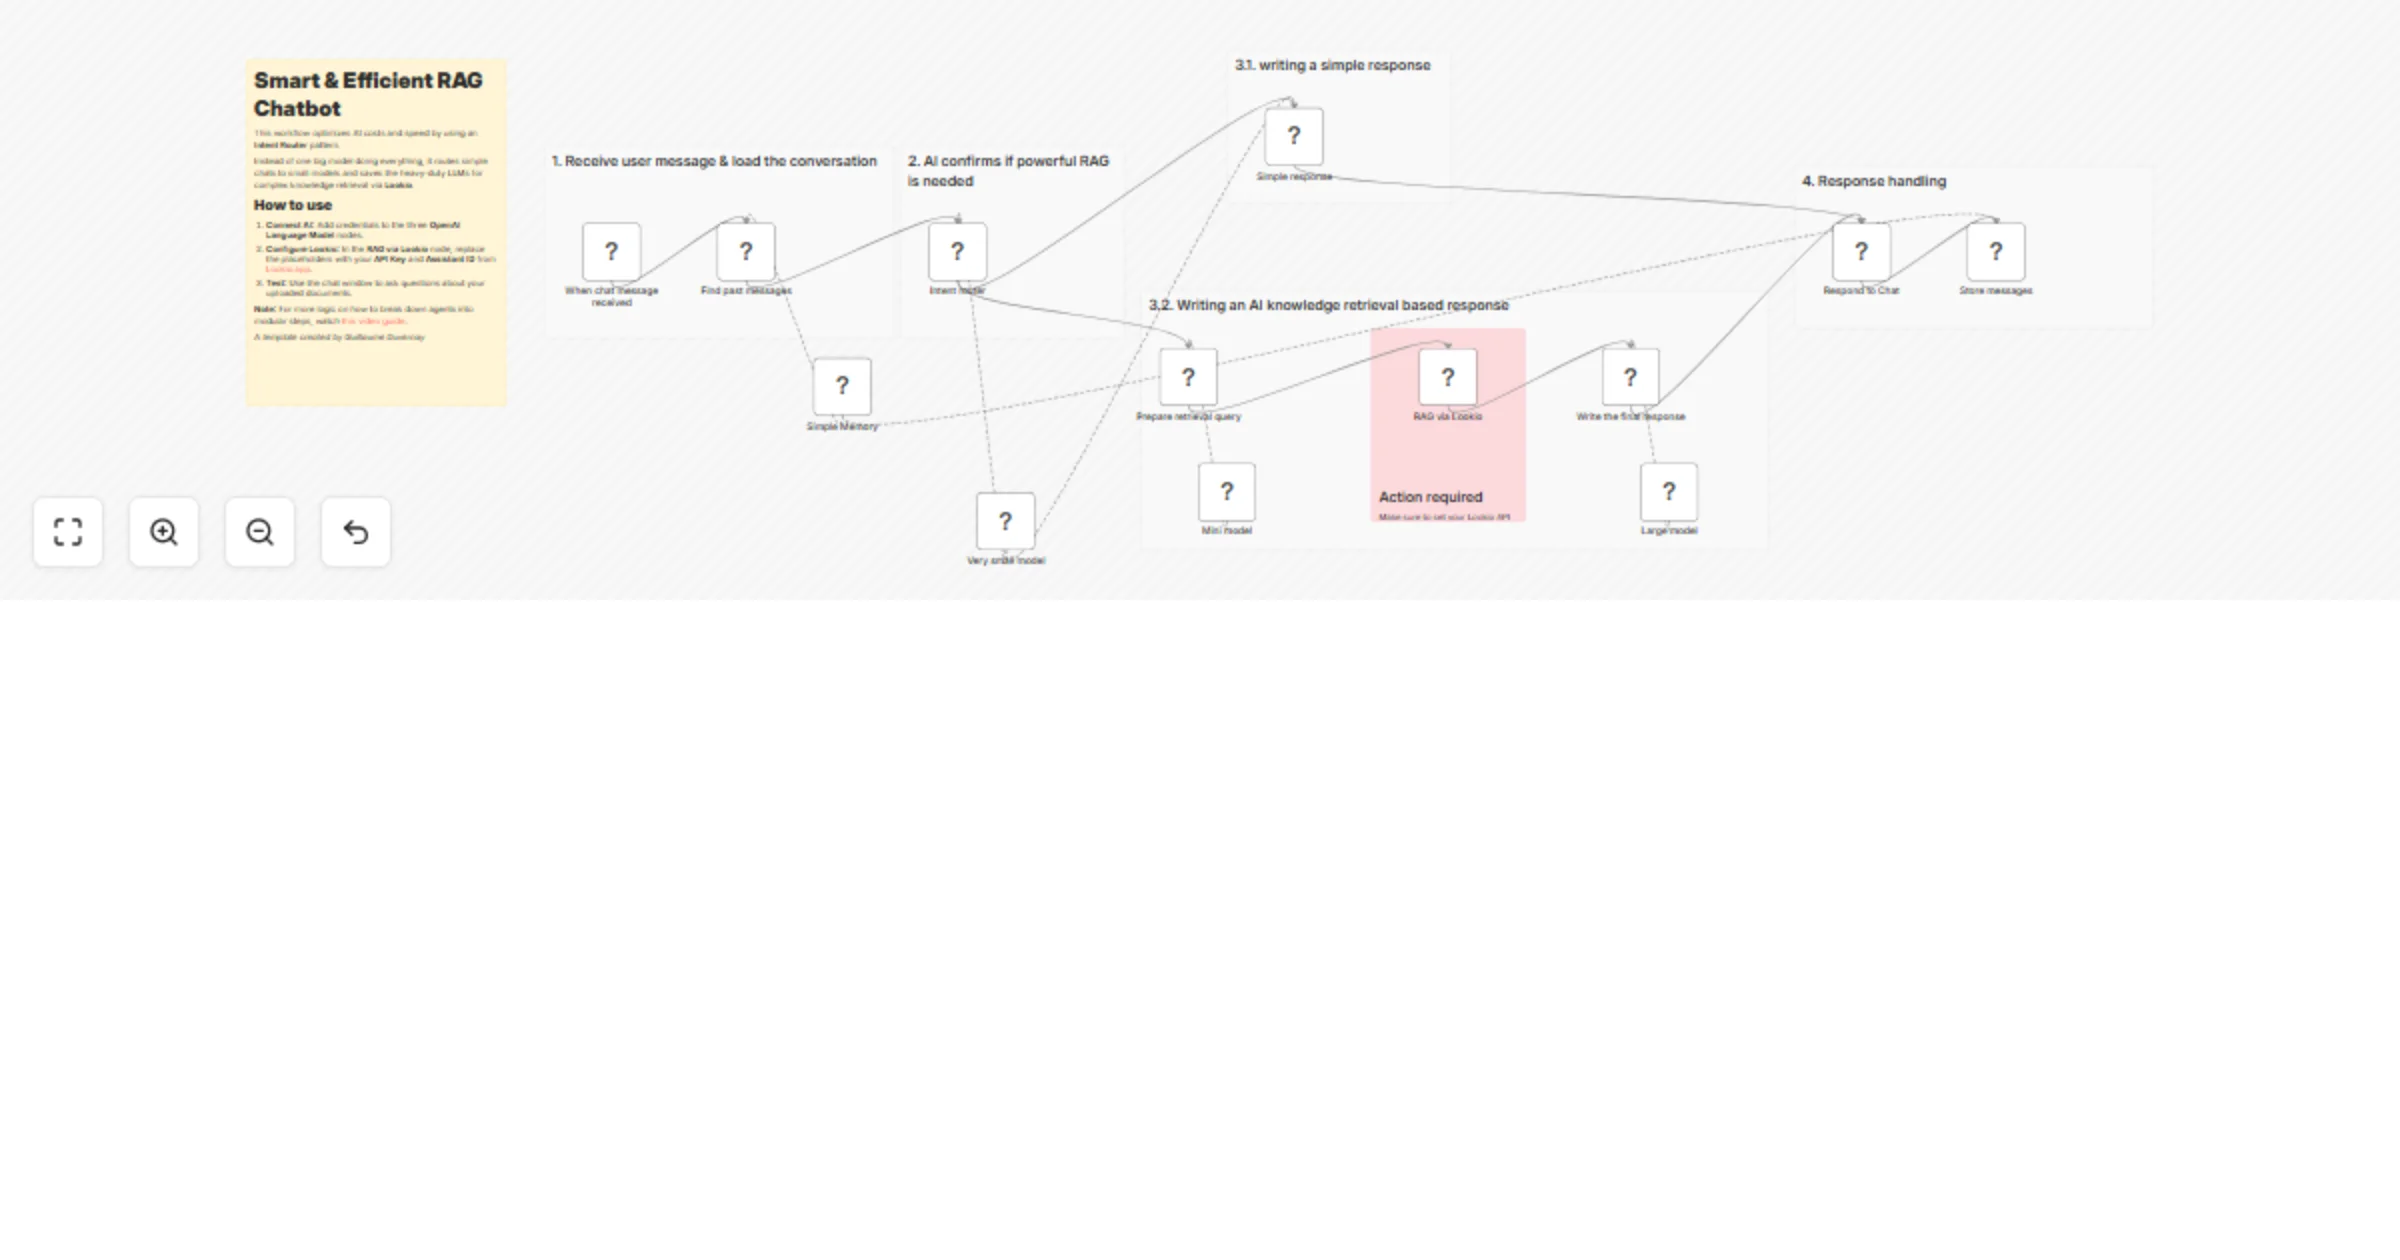
Build a cost-efficient Lookio RAG chatbot with GPT-4.1 models for knowledge Q&A
This template provides a high performance, cost optimized alternative to standard AI Agents for building RAG (Retriev...
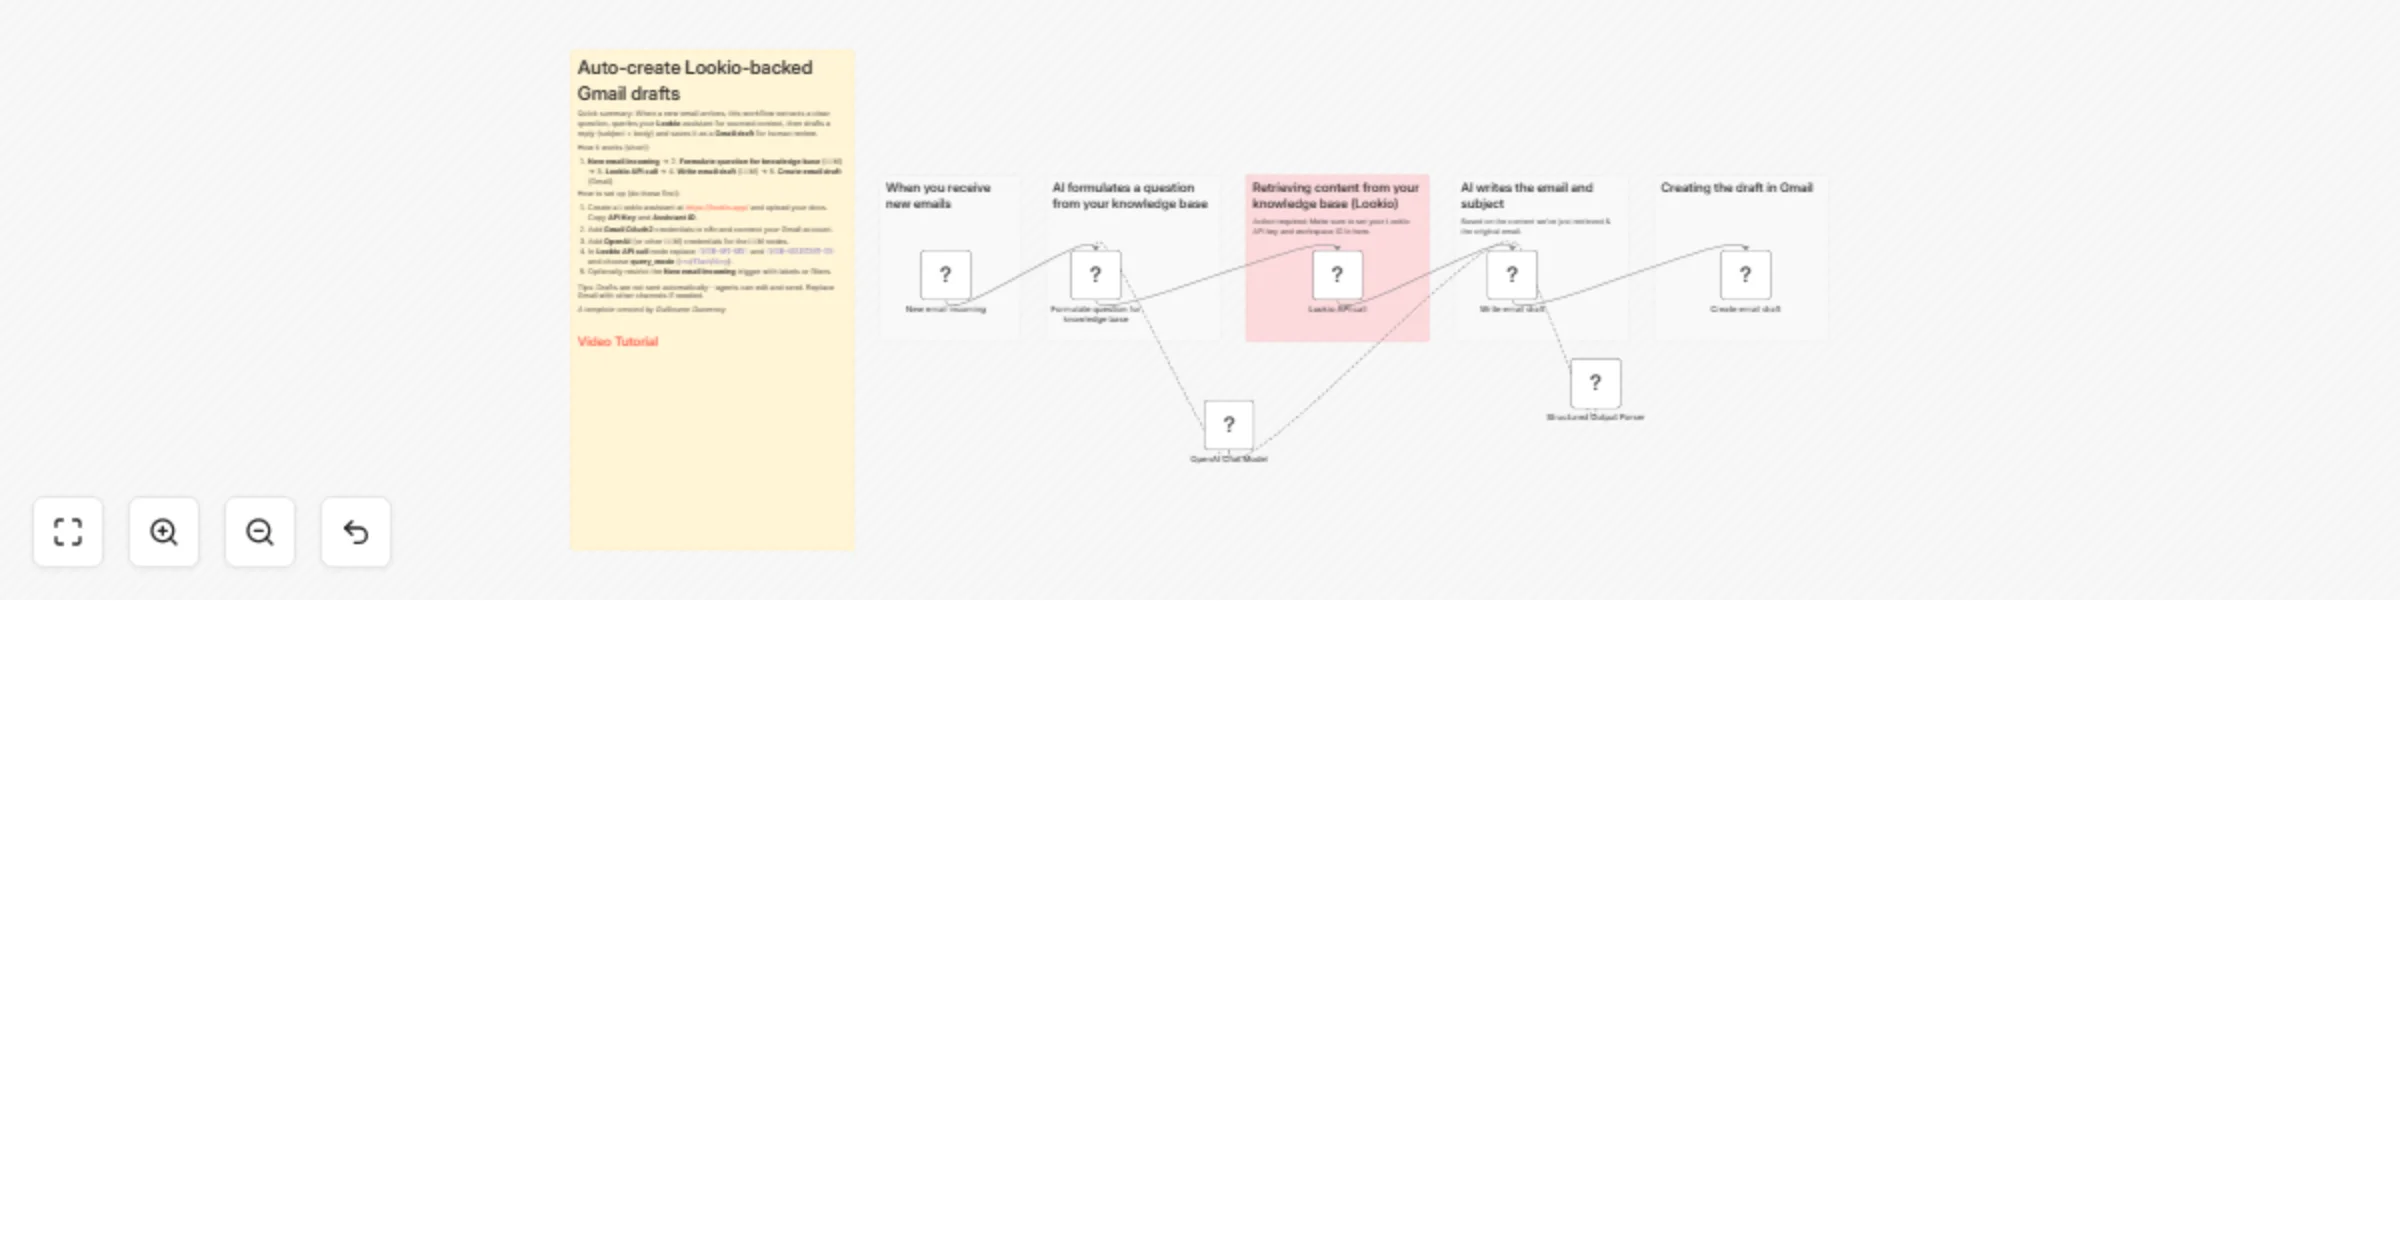
Generate Lookio RAG-backed Gmail drafts from incoming emails with GPT-4.1
This n8n template automatically generates knowledge backed draft email replies when a new message arrives in a connec...
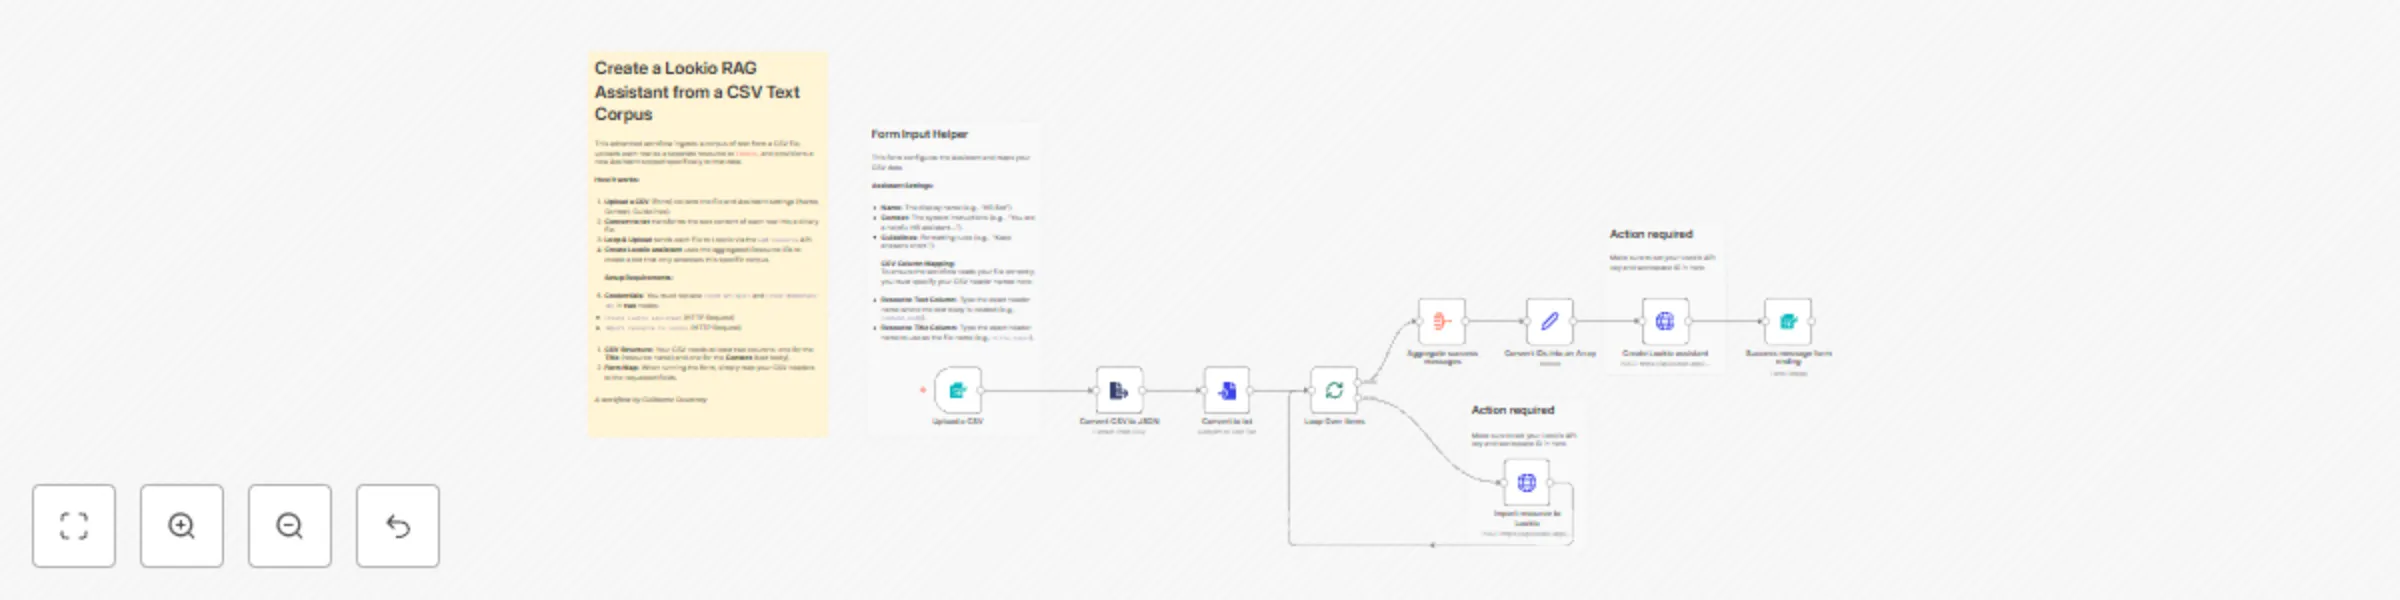
Create a Lookio RAG assistant from a CSV text corpus
This advanced template automates the creation of a Lookio Assistant populated with a specific corpus of text. Instead...
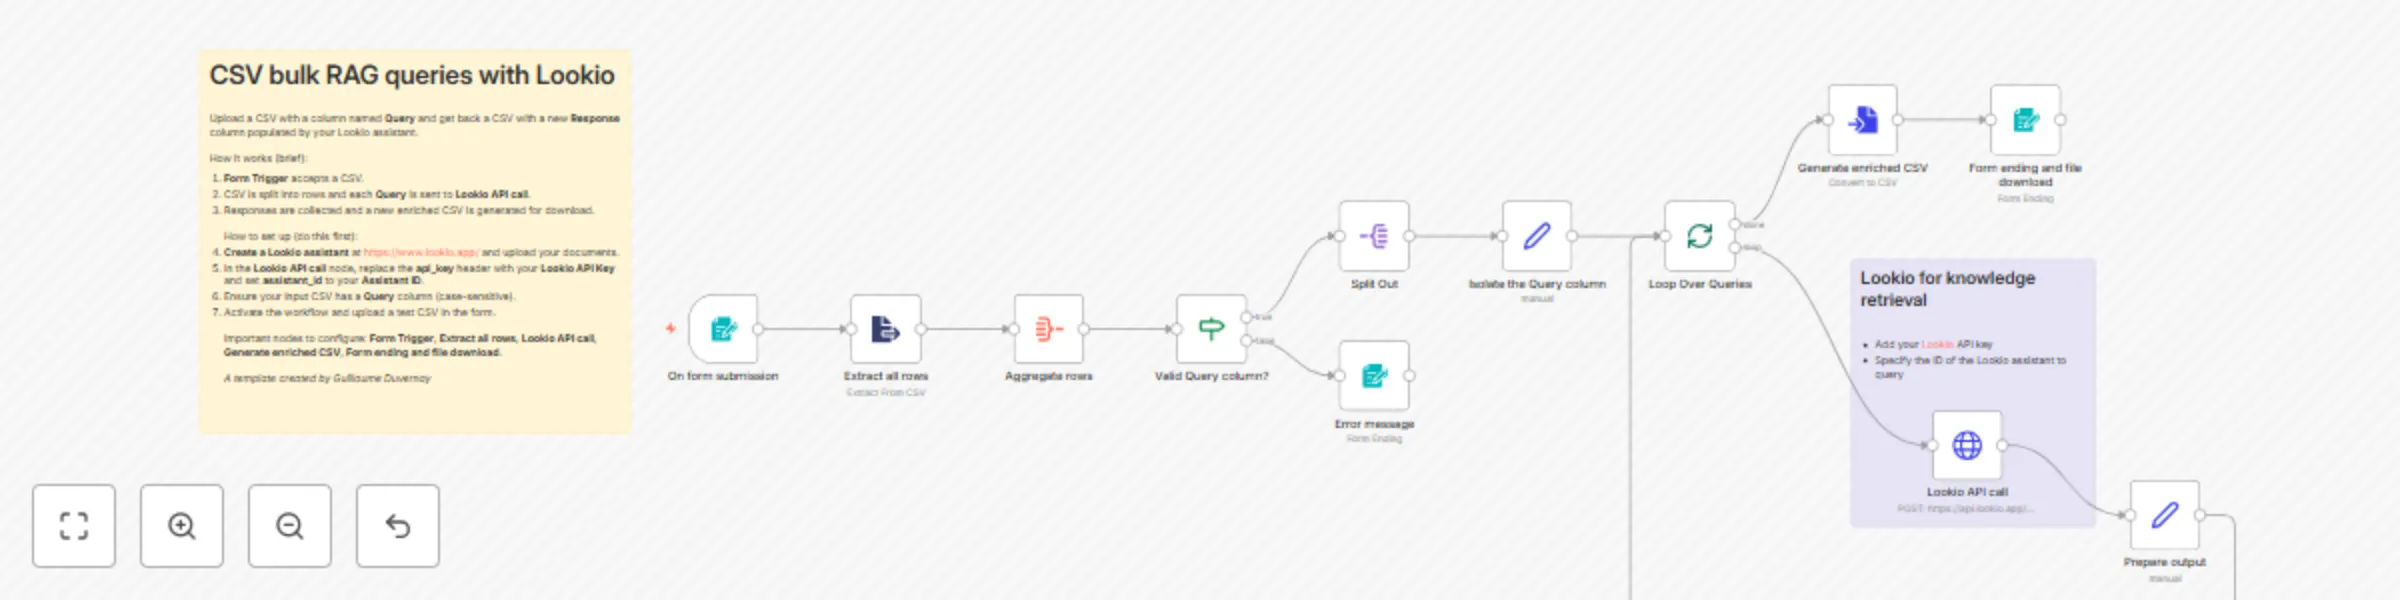
Run bulk RAG queries from CSV with Lookio
This template processes a CSV of questions and returns an enriched CSV with RAG based answers produced by your Lookio...

Build a Telegram Q&A bot with Linkup web search, GPT-4.1 & Mistral voice
Create a Telegram bot that answers questions using AI powered web search from Linkup and an LLM agent (GPT 4.1). This...

Create a voice & text Telegram assistant with Lookio RAG and GPT-4.1
Create a Telegram bot that answers questions using Retrieval Augmented Generation (RAG) powered by Lookio and an LLM...

Create dual-source expert articles with internal knowledge and web research using Lookio, Linkup, and GPT-5
Create truly authoritative articles that blend your unique, internal expertise with the latest, most relevant informa...
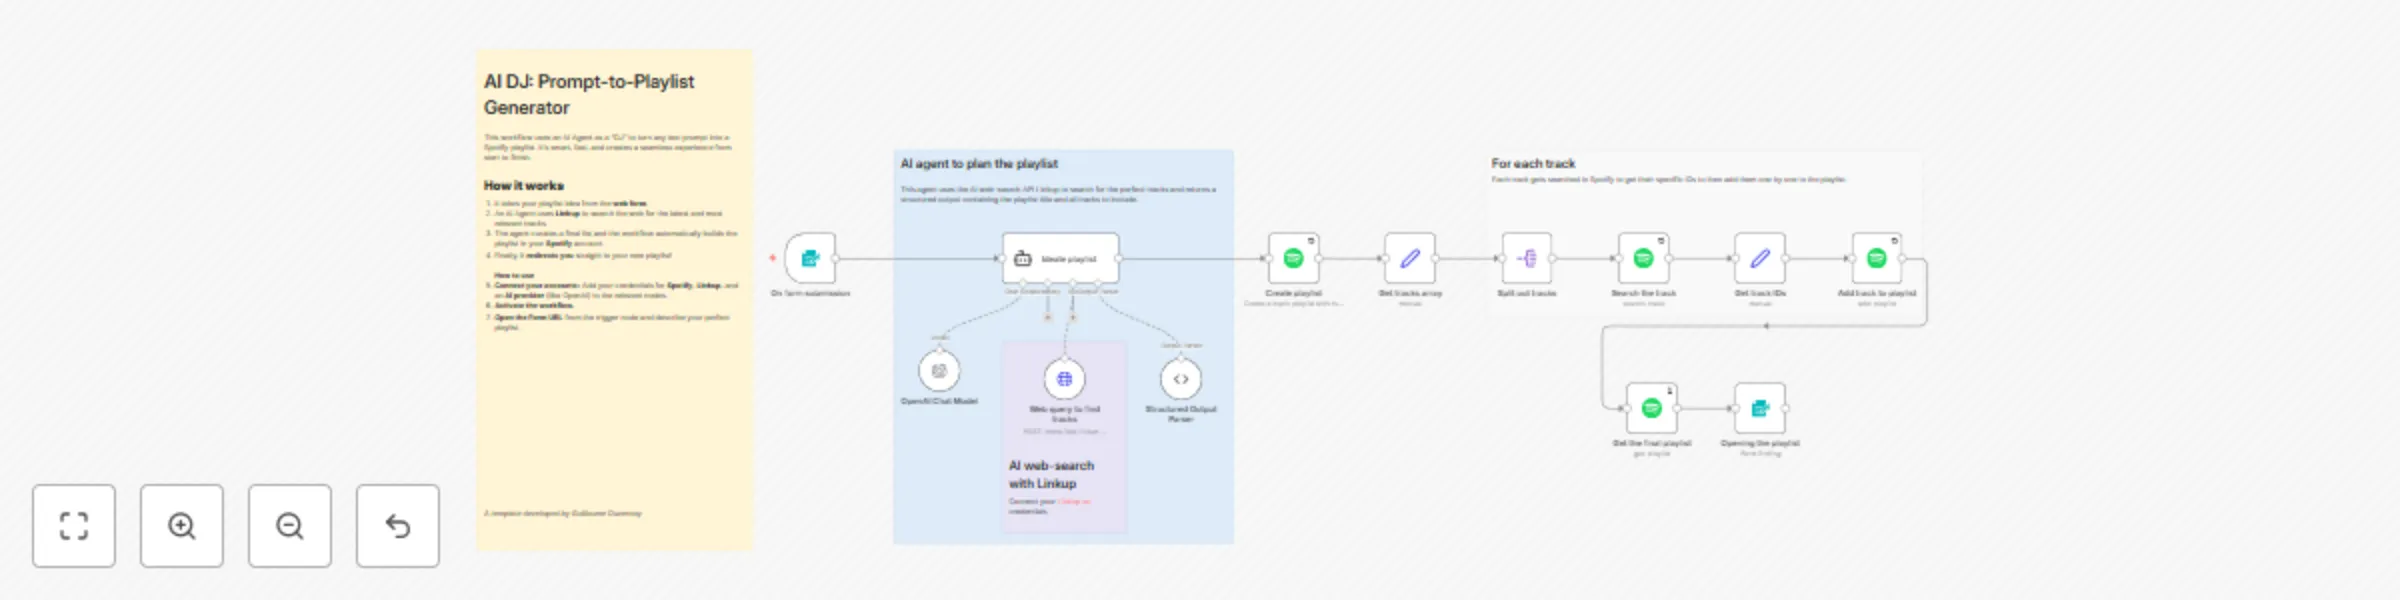
AI DJ: Text-to-Spotify playlist generator with Linkup and GPT4
Stop manually searching for songs and let an AI DJ do the work for you. This template provides a complete, end to end...

Build an intelligent Q&A bot with Lookio Knowledge Base and GPT
Build a powerful AI chatbot that provides precise answers from your own company's knowledge base. This template provi...

Create fact-based articles from knowledge sources with Lookio and OpenAI GPT
Move beyond generic AI generated content and create articles that are high quality, factually reliable, and aligned w...

Dynamic AI web researcher: From plain text to custom CSV with GPT-4 and Linkup
This template introduces a revolutionary approach to automated web research. Instead of a rigid workflow that can onl...

Create research-backed articles with AI planning, Linkup Search & GPT-5
Go beyond basic AI generated text and create articles that are well researched, comprehensive, and credible. This tem...

Create fact-based articles from your knowledge sources with Super RAG and GPT-5
Move beyond generic AI generated content and create articles that are high quality, factually reliable, and aligned w...

Create recurring AI-powered data digests in Slack with Super Assistant
Stop the daily grind of checking multiple apps just to stay updated. This template automates the creation of recurrin...

Auto-document and backup workflows with GPT-4 and Airtable
Never worry about losing your n8n workflows again. This template provides a powerful, automated backup system that gi...

Unify multiple triggers into a single workflow
Stop duplicating your work! This template demonstrates a powerful design pattern to handle multiple triggers (e.g., F...

Build an advanced multi-query RAG system with Supabase and GPT-5
Go beyond basic Retrieval Augmented Generation (RAG) with this advanced template. While a simple RAG setup can answer...
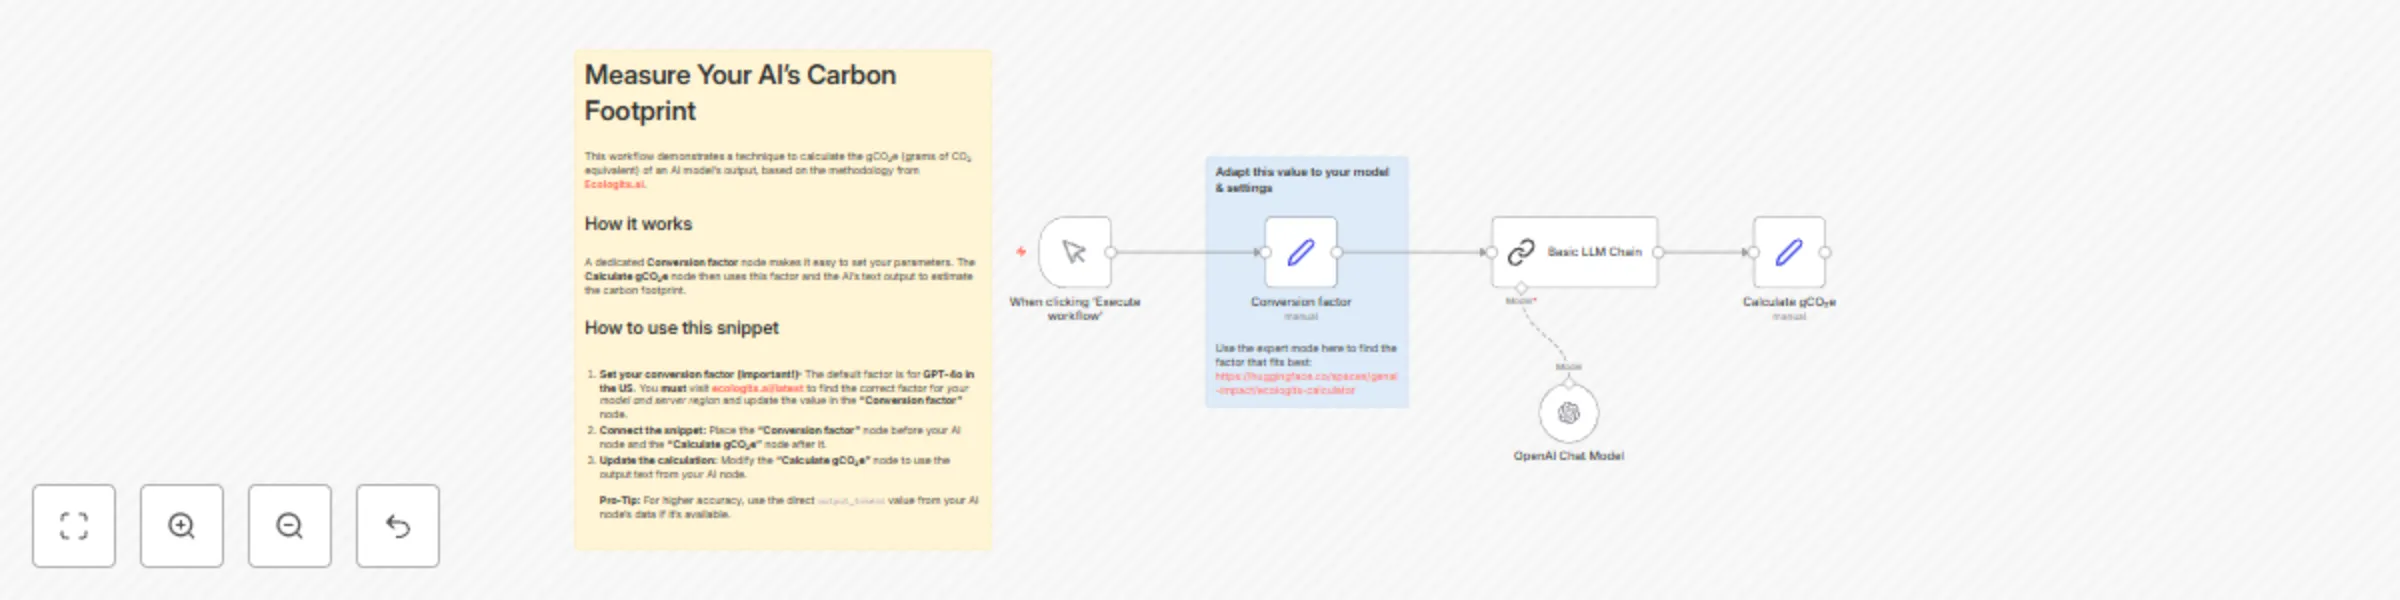
Measure AI model carbon footprint with Ecologits.ai methodology
This template provides a straightforward technique to measure and raise awareness about the environmental impact of y...

Create multi-step reasoning AI agents with GPT-4 and reusable thinking tools
Unlock a new level of sophistication for your AI agents with this template. While the native n8n Think Tool is great...

Sales prospect research & outreach preparation with Apollo, Linkup AI, and LinkedIn
This template transforms your sales and outreach process by automating deep, personalized research on any contact. Go...
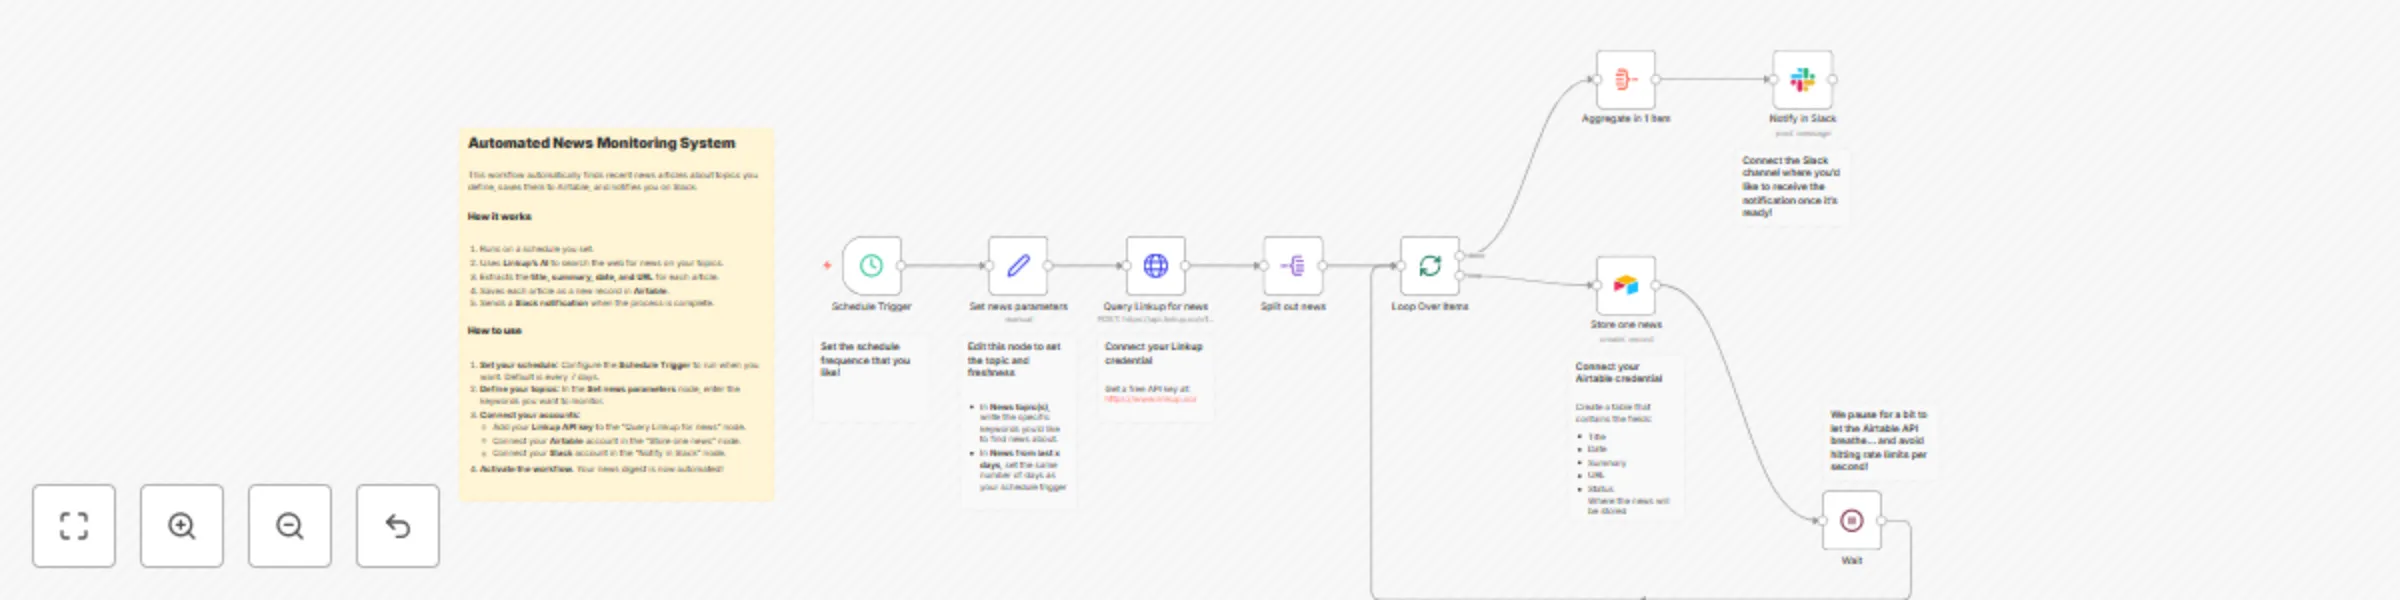
AI-powered news monitoring with Linkup, Airtable, and Slack notifications
This template provides a fully automated system for monitoring news on any topic you choose. It leverages Linkup's AI...

Create a speech-to-text API with OpenAI GPT4o-mini transcribe
Description This template provides a simple and powerful backend for adding speech to text capabilities to any applic...

Create playlists and control your Spotify player with GPT-4
This n8n template provides a powerful AI powered chatbot that acts as your personal Spotify DJ. Simply tell the chatb...