
Deniz
4
Workflows
Workflows by Deniz
Free advanced
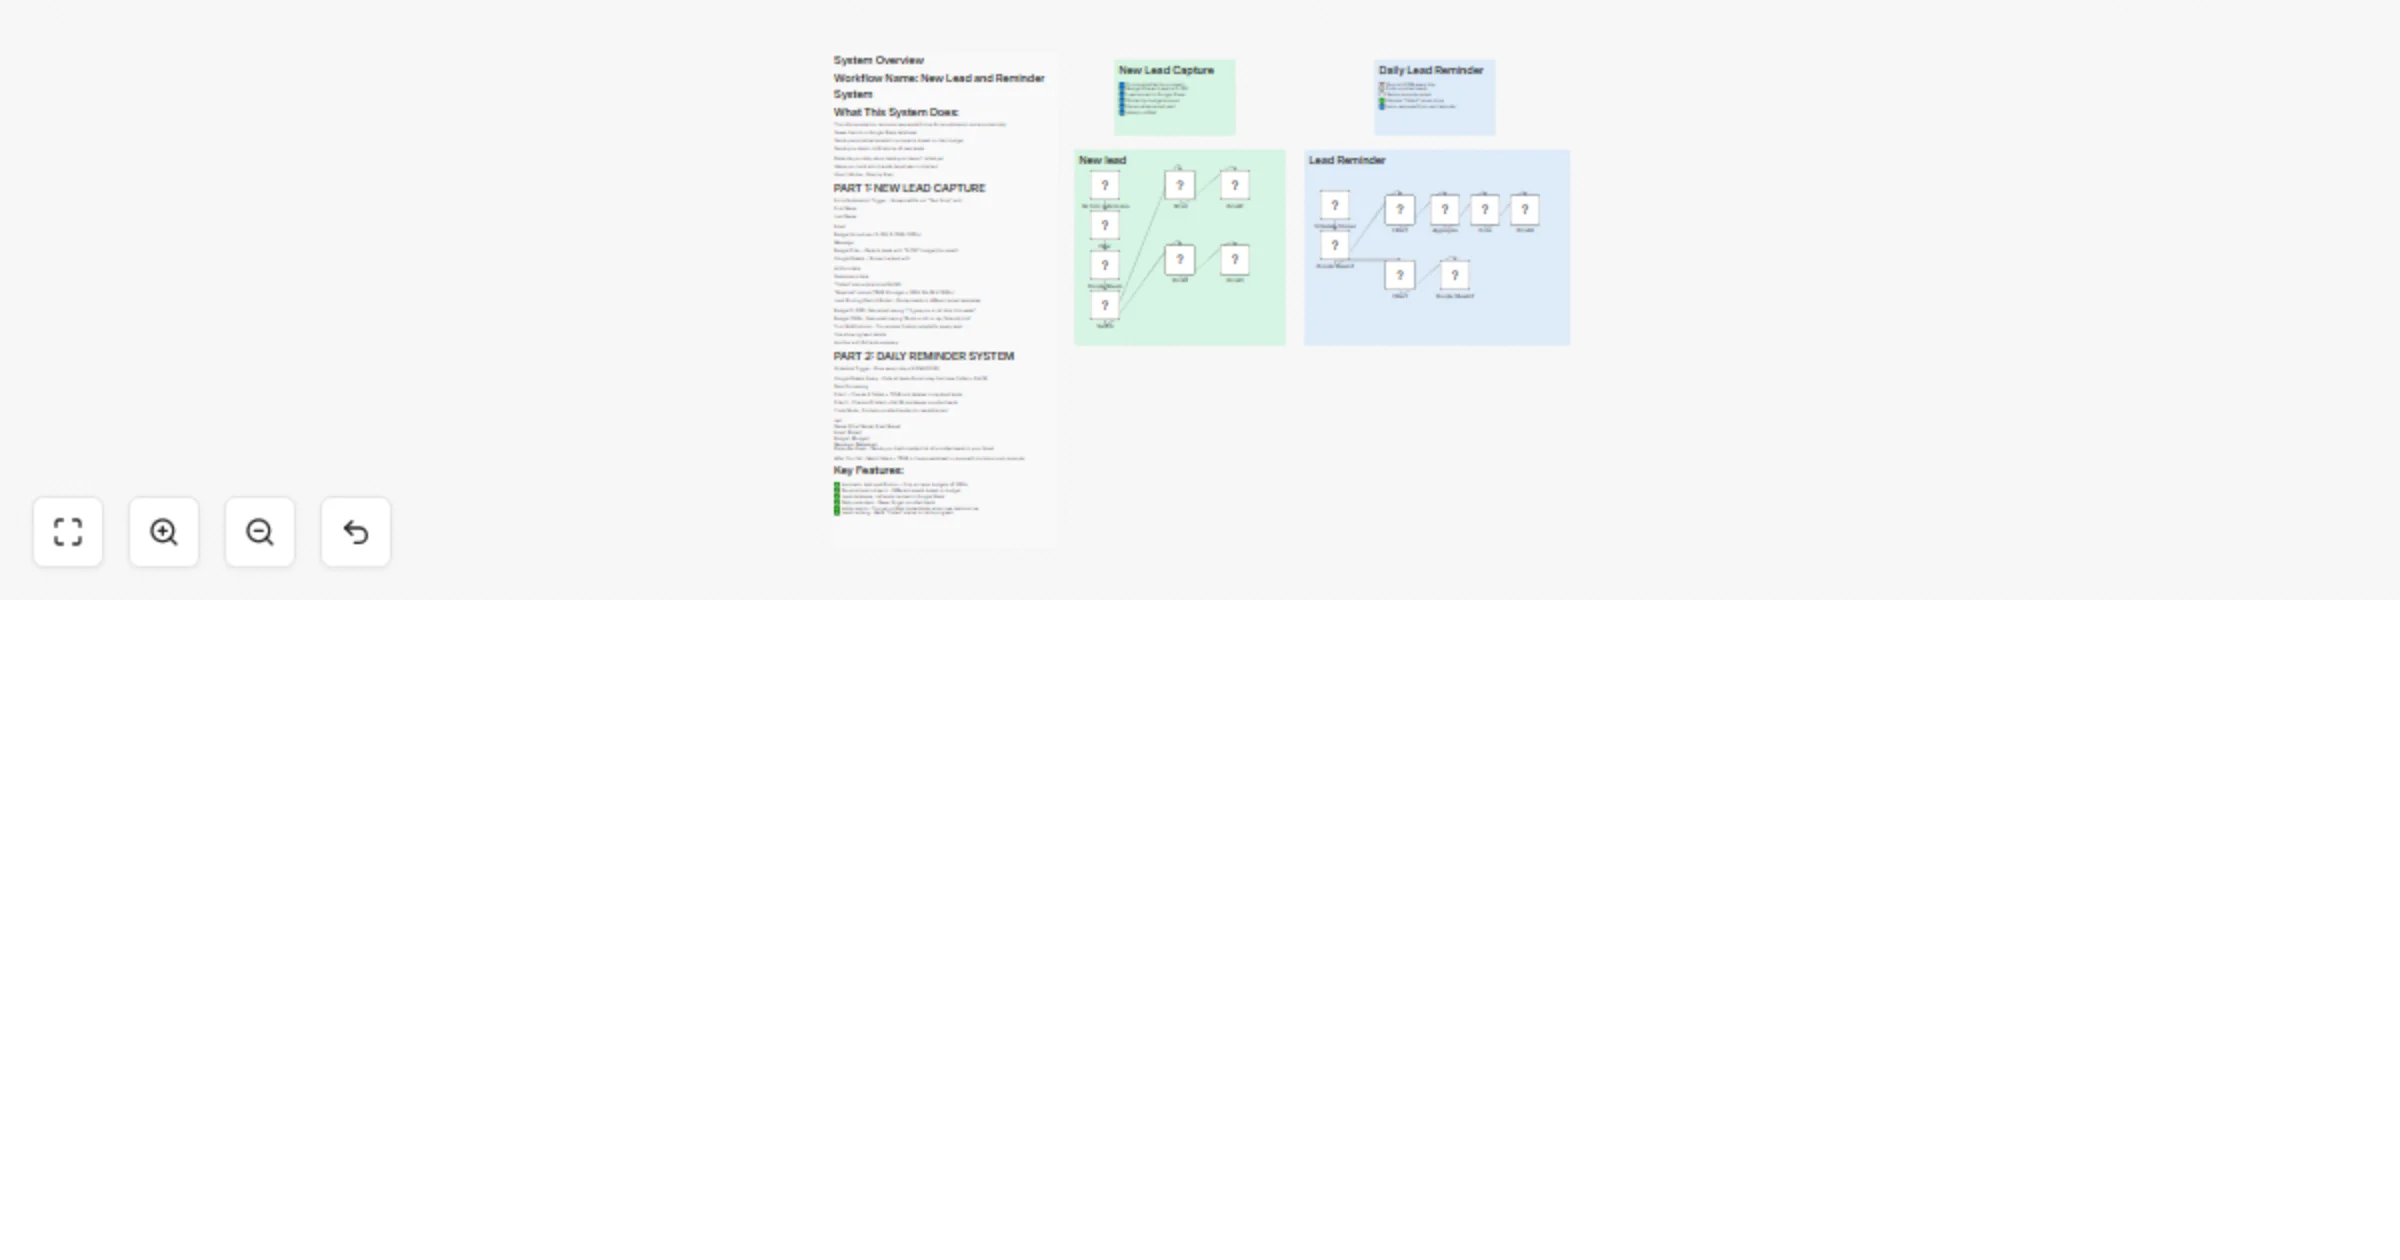
Capture leads from forms to Google Sheets and send Gmail reminders
System Overview Workflow Name: New Lead and Reminder System What This System Does: This n8n automation captures new l...
Lead Generation
11 Nov 2025
75
0

Free advanced
Create AI-generated UGC marketing videos with Telegram & GPT-4
📌 How to Set Up the AI UGC Video Automation System This system uses Telegram + N8N (no code automation) + AI models...
Content Creation
4 Oct 2025
1893
0

Free advanced
Narrative chaining: AI-generated video scene extensions with Veo3
Structured Setup Guide: Narrative Chaining with N8N + AI 1. Input Setup Use a Google Sheet as the control panel. Fiel...
Content Creation
1 Oct 2025
688
0

Free advanced
Automate lead generation with Apollo, AI parsing, and timed email follow-ups
Good to know: The workflow runs every hour with a randomized delay of 5–20 minutes to help distribute load. It record...
Lead Generation
28 Sep 2025
526
0