Manuel
Workflows by Manuel
Add new clients from Notion to Clockify
# Who is this template for? This workflow template is ideal for anyone using Notion for project management and Clockify for time tracking. The workflow automatically adds all new clients from Notion to Clockify. ## How it works 1. Scans your Notion client table every minute for new clients 2. Adds all new clients to your Clockify workspace ## Set up Steps 1. Set up the Notion trigger node by adding your Notion API credentials as described in the [n8n Notion docs](https://docs.n8n.io/integrations/builtin/credentials/notion/). 2. Go to your Notion clients page/table and give your integration permission to acces the data on this page. 3. Go back to n8n and select your Notion client page in the Notion trigger node. 3. Set up the Clockify node by adding your Clockify API credentials as described in the [n8n Clockify docs](https://docs.n8n.io/integrations/builtin/credentials/clockify/), select your Clockify workspace and map your client name column from Notion to the Clockify "Client Name" field.
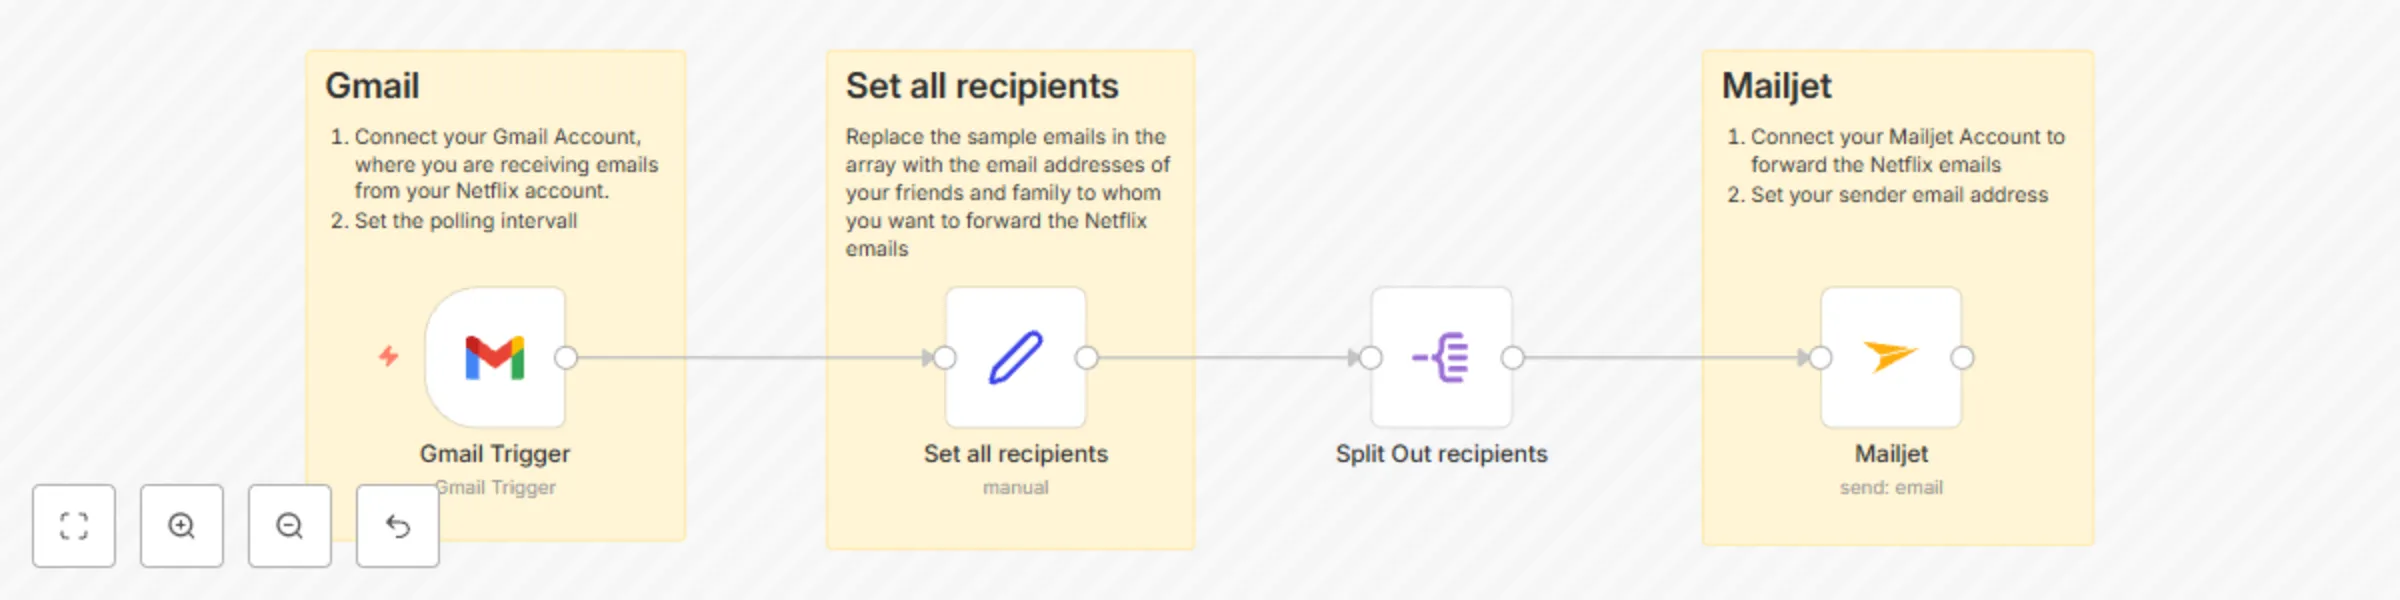
Forward Netflix emails to multiple email addresses with GMail and Mailjet
# Who is this template for? This workflow template is designed for everyone with a Gmail address, who wants to forward all Netflix emails, including temporary login codes, to friends and family effortlessly. ## How it works 1. Scans your Gmail inbox every minute for new e-mails from Netflix 2. Forwards all Netflix e-mails to all desired e-mail addresses via the e-mail provider Mailjet ## Setup Steps 1. Connect your Google Mail Account to n8n following the [official n8n instructions](https://docs.n8n.io/integrations/builtin/credentials/google/oauth-single-service/) 2. Add all recipients you want to the recipients array at the "Set all recipients" node. 3. Create and connect your Mailjet Account to n8n following the [official n8n instructions](https://docs.n8n.io/integrations/builtin/credentials/mailjet/). Note: You cannot use an Gmail e-mail address as the sender address, as mailjet does not support this. I recommend using your own email address from a custom domain. This works perfectly.
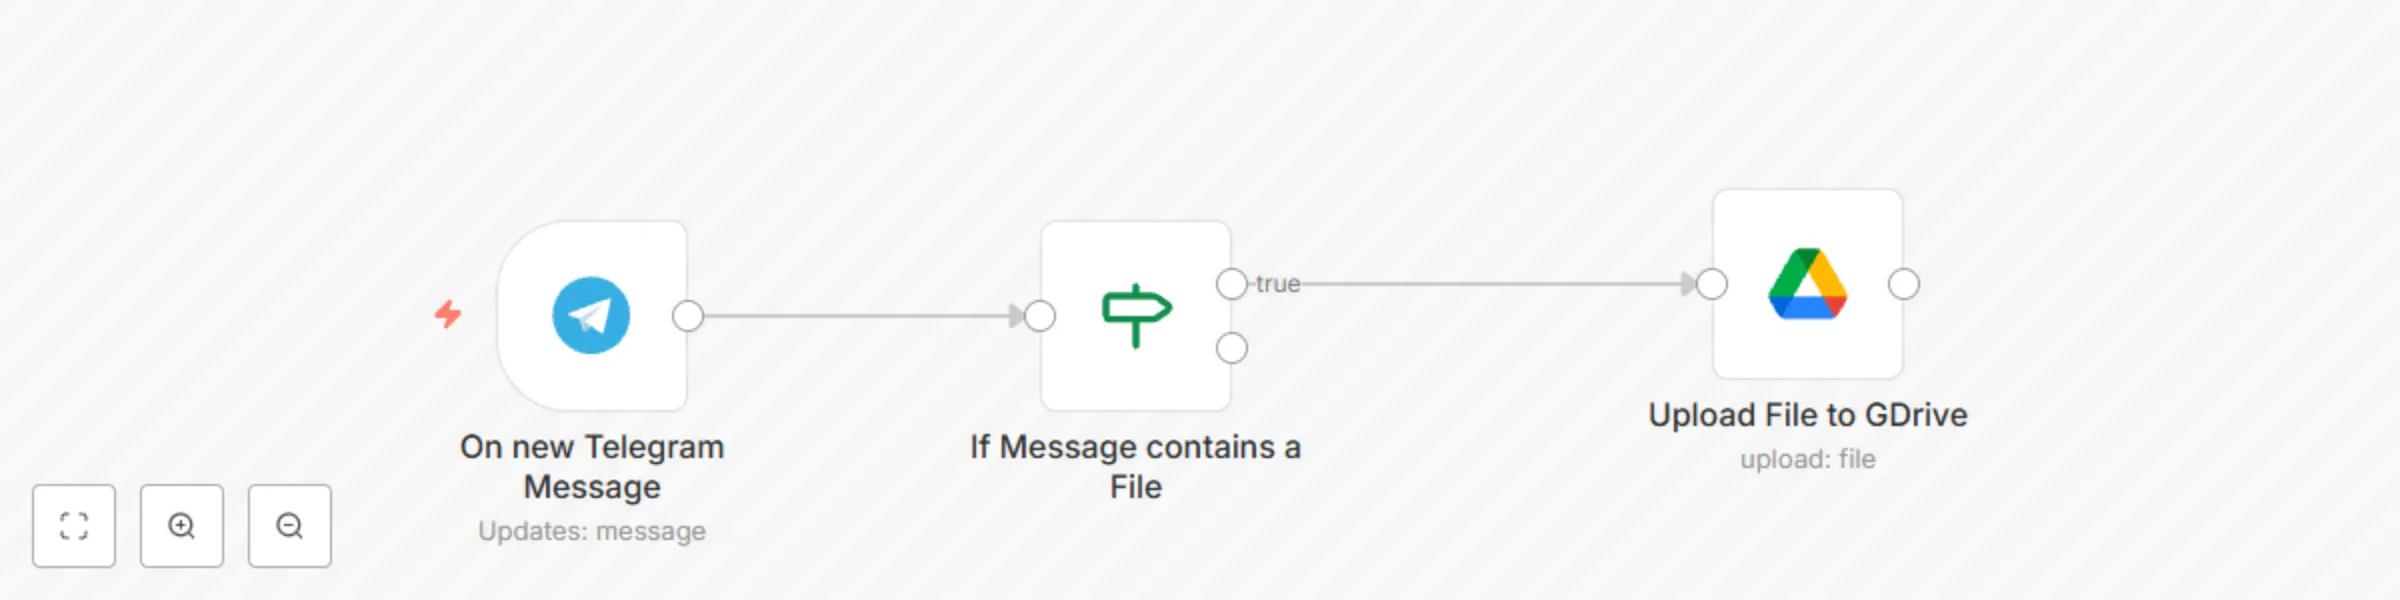
Save new files received on Telegram to Google Drive
Effortlessly optimize your workflow by automatically save all files you are receiving on Telegram to a Google Drive Folder. ## How it works 1. Retrieve a message sent to your Telegram Bot containing a file 2. Upload the file to your Google Drive Folder ## Set up Steps 1. Create a Telegram Account and a Telegram Bot and connect your Telegram Bot to n8n by following [the official n8n instructions](https://docs.n8n.io/integrations/builtin/credentials/telegram/?utm_source=n8n_app&utm_medium=credential_settings&utm_campaign=create_new_credentials_modal#using-bot-access-token) 2. Create a Google Drive Folder 3. Connect your Google Drive with n8n following [the official n8n instructions](https://docs.n8n.io/integrations/builtin/app-nodes/n8n-nodes-base.googledrive/?utm_source=n8n_app&utm_medium=node_settings_modal-credential_link&utm_campaign=n8n-nodes-base.googleDrive) 4. Set the right folder in the Google Drive node ## Use case examples - Backup and Recovery - Cross-Platform Access - File Organization and Management - File Collaboration and Sharing - Storage Space Management
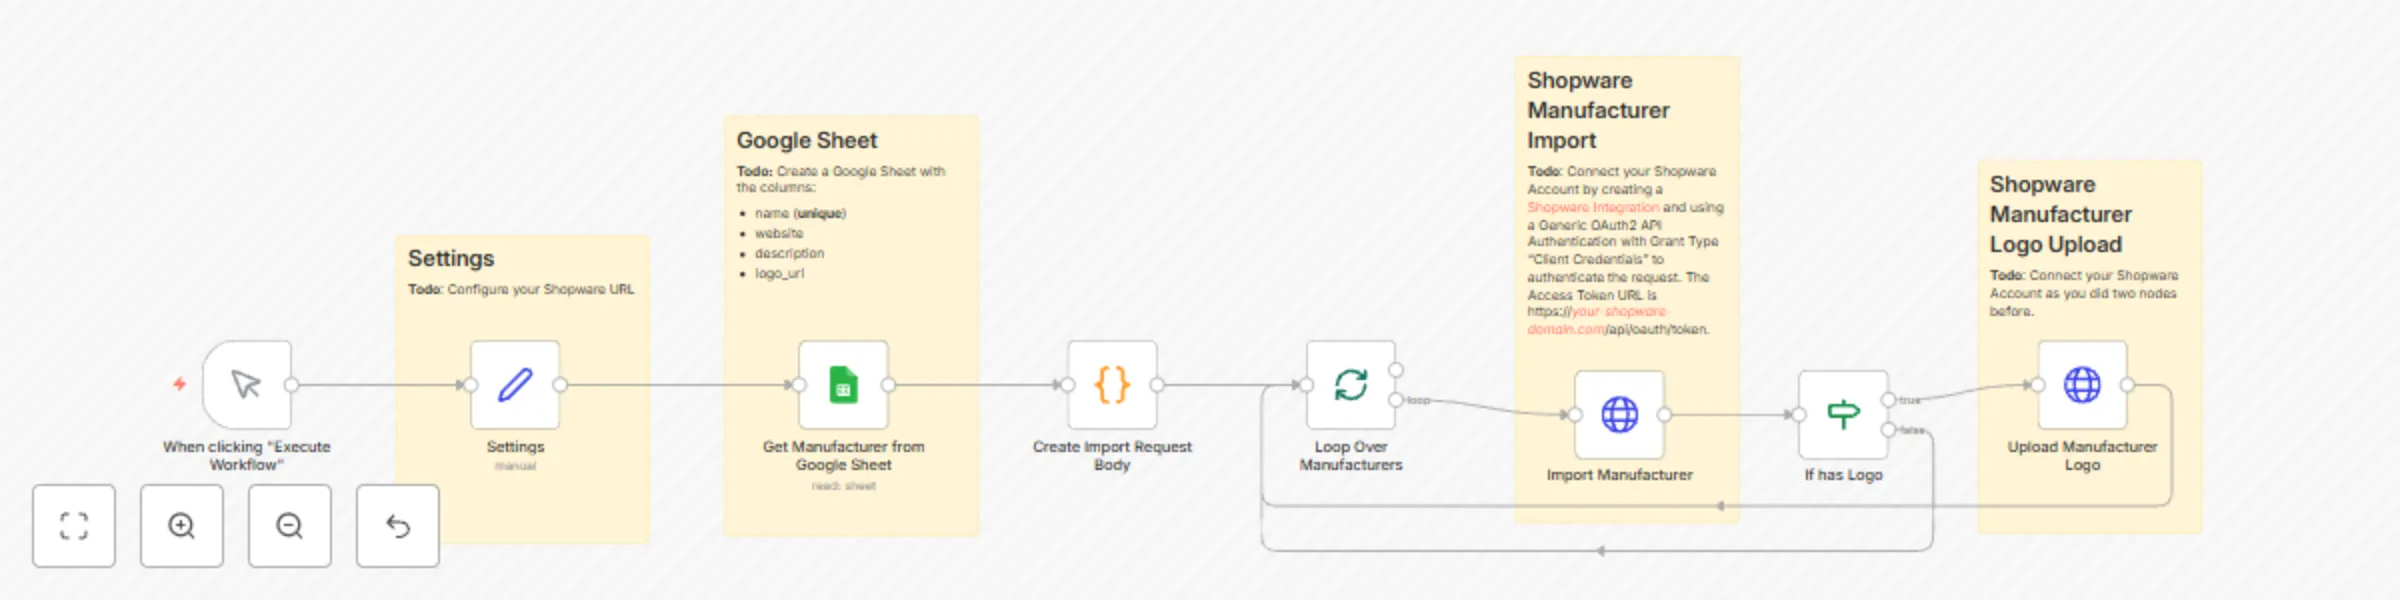
Import multiple manufacturers from Google Sheets to Shopware 6
Effortlessly optimize your workflow by automatically importing hundreds of manufacturers from a Google Sheet into your Shopware online store, saving countless hours of manual work. ## How it works 1. Retrieve all manufactures from a Google Sheet 2. Add each manufacture via Shopware sync API Endpoint to Shopware 3. Upload a logo for each manufacture from a provided public URL to Shopware ## Set Up Steps 1. Add your Shopware url to first node called Settings 2. Create a Google Sheet in your Google account with the following columns ([Demo Sheet](https://docs.google.com/spreadsheets/d/1Qmsjs8usT90fPNnCIaI605W77zoKkOB3t3i8UsdpA5Q/edit?usp=sharing)) 1. name (the name of the manufacturer which has to be unique and is required) 2. website (url to the manufacturer website) 3. description 4. logo_url (public manufcaturer logo url. Have to be a png, jpg or svg file) 5. translation_language_code_1 (optional. Language Code of your language. For example 'es-ES' for spanish. You have to make sure a language with this code exists in your Shopware shop.) 6. translation_name_1 (optional. Manufacturer name translated to the language you defined at translation_language_code_1) 7. translation_description_1 (optional. Manufacturer description translated to the language you defined at translation_language_code_1) 8. translation_language_code_2 (optional. Same as translation_language_code_1 for another language) 9. translation_name_2 (optional. Same as translation_name_1 for another language) 10. translation_description_2 (optional. Same as translation_description_1 for another language) 11. translation_language_code_3 (optional. Same as translation_language_code_1 for another language) 9. translation_name_3 (optional. Same as translation_name_1 for another language) 10. translation_description_3 (optional. Same as translation_description_1 for another language) 3. Connect to your Google account 4. Connect to your Shopware account 1. Create a [Shopware Integration](https://docs.shopware.com/en/shopware-6-en/settings/system/integrationen) 2. Connect to Shopware at the nodes "Import Manufacturer" and "Upload Manufacturer Logo" using a Generic OAuth2 API Authentication with Grant Type "Client Credentials". The Access Token URL is https://your-shopware-domain.com/api/oauth/token. 5. Run the workflow