Agent Studio
Workflows by Agent Studio

Track OpenAI Admin API usage and costs automatically with Google Sheets
This workflow aims to help you and your team track your expenses with OpenAI It automatically collects your OpenAI or...

Sync Zendesk knowledge base articles to Airtable with markdown conversion
Who is it for Customer service or support teams who want to use their Zendesk articles in other tools. Content/Knowle...

Export AI agent conversation logs from Postgres to Google Sheets
This n8n workflow retrieves AI agent chat memory logs stored in Postgres and pushes them to Google Sheets, creating o...

Connect Retell Voice Agents to custom functions
This workflow allows you to trigger custom logic in n8n directly from Retell's Voice Agent using [Custom Functions](h...
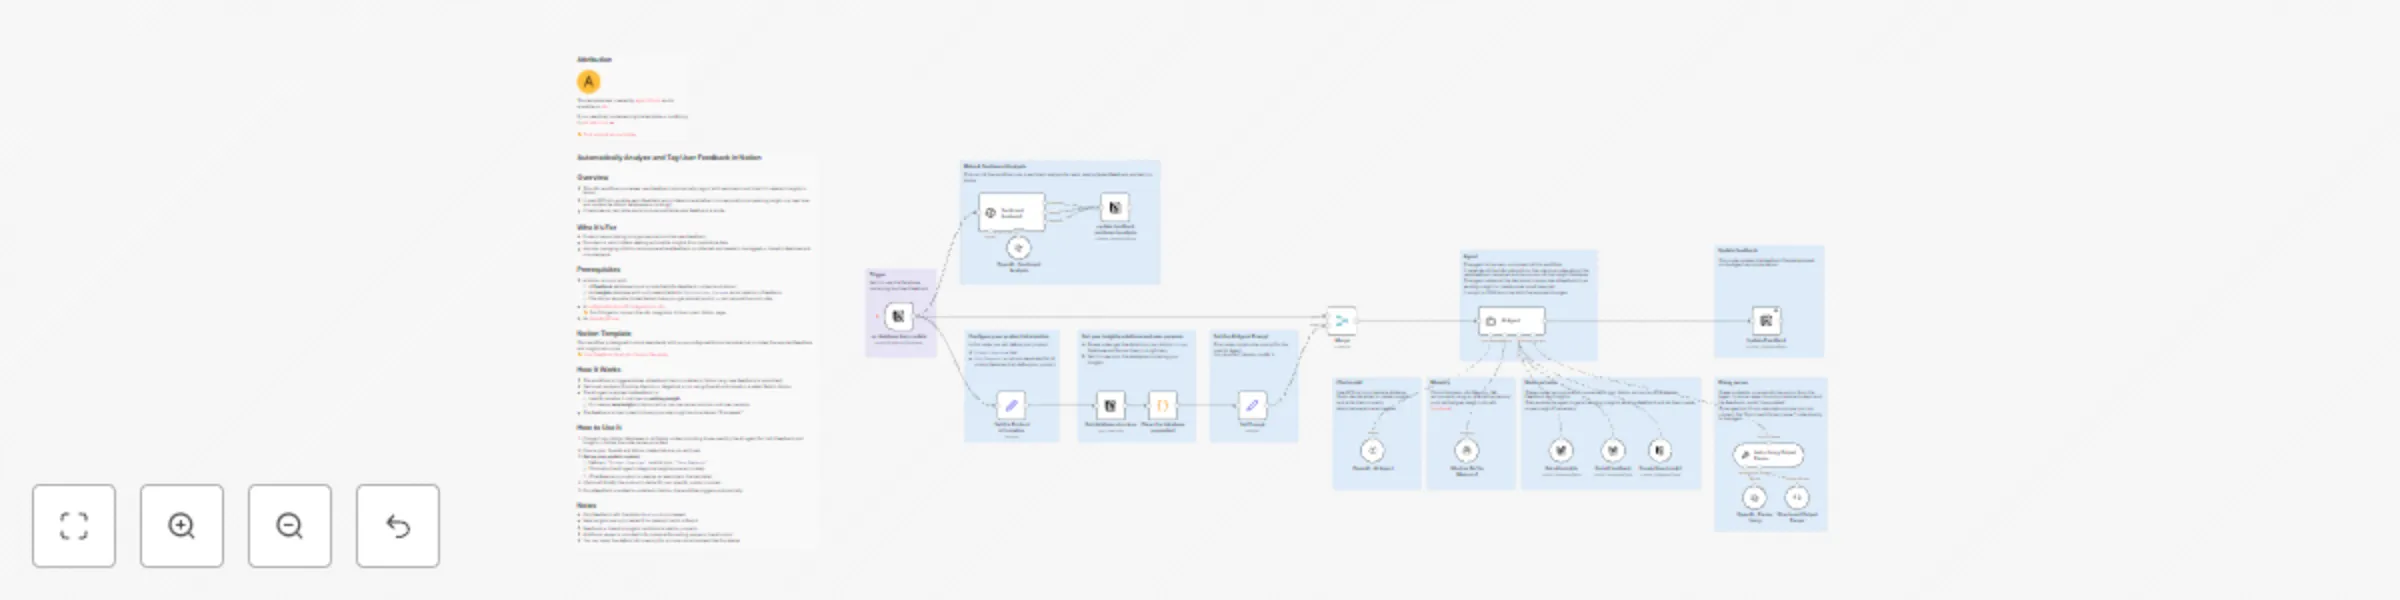
Analyze & Tag User Feedback in Notion with GPT-4 Sentiment Analysis
This n8n workflow processes user feedback automatically, tags it with sentiment, and links it to relevant insights in...

Store retell transcripts in Sheets, Airtable or Notion from webhook
Automatically store Retell transcripts in Google Sheets/Airtable/Notion from webhook Overview This workflow stores th...

Populate Retell dynamic variables with Google Sheets data for call handling
This workflow provides Retell agent builders with a simple way to populate dynamic variables using n8n. The workflow...

Extract and process information directly from PDF using Claude and Gemini
This workflow helps you compare Claude 3.5 Sonnet and Gemini 2.0 Flash when extracting data from a PDF This workflow...

Visualize your SQL Agent queries with OpenAI and Quickchart.io
This workflow aims to provide data visualization capabilities to a native SQL Agent. Together, they can help foster d...

Text automations using Apple Shortcuts
This workflow answers user requests sent via Mac Shortcuts Several Shortcuts call the same webhook, with a query and...

AI agent with charts capabilities using OpenAI structured output and Quickchart
This workflow is an experiment to integrate charts in AI Agents, using the new Structured Output from OpenAI and [Qui...
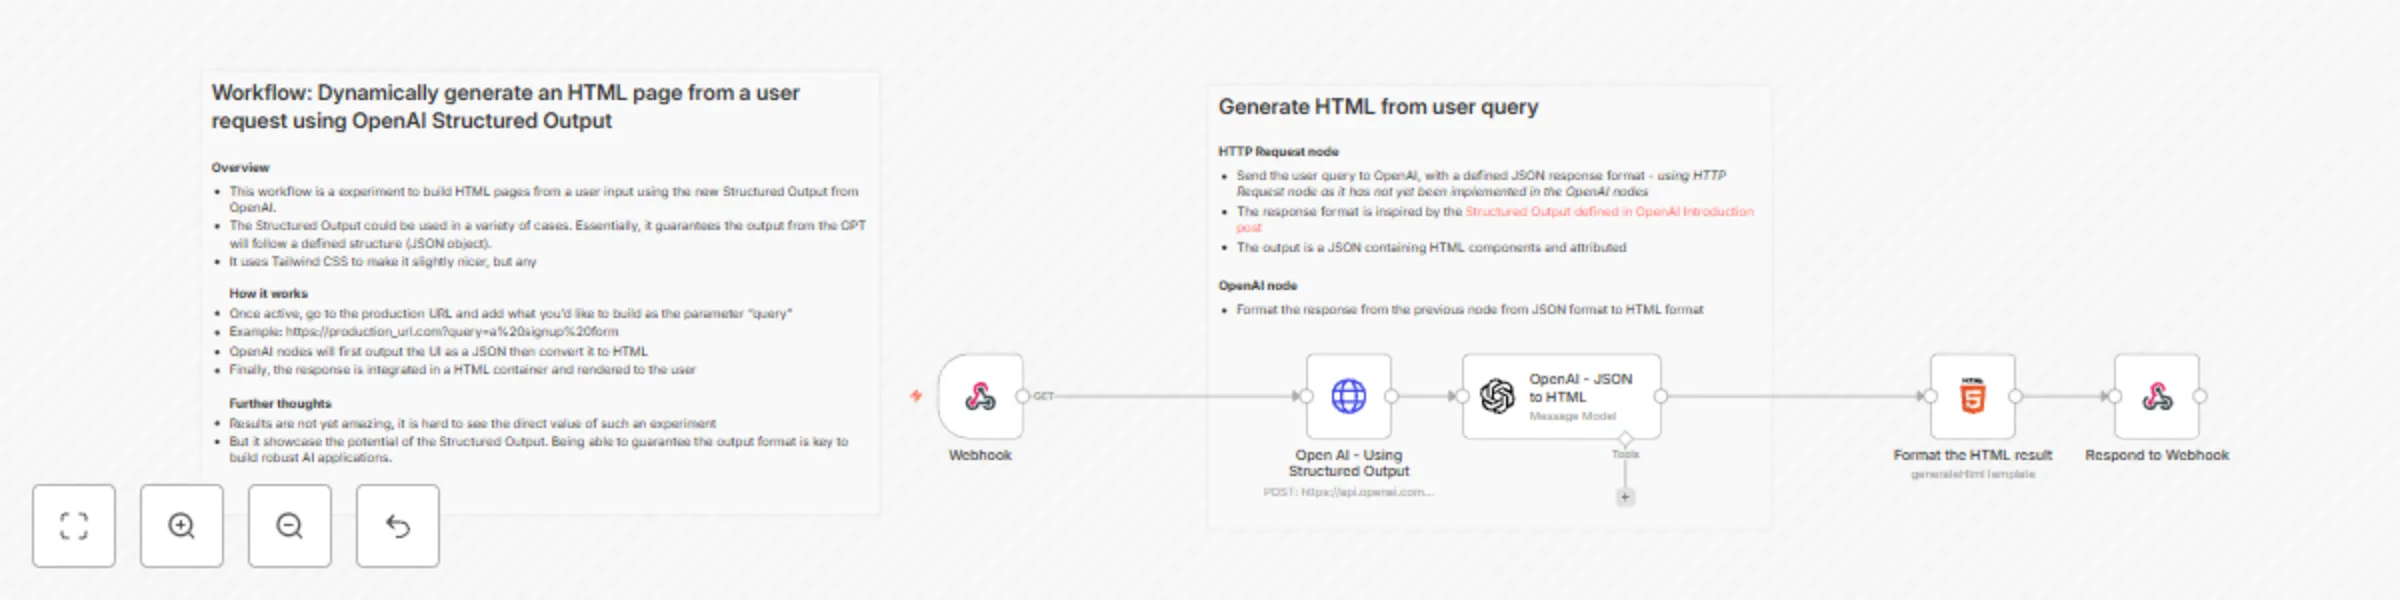
Dynamically generate a webpage from user request using OpenAI structured output
This workflow is a experiment to build HTML pages from a user input using the new Structured Output from OpenAI. How...
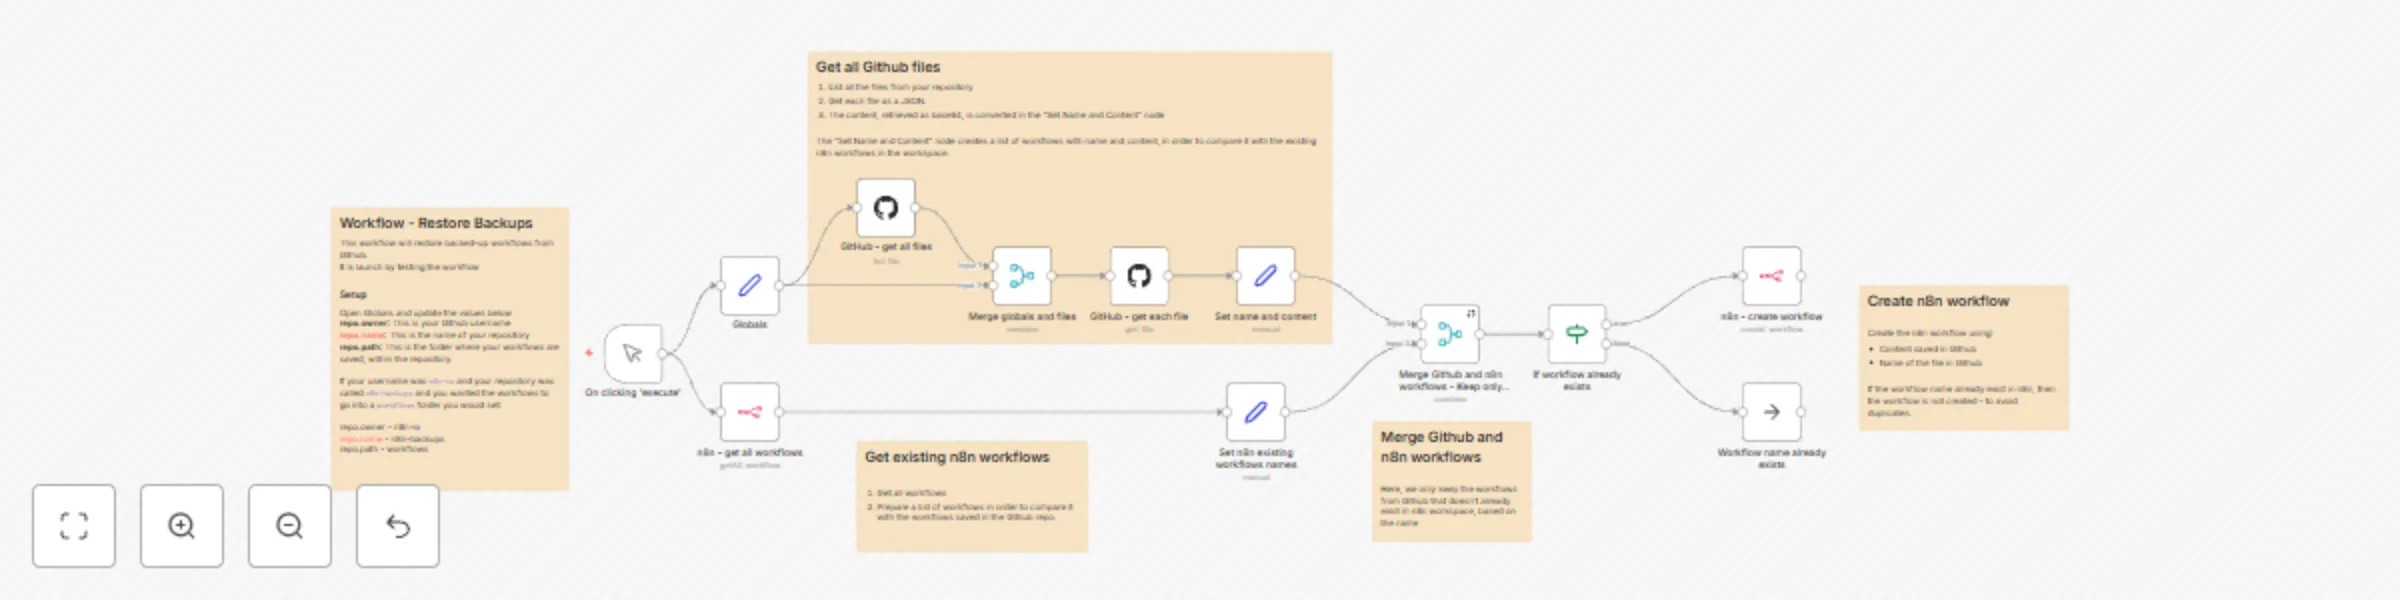
Restore backed up workflows from GitHub to n8n
Restore backed up workflows from GitHub to your n8n workspace. This workflow was inspired by this one that lets you b...