
PollupAI
Workflows by PollupAI
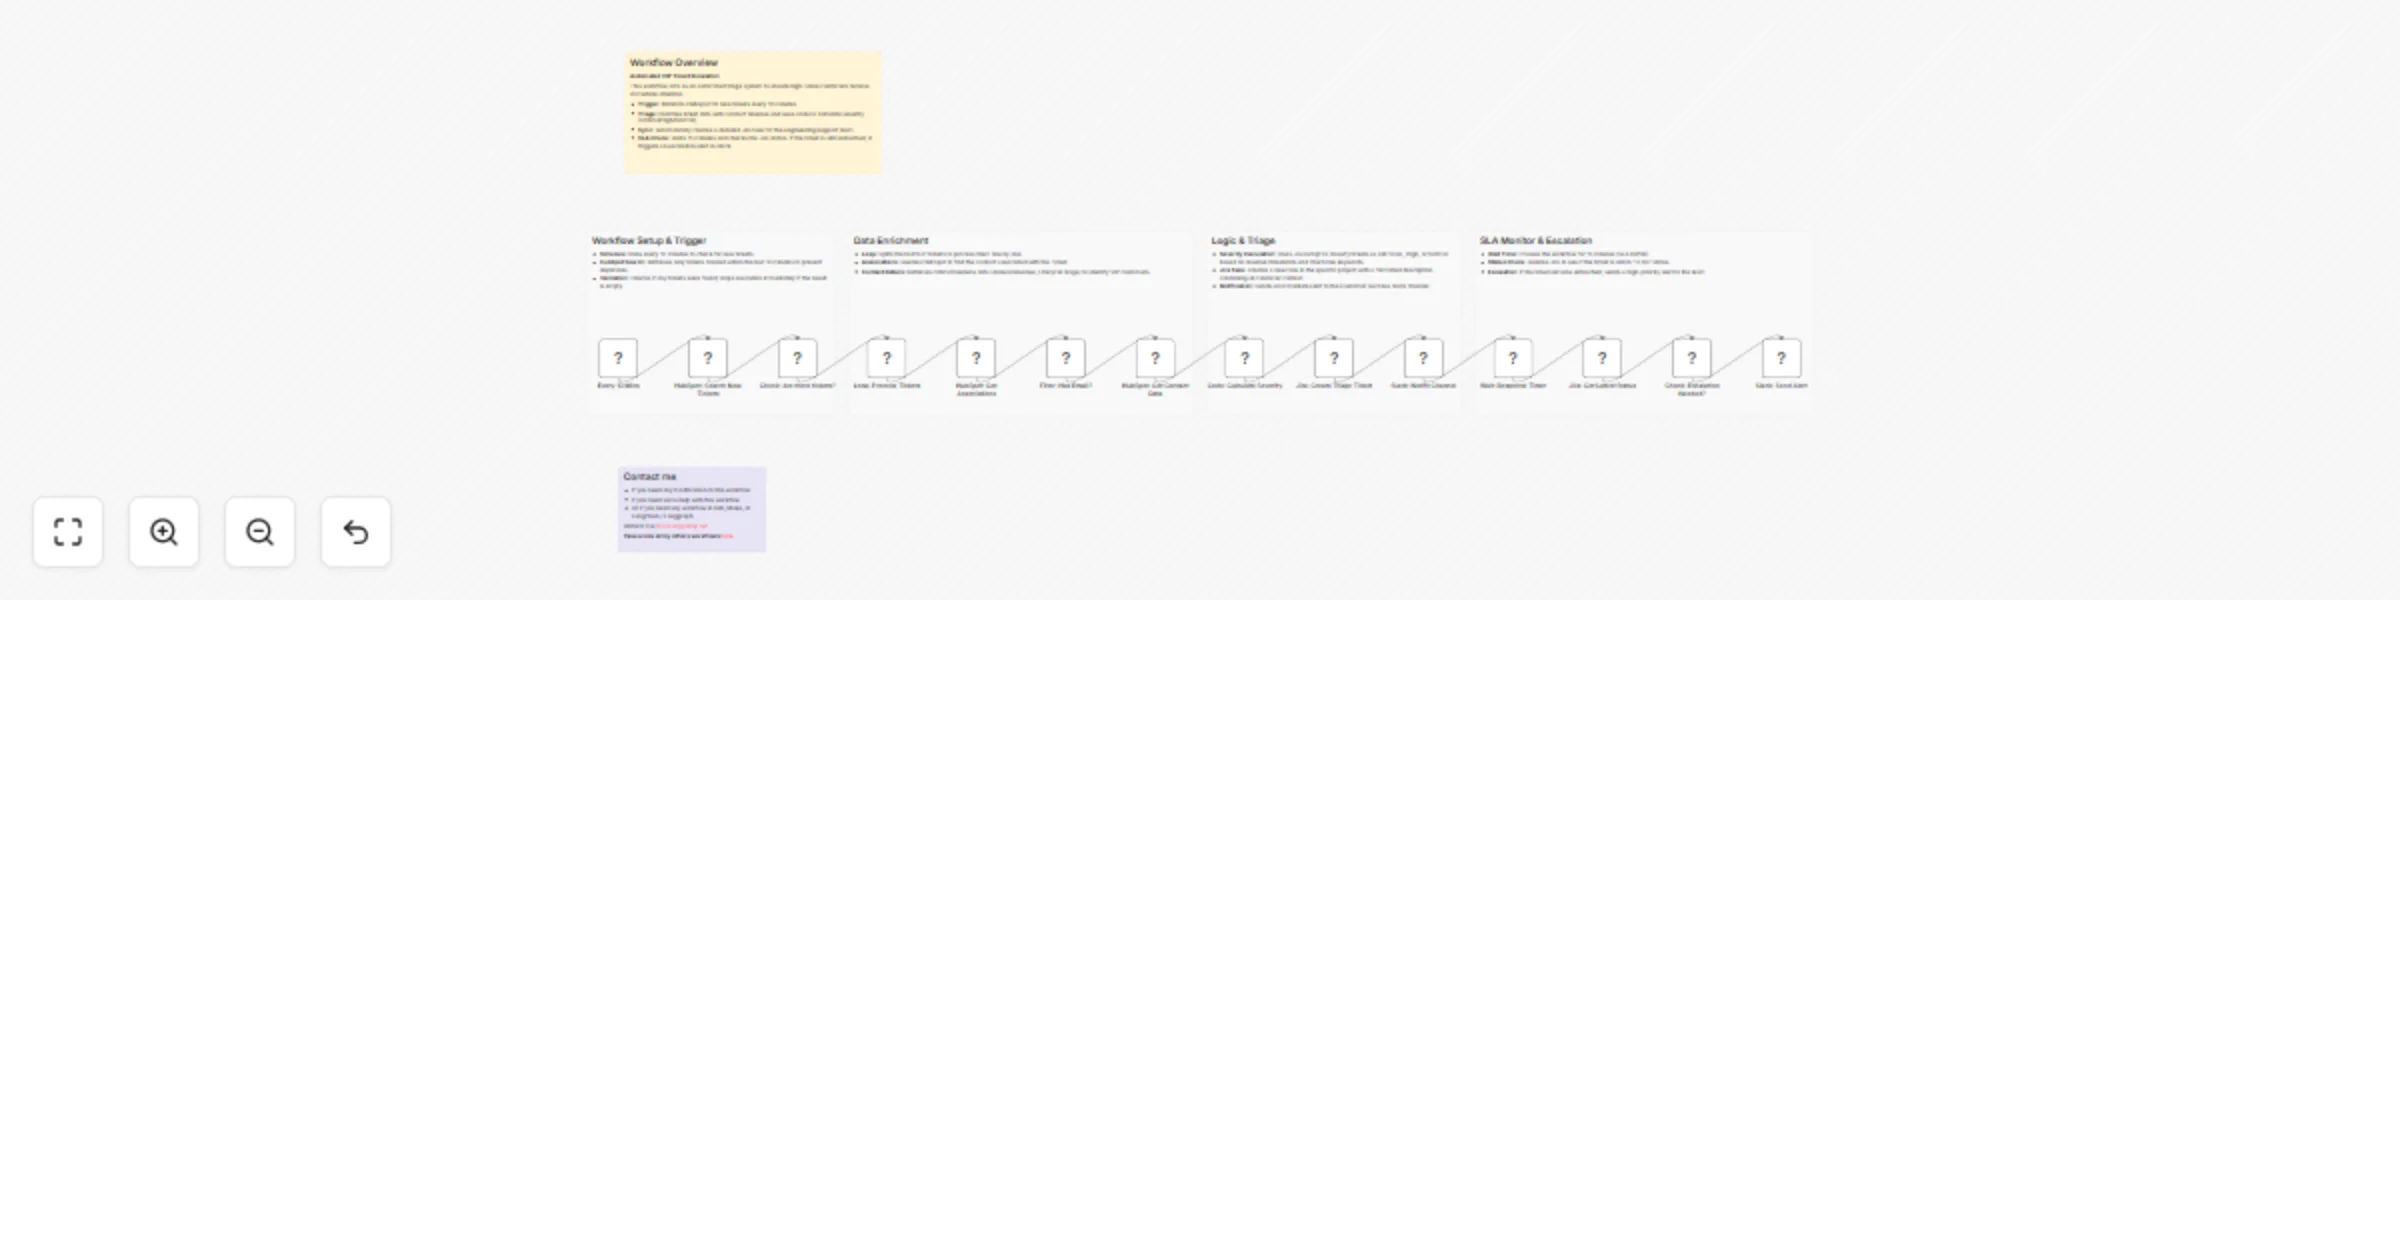
Triage and escalate HubSpot tickets to Jira with Slack SLA alerts
This workflow automates the prioritization and escalation of customer support tickets. It acts as an intelligent tria...
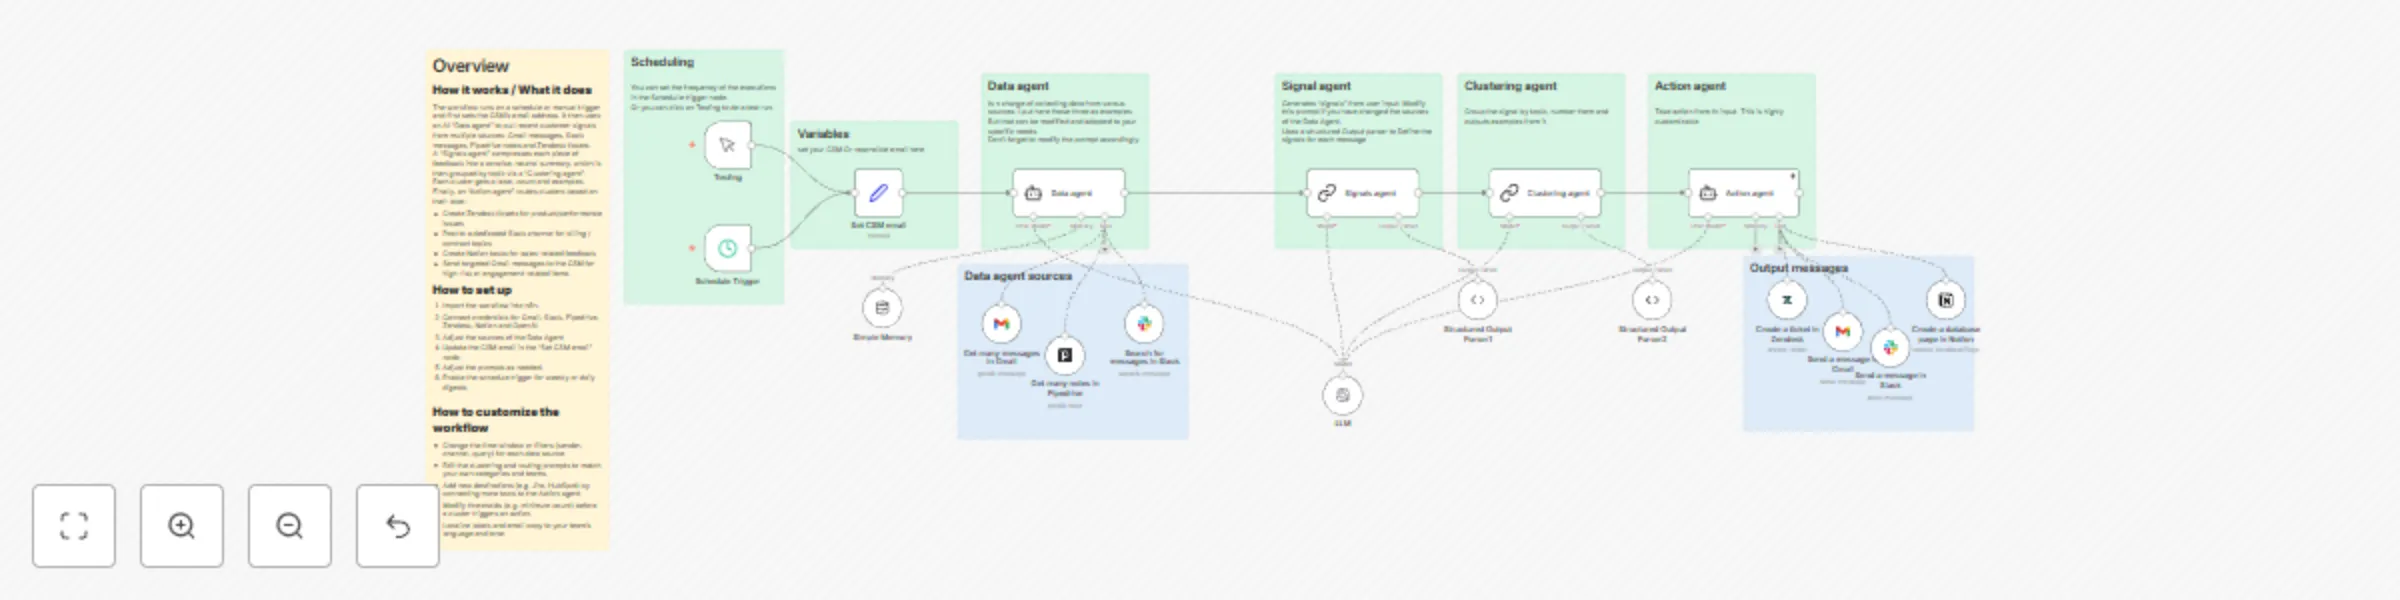
AI-powered customer feedback routing with Gmail, Slack, Pipedrive, Zendesk & Notion
Who’s it for This workflow is built for B2B SaaS and CX teams that are drowning in unstructured customer feedback acr...
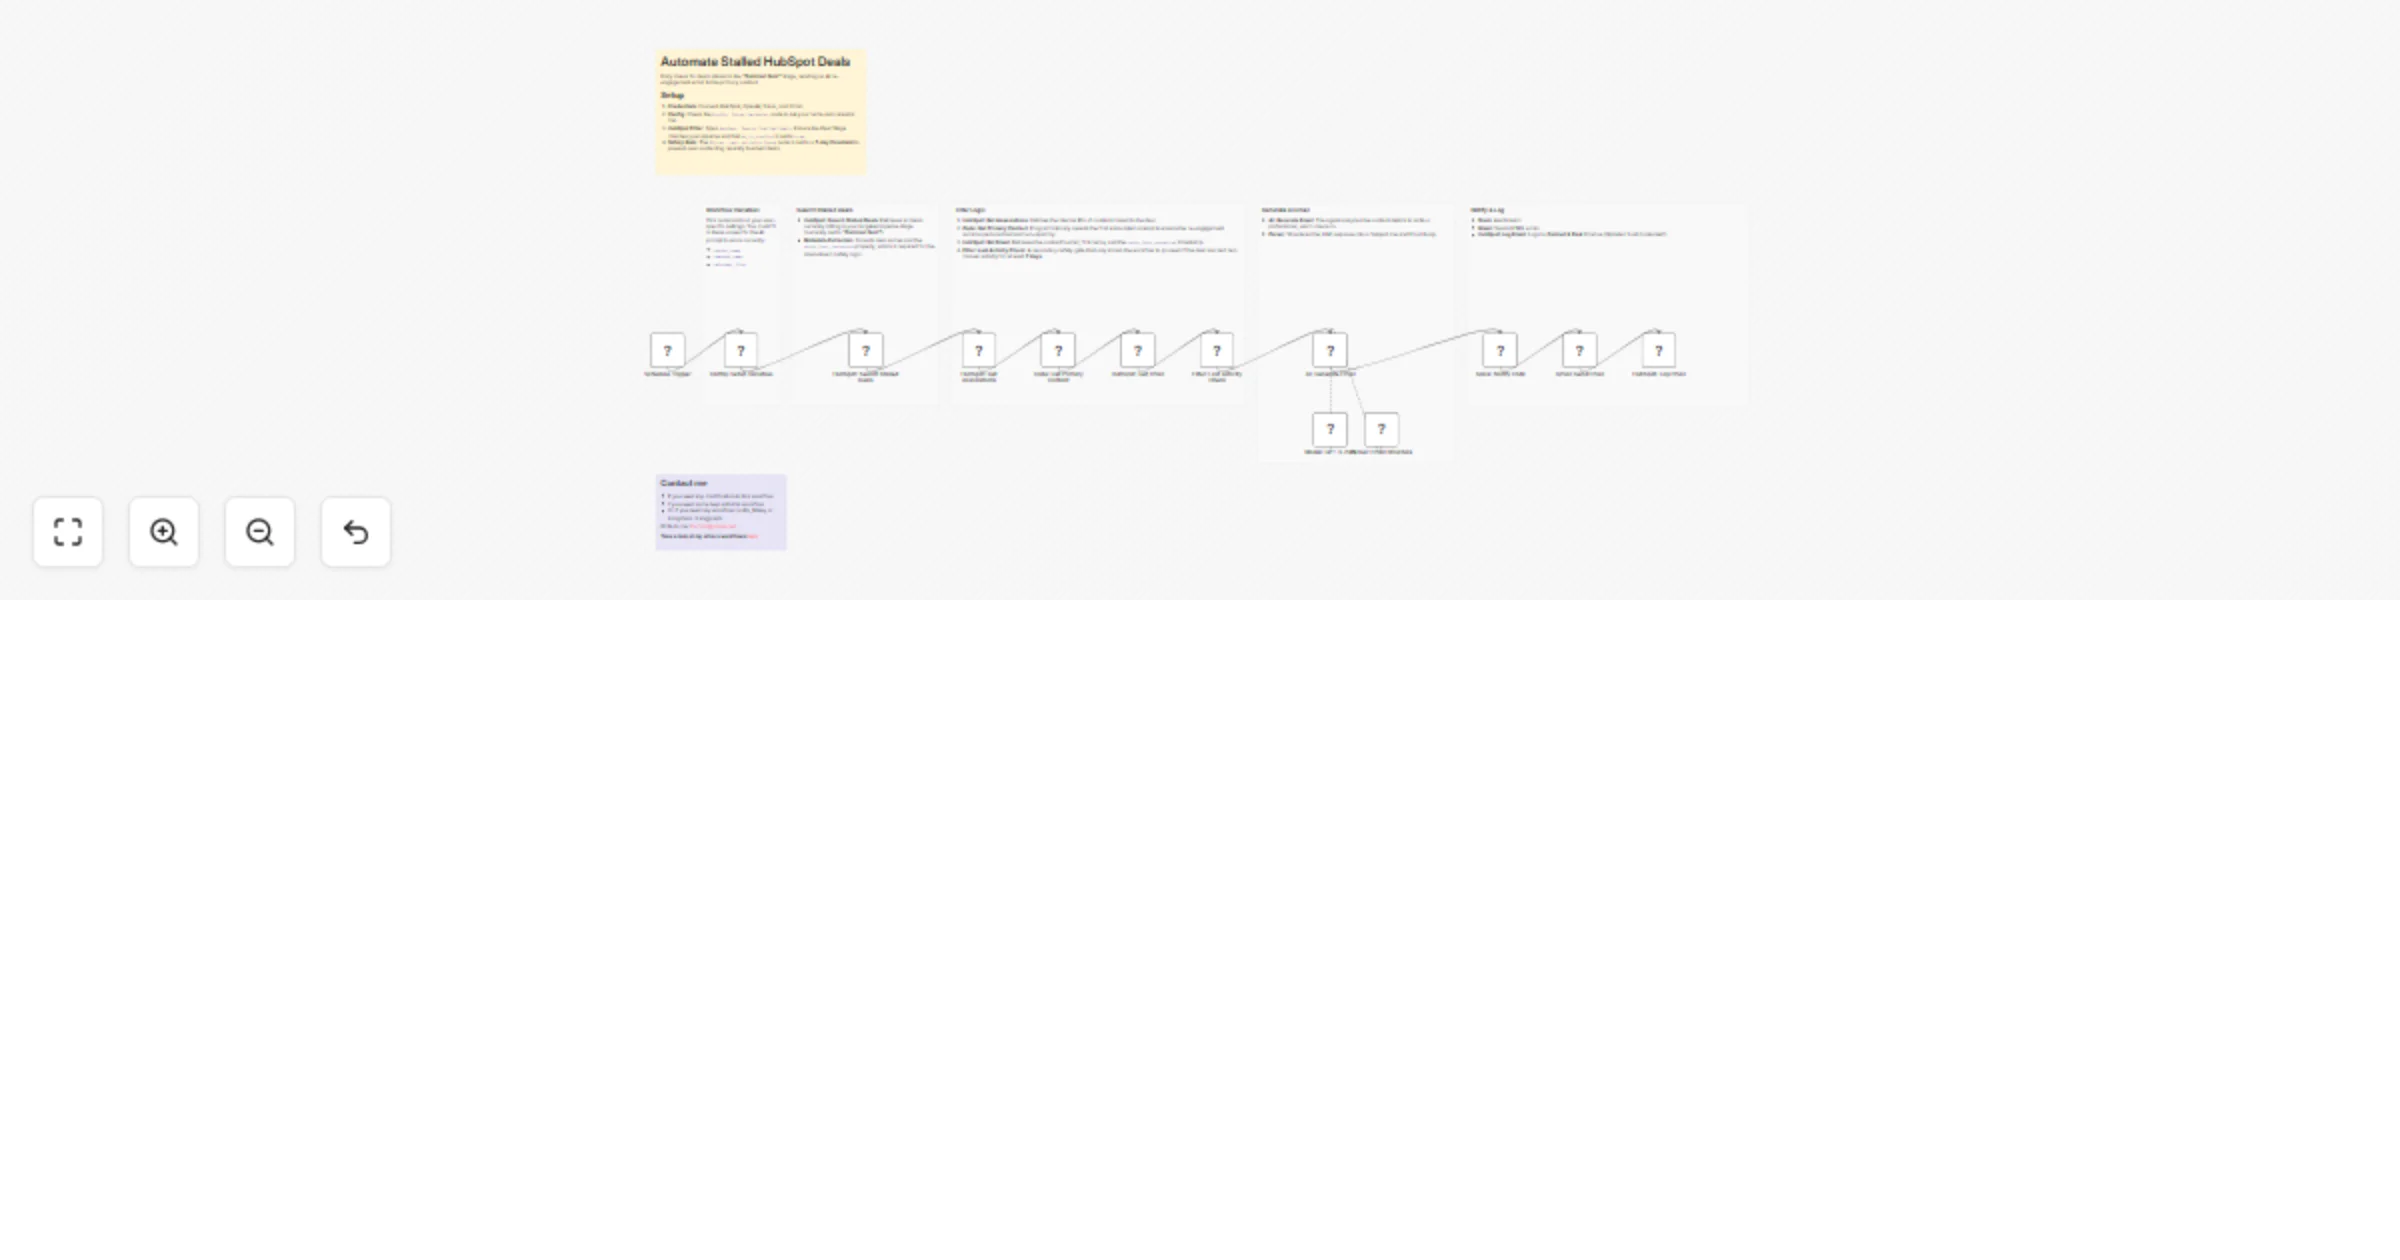
Re-engage stalled HubSpot deals with GPT-5-mini, Gmail, and Slack
Who is this for This workflow is designed for Customer Success Managers and Sales Teams who manage high volume pipeli...

Smart CSM assignment & AI welcome emails for HubSpot deal wins with Gmail
Who's it for This template is for Customer Success and Sales teams who use HubSpot. It automates the critical handoff...

Predict customer churn with AI analysis of HubSpot and Google Sheets data
Who it’s for Built for Customer Success and Account Management teams focused on proactive retention. This workflow he...

AI-powered customer feedback analysis & routing for Gmail, Zendesk, Slack & Pipedrive
Who's it for This workflow is for Customer Success, Product, and Support teams who need to centralize and analyze uns...

Create workflow inventory dashboard with n8n API and Google Sheets
This workflow provides a powerful way to automatically document and maintain an inventory of all your n8n workflows i...

Automate support ticket classification & routing from HubSpot to Jira with GPT
Who is this for? This n8n workflow template is designed for customer support , CX , and ops teams that manage custome...

Automate multi-step onboarding with Google Sheets, Forms and Gmail notifications
This n8n workflow enables teams to automate and standardize multi step onboarding or messaging workflows using Google...

Automate CSAT surveys with Freshdesk & store responses in Google Sheets
Never forget to send a satisfaction survey again! This workflow helps you automatically send CSAT surveys when a Fres...

Automate new customer onboarding with HubSpot, Google Calendar, and AI-powered Gmail
This n8n workflow streamlines the onboarding process for new customers by automating personalized email communication...

Sync HubSpot contacts with LinkedIn URLs, detect changes & send Gmail alerts
Automate CSV imports into HubSpot without the mess. Powered by n8n. Supercharged by Pollup AI. Who’s this for? This w...

CSV to HubSpot Uploader with Dynamic Field Mapping and Google Sheets Integration
Who is this for? This n8n workflow is designed for Customer Success Managers (CSM) , marketers, sales teams, and data...

Update Hubspot engagement by parsing inbox mail with AI
Who is this for? This workflow is designed for Customer Success Managers (CSM), sales, support, or marketing teams us...

Analyze client transcripts & route feedback with GPT-4o Mini, HubSpot, and Gmail
Who is this for? This workflow is designed for Customer Satisfaction Managers (CSM), sales professionals, and operati...
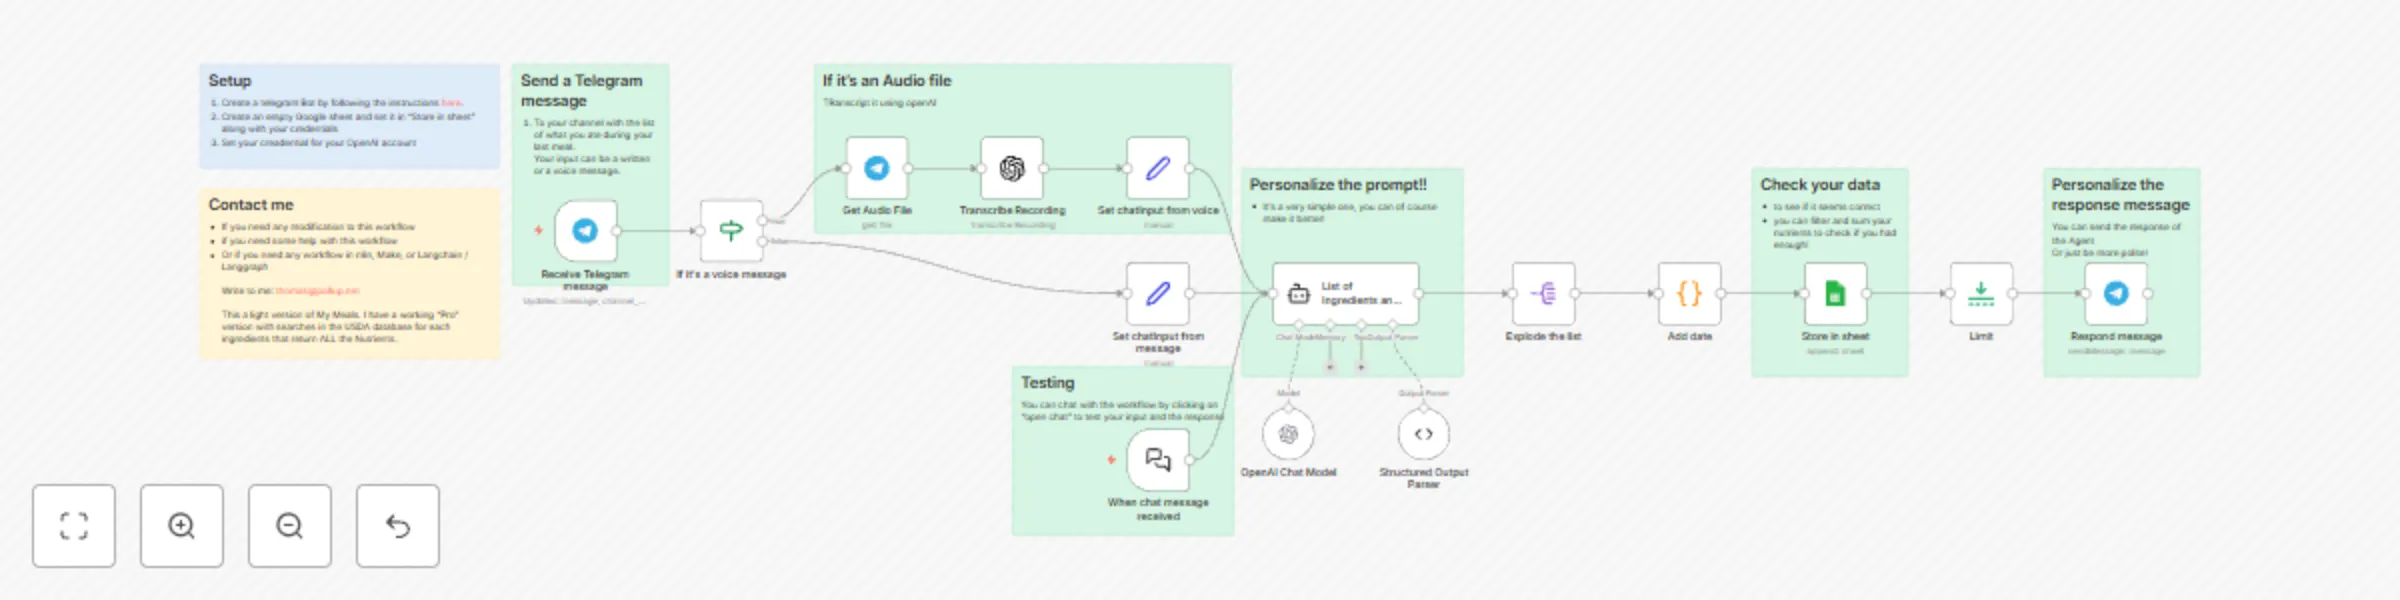
Log meal nutrients from Telegram to Google Sheets using an AI agent
Who is this for? This workflow is ideal for individuals focused on nutrition tracking, meal planning, or diet optimiz...
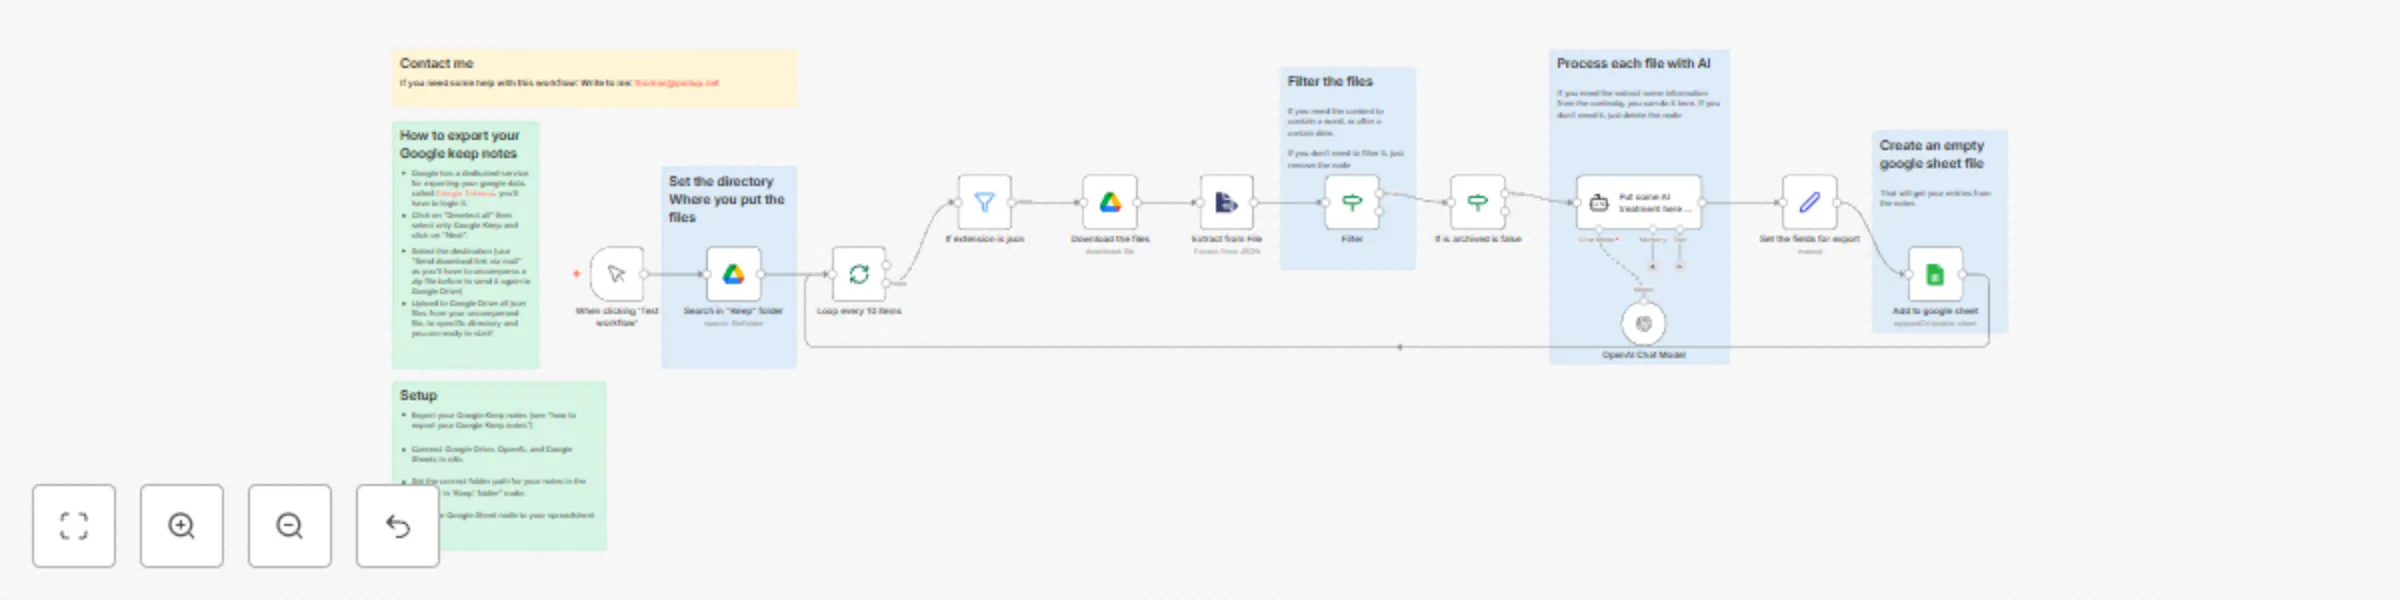
Import Google Keep notes to Google Sheets using OpenAI and Google Drive
This n8n workflow automates the import of your Google Keep notes into a structured Google Sheet, using Google Drive,...
Automate LinkedIn requests & icebreaker with Browserflow and Google sheets
Disclaimer: As this workflow uses a Community node, it is available only to self hosted installation of n8n Who is th...

Automate LinkedIn contact requests & icebreaker with Unipile and Google sheets
Automate your LinkedIn Contact Requests and send them an Icebreaker Disclaimer: this workflow only works on self host...

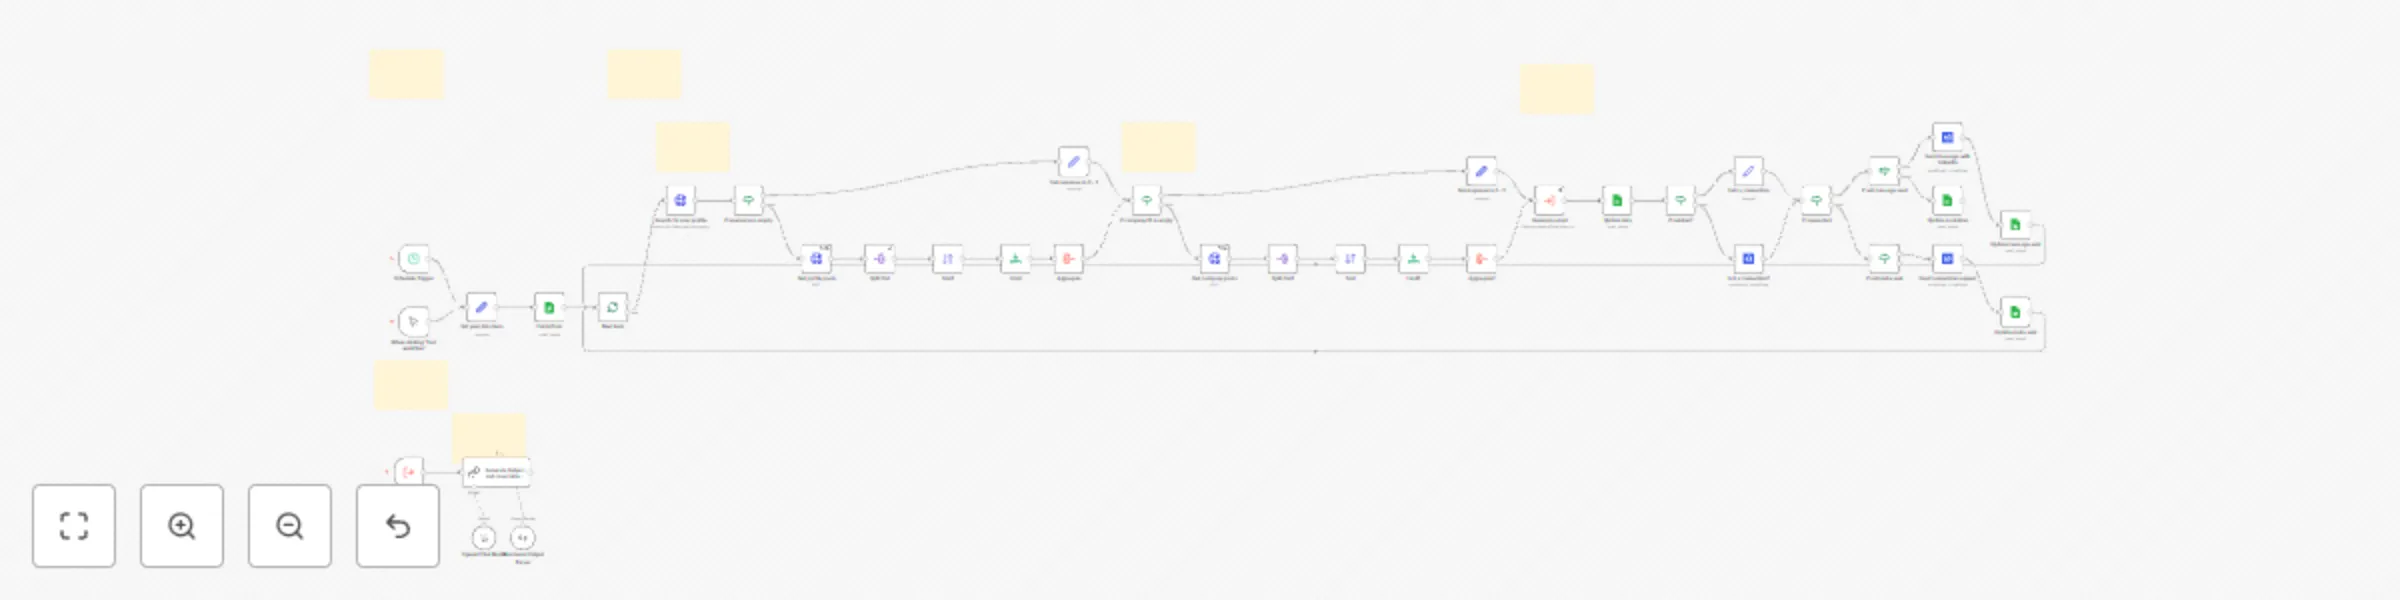
Social media analysis and automated email generation
Social Media Analysis and Automated Email Generation > by Thomas Vie [email protected] Who is this for? This templ...

Enrich Linkedin profiles from Google Sheets via RapidAPI
LinkedIn Profile Enrichment Workflow Who is this for? This workflow is ideal for recruiters, sales professionals, and...
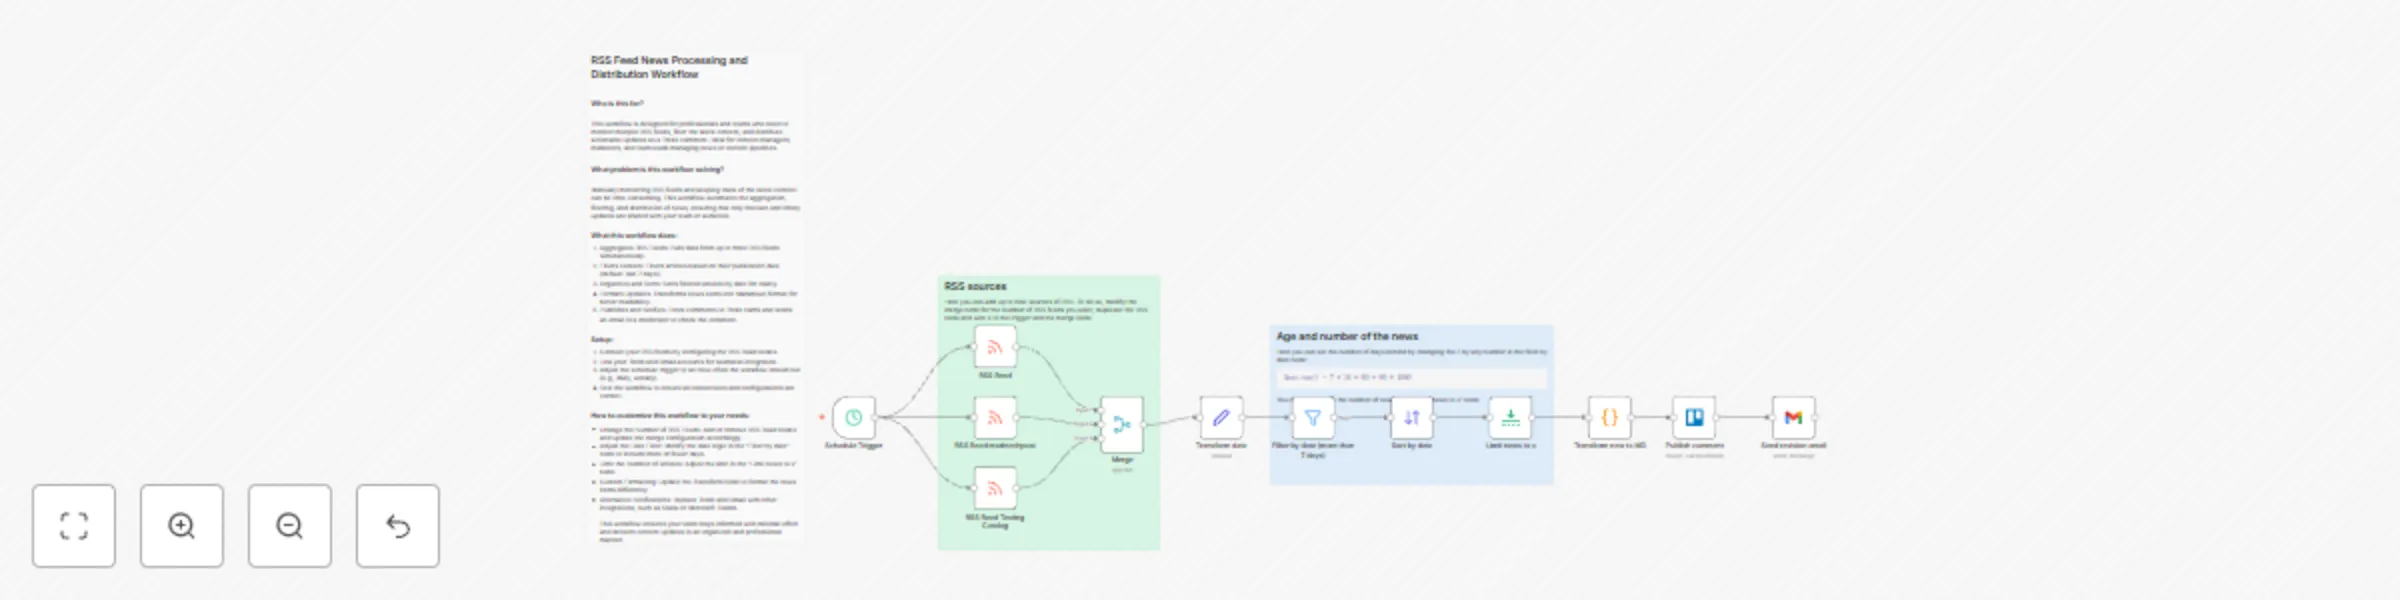
Rss feed news processing and distribution workflow
Who is this for? This workflow is designed for professionals and teams who need to monitor multiple RSS feeds, filter...