
KlickTipp
Workflows by KlickTipp
Create WordPress users from KlickTipp and tag contacts based on comments
Community Node Disclaimer This workflow uses KlickTipp community nodes , available for self hosted n8n instances only...
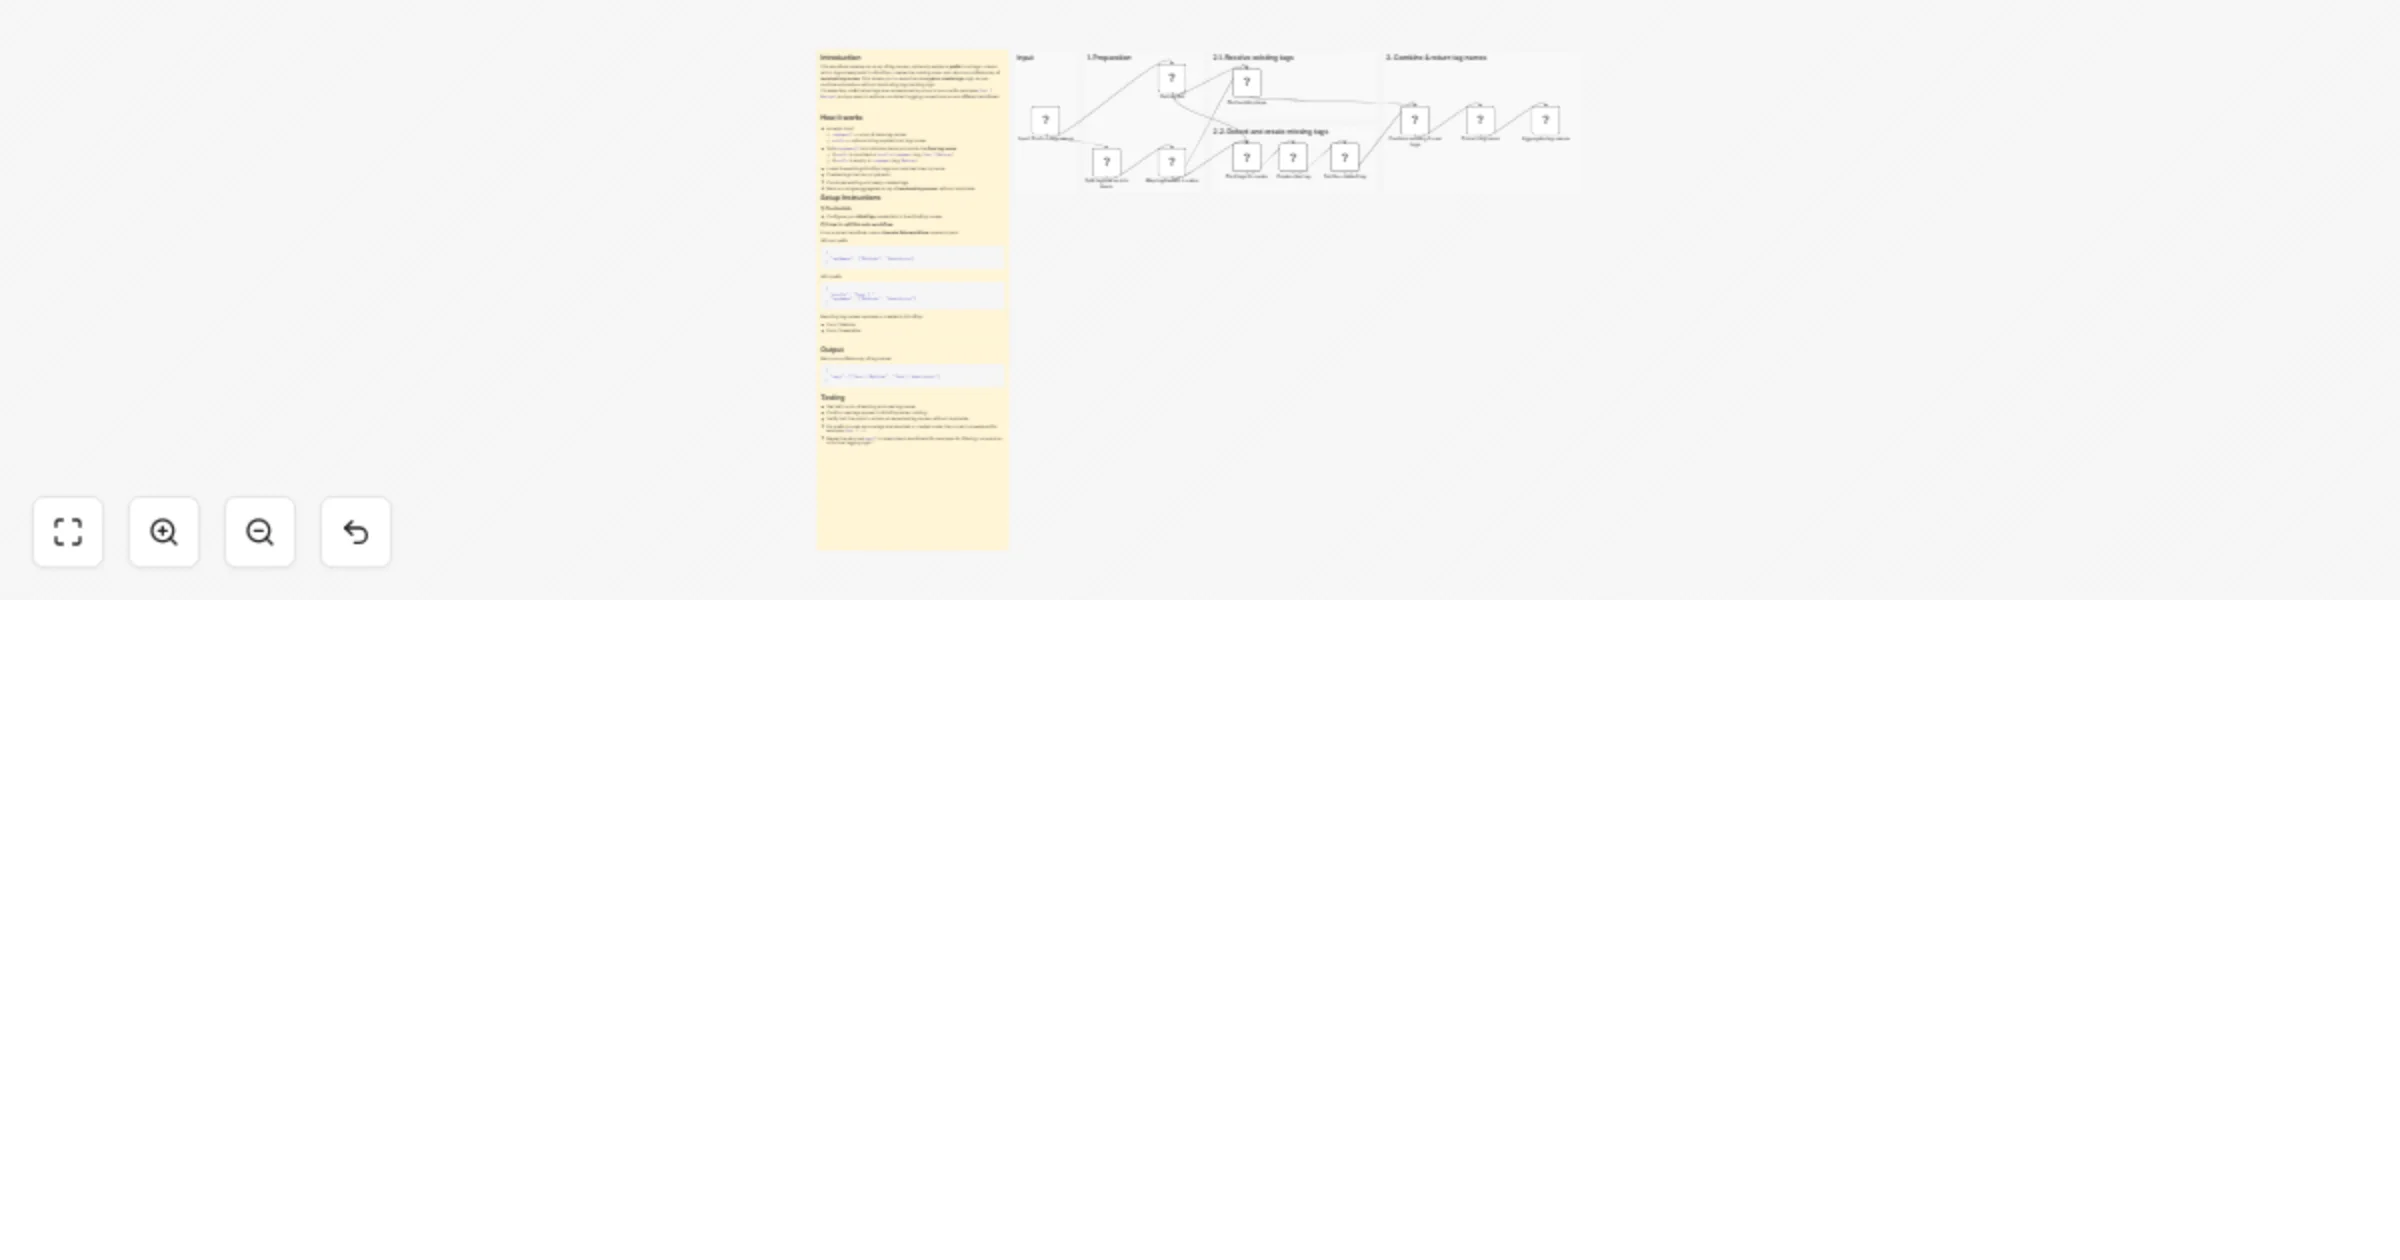
Resolve and create KlickTipp tags from names with optional prefixes
Community Node Disclaimer This workflow uses KlickTipp community nodes , available for self hosted n8n instances only...
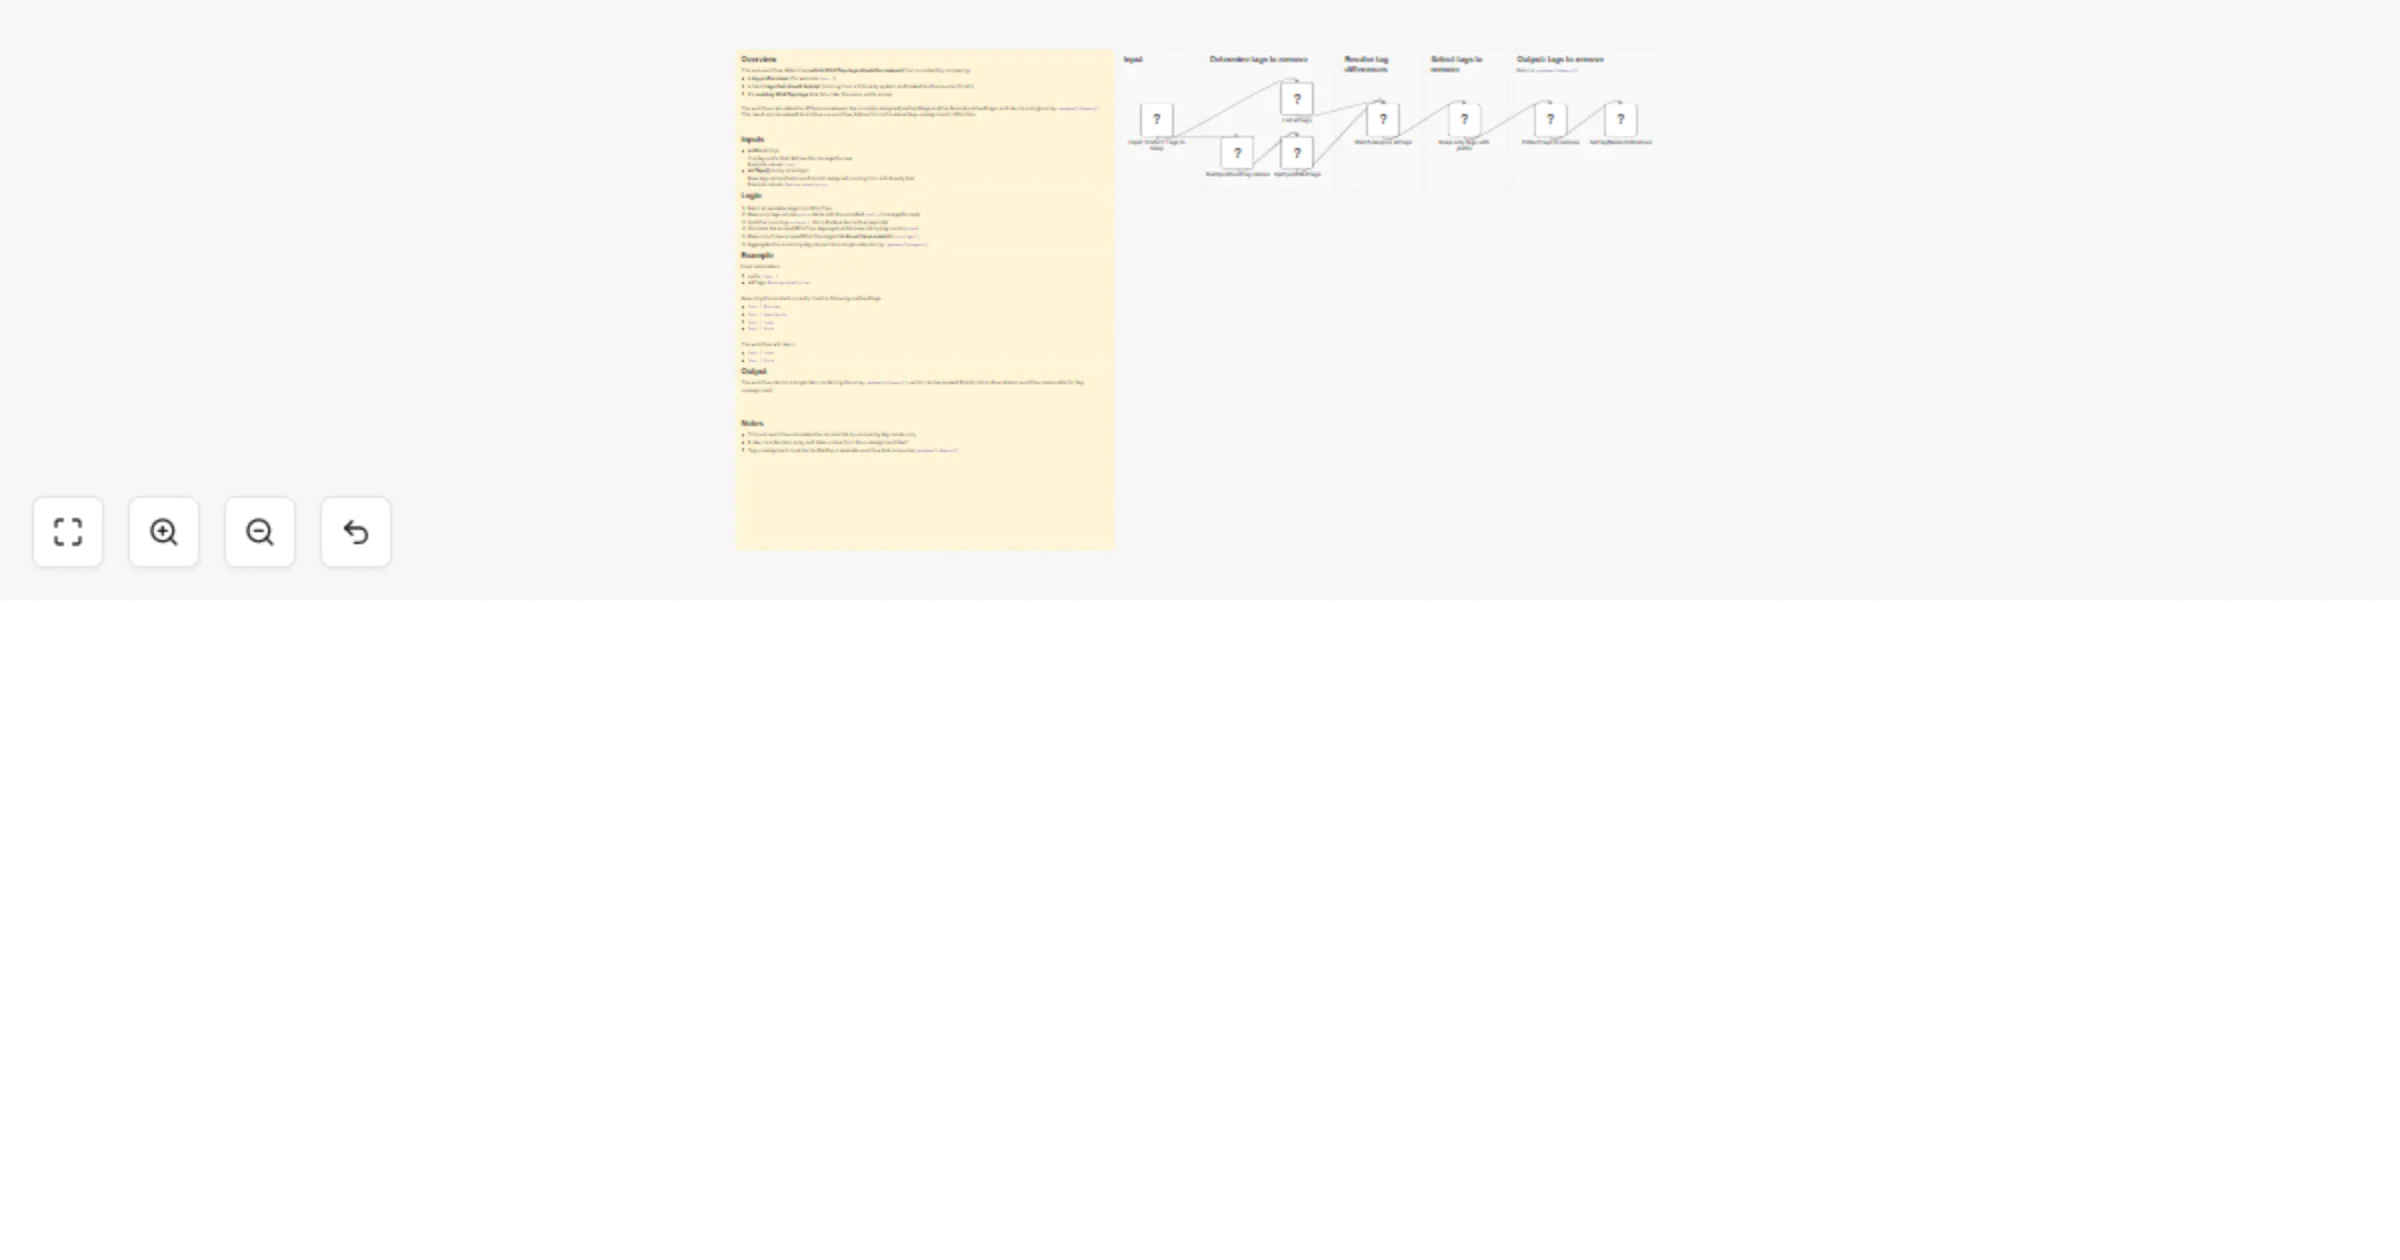
Find KlickTipp tags to remove by prefix
Community Node Disclaimer This workflow uses KlickTipp community nodes , available for self hosted n8n instances only...
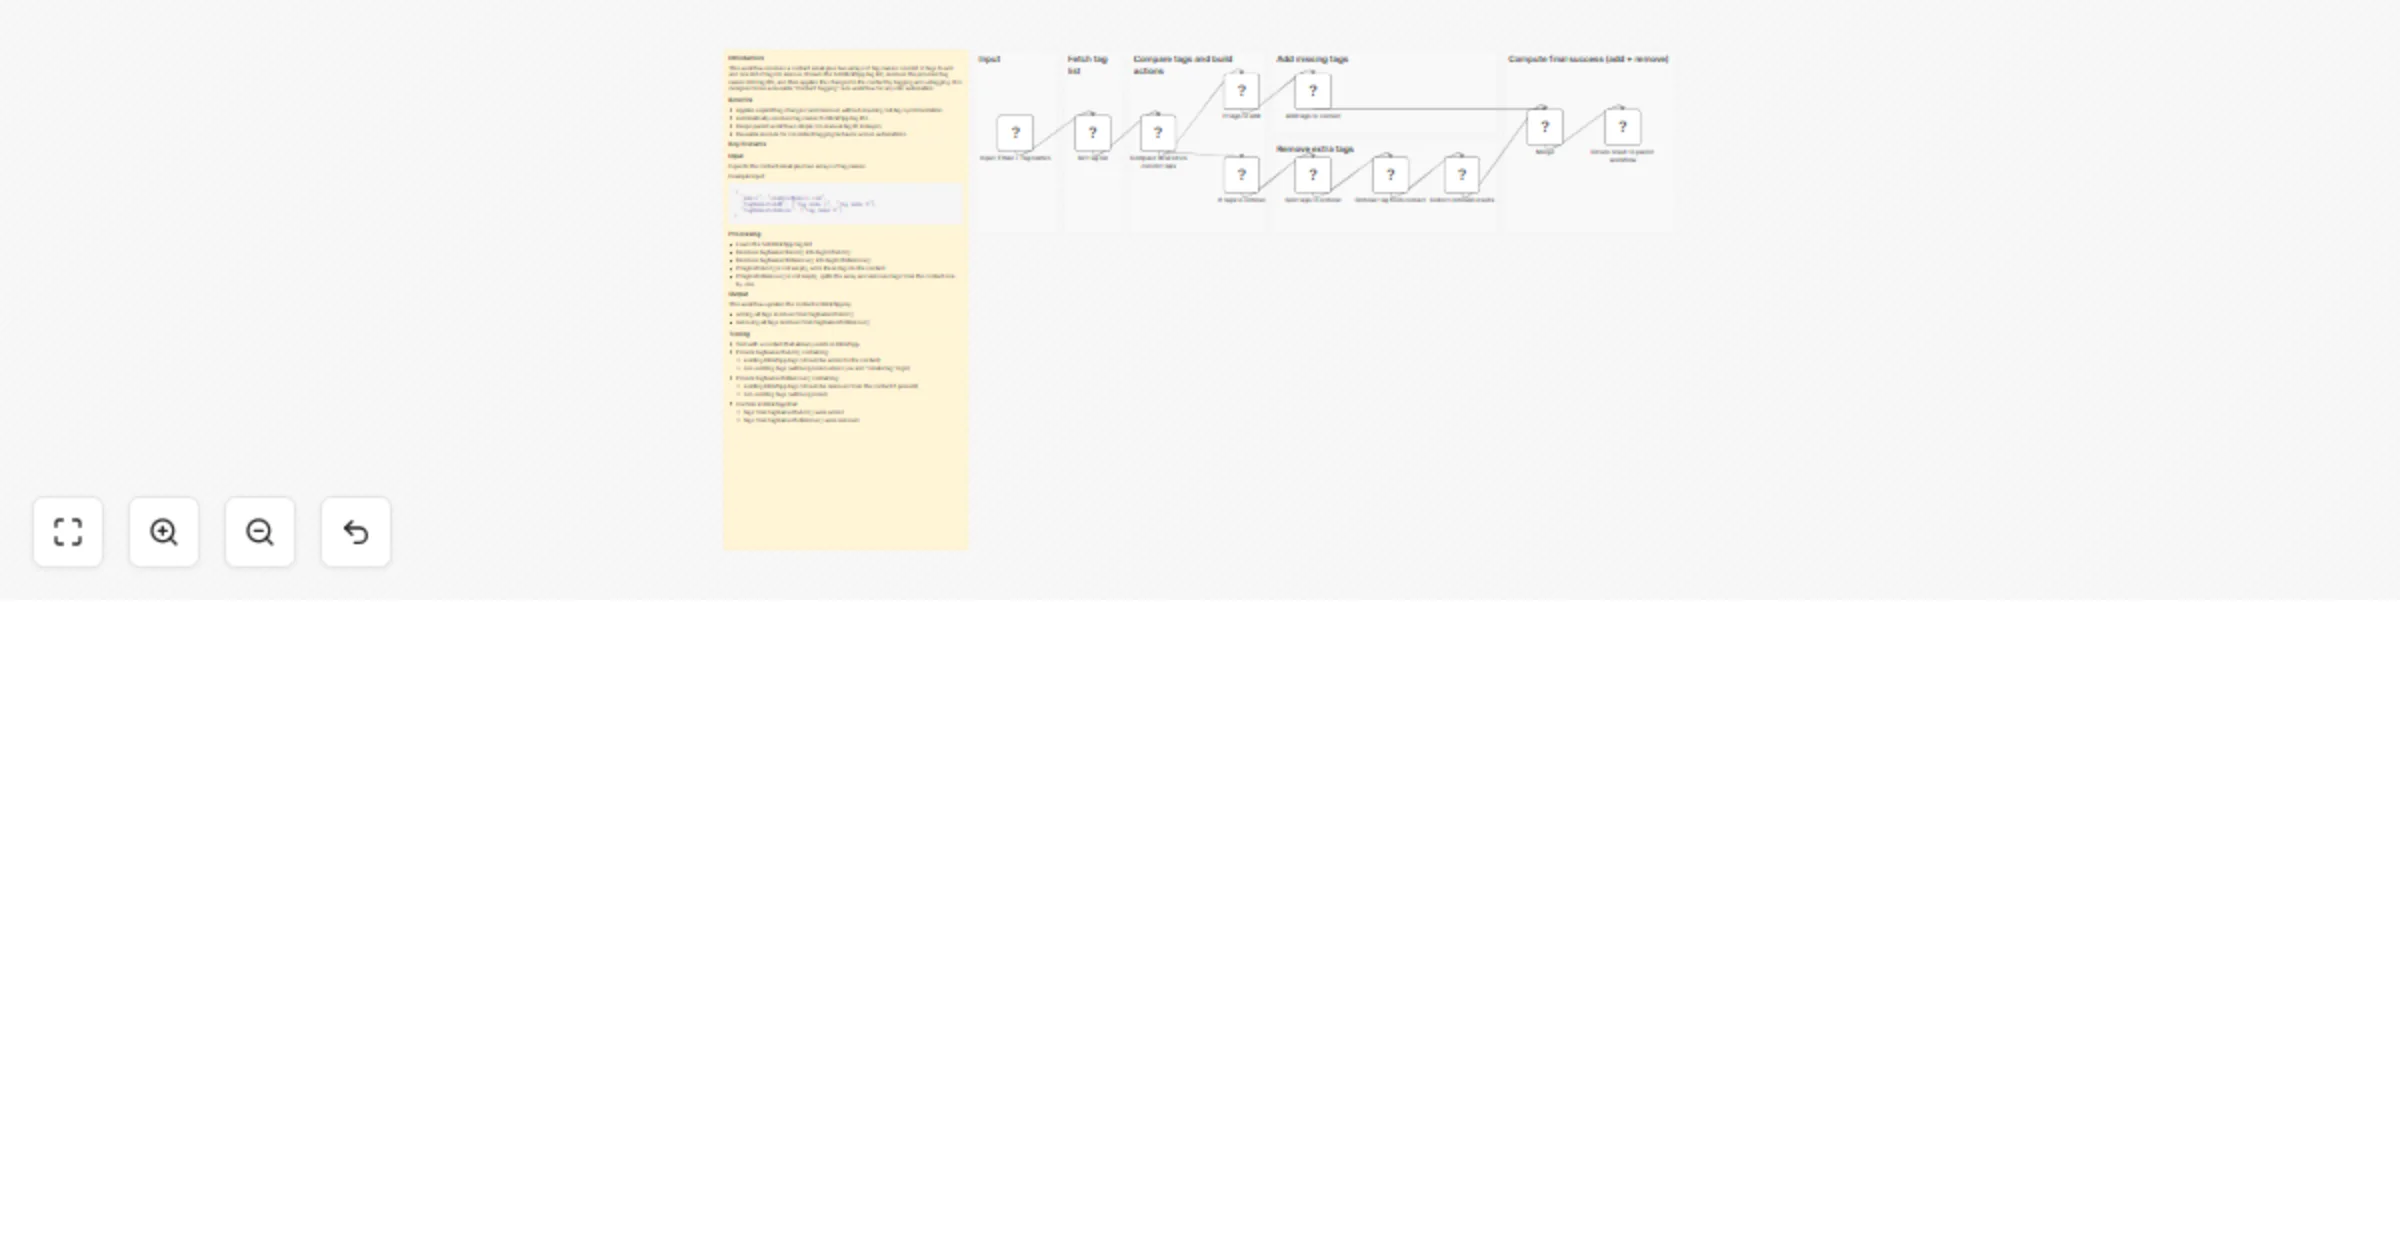
Update KlickTipp contact tags by tag names
Community Node Disclaimer This workflow uses KlickTipp community nodes , available for self hosted n8n instances only...
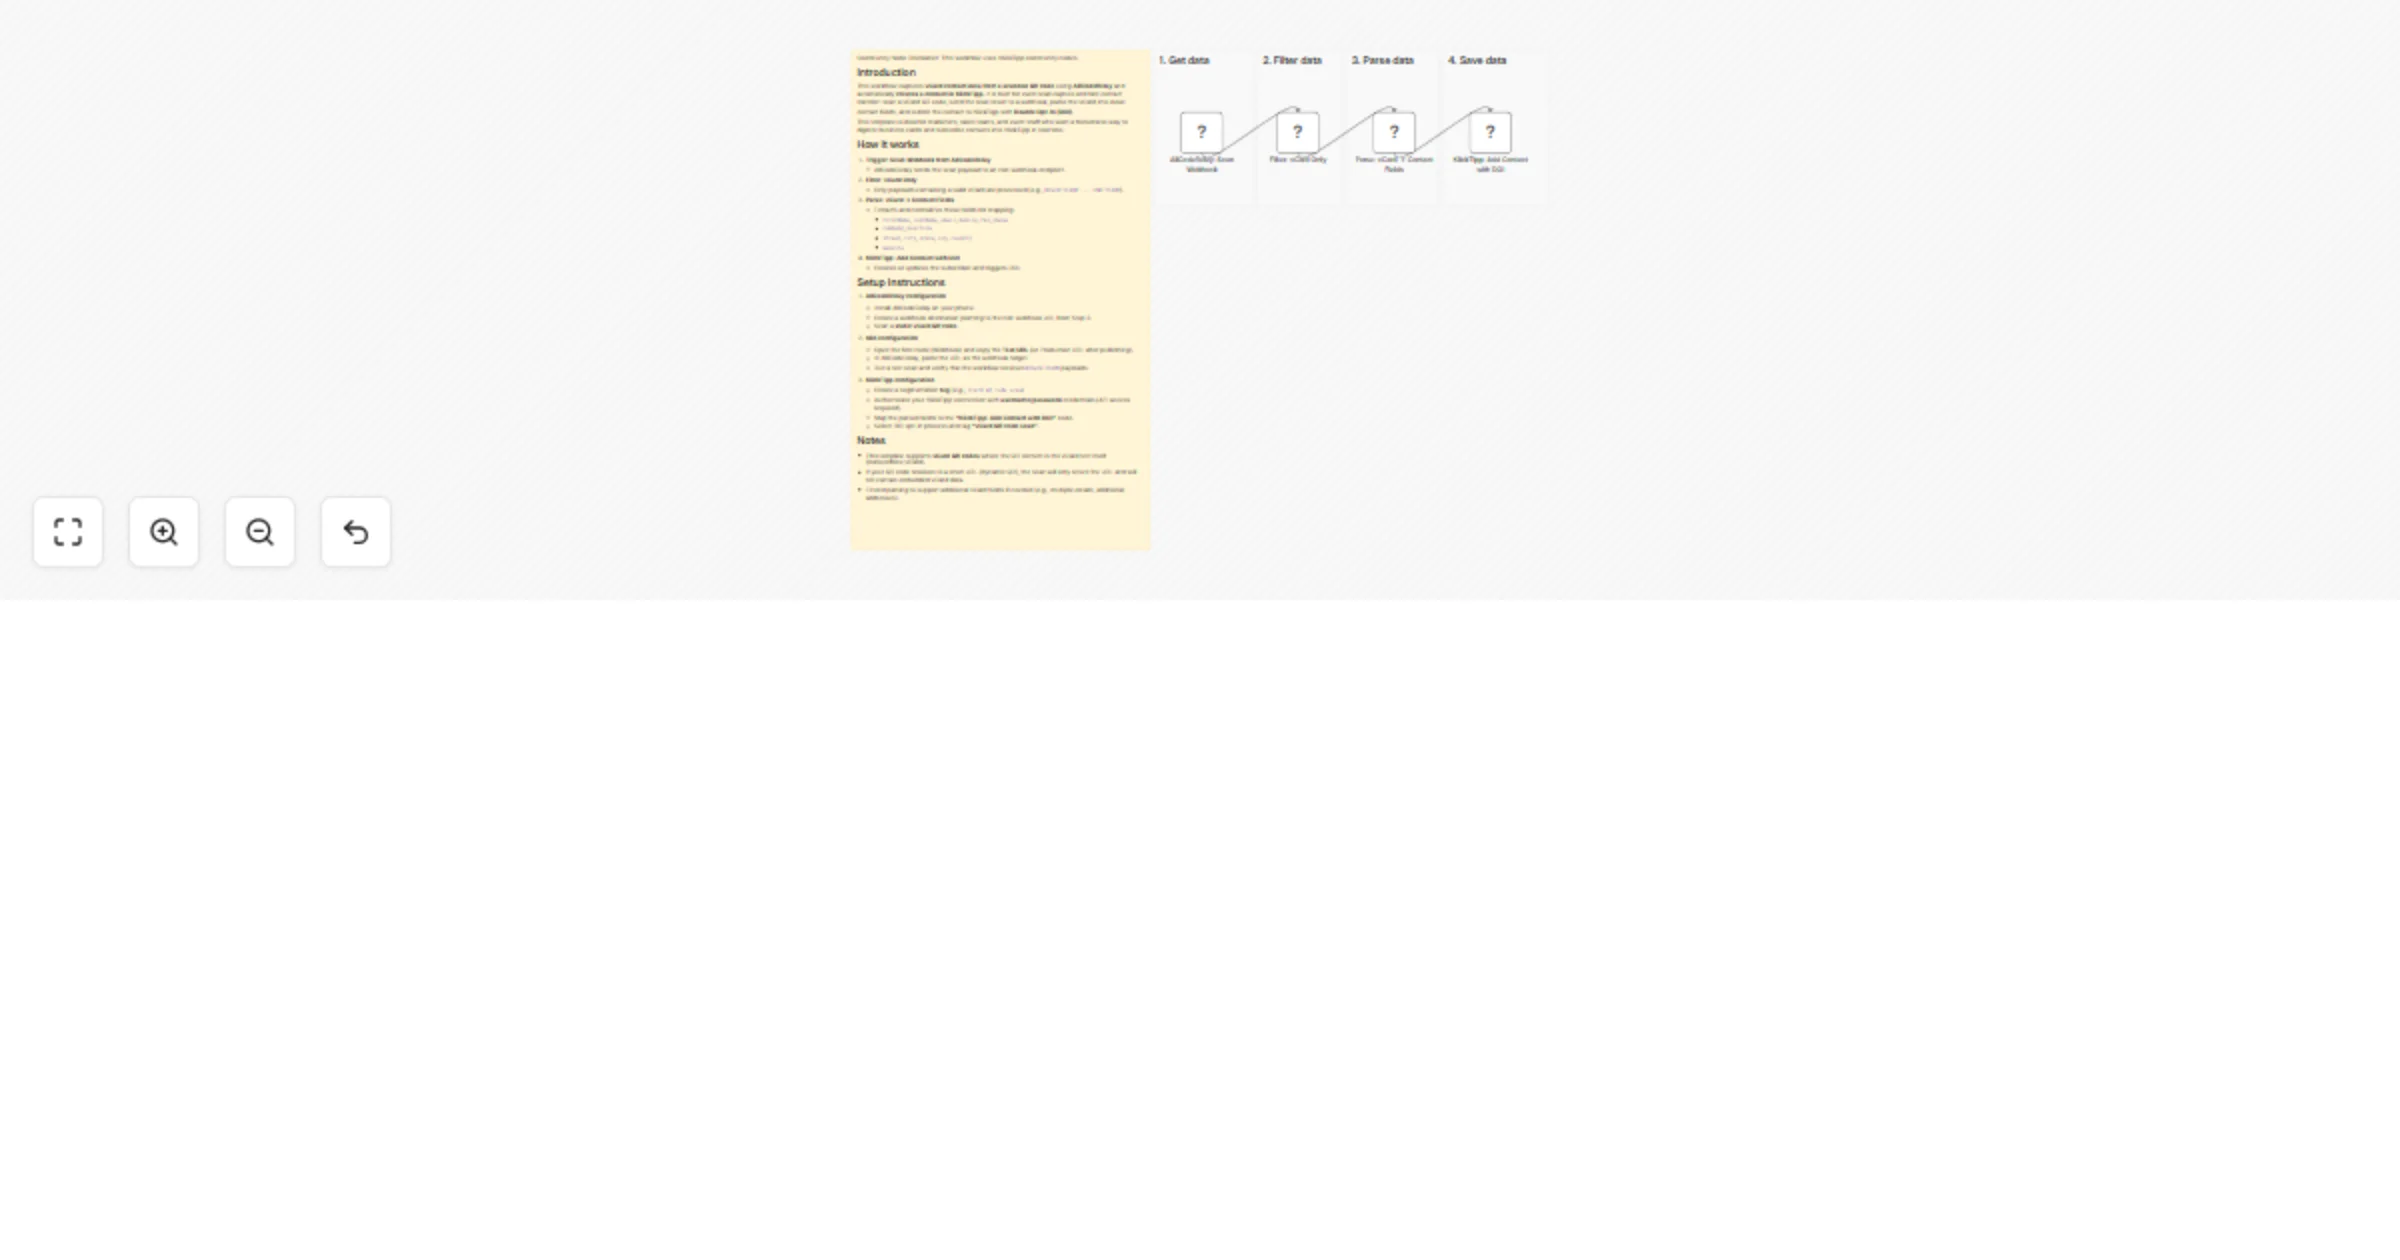
Capture vCard QR code contacts with AllCodeRelay and add them to KlickTipp
Community Node Disclaimer: This workflow uses KlickTipp community nodes. Introduction This workflow captures vCard co...
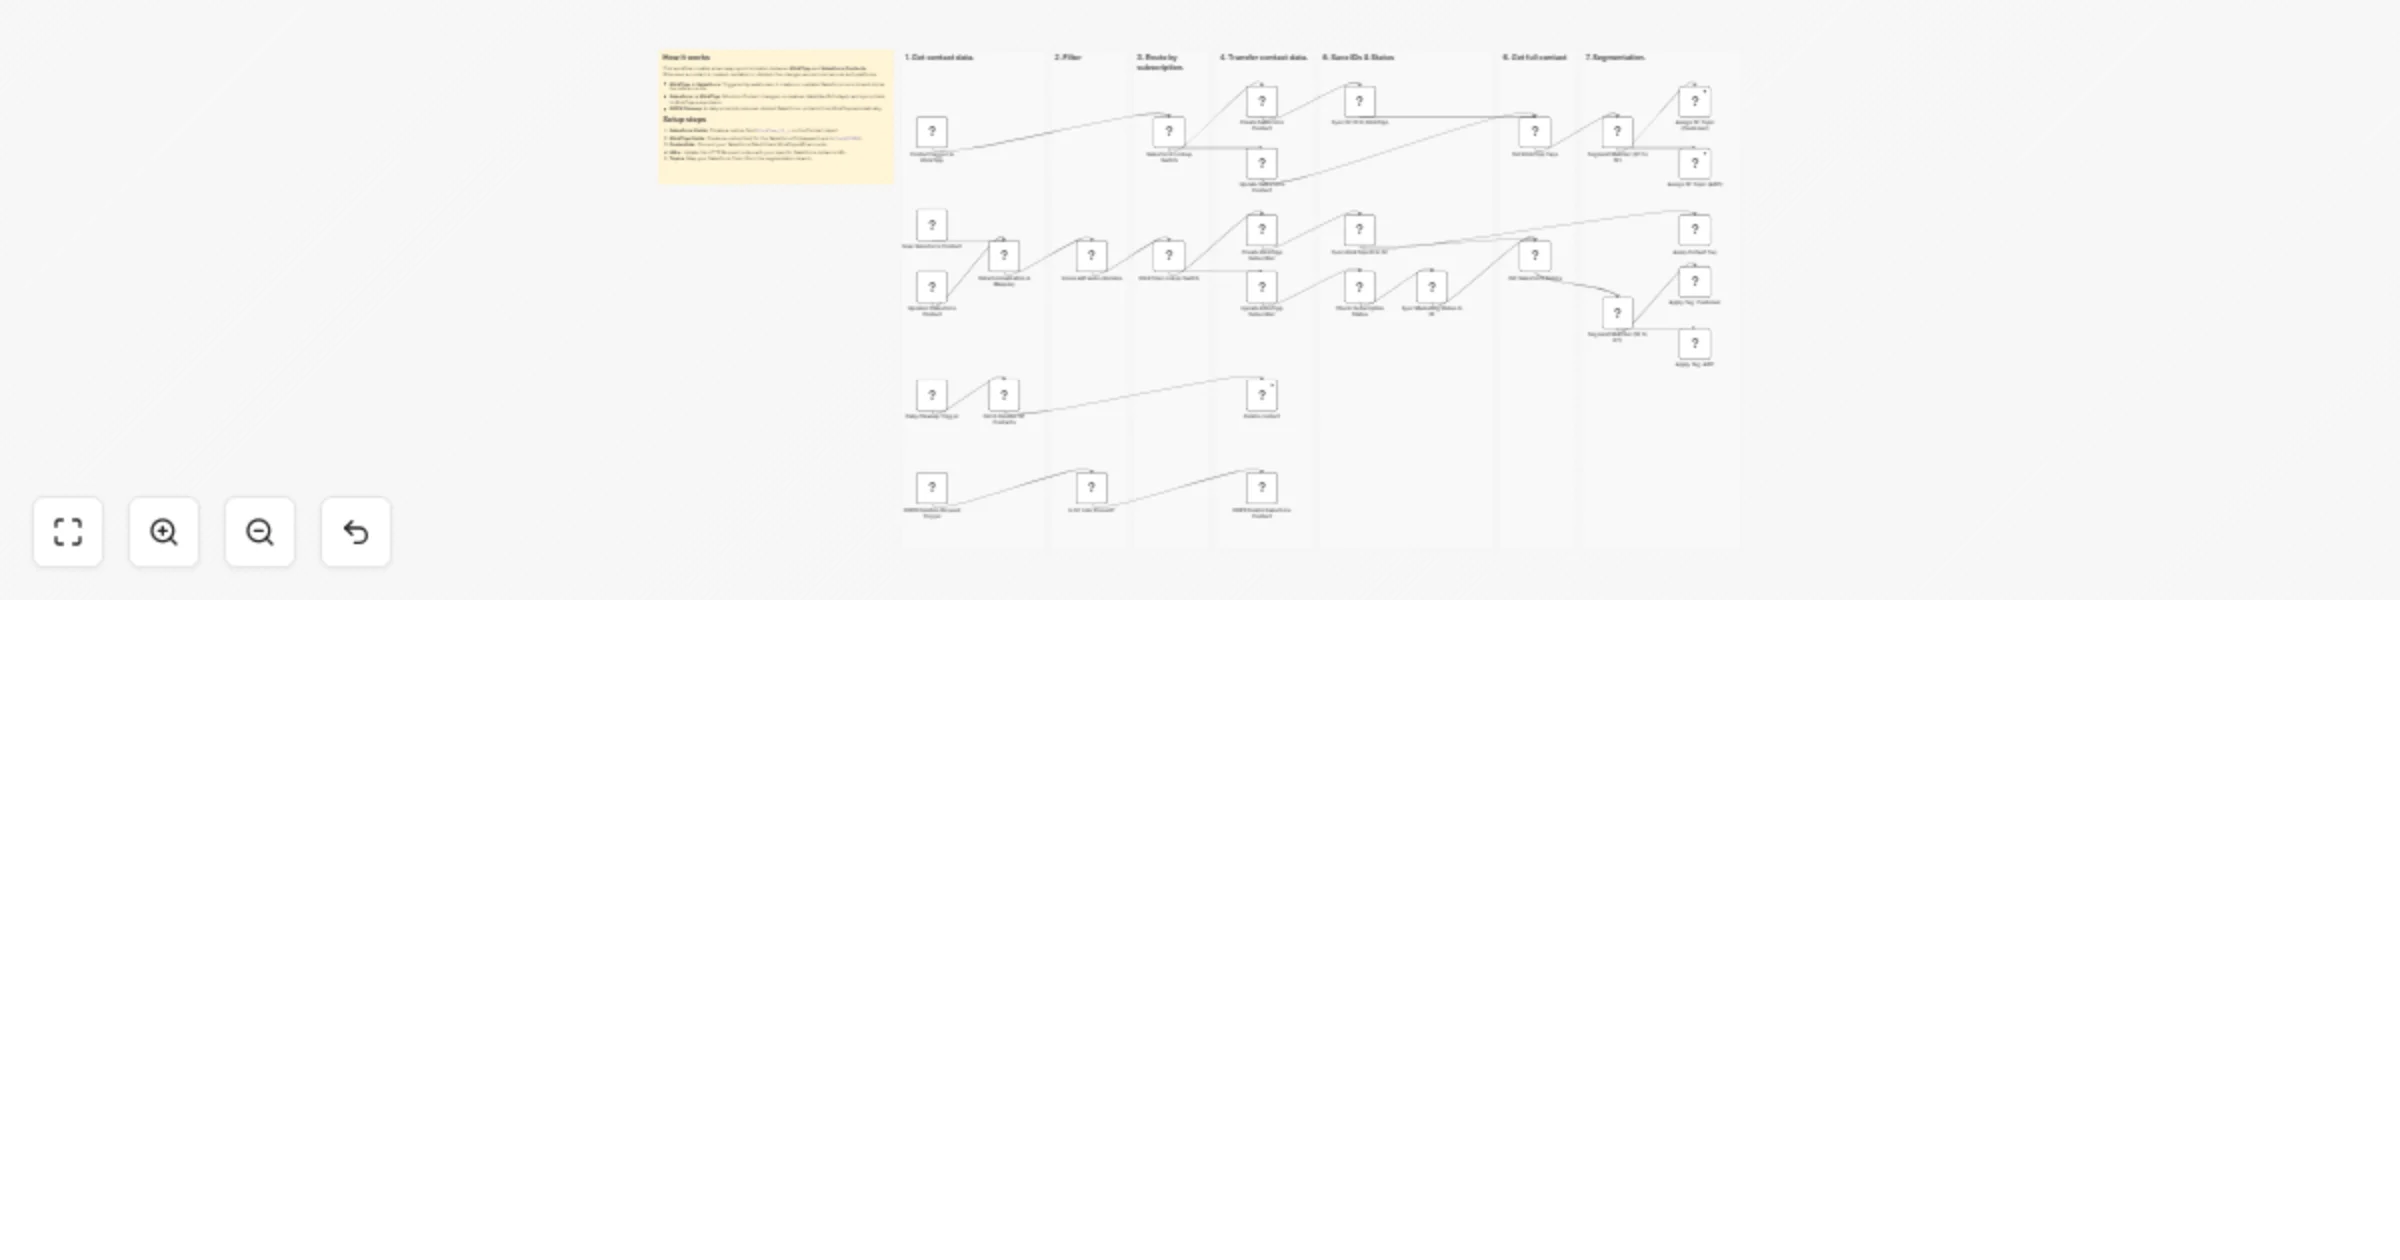
Sync contacts, consent, and segments between KlickTipp and Salesforce
Community Node Disclaimer This workflow uses KlickTipp community nodes , available for self hosted n8n instances only...
Sync contacts, consent, and segments between KlickTipp and Pipedrive
Community Node Disclaimer This workflow uses KlickTipp community nodes , available for self hosted n8n instances only...

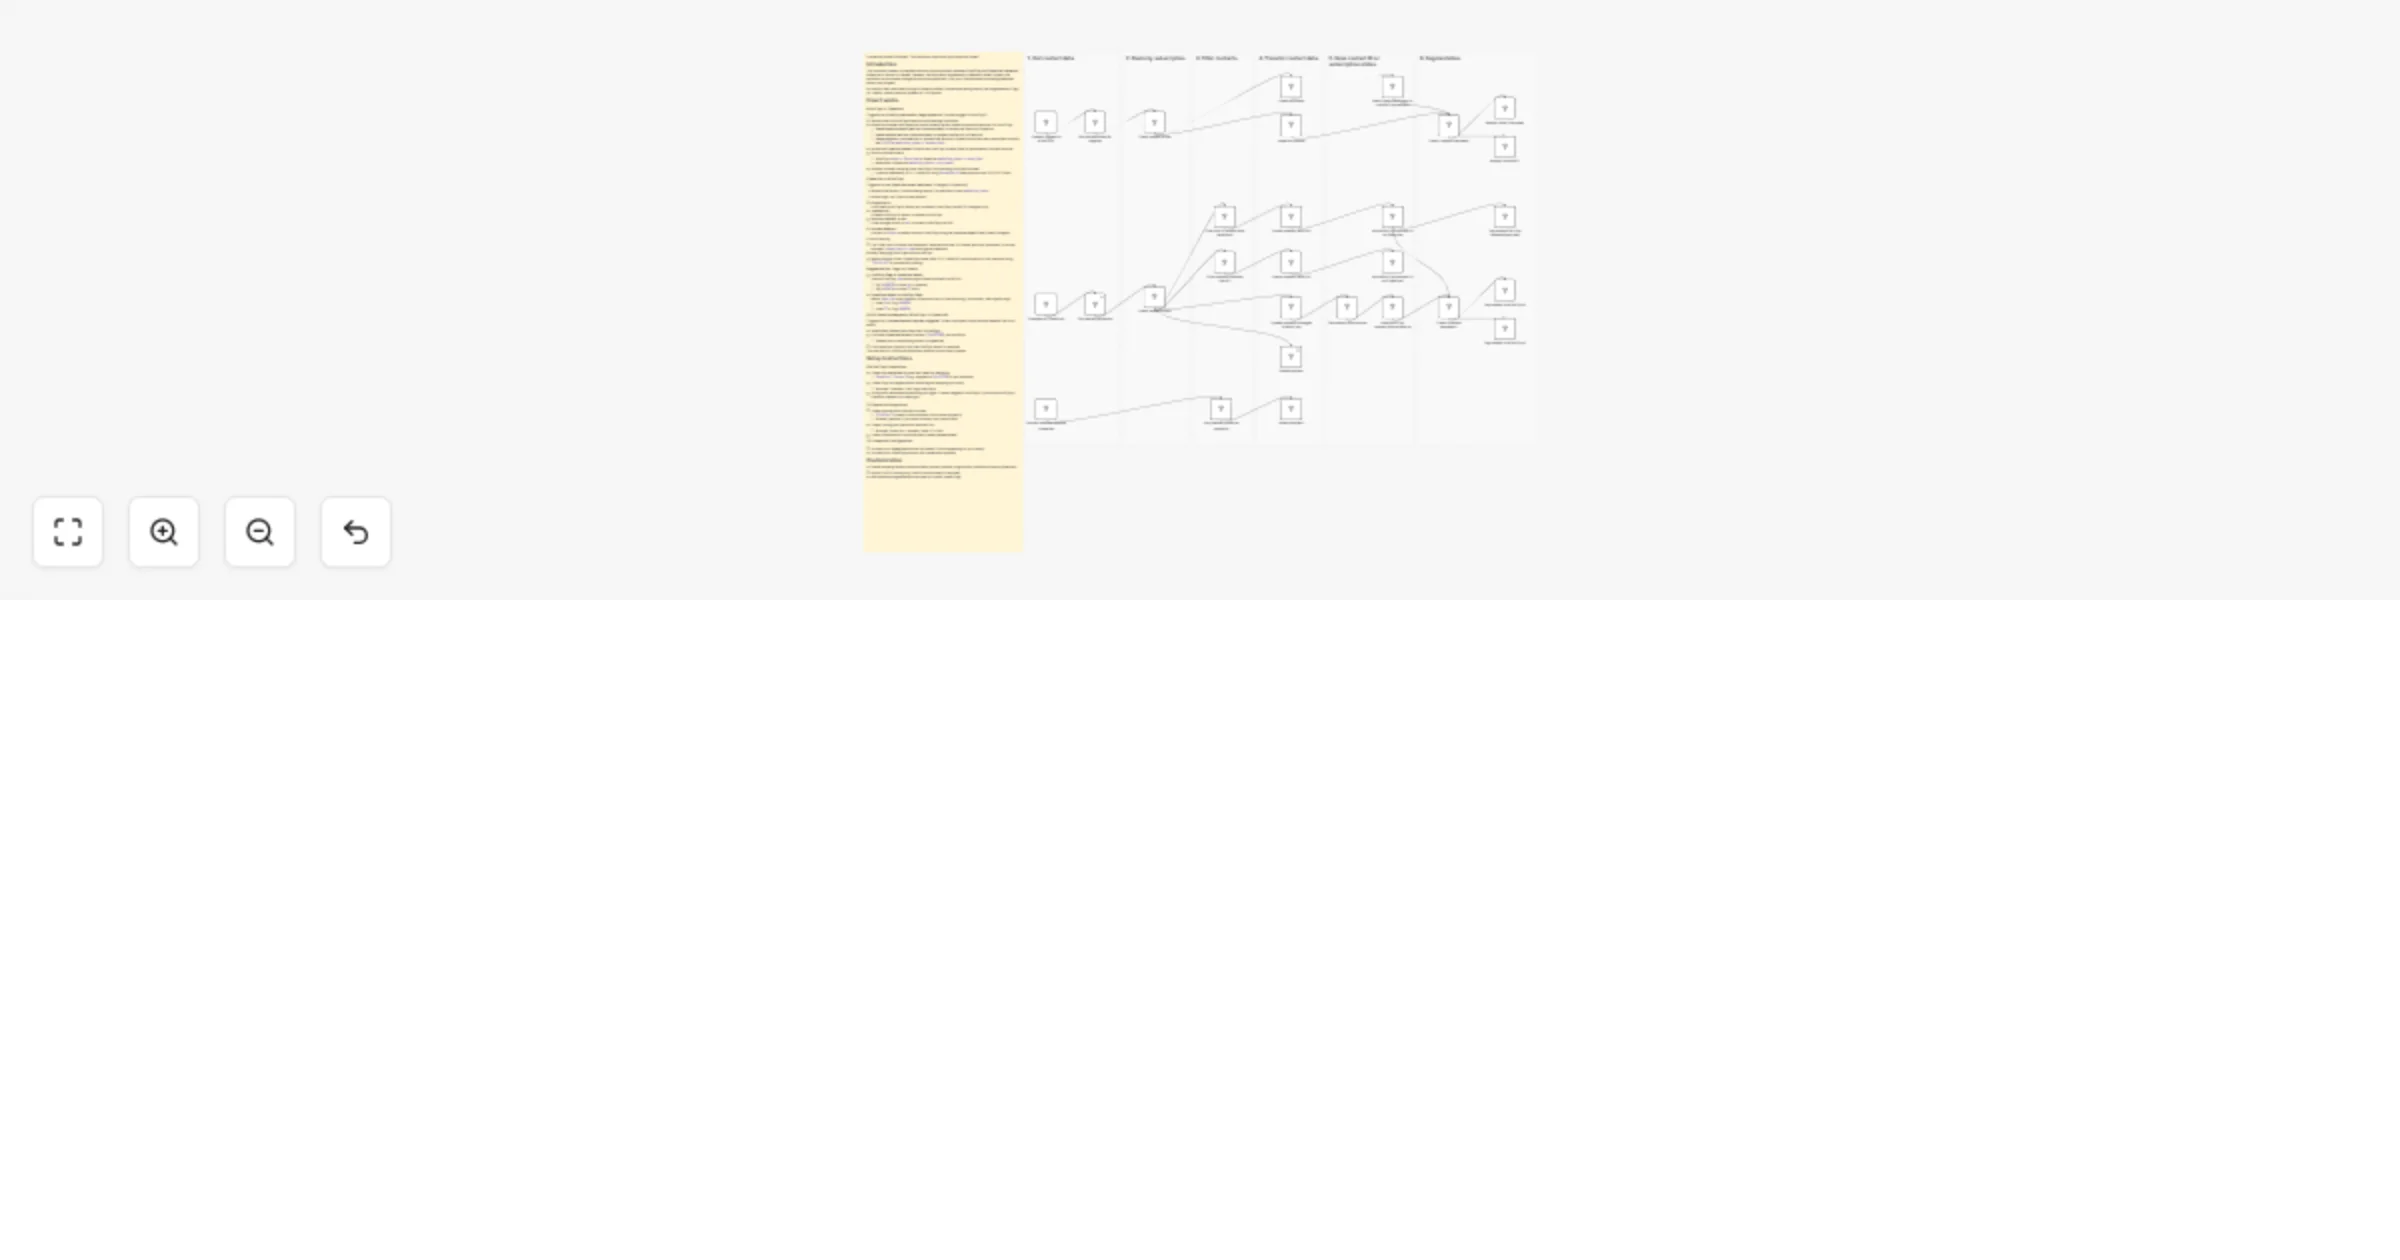
Sync contacts two-way between Zoho CRM and KlickTipp
Community Node Disclaimer: This workflow uses KlickTipp community nodes. Introduction This workflow creates a complet...
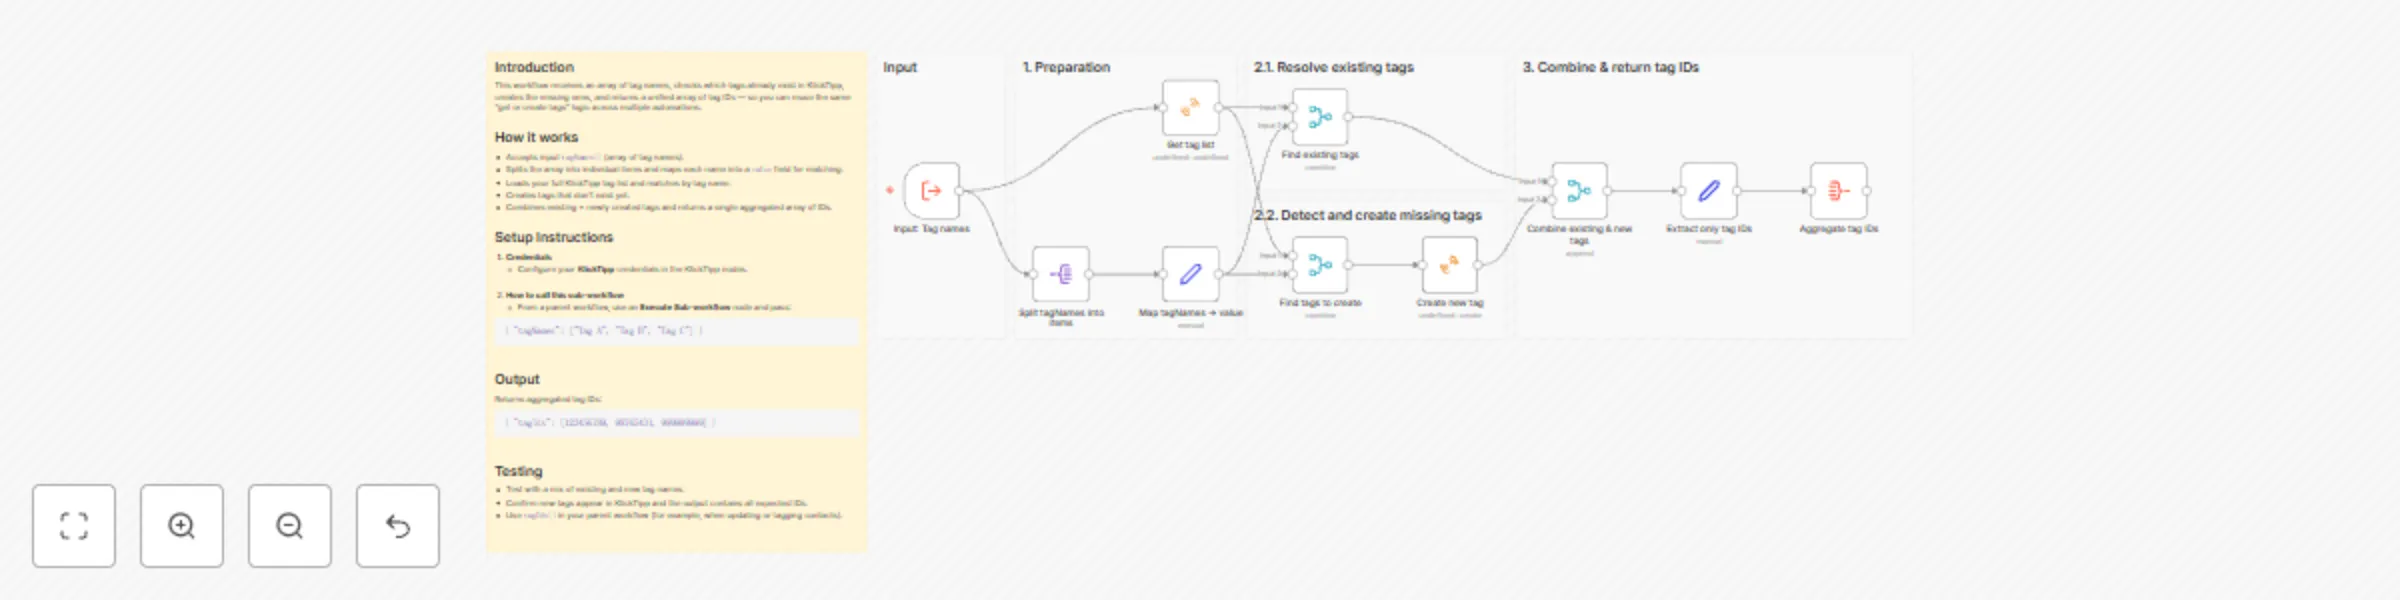
KlickTipp tag manager: convert tag names to IDs
Community Node Disclaimer This workflow uses KlickTipp community nodes , available for self hosted n8n instances only...

Synchronize events & attendees between KlickTipp and Google Calendar
Community Node Disclaimer: This workflow uses KlickTipp community nodes. Introduction This workflow creates a ...

Automatic Eventbrite attendance tagging in KlickTipp
> ⚠️ Community Node Disclaimer > This workflow uses KlickTipp community nodes and works only on self hosted...

Sync Eventbrite orders & refunds to KlickTipp for automated event marketing
Community Node Disclaimer This workflow uses KlickTipp community nodes and works only on self hosted n8n instances. I...

Automated Instagram lead enrichment with AI insights & KlickTipp CRM integration
Community Node Disclaimer This workflow uses KlickTipp community nodes , available for self hosted n8n instance...

Convert Instagram comments to leads with KlickTipp & custom DMs
Community Node Disclaimer This workflow uses KlickTipp community nodes , available for self hosted n8n instances only...

Automate Stripe customer data transfer to KlickTipp with dynamic tagging logic
Community Node Disclaimer: This workflow uses KlickTipp community nodes. How It Works This work...

Sync Adobe Commerce Customer Data to KlickTipp with Value-Based Tagging
Community Node Disclaimer: This workflow uses KlickTipp community nodes. Introduction This wor...

Automate Zoom attendee segmentation in KlickTipp based on participation
Community Node Disclaimer : This workflow uses KlickTipp community nodes. Introduction This workflow automates the en...

Send personalized transactional emails from KlickTipp via SMTP
Community Node Disclaimer : This workflow uses KlickTipp community nodes. How It Works Automate transactional emails...

Automated KlickTipp to Gmail: send transactional emails
Community Node Disclaimer : This workflow uses KlickTipp community nodes. How It Works Automate transactional emails...

Automated meeting attendance tagging for Zoom Webinars with KlickTipp
Community Node Disclaimer : This workflow uses KlickTipp community nodes. Introduction This workflow listens to Zoom...

Automate webinar registration with Zoom & KlickTipp form integration
Community Node Disclaimer : This workflow uses KlickTipp community nodes. Introduction This workflow automates Zoom r...

Automated Stripe to KlickTipp: send purchase confirmation emails via tagging
Community Node Disclaimer : This workflow uses KlickTipp community nodes. Introduction This workflow automates Stripe...

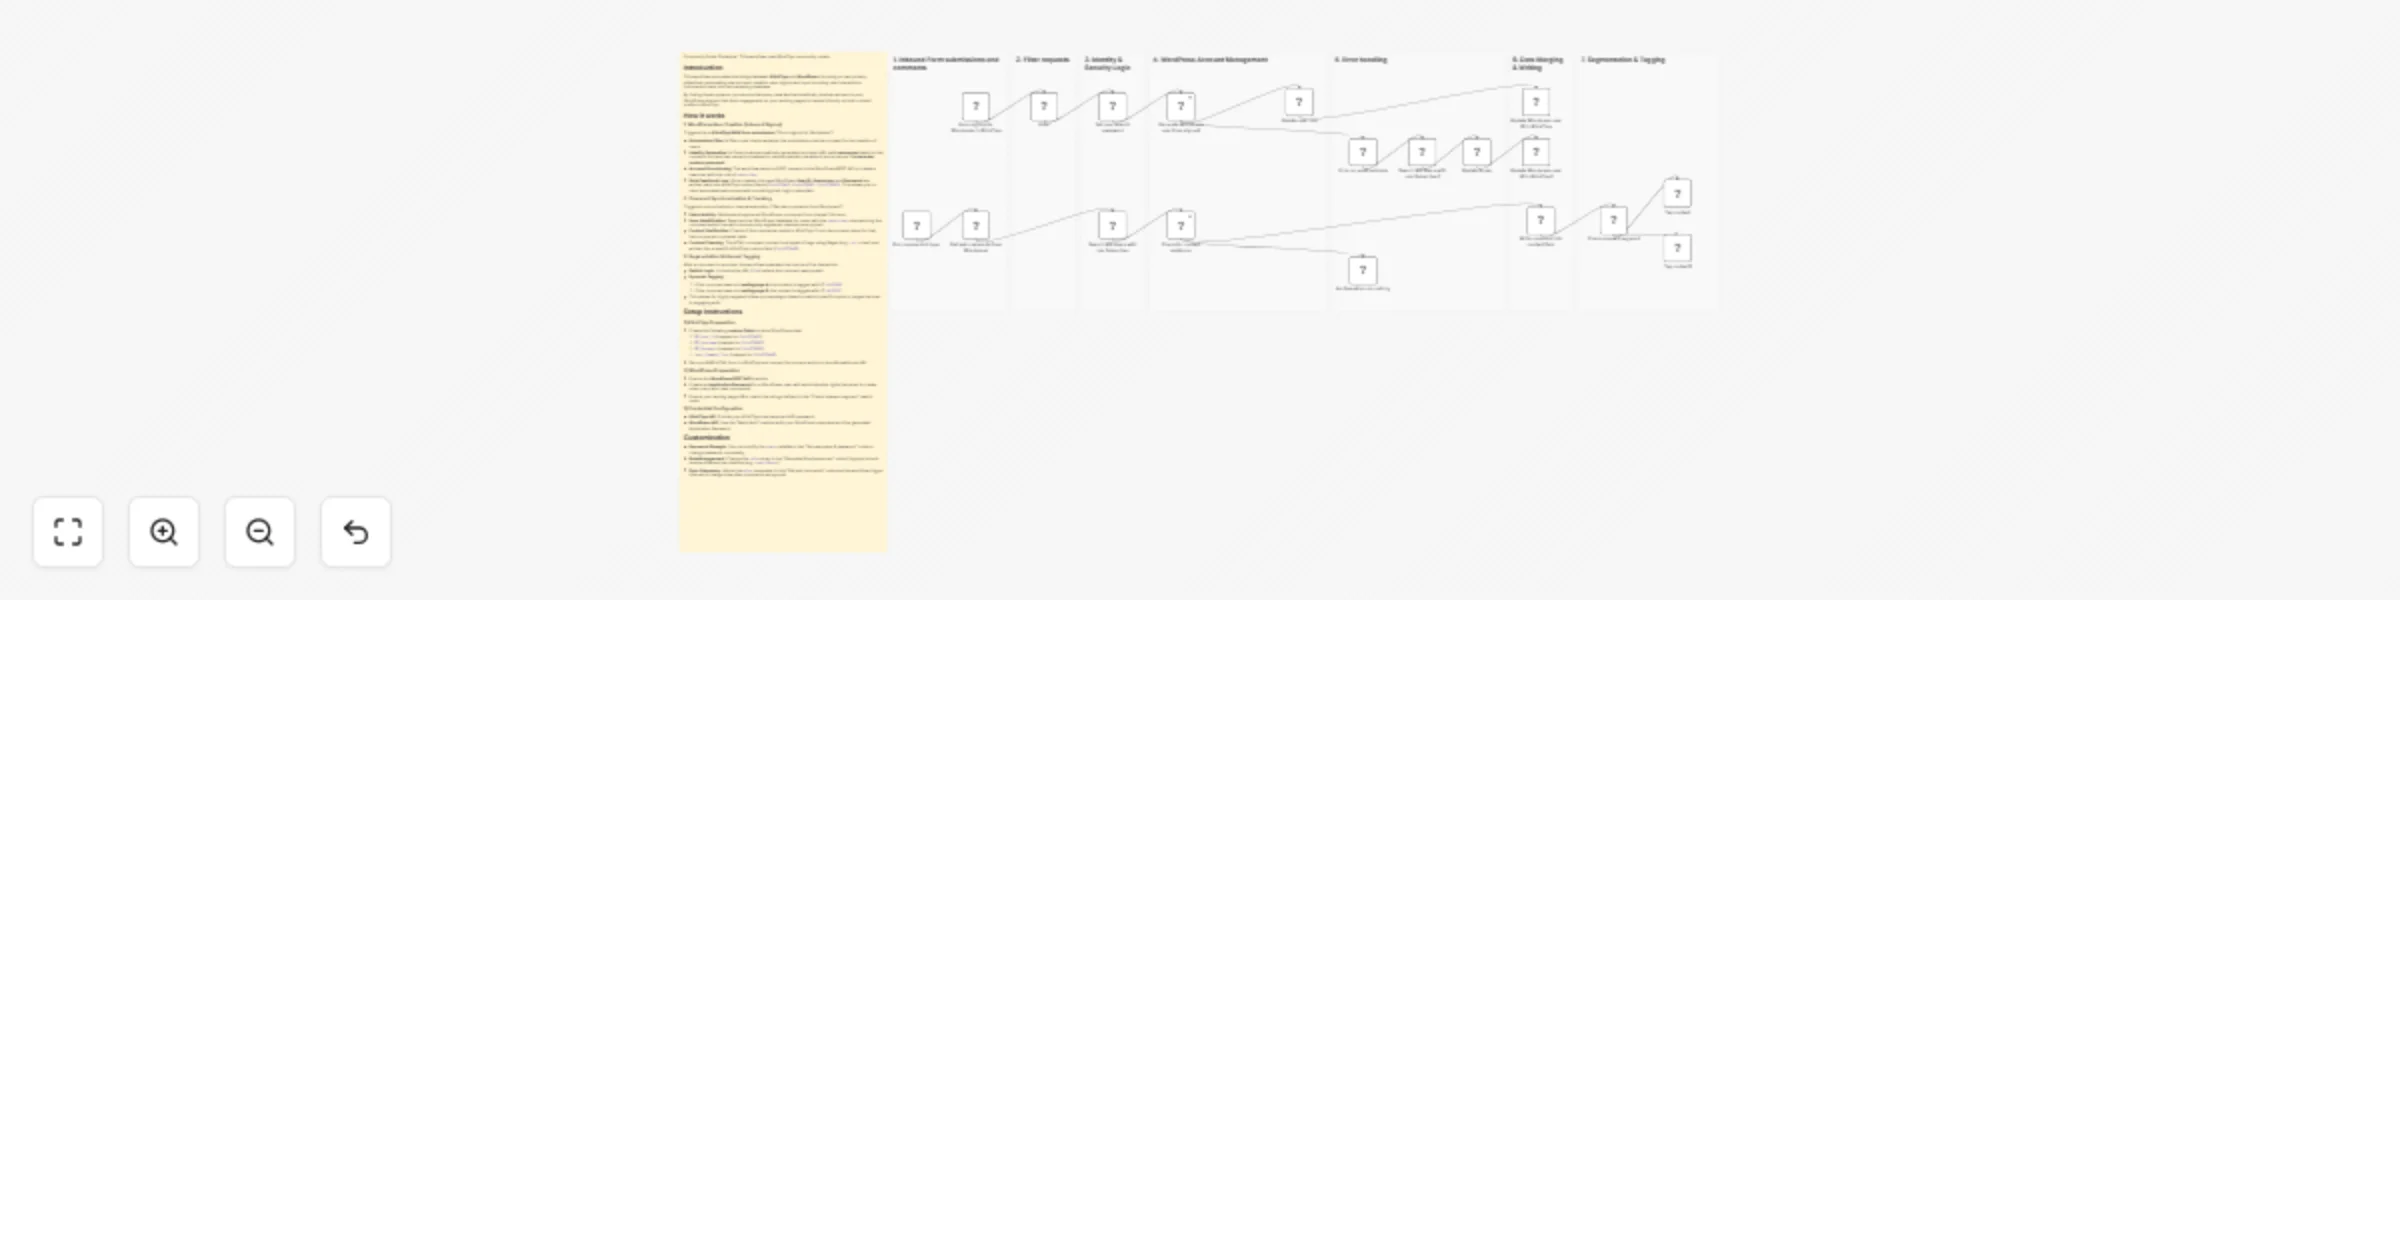
AI-powered contact management in KlickTipp with MCP server
Community Node Disclaimer : This workflow uses KlickTipp community nodes. How It Works This workflow connects an MCP...

Manage KlickTipp contacts via Telegram Bot with GPT-5 mini agent
Community Node Disclaimer : This workflow uses KlickTipp community nodes. How It Works AI Agent and KlickTipp Tools I...